文章
Dummer. ゛☀
2017年08月27日

The asparagus fern plant (Asparagus aethiopicus syn. Asparagus densiflorus) is normally found in a hanging basket, decorating the deck or patio in summer and helping to clean indoor air in winter. The asparagus fern plant is not really a fern at all, but a member of the Liliaceae family. When growing asparagus ferns outside, place them in a part sun to shady location for best foliage growth. While the asparagus fern plant may sometimes flower, the tiny white flowers are small and not necessary for the beauty of growing asparagus fern.

Information on Asparagus Fern Care
Growing asparagus fern is easy. The frilly, feathery asparagus fern plant appears soft and fuzzy, but when taking care of asparagus ferns you may be surprised to find they have thorny spurs. This, however, is no reason not to grow asparagus ferns, simply wear gloves during asparagus fern care. Asparagus fern can provide small flowers and berries when it is happy in its location. Berries can be planted to propagate the asparagus fern plant. Medium green, cascading foliage that will quickly fill a container can be expected when growing asparagus fern. Growing asparagus fern indoors takes a little more effort. Humidity is necessary and indoor areas are often dry because of winter heat. Mist the plant daily and provide a nearby pebble tray to keep the tiny leaves from turning brown and dropping. The fern may dry out to the point it appears dead; however, outdoor springtime temperatures generally revive them. Keep the plant well watered in all situations and repot every few years.
Care of asparagus ferns indoors involves misting the arching stems to provide humidity to the plant. When you grow asparagus ferns outside in summer, asparagus fern care involves watering, fertilizing to encourage growth and occasionally pruning out dead stems. Asparagus ferns prefer to be pot bound, so yearly division is not needed or desirable. Combine this reliable specimen with summer blooms and foliage plants for an attractive container. A spiky, shade loving plant does well at the center of the pot, surrounded by the cascading branches of the asparagus fern.

Information on Asparagus Fern Care
Growing asparagus fern is easy. The frilly, feathery asparagus fern plant appears soft and fuzzy, but when taking care of asparagus ferns you may be surprised to find they have thorny spurs. This, however, is no reason not to grow asparagus ferns, simply wear gloves during asparagus fern care. Asparagus fern can provide small flowers and berries when it is happy in its location. Berries can be planted to propagate the asparagus fern plant. Medium green, cascading foliage that will quickly fill a container can be expected when growing asparagus fern. Growing asparagus fern indoors takes a little more effort. Humidity is necessary and indoor areas are often dry because of winter heat. Mist the plant daily and provide a nearby pebble tray to keep the tiny leaves from turning brown and dropping. The fern may dry out to the point it appears dead; however, outdoor springtime temperatures generally revive them. Keep the plant well watered in all situations and repot every few years.

Care of asparagus ferns indoors involves misting the arching stems to provide humidity to the plant. When you grow asparagus ferns outside in summer, asparagus fern care involves watering, fertilizing to encourage growth and occasionally pruning out dead stems. Asparagus ferns prefer to be pot bound, so yearly division is not needed or desirable. Combine this reliable specimen with summer blooms and foliage plants for an attractive container. A spiky, shade loving plant does well at the center of the pot, surrounded by the cascading branches of the asparagus fern.
0
0
文章
Dummer. ゛☀
2017年08月23日

If you are someone who has always been partial to hanging baskets, yet you like cacti and succulent plants, you might be wondering, “What are my choices?” There are plenty of succulent plants that hang down that are perfect for hanging baskets. Some cacti and succulents are best being allowed to grow tall or straight out of a pot. However, there are many types of hanging cactus and unusual succulents that enjoy growing in a hanging pot so they can stream down as each new piece starts.

Types of Hanging Cactus
Here are some popular hanging succulent plants: Burro’s tail (Sedum morganianum) – One of the prettiest sedums, this is one of those unusual succulents that grows in the pot and has pendant stems that tend to cascade down over the edges of the basket. The foliage is short and very light green. The entire plant is covered by bluish-silver blooms. Hanging succulent plants are usually easy to propagate, and the Burro’s tail is no exception. Flowering sansevieria (Sanservieria parva) – This particular hanging cactus starts out as an upright plant that ends up becoming one of those hanging succulent plants with bright green foliage. The foliage is shaped like a lance and can be one and a half feet in length. It also flowers with little pinkish-white blooms. Lamb’s tail – Similar to the Burro’s tail, this is one of the unusual succulents that has larger leaves that aren’t as tender as the Burro’s tail. Further, the leaves are a little stronger held than the Burro’s tail leaves which tend to drop when touched. Ragwort vine (Othonna capensis) – This is one of the creeping hanging succulent plants. It is actually a member of the Daisy family. It has trailing stems that reach many feet in length. This is an excellent example of plants that hang down because it trails nicely. It has yellow blooms that require sunshine in order to open up. This is a beautiful type of hanging cactus. String of hearts (Ceropegia woodii) – Sometimes called the rosary vine, the stems are long and pendulous and this is a great choice of hanging cacti if you are looking for plants that hang down beautifully. It has leaves shaped like hearts and while the upper surface of the leave is a pretty blue green with some silver, underneath the leaves you will find a beautiful purplish gray. Easily propagated, these types of hanging cactus are truly a great addition to any of your hanging plants. String of pearls (Senecio rowleyanus) – This easy-care succulent plant resembles a beaded necklace with its fleshy green, pea-like foliage and looks great in hanging baskets. String of nickels (Dischidia nummularia) – This trailing succulent plant has interesting foliage that screams for attention. It consists of round gray-green leaves which are flat and reminiscent of little coins (about nickel size) hanging from a string. There are many different types of hanging cactus, and they are pretty easy to care for because hanging succulent plants do not require watering as often as other hanging plants. In answer to, “What are my choices,” you can see there are plenty of choices to be had if you want to grow hanging cacti around your home and garden.
1
0
文章
Dummer. ゛☀
2017年08月22日

Aztec sweet herb care isn’t difficult. This perennial can be grown in the ground as a container plant or in a hanging basket, allowing you to grow it indoors or out. Just what is Aztec sweet herb? It’s a plant that has been used in salads and as a medicinal plant for one of several conditions.
Aztec Sweet Herb Growing
Aztec sweet herb growing is productive when you grow it in an area that receives full sunlight. It needs the warmth, especially during cold months, if it’s going to continue growing and providing you with herbs you can use in your food.
Aztec sweet herb plants (Lippia dulcis) grow well in the ground and in large containers you set outdoors. It’s ideal for planting in a hanging basket, which allows you to add a little more beauty to your yard. The soil pH range should be between 6.0 and 8.0, which means it will range from acidic to alkaline. Before you plant your cuttings, incorporate potting soil so the pH is in the right range.
Caring for Aztec Sweet Herb After planting your sweet herb, make sure the soil is well drained. Aztec sweet herb care in a desert area is easy because you’re going to allow the soil to nearly dry out before you water again. Once you’ve planted your herbs, you’ll find that they grow quickly, creeping along the ground and covering the soil. After it has settled into the soil, it will be a hardy plant that will easily withstand a little neglect.
How to Use Aztec Sweet Herb Plants
If you’re looking for ideas for how to use Aztec sweet herb, pick a leaf or two and pop them into your mouth. You’ll find they are just as sweet as any candy you pick up at the store, hence the name. Because of this, you can also pick several leaves and add them to a chilled fruit salad. This herb also has several medicinal uses. In past years, it was used as an expectorant for persistent coughs. It has also been used in South America, Central America and in the Caribbean Islands as a remedy for bronchitis, colds, asthma and colic. Disclaimer: The contents of this article is for educational and gardening purposes only. Before using ANY herb or plant for medicinal purposes, please consult a physician or a medical herbalist for advice.

Aztec Sweet Herb Growing
Aztec sweet herb growing is productive when you grow it in an area that receives full sunlight. It needs the warmth, especially during cold months, if it’s going to continue growing and providing you with herbs you can use in your food.
Aztec sweet herb plants (Lippia dulcis) grow well in the ground and in large containers you set outdoors. It’s ideal for planting in a hanging basket, which allows you to add a little more beauty to your yard. The soil pH range should be between 6.0 and 8.0, which means it will range from acidic to alkaline. Before you plant your cuttings, incorporate potting soil so the pH is in the right range.

Caring for Aztec Sweet Herb After planting your sweet herb, make sure the soil is well drained. Aztec sweet herb care in a desert area is easy because you’re going to allow the soil to nearly dry out before you water again. Once you’ve planted your herbs, you’ll find that they grow quickly, creeping along the ground and covering the soil. After it has settled into the soil, it will be a hardy plant that will easily withstand a little neglect.

How to Use Aztec Sweet Herb Plants
If you’re looking for ideas for how to use Aztec sweet herb, pick a leaf or two and pop them into your mouth. You’ll find they are just as sweet as any candy you pick up at the store, hence the name. Because of this, you can also pick several leaves and add them to a chilled fruit salad. This herb also has several medicinal uses. In past years, it was used as an expectorant for persistent coughs. It has also been used in South America, Central America and in the Caribbean Islands as a remedy for bronchitis, colds, asthma and colic. Disclaimer: The contents of this article is for educational and gardening purposes only. Before using ANY herb or plant for medicinal purposes, please consult a physician or a medical herbalist for advice.
1
0
文章
Dummer. ゛☀
2017年08月21日

Spider plants (Chlorophytum comosum) are another commonly grown houseplant. They make excellent additions to hanging baskets with their long, ribbon-like foliage and arching stems of spiderettes spilling over the edges. To keep these plants looking their best, it is occasionally necessary to trim spider plant leaves and spiderettes.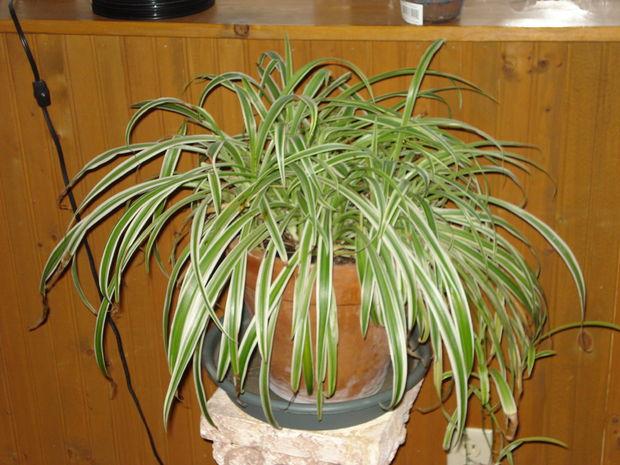
Trimming Spider Plant Leaves
When given the proper growing conditions, spider plants can reach 2 ½ to 3 feet in both diameter and length. As a result, spider plants benefit from an occasional pruning. This is normally done during spring, or in most cases, summer. Pruning spider plants keeps them at a more desirable and manageable size and rejuvenates their overall health and vigor. In addition, the more babies it produces, the more the plant needs fertilizer and water as this uses up much of its energy. Therefore, the spiderettes should be removed as well. These can then be placed in moist soil or water to make additional plants, which root within a few weeks.
How to Prune Spider Plant
Any foliage being pruned should be cut at the base of the plant. Always use sharp pruners or scissors when pruning spider plants. Remove all discolored, diseased, or dead foliage as needed. To remove the spiderettes, cut the long stems back to the base from both the mother plant and the baby. For overgrown or pot bound plants, repotting in addition to pruning may be necessary. After pruning, repot the spider plant, giving it a good root pruning as well prior to returning it to the pot of fresh soil. Generally, it’s a good idea to include root pruning at least once every year or two.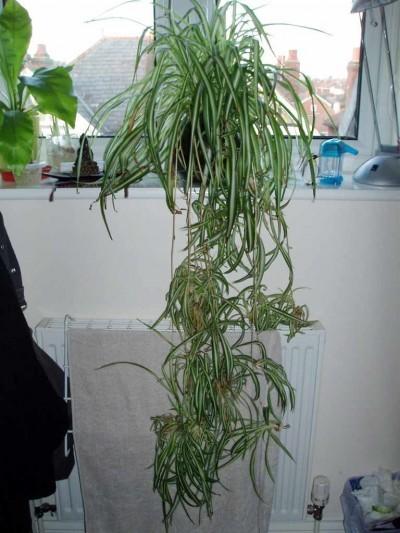
Spider Plants Brown Tips
Occasionally, you may notice brown tips on your spider plants. Oftentimes this is due to the type of water being used during irrigation. For example, city water often contains chemicals such as chlorine or fluoride that can be hard on plants. Over time these chemicals will build up in the foliage, eventually burning the tips and subsequently turning them brown. For this reason, it’s better to use distilled water (or rainwater) whenever possible. You could also choose to leave some water sitting out overnight to lessen the chemical effects. Brown tips can also occur from too much sunlight and low humidity. Keep spider plants out of direct light and mist the plants when the humidity is low. Remove any leaves that have brown tips as well as any that may be yellowing.

Trimming Spider Plant Leaves
When given the proper growing conditions, spider plants can reach 2 ½ to 3 feet in both diameter and length. As a result, spider plants benefit from an occasional pruning. This is normally done during spring, or in most cases, summer. Pruning spider plants keeps them at a more desirable and manageable size and rejuvenates their overall health and vigor. In addition, the more babies it produces, the more the plant needs fertilizer and water as this uses up much of its energy. Therefore, the spiderettes should be removed as well. These can then be placed in moist soil or water to make additional plants, which root within a few weeks.

How to Prune Spider Plant
Any foliage being pruned should be cut at the base of the plant. Always use sharp pruners or scissors when pruning spider plants. Remove all discolored, diseased, or dead foliage as needed. To remove the spiderettes, cut the long stems back to the base from both the mother plant and the baby. For overgrown or pot bound plants, repotting in addition to pruning may be necessary. After pruning, repot the spider plant, giving it a good root pruning as well prior to returning it to the pot of fresh soil. Generally, it’s a good idea to include root pruning at least once every year or two.

Spider Plants Brown Tips
Occasionally, you may notice brown tips on your spider plants. Oftentimes this is due to the type of water being used during irrigation. For example, city water often contains chemicals such as chlorine or fluoride that can be hard on plants. Over time these chemicals will build up in the foliage, eventually burning the tips and subsequently turning them brown. For this reason, it’s better to use distilled water (or rainwater) whenever possible. You could also choose to leave some water sitting out overnight to lessen the chemical effects. Brown tips can also occur from too much sunlight and low humidity. Keep spider plants out of direct light and mist the plants when the humidity is low. Remove any leaves that have brown tips as well as any that may be yellowing.
0
0
文章
Dummer. ゛☀
2017年08月20日

If you are used to seeing spider plants in hanging baskets indoors, the idea of spider plants as ground cover may surprise you. However, spider plants in the wild grow in the ground. And those who live in warm climates have been using spider plant for ground cover for years. If you are considering spider plant ground cover, read on for all the information you’ll need about caring for spider plants in gardens.
Spider Plant Ground Cover
Spider plants, with their long, slender, trailing leaves, look a bit like green spiders. These are great plants for beginning gardeners since they are surprisingly easy going and very tolerant of less-than-perfect cultural care. Many people have a few spider plants indoors as potted or hanging-basket plants. But those who live in warmer climates like U.S. Department of Agriculture plant hardiness zones 9b to 11 can grow these lush beauties in outdoor garden beds or as spider plant ground cover.
Using Spider Plant for Ground Cover
If you’ve ever owned a spider plant, you already know how fast they grow. In time, a plant often develops “babies” – plantlets that grow on the end of long stolons. Once these tiny spider plants touch soil, they develop roots. Spider plant babies can be snipped off the stolons and will grow as independent plants. In an outdoor setting, the babies can stay attached to the parent plant. They simply root, spreading the lush foliage into new territory.
Caring for Spider Plants in Gardens
If you’ve decided to use spider plants as ground cover, be sure you plant them in soil that drains well. They are very forgiving of many gardener sins, but they can’t thrive if their roots are in mud. On the other hand, you can plant them in sun or partial shade. The ideal outdoor location in hot climates is filtered sunshine. Irrigation is important, although precision is not necessary. Water when the surface of the soil is dry, but if you forget one week, the plants won’t die because of it. Their thick roots are made to survive varying amounts of available water. If you want to fertilize the plants, you can do so in spring and summer. If you don’t, spider plants will probably grow well anyway.

Spider Plant Ground Cover
Spider plants, with their long, slender, trailing leaves, look a bit like green spiders. These are great plants for beginning gardeners since they are surprisingly easy going and very tolerant of less-than-perfect cultural care. Many people have a few spider plants indoors as potted or hanging-basket plants. But those who live in warmer climates like U.S. Department of Agriculture plant hardiness zones 9b to 11 can grow these lush beauties in outdoor garden beds or as spider plant ground cover.

Using Spider Plant for Ground Cover
If you’ve ever owned a spider plant, you already know how fast they grow. In time, a plant often develops “babies” – plantlets that grow on the end of long stolons. Once these tiny spider plants touch soil, they develop roots. Spider plant babies can be snipped off the stolons and will grow as independent plants. In an outdoor setting, the babies can stay attached to the parent plant. They simply root, spreading the lush foliage into new territory.

Caring for Spider Plants in Gardens
If you’ve decided to use spider plants as ground cover, be sure you plant them in soil that drains well. They are very forgiving of many gardener sins, but they can’t thrive if their roots are in mud. On the other hand, you can plant them in sun or partial shade. The ideal outdoor location in hot climates is filtered sunshine. Irrigation is important, although precision is not necessary. Water when the surface of the soil is dry, but if you forget one week, the plants won’t die because of it. Their thick roots are made to survive varying amounts of available water. If you want to fertilize the plants, you can do so in spring and summer. If you don’t, spider plants will probably grow well anyway.
0
0
文章
Dummer. ゛☀
2017年08月19日

Pitcher plants are a fantastic addition to the home. They’re a little bit temperamental, but if you’re willing to put in the extra work, you’ll have a striking conversation piece. Keep reading to learn about good pitcher plants for hanging baskets.
Hanging Pitcher Plant Care
Hanging pitcher plants in baskets is the most effective way to grow them. In the wild, the plants vine up trees, and providing them with plenty of empty space will give them the air circulation they crave and allow the pitchers to grow to their full and most impressive extent.
Hanging pitcher plants thrive in light, well-draining soil that’s poor in nutrients but high in organic matter. This can be sphagnum moss, coconut fiber, or a store-bought orchid mix. Pitcher plants need high humidity – water frequently from above, and mist daily. Hang your basket somewhere it can receive full sun. Temperature is very important. Most species require daytime temperatures of 80 F. (26 C.) and higher, with a very marked temperature drop at night.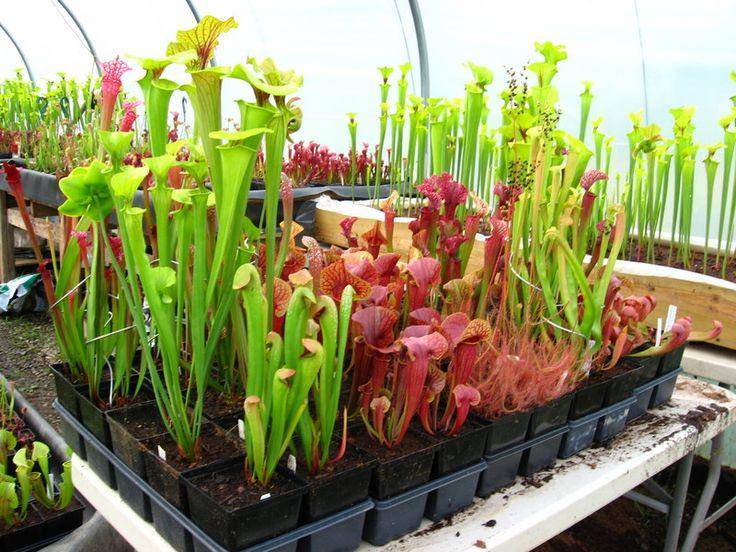
Pitcher Plants for Hanging Baskets
Pitcher plants are native to Southeast Asia and northern Australia and, for the most part, crave high temperatures and humid air. Many varieties, however, grow at high elevations and are used to much cooler temperatures. Pitcher plants cross pollinate very easily and, as such, there are a huge number of varieties and quite a few that are able to tolerate low temperatures. Nepenthes khasiana is a species that’s a good choice for beginners. It’s extremely hardy as pitcher plants go, with a tolerance range of 38-105 F. (3-40 C.). Nepenthes stenophylla can tolerate a narrower but still wide range of temperatures from 50-98 F. (10-36 C.). If you live in a hot area or have a greenhouse, however, your options are much greater. Nepenthes alata is easy to care for and forms bright red pitchers that can reach 7 inches (8 cm) in length. Nepenthes eymae produces wide, red speckled pitchers low on the plant and small green pitchers higher up, making for a nice, diverse look.
The number of species is enormous, however, so first get a sense of your area’s temperature range, and then look into what’s available.

Hanging Pitcher Plant Care
Hanging pitcher plants in baskets is the most effective way to grow them. In the wild, the plants vine up trees, and providing them with plenty of empty space will give them the air circulation they crave and allow the pitchers to grow to their full and most impressive extent.
Hanging pitcher plants thrive in light, well-draining soil that’s poor in nutrients but high in organic matter. This can be sphagnum moss, coconut fiber, or a store-bought orchid mix. Pitcher plants need high humidity – water frequently from above, and mist daily. Hang your basket somewhere it can receive full sun. Temperature is very important. Most species require daytime temperatures of 80 F. (26 C.) and higher, with a very marked temperature drop at night.

Pitcher Plants for Hanging Baskets
Pitcher plants are native to Southeast Asia and northern Australia and, for the most part, crave high temperatures and humid air. Many varieties, however, grow at high elevations and are used to much cooler temperatures. Pitcher plants cross pollinate very easily and, as such, there are a huge number of varieties and quite a few that are able to tolerate low temperatures. Nepenthes khasiana is a species that’s a good choice for beginners. It’s extremely hardy as pitcher plants go, with a tolerance range of 38-105 F. (3-40 C.). Nepenthes stenophylla can tolerate a narrower but still wide range of temperatures from 50-98 F. (10-36 C.). If you live in a hot area or have a greenhouse, however, your options are much greater. Nepenthes alata is easy to care for and forms bright red pitchers that can reach 7 inches (8 cm) in length. Nepenthes eymae produces wide, red speckled pitchers low on the plant and small green pitchers higher up, making for a nice, diverse look.

The number of species is enormous, however, so first get a sense of your area’s temperature range, and then look into what’s available.
0
0
文章
Miss Chen
2017年08月15日

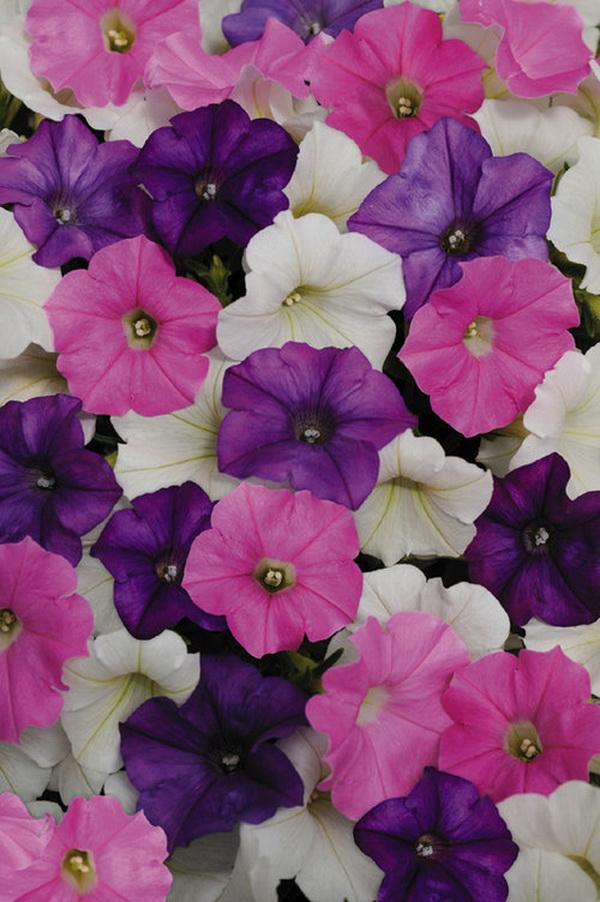
To a flower gardener, few things are more satisfying than a hanging basket overflowing with masses of blooms. Although wave petunias lack the stop-in-your-tracks scent of the traditional variety, they provide an eye-catching cascade of bright white, pink and purple flowers that last as long as the warm weather holds. If your once-beautiful wave petunias stop flowering before their season is over, a few approaches will likely remedy the situation.
A Sense of Place
Petunias in general are fairly hardy plants during warm weather months and do well in most types of soil. Although they are somewhat drought-tolerant, they prefer a moist, well drained, loamy soil. When watering wave petunias planted as ground cover, direct the water toward their roots. Waterlogged blooms will turn to mush and fall off. Aphid attacks, though possible, are rare and tend not to affect the plant's ability to flower. Wash these tiny pests off with a light spray of water, and then gently shake the water off the blooms to avoid soft rot.
Regardless of soil conditions, a petunia plant will bloom either sparingly or not at all if it doesn't receive enough light. These sun-loving annuals bloom most abundantly in full sun and stand up to heat particularly well. If you have a hanging basket of wave petunias that aren't blooming or have stopped blooming, check whether it's in partial or full shade. Switching the plant to a south-facing porch or wall hook will provide the full sun exposure it needs, ensuring a magnificent display all season long. If you're using your multiflora as a ground cover, transplant it to an open space where taller plants won't rob it of sunlight.

Care and Feeding
Wave petunias are an increasingly popular class of the multiflora petunia hybrid. Their 1- to 1 1/2-inch flowers grow quickly and tend to out-bloom and outlast their larger, delicately scented counterparts. A well-fed petunia, regardless of variety, will reward you with healthy foliage and masses of color. To revive the blooms on your plant, once a month, add a phosphorus- and potassium-rich fertilizer to your watering can and give the petunias a good soak. The rest of the time, keep the soil moist. Hanging baskets in full sun often need watering once a day to thrive during the hottest days of the summer. You may get lucky and be able to completely revive a drooping petunia, but there's a fine line between droopy and dead, so watering often is highly recommended.
Drastic Measures, Dramatic Results
All varieties of petunia benefit from constant grooming. If the foliage is growing without blooms, pinch off the old withered blooms. This make the plant substantially more attractive and redirect the plant's energy into producing more flowers. Though you may be tempted to let the plant continue to grow in length (up to 3 feet for the wave variety), you'll discover it becomes less attractive and more scraggly when it's allowed to continue down this path. Mid-season, bite the bullet and cut back the petunia plant by half. Within a week you'll be rewarded with a resurrection of the bushy, flower-heavy plant that tempted your pocketbook at the beginning of the season. All season long, don't hesitate to cut back any rangy growth for the same result.

A Sense of Place
Petunias in general are fairly hardy plants during warm weather months and do well in most types of soil. Although they are somewhat drought-tolerant, they prefer a moist, well drained, loamy soil. When watering wave petunias planted as ground cover, direct the water toward their roots. Waterlogged blooms will turn to mush and fall off. Aphid attacks, though possible, are rare and tend not to affect the plant's ability to flower. Wash these tiny pests off with a light spray of water, and then gently shake the water off the blooms to avoid soft rot.
Regardless of soil conditions, a petunia plant will bloom either sparingly or not at all if it doesn't receive enough light. These sun-loving annuals bloom most abundantly in full sun and stand up to heat particularly well. If you have a hanging basket of wave petunias that aren't blooming or have stopped blooming, check whether it's in partial or full shade. Switching the plant to a south-facing porch or wall hook will provide the full sun exposure it needs, ensuring a magnificent display all season long. If you're using your multiflora as a ground cover, transplant it to an open space where taller plants won't rob it of sunlight.

Care and Feeding
Wave petunias are an increasingly popular class of the multiflora petunia hybrid. Their 1- to 1 1/2-inch flowers grow quickly and tend to out-bloom and outlast their larger, delicately scented counterparts. A well-fed petunia, regardless of variety, will reward you with healthy foliage and masses of color. To revive the blooms on your plant, once a month, add a phosphorus- and potassium-rich fertilizer to your watering can and give the petunias a good soak. The rest of the time, keep the soil moist. Hanging baskets in full sun often need watering once a day to thrive during the hottest days of the summer. You may get lucky and be able to completely revive a drooping petunia, but there's a fine line between droopy and dead, so watering often is highly recommended.
Drastic Measures, Dramatic Results
All varieties of petunia benefit from constant grooming. If the foliage is growing without blooms, pinch off the old withered blooms. This make the plant substantially more attractive and redirect the plant's energy into producing more flowers. Though you may be tempted to let the plant continue to grow in length (up to 3 feet for the wave variety), you'll discover it becomes less attractive and more scraggly when it's allowed to continue down this path. Mid-season, bite the bullet and cut back the petunia plant by half. Within a week you'll be rewarded with a resurrection of the bushy, flower-heavy plant that tempted your pocketbook at the beginning of the season. All season long, don't hesitate to cut back any rangy growth for the same result.
1
0
文章
Miss Chen
2017年08月14日

Nothing shouts "Summer!" more emphatically than hanging baskets brimming with masses of petunias (Petunia spp.) Where they don't bloom year-round in U.S. Department of Agriculture plant hardiness zones [10 through 11](http://www.missouribotanicalgarden.org/PlantFinder/PlantFinderDetails.aspx?taxonid=264607&isprofile=0&letter=p), petunias cover themselves in fragrant flowers – some up to 4 inches wide – from early spring until the first killing frost. Although hanging-basket petunias require more attention than their garden-planted counterparts, their enthusiastic performance is well worth the extra effort.
Feed for Flowers
The cascades of color that make petunia hanging baskets so appealing won't materialize without at least six hours of daily sun and regular doses of fertilizer. Producing all those trailing stems of flowers takes lots of energy.
To give them the best start, mix slow-release 5-10-5 granulated plant food into the soil before planting. One manufacturer recommends using 2 teaspoons for each 1 square foot of soil. After adding the petunias, fill the container with soil and water well.
Rain and maintenance watering both leach nutrients from hanging baskets. Yellowing leaves are a sign of nutrient deficiency. When they appear, begin fertilizing the petunias with liquid, 5-10-5 plant food every 10 days to two weeks for the remainder of the growing season. Mix a solution of 4 tablespoons, or the label's specified amount, of the plant food and 1 gallon of water.
Water Wisely
Hanging baskets dry out quickly. In hot, dry weather, petunias may need watering twice a day. Overwatering, however, may rot their roots. When you do water, stop only when water begins draining from the bottom of the baskets.

Groom for Growth
Many petunia varieties need regular grooming to look their best for an entire growing season. If their spent flowers are allowed to go to seed, they'll stop blooming. Deadheading, the practice of pinching old blooms off below the thickened base where seeds form, keeps new ones coming.
If the plants become overgrown, prune them back by one-third. Using clean, sharp stem cutters, make each pruning cut just above a set of leaves. Healthy new growth and flowers soon follow.
Potential Diseases
Petunias' occasional diseases include root rot from excessively wet soil. As long as their baskets have at least four drainage holes, root rot isn't likely.
Gray mold surfaces as fuzzy, grayish to brown blotches on the stems and leaves. The fungus loves humidity, so don't overcrowd baskets. Water the petunias at their bases so the leaves stay dry .
Late blight causes water-soaked, irregular spots on young leaves. Affected leaves eventually turn brown and die. Spraying weekly with ready-to-use chlorothalonil protects the plants when warm days, cool nights and wet weather favor the disease. Spray until the fungicide drips from their leaves.
Yellow mottling on petunia leaves indicates tobacco mosaic virus. Other symptoms include stunted or distorted growth and leaf lesions. No cure exists; dispose of infected plants and their potting mix and baskets in sealed plastic bags, and disinfect any gardening tools they may have contaminated in a solution of 1 part household bleach to 9 parts alcohol.

Potential Pests
Aphids drain sap from tender new stems and leaves, covering them in sticky waste called honeydew. Tiny black flea beetles typically arrive in midsummer to chew holes in the backs of the leaves.
Organic, ready-to-use pyrethrin insecticide kills both insects. Spray the plants until they drip, being sure to cover the backs of the leaves where the insects usually feed.
Feed for Flowers
The cascades of color that make petunia hanging baskets so appealing won't materialize without at least six hours of daily sun and regular doses of fertilizer. Producing all those trailing stems of flowers takes lots of energy.
To give them the best start, mix slow-release 5-10-5 granulated plant food into the soil before planting. One manufacturer recommends using 2 teaspoons for each 1 square foot of soil. After adding the petunias, fill the container with soil and water well.
Rain and maintenance watering both leach nutrients from hanging baskets. Yellowing leaves are a sign of nutrient deficiency. When they appear, begin fertilizing the petunias with liquid, 5-10-5 plant food every 10 days to two weeks for the remainder of the growing season. Mix a solution of 4 tablespoons, or the label's specified amount, of the plant food and 1 gallon of water.
Water Wisely
Hanging baskets dry out quickly. In hot, dry weather, petunias may need watering twice a day. Overwatering, however, may rot their roots. When you do water, stop only when water begins draining from the bottom of the baskets.

Groom for Growth
Many petunia varieties need regular grooming to look their best for an entire growing season. If their spent flowers are allowed to go to seed, they'll stop blooming. Deadheading, the practice of pinching old blooms off below the thickened base where seeds form, keeps new ones coming.
If the plants become overgrown, prune them back by one-third. Using clean, sharp stem cutters, make each pruning cut just above a set of leaves. Healthy new growth and flowers soon follow.
Potential Diseases
Petunias' occasional diseases include root rot from excessively wet soil. As long as their baskets have at least four drainage holes, root rot isn't likely.
Gray mold surfaces as fuzzy, grayish to brown blotches on the stems and leaves. The fungus loves humidity, so don't overcrowd baskets. Water the petunias at their bases so the leaves stay dry .
Late blight causes water-soaked, irregular spots on young leaves. Affected leaves eventually turn brown and die. Spraying weekly with ready-to-use chlorothalonil protects the plants when warm days, cool nights and wet weather favor the disease. Spray until the fungicide drips from their leaves.
Yellow mottling on petunia leaves indicates tobacco mosaic virus. Other symptoms include stunted or distorted growth and leaf lesions. No cure exists; dispose of infected plants and their potting mix and baskets in sealed plastic bags, and disinfect any gardening tools they may have contaminated in a solution of 1 part household bleach to 9 parts alcohol.

Potential Pests
Aphids drain sap from tender new stems and leaves, covering them in sticky waste called honeydew. Tiny black flea beetles typically arrive in midsummer to chew holes in the backs of the leaves.
Organic, ready-to-use pyrethrin insecticide kills both insects. Spray the plants until they drip, being sure to cover the backs of the leaves where the insects usually feed.
0
0
文章
Miss Chen
2017年08月14日

Flowering annuals bring bright colors to gardens and hanging baskets starting with the first blooms of spring through the summer and into autumn. However, many annual flowering plants need a little help to look their best and benefit from deadheading. Deadheading is the removal of spent blooms and foliage. Impatiens generally don't require deadheading as they are a self-cleaning plant that naturally sheds spent blooms, according to North Carolina State University Extension. However, even impatiens can benefit from deadheading if the plant has become stressed and has lost the majority of its blooms at the same time.

Step 1
Inspect the impatiens for blooms that are wilting or are turning brown, as well as for any dead leaves or stems, advises online resource Creative Homemaking.
Step 2
Grasp the plant 1/4 inch below the bloom with the thumb and forefinger and pinch the entire bloom off the plant. Discard the detached flower.

Step 3
Water and fertilize the impatiens with a water-soluble flower fertilizer. Keep soil moist. The impatiens should return to full bloom approximately one week after a severe deadheading.

Step 1
Inspect the impatiens for blooms that are wilting or are turning brown, as well as for any dead leaves or stems, advises online resource Creative Homemaking.
Step 2
Grasp the plant 1/4 inch below the bloom with the thumb and forefinger and pinch the entire bloom off the plant. Discard the detached flower.

Step 3
Water and fertilize the impatiens with a water-soluble flower fertilizer. Keep soil moist. The impatiens should return to full bloom approximately one week after a severe deadheading.
0
1
文章
Miss Chen
2017年08月14日

Petunias (Petunia spp) fill the showiest of flower beds or the humblest of hanging baskets with spring-to-fall color. These tough, sun-loving annuals grow in bush or trailing forms, with trumpet-like, single or double blooms. Deadheading their spent blossoms keeps the easy-care plants in full flower over the entire summer. Add fragrance to their list of attributes, and petunias may be the ideal garden annuals. One of their few liabilities is that a tiny, flower-devouring striped worm finds petunias irresistible.

Identification
Gardeners across the United States risk finding their prize petunias infested with tobacco budworms. These green caterpillars are the larvae of the 1 1/2-inch wide Helicoverpa virescens moth. The female moths deposit their eggs on a petunia's foliage and buds at dusk. The eggs hatch into striped caterpillars. Their colors range from light green or light brown to red and other dark shades. The coloration acts as camouflage. It varies according to the plants on which the pests feed.
Life Cycle
Newly tobacco budworms feed on a petunia's flowers for about four weeks before falling to the ground. They tunnel from 2 to 6 inches deep, build dirt cocoons and pupate. Where winter temperatures remain above 20 degrees Fahrenheit, the caterpillars entering the soil in autumn can survive until spring. The adults emerge after pupation to mate to lay eggs. Two generations of these worms typically attack petunias in a single growing season.
Damage
The tobacco budworms feed on flower buds and flower ovaries. Some buds don't open at all. Infected buds that do open have chewed, shredded petals. Budworm infestations, and the damage they cause, worsen as the summer passes.

Manual Control
Checking your petunias daily for chewed buds and blooms is the best way to limit tobacco budworm damage. The caterpillars feed most heavily in the early evening. Examine the plants, then manually remove and destroy the worms. If that's impractical, do a daytime check under the petunias' lower leaves and around their bases. The worms frequently hide in the soil during daylight. Tilling your petunia bed in fall destroys overwintering pupae.
Biological Control
Parasitic wasps feed on tobacco budworm caterpillars. Campoletis sonorensis attacks the young larvae, while Cardiochiles nigriceps goes after mature caterpillars ready to pupate. Several species of paper wasps also kill the pests.
Chemical Control
Tobacco budworms are somewhat insecticide-resistant. Spinosad-based insecticides as well as those containing synthetic pyrethrins are most likely to succeed in controlling them. Look for insecticides containing bifentrhrin, permethrin or esfenvalerate.

Identification
Gardeners across the United States risk finding their prize petunias infested with tobacco budworms. These green caterpillars are the larvae of the 1 1/2-inch wide Helicoverpa virescens moth. The female moths deposit their eggs on a petunia's foliage and buds at dusk. The eggs hatch into striped caterpillars. Their colors range from light green or light brown to red and other dark shades. The coloration acts as camouflage. It varies according to the plants on which the pests feed.
Life Cycle
Newly tobacco budworms feed on a petunia's flowers for about four weeks before falling to the ground. They tunnel from 2 to 6 inches deep, build dirt cocoons and pupate. Where winter temperatures remain above 20 degrees Fahrenheit, the caterpillars entering the soil in autumn can survive until spring. The adults emerge after pupation to mate to lay eggs. Two generations of these worms typically attack petunias in a single growing season.
Damage
The tobacco budworms feed on flower buds and flower ovaries. Some buds don't open at all. Infected buds that do open have chewed, shredded petals. Budworm infestations, and the damage they cause, worsen as the summer passes.

Manual Control
Checking your petunias daily for chewed buds and blooms is the best way to limit tobacco budworm damage. The caterpillars feed most heavily in the early evening. Examine the plants, then manually remove and destroy the worms. If that's impractical, do a daytime check under the petunias' lower leaves and around their bases. The worms frequently hide in the soil during daylight. Tilling your petunia bed in fall destroys overwintering pupae.
Biological Control
Parasitic wasps feed on tobacco budworm caterpillars. Campoletis sonorensis attacks the young larvae, while Cardiochiles nigriceps goes after mature caterpillars ready to pupate. Several species of paper wasps also kill the pests.
Chemical Control
Tobacco budworms are somewhat insecticide-resistant. Spinosad-based insecticides as well as those containing synthetic pyrethrins are most likely to succeed in controlling them. Look for insecticides containing bifentrhrin, permethrin or esfenvalerate.
0
0
文章
Dummer. ゛☀
2017年08月06日

BOTANICAL NAME: Petunia
PLANT TYPE: Flower
FLOWER COLOR: PinkPurpleRedWhiteYellow
BLOOM TIME: SpringSummerFall
Petunias are divided into two different groups:
Grandiflora petunias have very large flowers and are best grown in containers or hanging baskets (because they are more susceptible to rain damage).
Multiflora petunias have smaller, but more abundant flowers and are ideal for summer bedding or in a mixed border (because they are more tolerant to wet weather).
PLANTING
You can grow petunias from seeds, but it is easier to grow them from transplants. If you are going to grow from seeds, start them indoors 10 to 12 weeks before you want to set them outside. Petunia seeds are very small and needs lots of light in order to germinate. Remember to water them. When the plants have three leaves, you can plant them outside.
It’s best to buy transplants and plant them in light, well-drained soil in full sun after the last spring frost. (See your local frost dates.) Petunias can grow in partial shade, but they will have fewer flowers. It’s better if the plants have shelter from the wind.
Space the plants about 1 foot apart.
If you’re planting petunias in containers, use a soil-less mix.
CARE
Petunias are tolerant of heat so you don’t have to water them regularly. A thorough watering once a week should be sufficient (unless there are prolonged periods of drought in your area). The spreading types and those in containers require more frequent watering though.
Fertilize your plants monthly to ensure good growth. Double-flowered cultivars like a biweekly dose of fertilizer.
Remove faded/dead flowers to prolong blooming.
PESTS/DISEASES
Aphids
Caterpillars
Leaf miners
Gray mold
Bacterial soft rot
Leaf spots
Viruses
PLANT TYPE: Flower
FLOWER COLOR: PinkPurpleRedWhiteYellow
BLOOM TIME: SpringSummerFall
Petunias are divided into two different groups:
Grandiflora petunias have very large flowers and are best grown in containers or hanging baskets (because they are more susceptible to rain damage).
Multiflora petunias have smaller, but more abundant flowers and are ideal for summer bedding or in a mixed border (because they are more tolerant to wet weather).

PLANTING
You can grow petunias from seeds, but it is easier to grow them from transplants. If you are going to grow from seeds, start them indoors 10 to 12 weeks before you want to set them outside. Petunia seeds are very small and needs lots of light in order to germinate. Remember to water them. When the plants have three leaves, you can plant them outside.
It’s best to buy transplants and plant them in light, well-drained soil in full sun after the last spring frost. (See your local frost dates.) Petunias can grow in partial shade, but they will have fewer flowers. It’s better if the plants have shelter from the wind.
Space the plants about 1 foot apart.
If you’re planting petunias in containers, use a soil-less mix.

CARE
Petunias are tolerant of heat so you don’t have to water them regularly. A thorough watering once a week should be sufficient (unless there are prolonged periods of drought in your area). The spreading types and those in containers require more frequent watering though.
Fertilize your plants monthly to ensure good growth. Double-flowered cultivars like a biweekly dose of fertilizer.
Remove faded/dead flowers to prolong blooming.

PESTS/DISEASES
Aphids
Caterpillars
Leaf miners
Gray mold
Bacterial soft rot
Leaf spots
Viruses
0
1
求助
Penney
2017年07月06日

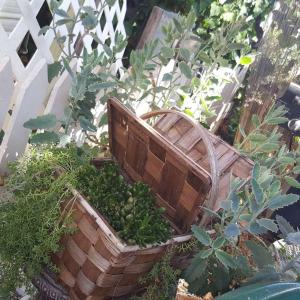
I don't know what the name of the hanging one is or the tall grey in the back.Any help?

2
1
Penney:@sunnusoa thanks so very much !
sunnyzou:hanging one:Sedum sarmentosum Bunge;
求助
Penney
2017年07月06日

Is this hanging one a banana plant?


1
0
Penney:@sara iordenz993, see I'm not sure mine are long and skinny,not sure if it cause it came off a older really long plant or if it's totally different. thanx
sarajordan2993:i believe so , heres a stem of mine – not too sure though


