文章
Miss Chen
2018年01月07日

Perennial gardeners who master bulb division and growing lilies from seed may want to try another form of vegetative propagation, stem cuttings. Although this method of propagation is more difficult for herbaceous perennials such as true lilies that grow from bulbs than it is for woody perennials, stem cuttings guarantee an identical clone of the parent plants. Some types of lilies lend themselves more readily to the technique.
How Lilies Reproduce
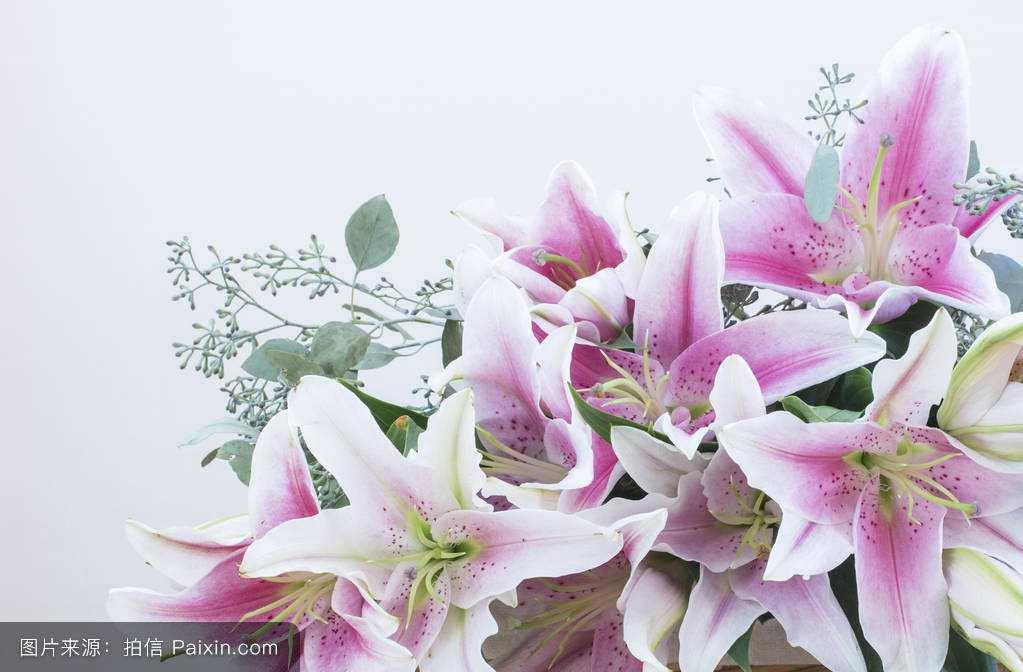
Lilies grow from scaled bulbs that carry the genetic code of the plant and the embryo and food and moisture to keep it safe until conditions allow it to grow again. Bulbs multiply rapidly. Some varieties produce additional bloom-ready bulbs every year. Some bulbs grow little bulblets around the base, or growth plate, of the parent bulbs and the section of the stem between the bulb and soil line. Some lilies, notably the North American native tiger lily, grow tiny bulbils at the junction of the leaf and stem. Each scale of the lily's bulb, every bulblet and bulbil carry the exact chromosomal combination of the parent. Seeds, produced in pods formed on flower stems, carry the combined genetic code for a new plant -- a hybrid -- with the combined chromosomal structure of the seed-bearing parent and whatever lily provided pollen. Success with stem cuttings relies on how the cultivar self-reproduces and how the stem cutting is planted.
Timing
Lily stems begin dying back quickly after flowers fade, so cuttings must be taken soon after the last flowers drop. Cuttings must be planted immediately in sharp sand or a starting mix and kept moist. When a shoot emerges, a bulbil has formed in the axil where the leaf meets the stem. This tiny bulb, planted in a nursery plot in spring, should grow large enough to move to the garden within a year or two. If the stem cutting successfully creates a bulbil, it may grow large enough to produce flowers within two to four seasons, depending on the lily cultivar.
Method
Section green, live sections of the stem, keeping at least one leaf on each section. Dust the section with a fungicide or rooting hormone, available at garden centers, and plant sections in a flat of sharp sand or soilless starter mix so that the leaves stand up above each section. Be sure to bury the axil of each leaf. That is where the bulbil will form.

Choosing Lilies for Cuttings
Many species of lilies, such as tiger lilies, readily form bulbils in leaf axils; hybrid Asiatics form bulblets on stems underground and leaves torn off with a section of stem. Lilies will not grow directly from stem cuttings; they must first form bulbils, so be patient. Only the lilies that grow bulbils -- or those hybrids whose ancestors grew bulbils -- will respond to this method of vegetative reproduction. The rest provide plenty of bulblets for the picking and planting on their mother bulbs' growth plates or along the underground sections of their stems.

How Lilies Reproduce
Lilies grow from scaled bulbs that carry the genetic code of the plant and the embryo and food and moisture to keep it safe until conditions allow it to grow again. Bulbs multiply rapidly. Some varieties produce additional bloom-ready bulbs every year. Some bulbs grow little bulblets around the base, or growth plate, of the parent bulbs and the section of the stem between the bulb and soil line. Some lilies, notably the North American native tiger lily, grow tiny bulbils at the junction of the leaf and stem. Each scale of the lily's bulb, every bulblet and bulbil carry the exact chromosomal combination of the parent. Seeds, produced in pods formed on flower stems, carry the combined genetic code for a new plant -- a hybrid -- with the combined chromosomal structure of the seed-bearing parent and whatever lily provided pollen. Success with stem cuttings relies on how the cultivar self-reproduces and how the stem cutting is planted.
Timing
Lily stems begin dying back quickly after flowers fade, so cuttings must be taken soon after the last flowers drop. Cuttings must be planted immediately in sharp sand or a starting mix and kept moist. When a shoot emerges, a bulbil has formed in the axil where the leaf meets the stem. This tiny bulb, planted in a nursery plot in spring, should grow large enough to move to the garden within a year or two. If the stem cutting successfully creates a bulbil, it may grow large enough to produce flowers within two to four seasons, depending on the lily cultivar.
Method
Section green, live sections of the stem, keeping at least one leaf on each section. Dust the section with a fungicide or rooting hormone, available at garden centers, and plant sections in a flat of sharp sand or soilless starter mix so that the leaves stand up above each section. Be sure to bury the axil of each leaf. That is where the bulbil will form.

Choosing Lilies for Cuttings
Many species of lilies, such as tiger lilies, readily form bulbils in leaf axils; hybrid Asiatics form bulblets on stems underground and leaves torn off with a section of stem. Lilies will not grow directly from stem cuttings; they must first form bulbils, so be patient. Only the lilies that grow bulbils -- or those hybrids whose ancestors grew bulbils -- will respond to this method of vegetative reproduction. The rest provide plenty of bulblets for the picking and planting on their mother bulbs' growth plates or along the underground sections of their stems.
0
0
文章
Miss Chen
2017年11月20日

Although some plants take well to division, or splitting, woody herbs such as rosemary (Rosmarinus officinalis cvs.) are propagated best with the layering technique. When layering, simply allow new plants to spring up alongside the "mother" plant until they are sturdy enough for you to "cut their cords" and move them to new locations.

Step 1
Choose one or two outer stems from the main rosemary plant, ensuring the stems look healthy and are tall. Spring is the best time to start this process, when the stems are most flexible and have plenty of time to root. If you want to layer more than one stem, then choose stems on each side of the main plant, and ensure each stem has room to grow.
Step 2
Mix one handful of compost and one handful of bonemeal with the top 4 to 6 inches of soil on each side of the rosemary plant. Each amended area should be a rectangular patch about 6 inches wide and 12 inches long, extending outward from the base of your selected stems.
Step 3
Dig a narrow trench about 2 inches deep in the center of the 12-inch-long section of amended soil. You can also judge the length for the trench by the general height of the stem that will lay in it, minus about 2 inches of the stem's leafy end.

Step 4
Strip a selected rosemary stem of most of its needlelike leaves, keeping the leaves on about 2 inches of the stem's tip. Use a small, sharp knife to slice the underside of the stem gently in several places, and dust the underside with hormone rooting powder. Disinfect the knife before and after its use by either spraying it with a household disinfectant or soaking its blade for five minutes in a solution that is one part bleach to three parts water. Air-dry the disinfected knife or rinse it with clean water and dry it with a clean cloth.
Step 5
Bend the stem gently down so that it lays flat against the bottom of the shallow trench. Do not press the last 2 inches of the stem's tip into the soil. That leafy part will remain above-ground. Use a landscape peg or U-shaped flexible wire at the midpoint of the stem to ensure the underside of the stem remains in contact with the ground.
Step 6
Fill the rest of the trench with the amended soil so that most of the stem is buried but its leafy end sticks above the soil.
Step 7
Repeat the process with each stem you want to layer to create a new plant. If you have several mature rosemary plants that you want to propagate, then repeat the process for the layering technique with them.
Step 8
Water the soil of the buried stems on a regular basis until the stems form rootlets. Although rosemary plants usually don't do well in moist soil, the baby plants will.
Step 9
Check for rootlets after several weeks by gently digging around the buried stems. It can take several months for the rosemary layering technique literally to take root. So be patient.
Step 10
Separate the young, well-established plants from their mother rosemary plant by slicing off the young plants near the base of the mature plant.
Step 11
Replant each young rosemary plant in its own container that has bottom drainage holes and is filled with potting soil. Alternatively, plant the young rosemary plants in a sunny place in your garden. When setting the young plants into containers or a garden bed, plant them at the same soil depth at which they previously grew. That depth usually is marked by a definite soil line on a plant's stem.

Step 1
Choose one or two outer stems from the main rosemary plant, ensuring the stems look healthy and are tall. Spring is the best time to start this process, when the stems are most flexible and have plenty of time to root. If you want to layer more than one stem, then choose stems on each side of the main plant, and ensure each stem has room to grow.
Step 2
Mix one handful of compost and one handful of bonemeal with the top 4 to 6 inches of soil on each side of the rosemary plant. Each amended area should be a rectangular patch about 6 inches wide and 12 inches long, extending outward from the base of your selected stems.
Step 3
Dig a narrow trench about 2 inches deep in the center of the 12-inch-long section of amended soil. You can also judge the length for the trench by the general height of the stem that will lay in it, minus about 2 inches of the stem's leafy end.

Step 4
Strip a selected rosemary stem of most of its needlelike leaves, keeping the leaves on about 2 inches of the stem's tip. Use a small, sharp knife to slice the underside of the stem gently in several places, and dust the underside with hormone rooting powder. Disinfect the knife before and after its use by either spraying it with a household disinfectant or soaking its blade for five minutes in a solution that is one part bleach to three parts water. Air-dry the disinfected knife or rinse it with clean water and dry it with a clean cloth.
Step 5
Bend the stem gently down so that it lays flat against the bottom of the shallow trench. Do not press the last 2 inches of the stem's tip into the soil. That leafy part will remain above-ground. Use a landscape peg or U-shaped flexible wire at the midpoint of the stem to ensure the underside of the stem remains in contact with the ground.
Step 6
Fill the rest of the trench with the amended soil so that most of the stem is buried but its leafy end sticks above the soil.
Step 7
Repeat the process with each stem you want to layer to create a new plant. If you have several mature rosemary plants that you want to propagate, then repeat the process for the layering technique with them.
Step 8
Water the soil of the buried stems on a regular basis until the stems form rootlets. Although rosemary plants usually don't do well in moist soil, the baby plants will.
Step 9
Check for rootlets after several weeks by gently digging around the buried stems. It can take several months for the rosemary layering technique literally to take root. So be patient.
Step 10
Separate the young, well-established plants from their mother rosemary plant by slicing off the young plants near the base of the mature plant.
Step 11
Replant each young rosemary plant in its own container that has bottom drainage holes and is filled with potting soil. Alternatively, plant the young rosemary plants in a sunny place in your garden. When setting the young plants into containers or a garden bed, plant them at the same soil depth at which they previously grew. That depth usually is marked by a definite soil line on a plant's stem.
0
0
文章
Dummer. ゛☀
2017年09月30日

Flowering plants, or Angiosperms (described taxonomically as the division Magnoliophyta) are the largest grouping within the plant kingdom (Kingdom Plantae or Viridiplantae) in terms of the numbers of described species. Approximately 260,000 species of flowering plant have been named so far, constituting nearly 90% of all known species of plants. Even so, taxonomists describe many new species annually, and estimates of total angiosperm diversity reach as high as 400,000 species. There are about 450 families of flowering plants, displaying extremely diverse life histories and ecological adaptations. In addition to dominating plant biodiversity, angiosperms are the dominant photosynthetic organisms (primary producers) in most terrestrial ecosystems (an important exception to this rule are the boreal forests, which are often dominated by conifers). All important food plants are angiosperms.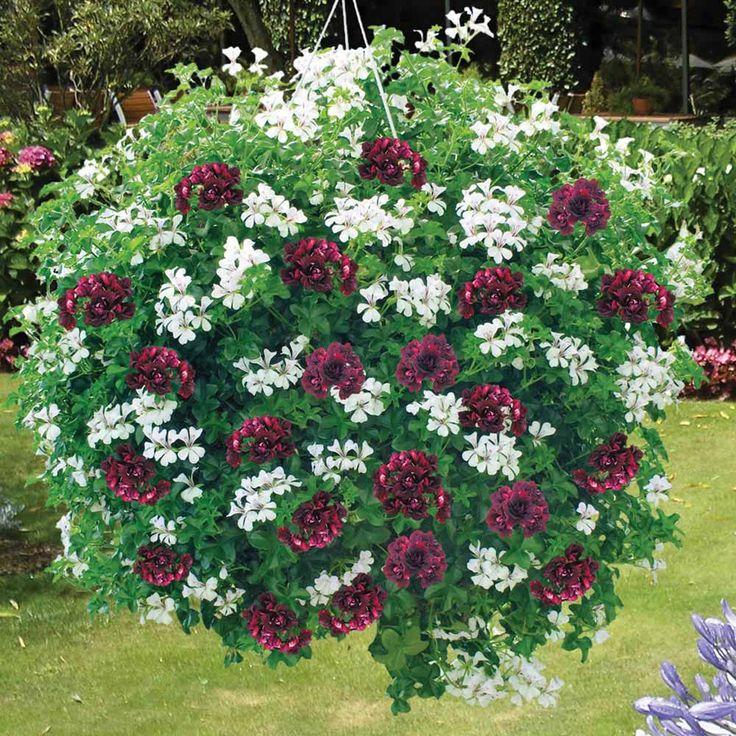
Natural History
Angiosperms are also the youngest of the plant divisions, having arisen relatively late in the history of terrestrial plant life. The first land plants are about 450 million years old, but the earliest definitive angiosperm fossils are only about 130 million years old, placing their known origins within the Early Cretaceous period. However, indirect evidence leads some scientists to estimate that angiosperms may have originated as early as 250 million years ago, that is, at the end of the Permian period.
By about 100 million years ago, during the Late Cretaceous period, angiosperms experienced a rapid diversification in form. The factors driving this diversification have long been of interest to evolutionary biologists. Many scientists hypothesize that specialized mutualistic relationships with animal pollinators played an important role in the development of angiosperm diversity (and perhaps insect diversity as well).
Physiological Characteristics and Behavior
Angiosperms are anatomically distinguished from other plant groups by several developmental and anatomical features. They produce flowers, which are very short branches bearing a series of closely spaced leaves modified to facilitate pollination (sepals and petals) or to bear the organs involved in sexual reproduction (stamens and pistils). Developing seeds are completely enclosed in an ovary derived from a portion of the pistil (the word angiosperm is of Greek derivation, meaning covered seed). Ovary tissues mature to form a fruit that is generally involved in protecting the seed and facilitating its dispersal (only angiosperms bear true fruits). Seeds at some point in their development contain a distinctive tissue, the triploid endosperm, which serves as a nutritional reserve for the developing embryo.
Angiosperms That May Interest You
Angiosperms comprise such a large group, it is difficult to single out a mere few of the most intriguing, but here are some of the most important and diverse (and delicious!) flowering plant families.
The composite or daisy family (Asteraceae) has about 24,000 named species, and may be the largest plant family. The orchid family (Orchidaceae) rivals the Daisy family in diversity, with about 17,000 species named. The Grass family (Poaceae), with over 10,000 species, includes three of the four most productive human-food plants: Rice (Oryza), Eheat (Triticum) and Maize (Zea). The fourth, the Potato (Solanum tuberosum), is a member of the Nightshade family (Solanaceae). The bean (or legume) family (Fabaceae, also known as Papilionaceae) includes about 19,000 species, many of which are important in human food because their symbiotic association with certain nitrogen-fixing bacteria leads to unusually high protein content.

Natural History
Angiosperms are also the youngest of the plant divisions, having arisen relatively late in the history of terrestrial plant life. The first land plants are about 450 million years old, but the earliest definitive angiosperm fossils are only about 130 million years old, placing their known origins within the Early Cretaceous period. However, indirect evidence leads some scientists to estimate that angiosperms may have originated as early as 250 million years ago, that is, at the end of the Permian period.

By about 100 million years ago, during the Late Cretaceous period, angiosperms experienced a rapid diversification in form. The factors driving this diversification have long been of interest to evolutionary biologists. Many scientists hypothesize that specialized mutualistic relationships with animal pollinators played an important role in the development of angiosperm diversity (and perhaps insect diversity as well).

Physiological Characteristics and Behavior
Angiosperms are anatomically distinguished from other plant groups by several developmental and anatomical features. They produce flowers, which are very short branches bearing a series of closely spaced leaves modified to facilitate pollination (sepals and petals) or to bear the organs involved in sexual reproduction (stamens and pistils). Developing seeds are completely enclosed in an ovary derived from a portion of the pistil (the word angiosperm is of Greek derivation, meaning covered seed). Ovary tissues mature to form a fruit that is generally involved in protecting the seed and facilitating its dispersal (only angiosperms bear true fruits). Seeds at some point in their development contain a distinctive tissue, the triploid endosperm, which serves as a nutritional reserve for the developing embryo.

Angiosperms That May Interest You
Angiosperms comprise such a large group, it is difficult to single out a mere few of the most intriguing, but here are some of the most important and diverse (and delicious!) flowering plant families.

The composite or daisy family (Asteraceae) has about 24,000 named species, and may be the largest plant family. The orchid family (Orchidaceae) rivals the Daisy family in diversity, with about 17,000 species named. The Grass family (Poaceae), with over 10,000 species, includes three of the four most productive human-food plants: Rice (Oryza), Eheat (Triticum) and Maize (Zea). The fourth, the Potato (Solanum tuberosum), is a member of the Nightshade family (Solanaceae). The bean (or legume) family (Fabaceae, also known as Papilionaceae) includes about 19,000 species, many of which are important in human food because their symbiotic association with certain nitrogen-fixing bacteria leads to unusually high protein content.
0
0
文章
Dummer. ゛☀
2017年09月19日

Cacti and succulents can safely be sent through the mail but if you are mailing plants from one country to another, you should contact the Plant Protection Division of the Department of Agriculture for their country to find out what the guidelines are about what plants you are allowed to mail and where you can mail them. The purpose of this article is only to tell you how to mail them.
People who have been growers of non succulent plants may not be aware that succulent plants including cacti can be successfully mailed from one person to another and an entire collection can be packed and moved along with household belongings if you are moving your home from one place to another.
The unique thing about cacti and succulents is their ability to survive without any moisture for reasonable periods of time. They are therefore ideally suited to mailing or transporting either with their roots or without their roots.
Here’s how to proceed.
1. Shake all soil off the roots of the plants being careful to break as few roots as possible. Don’t worry if a few roots are broken. That won’t kill the plants. It is much easier to remove the soil if it is dried out. Don’t try to remove the soil after you water the plants!
2. Any plants that are in full growth and seem rather too juicy or turgid are safer allowed to dry out for a few days without water which will harden the growth and then they will be less likely to bruise or rot.
3. You can trim back excessive roots if you like, again with no damage to the plant.
4. Make sure the plant and roots are very dry. Succulents travel more safely if the roots are dry. And most important, there will be less weight to pay postage on! And these days heaven knows anything saved on postage is a bonus.
5. Prepare a label for each plant with the name of the plant on it.
6. Wrap each plant in soft paper – with the label with the name of the plant on it. If it is a delicate plant use soft kitchen towelling. If a stronger plant you can use newspaper. If lots of spines, use two or three layers of newspaper. I like to put a note on such plants to be careful when opening so people don’t stab themselves when opening the parcel.
7. A little different procedure is needed for a few plants such as Epiphytes, Orchid Cacti or Christmas Cactus. If they have roots, they do not do as well if left dry for too long. Use a small plastic bag containing a pinch of damp peat moss and wrap it around the roots only and secure with a rubber band. Actually it is better to send dry cuttings of these than to send cuttings with roots. If there are no roots you don’t need to worry about moisture-just wrap them dry.
8. An important safeguard for succulents sent through the mail is a strong, light weight box. The best type of box is one made of corrugated cardboard. Try your hardware store, garage, drugstore or the grocery store where you will often find these and they are usually free. If the box is too big, it is not difficult to make a smaller box out of a larger corrugated one. Just crease the folds with the back of a knife or ruler, cutting off excess where necessary.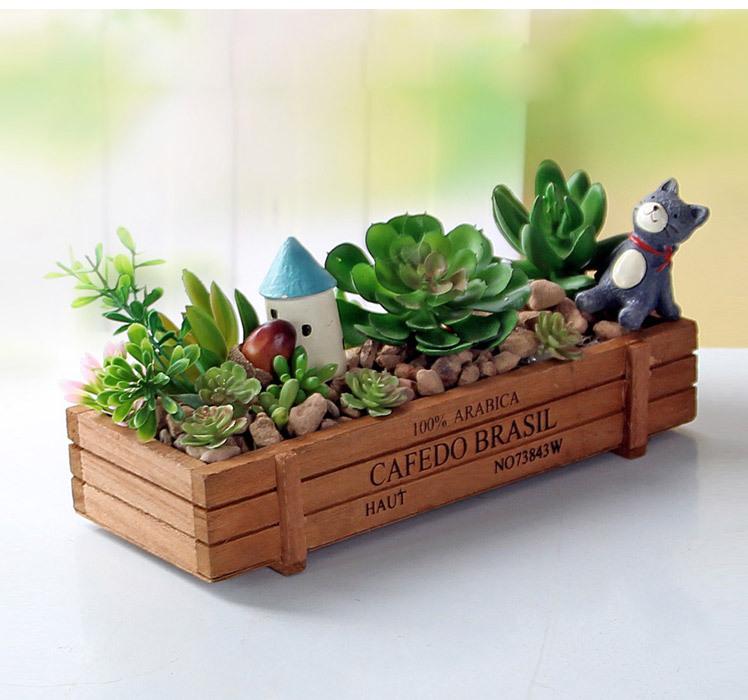
DO NOT use cereal boxes, shoe boxes and the like and expect your package and plants to arrive uncrushed!! Remember your parcel can go hurtling along conveyor belts and down long chutes landing in huge piles with heavier packages on top of yours. Parcels have to withstand much battering as it goes through the post office. If you don’t wrap it right, it will fall apart. You could, however, use those flimsy types of boxes inside the box you are mailing to contain and separate some plants from others if you are packing quite a few. I find them handy for plants with really vicious spines which insist on piercing all sorts of paper but which are quite protected in a box within the box.
9. Pack sufficient extra paper (shredded paper or crumpled newspaper is good) around the individually wrapped plants in your box so they won’t shake around. Fill in also any empty spaces when all plants are put in the box. It is very important that the plants or cuttings do not move around in the box or they will damage each other.
10. Seal the box tightly with proper tape made for wrapping parcels. Ordinary scotch tape won’t hold! Do not use string or twine or cord. They are not allowed by the post office (at least in Canada). There is no need to wrap the box again in paper. If the box has been in the mail before and there are addresses or other notations on it, strike these out boldly with a marking pen.
11. Prepare three labels. Two for the outside of the box – top and bottom and one to go inside, just in case anything happens to badly damage the outside of the box. Either print out a label on your printer or print by hand – your address in the upper left hand corner. The address of the person you are sending it to in the middle further down. And make sure postal codes are shown for both addresses.
12. Write on all three labels in large letters at the bottom P E R I S H A B L E.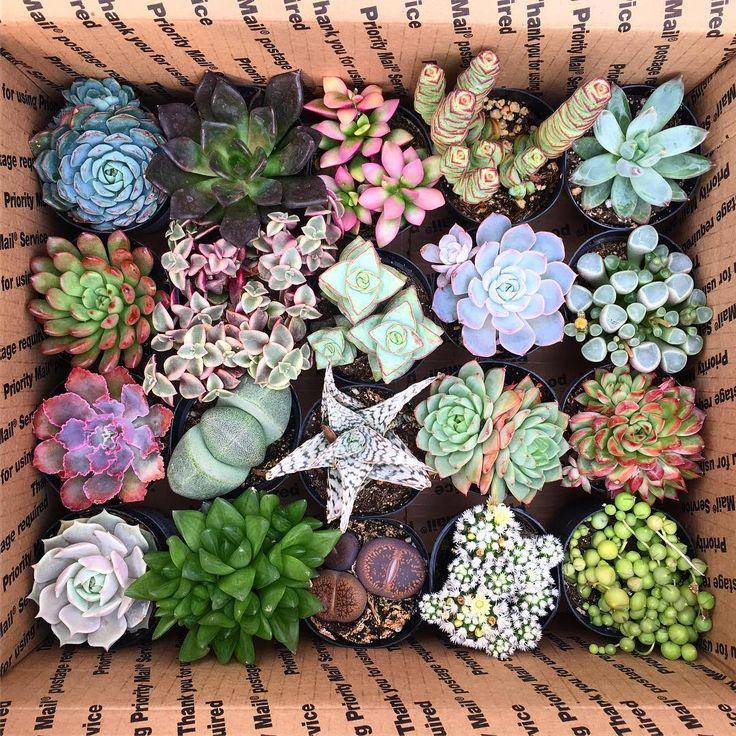
13. One final tip. If you send your plant parcels by regular parcel post which is the cheapest parcel rate available .. and spend and extra 50 cents or a dollar to insure the parcel with the post office, you will find that it goes through the post office very fast. They do not want insured mail to get lost so priority is given to getting it there. There is no point paying for what is now very expensive first class mail if you do it the insurance way and save many dollars in the process. And please note parcels sent by parcel services will often take much longer to arrive than those sent through the post office, especially if they are going outside your country.

People who have been growers of non succulent plants may not be aware that succulent plants including cacti can be successfully mailed from one person to another and an entire collection can be packed and moved along with household belongings if you are moving your home from one place to another.
The unique thing about cacti and succulents is their ability to survive without any moisture for reasonable periods of time. They are therefore ideally suited to mailing or transporting either with their roots or without their roots.

Here’s how to proceed.
1. Shake all soil off the roots of the plants being careful to break as few roots as possible. Don’t worry if a few roots are broken. That won’t kill the plants. It is much easier to remove the soil if it is dried out. Don’t try to remove the soil after you water the plants!
2. Any plants that are in full growth and seem rather too juicy or turgid are safer allowed to dry out for a few days without water which will harden the growth and then they will be less likely to bruise or rot.

3. You can trim back excessive roots if you like, again with no damage to the plant.
4. Make sure the plant and roots are very dry. Succulents travel more safely if the roots are dry. And most important, there will be less weight to pay postage on! And these days heaven knows anything saved on postage is a bonus.
5. Prepare a label for each plant with the name of the plant on it.
6. Wrap each plant in soft paper – with the label with the name of the plant on it. If it is a delicate plant use soft kitchen towelling. If a stronger plant you can use newspaper. If lots of spines, use two or three layers of newspaper. I like to put a note on such plants to be careful when opening so people don’t stab themselves when opening the parcel.

7. A little different procedure is needed for a few plants such as Epiphytes, Orchid Cacti or Christmas Cactus. If they have roots, they do not do as well if left dry for too long. Use a small plastic bag containing a pinch of damp peat moss and wrap it around the roots only and secure with a rubber band. Actually it is better to send dry cuttings of these than to send cuttings with roots. If there are no roots you don’t need to worry about moisture-just wrap them dry.
8. An important safeguard for succulents sent through the mail is a strong, light weight box. The best type of box is one made of corrugated cardboard. Try your hardware store, garage, drugstore or the grocery store where you will often find these and they are usually free. If the box is too big, it is not difficult to make a smaller box out of a larger corrugated one. Just crease the folds with the back of a knife or ruler, cutting off excess where necessary.

DO NOT use cereal boxes, shoe boxes and the like and expect your package and plants to arrive uncrushed!! Remember your parcel can go hurtling along conveyor belts and down long chutes landing in huge piles with heavier packages on top of yours. Parcels have to withstand much battering as it goes through the post office. If you don’t wrap it right, it will fall apart. You could, however, use those flimsy types of boxes inside the box you are mailing to contain and separate some plants from others if you are packing quite a few. I find them handy for plants with really vicious spines which insist on piercing all sorts of paper but which are quite protected in a box within the box.

9. Pack sufficient extra paper (shredded paper or crumpled newspaper is good) around the individually wrapped plants in your box so they won’t shake around. Fill in also any empty spaces when all plants are put in the box. It is very important that the plants or cuttings do not move around in the box or they will damage each other.
10. Seal the box tightly with proper tape made for wrapping parcels. Ordinary scotch tape won’t hold! Do not use string or twine or cord. They are not allowed by the post office (at least in Canada). There is no need to wrap the box again in paper. If the box has been in the mail before and there are addresses or other notations on it, strike these out boldly with a marking pen.

11. Prepare three labels. Two for the outside of the box – top and bottom and one to go inside, just in case anything happens to badly damage the outside of the box. Either print out a label on your printer or print by hand – your address in the upper left hand corner. The address of the person you are sending it to in the middle further down. And make sure postal codes are shown for both addresses.
12. Write on all three labels in large letters at the bottom P E R I S H A B L E.

13. One final tip. If you send your plant parcels by regular parcel post which is the cheapest parcel rate available .. and spend and extra 50 cents or a dollar to insure the parcel with the post office, you will find that it goes through the post office very fast. They do not want insured mail to get lost so priority is given to getting it there. There is no point paying for what is now very expensive first class mail if you do it the insurance way and save many dollars in the process. And please note parcels sent by parcel services will often take much longer to arrive than those sent through the post office, especially if they are going outside your country.
0
0
文章
Miss Chen
2017年08月10日

Lesco, originally known as Lakeshore Equipment and Supply Co., is a division of John Deere Landscapes. Started in 1962, the founders started by offering turf maintenance equipment and eventually fertilizer and seeds. Now Lesco is known throughout the United States for its quality lawn care products and services for both homeowners and lawn care professionals.

Tall Fescue
A good grass for home lawns, this grass will stay green all year round in a climate with a mild winter. It is also a sturdy grass for playing fields. It has a coarse texture and clumps as it grows. Lesco offers Biltmore, Bravo, Hunter, Kentucky, Magellan, Padre and Stetson Tall Fescue types.
Bluegrass
Bluegrass is the most commonly known type of grass for both home and professional lawns. It is a good cool-season grass and does not need a lot of maintenance. It will go dormant in hot weather but is not recommended for places where the climate is very hot for extended periods of time. Bluegrass is generally not suited to shady areas. Lesco offers a variety of bluegrasses including Kentucky, Blue Velvet, Midnight, Nuglade Kentucky, Supina Supranova and Shamrock.
Annual Ryegrass
Annual ryegrass does not overwinter in cold climates, according to American Lawns. This type of grass grows quickly and is well suited to be a temporary ground cover. It is used most often as a forage plant for animals. Lesco offers one type of annual rye seed.
Perennial Ryegrass
Perennial ryegrass also makes a suitable temporary ground cover. It is often used in warm climates as an overseed to keep a lawn green when summer grasses go dormant. It is a cool season grass not suited to hot climates as more than an annual. It is not drought tolerant and requires a lot of mowing. Lesco offers Greenville, Harbour, Manhattan, Midway, Allsport and Prosport varieties of perennial ryegrass.

Fine Fescue
A fine fescue is, according to Purdue University, a fine-leafed grass used for both sunny and shady areas. It germinates quickly, is easy to establish, but can lose its color quickly in a drought.
Creeping Bentgrass
Creeping bentgrass is used throughout cooler climates for a golf course style lawn. It has a fine texture, is soft and carpet-like, according to the Purdue University Extension. It is also a high-maintenance grass needing constant attention; otherwise, it loses its luster. Creeping bentgrass needs to be mowed and watered frequently and also needs a lot of fertilizer.

Tall Fescue
A good grass for home lawns, this grass will stay green all year round in a climate with a mild winter. It is also a sturdy grass for playing fields. It has a coarse texture and clumps as it grows. Lesco offers Biltmore, Bravo, Hunter, Kentucky, Magellan, Padre and Stetson Tall Fescue types.
Bluegrass
Bluegrass is the most commonly known type of grass for both home and professional lawns. It is a good cool-season grass and does not need a lot of maintenance. It will go dormant in hot weather but is not recommended for places where the climate is very hot for extended periods of time. Bluegrass is generally not suited to shady areas. Lesco offers a variety of bluegrasses including Kentucky, Blue Velvet, Midnight, Nuglade Kentucky, Supina Supranova and Shamrock.
Annual Ryegrass
Annual ryegrass does not overwinter in cold climates, according to American Lawns. This type of grass grows quickly and is well suited to be a temporary ground cover. It is used most often as a forage plant for animals. Lesco offers one type of annual rye seed.
Perennial Ryegrass
Perennial ryegrass also makes a suitable temporary ground cover. It is often used in warm climates as an overseed to keep a lawn green when summer grasses go dormant. It is a cool season grass not suited to hot climates as more than an annual. It is not drought tolerant and requires a lot of mowing. Lesco offers Greenville, Harbour, Manhattan, Midway, Allsport and Prosport varieties of perennial ryegrass.

Fine Fescue
A fine fescue is, according to Purdue University, a fine-leafed grass used for both sunny and shady areas. It germinates quickly, is easy to establish, but can lose its color quickly in a drought.
Creeping Bentgrass
Creeping bentgrass is used throughout cooler climates for a golf course style lawn. It has a fine texture, is soft and carpet-like, according to the Purdue University Extension. It is also a high-maintenance grass needing constant attention; otherwise, it loses its luster. Creeping bentgrass needs to be mowed and watered frequently and also needs a lot of fertilizer.
0
0
成长记
Plants Encyclopdias
2016年08月17日

Name: Golden Sedum
Latin: Sedum adolphii
Origin: South America
Plant height: 15 - 30 cm
Reproduction: #Division
Difficulty level: #Easy
Tags: #SouthAmerica #Sedumadolphii
Latin: Sedum adolphii
Origin: South America
Plant height: 15 - 30 cm
Reproduction: #Division
Difficulty level: #Easy
Tags: #SouthAmerica #Sedumadolphii

36
16
Yve:Hoya plant
Yve:Hoya
成长记
Plants Encyclopdias
2016年08月17日

Name: Sedum Bertram Anderson
Latin: Sedum cauticola
Origin: South America
Plant height: 10 - 20 cm
Reproduction: #Division
Difficulty level: #Easy
Tags: #SouthAmerica #Sedumcauticola

Latin: Sedum cauticola
Origin: South America
Plant height: 10 - 20 cm
Reproduction: #Division
Difficulty level: #Easy
Tags: #SouthAmerica #Sedumcauticola

15
2
成长记
Plants Encyclopdias
2016年08月17日

Name: Sedum Mini Joy
Latin: Sedum spectabile
Origin: South America
Plant height: 60 - 90 cm
Reproduction: #Division
Difficulty level: #Easy
Tags: #SouthAmerica #Sedumspectabile
Latin: Sedum spectabile
Origin: South America
Plant height: 60 - 90 cm
Reproduction: #Division
Difficulty level: #Easy
Tags: #SouthAmerica #Sedumspectabile

15
3
桓谭生:like
成长记
Plants Encyclopdias
2016年08月17日

Name: Sedum Lynda Windsor
Latin: Sedum telephium
Origin: South America
Plant height: 30 - 45 cm
Reproduction: #Division
Difficulty level: #Easy
Tags: #SouthAmerica #Sedumtelephium

Latin: Sedum telephium
Origin: South America
Plant height: 30 - 45 cm
Reproduction: #Division
Difficulty level: #Easy
Tags: #SouthAmerica #Sedumtelephium

18
2
成长记
Plants Encyclopdias
2016年08月17日

Name: Golden Calla Lily
Latin: Zantedeschia elliottiana
Origin: Africa
Plant height: 50 - 90 cm
Reproduction: #Division
Difficulty level: #Pro
Tags: #Africa #Zantedeschiaelliottiana

Latin: Zantedeschia elliottiana
Origin: Africa
Plant height: 50 - 90 cm
Reproduction: #Division
Difficulty level: #Pro
Tags: #Africa #Zantedeschiaelliottiana

7
3
成长记
Plants Encyclopdias
2016年08月17日

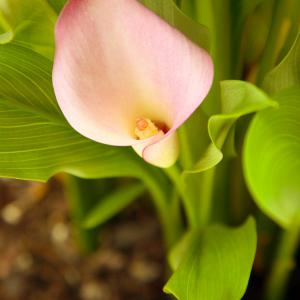
Name: Pink Calla Lily
Latin: Zantedeschia rehmannii
Origin: Africa
Plant height: 50 - 90 cm
Reproduction: #Division
Difficulty level: #Pro
Tags: #Africa #Zantedeschiarehmannii
Latin: Zantedeschia rehmannii
Origin: Africa
Plant height: 50 - 90 cm
Reproduction: #Division
Difficulty level: #Pro
Tags: #Africa #Zantedeschiarehmannii

5
3
成长记
Plants Encyclopdias
2016年08月17日

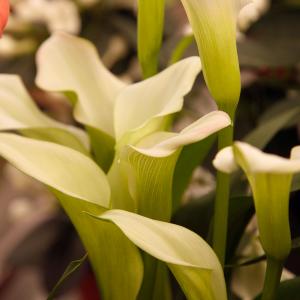
Name: Calla lily
Latin: Zantedeschia aethiopica
Origin: Africa
Plant height: 50 - 90 cm
Reproduction: #Division
Difficulty level: #Pro
Tags: #Africa #Zantedeschiaaethiopica
Latin: Zantedeschia aethiopica
Origin: Africa
Plant height: 50 - 90 cm
Reproduction: #Division
Difficulty level: #Pro
Tags: #Africa #Zantedeschiaaethiopica

6
4
成长记
Plants Encyclopdias
2016年08月17日

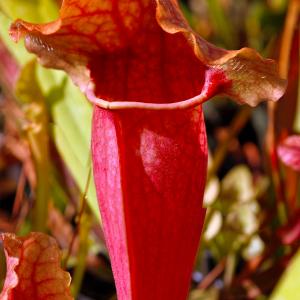
Name: Purple pitcher plant
Latin: Sarracenia purpurea
Origin: North America
Plant height: 10 - 100 cm
Reproduction: #Division
Difficulty level: #Pro
Tags: #NorthAmerica #Sarraceniapurpurea
Latin: Sarracenia purpurea
Origin: North America
Plant height: 10 - 100 cm
Reproduction: #Division
Difficulty level: #Pro
Tags: #NorthAmerica #Sarraceniapurpurea

5
0


