文章
Dummer. ゛☀
2017年08月21日

Chlorophytum comosum may be lurking in your house. What is Chlorophytum comosum? Only one of the most popular houseplants. You may recognize its common name of spider plant, AKA airplane plant, St. Bernard’s lily, spider ivy or ribbon plant. Spider plants are one of the most popular houseplants because they are so resilient and easy to grow but do spider plants need fertilizer? If so, what type of fertilizer is best for spider plants and how do you fertilize spider plants?
Spider Plant Fertilizer
Spider plants are hardy plants that thrive in less than optimal conditions. Plants form tight rosettes of leaves with dangling plantlets hanging from long stems of up to 3 feet. While they prefer bright light, they tend to scorch in direct sunlight and are perfect for lower lit abodes and offices. They do not like temperature below 50 degrees F. (10 C.) or cold drafts.
To care for your spider plant, be sure it is planted in well-draining, well-aerating potting medium. Water throughout the growing season on a regular basis and mist the plant occasionally, as they enjoy the humidity. If your water is from city sources, it is most likely chlorinated and probably fluoridated as well. Both of these chemicals can result in tip burn. Allow tap water to sit at room temperature for at least 24 hours or use rainwater or distilled water to irrigate spider plants. Spider plants are native to South Africa and are prolific growers and producers of a multitude of plantlets. The plantlets are basically a spider plant baby and can be easily snipped from the parent and rooted in water or damp potting soil to become yet another spider plant. All that aside, do spider plants need fertilizer as well?
How to Fertilize Spider Plants
Fertilizing a spider plant must be done in moderation. Fertilizer for spider plants should be applied sparingly, as over-fertilization will result in brown leaf tips just as chemically laden water. There is no specific spider plant fertilizer. Any all-purpose, complete, water soluble or granular time-release fertilizer suitable for houseplants is acceptable. There is some discrepancy in the number of times you should feed your spider plant during the growing season. Some sources say once a week, while others says every 2-4 weeks. The common trend seems to be that over-fertilizing will cause more damage than under feeding. I would go for a happy medium of every 2 weeks with a liquid fertilizer.
If the tips of the spider plant begin to brown, I would back off the amount of fertilizer by ½ of the manufacturer’s recommended amount. Remember that brown tips may also be caused by chemical laden water, drought stress, drafts, or temperature fluxes. A little experimentation might be in order to get your plant back in tip-top shape, but these plants are known for rebounding and will almost certainly be in the flush of health with a little TLC.

Spider Plant Fertilizer
Spider plants are hardy plants that thrive in less than optimal conditions. Plants form tight rosettes of leaves with dangling plantlets hanging from long stems of up to 3 feet. While they prefer bright light, they tend to scorch in direct sunlight and are perfect for lower lit abodes and offices. They do not like temperature below 50 degrees F. (10 C.) or cold drafts.
To care for your spider plant, be sure it is planted in well-draining, well-aerating potting medium. Water throughout the growing season on a regular basis and mist the plant occasionally, as they enjoy the humidity. If your water is from city sources, it is most likely chlorinated and probably fluoridated as well. Both of these chemicals can result in tip burn. Allow tap water to sit at room temperature for at least 24 hours or use rainwater or distilled water to irrigate spider plants. Spider plants are native to South Africa and are prolific growers and producers of a multitude of plantlets. The plantlets are basically a spider plant baby and can be easily snipped from the parent and rooted in water or damp potting soil to become yet another spider plant. All that aside, do spider plants need fertilizer as well?

How to Fertilize Spider Plants
Fertilizing a spider plant must be done in moderation. Fertilizer for spider plants should be applied sparingly, as over-fertilization will result in brown leaf tips just as chemically laden water. There is no specific spider plant fertilizer. Any all-purpose, complete, water soluble or granular time-release fertilizer suitable for houseplants is acceptable. There is some discrepancy in the number of times you should feed your spider plant during the growing season. Some sources say once a week, while others says every 2-4 weeks. The common trend seems to be that over-fertilizing will cause more damage than under feeding. I would go for a happy medium of every 2 weeks with a liquid fertilizer.

If the tips of the spider plant begin to brown, I would back off the amount of fertilizer by ½ of the manufacturer’s recommended amount. Remember that brown tips may also be caused by chemical laden water, drought stress, drafts, or temperature fluxes. A little experimentation might be in order to get your plant back in tip-top shape, but these plants are known for rebounding and will almost certainly be in the flush of health with a little TLC.
0
0
文章
Dummer. ゛☀
2017年08月21日

Spider plants (Chlorophytum comosum) are very popular houseplants. They are great for beginners since they are tolerant and very difficult to kill. After you’ve had your plant for a few years, you may find that it has grown very large and isn’t doing well. If that happens, it’s time to start dividing spider plants. Can you split a spider plant? Yes, you can. Read on for information about when and how to divide a spider plant.
Spider Plant Division
Spider plants have tubular roots that grow rapidly. That’s why spider plants outgrow their pots so quickly—the roots just need more room to grow. If you’ve moved your spider into new, bigger pots several times, it should be thriving. If it is struggling, it may be time to think about spider plant division.
If you want to know when to split a spider plant, dividing spider plants is appropriate when the roots are crowded. Tightly packed roots may kill off some central root sections. When this happens, the plant’s leaves may die and brown even though you haven’t moved it or changed its care.
That’s because some of the roots are not able to do their job. Dividing spider plants pushes the plant’s “restart” button and gives it a new chance to grow happily.
How to Divide a Spider Plant
If you want to know how to divide a spider plant, it isn’t very difficult if you have an overview of the procedure.
When you are dividing spider plants, you’ll need a sharp garden knife, additional containers with good drain holes and potting soil. The idea is to slice off and throw away the damaged roots, then divide the healthy roots into several pieces.
Remove the plant from its pot and take a look at the roots. You may need to wash soil from the roots with the hose in order to see them well. Identify the damaged roots and cut them off. Decide how many plants can be started from the remaining roots. After that, cut the roots into several sections, one for each new plant.
Repot each section of the plant into its own pot. Plant each one in well-draining potting soil, then water each pot well.

Spider Plant Division
Spider plants have tubular roots that grow rapidly. That’s why spider plants outgrow their pots so quickly—the roots just need more room to grow. If you’ve moved your spider into new, bigger pots several times, it should be thriving. If it is struggling, it may be time to think about spider plant division.
If you want to know when to split a spider plant, dividing spider plants is appropriate when the roots are crowded. Tightly packed roots may kill off some central root sections. When this happens, the plant’s leaves may die and brown even though you haven’t moved it or changed its care.

That’s because some of the roots are not able to do their job. Dividing spider plants pushes the plant’s “restart” button and gives it a new chance to grow happily.
How to Divide a Spider Plant
If you want to know how to divide a spider plant, it isn’t very difficult if you have an overview of the procedure.
When you are dividing spider plants, you’ll need a sharp garden knife, additional containers with good drain holes and potting soil. The idea is to slice off and throw away the damaged roots, then divide the healthy roots into several pieces.

Remove the plant from its pot and take a look at the roots. You may need to wash soil from the roots with the hose in order to see them well. Identify the damaged roots and cut them off. Decide how many plants can be started from the remaining roots. After that, cut the roots into several sections, one for each new plant.
Repot each section of the plant into its own pot. Plant each one in well-draining potting soil, then water each pot well.
1
1
文章
Dummer. ゛☀
2017年08月21日

Spider plants (Chlorophytum comosum) are popular houseplants. Flexible about the level of care they receive and tolerant of abuse, they are perfect for gardening beginners. When should you repot a spider plant? These plants grow fast and the tuberous roots can crack open a flower pot. It’s important to start spider plant repotting before this happens. Read on for information on moving spider plants to larger pots.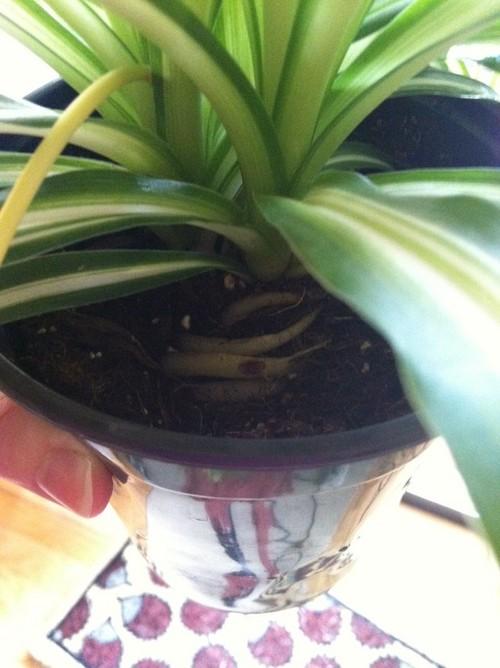
Spider Plant Repotting
Repotting spider plants simply means moving spider plants to larger pots. It is often necessary to repot houseplants as they outgrow their pots, and spider plants tend to grow faster than most. Spider plants are native to the coastal areas of South America. The plant’s tuberous roots allows the species to thrive despite varying levels of precipitation in the wild. These same water-storing tuberous roots assist your spider houseplant to survive when you forget to water it for a few weeks. The roots grow fast, however. At some point before the roots crack open the pot, it’s time to think about spider plant repotting.
When Should You Repot a Spider Plant?
Spider plants grow best when they are slightly pot bound. However, the plants, roots included, grow fast. You’ll want to think about repotting spider plants before the plants crack their pots. Plants get different cultural care, so their growth rates vary. You just have to keep an eye on your spider plant. When you see roots showing above the soil, it is time to start moving spider plants to larger pots.
How Do You Repot a Spider Plant?
How do you repot a spider plant? Repotting a spider plant is fairly easy. You gently remove the plant from its current pot, rinse and trim its roots, then replant it in a larger pot. When you are moving spider plants to larger pots, make sure the new pots have good drainage holes. Spider plants don’t tolerate wet soil for very long. Use a general-purpose potting soil or soilless medium for spider plant repotting. Fill the bottom of the pot with soil, then place the plant’s roots in the soil. Keep adding soil and tucking it around the roots until all the roots are covered. Water the plant well and care as usual.

Spider Plant Repotting
Repotting spider plants simply means moving spider plants to larger pots. It is often necessary to repot houseplants as they outgrow their pots, and spider plants tend to grow faster than most. Spider plants are native to the coastal areas of South America. The plant’s tuberous roots allows the species to thrive despite varying levels of precipitation in the wild. These same water-storing tuberous roots assist your spider houseplant to survive when you forget to water it for a few weeks. The roots grow fast, however. At some point before the roots crack open the pot, it’s time to think about spider plant repotting.

When Should You Repot a Spider Plant?
Spider plants grow best when they are slightly pot bound. However, the plants, roots included, grow fast. You’ll want to think about repotting spider plants before the plants crack their pots. Plants get different cultural care, so their growth rates vary. You just have to keep an eye on your spider plant. When you see roots showing above the soil, it is time to start moving spider plants to larger pots.

How Do You Repot a Spider Plant?
How do you repot a spider plant? Repotting a spider plant is fairly easy. You gently remove the plant from its current pot, rinse and trim its roots, then replant it in a larger pot. When you are moving spider plants to larger pots, make sure the new pots have good drainage holes. Spider plants don’t tolerate wet soil for very long. Use a general-purpose potting soil or soilless medium for spider plant repotting. Fill the bottom of the pot with soil, then place the plant’s roots in the soil. Keep adding soil and tucking it around the roots until all the roots are covered. Water the plant well and care as usual.
0
0
文章
Dummer. ゛☀
2017年08月20日

The spider plant (Chlorophytum comosum) is considered one of the most adaptable of houseplants and the easiest to grow. This plant can grow in a wide range of conditions and suffers from few problems, other than brown tips. The spider plant is so named because of its spider-like plants, or spiderettes, which dangle down from the mother plant like spiders on a web. Available in green or variegated varieties, these spiderettes often start out as small white flowers.
Gardening Tips for Spider Plants and General Spider Plant Care
Caring for spider plants is easy. These tough plants tolerate lots of abuse, making them excellent candidates for newbie gardeners or those without a green thumb. Provide them with well-drained soil and bright, indirect light and they will flourish. Water them well but do not allow the plants to become too soggy, which can lead to root rot. In fact, spider plants prefer to dry out some between waterings.
When caring for spider plants, also take into account that they enjoy cooler temperatures — around 55 to 65 F. (13-18 C.). Spider plants can also benefit from occasional pruning, cutting them back to the base. Since spider plants prefer a semi-potbound environment, repot them only when their large, fleshy roots are highly visible and watering is difficult. Spider plants can be easily propagated as well through division of the mother plant or by planting the small spiderettes.
Spider Plant Spiderettes
As daylight increases in spring, spider plants should begin producing flowers, eventually developing into babies, or spider plant spiderettes. This may not always occur, however, as only mature plants with enough stored energy will produce spiderettes. Spiderettes can be rooted in water or soil, but will generally yield more favorable results and a stronger root system when planted in soil. Ideally, the best method for rooting spider plant spiderettes is by allowing the plantlet to remain attached to the mother plant. Choose a spiderette and place it in a pot of soil near the mother plant. Keep this well watered and once it roots, you can cut it from the mother plant. Alternatively, you can cut off one of the plantlets, place it in a pot of soil, and water generously. Place the pot in a ventilated plastic bag and put this in a bright location. Once the spiderette is well rooted, remove from the bag and grow as usual.
Spider Plant Leaves Browning
If you begin to notice spider plant leaves browning, there’s no need for worry. Browning of leaf tips is quite normal and will not harm the plant. This is often the result of fluoride found in water, which causes salt buildup in the soil. It usually helps to periodically leach plants by giving them a thorough watering to flush out excess salts. Be sure to allow the water to drain out and repeat as needed. It may also help to use distilled water or even rainwater on plants instead of that from the kitchen or outside spigot.

Gardening Tips for Spider Plants and General Spider Plant Care
Caring for spider plants is easy. These tough plants tolerate lots of abuse, making them excellent candidates for newbie gardeners or those without a green thumb. Provide them with well-drained soil and bright, indirect light and they will flourish. Water them well but do not allow the plants to become too soggy, which can lead to root rot. In fact, spider plants prefer to dry out some between waterings.
When caring for spider plants, also take into account that they enjoy cooler temperatures — around 55 to 65 F. (13-18 C.). Spider plants can also benefit from occasional pruning, cutting them back to the base. Since spider plants prefer a semi-potbound environment, repot them only when their large, fleshy roots are highly visible and watering is difficult. Spider plants can be easily propagated as well through division of the mother plant or by planting the small spiderettes.

Spider Plant Spiderettes
As daylight increases in spring, spider plants should begin producing flowers, eventually developing into babies, or spider plant spiderettes. This may not always occur, however, as only mature plants with enough stored energy will produce spiderettes. Spiderettes can be rooted in water or soil, but will generally yield more favorable results and a stronger root system when planted in soil. Ideally, the best method for rooting spider plant spiderettes is by allowing the plantlet to remain attached to the mother plant. Choose a spiderette and place it in a pot of soil near the mother plant. Keep this well watered and once it roots, you can cut it from the mother plant. Alternatively, you can cut off one of the plantlets, place it in a pot of soil, and water generously. Place the pot in a ventilated plastic bag and put this in a bright location. Once the spiderette is well rooted, remove from the bag and grow as usual.

Spider Plant Leaves Browning
If you begin to notice spider plant leaves browning, there’s no need for worry. Browning of leaf tips is quite normal and will not harm the plant. This is often the result of fluoride found in water, which causes salt buildup in the soil. It usually helps to periodically leach plants by giving them a thorough watering to flush out excess salts. Be sure to allow the water to drain out and repeat as needed. It may also help to use distilled water or even rainwater on plants instead of that from the kitchen or outside spigot.
0
1
文章
Dummer. ゛☀
2017年08月06日

BOTANICAL NAME: Chlorophytum Comosum
PLANT TYPE: Houseplant
SUN EXPOSURE: Part Sun
SOIL TYPE: Any
FLOWER COLOR: White
Spider Plants or Airplane Plants produce arched green and pale yellow stems that extend to be 12-18 inches long. When less than a year old, Spider Plants may produce tiny white flowers during the summer. These easy-to-grow plants look especially nice in a hanging basket.
PLANTING
Grow in soil-based potting mix in bright to moderate sunlight, but not directly facing hot sun.
Maintain average room temperature and humidity.
CARE
During growth, water occasionally; once fully developed (within one year), water moderately.
In the spring and summer months keep the soil moist. Do not let soil dry out.
Fertilize twice a month in the spring and summer, however, avoid overfertilization.
PESTS/DISEASES
Prone to tip burn from dry soil or salt and fluoride found in some public water. Keep the soil slightly moist. Avoid using fluoridated water.
To rid of the brown discs on leaves, use your fingernail to remove the brown residue every few days.
PLANT TYPE: Houseplant
SUN EXPOSURE: Part Sun
SOIL TYPE: Any
FLOWER COLOR: White
Spider Plants or Airplane Plants produce arched green and pale yellow stems that extend to be 12-18 inches long. When less than a year old, Spider Plants may produce tiny white flowers during the summer. These easy-to-grow plants look especially nice in a hanging basket.

PLANTING
Grow in soil-based potting mix in bright to moderate sunlight, but not directly facing hot sun.
Maintain average room temperature and humidity.

CARE
During growth, water occasionally; once fully developed (within one year), water moderately.
In the spring and summer months keep the soil moist. Do not let soil dry out.
Fertilize twice a month in the spring and summer, however, avoid overfertilization.

PESTS/DISEASES
Prone to tip burn from dry soil or salt and fluoride found in some public water. Keep the soil slightly moist. Avoid using fluoridated water.
To rid of the brown discs on leaves, use your fingernail to remove the brown residue every few days.
3
2
文章
Dummer. ゛☀
2017年07月02日

Wedding Chlorophytum , also called romantic grass.
Wedding Chlorophytum character Morphological
Needle shaped, long and narrow, flexible like orchid, 20 - 45 cm long, 1 cm wide, 2 cm long, apex long and tapering, base bearing stem, borne on short stem. The biggest characteristic lies in mature plants Chlorophytum sometimes grown plants, 30 - 60 cm long stem apex, all grow small plants. slender, longer than leaves, bent; raceme inflorescences simple or branched, and sometimes also the upper nodes of cluster growth of 2 - bar foliage 8 cm; flowers white, the number of clusters, scattered in rachis alienation. Flowering in spring and summer, indoors, winter flowering.
The growth habit of Wedding Chlorophytum
Comparison of love wedding Chlorophytum growth environment of high temperature and high humidity, there is plenty of light scattering requirements, more afraid of sunlight, and it is not too shade. Love and wedding Chlorophytum to meet it, the water and fertilizer demand in the breeding time. The wedding is cut resistant chlorophytum.
Breeding method of Wedding Chlorophytum
The propagation of Wedding Chlorophytum is relatively simple, generally adopts the cutting propagation and.vegetative propagation can be a relatively high success rate.


0
0
成长记
Plants Encyclopdias
2016年08月17日

Name: Spider plant
Latin: Chlorophytum comosum
Origin: South America
Plant height: 10 - 80 cm
Reproduction: #Division
Difficulty level: #Easy
Tags: #SouthAmerica #Chlorophytumcomosum
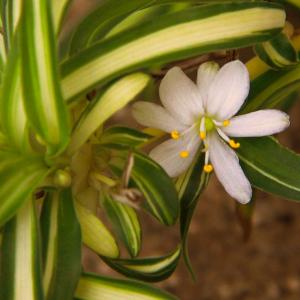
Latin: Chlorophytum comosum
Origin: South America
Plant height: 10 - 80 cm
Reproduction: #Division
Difficulty level: #Easy
Tags: #SouthAmerica #Chlorophytumcomosum

3
5
成长记
Plants Encyclopdias
2016年08月17日

Name: Chlorophytum
Latin: Chlorophytum
Origin: South America
Plant height: 10 - 60 cm
Reproduction: #Division
Difficulty level: #Easy
Tags: #SouthAmerica #Chlorophytum
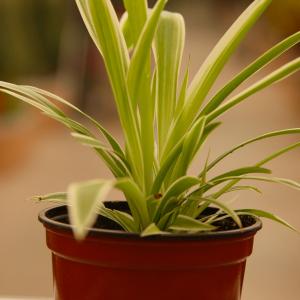
Latin: Chlorophytum
Origin: South America
Plant height: 10 - 60 cm
Reproduction: #Division
Difficulty level: #Easy
Tags: #SouthAmerica #Chlorophytum

2
1
童扬
2016年05月02日

#吊兰#
吊兰(学名:Chlorophytum comosum(Thunb.)Baker.),吊兰又称:垂盆草、挂兰、钓兰、兰草、折鹤兰,西欧又叫蜘蛛草或飞机草,原产于南非。
单子叶植物纲、百合科、吊兰属多年生常绿草本植物,根状茎平生或斜生,有多数肥厚的根。叶丛生,线形,叶细长,似兰花。有时中间有绿色或黄色条纹。花茎从叶丛中抽出,长成匍匐茎在顶端抽叶成簇,花白色,常2-4朵簇生,排成疏散的总状花序或圆锥花序偶然内部会出现紫色花瓣;蒴果三棱状扁球形,长约5毫米,宽约8毫米,每室具种子3-5颗。花期5月,果期8月。植株有净化空气的作用,全株可入药。
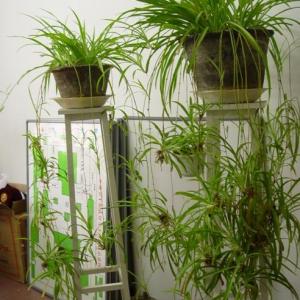
吊兰(学名:Chlorophytum comosum(Thunb.)Baker.),吊兰又称:垂盆草、挂兰、钓兰、兰草、折鹤兰,西欧又叫蜘蛛草或飞机草,原产于南非。
单子叶植物纲、百合科、吊兰属多年生常绿草本植物,根状茎平生或斜生,有多数肥厚的根。叶丛生,线形,叶细长,似兰花。有时中间有绿色或黄色条纹。花茎从叶丛中抽出,长成匍匐茎在顶端抽叶成簇,花白色,常2-4朵簇生,排成疏散的总状花序或圆锥花序偶然内部会出现紫色花瓣;蒴果三棱状扁球形,长约5毫米,宽约8毫米,每室具种子3-5颗。花期5月,果期8月。植株有净化空气的作用,全株可入药。

3
1
。小树林:我也想养又株,好养吗,请赐教


