成长记
meriunkat
2017年10月08日

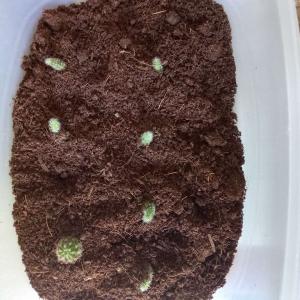
I new added a "Graptosedum Francesco Baldi and Paraguayense propagation" in my "garden"


1
0
成长记
imightbeagiant
2017年09月28日

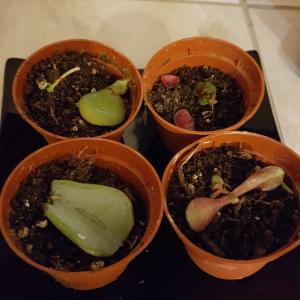
I new added a "First attenpt at propagation. Bottom right is Jade, not sure of others." in my "garden"

1
0
文章
Dummer. ゛☀
2017年09月23日

Some succulents make your propagation work easier by forming new plants mostly on their own. Some leaf succulents develop roots on their stems while still attached to the mother plant, and sometimes leaves fall off succulents and root by themselves. Still others develop new rooted plantlets at their bases. For such plants, minimal effort is needed on the part of the gardener.
Root-Forming Stems
Many members of the Crassulaceae family grow prominent aerial roots along branch stems. If the branch bends over sufficiently to contact the soil, the branch roots into the ground at the point of contact. All you need to do is to cut the connection with the mother plant, dig the new plantlet up and give it a pot of its own. Some examples are Red Echeveria (Echeveria harmsii), Crinkle Leaf Plant (Adromischus cristatus), Pinwheel Plant (Aeonium haworthii) and many Kalanchoes. These plants all grow in U.S. Department of Agriculture plant hardiness zones 10 and 11 and can be grown as houseplants anywhere.
Leaf Propagation
Another characteristic of many Crassulaceae family plants is the ability to grow an entire new plant from one leaf. Jelly Bean Plant (Sedum rubrotinctum) grows about 6 inches (15 cm) tall with sprawling branches that root as they go. Leaves are plump, reddish-green and the shape of a jelly bean. They turn bright red in winter. If a leaf falls from the plant, it grows a new plant from its basal end. Jade plant (Crassula ovata) does the same thing. Mother-of-millions (Kalanchoe x houghtonii) produces plantlets along the leaf margins, each of which grows into a new plant. It is so successful that in areas of Australia where it is hardy, it can become a noxious weed. These three plants are hardy in USDA zones 10 and 11.
Division
Succulent plants that form basal rosettes like Aloe and Haworthia produce new plants from the base of the mother plant. For a while, the plant remains attached to the parent plant, but as new offsets form, the outer plantlets, already with roots of their own, become disconnected from the parent. You can periodically unpot the plant, remove these independent little offsets and give them a pot of their own. Aloes grow in USDA zones 9 through 11, depending on the species, and Haworthias are hardy in USDA zone 11.
Bulbils and Tubers
Pregnant Onion Plant (Ornithogalum caudatum), a member of the Lily family, is a stem succulent that produces a large, pale-green above-ground bulb with a papery white covering. When the plant is 2 to 3 years old, it starts to produce little bulbils here and there on the bulb under the papery covering. They eventually get big enough to break through the covering and can fall to the ground, growing roots and forming a new plant. You can also break them off when they are growing their own leaves and put them on potting soil to root. Pregnant Onion is hardy in USDA zones 9 through 11. String of Hearts (Ceropegia woodii) forms little round tubers along its stems. Lay a stem with tubers along potting soil, and the tubers will root into the soil. Disconnect the rooted stem from the mother plant to make an independent plant. String of Hearts is hardy in USDA zone 10.

Root-Forming Stems
Many members of the Crassulaceae family grow prominent aerial roots along branch stems. If the branch bends over sufficiently to contact the soil, the branch roots into the ground at the point of contact. All you need to do is to cut the connection with the mother plant, dig the new plantlet up and give it a pot of its own. Some examples are Red Echeveria (Echeveria harmsii), Crinkle Leaf Plant (Adromischus cristatus), Pinwheel Plant (Aeonium haworthii) and many Kalanchoes. These plants all grow in U.S. Department of Agriculture plant hardiness zones 10 and 11 and can be grown as houseplants anywhere.

Leaf Propagation
Another characteristic of many Crassulaceae family plants is the ability to grow an entire new plant from one leaf. Jelly Bean Plant (Sedum rubrotinctum) grows about 6 inches (15 cm) tall with sprawling branches that root as they go. Leaves are plump, reddish-green and the shape of a jelly bean. They turn bright red in winter. If a leaf falls from the plant, it grows a new plant from its basal end. Jade plant (Crassula ovata) does the same thing. Mother-of-millions (Kalanchoe x houghtonii) produces plantlets along the leaf margins, each of which grows into a new plant. It is so successful that in areas of Australia where it is hardy, it can become a noxious weed. These three plants are hardy in USDA zones 10 and 11.

Division
Succulent plants that form basal rosettes like Aloe and Haworthia produce new plants from the base of the mother plant. For a while, the plant remains attached to the parent plant, but as new offsets form, the outer plantlets, already with roots of their own, become disconnected from the parent. You can periodically unpot the plant, remove these independent little offsets and give them a pot of their own. Aloes grow in USDA zones 9 through 11, depending on the species, and Haworthias are hardy in USDA zone 11.

Bulbils and Tubers
Pregnant Onion Plant (Ornithogalum caudatum), a member of the Lily family, is a stem succulent that produces a large, pale-green above-ground bulb with a papery white covering. When the plant is 2 to 3 years old, it starts to produce little bulbils here and there on the bulb under the papery covering. They eventually get big enough to break through the covering and can fall to the ground, growing roots and forming a new plant. You can also break them off when they are growing their own leaves and put them on potting soil to root. Pregnant Onion is hardy in USDA zones 9 through 11. String of Hearts (Ceropegia woodii) forms little round tubers along its stems. Lay a stem with tubers along potting soil, and the tubers will root into the soil. Disconnect the rooted stem from the mother plant to make an independent plant. String of Hearts is hardy in USDA zone 10.

0
0
文章
Dummer. ゛☀
2017年09月23日

Cacti growing in the wild with paddles and branches tend to drop them to the ground where they root in the rainy season. This is a form of vegetative self-propagation. Even a smashed cactus will attempt to grow roots from the pieces that make contact with the ground. Prickly Pear Cactus (Opuntia compressa), which grows in U.S. Department of Agriculture plant hardiness zones 4 through 9, forms colonies with its paddle-like branches through self-propagation. It is possible to regrow a cactus from an arm if taken from a healthy cactus.
Timing
While you can root a cactus branch any time of year, rooting while the cactus is actively growing gives the best chance of success. Try rooting the arm in late spring or summer while nighttime temperatures stay above 60 degrees Fahrenheit (16 degrees Celsius). When temperatures fall below 60 F (16 C), the development of roots slows and the arm dries out before rooting. Branches taken from dormant cacti have the worst chance of rooting.
Drying
Once the arm is cut or falls off the cactus, let it dry at room temperature in a shady area for two to seven days. The cut end needs to callus over. This hardening of the wound prevents rotting. It also stops plant diseases from entering through the wound and infecting the cactus arm.
Rooting Mixture
The soil for rooting cactus needs to drain quickly, but hold some moisture near the forming roots. The most common mixture is half organic and half inorganic materials. Peat moss holds moisture and provides slow-release nutrients for the developing roots. Use coarse-textured sand, which does not compact down like fine-textured sand. The sand improves the drainage properties of the rooting mixture.
Potting
Handle the cactus piece with care so it does not stab your fingers. Use heave-duty gloves, tongs or a folded newspaper wrapped around the prickly piece when moving it. Avoid touching the piece with your hands if it is spiny. Press the cut end of the cactus into the soil mixture. If the branch is large, bury the bottom part of the cactus until the soil supports the branch.
Rooting
Most cacti will form roots in four to six weeks during the growing season. Keep the soil damp by misting the soil, but do not over-water the rooting branch. Water deeply, but do not let the container sit in water, which will lead to rot. Once the roots are established, then the plant pot will lift up when the arm is gently picked up. Let the soil dry between watering sessions once the roots develop.

Timing
While you can root a cactus branch any time of year, rooting while the cactus is actively growing gives the best chance of success. Try rooting the arm in late spring or summer while nighttime temperatures stay above 60 degrees Fahrenheit (16 degrees Celsius). When temperatures fall below 60 F (16 C), the development of roots slows and the arm dries out before rooting. Branches taken from dormant cacti have the worst chance of rooting.

Drying
Once the arm is cut or falls off the cactus, let it dry at room temperature in a shady area for two to seven days. The cut end needs to callus over. This hardening of the wound prevents rotting. It also stops plant diseases from entering through the wound and infecting the cactus arm.

Rooting Mixture
The soil for rooting cactus needs to drain quickly, but hold some moisture near the forming roots. The most common mixture is half organic and half inorganic materials. Peat moss holds moisture and provides slow-release nutrients for the developing roots. Use coarse-textured sand, which does not compact down like fine-textured sand. The sand improves the drainage properties of the rooting mixture.

Potting
Handle the cactus piece with care so it does not stab your fingers. Use heave-duty gloves, tongs or a folded newspaper wrapped around the prickly piece when moving it. Avoid touching the piece with your hands if it is spiny. Press the cut end of the cactus into the soil mixture. If the branch is large, bury the bottom part of the cactus until the soil supports the branch.

Rooting
Most cacti will form roots in four to six weeks during the growing season. Keep the soil damp by misting the soil, but do not over-water the rooting branch. Water deeply, but do not let the container sit in water, which will lead to rot. Once the roots are established, then the plant pot will lift up when the arm is gently picked up. Let the soil dry between watering sessions once the roots develop.
0
0
文章
Dummer. ゛☀
2017年09月23日

Succulent plants are as lovely as they are easy to grow. The best part is that its leaves and stem provide an endless number of identical plants through simple propagation. Growing succulents from clippings is both fun and rewarding. They grow quickly and with minimal effort, and the resulting plants make great gifts and lively home decor. A well-clipped leaf or stem is practically all a gardener needs to grow an entirely new succulent with success.
Propagating from a Leaf Clipping
It is easy to remove a succulent leaf from a healthy plant without disrupting its appearance or hindering its growth. Also, when a succulent has grown “leggy,” with a long stem that some growers dislike, they can separate each of the plant’s many leaves and grow them into new plants.
Prepare the Soil
Prepare a new pot or tray of cactus or succulent soil. Cactus or succulent soil must provide good drainage. A mixture of equal parts cactus potting soil and perlite works well. It need not be more than a couple inches deep for the beginning stage. An aluminum baking pan works well for propagating several new plants at once.
Clip or Pluck a Leaf
Gardeners can pluck succulent leaves from an existing plant by hand or cut them with a metal tool. A sharp knife, razor blade, or pruning shears work well. It is important to sterilize a metal tool first to prevent infection in the plant or leaf. Cut as close to the stem as possible, and take care not to bruise the leaf or stem. To pluck by hand, rock the leaf gently from side to side until it comes loose. Some leaves loosen very easily, which makes hand-plucking a popular method.
Let the Leaves Dry
Lay the fresh leaf cuttings down flat on the surface of the soil mix, and place the container in bright, indirect sunlight. Let the leaves dry out for a few days before adding any water. This is an important step because watering them immediately can easily cause them to rot. It also allows time for the “wound” from cutting to callous over, preventing disease from sinking in.
Let Roots Develop
Once they have sufficiently dried and calloused, some people start moistening the soil regularly, while others give the leaves more time to grow on their own. In humid environments, the leaves may not require any water at all. In a dry climate or a house with dry air conditioning, it is a good idea to water sparingly but consistently. An effective method is to add a sprinkle of water to the pot whenever the soil has completely dried out. After anywhere from a few weeks to a month, tiny roots, and possibly the leaves of a new baby plant, emerge from the cut end of the leaves.
Help the Roots Find the Soil
Sometimes the roots grow down into the soil on their own, and sometimes they grow into the air and need a little help. In the latter situation, form a small divot in the soil, and gently cover the roots with a tiny layer of soil. Use a spray bottle to add a light spritz of water about once a week from this point.
Separate and Enjoy
Within about a month or so, gardeners should see new growth on the planted cutting. At this point, it is safe to place each in its own pot or mix them into an arrangement for a garden setting. Once a succulent reaches maturity, it only needs watering once every few weeks.
Propagating from a Stem
When a succulent plant gets leggy from lack of light, an easy method for salvaging the plant is to “behead” it and propagate new plants both from the head and the stem. This process is identical to propagating from leaf cuttings.
Cut the rosette off the top with a sterile instrument, and let the cutting dry and callous. Water sparingly until roots emerge, and then simply let nature take its course. The remaining stem should grow new plantlets on its own. Growers can then cut and propagate these as well.

Propagating from a Leaf Clipping
It is easy to remove a succulent leaf from a healthy plant without disrupting its appearance or hindering its growth. Also, when a succulent has grown “leggy,” with a long stem that some growers dislike, they can separate each of the plant’s many leaves and grow them into new plants.

Prepare the Soil
Prepare a new pot or tray of cactus or succulent soil. Cactus or succulent soil must provide good drainage. A mixture of equal parts cactus potting soil and perlite works well. It need not be more than a couple inches deep for the beginning stage. An aluminum baking pan works well for propagating several new plants at once.

Clip or Pluck a Leaf
Gardeners can pluck succulent leaves from an existing plant by hand or cut them with a metal tool. A sharp knife, razor blade, or pruning shears work well. It is important to sterilize a metal tool first to prevent infection in the plant or leaf. Cut as close to the stem as possible, and take care not to bruise the leaf or stem. To pluck by hand, rock the leaf gently from side to side until it comes loose. Some leaves loosen very easily, which makes hand-plucking a popular method.

Let the Leaves Dry
Lay the fresh leaf cuttings down flat on the surface of the soil mix, and place the container in bright, indirect sunlight. Let the leaves dry out for a few days before adding any water. This is an important step because watering them immediately can easily cause them to rot. It also allows time for the “wound” from cutting to callous over, preventing disease from sinking in.

Let Roots Develop
Once they have sufficiently dried and calloused, some people start moistening the soil regularly, while others give the leaves more time to grow on their own. In humid environments, the leaves may not require any water at all. In a dry climate or a house with dry air conditioning, it is a good idea to water sparingly but consistently. An effective method is to add a sprinkle of water to the pot whenever the soil has completely dried out. After anywhere from a few weeks to a month, tiny roots, and possibly the leaves of a new baby plant, emerge from the cut end of the leaves.

Help the Roots Find the Soil
Sometimes the roots grow down into the soil on their own, and sometimes they grow into the air and need a little help. In the latter situation, form a small divot in the soil, and gently cover the roots with a tiny layer of soil. Use a spray bottle to add a light spritz of water about once a week from this point.
Separate and Enjoy
Within about a month or so, gardeners should see new growth on the planted cutting. At this point, it is safe to place each in its own pot or mix them into an arrangement for a garden setting. Once a succulent reaches maturity, it only needs watering once every few weeks.

Propagating from a Stem
When a succulent plant gets leggy from lack of light, an easy method for salvaging the plant is to “behead” it and propagate new plants both from the head and the stem. This process is identical to propagating from leaf cuttings.
Cut the rosette off the top with a sterile instrument, and let the cutting dry and callous. Water sparingly until roots emerge, and then simply let nature take its course. The remaining stem should grow new plantlets on its own. Growers can then cut and propagate these as well.
0
1
文章
Dummer. ゛☀
2017年09月23日

Grafting cacti is a process where a cut piece of one species is grown onto a wounded piece of another. It is a straightforward method of propagation which even a novice gardener can try.
Cacti are easy to propagate through grafting, stem cuttings, leaf cuttings, seed or offsets. Growing cactus from seed is a long process, as germination may be unreliable and growth is at a snail’s pace. Broadly, cacti that do not produce offsets can be propagated by grafting as long as there is a compatible rootstock. The grafted part is called a scion and the base or rooted part is the rootstock.
Grafting Guide
Cacti are grafted for a variety of reasons. One may simply be to produce a different species mechanically, but the process also produces disease free stems, to provide a new stem for an existing stem that is rotting or to enhance photosynthesis in plants that lack the ability. Grafting cacti is also done to create unique forms, such as weeping plants.
Grafting is common in fruiting plants because it increases the maturity of an existing cultivar for earlier fruit production. The scion becomes the top part of the plant with all the originating species’s characteristics. The rootstock becomes the roots and base of the plant. The union is at the vascular cambium where the wounds of scion and rootstock are sealed together to heal and join. Once the joining wounds have healed, no special grafted cactus care is required. Simply grow it as you would any other plant.
Rootstock Cactus
The generally approved rootstocks for grafting cactus are: Hylocereus trigonus or Hylocereus undatus, Cereus repandus and Echinopsis spachiana.
Also, if the rootstock and scion are in the same species, the compatibility is excellent. Compatibility decreases as the family relationship decreases. Two plants in the same genus may possibly graft, but two in the same genera are rare and two in the same family are very rare. The appropriate cacti for grafting are, therefore, the ones in the same species and with as close a relationship as possible for the best outcome.
How to Graft a Cactus
Use very clean, sterile instruments when making cuts. Choose healthy plants and prepare a scion. Cut off the top or at least a 1-inch (2.5 cm) stem. Then prepare the rootstock by beheading a cactus to within a few inches of the soil.
Set the scion on top of the cut portion of the still rooted rootstock so both vascular cambium are situated together. Use rubber bands to hold the pieces joined as one.
Grafted cactus care is the same as ungrafted cactus. Watch for any insects at the union or rot. In about two months, you can remove the rubber bands and the union should be sealed.

Cacti are easy to propagate through grafting, stem cuttings, leaf cuttings, seed or offsets. Growing cactus from seed is a long process, as germination may be unreliable and growth is at a snail’s pace. Broadly, cacti that do not produce offsets can be propagated by grafting as long as there is a compatible rootstock. The grafted part is called a scion and the base or rooted part is the rootstock.

Grafting Guide
Cacti are grafted for a variety of reasons. One may simply be to produce a different species mechanically, but the process also produces disease free stems, to provide a new stem for an existing stem that is rotting or to enhance photosynthesis in plants that lack the ability. Grafting cacti is also done to create unique forms, such as weeping plants.

Grafting is common in fruiting plants because it increases the maturity of an existing cultivar for earlier fruit production. The scion becomes the top part of the plant with all the originating species’s characteristics. The rootstock becomes the roots and base of the plant. The union is at the vascular cambium where the wounds of scion and rootstock are sealed together to heal and join. Once the joining wounds have healed, no special grafted cactus care is required. Simply grow it as you would any other plant.

Rootstock Cactus
The generally approved rootstocks for grafting cactus are: Hylocereus trigonus or Hylocereus undatus, Cereus repandus and Echinopsis spachiana.
Also, if the rootstock and scion are in the same species, the compatibility is excellent. Compatibility decreases as the family relationship decreases. Two plants in the same genus may possibly graft, but two in the same genera are rare and two in the same family are very rare. The appropriate cacti for grafting are, therefore, the ones in the same species and with as close a relationship as possible for the best outcome.

How to Graft a Cactus
Use very clean, sterile instruments when making cuts. Choose healthy plants and prepare a scion. Cut off the top or at least a 1-inch (2.5 cm) stem. Then prepare the rootstock by beheading a cactus to within a few inches of the soil.
Set the scion on top of the cut portion of the still rooted rootstock so both vascular cambium are situated together. Use rubber bands to hold the pieces joined as one.

Grafted cactus care is the same as ungrafted cactus. Watch for any insects at the union or rot. In about two months, you can remove the rubber bands and the union should be sealed.
0
1
文章
Dummer. ゛☀
2017年09月23日

Growing a collection of succulents for your indoor garden starts with one you already own.
1. Cut the Heads
Any healthy succulent is a candidate for propagation, especially those that have central, trunk-like stems. If propagating from a rosette-style succulent, you can begin at step 2. Otherwise, use a sharp pair of scissors to snip a leaf-covered section of one of the stems that’s at least 3 inches (7.5 cm) long. This is your cutting. If your plant’s stems are looking bare and you can’t find 3 inches (7.5 cm) of lush growth to work with, instead cut at least 1 inch (2.5 cm) under the best-looking bunch of leaves.
2. Pluck Leaves
Succulents will propagate from individual leaves, too. You can either pluck leaves from your clippings or from the parent plant. Hold the fleshy leaf close to the stem. Twist gently to remove cleanly. Any fat, juicy leaves will fall off with ease. Others you may have to coax off. What’s left on the leaf’s stem is called meristematic tissue, and it looks like a potato eye. This is where small new roots and leaves will start to emerge a few weeks after beginning step 3.
3. Arrange and Water
Place your clippings and leaves, cut ends up, on a dish filled with fast-draining soil and facing indirect sunlight. Leave for about three days or until the ends callus over. Once that happens, use a spray bottle to squirt everything five to six times until the soil is moist but not soaked. Repeat whenever the soil is dry, roughly every four to five days. In about three to four weeks, tiny pink roots will start to sprout from your clippings. Be patient, observe, and keep watering.
4. Tend To The Pups
Six or seven weeks after starting the propagating process, you’ll notice baby pups (i.e. tiny leaves, i.e. the cutest things you’ve ever seen) emerging from the parent leaves. The parents may look shriveled—this is because they are feeding the pups with their own water and nutrients. It’s now time to transfer your cuttings and leaves to containers of their own, at least 4 inches (10 cm) in diameter. Cover the new roots with 0.5 inch (1.3 cm) of soil, sit back, and watch your garden grow.

1. Cut the Heads
Any healthy succulent is a candidate for propagation, especially those that have central, trunk-like stems. If propagating from a rosette-style succulent, you can begin at step 2. Otherwise, use a sharp pair of scissors to snip a leaf-covered section of one of the stems that’s at least 3 inches (7.5 cm) long. This is your cutting. If your plant’s stems are looking bare and you can’t find 3 inches (7.5 cm) of lush growth to work with, instead cut at least 1 inch (2.5 cm) under the best-looking bunch of leaves.

2. Pluck Leaves
Succulents will propagate from individual leaves, too. You can either pluck leaves from your clippings or from the parent plant. Hold the fleshy leaf close to the stem. Twist gently to remove cleanly. Any fat, juicy leaves will fall off with ease. Others you may have to coax off. What’s left on the leaf’s stem is called meristematic tissue, and it looks like a potato eye. This is where small new roots and leaves will start to emerge a few weeks after beginning step 3.

3. Arrange and Water
Place your clippings and leaves, cut ends up, on a dish filled with fast-draining soil and facing indirect sunlight. Leave for about three days or until the ends callus over. Once that happens, use a spray bottle to squirt everything five to six times until the soil is moist but not soaked. Repeat whenever the soil is dry, roughly every four to five days. In about three to four weeks, tiny pink roots will start to sprout from your clippings. Be patient, observe, and keep watering.

4. Tend To The Pups
Six or seven weeks after starting the propagating process, you’ll notice baby pups (i.e. tiny leaves, i.e. the cutest things you’ve ever seen) emerging from the parent leaves. The parents may look shriveled—this is because they are feeding the pups with their own water and nutrients. It’s now time to transfer your cuttings and leaves to containers of their own, at least 4 inches (10 cm) in diameter. Cover the new roots with 0.5 inch (1.3 cm) of soil, sit back, and watch your garden grow.

0
0
Ashtyn Emily Wright
2017年09月20日

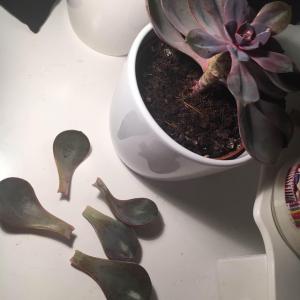
My old Duchess of Nuremberg was starting to get a little straggly so I've taken some leaves & I'm hoping for a successful propagation.. I'll keep you posted!😁🌱

2
0
求助
cclecombe
2017年09月17日

I've been trying to propagate from a devils ivy plant and its lost a few leaves, and the remaining ones are looking a little limp and yellow. Its currently housed in our conservatory. Could it be that its too light in there? #Propagation #ivy


0
0
Ueca
2017年08月30日

Propagation post. Can you guess what some of them are?


2
0
Ueca:We haven't got any jade cuttings right now. The round ones in the styrofoam are all Kalanchoe babies scraped up from various corners.
meriunkat:Hmm on the top left corner I only know Jade plant lols
文章
Dummer. ゛☀
2017年08月30日

Propagating dogwood cuttings is easy and inexpensive. You can easily make enough trees for your own landscape, and a few more to share with friends. For the home gardener, the easiest and fastest method of dogwood tree propagation is taking softwood cuttings. Find out how to grow dogwood cuttings in this article.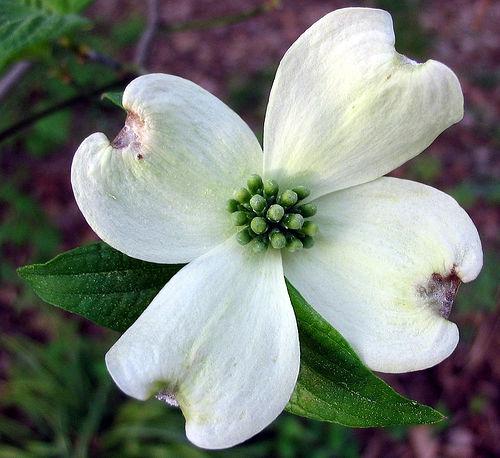
Propagating Dogwood Cuttings
Knowing when to take cuttings of dogwood stems can mean the difference between successful propagation and failure. The best time to cut is in the spring, as soon as the tree completes its bloom cycle. You know the stem is ready to cut if it snaps when you bend it in half.
Cuttings aren’t always successful, so take more than you need. The cuttings should be three to five inches long. Make the cut about an inch below a set of leaves. As you take cuttings, lay them in a plastic basin lined with damp paper towels and cover them with another damp towel.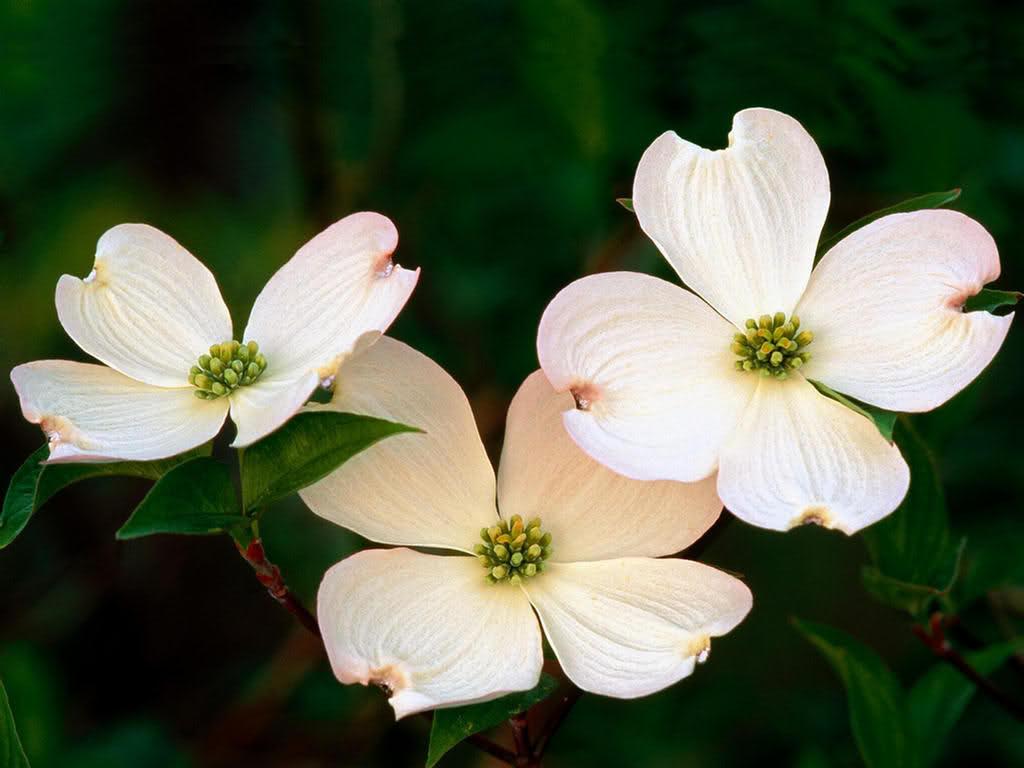
Here are the steps in starting dogwoods from cuttings:
Remove the bottom set of leaves from the stem. This creates wounds to let the rooting hormone in and encourage root growth. Cut the remaining leaves in half if they are long enough to touch the soil when you bury the end of the stem 1.5 inches deep. Keeping the leaves off the soil prevents rot, and shorter leaf surfaces lose less water.
Fill a three-inch pot with rooting medium. You can buy commercial medium or use a mixture of sand and perlite. Don’t use regular potting soil, which holds too much moisture and causes the stem to rot before it roots. Moisten the rooting medium with water. Role or dip the bottom 1.5 inches of the stem in rooting hormone and tap it to remove the excess.
Stick the lower 1.5 inches of the stem in the rooting medium and then firm the medium so that the stems stand straight. Mist the cutting with water. Place the potted cutting inside a large plastic bag and seal it to create a mini greenhouse. Make sure the leaves don’t touch the sides of the bag. If necessary, you can hold the bag away from the plant by placing clean wooden sticks around the edge of the pot. Check the dogwood cutting for roots once a week. You can look at the bottom of the pot to see if roots are coming through or give the stem a gentle tug. Once roots form, the stem will resist a tug. You should find that the cutting has roots within six weeks.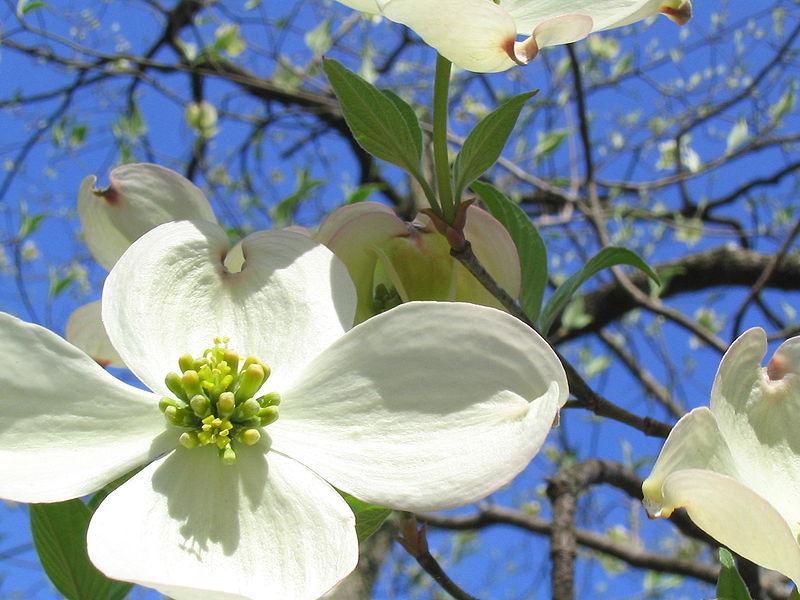
Remove the plastic bag when you’re sure you have roots, and place the new plant in a sunny window. Keep the soil moist at all times. Use half-strength liquid fertilizer every two weeks until the plant is growing well. When the dogwood cutting outgrows its little pot, repot it into a larger pot filled with regular potting soil.

Propagating Dogwood Cuttings
Knowing when to take cuttings of dogwood stems can mean the difference between successful propagation and failure. The best time to cut is in the spring, as soon as the tree completes its bloom cycle. You know the stem is ready to cut if it snaps when you bend it in half.
Cuttings aren’t always successful, so take more than you need. The cuttings should be three to five inches long. Make the cut about an inch below a set of leaves. As you take cuttings, lay them in a plastic basin lined with damp paper towels and cover them with another damp towel.

Here are the steps in starting dogwoods from cuttings:
Remove the bottom set of leaves from the stem. This creates wounds to let the rooting hormone in and encourage root growth. Cut the remaining leaves in half if they are long enough to touch the soil when you bury the end of the stem 1.5 inches deep. Keeping the leaves off the soil prevents rot, and shorter leaf surfaces lose less water.
Fill a three-inch pot with rooting medium. You can buy commercial medium or use a mixture of sand and perlite. Don’t use regular potting soil, which holds too much moisture and causes the stem to rot before it roots. Moisten the rooting medium with water. Role or dip the bottom 1.5 inches of the stem in rooting hormone and tap it to remove the excess.

Stick the lower 1.5 inches of the stem in the rooting medium and then firm the medium so that the stems stand straight. Mist the cutting with water. Place the potted cutting inside a large plastic bag and seal it to create a mini greenhouse. Make sure the leaves don’t touch the sides of the bag. If necessary, you can hold the bag away from the plant by placing clean wooden sticks around the edge of the pot. Check the dogwood cutting for roots once a week. You can look at the bottom of the pot to see if roots are coming through or give the stem a gentle tug. Once roots form, the stem will resist a tug. You should find that the cutting has roots within six weeks.

Remove the plastic bag when you’re sure you have roots, and place the new plant in a sunny window. Keep the soil moist at all times. Use half-strength liquid fertilizer every two weeks until the plant is growing well. When the dogwood cutting outgrows its little pot, repot it into a larger pot filled with regular potting soil.
0
0


