文章
Miss Chen
2018年08月21日

The curious little resurrection fern, Polypodium polypodioides, may very well be the perfect plant for the unfortunately black-thumbed gardener -- or the incredibly lazy one. If there's a truly care- and maintenance-free living plant, this is it. The strange little fern virtually laughs thirst in the face and defies death as it takes even the severest of droughts easily in its stride. The resurrection fern simply takes a nap until conditions become more favorable. When rains return, the seemingly dead plant miraculously returns to life and its former beauty within a few hours. Resurrection ferns are readily available from mail order, online and brick-and-mortar plant retailers. If you live near a wooded area within this common little epiphyte's natural range, you can easily find fallen branches decorated with them just about anywhere on the shady forest floor.

Step 1
Remove the purchased resurrection fern carefully from its bag or packaging. Set it in a shallow container out of direct sunlight. Water all of its surfaces generously to the point of runoff with a repurposed plastic spray bottle. Within minutes, the plant will begin to unfurl its crumpled brown fronds and show signs of greening up.
Step 2
Fill a 4- or 6-inch pot with orchid growing medium if you wish to keep your resurrection fern as a houseplant. Set the pot in a shallow container of water until the surface feels moist. Remove it from the water and allow it to drain for about 15 minutes. Place the fern on top of the medium and set it anywhere out of direct sunlight.
Step 3
Spritz the resurrection fern with water and leave it alone. It doesn't need any fertilizer or further care.
Step 4
Choose a tree in your yard to which to secure the resurrection fern if you would rather grow it outdoors. While any tree will do, these plants seem to have an affinity for pecan and live oak. Carefully press one or more of the reviving fern's long, thin rhizomes into crevices in the bark of the tree's branch or trunk. Use lightweight wire to anchor the fern, if you wish.

Step 5
Collect a fallen branch with resurrection fern growing on it and haul it home to your garden if you'd rather harvest free plants. Prop one end of the limb against the trunk of one of your trees. Use some lightweight wire to secure the branch into place. Eventually, the fern will seed some of its spores right onto your living tree and propagate itself prolifically.
Step 6
Place the branch with resurrection ferns in any shady or partially shaded garden spot you wish, but these epiphytes do prefer to reside in and on living trees.
Step 7
Water the indoor or outdoor resurrection fern again when it begins to turn brown or look dry if you prefer to keep the plant fresh and green. Otherwise, withhold water and allow it to appear to die. Water it when you want to revive it.

Step 1
Remove the purchased resurrection fern carefully from its bag or packaging. Set it in a shallow container out of direct sunlight. Water all of its surfaces generously to the point of runoff with a repurposed plastic spray bottle. Within minutes, the plant will begin to unfurl its crumpled brown fronds and show signs of greening up.
Step 2
Fill a 4- or 6-inch pot with orchid growing medium if you wish to keep your resurrection fern as a houseplant. Set the pot in a shallow container of water until the surface feels moist. Remove it from the water and allow it to drain for about 15 minutes. Place the fern on top of the medium and set it anywhere out of direct sunlight.
Step 3
Spritz the resurrection fern with water and leave it alone. It doesn't need any fertilizer or further care.
Step 4
Choose a tree in your yard to which to secure the resurrection fern if you would rather grow it outdoors. While any tree will do, these plants seem to have an affinity for pecan and live oak. Carefully press one or more of the reviving fern's long, thin rhizomes into crevices in the bark of the tree's branch or trunk. Use lightweight wire to anchor the fern, if you wish.

Step 5
Collect a fallen branch with resurrection fern growing on it and haul it home to your garden if you'd rather harvest free plants. Prop one end of the limb against the trunk of one of your trees. Use some lightweight wire to secure the branch into place. Eventually, the fern will seed some of its spores right onto your living tree and propagate itself prolifically.
Step 6
Place the branch with resurrection ferns in any shady or partially shaded garden spot you wish, but these epiphytes do prefer to reside in and on living trees.
Step 7
Water the indoor or outdoor resurrection fern again when it begins to turn brown or look dry if you prefer to keep the plant fresh and green. Otherwise, withhold water and allow it to appear to die. Water it when you want to revive it.
0
0
文章
Miss Chen
2018年08月21日

Reaching heights of up to 6 feet tall and producing curling, feathery fronds, ostrich fern (Matteuccia struthiopteris) is a perennial species that thrives in cool, shaded areas. It requires minimal maintenance and care, and is rarely bothered by pests or diseases. The fern often spreads, forming dense colonies when planted in ideal growing conditions.

Choose a Shady Site
Ostrich fern is hardy in U.S. Department of Agriculture plant hardiness zones 3 through 7, where it prefers partial and full shade. A wooded area, the north side of a building or a shady riverbank or pond side are ideal locations for the plant. It does best in naturally cool climates and suffers when grown in humid, southern U.S. regions. Because each ostrich fern can grow 5 to 8 feet wide, provide at least 5 feet of space between each fern and other plants. Transplant an ostrich fern by digging it up carefully in early spring, leaving plenty of room around its crown -- where its above-ground and below-ground parts join -- to avoid disturbing its roots. Replant the fern so that soil completely encloses its root ball, but don't place the fern so deeply that soil gets in its center, from which its fronds or stems grow; soil in that location may cause rot.
Add Organic Material to Soil
Ostrich fern tolerates a wide variety of soil types, though it looks its best in well-draining soil generously enhanced with organic matter. If your location has light, sandy soil or heavy clay soil, mix a 2-inch-thick layer of organic material, such as composted pine bark, with the top 10 inches of the soil before planting. Rather than just mixing the organic matter into each planting hole, mix the material into the whole planting bed so that water doesn't fill the hole and cause root damage to the plants.
Water Regularly
Water frequently -- at least once each week unless it rains -- to keep each ostrich fern's soil moist at all times. Do not allow the soil to dry out completely; err on the side of too wet rather than too dry because ostrich fern tolerates wet soil. Applying a 2- to 3-inch-thick layer of organic matter such as leaves or pine straw on the soil surface -- but not touching the plants -- in spring and fall helps retain moisture in the soil. In a wooded area, the ferns receive some natural mulch from fallen leaves and evergreen needles.

Fertilize Sparingly
Ferns are sensitive to fertilizer, though they can benefit from a light application in spring, right after their new fronds begin to emerge. Use a controlled-release, granular, 14-14-14 fertilizer, spreading 1/8 cup of it uniformly on the soil surface per 10 square feet, avoiding getting it on the ferns and other plants. Till it into the top 1/2 to 1 inch of the soil very lightly if you can avoid damaging the ferns' roots or rhizomes. Store unused fertilizer in a cool, dry place away from children and pets.

Choose a Shady Site
Ostrich fern is hardy in U.S. Department of Agriculture plant hardiness zones 3 through 7, where it prefers partial and full shade. A wooded area, the north side of a building or a shady riverbank or pond side are ideal locations for the plant. It does best in naturally cool climates and suffers when grown in humid, southern U.S. regions. Because each ostrich fern can grow 5 to 8 feet wide, provide at least 5 feet of space between each fern and other plants. Transplant an ostrich fern by digging it up carefully in early spring, leaving plenty of room around its crown -- where its above-ground and below-ground parts join -- to avoid disturbing its roots. Replant the fern so that soil completely encloses its root ball, but don't place the fern so deeply that soil gets in its center, from which its fronds or stems grow; soil in that location may cause rot.
Add Organic Material to Soil
Ostrich fern tolerates a wide variety of soil types, though it looks its best in well-draining soil generously enhanced with organic matter. If your location has light, sandy soil or heavy clay soil, mix a 2-inch-thick layer of organic material, such as composted pine bark, with the top 10 inches of the soil before planting. Rather than just mixing the organic matter into each planting hole, mix the material into the whole planting bed so that water doesn't fill the hole and cause root damage to the plants.
Water Regularly
Water frequently -- at least once each week unless it rains -- to keep each ostrich fern's soil moist at all times. Do not allow the soil to dry out completely; err on the side of too wet rather than too dry because ostrich fern tolerates wet soil. Applying a 2- to 3-inch-thick layer of organic matter such as leaves or pine straw on the soil surface -- but not touching the plants -- in spring and fall helps retain moisture in the soil. In a wooded area, the ferns receive some natural mulch from fallen leaves and evergreen needles.

Fertilize Sparingly
Ferns are sensitive to fertilizer, though they can benefit from a light application in spring, right after their new fronds begin to emerge. Use a controlled-release, granular, 14-14-14 fertilizer, spreading 1/8 cup of it uniformly on the soil surface per 10 square feet, avoiding getting it on the ferns and other plants. Till it into the top 1/2 to 1 inch of the soil very lightly if you can avoid damaging the ferns' roots or rhizomes. Store unused fertilizer in a cool, dry place away from children and pets.
0
0
文章
Miss Chen
2018年08月20日

Autumn fern (Dryopteris erythrosora) earns its common name from the color -- not the timing -- of its emerging fronds. As new fiddleheads unfurl in spring, the leaves display shades of copper and bronze with hints of salmon, rose and purple before maturing to glossy green in summer. Sporadic flushes of new growth through the growing season keep autumnal colors going. In cool climates, the leaves take on a slight russet-brown, but nothing that compares to spring. Low-maintenance and easy-care, autumn fern is a shade gardener's friend.

Site and Soil
Autumn fern is a woodland plant native to full and partial shade, protected from intense afternoon sun. Maturing at 18 inches tall and 24 inches wide, it will flourish beneath trees with high, open shade and well-drained, loamy, humus-rich soil.
All soil types, from sand to clay, suit adaptable autumn fern, but it will prefer a pH slightly below 7.0. Think of moisture-retentive woodland soil, rich with leaf mold and other organic matter, as a guide for your garden. If your garden lacks organic matter, work a 4-inch layer of compost or fine pine bark into the soil's upper 4 to 6 inches before planting autumn fern.
Water and Nutrients
Autumn fern prefers consistently moist soil, but doesn't tolerate waterlogged conditions. Once established, the slow-growing plant withstands periods of relative dryness better than many ferns, but it turns pale and wilts when water-stressed. Supplement natural rainfall, as needed, to keep the soil moist. The more sun the plant gets, the more water it needs.
Planted in rich, loamy soil, autumn fern doesn't require fertilizer. Like other woodland ferns, it's sensitive and easily burned by chemical fertilizers. Natural decomposition from leaves and a 1- to 2-inch layer of compost spread once a year are all it needs.

Pruning, Pests and Disease
In frost-free climates, autumn fern is evergreen. In cool-climate gardens, it dies back slowly with semi-evergreen growth at the crown. Leave the fronds intact over winter, then remove the dead or winter-worn foliage in spring. This is easily done by hand, which protects emerging fiddleheads and surface roots from accidental pruning injuries. When clipping, use shears that have been wiped with a cloth soaked in rubbing alcohol. This helps prevent the spread of disease.
Autumn fern has no significant problems with insect pests or disease. The fern is sensitive to pesticides, so good sanitation and proper care are key. Slugs and snails often gather in shade gardens. A inverted rind of melon (Cucumis melo) makes an effective, overnight slug trap. Dispose of the melon rind and its sluggish inhabitants in the morning.
Hardiness and Heaving
Autumn fern grows in U.S. Department of Agriculture plant hardiness zones 5 through 8. It's intolerant of hot, arid conditions in warmer Southwestern climates, but it tolerates heat and humidity in the Southeast. Named a Florida Garden Select plant by the Florida Nursery, Growers and Landscape Association, autumn fern thrives in Florida's USDA zones 8 through 11.
In all climates, a mature autumn fern tends to lift slightly out of the soil from year to year. When this happens, gently pull back the soil and reposition the crown back at soil level. The annual layer of 1 to 2 inches of compost also helps prevent autumn fern from heaving.

Site and Soil
Autumn fern is a woodland plant native to full and partial shade, protected from intense afternoon sun. Maturing at 18 inches tall and 24 inches wide, it will flourish beneath trees with high, open shade and well-drained, loamy, humus-rich soil.
All soil types, from sand to clay, suit adaptable autumn fern, but it will prefer a pH slightly below 7.0. Think of moisture-retentive woodland soil, rich with leaf mold and other organic matter, as a guide for your garden. If your garden lacks organic matter, work a 4-inch layer of compost or fine pine bark into the soil's upper 4 to 6 inches before planting autumn fern.
Water and Nutrients
Autumn fern prefers consistently moist soil, but doesn't tolerate waterlogged conditions. Once established, the slow-growing plant withstands periods of relative dryness better than many ferns, but it turns pale and wilts when water-stressed. Supplement natural rainfall, as needed, to keep the soil moist. The more sun the plant gets, the more water it needs.
Planted in rich, loamy soil, autumn fern doesn't require fertilizer. Like other woodland ferns, it's sensitive and easily burned by chemical fertilizers. Natural decomposition from leaves and a 1- to 2-inch layer of compost spread once a year are all it needs.

Pruning, Pests and Disease
In frost-free climates, autumn fern is evergreen. In cool-climate gardens, it dies back slowly with semi-evergreen growth at the crown. Leave the fronds intact over winter, then remove the dead or winter-worn foliage in spring. This is easily done by hand, which protects emerging fiddleheads and surface roots from accidental pruning injuries. When clipping, use shears that have been wiped with a cloth soaked in rubbing alcohol. This helps prevent the spread of disease.
Autumn fern has no significant problems with insect pests or disease. The fern is sensitive to pesticides, so good sanitation and proper care are key. Slugs and snails often gather in shade gardens. A inverted rind of melon (Cucumis melo) makes an effective, overnight slug trap. Dispose of the melon rind and its sluggish inhabitants in the morning.
Hardiness and Heaving
Autumn fern grows in U.S. Department of Agriculture plant hardiness zones 5 through 8. It's intolerant of hot, arid conditions in warmer Southwestern climates, but it tolerates heat and humidity in the Southeast. Named a Florida Garden Select plant by the Florida Nursery, Growers and Landscape Association, autumn fern thrives in Florida's USDA zones 8 through 11.
In all climates, a mature autumn fern tends to lift slightly out of the soil from year to year. When this happens, gently pull back the soil and reposition the crown back at soil level. The annual layer of 1 to 2 inches of compost also helps prevent autumn fern from heaving.
0
0
文章
Miss Chen
2018年08月20日

Ferns are one of the oldest forms of plant life. There are over 10,000 known species of fern, some of which are deciduous and some that are evergreen. Fern leaves are called fronds, and they house the reproductive spores that ferns produce instead of seeds. Deciduous ferns lose their leaves in winter and tend to look ratty over the season when some of them die back but don't fall off. Evergreen ferns are vibrant year-round but they can benefit from cleanups to remove damage and dead fronds. Timing is important when pruning ferns so new fiddleheads (immature ferns) are not disturbed and spores are able to disperse.
Timing is Everything
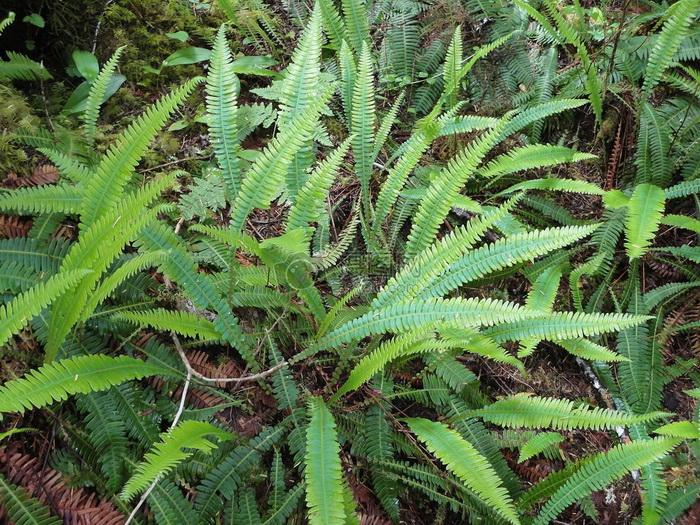
Pruning of ferns needs to occur after the spores on fruiting fronds have matured and released. Trim them when they are dormant, which is during winter. They can also be pruned in very early spring. Many ferns do not object to pruning at any time of the year. The hardy ferns such as sword fern can be pruned once a year if necessary, just about any time, since they are continuously growing.
Evergreen Ferns
As a rule, ferns don't really need pruning. Ferns in nature are generally self-cleaning and will release old fronds as they die. In the garden, occasional removal of dead fronds will improve the appearance of the plant, but it is strictly cosmetic. Where the plants are large and very old, severe pruning can take place to the crown. All the fronds can be removed in late winter or before the first new fiddleheads appear. Prune the stems away from the crown in a circular pattern so you are left with a little dome. This is not only attractive, but it prevents accidental damage to the newest growth which appears at the center of the plant.
Deciduous Ferns
Deciduous ferns don't necessarily drop all their fronds when temperatures plummet. They do experience dieback and many of the fronds will fall off or turn brown. From a cosmetic standpoint, it is best to get these dead fronds out of the plant. You will also increase light and room for new leaflets. Many people prune the deciduous ferns in fall so they are ready for the spring, but the old fronds provide protection for the crown. It is best to leave them, unattractive though they may be, until spring.
Pruning Indoor Ferns
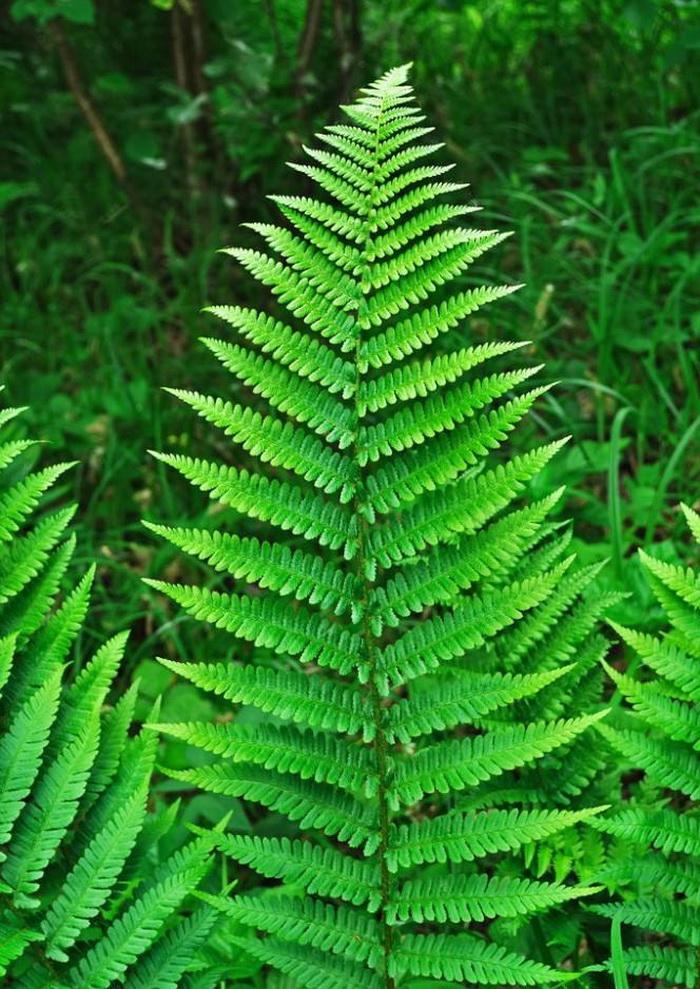
Boston, staghorn and maidenhair are some of the common ferns used as houseplants. These plants do not need pruning but they do need cleaning. The difference is that pruning increases the health of a plant and is done for many reasons, while cleaning is just routine maintenance. As with outdoor ferns you may choose to remove dead fronds. These should be cut with very sharp scissors or pruning shears and taken back 1/4 to 1/2 inch above the crown. The only time you would ever need to prune out all the fronds is when you are faced with a monumental pest problem. In this case, fertilize one week before the big haircut and then remove all the fronds.

Timing is Everything
Pruning of ferns needs to occur after the spores on fruiting fronds have matured and released. Trim them when they are dormant, which is during winter. They can also be pruned in very early spring. Many ferns do not object to pruning at any time of the year. The hardy ferns such as sword fern can be pruned once a year if necessary, just about any time, since they are continuously growing.
Evergreen Ferns
As a rule, ferns don't really need pruning. Ferns in nature are generally self-cleaning and will release old fronds as they die. In the garden, occasional removal of dead fronds will improve the appearance of the plant, but it is strictly cosmetic. Where the plants are large and very old, severe pruning can take place to the crown. All the fronds can be removed in late winter or before the first new fiddleheads appear. Prune the stems away from the crown in a circular pattern so you are left with a little dome. This is not only attractive, but it prevents accidental damage to the newest growth which appears at the center of the plant.
Deciduous Ferns
Deciduous ferns don't necessarily drop all their fronds when temperatures plummet. They do experience dieback and many of the fronds will fall off or turn brown. From a cosmetic standpoint, it is best to get these dead fronds out of the plant. You will also increase light and room for new leaflets. Many people prune the deciduous ferns in fall so they are ready for the spring, but the old fronds provide protection for the crown. It is best to leave them, unattractive though they may be, until spring.

Pruning Indoor Ferns
Boston, staghorn and maidenhair are some of the common ferns used as houseplants. These plants do not need pruning but they do need cleaning. The difference is that pruning increases the health of a plant and is done for many reasons, while cleaning is just routine maintenance. As with outdoor ferns you may choose to remove dead fronds. These should be cut with very sharp scissors or pruning shears and taken back 1/4 to 1/2 inch above the crown. The only time you would ever need to prune out all the fronds is when you are faced with a monumental pest problem. In this case, fertilize one week before the big haircut and then remove all the fronds.
0
0
文章
Miss Chen
2018年08月18日

An evergreen, foxtail fern (Asparagus densiflorus "Myers") has delicate-looking, plumed stems, which are lined with pointed, bright green leaves. Despite its ferny appearance, foxtail fern is a flowering plant. Forming fluffy mounds 2 feet tall and up to 4 feet wide, foxtail fern works wells as a houseplant, specimen, container or border plant, requiring minimal maintenance and care. Foxtail ferns are generally free from pests and disease (ref 5)

Warm-Climate Plant
Foxtail fern grows outdoors in U.S. Department of Agriculture plant hardiness zones 9 through 11, growing in full sun to light shade. Dappled sunlight is best. If it gets too much sun, its leaves may drop. If you're growing multiple plants, space them 18 to 24 inches apart. Foxtail fern can tolerate temperatures as low as 20 degrees Fahrenheit. Where not hardy, foxtail fern may be grown as a houseplant in front of a bright, sunny windowsill with temperatures between 60 and 75 degrees F. The decorative red berries are mildly toxic if eaten, so warn children not to sample them.
Water Regularly
Foxtail fern tolerates a range of soil types, as long as it is well-draining. Water regularly and deeply, allowing the soil to dry out somewhat between waterings. Do not allow the soil to become flooded or waterlogged. Reduce watering in the winter, but do not allow the soil to become completely dry. Insufficient water may cause leaf drop. If you're growing it in a container, choose a pot with at least one drainage hole. Increase humidity for indoor plants by placing the container on a tray with wet pebbles and misting the plant regularly with room-temperature water.
Fertilize Monthly
During the growing season, fertilize outdoor plants monthly with 3 ounces of a 10-10-10 fertilizer mixed into 1 gallon of water per 10 square feet of bedding space. Check the label as directions vary among brands. Fertilize indoor plants monthly during the growing season with 7 drops of a liquid 10-10-10 fertilizer per 1 quart of water. Don not fertilize in winter.
Winter Considerations
Winter temperatures in the mid to low 20s Fahrenheit may damage foliage in the winter. In early spring, trim frost-damaged foliage to help the plant regain its good looks. (ref 6) Disinfect pruning equipment afterwards by soaking tools for 5 minutes in a solution that is equal parts alcohol and water. Rinse with water and air dry. If there is no rainfall, water plants monthly. To help prevent winter dehydration, mulch around the plant with 2 to 3 inches of organic mulch, such as shredded deciduous plant leaves or pine boughs. Remove mulch in the spring, after frosts have passed. (last ref)
0
0
文章
Miss Chen
2018年08月11日

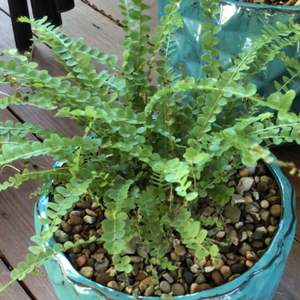
Boston fern, known botanically as Nephrolepis exaltata "Bostoniensis" is a tropical fern commonly grown as a patio, porch or indoor plant. According to the University of Rhode Island, "Bostoniensis" is a cultivar that demands high ambient humidity and consistently moist soil. Watering the soil is but one way that you will need to deliver moisture to your plant to keep it healthy. To prevent your fern from suffering browning leaf tips or frond die-back, vigilant care is needed, and the higher you can get the humidity around your Boston fern, the happier it will be.

Step 1
Water the soil of your Boston fern consistently to keep it evenly very moist to the touch but not drowning in stagnant water. Unlike some ferns, Boston fern cannot tolerate its soil to be dry, even on the surface, between waterings. In hot and dry climes, daily watering may be required, while gardeners in cool, rainy climes can offer less frequent irrigation.
Step 2
Boost the ambient humidity passively by setting the fern pot atop a shallow tray filled with stones or marbles and water. Keep the bottom of the pot above the water resting on the stones but refill the tray reservoir frequently to keep the water level high.

Step 3
Mist your Boston fern frequently with a spray bottle filled with distilled water. In low humidity environs or when heating and cooling is being used, daily misting may help keep the fronds green. Refrain from misting with tap water as the treatment chemicals, salts and minerals in the water can damage the leaves.

Step 1
Water the soil of your Boston fern consistently to keep it evenly very moist to the touch but not drowning in stagnant water. Unlike some ferns, Boston fern cannot tolerate its soil to be dry, even on the surface, between waterings. In hot and dry climes, daily watering may be required, while gardeners in cool, rainy climes can offer less frequent irrigation.
Step 2
Boost the ambient humidity passively by setting the fern pot atop a shallow tray filled with stones or marbles and water. Keep the bottom of the pot above the water resting on the stones but refill the tray reservoir frequently to keep the water level high.

Step 3
Mist your Boston fern frequently with a spray bottle filled with distilled water. In low humidity environs or when heating and cooling is being used, daily misting may help keep the fronds green. Refrain from misting with tap water as the treatment chemicals, salts and minerals in the water can damage the leaves.
0
1
文章
Miss Chen
2018年08月07日

Lady fern (Athyrium filix-femina) is part of a diverse group of ferns that populates natural woodland habitats around the globe. It's a sturdy addition to the woodland garden, too, thanks to the adaptations that allow it to grow well where other ferns might struggle.

Growth Habit
Lady fern grows in circular clumps of fronds, each of which is up to 3 feet long and as much as 1 foot wide at its widest part. The plant spreads by sending out slow-growing underground rhizomes from which new plants emerge; over time, colonies of the plants form dense clumps up to 7 feet in diameter. The ability to spread in this way, which not all ferns possess, is an adaptation that allows the lady fern to reproduce asexually without fertilization from another plant.
The clumps may be divided every few years in spring. Lady fern's growth habit is compact and manageable; it's not hard to keep it contained in a garden. If allowed to spread, however, it can function as a dense ground cover.
Frond Form
Lady fern's characteristic lacy appearance is the result of the complex structure of its fronds. Each frond consists of a central stem, or rachis, from which branch 20 or more lateral leaflets; the leaflets taper in length from wide at the bottom of the frond to narrow at the tip, giving the frond an overall wedge-shaped form. The leaflets are divided into 15 or more subleaflets, each of which is tapered in shape and serrated along its edges. The fern's numerous leaflets may help it tolerate fluctuations in temperature.
Natural Habitat
Lady fern is a native of northern regions of North America, Europe and Asia. In the United States, it is hardy in U.S. Department of Agriculture plant hardiness zones 4 through 8. It is winter-hardy in those zones, but it drops its leaves and goes dormant after the first frost in fall, an adaptation that helps the plant survive cold temperatures. In the wild, it grows in forests, ravines, meadows and swamps where soils are consistently moist and rich in organic matter.
In the garden, lady fern thrives in loamy soil that is well-drained but that does not dry out quickly. It also does well in soil that is slightly acidic, with a pH level below 6.8.

Sun and Drought Tolerance
Most ferns perform best in shady locations with consistently humid conditions, and lady fern is no exception; it fares best when protected from sun exposure and drought. It is, however, better adapted to be tolerant of sunny, dry conditions than many other fern species, and it can handle being placed in an area that gets full sun as long the soil around its roots remains moist.
Its long fronds may break if subjected to strong winds, though. So it is best grown in shelter provided by a nearby wall, hedge or other windbreak.

Growth Habit
Lady fern grows in circular clumps of fronds, each of which is up to 3 feet long and as much as 1 foot wide at its widest part. The plant spreads by sending out slow-growing underground rhizomes from which new plants emerge; over time, colonies of the plants form dense clumps up to 7 feet in diameter. The ability to spread in this way, which not all ferns possess, is an adaptation that allows the lady fern to reproduce asexually without fertilization from another plant.
The clumps may be divided every few years in spring. Lady fern's growth habit is compact and manageable; it's not hard to keep it contained in a garden. If allowed to spread, however, it can function as a dense ground cover.
Frond Form
Lady fern's characteristic lacy appearance is the result of the complex structure of its fronds. Each frond consists of a central stem, or rachis, from which branch 20 or more lateral leaflets; the leaflets taper in length from wide at the bottom of the frond to narrow at the tip, giving the frond an overall wedge-shaped form. The leaflets are divided into 15 or more subleaflets, each of which is tapered in shape and serrated along its edges. The fern's numerous leaflets may help it tolerate fluctuations in temperature.
Natural Habitat
Lady fern is a native of northern regions of North America, Europe and Asia. In the United States, it is hardy in U.S. Department of Agriculture plant hardiness zones 4 through 8. It is winter-hardy in those zones, but it drops its leaves and goes dormant after the first frost in fall, an adaptation that helps the plant survive cold temperatures. In the wild, it grows in forests, ravines, meadows and swamps where soils are consistently moist and rich in organic matter.
In the garden, lady fern thrives in loamy soil that is well-drained but that does not dry out quickly. It also does well in soil that is slightly acidic, with a pH level below 6.8.

Sun and Drought Tolerance
Most ferns perform best in shady locations with consistently humid conditions, and lady fern is no exception; it fares best when protected from sun exposure and drought. It is, however, better adapted to be tolerant of sunny, dry conditions than many other fern species, and it can handle being placed in an area that gets full sun as long the soil around its roots remains moist.
Its long fronds may break if subjected to strong winds, though. So it is best grown in shelter provided by a nearby wall, hedge or other windbreak.
0
0
文章
Miss Chen
2018年08月07日

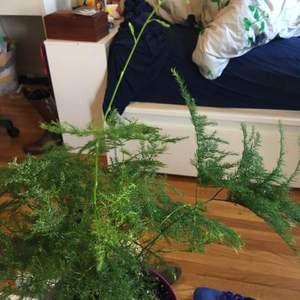
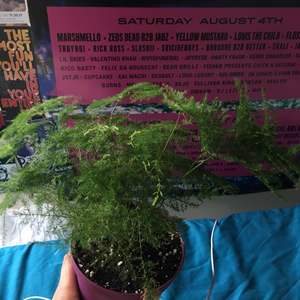
Asparagus fern (Protasparagus densiflorus) is not a real fern, but an evergreen, perennial member of the lily family. Also referred to as emerald fern and foxtail fern, the plant is a native of South Africa. Asparagus fern is widely used as an ornamental plant for containers and as a groundcover. The plant has however escaped cultivation in many regions and is classified as an invasive weed. Asparagus ferns cannot be propagated with cuttings.

Propagation Method
The recommended way to propagate new asparagus plants is with the use of seeds or by dividing the plants, as suggested by online plant resource Floridata. Though cuttings are a very commonly used method of plant propagation, it cannot be applied to the asparagus fern. The University of Missouri Extension also recommends propagating asparagus fern by division.
Propagating by Division
The best time to divide asparagus fern is during spring when the plant is growing actively. Prepare new pots for the new plants. Carefully slide out the plant from the containers. Using a sharp scissors, cut the root ball into multiple sections depending on the size of the plant. Each section should have a good number of roots, leaves and stems. Plant each section in individual pots and water well. Keep plants out of direct sunlight until the plants are established and growing well.
Propagating with Seed
Buy fresh seed from a reliable source and soak overnight in slightly warm water. Sow in a medium sized pot filled with a good potting soil. Do not sow very deep but just below the soil surface. Keep pot at room temperature. Asparagus fern seeds germinate very slowly with a germination time of a month or longer. For planting outdoors, start seeds 14 to 18 months prior to last frost date in the area. (Reference 5)

Growth Requirements
Asparagus fern grows best in fertile, well-drained soil amended with humus. Plant in areas of full sun to deep shade. Plants tend to start yellowing if exposed to very hot sun. Water enough to keep soil consistently moist. Divide the plants every one to two years to maintain healthy growth. Prior to dividing, cut the stems to a length of about 6 inches to minimize long mingling stems.

Propagation Method
The recommended way to propagate new asparagus plants is with the use of seeds or by dividing the plants, as suggested by online plant resource Floridata. Though cuttings are a very commonly used method of plant propagation, it cannot be applied to the asparagus fern. The University of Missouri Extension also recommends propagating asparagus fern by division.
Propagating by Division
The best time to divide asparagus fern is during spring when the plant is growing actively. Prepare new pots for the new plants. Carefully slide out the plant from the containers. Using a sharp scissors, cut the root ball into multiple sections depending on the size of the plant. Each section should have a good number of roots, leaves and stems. Plant each section in individual pots and water well. Keep plants out of direct sunlight until the plants are established and growing well.
Propagating with Seed
Buy fresh seed from a reliable source and soak overnight in slightly warm water. Sow in a medium sized pot filled with a good potting soil. Do not sow very deep but just below the soil surface. Keep pot at room temperature. Asparagus fern seeds germinate very slowly with a germination time of a month or longer. For planting outdoors, start seeds 14 to 18 months prior to last frost date in the area. (Reference 5)

Growth Requirements
Asparagus fern grows best in fertile, well-drained soil amended with humus. Plant in areas of full sun to deep shade. Plants tend to start yellowing if exposed to very hot sun. Water enough to keep soil consistently moist. Divide the plants every one to two years to maintain healthy growth. Prior to dividing, cut the stems to a length of about 6 inches to minimize long mingling stems.
0
0


