成长记
Plantlin
2018年05月06日

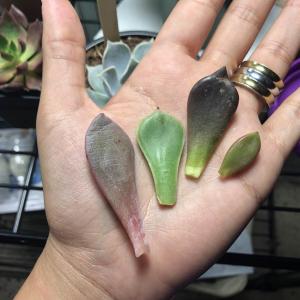
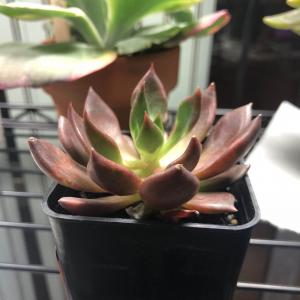
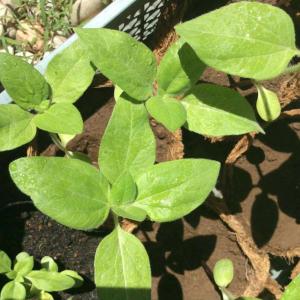
Put in a different pot, but not added any new soil, left everyrhing as it was!


1
0
文章
Miss Chen
2018年04月19日

You can create a low-cost patio garden by growing cucumbers in a 5-gallon bucket. The process requires few supplies and works as well as using more expensive containers sold at garden supply stores. You can purchase a new bucket from a home supply store or recycle one used for food storage, although you want to avoid using buckets that previously contained chemicals to prevent passing toxic residue to the cucumbers you are consuming. This technique also works well for other vegetable plants, including peppers, squash and tomatoes.

Step 1
Wash the 5-gallon bucket with soap and water to remove all dirt and residue. Rinse the bucket well and let it air-dry.
Step 2
Drill six to eight half-inch-diameter drainage holes through the bottom of the bucket to prevent water pooling around the roots. Space the holes evenly for best results with drainage.
Step 3
Fill the bucket two inches from the top with a well-draining vegetable potting soil available at garden supply stores.
Step 4
Mix a slow-release vegetable fertilizer into the soil to provide nutrients throughout the growing season. A second option for fertilizer is to apply a 20-20-20 water-soluble fertilizer to the soil every other week from planting to harvest.

Step 5
Dig a 4-inch-deep hole in the center of the bucket. Remove the cucumber seedling from the growing container and set the root ball into the hole so the first set of leaves is just above the soil level.
Step 6
Place the bucket in an area that receives full sun. Set the bucket on two bricks or wood blocks to keep the bottom elevated for proper drainage.
Step 7
Soak the soil with water until it flows out the bottom drainage holes. Apply water to the soil, instead of pouring it over the plant. Monitor the soil moisture and provide supplemental water three or four times a week to keep it evenly moist. Container growing environments dry out quickly during periods of no rain.
Step 8
Harvest the cucumbers once they reach a mature length to stimulate new blossom and cucumber growth. Read the information listed on the seedling package or seed packet to determine the approximate mature length of the variety planted.

Step 1
Wash the 5-gallon bucket with soap and water to remove all dirt and residue. Rinse the bucket well and let it air-dry.
Step 2
Drill six to eight half-inch-diameter drainage holes through the bottom of the bucket to prevent water pooling around the roots. Space the holes evenly for best results with drainage.
Step 3
Fill the bucket two inches from the top with a well-draining vegetable potting soil available at garden supply stores.
Step 4
Mix a slow-release vegetable fertilizer into the soil to provide nutrients throughout the growing season. A second option for fertilizer is to apply a 20-20-20 water-soluble fertilizer to the soil every other week from planting to harvest.

Step 5
Dig a 4-inch-deep hole in the center of the bucket. Remove the cucumber seedling from the growing container and set the root ball into the hole so the first set of leaves is just above the soil level.
Step 6
Place the bucket in an area that receives full sun. Set the bucket on two bricks or wood blocks to keep the bottom elevated for proper drainage.
Step 7
Soak the soil with water until it flows out the bottom drainage holes. Apply water to the soil, instead of pouring it over the plant. Monitor the soil moisture and provide supplemental water three or four times a week to keep it evenly moist. Container growing environments dry out quickly during periods of no rain.
Step 8
Harvest the cucumbers once they reach a mature length to stimulate new blossom and cucumber growth. Read the information listed on the seedling package or seed packet to determine the approximate mature length of the variety planted.
0
1
成长记
Shami
2018年04月18日

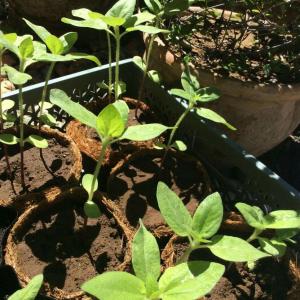
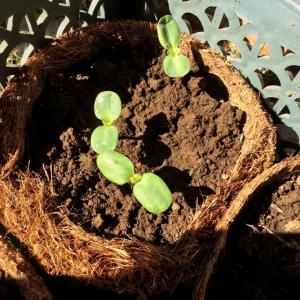
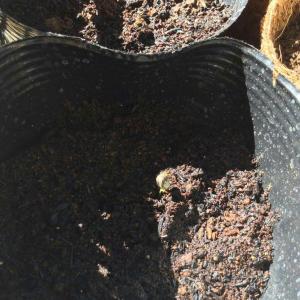
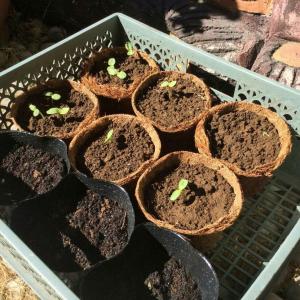
New leaves start to form. One sunflower did not sprout. :( The other sunflowers I planted the other day are starting to sprout! ☺ Date: April 19, 2018


0
0
kensong
2018年04月17日

New shoots from my Calathea Roseoptica but the new leaf already brown and dry. Any idea why?


0
0
文章
Miss Chen
2018年04月16日

Soybeans (Glycine max) are a common annual farm crop produced for the oil market, as well as livestock feed and human consumption. The warm-weather legume grows under a variety of climate conditions, and many new hybrids offer shorter maturity dates, allowing northern farmers more options for growing soybeans. Soybeans should not be planted until the soil temperature is at least 60 degrees Fahrenheit and prefer average daytime temperatures in the 70s.

Maturity Dates and Varieties
Different varieties of soybeans mature at different rates. This is often stated in seed packets as a number of days and reflects the estimated time between planting and crop maturity. Many soybean varieties have maturity dates ranging between 90 and 150 days, with some hybrids developed for northern regions maturing even faster. Select a variety suited for your local climate and its number of anticipated growing days.
Late Planting
Soybeans respond to the shortening days in the fall by accelerating the seed-maturing process. This means delayed planting may still lead to a harvestable crop in the fall. Purdue University estimates that for each three days spring planting is delayed, harvest is delayed one day. The acceleration of the maturity may lead to a smaller yield because the plant may set fewer pods.
Plant Emergence
It commonly takes a soybean seed about two days to germinate and sprout. The new plant doesn't emerge from the ground until about one week after planting. Plants are at the most vulnerable during this process and can be damaged by low temperatures or pests. If the initial planting is lost, the crop can sometimes be replanted with a shorter-maturing variety.

Harvest
The best time to harvest soybeans is when the seeds are fully developed but the pod has not yet turned from green to yellow. Most commercial varieties of soybeans hold in this window of development for about a week before the pod starts to dry. Once the pod dries, it is likely to shatter during harvest, leading to seed loss. Harvest dates are determined by the crop conditions, since the maturity rate is affected by temperature and humidity levels. For example, a 100-day soybean may take 110 days from planting to maturity if conditions are cooler and wetter than normal.

Maturity Dates and Varieties
Different varieties of soybeans mature at different rates. This is often stated in seed packets as a number of days and reflects the estimated time between planting and crop maturity. Many soybean varieties have maturity dates ranging between 90 and 150 days, with some hybrids developed for northern regions maturing even faster. Select a variety suited for your local climate and its number of anticipated growing days.
Late Planting
Soybeans respond to the shortening days in the fall by accelerating the seed-maturing process. This means delayed planting may still lead to a harvestable crop in the fall. Purdue University estimates that for each three days spring planting is delayed, harvest is delayed one day. The acceleration of the maturity may lead to a smaller yield because the plant may set fewer pods.
Plant Emergence
It commonly takes a soybean seed about two days to germinate and sprout. The new plant doesn't emerge from the ground until about one week after planting. Plants are at the most vulnerable during this process and can be damaged by low temperatures or pests. If the initial planting is lost, the crop can sometimes be replanted with a shorter-maturing variety.

Harvest
The best time to harvest soybeans is when the seeds are fully developed but the pod has not yet turned from green to yellow. Most commercial varieties of soybeans hold in this window of development for about a week before the pod starts to dry. Once the pod dries, it is likely to shatter during harvest, leading to seed loss. Harvest dates are determined by the crop conditions, since the maturity rate is affected by temperature and humidity levels. For example, a 100-day soybean may take 110 days from planting to maturity if conditions are cooler and wetter than normal.
0
0


