成长记
hege
2017年12月09日

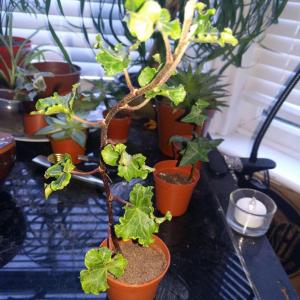
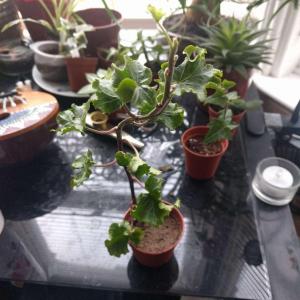
this cutting didn't grow roots for ages, then I forgot about it and it grew really good ones plus a new leaf!


0
0
文章
Miss Chen
2017年12月04日

Mushrooms are fungi that have very different growing requirements from those of green plants. Mushrooms come in many varieties, but they have similar growing needs. The easiest mushrooms for new growers to cultivate are oyster mushrooms, according to the National Sustainable Agriculture Information Service. White button and shiitake mushrooms are two other popular choices. Mushrooms may be grown in almost any container. With the right growing medium and conditions, you can have delicious and fresh mushrooms for your culinary needs.

Step 1
Fill your container with hardwood chips, chopped cereal straws, such as wheat, or shredded corn cobs. Mushrooms contain no chlorophyll, the substance that makes leaves green, and must obtain their nutrients from their growing medium.
Step 2
Moisten the growing medium with water, keeping it warm and consistently damp. Turn it often with a hand-held rake to make sure the mixture has adequate oxygen. The growing medium will reach temperatures of 145 degrees. This unique compost contains the nutrients mushrooms need to grow.
Step 3
Place the container with the composted growing medium on a heating pad to keep the temperature of the growing medium about 70 degrees Fahrenheit.

Step 4
Sprinkle the mushroom spawn over the growing medium. Mushrooms don't grow by seed but by spawn, or microscopic spores. One mushroom can produce up to 16 billion spores according to Fresh Mushrooms.
Step 5
Keep your container in an area of your house that receives little to no sunlight, such as a basement or even a closet. The location should be easily accessible as the growing mushrooms need supervision.
Step 6
Lower the temperature of the soil to between 55 and 60 degrees F once the spawn has rooted. You will notice filaments spreading through the growing medium. This takes about three weeks according to Gardening Know How.
Step 7
Cover the spawn with one inch of garden soil. Lay a damp cloth over the soil and the entire container. Keep the cloth and the soil damp, but not wet. This will provide your mushrooms with the humidity and moisture they need to grow.
Step 8
Harvest your mushrooms when the cap has separated from the stem. It takes between 17 and 25 days for mushrooms to mature, according to Fresh Mushrooms.

Step 1
Fill your container with hardwood chips, chopped cereal straws, such as wheat, or shredded corn cobs. Mushrooms contain no chlorophyll, the substance that makes leaves green, and must obtain their nutrients from their growing medium.
Step 2
Moisten the growing medium with water, keeping it warm and consistently damp. Turn it often with a hand-held rake to make sure the mixture has adequate oxygen. The growing medium will reach temperatures of 145 degrees. This unique compost contains the nutrients mushrooms need to grow.
Step 3
Place the container with the composted growing medium on a heating pad to keep the temperature of the growing medium about 70 degrees Fahrenheit.

Step 4
Sprinkle the mushroom spawn over the growing medium. Mushrooms don't grow by seed but by spawn, or microscopic spores. One mushroom can produce up to 16 billion spores according to Fresh Mushrooms.
Step 5
Keep your container in an area of your house that receives little to no sunlight, such as a basement or even a closet. The location should be easily accessible as the growing mushrooms need supervision.
Step 6
Lower the temperature of the soil to between 55 and 60 degrees F once the spawn has rooted. You will notice filaments spreading through the growing medium. This takes about three weeks according to Gardening Know How.
Step 7
Cover the spawn with one inch of garden soil. Lay a damp cloth over the soil and the entire container. Keep the cloth and the soil damp, but not wet. This will provide your mushrooms with the humidity and moisture they need to grow.
Step 8
Harvest your mushrooms when the cap has separated from the stem. It takes between 17 and 25 days for mushrooms to mature, according to Fresh Mushrooms.
0
0
文章
Miss Chen
2017年11月29日

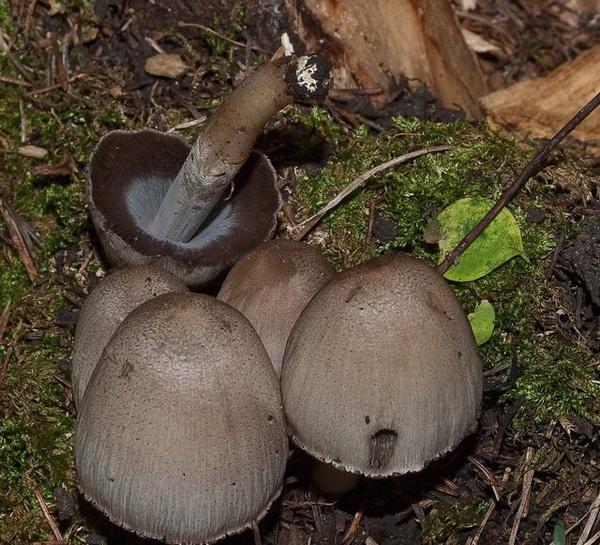
Mushrooms are fungal fruiting bodies. Most mushrooms have an umbrella-like appearance; they have a broad stalk topped by a flattened or cup-like cap. They produce fungal spores on the underside of the cap. The spores disperse on the wind and create new fungal bodies. Mushrooms grow on a number of different materials such as trees, mulch and compost. Edible mushrooms can be expensive in stores, but you can grow your own button mushrooms in boxes at home with only a few basic supplies.
Growing Mushrooms at Home
Step 1
Pile compost into the wooden tray or trays and mix mushroom flake spawn into the compost. Use approximately 1 or 2 cups of mushroom flakes for each 2-by-3-foot tray. Allow the compost and mushroom flake mixture to sit overnight. The next day, press the mixture into the trays using a piece of wood or some heavy bricks. Leave around 2 inches of space at the top of the tray.
Step 2
Place the trays in a cool, dark area such as in a shed, under a table or in a closet. Keep your growing temperature between 65 and 70 degrees Fahrenheit. In about two or three weeks, the top of the compost should be covered in a thin white webbing of fungal mycelium. Mist the mixture with water several times a day. Do not pour water directly on the compost, because this can damage the developing fungal growth.
Step 3
Apply peat moss to the top of the compost mixture when the mycelial webbing begins to form. Moisten the peat moss until it holds together easily when you squeeze it in your hand. Add around 1.5 inches to the top of the compost and moisten it again so that it is thoroughly dampened but not soggy. Lower the temperature to around 55 degrees F. Cover the moistened peat moss with a layer of damp newspapers. Spray the newspapers twice a day to maintain the moisture level.

Step 4
Remove the newspapers after around 10 days. Small white pinheads should be apparent within several days after removing the newspaper. They will ripen into fresh mushrooms in around a week. Your mushrooms will grow faster if you increase the temperature in the room to around 65 or 70 degrees F, but you may end up with too many at once, so it's usually better to keep the temperature between 50 and 55 degrees so that the mushrooms grow more slowly.
Step 5
Your compost and peat moss mixture will continue to produce mushrooms approximately every two weeks for between three and six months. Dispose of the compost when it stops yielding mushrooms and start the process over.

Growing Mushrooms at Home
Step 1
Pile compost into the wooden tray or trays and mix mushroom flake spawn into the compost. Use approximately 1 or 2 cups of mushroom flakes for each 2-by-3-foot tray. Allow the compost and mushroom flake mixture to sit overnight. The next day, press the mixture into the trays using a piece of wood or some heavy bricks. Leave around 2 inches of space at the top of the tray.
Step 2
Place the trays in a cool, dark area such as in a shed, under a table or in a closet. Keep your growing temperature between 65 and 70 degrees Fahrenheit. In about two or three weeks, the top of the compost should be covered in a thin white webbing of fungal mycelium. Mist the mixture with water several times a day. Do not pour water directly on the compost, because this can damage the developing fungal growth.
Step 3
Apply peat moss to the top of the compost mixture when the mycelial webbing begins to form. Moisten the peat moss until it holds together easily when you squeeze it in your hand. Add around 1.5 inches to the top of the compost and moisten it again so that it is thoroughly dampened but not soggy. Lower the temperature to around 55 degrees F. Cover the moistened peat moss with a layer of damp newspapers. Spray the newspapers twice a day to maintain the moisture level.

Step 4
Remove the newspapers after around 10 days. Small white pinheads should be apparent within several days after removing the newspaper. They will ripen into fresh mushrooms in around a week. Your mushrooms will grow faster if you increase the temperature in the room to around 65 or 70 degrees F, but you may end up with too many at once, so it's usually better to keep the temperature between 50 and 55 degrees so that the mushrooms grow more slowly.
Step 5
Your compost and peat moss mixture will continue to produce mushrooms approximately every two weeks for between three and six months. Dispose of the compost when it stops yielding mushrooms and start the process over.
1
1
成长记
pzsoofi
2017年11月28日

The “palmtrees” are so happy about November sun and their new neighbor. Also, they are getting some of that purple back on their leaves, finally they might match the color of their pot again :D


1
0
成长记
pzsoofi
2017年11月28日

Turning pink and growing new little “bubbles” and roots (finally, ROOTS!!!). This little plant is so thankful. I hope the new leaves will stay more tightly packed due to all these sunrays coming through the window :)


2
0
成长记
kimberly
2017年11月22日

My Crassula Argentea is starting to grow. Also found some new growth in one of my Sedum Burrito pots. My attempt at propagating Cotyledon Tomentosa variegata has failed.


0
0
Mohamad.hamidizade:Nice good job im love it all cerasulla
文章
Miss Chen
2017年11月21日

The United States grows – and consumes -- most of the world's popcorn. It's an ancient food. According to the Popcorn Board, the oldest known ears of popcorn, discovered in New Mexico in 1948 and 1950, date back 4,000 years. The traditional Corn Belt states grow most U.S. popcorn. The 12 states in the Corn Belt are Illinois, Iowa, Nebraska, Minnesota, Indiana, Wisconsin, Michigan, South Dakota, Kansas, Missouri, Kentucky and Ohio.

Nebraska
Nebraska has been the largest producer of popcorn in the United States from 1977 through 2010. The state grows more than 25 per cent of the nation's popcorn. High irrigation rates are at least partly responsible for Nebraska's popcorn success.
Indiana
Indiana is only slightly behind Nebraska in popcorn production as of 2010. Combined, the two states produce roughly 55 percent of the nation's commercial production. For a time, after popcorn hybrids became increasingly popular in the 1940s, Indiana enjoyed the number one spot.
Iowa, Ohio and Illinois
Together, Iowa, Ohio and Illinois produce roughly 25 per cent of the total corn production in the United States. Up until the mid 1940s, Iowa was the top producer. After the introduction of popcorn hybrids, Illinois took over that position, followed by Indiana and finally Nebraska.
0
0
文章
Miss Chen
2017年11月20日

Although some plants take well to division, or splitting, woody herbs such as rosemary (Rosmarinus officinalis cvs.) are propagated best with the layering technique. When layering, simply allow new plants to spring up alongside the "mother" plant until they are sturdy enough for you to "cut their cords" and move them to new locations.

Step 1
Choose one or two outer stems from the main rosemary plant, ensuring the stems look healthy and are tall. Spring is the best time to start this process, when the stems are most flexible and have plenty of time to root. If you want to layer more than one stem, then choose stems on each side of the main plant, and ensure each stem has room to grow.
Step 2
Mix one handful of compost and one handful of bonemeal with the top 4 to 6 inches of soil on each side of the rosemary plant. Each amended area should be a rectangular patch about 6 inches wide and 12 inches long, extending outward from the base of your selected stems.
Step 3
Dig a narrow trench about 2 inches deep in the center of the 12-inch-long section of amended soil. You can also judge the length for the trench by the general height of the stem that will lay in it, minus about 2 inches of the stem's leafy end.

Step 4
Strip a selected rosemary stem of most of its needlelike leaves, keeping the leaves on about 2 inches of the stem's tip. Use a small, sharp knife to slice the underside of the stem gently in several places, and dust the underside with hormone rooting powder. Disinfect the knife before and after its use by either spraying it with a household disinfectant or soaking its blade for five minutes in a solution that is one part bleach to three parts water. Air-dry the disinfected knife or rinse it with clean water and dry it with a clean cloth.
Step 5
Bend the stem gently down so that it lays flat against the bottom of the shallow trench. Do not press the last 2 inches of the stem's tip into the soil. That leafy part will remain above-ground. Use a landscape peg or U-shaped flexible wire at the midpoint of the stem to ensure the underside of the stem remains in contact with the ground.
Step 6
Fill the rest of the trench with the amended soil so that most of the stem is buried but its leafy end sticks above the soil.
Step 7
Repeat the process with each stem you want to layer to create a new plant. If you have several mature rosemary plants that you want to propagate, then repeat the process for the layering technique with them.
Step 8
Water the soil of the buried stems on a regular basis until the stems form rootlets. Although rosemary plants usually don't do well in moist soil, the baby plants will.
Step 9
Check for rootlets after several weeks by gently digging around the buried stems. It can take several months for the rosemary layering technique literally to take root. So be patient.
Step 10
Separate the young, well-established plants from their mother rosemary plant by slicing off the young plants near the base of the mature plant.
Step 11
Replant each young rosemary plant in its own container that has bottom drainage holes and is filled with potting soil. Alternatively, plant the young rosemary plants in a sunny place in your garden. When setting the young plants into containers or a garden bed, plant them at the same soil depth at which they previously grew. That depth usually is marked by a definite soil line on a plant's stem.

Step 1
Choose one or two outer stems from the main rosemary plant, ensuring the stems look healthy and are tall. Spring is the best time to start this process, when the stems are most flexible and have plenty of time to root. If you want to layer more than one stem, then choose stems on each side of the main plant, and ensure each stem has room to grow.
Step 2
Mix one handful of compost and one handful of bonemeal with the top 4 to 6 inches of soil on each side of the rosemary plant. Each amended area should be a rectangular patch about 6 inches wide and 12 inches long, extending outward from the base of your selected stems.
Step 3
Dig a narrow trench about 2 inches deep in the center of the 12-inch-long section of amended soil. You can also judge the length for the trench by the general height of the stem that will lay in it, minus about 2 inches of the stem's leafy end.

Step 4
Strip a selected rosemary stem of most of its needlelike leaves, keeping the leaves on about 2 inches of the stem's tip. Use a small, sharp knife to slice the underside of the stem gently in several places, and dust the underside with hormone rooting powder. Disinfect the knife before and after its use by either spraying it with a household disinfectant or soaking its blade for five minutes in a solution that is one part bleach to three parts water. Air-dry the disinfected knife or rinse it with clean water and dry it with a clean cloth.
Step 5
Bend the stem gently down so that it lays flat against the bottom of the shallow trench. Do not press the last 2 inches of the stem's tip into the soil. That leafy part will remain above-ground. Use a landscape peg or U-shaped flexible wire at the midpoint of the stem to ensure the underside of the stem remains in contact with the ground.
Step 6
Fill the rest of the trench with the amended soil so that most of the stem is buried but its leafy end sticks above the soil.
Step 7
Repeat the process with each stem you want to layer to create a new plant. If you have several mature rosemary plants that you want to propagate, then repeat the process for the layering technique with them.
Step 8
Water the soil of the buried stems on a regular basis until the stems form rootlets. Although rosemary plants usually don't do well in moist soil, the baby plants will.
Step 9
Check for rootlets after several weeks by gently digging around the buried stems. It can take several months for the rosemary layering technique literally to take root. So be patient.
Step 10
Separate the young, well-established plants from their mother rosemary plant by slicing off the young plants near the base of the mature plant.
Step 11
Replant each young rosemary plant in its own container that has bottom drainage holes and is filled with potting soil. Alternatively, plant the young rosemary plants in a sunny place in your garden. When setting the young plants into containers or a garden bed, plant them at the same soil depth at which they previously grew. That depth usually is marked by a definite soil line on a plant's stem.
0
0


