文章
Miss Chen
2017年11月08日

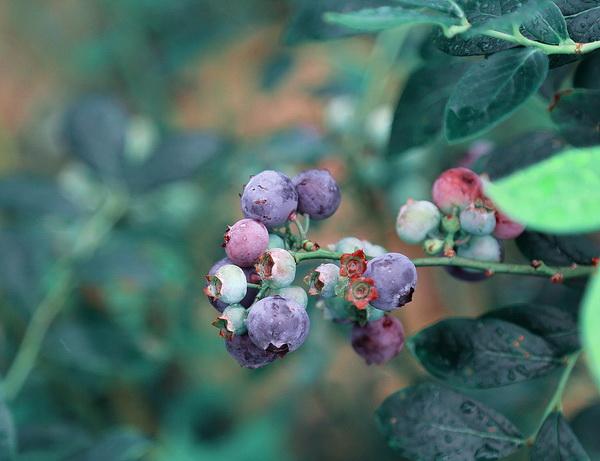
Blueberries contain small seeds almost not recognizable in comparison with other berries like raspberries or blackberries. These seeds will actually produce new plants just as they do in the wild setting, slowly carpeting the area with new plants. Blueberries are cold weather plants and need a few months of freezing to break the seed dormancy. Replicate the natural setting of an acid soil and watch the tiny seedlings emerge.

Step 1
Set a plastic bag of 8 oz. blueberries into the freezer for 90 days.
Step 2
Remove the bag from the freezer and empty the blueberries into a kitchen blender. Add 8 oz. water and pulse the blender on high for 15 seconds.
Step 3
Let the mixture settle for five minutes allowing the seeds to drop to the bottom. Pour off the water slowly, taking the pulpy material with it. Add another cup of water, blend, and drain three times.
Step 4
Pour the remaining seeds and water into a sieve lined with a coffee filter. Shake the seeds onto a paper towel to dry for about 30 minutes.
Step 5
Prepare a planting tray by taking finely ground dampened sphagnum moss and spreading it evenly over the surface.
Step 6
Sprinkle the seeds over the surface of the tray and then sprinkle a very fine layer of more ground sphagnum moss about 1/8-inch thick.
Step 7
Sprinkle 4 oz. water over the surface of the tray and then cover with two or three layers of newspaper.
Step 8
Keep in a warm room for a month, until the seeds have sprouted under the paper, making sure to sprinkle the tray with about 4 oz. water every few days, to keep them moist but not soggy.
Step 9
Remove the paper and keep the seedlings under grow lights or near a sunny window, watering them as needed to keep the moss moist until they are about 3 inches high.
Step 10
Transplant the blueberry seedlings into 8-oz. peat pots filled with equal parts sand, dampened peat moss and potting soil, being careful not to break the fragile roots.
Step 11
Fertilize the blueberry seedlings with a balanced liquid fertilizer every two weeks, according to the manufacturer's directions.
Step 12
Move the peat pots outside to a permanent location after the danger of frost has passed, keeping in mind that they need full sun, acid soil, and plenty of water but good drainage.
Step 13
Mulch them for the winter with 4 to 6 inches of sawdust, pine needles or pine bark mulch.

Step 1
Set a plastic bag of 8 oz. blueberries into the freezer for 90 days.
Step 2
Remove the bag from the freezer and empty the blueberries into a kitchen blender. Add 8 oz. water and pulse the blender on high for 15 seconds.
Step 3
Let the mixture settle for five minutes allowing the seeds to drop to the bottom. Pour off the water slowly, taking the pulpy material with it. Add another cup of water, blend, and drain three times.

Step 4
Pour the remaining seeds and water into a sieve lined with a coffee filter. Shake the seeds onto a paper towel to dry for about 30 minutes.
Step 5
Prepare a planting tray by taking finely ground dampened sphagnum moss and spreading it evenly over the surface.
Step 6
Sprinkle the seeds over the surface of the tray and then sprinkle a very fine layer of more ground sphagnum moss about 1/8-inch thick.
Step 7
Sprinkle 4 oz. water over the surface of the tray and then cover with two or three layers of newspaper.
Step 8
Keep in a warm room for a month, until the seeds have sprouted under the paper, making sure to sprinkle the tray with about 4 oz. water every few days, to keep them moist but not soggy.
Step 9
Remove the paper and keep the seedlings under grow lights or near a sunny window, watering them as needed to keep the moss moist until they are about 3 inches high.
Step 10
Transplant the blueberry seedlings into 8-oz. peat pots filled with equal parts sand, dampened peat moss and potting soil, being careful not to break the fragile roots.
Step 11
Fertilize the blueberry seedlings with a balanced liquid fertilizer every two weeks, according to the manufacturer's directions.
Step 12
Move the peat pots outside to a permanent location after the danger of frost has passed, keeping in mind that they need full sun, acid soil, and plenty of water but good drainage.
Step 13
Mulch them for the winter with 4 to 6 inches of sawdust, pine needles or pine bark mulch.
0
0
成长记
astronbot
2017年11月07日

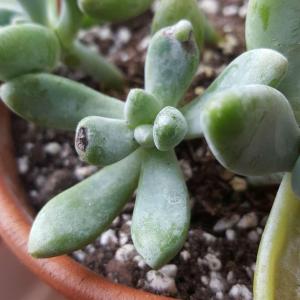
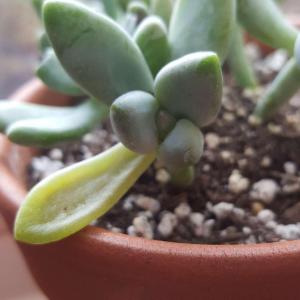
poor snail town has been thru a lot.. I think I overwatered him. but he's growing thru his sunburn and his new leaves look cute and plump. I'll drought him for a while.


0
0
求助
Lucky Coyote
2017年11月05日

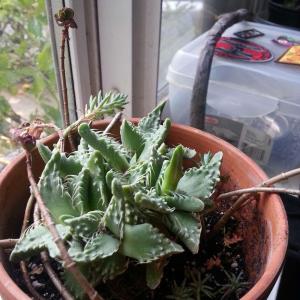
What is the new shoot on my tiger's jaws that shot up overnight?

1
0
家苗铭凯:是四海波
Kiersten_27:It’s a flower budding
成长记
cclecombe
2017年11月05日

Doing loads better since putting it in direct sunlight! New babies on the way too!


3
0
成长记
cclecombe
2017年11月05日

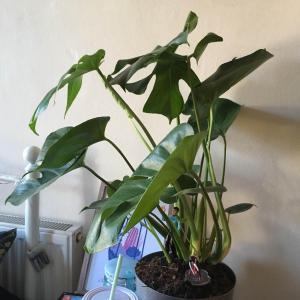
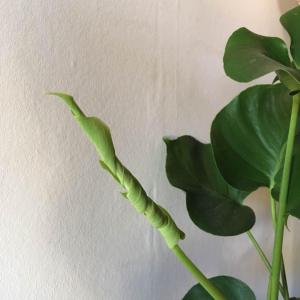
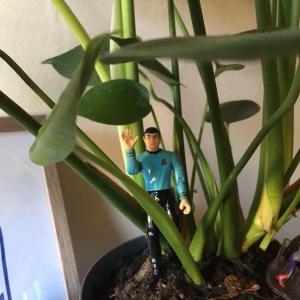
Had to spin this around as it was getting a little heavy on one side! Excited to see these new leaves open!



0
0
成长记
cclecombe
2017年11月05日

This keeps going kinda brown on the leaves but also is contrantly pushing out new ones. Is it perhaps getting too much light? #Fern


0
0
文章
Miss Chen
2017年11月02日

When you look at a strawberry, those little yellow dots that you see evenly coating the outer flesh are actually seeds. Each one of these seeds is capable of germinating into a whole new plant that can provide at least 1 qt. berries. Because strawberry plants are perennials, they will continue to produce bountiful harvests year after year. With a little preparation, you can grow your own strawberry plants indoors from the seeds of the fresh berry.

Step 1
Place one or two fresh strawberries on a paper plate. Set the paper plate in an undisturbed area such as a high shelf or windowsill to dry out.
Step 2
Rub the skin of the strawberry with your hands. As you rub, the strawberry seeds will fall onto the paper plate.
Step 3
Collect the seeds and store them in an envelope inside the refrigerator for 30 days. Cold storage or "stratification" is essential prior to germination.

Step 4
Fill a seed starter tray with organic potting soil. Remove the strawberry seeds from the envelope and press two seeds, ¼ inch into the soil of each cell.
Step 5
Spray the soil with warm water from a spray bottle. Place the clear plastic cover on the seed starter tray and set the tray in an area with bright, indirect sunlight.
Step 6
Remove the plastic cover when the strawberry seedlings poke their way through the soil. Germination is usually between four and seven days. Continue to provide the young strawberry plants with bright, indirect sunlight and moist soil as they grow.

Step 1
Place one or two fresh strawberries on a paper plate. Set the paper plate in an undisturbed area such as a high shelf or windowsill to dry out.
Step 2
Rub the skin of the strawberry with your hands. As you rub, the strawberry seeds will fall onto the paper plate.
Step 3
Collect the seeds and store them in an envelope inside the refrigerator for 30 days. Cold storage or "stratification" is essential prior to germination.

Step 4
Fill a seed starter tray with organic potting soil. Remove the strawberry seeds from the envelope and press two seeds, ¼ inch into the soil of each cell.
Step 5
Spray the soil with warm water from a spray bottle. Place the clear plastic cover on the seed starter tray and set the tray in an area with bright, indirect sunlight.
Step 6
Remove the plastic cover when the strawberry seedlings poke their way through the soil. Germination is usually between four and seven days. Continue to provide the young strawberry plants with bright, indirect sunlight and moist soil as they grow.
0
0
求助
CMO111101
2017年11月02日

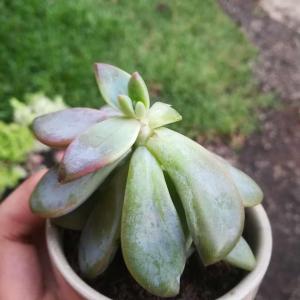
Hi! I have my new plant. I just found this outside, abandoned. It's a little weak and some leaves are missing. I have many questions.
a. What succulent is this?
b. Leaves are a little weak and might fall off. Will these leaves stick back if I take care of the plant?
c. A leaf has been cut off. Will it grow back?
I want this plant to have the perfect shape again. Please help me out. Thank you!
a. What succulent is this?
b. Leaves are a little weak and might fall off. Will these leaves stick back if I take care of the plant?
c. A leaf has been cut off. Will it grow back?
I want this plant to have the perfect shape again. Please help me out. Thank you!

1
0
Edgar Enrique Solis de la Rosa:these plants love the sun, the substrate must be very drained and water once a week
meriunkat:Also when they received to much sunlight without training it to withstand the leaves will slouch
meriunkat:Usually if leaves are dry the plant is not getting enough water, if the leaves are mushy it is being overwatered which as a result could rot and die
meriunkat:However first decide whether the leaves are dry or mushy above all, this will help you decide weather it needs more water or less
meriunkat:New leaves grow from the top of the stem, a fallen leaf can be used to propagate, sometimes new leaves will grow from the bottom part of stem as a new plant
显示更多
Zeketirtle
2017年10月31日

Hello! I am brand new to the succulent life. is anyone able to give me some pointers on these guys?


2
0
Zeketirtle:@Naisk thank you! I will implement this right away!
Naisk:@Zeketirtle That's too much, once a week is enough, the soil needs to be completely dry for 2-3 days before watering. Too much water will lead to root rot and the death of your plant, the rule of thumb for succulent is "less is better". When there's no more water in the soil, the plant will take the water in its leaves and make the roots tougher, then when you water them the leaves stock water back to normal level and wait for the next dry period. If you give too much water, the leaves take too much water leading to the yellowing and death of the leaf and the excess of water could rot the roots which like to be dry. I hope I made myself clear as english is not my mothertongue ;)
Zeketirtle:@Naisk I water them about 3-4 times a week. They get probably 6-7 hours of sun a day. Should I give the evecheveria a break for a day or two? Thanks for responding!
Naisk:Welcome! At which frequency do you water them? The evecheveria seems a bit overwatered that's why lower leaves turn yellow.
lrgarden:Welcome 😁
显示更多


