文章
Miss Chen
2017年11月19日

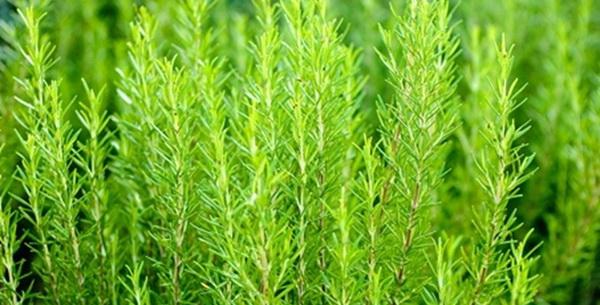
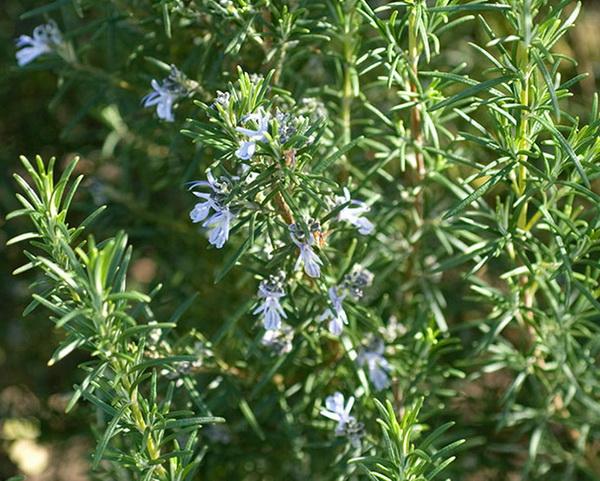
Rosemary is an aromatic evergreen herb used in cooking and scented cosmetic products. If you are already growing rosemary, you can start several new plants from your mother plant. The easiest way to regrow rosemary is by pruning and rooting cuttings.
Step 1
Fill a small planter with soil or a mix of soil and sand or vermiculite. You can also plant several cuttings together in one large planter, rather than rooting single stems in individual planters.
Step 2
Cut a soft stem just below a leaf or pair of leaves with a sharp knife or cutting shears. Choose a cutting no less than 3 inches – but up to 8 inches – from the tip.
Step 3
Strip the leaves from the bottom of the stem so the portion of the stem that will be planted is free of leaves.
Step 4
Dip the end of the stem in hormone rooting powder, if desired. Rooting powder is available in gardening supply stores and fortifies cuttings, but it is not necessary when rooting rosemary.
Step 5
Push the cutting into the soil and water it. Cover the plant with a plastic bag and leave it in a warm, sunny spot for about three weeks. Check roots by gently inverting the planter into your hand to see the underside of the soil.

Step 1
Fill a small planter with soil or a mix of soil and sand or vermiculite. You can also plant several cuttings together in one large planter, rather than rooting single stems in individual planters.
Step 2
Cut a soft stem just below a leaf or pair of leaves with a sharp knife or cutting shears. Choose a cutting no less than 3 inches – but up to 8 inches – from the tip.
Step 3
Strip the leaves from the bottom of the stem so the portion of the stem that will be planted is free of leaves.

Step 4
Dip the end of the stem in hormone rooting powder, if desired. Rooting powder is available in gardening supply stores and fortifies cuttings, but it is not necessary when rooting rosemary.
Step 5
Push the cutting into the soil and water it. Cover the plant with a plastic bag and leave it in a warm, sunny spot for about three weeks. Check roots by gently inverting the planter into your hand to see the underside of the soil.
0
0
成长记
cclecombe
2017年11月18日

We sadly lost some leaves today but we’ve got a new leaf opening up and a new shoot happening!


0
0
文章
绿手指客服
2017年11月17日

GFinger VIP function on the line, in order to bring better user experience, green fingers newly launched the VIP function
Here is to introduce this new function for you
Upload HD photos
Users can upload and download high-definition pictures, let Gfingers become your high-definition picture of the cloud library, save mobile phone space, clear record of flowers every moment!
Modification dairy date
Users can modify the date of their own growing up at any time, in your busy, can not carefully record the growing days of plants, to help you restore the precise state of the plant daily.
Watermark settings
Users can enjoy the privileges of adding user name watermark and not allowing others to save their own pictures. Make your pictures clear and protected by copyright.More preservation of pictures, no watermarks, pictures perfect preservation, give you a more comfortable user experience.
Blacklist settings
To VIP users more perfect user rights processing, pull black do not like the user.
Delete comments
VIP users can delete their favorite comments. Your comment is up to you!
Flower recycling station
The flowers VIP recovery can be used to store the new user station is already dead or deleted the memorial plant, you have plants, and plants along the old time record.
Remove advertising
VIP users can enjoy the advertising function. During the use of green fingers, do not be disturbed by advertising, give you more comfortable and efficient application experience.

The Gfinger aims to provide better functionality and services for the flower friends, but Gfingers also need to survive and grow, and need to increase revenue through advertising and other means,You can buy VIP services to completely bid farewell to pop-up ads, as well as upload and download high-definition pictures, watermark settings and other functions, Gfingers also want to have your understanding and support,Let us introduce more and better functions to serve you, thank you for your use!
Here is to introduce this new function for you
Upload HD photos
Users can upload and download high-definition pictures, let Gfingers become your high-definition picture of the cloud library, save mobile phone space, clear record of flowers every moment!
Modification dairy date
Users can modify the date of their own growing up at any time, in your busy, can not carefully record the growing days of plants, to help you restore the precise state of the plant daily.
Watermark settings
Users can enjoy the privileges of adding user name watermark and not allowing others to save their own pictures. Make your pictures clear and protected by copyright.More preservation of pictures, no watermarks, pictures perfect preservation, give you a more comfortable user experience.
Blacklist settings
To VIP users more perfect user rights processing, pull black do not like the user.
Delete comments
VIP users can delete their favorite comments. Your comment is up to you!
Flower recycling station
The flowers VIP recovery can be used to store the new user station is already dead or deleted the memorial plant, you have plants, and plants along the old time record.
Remove advertising
VIP users can enjoy the advertising function. During the use of green fingers, do not be disturbed by advertising, give you more comfortable and efficient application experience.

The Gfinger aims to provide better functionality and services for the flower friends, but Gfingers also need to survive and grow, and need to increase revenue through advertising and other means,You can buy VIP services to completely bid farewell to pop-up ads, as well as upload and download high-definition pictures, watermark settings and other functions, Gfingers also want to have your understanding and support,Let us introduce more and better functions to serve you, thank you for your use!
6
2
文章
Miss Chen
2017年11月15日

Because seeds from grapevines (Vitis spp.) don't produce plants like the mother plants, the seeds usually are sown only by plant breeders in search of new grape varieties. You, too, can create your own cultivar in that way, though it may be inferior to its mother plant. Because the hardiness of grapevines ranges from U.S. Department of Agriculture plant hardiness zones 4 through 10, depending on the variety, select seeds from a type that flourishes in your climate. Some seedlings may produce fruits within two years while others could require up to seven years of growth before they begin producing.

Acquire Seeds
Harvest grape seeds from fruits that are fully ripe by slicing them in half lengthwise. Extract the seeds with the tip of a clean knife or your fingernails, being careful not to harm the seeds in the process. After dropping the seeds into a container of water, allow them to soak for 24 hours, skimming off and discarding all of them that don't sink.
Prepare Seeds
Drain the remaining seeds the following day, and place them inside a small container accompanied by a little damp peat moss. One tablespoon of peat moss should be adequate for up to 50 seeds. After capping the container, leave it in a 35- to 40-degrees Fahrenheit refrigerator for three months. The exposure to cold is called the stratification period.
Sow Seeds
At the end of that time period, open the container and plant the seeds at a depth about three times their length in a flat of damp and sterile seed-starting mix. Ensure the flat has bottom drainage holes, and space the seeds 1 1/2 inches apart from each other. Place the flat under a grow light that runs for 16 hours per day because grape seeds germinate best under long-day conditions, and keep the seed-starting mix damp. If the temperature remains at about 70 F during the day, preferably dropping to 60 F at night, some seeds may germinate, or sprout, within two weeks, though others may take two months or longer to sprout.

Hasten Germination
Reportedly, placing grape seeds in running water eliminates their stratification period requirement because the water washes away their germination inhibitors. Try that technique by inserting damp grape seeds in a small, muslin bag immediately after you harvest the seeds, and place that bag in running water, such as in a "babbling" brook. Tying the bag to a stake may be necessary to prevent the bag from being swept away.
Under those conditions, the seeds can begin to make roots in eight days, after which they should be planted in the same way you would sow stratified seeds that have no roots. Don't leave the seeds in the water longer than 12 days, or their roots will begin to turn brown.
Nourish Seedlings
When the little grapevine seedlings have two sets of leaves, transplant each plant into its own 4-inch-diameter pot filled with a mixture that is 8 parts potting soil, 1 part pumice and 1 part sand. If you like, you can feed them with a plant food recommended for seedlings -- such as 2-3-1-- at one-half the fertilizer package's recommended strength. For the first month, mix 1 tablespoon of 2-3-1 fertilizer with 1 gallon of water. Afterward, raise the fertilizer amount to 2 tablespoons per 1 gallon of water. Transplant each seedling into its own 1-gallon pot about six weeks after each seedling was moved into the 4-inch-diameter pots.
The young grapevines should be ready to go outdoors when each plant has added six true leaves to its original two leaves, which are seed leaves. Accustom the vines to outdoor conditions by setting their pots in a shady position for a few hours every day at first and then taking them back indoors for the rest of each day. Gradually shift them into more sunlight.
Plant Seedlings
After your location's last average spring frost date, select a position for the grapevines, ensuring the site has full-sun exposure and moderately rich, well-drained soil and is beside an arbor, trellis or fence. Plant the seedlings about 8 to 10 feet apart, making each planting hole wider and deeper than its respective vine's root ball and situating the vines at the same soil depth at which they grew in their pots. Fill the remainder of the holes with the soil you removed to make the holes; ensure the soil around the plants is level with the surrounding ground. Cut each grapevine back to its lowest two leaf buds. Water the plants' soil well, and ensure that they receive at least 1 inch of water per week during their first year.
Work a small amount of balanced fertilizer – about one-fourth of the regular rate – into the soil around each vine. For example, use 5-5-5 organic fertilizer, applying about 3/16 cup every other month from spring through autumn. Increase the fertilizer amount by one-fourth each spring until the grapevines receive the fertilizer package's full recommended amount per feeding – such as 3/4 cup of 5-5-5 organic fertilizer -- in their fourth year.

Acquire Seeds
Harvest grape seeds from fruits that are fully ripe by slicing them in half lengthwise. Extract the seeds with the tip of a clean knife or your fingernails, being careful not to harm the seeds in the process. After dropping the seeds into a container of water, allow them to soak for 24 hours, skimming off and discarding all of them that don't sink.
Prepare Seeds
Drain the remaining seeds the following day, and place them inside a small container accompanied by a little damp peat moss. One tablespoon of peat moss should be adequate for up to 50 seeds. After capping the container, leave it in a 35- to 40-degrees Fahrenheit refrigerator for three months. The exposure to cold is called the stratification period.
Sow Seeds
At the end of that time period, open the container and plant the seeds at a depth about three times their length in a flat of damp and sterile seed-starting mix. Ensure the flat has bottom drainage holes, and space the seeds 1 1/2 inches apart from each other. Place the flat under a grow light that runs for 16 hours per day because grape seeds germinate best under long-day conditions, and keep the seed-starting mix damp. If the temperature remains at about 70 F during the day, preferably dropping to 60 F at night, some seeds may germinate, or sprout, within two weeks, though others may take two months or longer to sprout.

Hasten Germination
Reportedly, placing grape seeds in running water eliminates their stratification period requirement because the water washes away their germination inhibitors. Try that technique by inserting damp grape seeds in a small, muslin bag immediately after you harvest the seeds, and place that bag in running water, such as in a "babbling" brook. Tying the bag to a stake may be necessary to prevent the bag from being swept away.
Under those conditions, the seeds can begin to make roots in eight days, after which they should be planted in the same way you would sow stratified seeds that have no roots. Don't leave the seeds in the water longer than 12 days, or their roots will begin to turn brown.
Nourish Seedlings
When the little grapevine seedlings have two sets of leaves, transplant each plant into its own 4-inch-diameter pot filled with a mixture that is 8 parts potting soil, 1 part pumice and 1 part sand. If you like, you can feed them with a plant food recommended for seedlings -- such as 2-3-1-- at one-half the fertilizer package's recommended strength. For the first month, mix 1 tablespoon of 2-3-1 fertilizer with 1 gallon of water. Afterward, raise the fertilizer amount to 2 tablespoons per 1 gallon of water. Transplant each seedling into its own 1-gallon pot about six weeks after each seedling was moved into the 4-inch-diameter pots.
The young grapevines should be ready to go outdoors when each plant has added six true leaves to its original two leaves, which are seed leaves. Accustom the vines to outdoor conditions by setting their pots in a shady position for a few hours every day at first and then taking them back indoors for the rest of each day. Gradually shift them into more sunlight.
Plant Seedlings
After your location's last average spring frost date, select a position for the grapevines, ensuring the site has full-sun exposure and moderately rich, well-drained soil and is beside an arbor, trellis or fence. Plant the seedlings about 8 to 10 feet apart, making each planting hole wider and deeper than its respective vine's root ball and situating the vines at the same soil depth at which they grew in their pots. Fill the remainder of the holes with the soil you removed to make the holes; ensure the soil around the plants is level with the surrounding ground. Cut each grapevine back to its lowest two leaf buds. Water the plants' soil well, and ensure that they receive at least 1 inch of water per week during their first year.
Work a small amount of balanced fertilizer – about one-fourth of the regular rate – into the soil around each vine. For example, use 5-5-5 organic fertilizer, applying about 3/16 cup every other month from spring through autumn. Increase the fertilizer amount by one-fourth each spring until the grapevines receive the fertilizer package's full recommended amount per feeding – such as 3/4 cup of 5-5-5 organic fertilizer -- in their fourth year.
0
0
成长记
Succulent wonderland
2017年11月15日

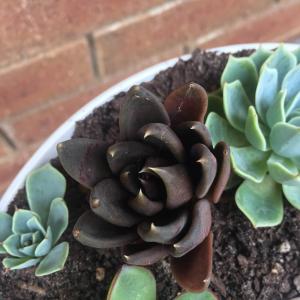
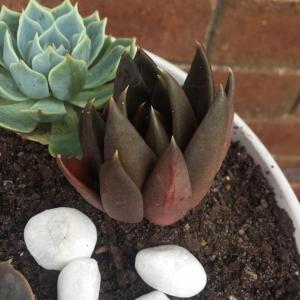
Repotted some closed up sad looking Black Knights, i hope they like their new home. #succulent #Echeveria


0
1
成长记
astronbot
2017年11月14日

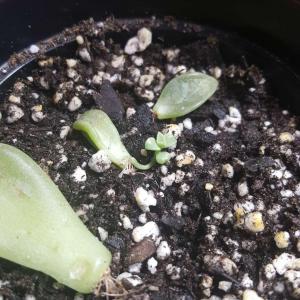
I decided to put all my unknown props into one plant category. Here's what this lil guy has been up to.. it looks pretty elongated :( hopefully it'll grow normally under my new grow light

0
0
成长记
Lilly Varbovska
2017年11月13日

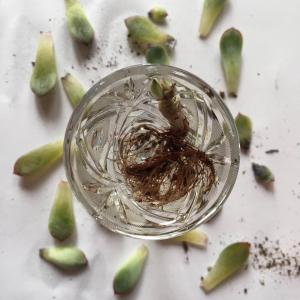
I don’t know what happend. Hope to be the beginning of new lifes.

0
0
蓝色风沙:everything goes well.
成长记
kimberly
2017年11月13日

Found some new growth in one of my Crassula Marnieriana pots.


1
0
rocky500:Beautiful!
文章
Miss Chen
2017年11月12日

Excessive amounts of blueberries (Vaccinium spp.) on a bush, called over-cropping, are typically smaller berries of poorer quality. To prevent this, prune canes to reduce the number of berry-producing buds. Fruit buds grow on new shoots one year before berries appear. Annual, moderate pruning of blueberry bushes will result in fewer canes but larger berries and greater, more consistent yields.

Species to Prune
Blueberries like well-drained, acidic soil with a pH between 4.5 to 5.5. The most widely grown species, highbush blueberries (Vaccinium corymbosum), grow from 6 to 12 feet tall in U.S. Department of Agriculture plant hardiness zones 3a through 8b. Rabbiteye blueberries (Vaccinium ashei) grow 6 to 8 feet tall in USDA zones 7a through 9B. Lowbush blueberries (Vaccinium augustifoliam) grow from 6 inches to 2 feet tall in USDA zones 2a to 6b.
When to Prune
Prune blueberries in late winter to early spring after the chance of freezing weather has passed. If you delay pruning a bush for a year or more then prune it heavily, canes maturing simultaneously will yield fewer berries. Pruning after harvesting berries will decrease long-term yield and make a bush susceptible to winter injury.
Tools to Use
Use hand-pruning shears to remove 1-year-old wood and a pruning lopper or hand saw to remove 2- to 3-year-old wood. Disinfect pruning tools before use by soaking them for five minutes in 1 part household bleach to 3 parts water and let air dry.

Pruning Young Bushes
Allowing young bushes to produce berries can stunt their growth, leading to several years of substantially lower harvests. To prevent this, prune the round, plump fruit buds 2 to 3 inches from the tips of the shoots. Prune to shape an upright plant that lets sunlight into the interior.
Remove twisted and low-growing canes at the start of the third year. Prune low-growing weak shoots from the bottom of young bushes. Since they'll be shaded by vigorous shoots above them, they won't be productive. Thicker, higher shoots will bloom later and bear larger berries. Pruning young, vigorous shoots to 4 to 6 inches below the top of the bush will stimulate side branches, increasing berry yields.
If a bush grew more than two new canes the previous year, prune all but the two most vigorous new canes at the level of the crown. Continue this light pruning until the bush reaches full maturity at about six years.
Pruning Mature Bushes
Blueberry canes give smaller yields and poorer quality berries after they're fully mature. Eight-year-old canes need more leaves to support their berries. Since they have usually grown numerous branches, their new shoots on which berries grow are typically weak and thin.
Prune one or two of the largest canes, including unproductive canes larger than 1 inch thick. Allow the same number of new canes to grow as replacements. If a bush contains a mix of different-aged canes, then you'll lose a minimal amount of berries by removing 8-year-old canes each year. Seven-year-old canes will replace pruned 8-year-old canes. You can prune up to 20 percent of a bush without affecting its yield. There will be fewer, larger berries, but eventually the entire crown will be renewed.
Since root suckers bear more berries than stump suckers on highbush cultivars, prune their old canes to the ground. Prune old canes of rabbiteye cultivars to 6 to 12 inches from the ground, forcing new, berry-producing canes to grow from their stumps.
To rejuvenate a declining bush, prune diseased, insect-infested and dead canes, then weak canes shaded by large canes. Prune older canes throughout the canopy to let in more light and encourage new canes to grow. If the bush no longer produces berries, prune all canes to renew growth.

Species to Prune
Blueberries like well-drained, acidic soil with a pH between 4.5 to 5.5. The most widely grown species, highbush blueberries (Vaccinium corymbosum), grow from 6 to 12 feet tall in U.S. Department of Agriculture plant hardiness zones 3a through 8b. Rabbiteye blueberries (Vaccinium ashei) grow 6 to 8 feet tall in USDA zones 7a through 9B. Lowbush blueberries (Vaccinium augustifoliam) grow from 6 inches to 2 feet tall in USDA zones 2a to 6b.
When to Prune
Prune blueberries in late winter to early spring after the chance of freezing weather has passed. If you delay pruning a bush for a year or more then prune it heavily, canes maturing simultaneously will yield fewer berries. Pruning after harvesting berries will decrease long-term yield and make a bush susceptible to winter injury.
Tools to Use
Use hand-pruning shears to remove 1-year-old wood and a pruning lopper or hand saw to remove 2- to 3-year-old wood. Disinfect pruning tools before use by soaking them for five minutes in 1 part household bleach to 3 parts water and let air dry.

Pruning Young Bushes
Allowing young bushes to produce berries can stunt their growth, leading to several years of substantially lower harvests. To prevent this, prune the round, plump fruit buds 2 to 3 inches from the tips of the shoots. Prune to shape an upright plant that lets sunlight into the interior.
Remove twisted and low-growing canes at the start of the third year. Prune low-growing weak shoots from the bottom of young bushes. Since they'll be shaded by vigorous shoots above them, they won't be productive. Thicker, higher shoots will bloom later and bear larger berries. Pruning young, vigorous shoots to 4 to 6 inches below the top of the bush will stimulate side branches, increasing berry yields.
If a bush grew more than two new canes the previous year, prune all but the two most vigorous new canes at the level of the crown. Continue this light pruning until the bush reaches full maturity at about six years.
Pruning Mature Bushes
Blueberry canes give smaller yields and poorer quality berries after they're fully mature. Eight-year-old canes need more leaves to support their berries. Since they have usually grown numerous branches, their new shoots on which berries grow are typically weak and thin.
Prune one or two of the largest canes, including unproductive canes larger than 1 inch thick. Allow the same number of new canes to grow as replacements. If a bush contains a mix of different-aged canes, then you'll lose a minimal amount of berries by removing 8-year-old canes each year. Seven-year-old canes will replace pruned 8-year-old canes. You can prune up to 20 percent of a bush without affecting its yield. There will be fewer, larger berries, but eventually the entire crown will be renewed.
Since root suckers bear more berries than stump suckers on highbush cultivars, prune their old canes to the ground. Prune old canes of rabbiteye cultivars to 6 to 12 inches from the ground, forcing new, berry-producing canes to grow from their stumps.
To rejuvenate a declining bush, prune diseased, insect-infested and dead canes, then weak canes shaded by large canes. Prune older canes throughout the canopy to let in more light and encourage new canes to grow. If the bush no longer produces berries, prune all canes to renew growth.
0
0
文章
Miss Chen
2017年11月12日

When deciding a new plant to grow in Georgia, a blueberry bush is a GREAT choice. The are easy to maintain, don't have thorns and won't spread like crazy growing all over the place.

Recently, doctors have started saying that blueberries are among the top most beneficial fruits to feed your body. It's no wonder, considering they yield the highest antioxidant capacity of all fresh fruit, neutralize free radicals and aid in reducing belly fat. Not to mention they help promote urinary tract health, brain health, help to fight heart disease and help relieve constipation and digestion. Some doctors even suspect they are linked with reversing cancer!
If you live in Georgia, you are exceptionally lucky as you live in the perfect climate for growing blueberries. It's in the south so it makes growing them much easier as the summers are long and hot and there is usually very little cold. It's the perfect climate to grow blue berries, in Georgia!
So how do you do it? The following three simple steps will show you.
Step 1
Choose the right variety of blueberry bush! Get the rabbiteye blueberry bushes as they are best for the climate in the south. If you want to grow blueberries in Georgia, it is critical you choose the rabbiteye variety for the most success. There are three different varieties of blueberries, such as highbush, lowbush and rabbiteye. The highbush and lowbush are more geared toward climates other than the kind in Georgia, so you will want to steer away from them.
Rabbiteye blue berries require more heat which makes them perfect for growing in Georgia. Another reason you will want to plant rabbiteye blueberry bushes is because they tend to grow the biggest at a whopping 10 feet high! That means more blueberries for your money and more bang for your buck.
Where do you get rabbiteye blueberry bushes? Most local nurseries in Georgia carry them, but if you have any trouble finding them you can always order them online for fairly cheap.
When you buy them, try to get plants that 2 years old as it will drastically speed up the production of blueberries.

Step 2
Plant them correctly. They are self fertile, but for the best results plant them near two other varieties to create cross pollination.
For the best development possible of rabbiteye blueberries bushes, plant them in the absolute sunniest place possible and in a region where they won't be crippled by late spring frosts.
Make sure you plant them in an acidic soil of anywhere between 4.5 pH and 4.8 pH, as this is what they will need to grow and meet their full potential. Most soils aren't this acidic, naturally, so be sure to do a bit of soil testing to make sure you select the most acidic and fertile spot.
You can buy home soil test kits either at the nursery where you buy the plant. If you can't find them in your local nursery, feel free to order your soil test kit online as well. If the soil in the area has too high of a pH balance, be sure to acidify it with Mir-Acid. You can buy Mir-Acid at just about any nursery nationwide.
To make the soil more fertile for the growth of your blueberries, be sure to add compost to the soil.
Once you make sure the soil is both fertile and of the right acidity, begin to plant your blueberry bushes by spacing them approximately four feet away from each other.
Be sure to plant the blueberry bushes so that their bloom periods overlap. For example, you want to have one mid season and one getting ready to start it's bloom period. This will ensure you will have blue berries year round.
I recommended applying a wood chip mulch around your blueberry plant to discourage the growth of weeds.
Step 3
Maintain them correctly. There are quite a few important things you need to do to make sure that your blueberries production is maintained. One of these things is to test the pH balance of the soil annually to make sure that it hasn't changed. After your blueberry bushes have been in production for a few years, you will want to prune them to open the way for new growth.
You'll need a good strategy to keep the birds away, unless you don't mind having the birds raid your plants. If you don't want to share the blueberries with the birds, then you're going to want to cover the bushes with a net.
To determine when the berries are ripe and ready for eating, hold your hand beneath each clump and gently brush them with your fingers. Any berries that are ready to be eaten will easily fall into your hand. Enjoy!

Recently, doctors have started saying that blueberries are among the top most beneficial fruits to feed your body. It's no wonder, considering they yield the highest antioxidant capacity of all fresh fruit, neutralize free radicals and aid in reducing belly fat. Not to mention they help promote urinary tract health, brain health, help to fight heart disease and help relieve constipation and digestion. Some doctors even suspect they are linked with reversing cancer!
If you live in Georgia, you are exceptionally lucky as you live in the perfect climate for growing blueberries. It's in the south so it makes growing them much easier as the summers are long and hot and there is usually very little cold. It's the perfect climate to grow blue berries, in Georgia!
So how do you do it? The following three simple steps will show you.
Step 1
Choose the right variety of blueberry bush! Get the rabbiteye blueberry bushes as they are best for the climate in the south. If you want to grow blueberries in Georgia, it is critical you choose the rabbiteye variety for the most success. There are three different varieties of blueberries, such as highbush, lowbush and rabbiteye. The highbush and lowbush are more geared toward climates other than the kind in Georgia, so you will want to steer away from them.
Rabbiteye blue berries require more heat which makes them perfect for growing in Georgia. Another reason you will want to plant rabbiteye blueberry bushes is because they tend to grow the biggest at a whopping 10 feet high! That means more blueberries for your money and more bang for your buck.
Where do you get rabbiteye blueberry bushes? Most local nurseries in Georgia carry them, but if you have any trouble finding them you can always order them online for fairly cheap.
When you buy them, try to get plants that 2 years old as it will drastically speed up the production of blueberries.

Step 2
Plant them correctly. They are self fertile, but for the best results plant them near two other varieties to create cross pollination.
For the best development possible of rabbiteye blueberries bushes, plant them in the absolute sunniest place possible and in a region where they won't be crippled by late spring frosts.
Make sure you plant them in an acidic soil of anywhere between 4.5 pH and 4.8 pH, as this is what they will need to grow and meet their full potential. Most soils aren't this acidic, naturally, so be sure to do a bit of soil testing to make sure you select the most acidic and fertile spot.
You can buy home soil test kits either at the nursery where you buy the plant. If you can't find them in your local nursery, feel free to order your soil test kit online as well. If the soil in the area has too high of a pH balance, be sure to acidify it with Mir-Acid. You can buy Mir-Acid at just about any nursery nationwide.
To make the soil more fertile for the growth of your blueberries, be sure to add compost to the soil.
Once you make sure the soil is both fertile and of the right acidity, begin to plant your blueberry bushes by spacing them approximately four feet away from each other.
Be sure to plant the blueberry bushes so that their bloom periods overlap. For example, you want to have one mid season and one getting ready to start it's bloom period. This will ensure you will have blue berries year round.
I recommended applying a wood chip mulch around your blueberry plant to discourage the growth of weeds.
Step 3
Maintain them correctly. There are quite a few important things you need to do to make sure that your blueberries production is maintained. One of these things is to test the pH balance of the soil annually to make sure that it hasn't changed. After your blueberry bushes have been in production for a few years, you will want to prune them to open the way for new growth.
You'll need a good strategy to keep the birds away, unless you don't mind having the birds raid your plants. If you don't want to share the blueberries with the birds, then you're going to want to cover the bushes with a net.
To determine when the berries are ripe and ready for eating, hold your hand beneath each clump and gently brush them with your fingers. Any berries that are ready to be eaten will easily fall into your hand. Enjoy!
0
0


