文章
权问薇
2017年09月23日

#吊兰 ——剪掉部分大粗根
同样是正常的浇水、施肥,为什么别人家的吊兰,一年就能长成瀑布。你家的一年只长几片叶子,而且还老是发黄干尖,这问题就出现在根上面了。
1.春秋季节,我们给花换的时候,会发现吊兰上有很多白胖胖的,像“小萝卜”一样,这些“小萝卜”是吊兰的储水组织,能够让它长时间不浇水也干不死。

但是“小萝卜”多了并不好,不仅挤得盆里不透气,容易烂根,而且会抢夺茎叶的水分和养分,导致只长根不长叶,所以要想吊兰的叶片长得旺,就要给这些“小萝卜”动动手术。
2.手术前,1周内不要给吊兰浇水,一只手抓住吊兰的根茎连接处,一只手把花盆倒扣过来,让整个根部土坨脱盆。

3.把土弄散,露出白花花的“小萝卜”,用剪刀分散着剪掉1/3左右的“小萝卜”,不要全都剪掉,当然烂根、老根也要剪掉。

4.把修剪后的吊兰放在阴凉通风的地方,伤口晾干10-15分钟,有多菌灵的可以泡5分钟多菌灵。
5.把晾干的吊兰重新种进新的盆土中,浇透水,放在阴凉通风的地方,过2周,再逐渐见阳光。

6.缓盆之后,吊兰的生长速度会比原来快很多,而且从不黄叶干尖哦!

君子兰——剪掉空根
很多花友经常会跟花花抱怨,自家的君子兰长得好慢,还不开花,到底是咋回事?这问题主要出在根上!尤其是那些养了3年以上的君子兰,根系趋于老化,吸收能力大大降低,为叶片提供不了什么养分,还在土壤中阻碍健康根系呼吸,增加烂根几率。
1.给君子兰修根之前,也要断水最起码一周,然后根系脱盆脱土。

2.把君子兰的底部根系,挨个捏一捏,捏到那种内部中空,一捏就瘪的空根就整根拽掉,而捏到内部厚实,尖端嫩白的好根就留着。当然烂根、特别硬的老根也一并拽掉。

3.空根、老根、烂根都剪完之后,把君子兰的整个根系及根茎连接处,浸泡在多菌灵或高锰酸钾溶液中20-30分钟,之后取出晾干20-30分钟就能上盆了。

4.按照腐叶土:松针:河沙:木炭渣=5:2:2:2的比例配制新土壤,然后把君子兰用新配土重新种进盆土中,把剩下的多菌灵溶液浇灌到盆土中,放在散光通风的地方养护即可。

5.大概2-3个月后,君子兰长出了新的根系,吸收能力大大增强,每周浇1次液肥,君子兰就会长得飞快,而且叶片油亮从不黄叶,比以前更加厚实哦!

多肉——剪掉过长根系
秋天啦,天气转凉,又到了多肉给多肉换盆修根的好时机,但是很多花友不敢给多肉换盆修根,怕把多肉搞死。其实长得快又美的多肉,都是每年最少修根1-2次哦。
1.修根前最起码控水2周,然后一手扶住根茎,一手翻转花盆,给多肉脱盆,双手轻轻抖动根部土壤,让根系上的土散落。

2.把多肉的根系稍微顺直,新手可以把过长的根系剪掉1/2,而老手,则可以直接剪掉整个根系长度的2/3。

3.过老的根系非常不利于多肉的生长,所以需要每半年或者一年把老化的根系剪掉,这样多肉才能生出更多白色的新根系,这些新根系,活力、吸收能力更强,会源源不断地给多肉提供养分,让它长得非常快哦!

绿萝——剪掉发黑的老根
决定绿萝长得快慢、好赖的因素,一个是浇水、施肥,另一个就是修根换盆了。所以,如果你正常浇水施肥,绿萝还是长不好,那就是该修根换盆了。
1.把绿萝倒扣过来,脱盆。

2.清理掉根上的泥土,剪掉发黑的、捏起来发软的、特别长的根系。

3.修剪完毕后,放多菌灵里泡8-10分钟,然后取出晾干5分钟。

4.把泥炭土和珍珠岩按照2:1的比例,混合成营养土,然后用这种土把绿萝重新种进花盆中,把之前用的多菌灵溶液倒进土里。

5.修完根后的绿萝,缓盆之后会生出更粗更壮的根系,水肥跟上,就会长得很快了。

月季——木栓化老根、根瘤
月季,尤其是盆栽月季,在养了2-3年以后,一定要修剪老根和根瘤,否则根系木栓化,不透水,也不能吸收养分,月季花量也会一年比一年少。而根瘤则会导致月季矮小瘦弱,叶片发黄。
1.把月季90度倾斜放倒,一只手握住月季的根茎连接处,一只手轻轻拍打花盆盆壁,让土坨离盆,慢慢将整个植株取出来。

2.把整个土坨,放在清水中浸泡,轻轻把根系上的泥土除去,直到根系干净为止。

3.发现根系上有像豆子一样的根瘤,就用消过度的剪刀,将其剪掉,另外有些有虫卵和病害的根系也一并剪掉,避免传染。

4.根系当中,如果发现个别又粗又长又硬的根系,也要剪掉,因为这种根系已经木栓化,阻碍花卉的营养吸收,剪掉之后,月季会萌发出更多新根,活力更强,吸收水分和养分的能力会大大增强。

5.把修剪好的月季根系,完全浸泡在多菌灵或高锰酸钾溶液中2-3个小时,然后就可以重新上盆了。注意,根系修剪的总长度不能超过整个根系长度的1/3,否则换盆会比较难。

6.月季的配土按照园土:珍珠岩:蛭石:有机肥=4:3:2:2:0.5,花盆底部再垫一层陶粒,防积水。

7.上盆后,适当剪掉一部分枝叶,减少养分消耗,然后放在阴凉通风的地方,每天叶面喷水保湿,缓盆1-2周,然后渐渐晒太阳就可以了。
富贵竹——砍掉全部老根
水培富贵竹基本家家都有,几乎都会出现黄叶、烂根的现象,其实不光是因为养护不当,更重要的是根系问题,尤其是水培了一年以上的富贵竹,根系发黑老化,吸收能力差,容易烂,不黄叶才怪,怎么解决呢?大家可以参考以下步骤。
1.把富贵竹从水培瓶中取出,将所有带根系的底部枝干全部砍掉,注意切口呈45度斜砍,呈马蹄状。

2.把富贵竹底部切口放在多菌灵溶液中泡几分钟,有生根剂的也可以泡泡生根剂。

3.把水培瓶中的原来的水倒出,里外清洗干净,再倒入1/3的清水,把富贵竹重新插入。

4.每隔2天换次水,大概1-2个星期后,富贵竹就会生根了,想要早生根、不烂根,可以把阿司匹林研成粉末,倒入水培瓶中。

5.根系长到3-4厘米左右的时候,就可以每周添加1-2滴营养液,新根系的吸收能力大增,富贵竹养分水分充足就不会黄叶了。
三角梅——砍掉1/3根系
三角梅根系强大,而且长得很快,如果长期不修剪,根系会布满整个花盆,老化、腐烂,导致落叶、干枯、不开花等现象。
1.修根前,三角梅1星期内别浇水,修根前把整个根系带着原来的土坨,脱盆。

2.把三角梅底部的根系连根带土,平着砍掉1/3,因为这些最底部的根系老化严重,并且最容易烂根。而且砍掉底部老化的1/3根系,不至于让三角梅太受损伤,容易缓盆。

3.找一个新的大一点的花盆,底部添上新的营养土。把剩下的三角梅,连根带土坨,一起重新种进花盆里就可以啦。

4.移栽好的三角梅,1周之内放在散光通风的地方,注意:正在花期或者孕蕾期的花卉不要进行这种操作。
同样是正常的浇水、施肥,为什么别人家的吊兰,一年就能长成瀑布。你家的一年只长几片叶子,而且还老是发黄干尖,这问题就出现在根上面了。
1.春秋季节,我们给花换的时候,会发现吊兰上有很多白胖胖的,像“小萝卜”一样,这些“小萝卜”是吊兰的储水组织,能够让它长时间不浇水也干不死。

但是“小萝卜”多了并不好,不仅挤得盆里不透气,容易烂根,而且会抢夺茎叶的水分和养分,导致只长根不长叶,所以要想吊兰的叶片长得旺,就要给这些“小萝卜”动动手术。
2.手术前,1周内不要给吊兰浇水,一只手抓住吊兰的根茎连接处,一只手把花盆倒扣过来,让整个根部土坨脱盆。

3.把土弄散,露出白花花的“小萝卜”,用剪刀分散着剪掉1/3左右的“小萝卜”,不要全都剪掉,当然烂根、老根也要剪掉。

4.把修剪后的吊兰放在阴凉通风的地方,伤口晾干10-15分钟,有多菌灵的可以泡5分钟多菌灵。
5.把晾干的吊兰重新种进新的盆土中,浇透水,放在阴凉通风的地方,过2周,再逐渐见阳光。

6.缓盆之后,吊兰的生长速度会比原来快很多,而且从不黄叶干尖哦!

君子兰——剪掉空根
很多花友经常会跟花花抱怨,自家的君子兰长得好慢,还不开花,到底是咋回事?这问题主要出在根上!尤其是那些养了3年以上的君子兰,根系趋于老化,吸收能力大大降低,为叶片提供不了什么养分,还在土壤中阻碍健康根系呼吸,增加烂根几率。
1.给君子兰修根之前,也要断水最起码一周,然后根系脱盆脱土。

2.把君子兰的底部根系,挨个捏一捏,捏到那种内部中空,一捏就瘪的空根就整根拽掉,而捏到内部厚实,尖端嫩白的好根就留着。当然烂根、特别硬的老根也一并拽掉。

3.空根、老根、烂根都剪完之后,把君子兰的整个根系及根茎连接处,浸泡在多菌灵或高锰酸钾溶液中20-30分钟,之后取出晾干20-30分钟就能上盆了。

4.按照腐叶土:松针:河沙:木炭渣=5:2:2:2的比例配制新土壤,然后把君子兰用新配土重新种进盆土中,把剩下的多菌灵溶液浇灌到盆土中,放在散光通风的地方养护即可。

5.大概2-3个月后,君子兰长出了新的根系,吸收能力大大增强,每周浇1次液肥,君子兰就会长得飞快,而且叶片油亮从不黄叶,比以前更加厚实哦!

多肉——剪掉过长根系
秋天啦,天气转凉,又到了多肉给多肉换盆修根的好时机,但是很多花友不敢给多肉换盆修根,怕把多肉搞死。其实长得快又美的多肉,都是每年最少修根1-2次哦。
1.修根前最起码控水2周,然后一手扶住根茎,一手翻转花盆,给多肉脱盆,双手轻轻抖动根部土壤,让根系上的土散落。

2.把多肉的根系稍微顺直,新手可以把过长的根系剪掉1/2,而老手,则可以直接剪掉整个根系长度的2/3。

3.过老的根系非常不利于多肉的生长,所以需要每半年或者一年把老化的根系剪掉,这样多肉才能生出更多白色的新根系,这些新根系,活力、吸收能力更强,会源源不断地给多肉提供养分,让它长得非常快哦!

绿萝——剪掉发黑的老根
决定绿萝长得快慢、好赖的因素,一个是浇水、施肥,另一个就是修根换盆了。所以,如果你正常浇水施肥,绿萝还是长不好,那就是该修根换盆了。
1.把绿萝倒扣过来,脱盆。

2.清理掉根上的泥土,剪掉发黑的、捏起来发软的、特别长的根系。

3.修剪完毕后,放多菌灵里泡8-10分钟,然后取出晾干5分钟。

4.把泥炭土和珍珠岩按照2:1的比例,混合成营养土,然后用这种土把绿萝重新种进花盆中,把之前用的多菌灵溶液倒进土里。

5.修完根后的绿萝,缓盆之后会生出更粗更壮的根系,水肥跟上,就会长得很快了。

月季——木栓化老根、根瘤
月季,尤其是盆栽月季,在养了2-3年以后,一定要修剪老根和根瘤,否则根系木栓化,不透水,也不能吸收养分,月季花量也会一年比一年少。而根瘤则会导致月季矮小瘦弱,叶片发黄。
1.把月季90度倾斜放倒,一只手握住月季的根茎连接处,一只手轻轻拍打花盆盆壁,让土坨离盆,慢慢将整个植株取出来。

2.把整个土坨,放在清水中浸泡,轻轻把根系上的泥土除去,直到根系干净为止。

3.发现根系上有像豆子一样的根瘤,就用消过度的剪刀,将其剪掉,另外有些有虫卵和病害的根系也一并剪掉,避免传染。

4.根系当中,如果发现个别又粗又长又硬的根系,也要剪掉,因为这种根系已经木栓化,阻碍花卉的营养吸收,剪掉之后,月季会萌发出更多新根,活力更强,吸收水分和养分的能力会大大增强。

5.把修剪好的月季根系,完全浸泡在多菌灵或高锰酸钾溶液中2-3个小时,然后就可以重新上盆了。注意,根系修剪的总长度不能超过整个根系长度的1/3,否则换盆会比较难。

6.月季的配土按照园土:珍珠岩:蛭石:有机肥=4:3:2:2:0.5,花盆底部再垫一层陶粒,防积水。

7.上盆后,适当剪掉一部分枝叶,减少养分消耗,然后放在阴凉通风的地方,每天叶面喷水保湿,缓盆1-2周,然后渐渐晒太阳就可以了。
富贵竹——砍掉全部老根
水培富贵竹基本家家都有,几乎都会出现黄叶、烂根的现象,其实不光是因为养护不当,更重要的是根系问题,尤其是水培了一年以上的富贵竹,根系发黑老化,吸收能力差,容易烂,不黄叶才怪,怎么解决呢?大家可以参考以下步骤。
1.把富贵竹从水培瓶中取出,将所有带根系的底部枝干全部砍掉,注意切口呈45度斜砍,呈马蹄状。

2.把富贵竹底部切口放在多菌灵溶液中泡几分钟,有生根剂的也可以泡泡生根剂。

3.把水培瓶中的原来的水倒出,里外清洗干净,再倒入1/3的清水,把富贵竹重新插入。

4.每隔2天换次水,大概1-2个星期后,富贵竹就会生根了,想要早生根、不烂根,可以把阿司匹林研成粉末,倒入水培瓶中。

5.根系长到3-4厘米左右的时候,就可以每周添加1-2滴营养液,新根系的吸收能力大增,富贵竹养分水分充足就不会黄叶了。
三角梅——砍掉1/3根系
三角梅根系强大,而且长得很快,如果长期不修剪,根系会布满整个花盆,老化、腐烂,导致落叶、干枯、不开花等现象。
1.修根前,三角梅1星期内别浇水,修根前把整个根系带着原来的土坨,脱盆。

2.把三角梅底部的根系连根带土,平着砍掉1/3,因为这些最底部的根系老化严重,并且最容易烂根。而且砍掉底部老化的1/3根系,不至于让三角梅太受损伤,容易缓盆。

3.找一个新的大一点的花盆,底部添上新的营养土。把剩下的三角梅,连根带土坨,一起重新种进花盆里就可以啦。

4.移栽好的三角梅,1周之内放在散光通风的地方,注意:正在花期或者孕蕾期的花卉不要进行这种操作。
1
0
文章
弄啥嘞
2017年09月23日


#富贵竹
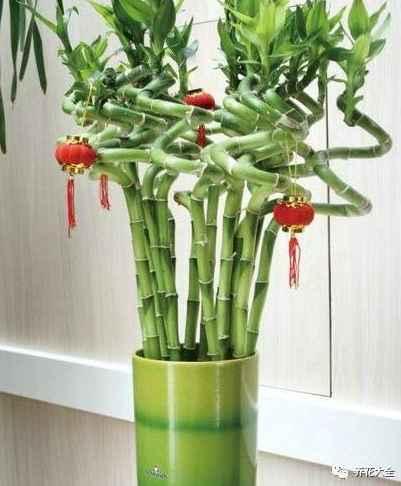
生根前养护:
1、自来水在使用之前,要先晾晒1天之后才能用。
2、隔1天换水1次,换水的时候要观察一下,已经生出来短短的白色根系的,换水的时候一定要非常轻柔。

3、放在室内阴凉通风的地方,比如室内客厅,或者是被阳台,不要让阳光直射哦~
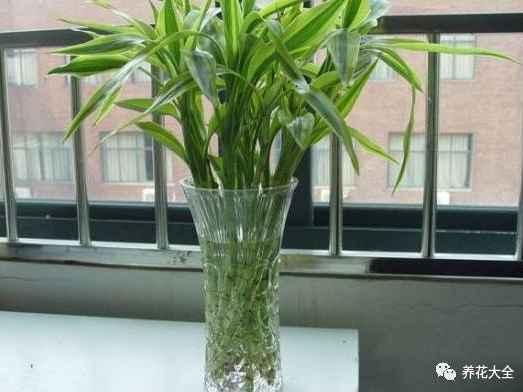
生根后养护:
1、始终将水位保持咋三分之一的位置,少了添水就可以。

2、大约1周换水1次,换水的时候,最好是将玻璃瓶里外重新清洗一遍,把内部瓶壁上的各种水垢污垢给清理干净。

3、富贵竹的根系也要放在流动的水流下清洗,水流不可过快,避免损伤富贵竹的根系哦~

4、也是要放在室内阴凉通风的地方哦~

腐烂后如何解决?
1、先把腐烂的根系,连同茎干一起剪掉,切口处要削成斜面的哦,面积大,容易生根。

2、把富贵竹的伤口浸泡在多菌灵溶液中30分钟左右,然后拿出来阴干。

3、把容器清洗干净,然后用酒精啊,高锰酸钾啊之类的进行消毒,然后晒干。

4、把已经晾晒了1天左右的自来水倒进容器里,再把富贵竹放进去即可,然后放到阴凉通风的地方,之后的养护请参考生根前哦~

白掌
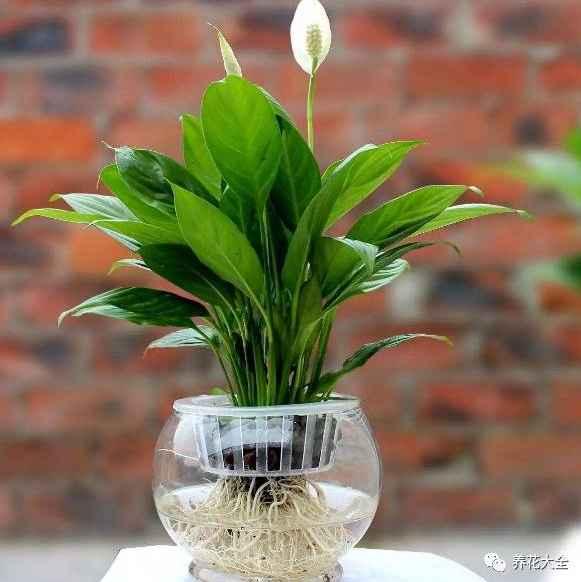
日常养护要点:
1、放在阴凉通风的地方,避免阳光直射。

2、夏天7天换水1次,冬天10~15天换水1次。换水的同时要把水培器皿清洗一遍,如果有条件的话,还可以用多菌灵呀,酒精呀之类的进行消毒。

3、换水的同时,也要把根系清洗一遍,很简单的,把根系放在平缓的水流下冲洗就可以啦~然后把根系中的老根、枯根之类的全都剪除就可以了~

4、换水的时候,水的界面以淹没根系的1/2~2/3为标准哦~

5、换水的时候可以滴进去1~2滴的营养液。

烂根了怎么办?
1、先把白掌取出来,根部的粘液清洗干净,然后用剪刀把腐烂的地方全都剪除。
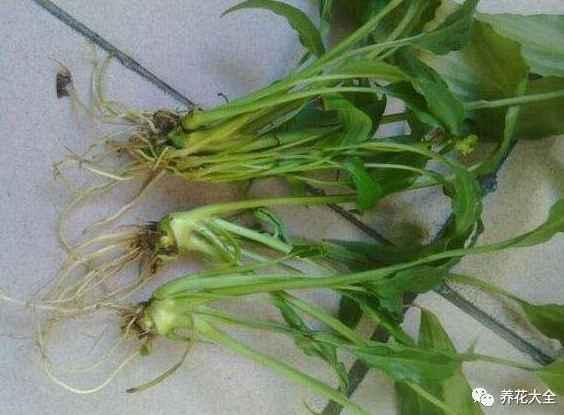
2、把根部的伤口放在多菌灵溶液中进行消毒,然后阴干。

3、把容器清洗干净并且消毒,把自来水静置1天,去除氯气。
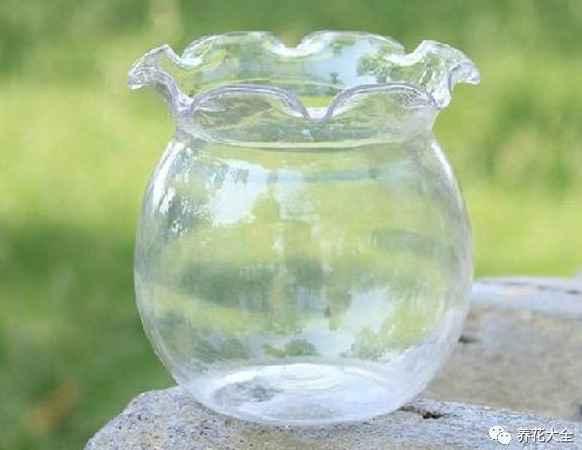
4、重新水培即可~

铜钱草
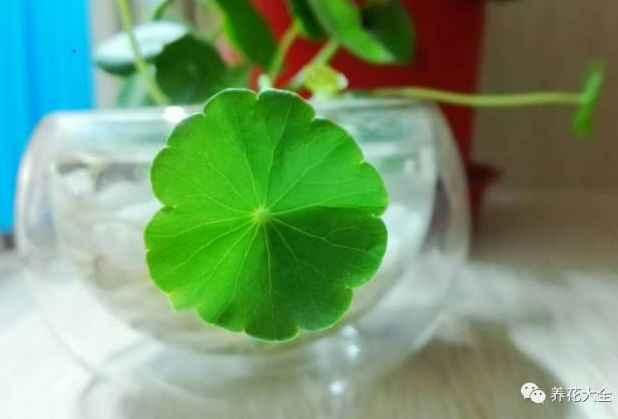
日常养护要点:
1、多晒太阳,能露养就最好了,不能露养的话,也请放在南阳台上哦~

2、加强通风,最好是放在窗台或者是阳台上,多开窗通风。

3、一定要及时补水,始终保持水位在2/3左右。

4、一般10~15天左右换一次水,其他的时间只要添水就可以了。

烂根如何处理?
1、先把铜钱草拿出来清洗干净,看看根系是不是全都腐烂了,如果全都烂了,那就是没救了,如果还没有全烂,那就把腐烂的地方切掉。

2、伤口处在多菌灵溶液里泡一下,杀菌,然后拿出来阴干。
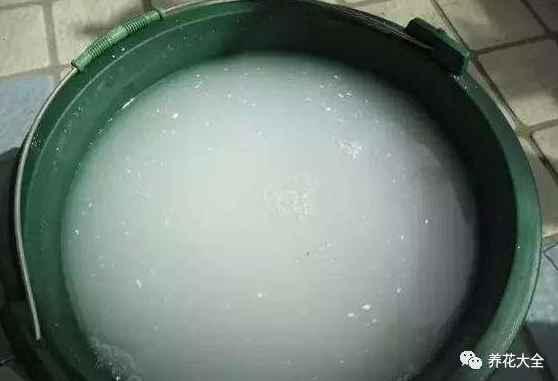
3、换一个新的已经消过毒的容器,重新水培即可。

4、注意了,重新水培的话,一定要多晒太阳,根系才能长的快。

龟背竹

生根前养护方法:
1、刚水培之后的龟背竹,暂时不要换水,等1周左右,看看有没有生根,如果有新根发出来,就说明水培成功了,等过上1~2天再换水,同时要小心不要弄断根系哦~
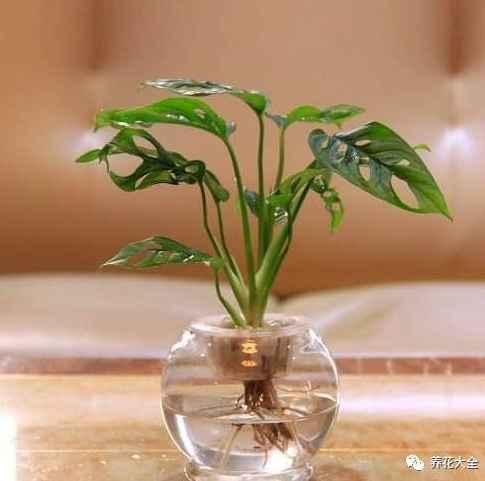
2、要放在阴凉通风的地方进行缓根哦~

日常养护方法:
1、龟背竹的根系不能全都浸泡在水里,要留1/2在空气中,好进行呼吸作用。

2、放在阴凉通风的地方,龟背竹不能阳光直射哦,很容易晒伤的。

3、大约10~15天左右换一次水就可以了。

4、在换水的时候,要把龟背竹根系上的粘液用清水冲洗干净,要用轻缓的水流哦~
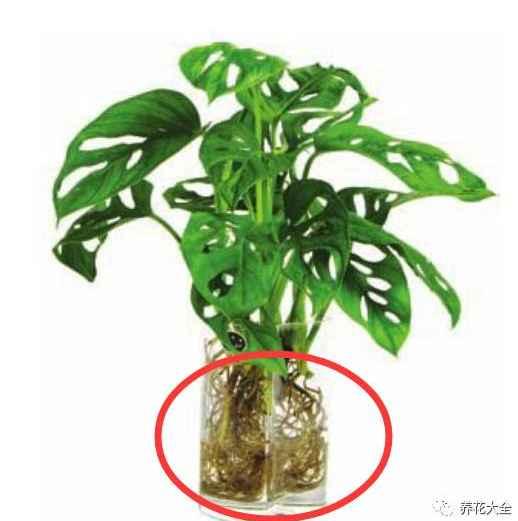
5、容器也要清洗干净并且消毒,能够避免黑腐等问题的出现哦~

烂根了怎么办?
1、将龟背竹的从水培瓶里拿出来,用清水冲洗干净,然后把腐烂的根系全都剪除。
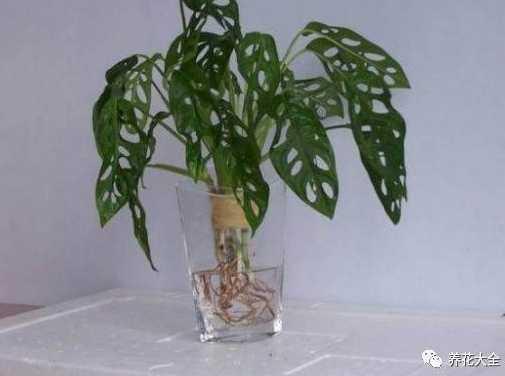
2、把容器清理干净,用酒精或者是多菌灵进行消毒。

3、把自来水晾1~2天的时间之后,再倒进容器里,重新给龟背竹水培。

1
6
文章
小九
2017年09月23日

#薄荷 是一种适合勤快人养护的盆栽植物,它的叶子带有天然的香气,而且还能用来泡茶,使用很不错的香草植物,如果给你一段薄荷的茎,你能不能繁殖一个阳台的薄荷
1、栽培的时机
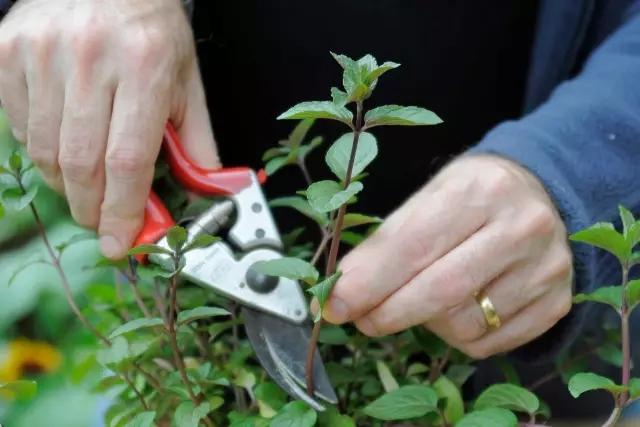
8、9月是非常适合栽种薄荷的时间,栽种一些薄荷,能够让你整个夏秋季节都充满活力,只需要从健壮的薄荷上剪下来一些长约8厘米长的茎,去掉底部的叶子,这样就能变成插穗了。
2、清水浸泡
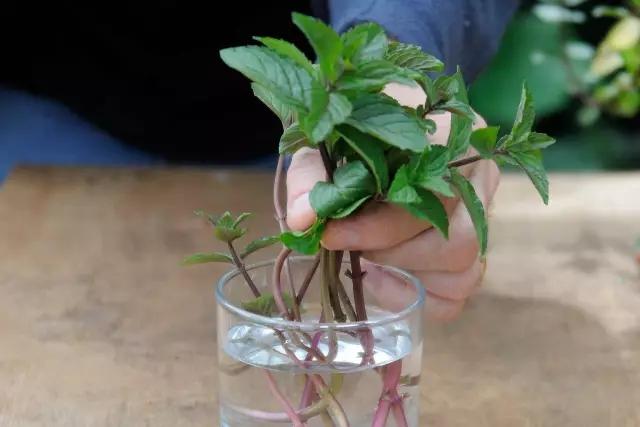
将处理好叶子的茎浸泡在清水中,放在一个通风和光线明亮的地方,薄荷茎的叶子不能沾到水,每2~3天换水一次,等待茎生根。
3、水培转土培
水培的薄荷茎只需要1~2周就能重新长满根系,之后我们就准备好肥沃疏松盆栽土,直接将土壤放入长满根系的薄荷茎里面,容器最选泡水孔较多的塑料盆,保证排水性好。

4、浇水养护
添加土壤之后,可以里面适当混入堆肥土,栽种好之后,就要将盆土浇透水。

5、修剪和掐顶
薄荷移栽土壤一周后见光,保持盆土微润,环境通风,这样薄荷就能保持旺盛的生长。
薄荷的茎长到10多厘米就进行掐顶,可以促进薄荷长出更多分枝,分枝长长之后再进行修剪,剪下来的茎可以继续培育。
1、栽培的时机
8、9月是非常适合栽种薄荷的时间,栽种一些薄荷,能够让你整个夏秋季节都充满活力,只需要从健壮的薄荷上剪下来一些长约8厘米长的茎,去掉底部的叶子,这样就能变成插穗了。
2、清水浸泡
将处理好叶子的茎浸泡在清水中,放在一个通风和光线明亮的地方,薄荷茎的叶子不能沾到水,每2~3天换水一次,等待茎生根。

3、水培转土培
水培的薄荷茎只需要1~2周就能重新长满根系,之后我们就准备好肥沃疏松盆栽土,直接将土壤放入长满根系的薄荷茎里面,容器最选泡水孔较多的塑料盆,保证排水性好。

4、浇水养护
添加土壤之后,可以里面适当混入堆肥土,栽种好之后,就要将盆土浇透水。

5、修剪和掐顶
薄荷移栽土壤一周后见光,保持盆土微润,环境通风,这样薄荷就能保持旺盛的生长。
薄荷的茎长到10多厘米就进行掐顶,可以促进薄荷长出更多分枝,分枝长长之后再进行修剪,剪下来的茎可以继续培育。

5
15
文章
小九
2017年09月23日

我一直以为#芦荟 只是阳台或室内的小盆栽,养着能长到1米多高已经是非常了不起了,但是没想到别人的芦荟能够长成一片小丛林,而且全部都开花了,花朵像是火焰一般,高高耸立,想要不注意它都不行了。

有花友看到这么多芦荟,就想着掰一些用来美容护肤,这么多不知道要用多久。芦荟虽然有美容或治疗烧伤晒伤的功效,但是并不是每个人都适合的,一些皮肤敏感的人就不能随便用芦荟,不然就会过敏了。
而另外一些人则将芦荟的叶片当菜来吃,不过大部分还是用于化妆护肤之类的额。
芦荟就是一种常见的多肉植物,在温暖干燥的地方就像野草一样好养,常年温暖的地方,露地栽培也是完全没有问题的。

不过栽种芦荟还是需要一定的环境条件的,至少要有排水良好的沙质土,不能种在粘重的土壤上面,养护最低温度保持在5度以上,可以有短暂的低温,但也不能低于0度。
芦荟的品种是非常多的,像下面这些丛生的品种一般是被叫做是龙爪,也有叫木立芦荟的,长了几年之后,它就会长出木质化的茎,而且还能不断长高。

夏天到来的时候,芦荟就会长出浅红色的茎,慢慢结出红色的花朵,也有一些芦荟是开黄色花的。
芦荟的叶片上有小小的软质小刺,叶缘在长日照和有温差的环境下,叶缘就会变成红色,这就是光照过足的现象了。

地栽养护的芦荟基本是不用管理的,保持长日照和直射光,保持温暖干燥的环境,排水沟挖好,加上疏松排水好的沙质土,基本就没有什么养护的问题了。
而在一些常年阴雨天较多的地方,最好就选择盆栽养护了。
芦荟大部分都是亚热带的植物,在偏南地区可以露地栽培,北方就只能盆栽养护,放在户外夏天的时候要适当遮阴,不然叶子也容易晒伤,看到叶片开始变红,就要适当减少光照,搬到遮阴处了。
养护芦荟一定要避免频繁浇水,因为它是一种多肉植物,对水分的需求是比较少的。而且栽种的花盆一定要排水好,土壤就选择疏松透气和排水良好的沙质土,土壤可以添加3等分的河沙,盆底再铺上碎瓦片,这样基本就能避免盆土积水了。
有些朋友将芦荟养在室内,也注意不能养在完全遮阴处,起码要保证光线明亮,而且环境要适当通风,空间不宜过于密闭,浇水的频率更是要减少。
芦荟喜欢常年微干的土壤,经常浇水是养不好芦荟的,而且冬季温度低的时候,还要断水,不然就容易烂根。
平常一定要等盆土干透之后再进行浇水,每次浇水浇透。
养护芦荟盆栽是不用怎么施肥,芦荟对肥料的需求也不高,经常施肥也很容易挂掉的,只需要在春末夏初的时候适当给一点平均肥就足够了。
其他的养护注意事项比较少,芦荟是属于粗养型的植物,不用经常管理,粗放养护反而会长得更好,也不用经常换盆,3~5年换一次盆都没有关系,想要繁殖的时候就等换盆时,将它的侧株连带根系剪下来,侧株移栽到新的盆土中,很容易存活,1周后慢慢见光给水就行了。

有花友看到这么多芦荟,就想着掰一些用来美容护肤,这么多不知道要用多久。芦荟虽然有美容或治疗烧伤晒伤的功效,但是并不是每个人都适合的,一些皮肤敏感的人就不能随便用芦荟,不然就会过敏了。
而另外一些人则将芦荟的叶片当菜来吃,不过大部分还是用于化妆护肤之类的额。
芦荟就是一种常见的多肉植物,在温暖干燥的地方就像野草一样好养,常年温暖的地方,露地栽培也是完全没有问题的。

不过栽种芦荟还是需要一定的环境条件的,至少要有排水良好的沙质土,不能种在粘重的土壤上面,养护最低温度保持在5度以上,可以有短暂的低温,但也不能低于0度。
芦荟的品种是非常多的,像下面这些丛生的品种一般是被叫做是龙爪,也有叫木立芦荟的,长了几年之后,它就会长出木质化的茎,而且还能不断长高。

夏天到来的时候,芦荟就会长出浅红色的茎,慢慢结出红色的花朵,也有一些芦荟是开黄色花的。
芦荟的叶片上有小小的软质小刺,叶缘在长日照和有温差的环境下,叶缘就会变成红色,这就是光照过足的现象了。

地栽养护的芦荟基本是不用管理的,保持长日照和直射光,保持温暖干燥的环境,排水沟挖好,加上疏松排水好的沙质土,基本就没有什么养护的问题了。
而在一些常年阴雨天较多的地方,最好就选择盆栽养护了。
芦荟大部分都是亚热带的植物,在偏南地区可以露地栽培,北方就只能盆栽养护,放在户外夏天的时候要适当遮阴,不然叶子也容易晒伤,看到叶片开始变红,就要适当减少光照,搬到遮阴处了。
养护芦荟一定要避免频繁浇水,因为它是一种多肉植物,对水分的需求是比较少的。而且栽种的花盆一定要排水好,土壤就选择疏松透气和排水良好的沙质土,土壤可以添加3等分的河沙,盆底再铺上碎瓦片,这样基本就能避免盆土积水了。
有些朋友将芦荟养在室内,也注意不能养在完全遮阴处,起码要保证光线明亮,而且环境要适当通风,空间不宜过于密闭,浇水的频率更是要减少。
芦荟喜欢常年微干的土壤,经常浇水是养不好芦荟的,而且冬季温度低的时候,还要断水,不然就容易烂根。
平常一定要等盆土干透之后再进行浇水,每次浇水浇透。
养护芦荟盆栽是不用怎么施肥,芦荟对肥料的需求也不高,经常施肥也很容易挂掉的,只需要在春末夏初的时候适当给一点平均肥就足够了。
其他的养护注意事项比较少,芦荟是属于粗养型的植物,不用经常管理,粗放养护反而会长得更好,也不用经常换盆,3~5年换一次盆都没有关系,想要繁殖的时候就等换盆时,将它的侧株连带根系剪下来,侧株移栽到新的盆土中,很容易存活,1周后慢慢见光给水就行了。
0
0
文章
Dummer. ゛☀
2017年09月23日

Growing a collection of succulents for your indoor garden starts with one you already own.
1. Cut the Heads
Any healthy succulent is a candidate for propagation, especially those that have central, trunk-like stems. If propagating from a rosette-style succulent, you can begin at step 2. Otherwise, use a sharp pair of scissors to snip a leaf-covered section of one of the stems that’s at least 3 inches (7.5 cm) long. This is your cutting. If your plant’s stems are looking bare and you can’t find 3 inches (7.5 cm) of lush growth to work with, instead cut at least 1 inch (2.5 cm) under the best-looking bunch of leaves.
2. Pluck Leaves
Succulents will propagate from individual leaves, too. You can either pluck leaves from your clippings or from the parent plant. Hold the fleshy leaf close to the stem. Twist gently to remove cleanly. Any fat, juicy leaves will fall off with ease. Others you may have to coax off. What’s left on the leaf’s stem is called meristematic tissue, and it looks like a potato eye. This is where small new roots and leaves will start to emerge a few weeks after beginning step 3.
3. Arrange and Water
Place your clippings and leaves, cut ends up, on a dish filled with fast-draining soil and facing indirect sunlight. Leave for about three days or until the ends callus over. Once that happens, use a spray bottle to squirt everything five to six times until the soil is moist but not soaked. Repeat whenever the soil is dry, roughly every four to five days. In about three to four weeks, tiny pink roots will start to sprout from your clippings. Be patient, observe, and keep watering.
4. Tend To The Pups
Six or seven weeks after starting the propagating process, you’ll notice baby pups (i.e. tiny leaves, i.e. the cutest things you’ve ever seen) emerging from the parent leaves. The parents may look shriveled—this is because they are feeding the pups with their own water and nutrients. It’s now time to transfer your cuttings and leaves to containers of their own, at least 4 inches (10 cm) in diameter. Cover the new roots with 0.5 inch (1.3 cm) of soil, sit back, and watch your garden grow.

1. Cut the Heads
Any healthy succulent is a candidate for propagation, especially those that have central, trunk-like stems. If propagating from a rosette-style succulent, you can begin at step 2. Otherwise, use a sharp pair of scissors to snip a leaf-covered section of one of the stems that’s at least 3 inches (7.5 cm) long. This is your cutting. If your plant’s stems are looking bare and you can’t find 3 inches (7.5 cm) of lush growth to work with, instead cut at least 1 inch (2.5 cm) under the best-looking bunch of leaves.

2. Pluck Leaves
Succulents will propagate from individual leaves, too. You can either pluck leaves from your clippings or from the parent plant. Hold the fleshy leaf close to the stem. Twist gently to remove cleanly. Any fat, juicy leaves will fall off with ease. Others you may have to coax off. What’s left on the leaf’s stem is called meristematic tissue, and it looks like a potato eye. This is where small new roots and leaves will start to emerge a few weeks after beginning step 3.

3. Arrange and Water
Place your clippings and leaves, cut ends up, on a dish filled with fast-draining soil and facing indirect sunlight. Leave for about three days or until the ends callus over. Once that happens, use a spray bottle to squirt everything five to six times until the soil is moist but not soaked. Repeat whenever the soil is dry, roughly every four to five days. In about three to four weeks, tiny pink roots will start to sprout from your clippings. Be patient, observe, and keep watering.

4. Tend To The Pups
Six or seven weeks after starting the propagating process, you’ll notice baby pups (i.e. tiny leaves, i.e. the cutest things you’ve ever seen) emerging from the parent leaves. The parents may look shriveled—this is because they are feeding the pups with their own water and nutrients. It’s now time to transfer your cuttings and leaves to containers of their own, at least 4 inches (10 cm) in diameter. Cover the new roots with 0.5 inch (1.3 cm) of soil, sit back, and watch your garden grow.

0
0
文章
Dummer. ゛☀
2017年09月22日

Disocactus flagelliformis commonly known as Rat Tail Cactus, is a cactus with a thick hanging stems, each with 8 – 13 ribs, up to 3.3 feet (1 m) long and up to 0.75 inches (1.9 cm) in diameter. The needle groups are tiny, almost fuzzy-looking and have 15 – 20 fine reddish-yellow spines each. Flowers are a beautiful magenta color, curved, up to 3 inches (7.5 cm) long and up to 1.5 inches (3.8 cm) in diameter.
Disocactus flagelliformis is epiphytic in the wild (it grows in trees). It is perfectly adapted to hanging baskets. It is the most cultivated species in the genus. Due to its ease of cultivation and attractive floral displays, Disocactus flagelliformis is often grown as an ornamental pot plant.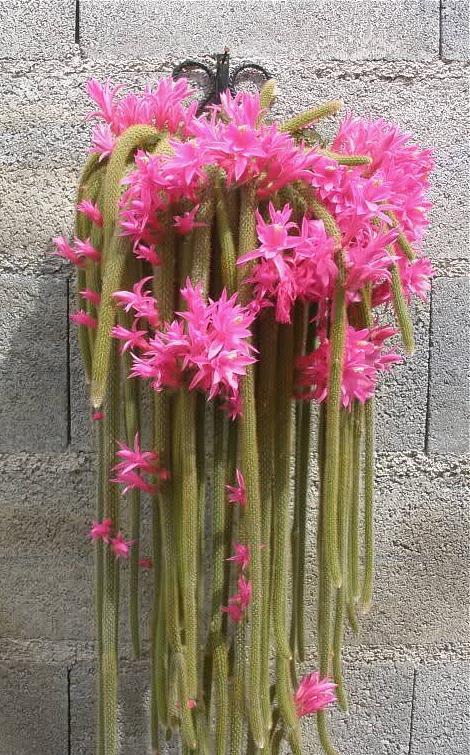
Growing Conditions
Light: Disocactus flagelliformis requires full sunlight. Hang the pot or basket in the sunniest window available. If possible, hang the plant outdoors in summer to give it fresh air and extra light.
Soil: A good draining soil mix that is gritty is advisable to use, which is sold and used for cacti and succulents.
Temperature: During the active growth period normal room temperatures are suitable. In winter these plants should be rested at 45 to 50 °F (7 to 10 °C), if possible, but they tolerate temperatures up to 59 to 61 °F (15 to 16 °C).
Watering: During the active growth period water plentifully, keeping the potting mixture thoroughly moist, but do not let plants stand in water. During the winter rest period just keep the mixture from drying out.
Fertilizing: Use half-strength liquid fertilizer sprayed on to the stems of the plant once every two weeks during the active growth period only.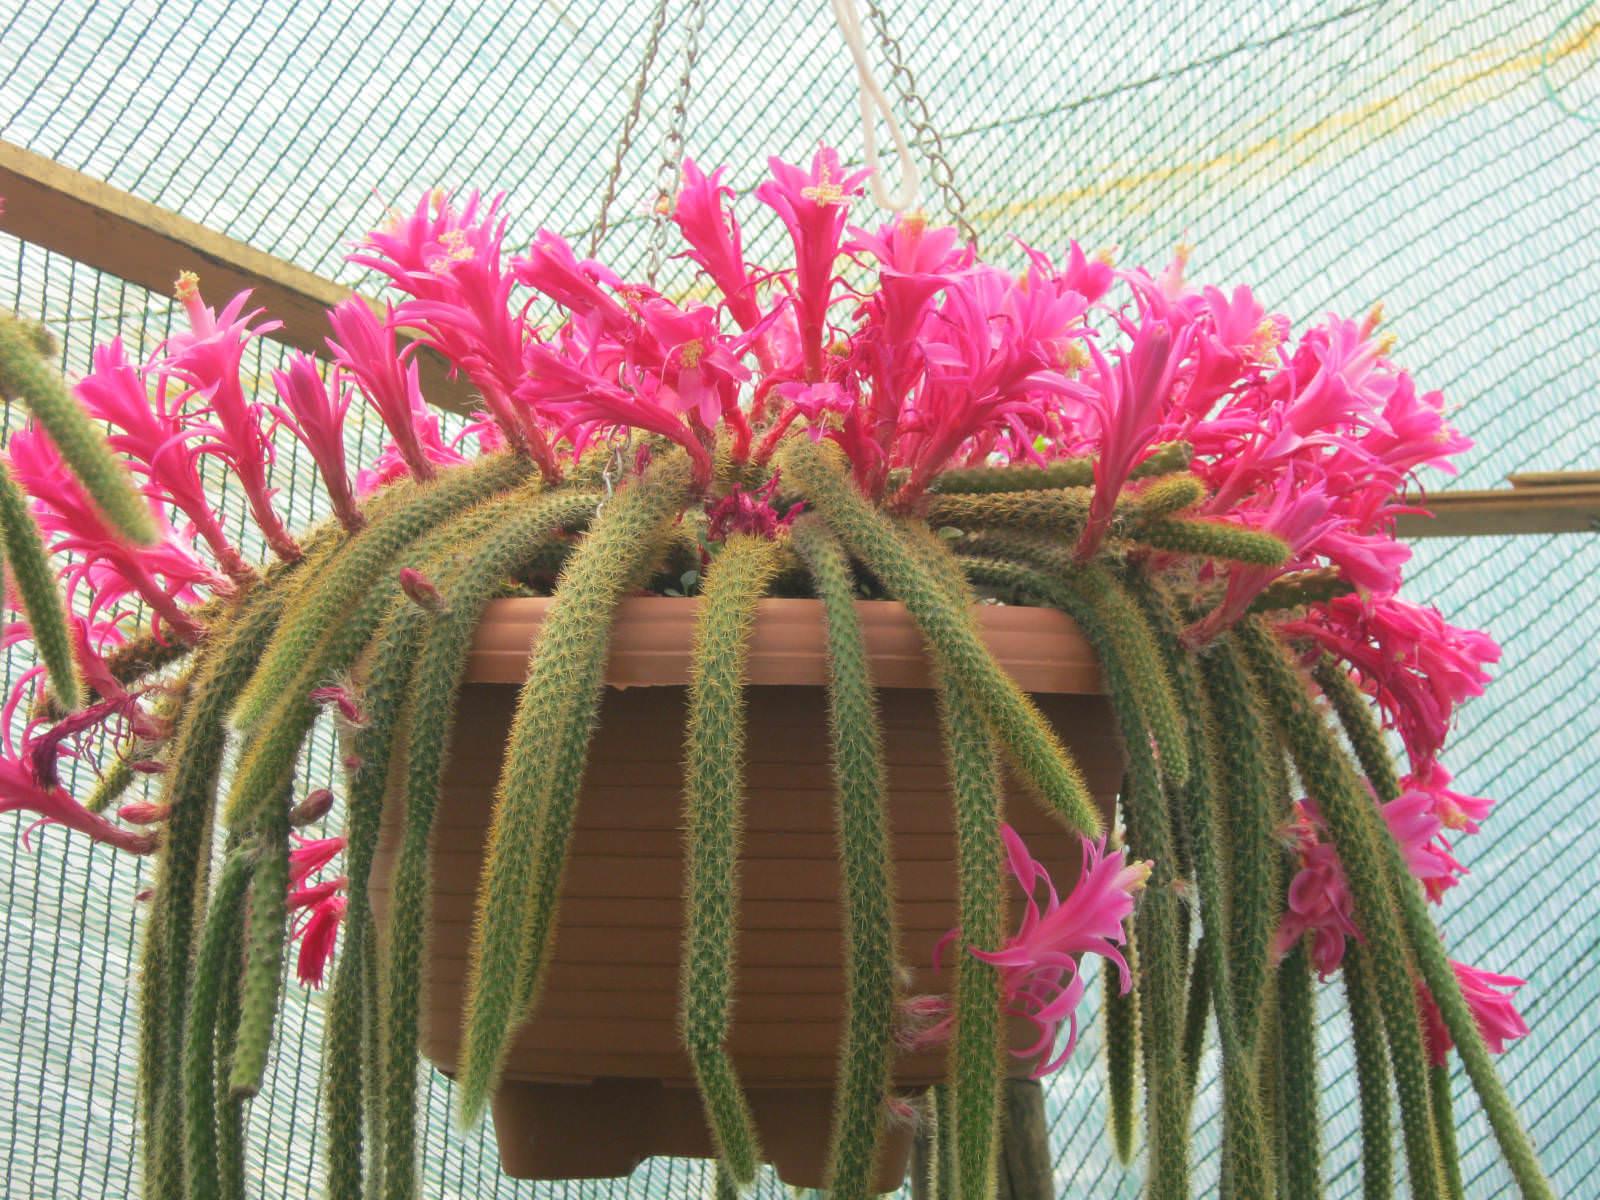
General Care
Disocactus flagelliformis is easy to cultivate and relatively fast growing cactus. Their trailing stems make these cacti ideal plants for a hanging basket. Line the basket with sphagnum moss before filling it with potting mixture and make sure it is hung where the prickly stems will not pose a treat to the unwary. If Disocactus flagelliformis is grown in a pot, hang the pot up or attache it to a high shelf. If it is left free-standing, it can soon be overbalanced by the lengthening stems.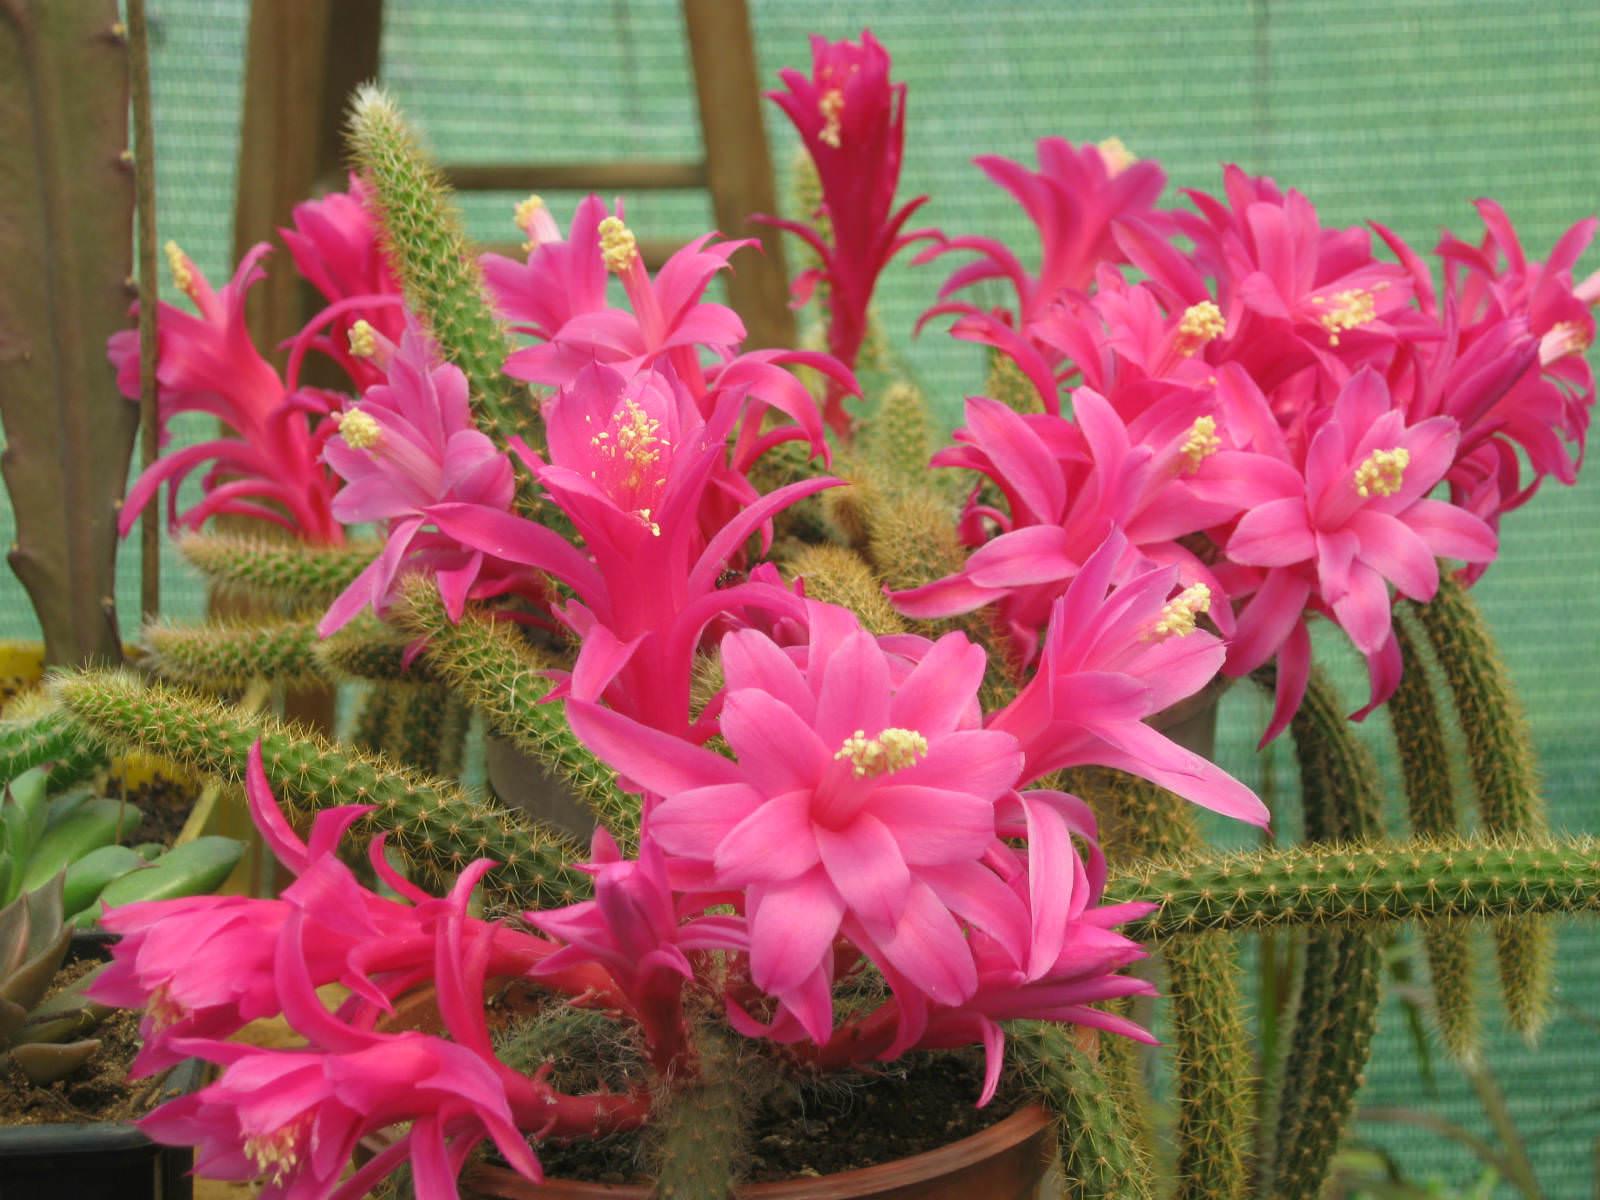
Propagation
To propagate, use either 6 inches (15 cm) tip or 6 inches (15 cm) segment of any part of the stem. Allow each cutting or segment to dry for three days; then insert it about 0.8 inch (2 cm) deep in a small pan or pot of the recommended potting mixture for mature plants; be sure that any stem segment is planted with the bottom end down. If this shallowly inserted cutting tends to fall over, it can be supported by being gently tied to a small wooden stick. Cultivation needs of cuttings are the same as those for mature Disocactus flagelliformis and rooting will occur within a few weeks.

Disocactus flagelliformis is epiphytic in the wild (it grows in trees). It is perfectly adapted to hanging baskets. It is the most cultivated species in the genus. Due to its ease of cultivation and attractive floral displays, Disocactus flagelliformis is often grown as an ornamental pot plant.

Growing Conditions
Light: Disocactus flagelliformis requires full sunlight. Hang the pot or basket in the sunniest window available. If possible, hang the plant outdoors in summer to give it fresh air and extra light.
Soil: A good draining soil mix that is gritty is advisable to use, which is sold and used for cacti and succulents.
Temperature: During the active growth period normal room temperatures are suitable. In winter these plants should be rested at 45 to 50 °F (7 to 10 °C), if possible, but they tolerate temperatures up to 59 to 61 °F (15 to 16 °C).
Watering: During the active growth period water plentifully, keeping the potting mixture thoroughly moist, but do not let plants stand in water. During the winter rest period just keep the mixture from drying out.
Fertilizing: Use half-strength liquid fertilizer sprayed on to the stems of the plant once every two weeks during the active growth period only.

General Care
Disocactus flagelliformis is easy to cultivate and relatively fast growing cactus. Their trailing stems make these cacti ideal plants for a hanging basket. Line the basket with sphagnum moss before filling it with potting mixture and make sure it is hung where the prickly stems will not pose a treat to the unwary. If Disocactus flagelliformis is grown in a pot, hang the pot up or attache it to a high shelf. If it is left free-standing, it can soon be overbalanced by the lengthening stems.

Propagation
To propagate, use either 6 inches (15 cm) tip or 6 inches (15 cm) segment of any part of the stem. Allow each cutting or segment to dry for three days; then insert it about 0.8 inch (2 cm) deep in a small pan or pot of the recommended potting mixture for mature plants; be sure that any stem segment is planted with the bottom end down. If this shallowly inserted cutting tends to fall over, it can be supported by being gently tied to a small wooden stick. Cultivation needs of cuttings are the same as those for mature Disocactus flagelliformis and rooting will occur within a few weeks.
0
0
文章
Dummer. ゛☀
2017年09月22日

The succulent Jade Plant (Crassula ovata) grows wild in its native southern Africa, where it can reach 8 to 9 feet tall and spread about as wide. The fleshy oval leaves measure about 1 inch long at maturity. Mature stems are barklike, with softer tip growth. The plant responds to leaf pruning or removal by quickly sending out new, small leaves. Use this natural trait to your advantage with jade bonsai to keep the leaves in scale and to help keep a mature jade from becoming top-heavy.
1. Prune unwieldy branches with bonsai pruners or small, sharp-pointed scissors to achieve a tree framework. Do this in stages, if necessary, allowing the plant to fill in with new growth between prunings so you can better envision the shape of the mature bonsai. Remove large leaves to open the plant and allow light to reach inner stems where you want new, smaller leaves to grow. Pruning cuts should be flush with the main branch so they can form a smooth callus. Both stubs and scooped-out cuts create conditions for stem rot infections.
2. Trim jade once or twice a week to control the size and density of the leaf buds. Pinch off oversized leaves, or pinch off leaf buds growing in unwanted places, such as on the lower trunk of the plant. Nip the tips of leggy branches to encourage clusters of new leaf buds to develop. Long tweezers make it easy to reach within the plant to remove pruned bits.
3. Avoid using wound sealant. Instead, let pruned areas air dry and form a callus. Pathogens trapped under sealant can cause bacterial or fungal rot. Clean the pruning cutter blades with rubbing alcohol after each cut to prevent the spread of disease, especially if you use the same tools with several plants.
4. Train longer branches into interesting configurations by gently coiling copper wire around each branch you want to manipulate. The coil should be loose. Carefully bend the branch once or twice a week in small increments, nudging it into the desired shape. Jade responds quickly to wiring and can maintain its new form in as little as three weeks. If the wire leaves small imprints where it contacted the branch, the marks typically disappear as water replenishes the branch after the wire is removed.
Things You Will Need
Sharp-pointed small scissors or bonsai pruners
Rubbing alcohol
Long tweezers
Copper wire, optional.
Tip
Don’t water jade immediately before wiring. After watering, jade cells fill with water, making the stems rigid and more likely to break during the wiring process. Resume normal watering after the wire is in place.
A similar plant sometimes sold as a jade, Portulacaria afra has naturally smaller, 1/2-inch leaves. It is useful for creating a smaller scale bonsai with minimum pruning. The space between leaf nodes is also shorter, so Portulacaria afra bonsai appears to be more compact than Crassula ovata.

1. Prune unwieldy branches with bonsai pruners or small, sharp-pointed scissors to achieve a tree framework. Do this in stages, if necessary, allowing the plant to fill in with new growth between prunings so you can better envision the shape of the mature bonsai. Remove large leaves to open the plant and allow light to reach inner stems where you want new, smaller leaves to grow. Pruning cuts should be flush with the main branch so they can form a smooth callus. Both stubs and scooped-out cuts create conditions for stem rot infections.

2. Trim jade once or twice a week to control the size and density of the leaf buds. Pinch off oversized leaves, or pinch off leaf buds growing in unwanted places, such as on the lower trunk of the plant. Nip the tips of leggy branches to encourage clusters of new leaf buds to develop. Long tweezers make it easy to reach within the plant to remove pruned bits.

3. Avoid using wound sealant. Instead, let pruned areas air dry and form a callus. Pathogens trapped under sealant can cause bacterial or fungal rot. Clean the pruning cutter blades with rubbing alcohol after each cut to prevent the spread of disease, especially if you use the same tools with several plants.

4. Train longer branches into interesting configurations by gently coiling copper wire around each branch you want to manipulate. The coil should be loose. Carefully bend the branch once or twice a week in small increments, nudging it into the desired shape. Jade responds quickly to wiring and can maintain its new form in as little as three weeks. If the wire leaves small imprints where it contacted the branch, the marks typically disappear as water replenishes the branch after the wire is removed.

Things You Will Need
Sharp-pointed small scissors or bonsai pruners
Rubbing alcohol
Long tweezers
Copper wire, optional.
Tip
Don’t water jade immediately before wiring. After watering, jade cells fill with water, making the stems rigid and more likely to break during the wiring process. Resume normal watering after the wire is in place.

A similar plant sometimes sold as a jade, Portulacaria afra has naturally smaller, 1/2-inch leaves. It is useful for creating a smaller scale bonsai with minimum pruning. The space between leaf nodes is also shorter, so Portulacaria afra bonsai appears to be more compact than Crassula ovata.
1
2
文章
Miss Chen
2017年09月22日

Vamos a ver diez ideas generales sobre la división de las plantas perennes. Hay que tener en cuenta, de todos modos, que cada tipo de planta va a exigir un tiempo y una técnica específica según sus características particulares.
1.- Divide cuando la planta tiene buen aspecto. No esperes a que la planta muestre señales inconfundibles, falta de crecimiento y desarrollo en el centro o los bordes. El primer año que veas que la planta presenta un aspecto maduro y bien desarrollado será el momento de realizar la división.

2.- Comienza por la línea de goteo. A la hora de comenzar a excavar las raíces de una planta uno no sabe bien por donde comenzar. Tomaremos como base la zona más amplia de la parte aérea de la planta y seguiremos dicho contorno en el suelo. Esa es la línea de goteo. Las raíces seguramente se extiendan más y tendremos que cortar alguna.

3.- Divide en tiempo fresco. Las plantas perennes pueden dividirse en cualquier época del año siempre que se tomen las debidas precauciones. Sin embargo para una mejor recuperación de las plantas es conveniente hacer la división cuando la temperatura de la tierra es superior a la del aire, es decir en primavera y otoño.
4.- Mantén las raíces frescas y húmedas. Durante el tiempo que las raíces divididas permanezcan fuera de la tierra debemos mantenerlas con una humedad del 50% y una temperatura que no sobrepase los 10ºC. Mantenerlas en un cubo envueltas con papel de periódico húmedo y en un lugar sombreado será suficiente. Caso de que se sequen las sumergiremos una hora en agua antes de plantarlas.

5.- Repón el suelo extraído con materia orgánica. Al hacer la división de la mata vamos a crear un vacío que es recomendable rellenar con materia orgánica, ya sea compost, estiércol, humus o cualquier otra. Así cuando volvamos a cultivar algo en el mismo lugar se encontrará un suelo rico.

6.- Utiliza secciones pequeñas. Hecha la división es conveniente usar porciones que no superen el 20-25 % del tamaño completo de la planta. Las porciones pequeñas suelen crecer con mayor vigor y además hemos de tener en cuenta que una planta perenne dividida puede doblar o triplicar su tamaño en un año.

7.- Extrema el cuidado cuando la planta está en flor. Aunque no es recomendable realizar la división cuando la planta está en flor se puede llevar a cabo si no hay otro momento. Entonces lo que haremos es extremar las precauciones en cuanto a temperatura y humedad para que la planta sufra lo menos posible.

8.- Desecha las raíces dañadas. Tras la extracción de las raíces de la planta que queremos dividir hemos de proceder a una intensa inspección para desechar las raíces enfermas y dañadas.

9.- Distribuye las divisiones en el suelo. Hay una regla que nos puede guiar al respecto, la planta será tan grande la próxima temporada como amplias son las divisiones realizadas. Por tanto dejaremos suficiente espacio entre ellas y sobre todo evitaremos que se monten unas sobre otras.

10.- Ten en cuenta el tipo de raíces. Generalmente los sistemas radiculares de las plantas perennes se dividen en cinco grandes grupos. Aunque la técnica será la misma habrá variaciones según el tipo de enraizamiento y sobre todo en el corte a realizar para separar las raíces.
1.- Divide cuando la planta tiene buen aspecto. No esperes a que la planta muestre señales inconfundibles, falta de crecimiento y desarrollo en el centro o los bordes. El primer año que veas que la planta presenta un aspecto maduro y bien desarrollado será el momento de realizar la división.

2.- Comienza por la línea de goteo. A la hora de comenzar a excavar las raíces de una planta uno no sabe bien por donde comenzar. Tomaremos como base la zona más amplia de la parte aérea de la planta y seguiremos dicho contorno en el suelo. Esa es la línea de goteo. Las raíces seguramente se extiendan más y tendremos que cortar alguna.

3.- Divide en tiempo fresco. Las plantas perennes pueden dividirse en cualquier época del año siempre que se tomen las debidas precauciones. Sin embargo para una mejor recuperación de las plantas es conveniente hacer la división cuando la temperatura de la tierra es superior a la del aire, es decir en primavera y otoño.
4.- Mantén las raíces frescas y húmedas. Durante el tiempo que las raíces divididas permanezcan fuera de la tierra debemos mantenerlas con una humedad del 50% y una temperatura que no sobrepase los 10ºC. Mantenerlas en un cubo envueltas con papel de periódico húmedo y en un lugar sombreado será suficiente. Caso de que se sequen las sumergiremos una hora en agua antes de plantarlas.

5.- Repón el suelo extraído con materia orgánica. Al hacer la división de la mata vamos a crear un vacío que es recomendable rellenar con materia orgánica, ya sea compost, estiércol, humus o cualquier otra. Así cuando volvamos a cultivar algo en el mismo lugar se encontrará un suelo rico.

6.- Utiliza secciones pequeñas. Hecha la división es conveniente usar porciones que no superen el 20-25 % del tamaño completo de la planta. Las porciones pequeñas suelen crecer con mayor vigor y además hemos de tener en cuenta que una planta perenne dividida puede doblar o triplicar su tamaño en un año.

7.- Extrema el cuidado cuando la planta está en flor. Aunque no es recomendable realizar la división cuando la planta está en flor se puede llevar a cabo si no hay otro momento. Entonces lo que haremos es extremar las precauciones en cuanto a temperatura y humedad para que la planta sufra lo menos posible.

8.- Desecha las raíces dañadas. Tras la extracción de las raíces de la planta que queremos dividir hemos de proceder a una intensa inspección para desechar las raíces enfermas y dañadas.

9.- Distribuye las divisiones en el suelo. Hay una regla que nos puede guiar al respecto, la planta será tan grande la próxima temporada como amplias son las divisiones realizadas. Por tanto dejaremos suficiente espacio entre ellas y sobre todo evitaremos que se monten unas sobre otras.

10.- Ten en cuenta el tipo de raíces. Generalmente los sistemas radiculares de las plantas perennes se dividen en cinco grandes grupos. Aunque la técnica será la misma habrá variaciones según el tipo de enraizamiento y sobre todo en el corte a realizar para separar las raíces.
0
0
文章
贾宗伟
2017年09月22日

主要的三大改变:
1.叶子的退化(lossofleaves)
2.可储存水份的多肉组织(water-storingsucculenttissues)
3.刺的形成(formationofspines)
次要的改变:
1.延迟的"树皮组织"生成(delayedbarkformation)
2.松散的外皮细胞(looseningofthecortexcells)
3.具弹性的脊(flexibleribs)
4.皮质维管束(corticalbundles)
1.叶子的退化(lossofleaves)
虽然大面积的叶表面可以大量的行光合作用来制造养分,但也同样地易使水份蒸散掉,所以这对生长在水份相对少的区域的仙人掌祖先而言是相当不利的。所以经数百万年的演化,仙人掌才演化成现今只有一些小叶子(如某些Opuntia属)甚至完全没叶子(绝大部份的仙人掌)。
nirwa推想,由此可见仙人掌祖先应该不是一开始就生长在极端的环境的,在Thecactusodyssey第一章的最後一个部份(GeologicalHistoryofsouthamericasettingthestageforcactusevolution)有提到,也是持相同的看法。
作者说,为何仙人掌大都产於南美洲?而北美洲的品种比较少?这可能是仙人掌祖先最早是住在南美洲的丛林,经数百万年的传播与演化才变成目前我们所看到的分布状态。不过,这也跟最早的南美洲和北美洲是同一块大陆尔後再漂移(drifting)开来以及和後来一些山脉的形成或地形地貌的改变也有很大的关系。
2.可储存水份的多肉组织(water-storingsucculenttissues)
这个是很容易了解的。有些地区一年只下一次或两次雨,在秘鲁(Peru)的南部以及智利(Chile)的北部的荒漠地区(bone-drydeserts)甚至每5~10年才下一场雨。它们必须在这些宝贵被土壤吸收或蒸散掉前,尽可能吸水(这也是部份仙人掌具大面积却很浅层的根系的原因)并靠这些水熬到下一次的降雨。
仙人掌祖先就慢慢演化出"肥肥的细胞"以及很多"肥肥的细胞"来因应。这些细胞大都聚集在茎的外层(即cortex;皮层)以及最里面的组织(即pith;髓部)。所以具更肥厚的多肉组织是仙人掌最具特色的特徵之一。
在一般印象中,"在沙漠中快渴死的人可以找到仙人掌就可活命"是这样没错,可是可能没办法把仙人掌剖开然後就有水泯泯而出事实应该不是这样,仙人掌的茎是有储存水份没错,但那个快渴死的人可能要用"嚼"的或"打成汁"才可从仙人掌补充水份,为什麽?因为水份都储存在细胞中而非组织间隙中…而且味道可能不会很好,看过"CAM-仙人掌与多肉植物的光合作用"了吗?
3.刺的形成(formationofspines)
刺的形成除了可减少水份的蒸发外,也可保护植株来避免其他动物的啃食。腋窝的芽苞或叶子因此可受到保护,不过有些沙漠地区的动物也演化出对付仙人掌剌的方法。有些鸟类也利用仙人掌,在柱形仙人掌(如弁庆柱)上打洞,就在上面筑巢养育下一代,鸟类在仙人掌根部会排遗,也替仙人掌加一些肥料,也算是一种共生现象。
1.叶子的退化(lossofleaves)
2.可储存水份的多肉组织(water-storingsucculenttissues)
3.刺的形成(formationofspines)
次要的改变:
1.延迟的"树皮组织"生成(delayedbarkformation)
2.松散的外皮细胞(looseningofthecortexcells)
3.具弹性的脊(flexibleribs)
4.皮质维管束(corticalbundles)
1.叶子的退化(lossofleaves)
虽然大面积的叶表面可以大量的行光合作用来制造养分,但也同样地易使水份蒸散掉,所以这对生长在水份相对少的区域的仙人掌祖先而言是相当不利的。所以经数百万年的演化,仙人掌才演化成现今只有一些小叶子(如某些Opuntia属)甚至完全没叶子(绝大部份的仙人掌)。
nirwa推想,由此可见仙人掌祖先应该不是一开始就生长在极端的环境的,在Thecactusodyssey第一章的最後一个部份(GeologicalHistoryofsouthamericasettingthestageforcactusevolution)有提到,也是持相同的看法。
作者说,为何仙人掌大都产於南美洲?而北美洲的品种比较少?这可能是仙人掌祖先最早是住在南美洲的丛林,经数百万年的传播与演化才变成目前我们所看到的分布状态。不过,这也跟最早的南美洲和北美洲是同一块大陆尔後再漂移(drifting)开来以及和後来一些山脉的形成或地形地貌的改变也有很大的关系。
2.可储存水份的多肉组织(water-storingsucculenttissues)
这个是很容易了解的。有些地区一年只下一次或两次雨,在秘鲁(Peru)的南部以及智利(Chile)的北部的荒漠地区(bone-drydeserts)甚至每5~10年才下一场雨。它们必须在这些宝贵被土壤吸收或蒸散掉前,尽可能吸水(这也是部份仙人掌具大面积却很浅层的根系的原因)并靠这些水熬到下一次的降雨。
仙人掌祖先就慢慢演化出"肥肥的细胞"以及很多"肥肥的细胞"来因应。这些细胞大都聚集在茎的外层(即cortex;皮层)以及最里面的组织(即pith;髓部)。所以具更肥厚的多肉组织是仙人掌最具特色的特徵之一。
在一般印象中,"在沙漠中快渴死的人可以找到仙人掌就可活命"是这样没错,可是可能没办法把仙人掌剖开然後就有水泯泯而出事实应该不是这样,仙人掌的茎是有储存水份没错,但那个快渴死的人可能要用"嚼"的或"打成汁"才可从仙人掌补充水份,为什麽?因为水份都储存在细胞中而非组织间隙中…而且味道可能不会很好,看过"CAM-仙人掌与多肉植物的光合作用"了吗?
3.刺的形成(formationofspines)
刺的形成除了可减少水份的蒸发外,也可保护植株来避免其他动物的啃食。腋窝的芽苞或叶子因此可受到保护,不过有些沙漠地区的动物也演化出对付仙人掌剌的方法。有些鸟类也利用仙人掌,在柱形仙人掌(如弁庆柱)上打洞,就在上面筑巢养育下一代,鸟类在仙人掌根部会排遗,也替仙人掌加一些肥料,也算是一种共生现象。
0
0
文章
玲儿
2017年09月22日

スギ(杉)の基本情報
学名:Cryptomeria japonica
和名:スギ
科名 / 属名:ヒノキ科 / スギ属
特徴
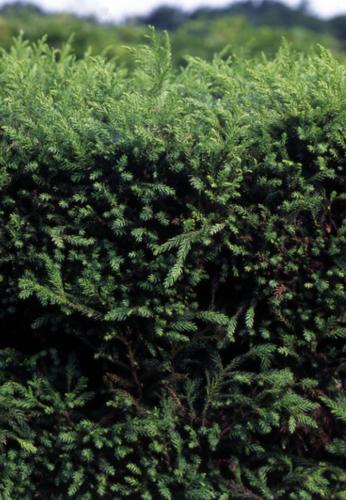
スギは1属1種の常緑高木で、日本では青森県南西部から鹿児島県屋久島に広く分布し、中国南部にも分布が見られます(中国南部に分布するものを別種とする見解もあります)。日本原産の樹木としては最も大きく、樹高50m、幹の直径2m、樹齢は2000年を超えるものまであり、その崇高な姿は各地で信仰の対象となる巨木として大切にされています。
また、まっすぐに伸びるスギは材木としても優れており、古くから日本人の生活や文化と深いかかわりがある樹木です。庭では主幹を止めて側枝を数本育てる台杉仕立てや段づくり仕立てのほか、生け垣としても植栽されています。

なお、これまでの分類体系ではスギ属はスギ科でしたが、現在のDNA解析に基づく分類体系ではスギ科はヒノキ科に統合されたため、スギ属はヒノキ科となっています。
種類(原種、園芸品種)
スギ
Cryptomeria japonica
生育期の葉は緑色で冬の寒さにより褐色を帯びる。自然に円錐形の整った樹形になるが、寿命が長いので年数とともに円錐形の先が丸みを帯び樹形が変わる。3月から4月に飛散する花粉は花粉症の原因物質の一つとなっている。
セッカンスギ
Cryptomeria japonica ‘Sekkan-sugi’
樹高6mほどの円錐形になる。新梢が黄白色で株全体が乳白色に覆われるためたいへん美しい。夏には黄緑色が強くなり、冬は褐色を帯びるが枝先に薄い黄色が残る。

スギ‘グロボサ・ナナ’
Cryptomeria japonica ‘Globosa Nana’
半球形の樹形になり、やがて各枝の先端がまた半球形となり、もこもことした独特の樹形をつくり3mほどの樹高になる。新梢は黄緑色でやがて緑色になり、冬は寒さに当たり褐色を帯びる。
学名:Cryptomeria japonica
和名:スギ
科名 / 属名:ヒノキ科 / スギ属
特徴
スギは1属1種の常緑高木で、日本では青森県南西部から鹿児島県屋久島に広く分布し、中国南部にも分布が見られます(中国南部に分布するものを別種とする見解もあります)。日本原産の樹木としては最も大きく、樹高50m、幹の直径2m、樹齢は2000年を超えるものまであり、その崇高な姿は各地で信仰の対象となる巨木として大切にされています。
また、まっすぐに伸びるスギは材木としても優れており、古くから日本人の生活や文化と深いかかわりがある樹木です。庭では主幹を止めて側枝を数本育てる台杉仕立てや段づくり仕立てのほか、生け垣としても植栽されています。

なお、これまでの分類体系ではスギ属はスギ科でしたが、現在のDNA解析に基づく分類体系ではスギ科はヒノキ科に統合されたため、スギ属はヒノキ科となっています。
種類(原種、園芸品種)
スギ
Cryptomeria japonica
生育期の葉は緑色で冬の寒さにより褐色を帯びる。自然に円錐形の整った樹形になるが、寿命が長いので年数とともに円錐形の先が丸みを帯び樹形が変わる。3月から4月に飛散する花粉は花粉症の原因物質の一つとなっている。

セッカンスギ
Cryptomeria japonica ‘Sekkan-sugi’
樹高6mほどの円錐形になる。新梢が黄白色で株全体が乳白色に覆われるためたいへん美しい。夏には黄緑色が強くなり、冬は褐色を帯びるが枝先に薄い黄色が残る。

スギ‘グロボサ・ナナ’
Cryptomeria japonica ‘Globosa Nana’
半球形の樹形になり、やがて各枝の先端がまた半球形となり、もこもことした独特の樹形をつくり3mほどの樹高になる。新梢は黄緑色でやがて緑色になり、冬は寒さに当たり褐色を帯びる。
0
0
文章
Miss Chen
2017年09月21日

La clusia es un arbusto o árbol pequeño que puede llegar a los 6 metros de altura si no se poda. Aunque lo habitual es que alcance entre 1 y 3 metros de altura. Su follaje es muy ornamental, con hojas rígidas y brillantes en forma de gotas. Tiene una característica interesante: es capaz de absorber el dióxido de carbono por la noche, por lo que la fotosíntesis es más eficiente y se encuentra más protegida contra la deshidratación. Las flores son pequeñas y de color blanco, es una especie dioica, es decir, tiene plantas masculinas y femeninas. La floración se produce en primavera y verano. Sus pequeños frutos atraen a las aves.
Al ser originaria de la América tropical, sobre todo de Brasil, es una planta que precisa temperaturas cálidas y mucha luz. Es una planta perenne que puede florecer durante todo el año, aunque como hemos dicho lo hace sobre todo en primavera y verano. Lógicamente esa floración durante todo el año dependerá del clima donde la cultivemos.

Tiene un amplio uso en jardinería para coberturas y setos, especialmente en la costa, donde otras plantas tienen dificultades para adaptarse. También se puede plantar en macetas en terrazas o interior. También se suele cultivar de forma individual o formando pequeños agrupamientos. Necesita un suelo rico y bien drenado así como una buena exposición al sol.

El riego debe ser regular, al menos una vez a la semana. En primavera y verano podemos aumentar la periodicidad a dos veces por semana pero teniendo en cuenta las características del suelo pues necesita un suelo húmedo pero no encharcado. Cada seis meses es aconsejable abonar la tierra.
Al ser originaria de la América tropical, sobre todo de Brasil, es una planta que precisa temperaturas cálidas y mucha luz. Es una planta perenne que puede florecer durante todo el año, aunque como hemos dicho lo hace sobre todo en primavera y verano. Lógicamente esa floración durante todo el año dependerá del clima donde la cultivemos.

Tiene un amplio uso en jardinería para coberturas y setos, especialmente en la costa, donde otras plantas tienen dificultades para adaptarse. También se puede plantar en macetas en terrazas o interior. También se suele cultivar de forma individual o formando pequeños agrupamientos. Necesita un suelo rico y bien drenado así como una buena exposición al sol.

El riego debe ser regular, al menos una vez a la semana. En primavera y verano podemos aumentar la periodicidad a dos veces por semana pero teniendo en cuenta las características del suelo pues necesita un suelo húmedo pero no encharcado. Cada seis meses es aconsejable abonar la tierra.
0
0
文章
权问薇
2017年09月20日


怎么施肥
1、#迷迭香 不是喜肥的植物,不过还是需要相应的肥料的。迷迭香是不需要太多肥料的。施肥的时候要注意施薄一点的肥料。
2、给迷迭香施肥之后不能立刻离开,要用土把施过肥的地方盖好才行,
3、家养迷迭香施要注意每次收获之后都要立即追肥一次,肥的成分主要是氮磷为好,所施的肥料最好选择见效快的肥料。这样才能事迷迭香二次生长,第二次在花园中收获的才能更好。

肥料选择
选择富含磷和钾的养花肥料更为合适,肥料要根据植株成长的特点挑选,最好溶解快见效快的。肥料不能有毒,不能影响土壤。这样的肥料才能给它们使用。迷迭香对干旱的环境适应还挺强的,幼苗时要注意施肥之前要把土壤里的草铲除干净期,根据情况确定施肥的多少。

注意事项
对这种植物的养护还要稍微有耐心一点,值得注意的是,施肥过量大量小都容易引起问题,相信如果有足够细心的小伙伴,就不会有用不好的肥。既然是这种情况,那大家就快快去种迷迭香吧。

1
1


