文章
A🎌王木木💮
2019年11月18日

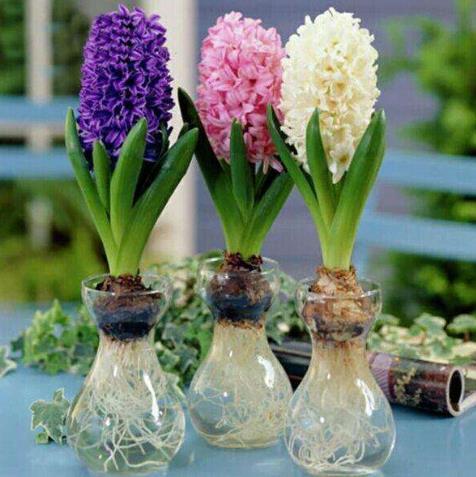
After entering the winter,the outside world is getting more and more depressed.If you’re a florist,you can raise some flowers and plants at home,let the space that belongs to you be full of spring.What flowers and plants are suitable for raising in winter?Today we introduce hyacinth.
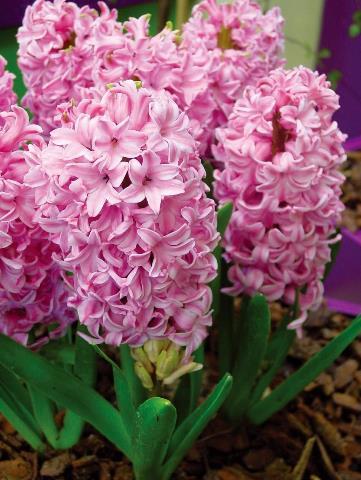
Other common names:hyacinth 'Woodstock'
Family:Asparagaceae
Genus:Hyacinthus are bulbous perennial with glossy, broadly strap-shaped leaves and fragrant, bell-shaped flowers with recurved petals, borne in loose or dense racemes in spring
Details:'Woodstock' is a perennial bulb, growing to 30cm tall, with rich green, glossy, upright foliage and spikes of plum-purple, scented flowers on black-purple stems in mid-spring
How to grow
Cultivation Plant 10cm deep in autumn in any moderately fertile, humus-rich, well-drained soil. Protect container-grown bulbs from excessive winter wet. See hyacinth cultivation
Propagation Propagate by removing offsets when dormant in summer
Suggested planting locations and garden types Flower borders and beds City & Courtyard Gardens Cottage & Informal Garden Mediterranean Climate Plants Patio & Container Plants

How to care
Pruning No pruning required
Pests Can be damaged by slugs
Diseases Generally disease free

Other common names:hyacinth 'Woodstock'
Family:Asparagaceae
Genus:Hyacinthus are bulbous perennial with glossy, broadly strap-shaped leaves and fragrant, bell-shaped flowers with recurved petals, borne in loose or dense racemes in spring
Details:'Woodstock' is a perennial bulb, growing to 30cm tall, with rich green, glossy, upright foliage and spikes of plum-purple, scented flowers on black-purple stems in mid-spring

How to grow
Cultivation Plant 10cm deep in autumn in any moderately fertile, humus-rich, well-drained soil. Protect container-grown bulbs from excessive winter wet. See hyacinth cultivation
Propagation Propagate by removing offsets when dormant in summer
Suggested planting locations and garden types Flower borders and beds City & Courtyard Gardens Cottage & Informal Garden Mediterranean Climate Plants Patio & Container Plants

How to care
Pruning No pruning required
Pests Can be damaged by slugs
Diseases Generally disease free
0
0
文章
绿手指客服
2019年10月28日

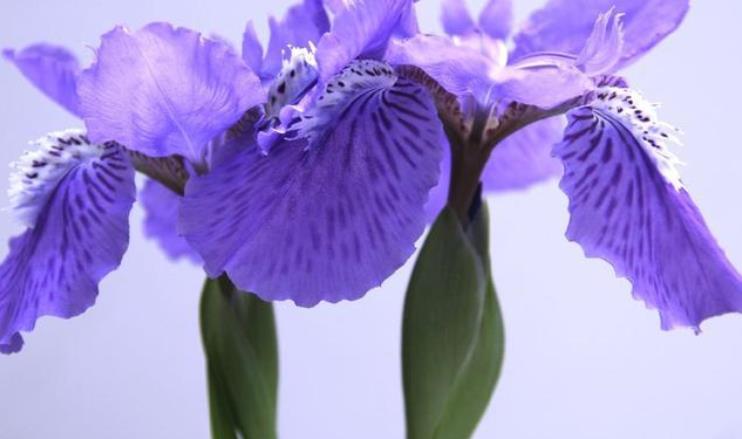
Just when you think winter is never going end, the cheery blue and yellow flowers of Iris reticulata ‘Harmony’ burst into bloom. This flowers from this easy-care bulb may be short, but they're big on bold color, especially when planted in large groupings in a rock or woodland garden. Like other bulbs, Iris reticulata ‘Harmony’ requires full sun (at least six hours a day) and well-drained soil.

Plant the spring-blooming bulbs in autumn, placing them 4 inches deep in the soil. Over time, Iris reticulata ‘Harmony’ will spread, slowly carpeting your garden with color. After the flowers fade, leave the foliage alone until it dries and disappears on its own.
How to grow
Cultivation Grow in well-drained, fertile, neutral to slightly acid loam in full sun
Propagation Propagate by division of rhizomes from midsummer to early autumn
Suggested planting locations and garden types Flower borders and beds Wall-side Borders City & Courtyard Gardens Coastal Cottage & Informal Garden
How to care
Pruning Remove any dying foliage in autumn, old flower stems can be cut down after flowering
Pests May be attacked by slugs, snails and thrips
Diseases May be subject to iris rhizome rot, a leaf spot and a virus

Plant the spring-blooming bulbs in autumn, placing them 4 inches deep in the soil. Over time, Iris reticulata ‘Harmony’ will spread, slowly carpeting your garden with color. After the flowers fade, leave the foliage alone until it dries and disappears on its own.

How to grow
Cultivation Grow in well-drained, fertile, neutral to slightly acid loam in full sun
Propagation Propagate by division of rhizomes from midsummer to early autumn
Suggested planting locations and garden types Flower borders and beds Wall-side Borders City & Courtyard Gardens Coastal Cottage & Informal Garden
How to care
Pruning Remove any dying foliage in autumn, old flower stems can be cut down after flowering
Pests May be attacked by slugs, snails and thrips
Diseases May be subject to iris rhizome rot, a leaf spot and a virus
0
0
成长记
Avacha
2019年05月25日

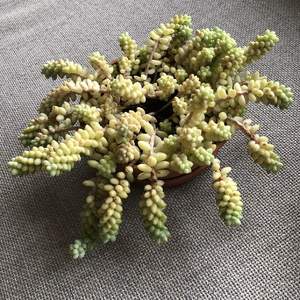
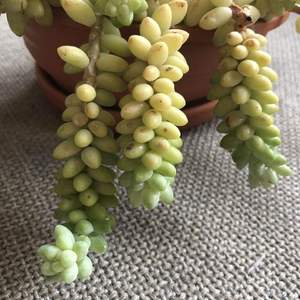
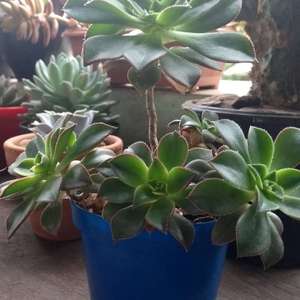
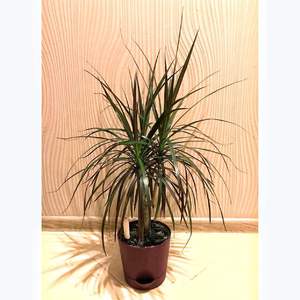
Looks like it’s feeling good. In winter 2019 I tried to accelerate its growth by putting the plant into the dark hallway (it has no windows and is illuminated with artificial light only when someone is there) and organizing the lighting of the plant with phyto-lamp (red and blue LEDs with special wavelengths of light for different light colours). The lamp was switched on irregularly, watering was irregular as well, and, though lots of new leaves grew fast, lots of leaves faded, too. So the plant moved to the window, where it receives enough attention.

0
0
成长记
Plantlin
2019年03月23日

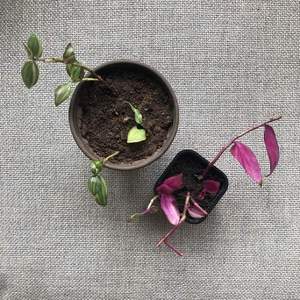
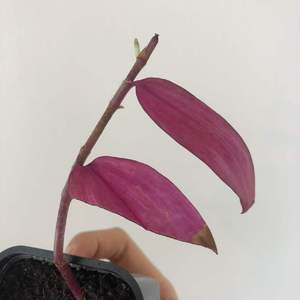
The plant with cutting at the end of winter... the cutting was under growlight... but got a bit too much...


1
0
成长记
Plantlin
2019年03月19日

Growing amazingly fast after watering:) watering regularly now after watering only once this winter!


2
0
成长记
Plantlin
2018年09月14日

The festival has moved inside for winter.... I hope I do not have to start all over in spring!


0
0
成长记
Plantlin
2018年09月14日

Took some cuttings today to start over:) It has been outside for the last couple of months. taking it insidr for winter


0
0
文章
Miss Chen
2018年09月07日

Hosta plants (also known as plantain lilies) are herbaceous perennials that die down in the winter months and reemerge in the spring with new growth. There are a wide variety to choose from. Hostas are shade-loving plants that grow from bulbs (or tubers). Planting them is fairly easy.

Step 1
Purchase hosta bulbs from your local nursery or from online sources (see Resources below). Read all the packaging instructions before deciding where to put your hostas. Some varieties do require some sunshine during the day. Hosta plants with a blue hue generally require more shade than some of the other types. They can be planted at any time of year, but springtime is best, when new roots are being formed.
Step 2
Prepare the planting area soil. Although the hosta is an easy plant to grow and maintain, starting with the proper soil conditions will give your plant an extra boost. The soil should be well drained, with a pH of 5.5 to 6.5.
Step 3
Plant the hosta bulbs 12 inches or more apart and at the ground level where the shoots first emerge. Of course, the root end of the bulb should be placed down into the ground. Gently fill the area surrounding the bulb with soil and then pack lightly at ground level.

Step 4
Water your hosta bulbs often, approximately an inch of water per week. Always check with packaging directions, as some of larger-leafed varieties require more water. Fertilize at 6-week intervals through the spring and summer months with a 10-10-10 fertilizer.

Step 1
Purchase hosta bulbs from your local nursery or from online sources (see Resources below). Read all the packaging instructions before deciding where to put your hostas. Some varieties do require some sunshine during the day. Hosta plants with a blue hue generally require more shade than some of the other types. They can be planted at any time of year, but springtime is best, when new roots are being formed.
Step 2
Prepare the planting area soil. Although the hosta is an easy plant to grow and maintain, starting with the proper soil conditions will give your plant an extra boost. The soil should be well drained, with a pH of 5.5 to 6.5.
Step 3
Plant the hosta bulbs 12 inches or more apart and at the ground level where the shoots first emerge. Of course, the root end of the bulb should be placed down into the ground. Gently fill the area surrounding the bulb with soil and then pack lightly at ground level.

Step 4
Water your hosta bulbs often, approximately an inch of water per week. Always check with packaging directions, as some of larger-leafed varieties require more water. Fertilize at 6-week intervals through the spring and summer months with a 10-10-10 fertilizer.
0
0
文章
Miss Chen
2018年09月07日

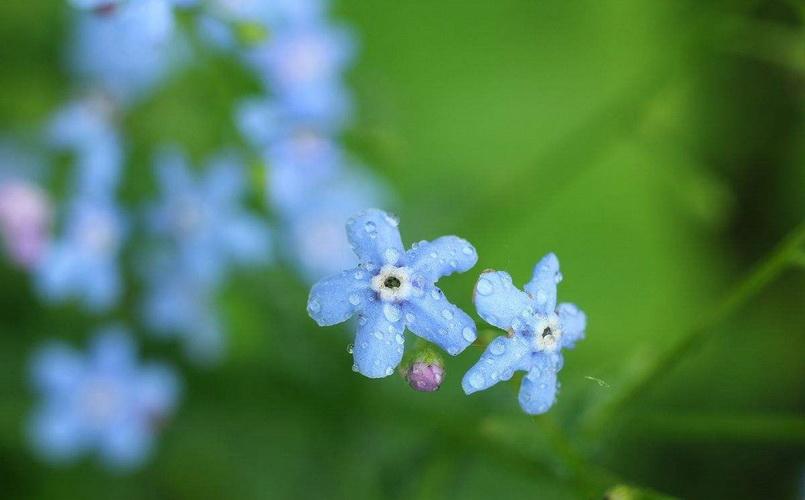
Delicate pale blue, or sometimes white and pink, forget-me-nots are a welcome sight after a long, snowy winter. Establishing forget-me-knots in your garden or yard is an easy task with great rewards. Forget-me-nots produce fantasy-like clouds of light blue that can provide quite a show-stopping display. They are a hardy perennial that will spread throughout your garden with very little effort on your part.

Step 1
Place potting soil in pots or six-pack inserts. Gently press the soil into the pot, but do not pack it too hard.
Step 2
Gently pour seeds from a packet into your hand. Forget-me-not seeds are very small; provided they are fresh, more than 90-percent of the seeds should germinate. Pinch a small amount of seeds and sprinkle them on top of the potting soil.
Step 3
Sprinkle more potting soil on top of the seeds so that there is about 1/8 inch of soil over the seeds. Press down to make sure the seeds have good contact with the soil, but do not pack the soil too hard.
Step 4
Water the soil. If your pots are in a cool location, cover them with plastic wrap to trap in heat, which aids in germination. The seeds should germinate within ten days. Let them grow for two weeks before transplanting them outdoors.
Step 5
Dig holes in the soil where you wish to transplant your forget-me-nots. Gently remove the plants from the six-pack plant pots and set them into the holes. Add soil around the stems and press lightly around the plants. Water only when your plants droop.
Step 6
Spread established forget-me-nots. Walk through the flowers as they begin to die off (in mid-June), and gently kick the plants to loosen and spread the seeds. You can also pull up a clump of flowers and shake them over areas where you would like to grow forget-me-nots the following year.

Step 1
Place potting soil in pots or six-pack inserts. Gently press the soil into the pot, but do not pack it too hard.
Step 2
Gently pour seeds from a packet into your hand. Forget-me-not seeds are very small; provided they are fresh, more than 90-percent of the seeds should germinate. Pinch a small amount of seeds and sprinkle them on top of the potting soil.
Step 3
Sprinkle more potting soil on top of the seeds so that there is about 1/8 inch of soil over the seeds. Press down to make sure the seeds have good contact with the soil, but do not pack the soil too hard.
Step 4
Water the soil. If your pots are in a cool location, cover them with plastic wrap to trap in heat, which aids in germination. The seeds should germinate within ten days. Let them grow for two weeks before transplanting them outdoors.
Step 5
Dig holes in the soil where you wish to transplant your forget-me-nots. Gently remove the plants from the six-pack plant pots and set them into the holes. Add soil around the stems and press lightly around the plants. Water only when your plants droop.

Step 6
Spread established forget-me-nots. Walk through the flowers as they begin to die off (in mid-June), and gently kick the plants to loosen and spread the seeds. You can also pull up a clump of flowers and shake them over areas where you would like to grow forget-me-nots the following year.
2
1
文章
Miss Chen
2018年09月06日

Winter-blooming clivia (Clivia miniata) flowers in winter and early spring. The clusters of yellow and orange blossoms are surrounded by strappy green leaves. Clivia grows outdoors in U.S. Department of Agriculture plant hardiness zones 9 through 11, but it can grow as a houseplant anywhere with proper care.

Pick a Spot
Whether you grow clivia outdoors in the garden, or indoors in a pot, provide the plant with partial shade. Outdoor beds with dappled sunlight work well, while indoors you can set them in an area with bright but indirect sunlight. Clivia is prone to root rot in wet soil, so grow them in well-draining beds or use pots with bottom drainage holes. Temperatures below 32 degrees Fahrenheit kill the plant, so bring outdoor potted plants indoors before a freeze and don't allow the foliage to touch a window during cold weather.
Watering Wisely
How much water a clivia needs depends on the season. During spring and summer, water the soil when the top 1 inch feels completely dry. When watering a potted plant, allow the excess to drain from the bottom drainage in the pot and empty the drip tray afterward. Withhold water from late fall through midwinter if you want the plant to flower, because clivia only flowers in response to drought stress. During this dry rest period, keep the temperature below 60 F to further encourage blooms. Resume regular watering and increase temperatures when the flower stalk is about 6 inches tall.
Feeding Tips
Light fertilizer encourages healthy growth, whether the clivia is grown indoors or outside. Fertilize once a week in spring and summer. Dilute 1/2 teaspoon of 15-15-15 fertilizer in 1 gallon of water, and use the mixture water for one regular watering each week. Clivia doesn't need fertilizer during its dormant period in fall and winter.
Pruning Needs
Clivia doesn't require any regular pruning, but you can trim off dead or badly damaged leaves to improve the plant's appearance. Gently pull off the leaves or trim them off with shears wiped with a rubbing alcohol-soaked cloth. Potted clivia also rarely needs repotting and grows best when root bound. If the roots completely fill the pot, which happens about every three or four years, transplant it in spring to a new pot one size larger than the old one. The new pot must have bottom drainage holes. Plant the clivia at the same depth it was growing previously, and handle the roots gently to avoid damage.

Controlling Pests
Diseases rarely affect clivia, with the exception of root rot in overly wet soil. Indoors, aphids and mites may feed on the foliage, but you can rinse these off with a strong stream of water. Slugs and snails may feast on clivia foliage outdoors. Pick these off by hand and drop them into a bucket of soapy water.

Pick a Spot
Whether you grow clivia outdoors in the garden, or indoors in a pot, provide the plant with partial shade. Outdoor beds with dappled sunlight work well, while indoors you can set them in an area with bright but indirect sunlight. Clivia is prone to root rot in wet soil, so grow them in well-draining beds or use pots with bottom drainage holes. Temperatures below 32 degrees Fahrenheit kill the plant, so bring outdoor potted plants indoors before a freeze and don't allow the foliage to touch a window during cold weather.
Watering Wisely
How much water a clivia needs depends on the season. During spring and summer, water the soil when the top 1 inch feels completely dry. When watering a potted plant, allow the excess to drain from the bottom drainage in the pot and empty the drip tray afterward. Withhold water from late fall through midwinter if you want the plant to flower, because clivia only flowers in response to drought stress. During this dry rest period, keep the temperature below 60 F to further encourage blooms. Resume regular watering and increase temperatures when the flower stalk is about 6 inches tall.
Feeding Tips
Light fertilizer encourages healthy growth, whether the clivia is grown indoors or outside. Fertilize once a week in spring and summer. Dilute 1/2 teaspoon of 15-15-15 fertilizer in 1 gallon of water, and use the mixture water for one regular watering each week. Clivia doesn't need fertilizer during its dormant period in fall and winter.
Pruning Needs
Clivia doesn't require any regular pruning, but you can trim off dead or badly damaged leaves to improve the plant's appearance. Gently pull off the leaves or trim them off with shears wiped with a rubbing alcohol-soaked cloth. Potted clivia also rarely needs repotting and grows best when root bound. If the roots completely fill the pot, which happens about every three or four years, transplant it in spring to a new pot one size larger than the old one. The new pot must have bottom drainage holes. Plant the clivia at the same depth it was growing previously, and handle the roots gently to avoid damage.

Controlling Pests
Diseases rarely affect clivia, with the exception of root rot in overly wet soil. Indoors, aphids and mites may feed on the foliage, but you can rinse these off with a strong stream of water. Slugs and snails may feast on clivia foliage outdoors. Pick these off by hand and drop them into a bucket of soapy water.
1
1
文章
Miss Chen
2018年08月31日

Winterize both garden-grown and container-grown hostas in the fall to prevent root damage. They will reward this extra winter care with lush new foliage in the spring and showy flowers in the summer. There's only one way to winterize hostas growing in the ground, but a few options exist for container hostas.

Hostas and Winter Damage
Hostas (Hosta spp.) are hardy in U.S. Department of Agriculture plant hardiness zones 3 to 9. They can survive winter temperatures as low as -40 degrees Fahrenheit when planted in the ground. Damage occurs to the root system when temperatures fluctuate. This is a bigger problem for hostas planted in the fall because they have not had a chance to grow their roots deep into the ground, but damage can occur in established hostas, too. As the ground goes through thaws and freezes, it pushes or heaves the hostas up, exposing their roots to the elements.
Hostas in the Ground
Cover hostas with 2 to 3 inches of shredded bark mulch in the fall after the ground freezes to a depth of 3 inches. The mulch will help insulate the soil, reducing the severity of temperature fluctuations, and protect the crowns of the plants. Remove the mulch in the spring when the ground thaws and there is no longer any danger that it will freeze again.
The tops of the hostas must be uncovered right away if new shoots begin to poke through the mulch. It can be left covering the crowns of the plants, though, if there is a chance temperatures may plummet again. Remove mulch from the crowns of the plants and pull it back a few inches away from stems after the danger of freezing temperatures has passed.
Hostas in Containers
Protect container-grown hostas from extreme cold, temperature fluctuations and moisture. Hostas in containers will be subjected to wind-chill temperatures far below what they would experience in the ground, and fluctuations will be more extreme. In addition, moisture will gather in the pots on top of the frozen roots when the sun warms the container, which will cause root rot.

Move hostas into an unheated garage or shed when temperatures begin to drop below freezing. Water them if temperatures warm to above freezing and the soil thaws only if it is completely dry. Set them back outdoors in the spring when temperatures warm to above freezing. If new shoots appear before freezing temperatures are over for the year, move the hostas outdoors to get some sunshine during the day while it is warm then back into the enclosure at night.
Dig holes in the ground large enough to hold the containers and sink the hostas, containers and all, into the ground in the fall before it freezes. Cover them with 2 to 3 inches of shredded bark mulch after the ground freezes. Pile the mulch over the top of the soil within the containers beneath the leaves and add more until plants are covered. This will prevent water pooling on the soil in the containers. Remove mulch in the spring and move the containers back to their usual positions when the danger of freezing weather has passed.
Bunch the potted hostas close together in an area protected from the wind such as right up against the north side of a building or next to the foundation of the house underneath a deck. Pile shredded bark mulch or shredded leaves over the soil in the containers and then over all of the plants to a depth of 2 to 3 inches. Pack it along the outer edge of the group of containers to a thickness of 3 to 4 inches. Uncover them and move them back to their usual locations in the spring when temperatures are likely to stay above freezing.

Hostas and Winter Damage
Hostas (Hosta spp.) are hardy in U.S. Department of Agriculture plant hardiness zones 3 to 9. They can survive winter temperatures as low as -40 degrees Fahrenheit when planted in the ground. Damage occurs to the root system when temperatures fluctuate. This is a bigger problem for hostas planted in the fall because they have not had a chance to grow their roots deep into the ground, but damage can occur in established hostas, too. As the ground goes through thaws and freezes, it pushes or heaves the hostas up, exposing their roots to the elements.
Hostas in the Ground
Cover hostas with 2 to 3 inches of shredded bark mulch in the fall after the ground freezes to a depth of 3 inches. The mulch will help insulate the soil, reducing the severity of temperature fluctuations, and protect the crowns of the plants. Remove the mulch in the spring when the ground thaws and there is no longer any danger that it will freeze again.
The tops of the hostas must be uncovered right away if new shoots begin to poke through the mulch. It can be left covering the crowns of the plants, though, if there is a chance temperatures may plummet again. Remove mulch from the crowns of the plants and pull it back a few inches away from stems after the danger of freezing temperatures has passed.
Hostas in Containers
Protect container-grown hostas from extreme cold, temperature fluctuations and moisture. Hostas in containers will be subjected to wind-chill temperatures far below what they would experience in the ground, and fluctuations will be more extreme. In addition, moisture will gather in the pots on top of the frozen roots when the sun warms the container, which will cause root rot.

Move hostas into an unheated garage or shed when temperatures begin to drop below freezing. Water them if temperatures warm to above freezing and the soil thaws only if it is completely dry. Set them back outdoors in the spring when temperatures warm to above freezing. If new shoots appear before freezing temperatures are over for the year, move the hostas outdoors to get some sunshine during the day while it is warm then back into the enclosure at night.
Dig holes in the ground large enough to hold the containers and sink the hostas, containers and all, into the ground in the fall before it freezes. Cover them with 2 to 3 inches of shredded bark mulch after the ground freezes. Pile the mulch over the top of the soil within the containers beneath the leaves and add more until plants are covered. This will prevent water pooling on the soil in the containers. Remove mulch in the spring and move the containers back to their usual positions when the danger of freezing weather has passed.
Bunch the potted hostas close together in an area protected from the wind such as right up against the north side of a building or next to the foundation of the house underneath a deck. Pile shredded bark mulch or shredded leaves over the soil in the containers and then over all of the plants to a depth of 2 to 3 inches. Pack it along the outer edge of the group of containers to a thickness of 3 to 4 inches. Uncover them and move them back to their usual locations in the spring when temperatures are likely to stay above freezing.
0
0


