成长记
FieryFlame
2017年05月10日

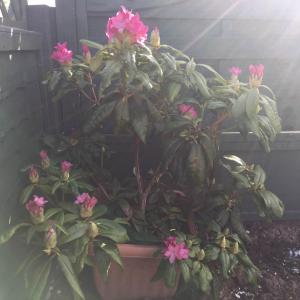
more flowers to come

0
0
FieryFlame:@妹纸乃不要酱紫 一直在院子里放着,自己自生自灭的
妹纸乃不要酱紫:买回来就是开花状态嘛?还是什么?
成长记
Hong Lam
2017年04月11日

Woke up this morning to a whole bunch of Tessa blooms, even a couple of purple ones! Whodathunk jasmine flowers can be purple??


1
0
lrgarden:Beautiful
成长记
riverrun
2017年03月19日
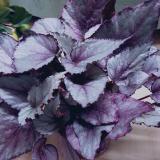
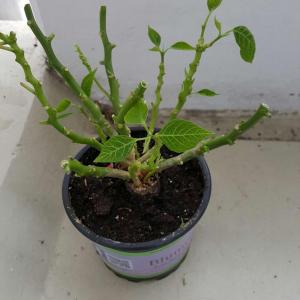
As sad as it might look, all the flowers need to be cut from this one after it blossomed, otherwise it dies. But it will grow bigger and thicker every time this is done 🍃

0
0
fyfywong:Oh, that's a brave move! They will become vivid again next winter ❄️🌺 (Blessing)
文章
Gina
2017年03月15日

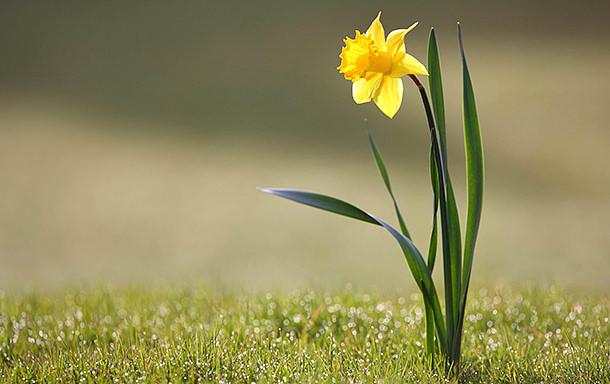
Just when you thought the snow would never melt, or the winds would never stop, daffodils brighten your garden with a burst of color in spring. Super easy to grow in most zones, daffodils are great cut flowers, can be used in both formal and informal gardens, can be grown in containers, and can even be forced to bloom out of season! There are many more varieties than just the time honored sunny yellow, and single and double foliage. There are even miniature daffodils, perfect for making a statement in a small garden, planting in a casual lawn of grass, or using in containers. If you know how to dig a hole and be patient, you can grow daffodils.
Daffodils must be planted in the fall to bloom in the spring with just a few easy care requirements.
How to Plant and Grow Daffodils
Choosing Bulbs and Varieties
Choose healthy bulbs by looking for bulbs that are papery, not shriveled. Full, heavy bulbs that don’t have gashes or cuts are a good sign of bulb health. Don’t buy any bulb with mold or fungus.
Most varieties will bloom wherever there is a winter frost, as they need a period of cold dormancy to force blooming. There are varieties that grow in the south in zone 9, check with your local nursery for best suggestions for your area. According to ‘Southern Living’, these types are perfect for Southern gardens. ‘Avalon’, ‘Carlton’, ‘February Gold’, ‘Geranium’, ‘Hawera’, ‘Ice Follies’, ‘Jack Snipe’, ‘Jetfire’, ‘Minnow’, Narcissus odorus, ‘Quail’, ‘Saint Keverne’, ‘Salome’, ‘Tête-à-tête’, ‘Thalia’, and ‘Trevithian’.
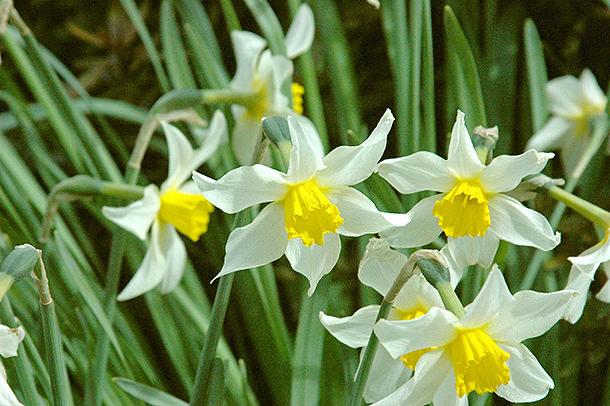
Varieties run from two foot tall sunny yellow traditional daffodils, to tiny little minis, to white doubles with a pure pink throat. There are pale yellows, coral throated beauties, and even a pure pink variety! Check out our favs at the end of the post to help you choose. Remember, choose for your space. Don’t expect a dozen minis to make a big impact on an acre lot.
Planting
Daffodil bulbs are planted in the fall, before the ground freezes. It’s best to plant them as soon as you can get your hands on them to give them time to set out roots.
Choose a light soil, they hate heavy clay. (Don’t we all?)
Plant 3 times deeper than their height. So if your bulb is 2 inches tall, you need to plant them 6 inches deep. 3-6 inches apart, depending on size, larger bulbs farther apart.
Choose a full to part sun position. Pink and red varieties have better color with afternoon shade, but all prefer 6 hours of sun a day for best flowering.

Seasonal Care
Fall
Plant bulbs and water well. Water occasionally if the fall is dry. Add a bulb fertilizer at time of planting and each fall after that to help the plant store energy for blooms. Bone meal is a good organic food for bulbs, especially in the planting hole.
Spring
Water the bulbs if it has been dry, and a half strength liquid fertilizer at this time can boost bloom.
Summer
Do not cut back withering foliage until it has totally died back, like most bulbs. They need every last bit of the green energy to store away enough for next seasons blooms. Most gardeners plant perennials or annuals near the bulbs so that as they grow in the spring, they cover much of the aging foliage. Cut back foliage to the ground when it it totally browned.
Winter
Daffodils are very hardy and do not require being dug up for winter. You may mulch to prevent them from being displaced by the heaving ground at hard freezes. Remember to remove the mulch in spring.
Tips and Cautions
Daffodils are poisonous if eaten, so do not plant where young children or pets can access them.
The flowers will tend to face the sun, so make sure you keep that in mind when choosing your site. You don’t want all those gorgeous blooms with their backs to you all day!
Daffodils can be lifted and divided with a sharp spade in early fall as they multiply, and then replanted for a larger display next year. Most can be divided every 3-4 years.
Daffodils are deer resistant.
Our Favorites
Our selections here are from ‘Brecks‘, as they are our favorite online bulb supplier. Nope, they did not sponsor this post, we just love ’em!
‘Carlton‘
A traditional yellow, medium sized bulb, these thrive just about anywhere, and naturalize beautifully! And they have a vanilla scent!

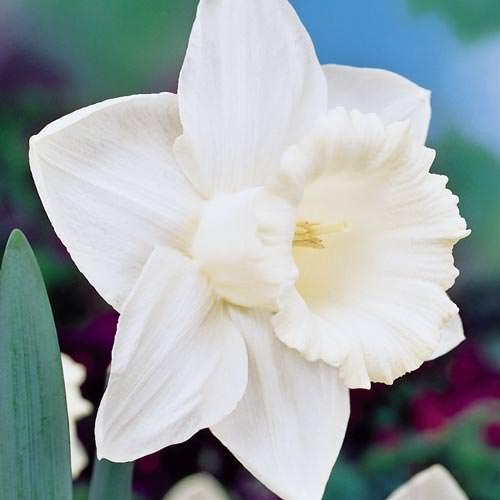
‘Mount Hood‘
A tried and true pure white variety. Large blooms great for cutting.
‘Cotinga‘
We love pink daffodils, and Cotinga has white petals with a pink throat. This is a smaller one, less than 12 inches high, but the long throat and delicate translucence to the petals make this an elegant choice.

‘Riot‘
Need a little more color from your Daffys? Try Riot for its red cups against white petals. Medium sized at 16 inches and very weather resistant, these are a great choice for grabbing attention for your garden!

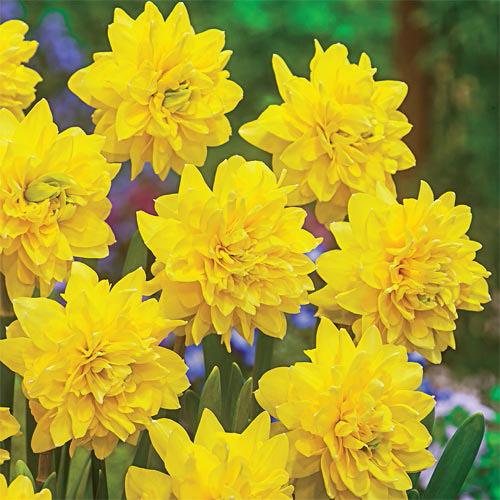
‘Dick Wilden‘ aka ‘Golden Beauty’
This stunning double yellow daffodil is a focal plant, to be sure. Medium height, easy to grow. Gorgeous in a vase!

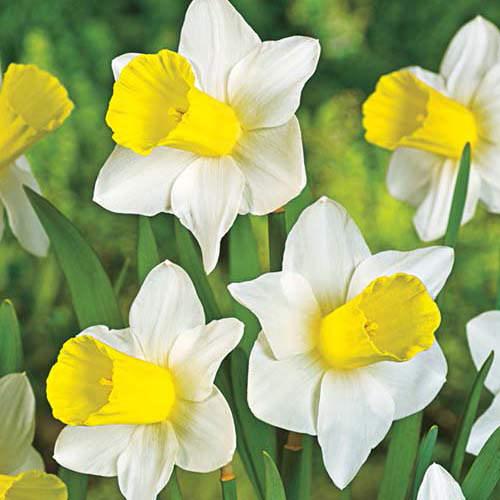
‘Bravoure‘
One of the most awarded daffodils, Bravoure is a great blend between a traditional happy yellow, tempered with a true pure white, and long elegant cups. Medium sized.
‘Petit Four‘
Tall, fragrant, beautiful.

‘Tête-à-Tête’
This is the double version of the iconic Tête-à-Tête mini daffodil, and we love this! Perfect for pots at only 8 inches high, this is a lot of bloom packed into a tiny plant! The original Tête-à-Tête is not double, but just as sweet!
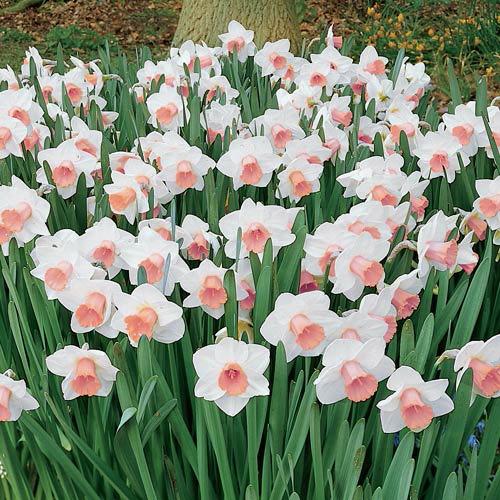
‘Salome‘
Our last choice is Salome for it’s apricot throats and pure white petals… These are medium plants that look amazing en masse. And they are fragrant!
2
2
文章
Colorful
2017年03月15日
Growing garlic indoors is not difficult and you’ll be able to get the supply of fresh green stalks, flowers, and even the garlic bulbs. Learn more!
If you have ever wondered about how to grow garlic indoors then the good news is that it is going to be considerably easier than you were perhaps aware. This is something that you will be able to achieve even with next to no previous gardening experience.
What You Need and Getting Started

When to Plant Garlic Indoors
Usually, the fall is the right planting season, outdoors in our gardens it’s the time when we plant garlic. However, when growing indoors, you can try to plant garlic anytime in the year.
Choosing a Container and Spacing
Look for a pot around 8-10 inches deep, minimum and if you are planning on growing more than one bulb at a time then the pot has to be big enough to maintain a four-inch gap between each clove. Also, make sure that the pot has drainage holes in the bottom. If you’re growing garlic for its GREENS– you can grow them more closely.
You can try growing garlic indoors from the grocery store garlic but they are treated with chemicals so for the best result buy from local farmers, order them online or check out your local gardening store for the organic garlic bulbs. Also, remember that you don’t need to remove the paper like husk from cloves.Planting and Getting them Growing
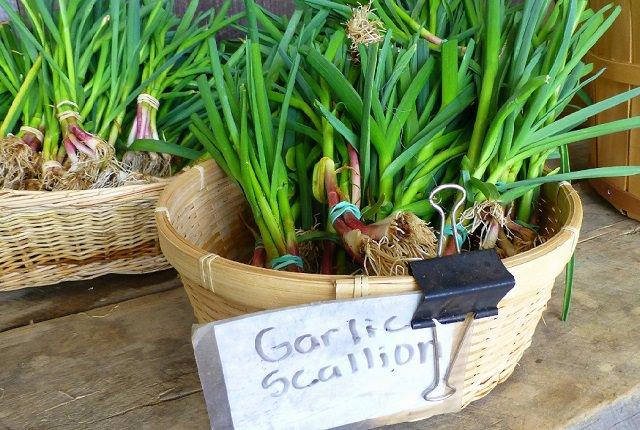
The next step is to fill the pot with the organic soil mixture. You then need to remove the individual cloves from the garlic bulbs and make sure that the flat end is going to be pointing down in the soil as that is where the roots come from.
At the time of filling the soil, you can also mix time-based granular fertilizer such as 10-10-10.
When planting them, you need to push the cloves down at least 2-3 inches deep into the soil. There should also be roughly 1 inch of soil between the top of the clove and the top layer of the soil.
Placement and Caring for the Bulbs
Soil
It is important that you use the right soil that is well-draining, and permeable. Soil-less potting medium is best, you can also make one for yourself instead of buying– Mix peat or cocopeat (coconut fiber), compost or manure, and either perlite or vermiculite (if you don’t have both, use sand) in equal parts.
Location
Once you have planted the bulbs decide where you should place the pot. If there is a room in your home with a South or West facing window where it can receive at least six hours of direct sunlight per day, consider that. You can also purchase indoor grow lights to make life easier and they can certainly be rather effective.
Watering
Outdoors, garlic prefers evenly moist soil, however, since you’re growing garlic indoors you may need to careful. Watering must be done according to the indoor growing conditions. Like, how much sunlight and warmth your potted garlic plants are receiving. Regular watering to keep the soil slightly moist is preferable.
Fertilizer
Garlic needs a good amount of fertilizer to grow well, indoors is no different. Fertilize the garlic plant twice a month with organic general purpose fertilizer during the warm growing season. You can also use kelp meal or fish fertilizer to ensure your garlic plant has enough nutrients for optimum growth.
HarvestingPicking Garlic Greens
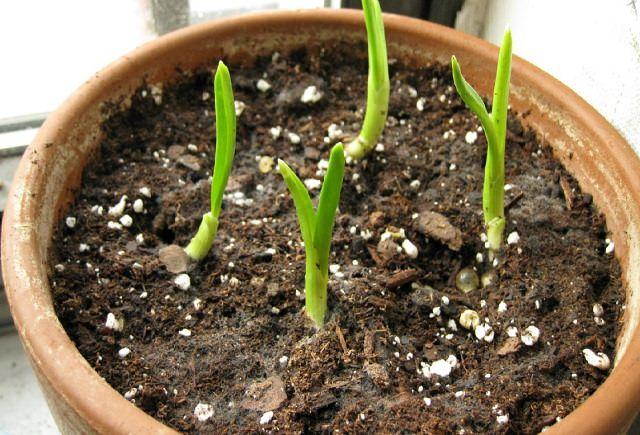
With the right soil, sunlight and proper watering, in a week or so you’ll be able to see the fresh new garlic shoots coming out. You can start picking the greens once they are at least 4-6 inches tall, which will happen in a few more weeks (depending on the weather). Leave an inch of growth on each clove to let your garlic plants regrow again.
Harvesting Bulbs
If you’re growing garlic indoors for garlic bulbs, note that it’ll be ready in around eight to ten months and you will know this when you see the leaves starting to turn brown. At this point, you need to remove them from the soil and allow them to dry for a week. By this time, they will be ready to include in your cooking or, of course, you could use some of them to then grow your next batch of garlic.
If you have ever wondered about how to grow garlic indoors then the good news is that it is going to be considerably easier than you were perhaps aware. This is something that you will be able to achieve even with next to no previous gardening experience.
What You Need and Getting Started

When to Plant Garlic Indoors
Usually, the fall is the right planting season, outdoors in our gardens it’s the time when we plant garlic. However, when growing indoors, you can try to plant garlic anytime in the year.
Choosing a Container and Spacing
Look for a pot around 8-10 inches deep, minimum and if you are planning on growing more than one bulb at a time then the pot has to be big enough to maintain a four-inch gap between each clove. Also, make sure that the pot has drainage holes in the bottom. If you’re growing garlic for its GREENS– you can grow them more closely.
You can try growing garlic indoors from the grocery store garlic but they are treated with chemicals so for the best result buy from local farmers, order them online or check out your local gardening store for the organic garlic bulbs. Also, remember that you don’t need to remove the paper like husk from cloves.Planting and Getting them Growing

The next step is to fill the pot with the organic soil mixture. You then need to remove the individual cloves from the garlic bulbs and make sure that the flat end is going to be pointing down in the soil as that is where the roots come from.
At the time of filling the soil, you can also mix time-based granular fertilizer such as 10-10-10.
When planting them, you need to push the cloves down at least 2-3 inches deep into the soil. There should also be roughly 1 inch of soil between the top of the clove and the top layer of the soil.
Placement and Caring for the Bulbs

Soil
It is important that you use the right soil that is well-draining, and permeable. Soil-less potting medium is best, you can also make one for yourself instead of buying– Mix peat or cocopeat (coconut fiber), compost or manure, and either perlite or vermiculite (if you don’t have both, use sand) in equal parts.
Location
Once you have planted the bulbs decide where you should place the pot. If there is a room in your home with a South or West facing window where it can receive at least six hours of direct sunlight per day, consider that. You can also purchase indoor grow lights to make life easier and they can certainly be rather effective.
Watering
Outdoors, garlic prefers evenly moist soil, however, since you’re growing garlic indoors you may need to careful. Watering must be done according to the indoor growing conditions. Like, how much sunlight and warmth your potted garlic plants are receiving. Regular watering to keep the soil slightly moist is preferable.
Fertilizer
Garlic needs a good amount of fertilizer to grow well, indoors is no different. Fertilize the garlic plant twice a month with organic general purpose fertilizer during the warm growing season. You can also use kelp meal or fish fertilizer to ensure your garlic plant has enough nutrients for optimum growth.
HarvestingPicking Garlic Greens
With the right soil, sunlight and proper watering, in a week or so you’ll be able to see the fresh new garlic shoots coming out. You can start picking the greens once they are at least 4-6 inches tall, which will happen in a few more weeks (depending on the weather). Leave an inch of growth on each clove to let your garlic plants regrow again.
Harvesting Bulbs
If you’re growing garlic indoors for garlic bulbs, note that it’ll be ready in around eight to ten months and you will know this when you see the leaves starting to turn brown. At this point, you need to remove them from the soil and allow them to dry for a week. By this time, they will be ready to include in your cooking or, of course, you could use some of them to then grow your next batch of garlic.
2
2
文章
Abigal
2017年03月13日

If you love chocolates grow chocolate scented flowers, check out this list of plants and flowers to get an idea.
If you love chocolate, chocolate scented flowers and plants are must have in your garden. Several plants and flowers that smell like chocolate or with their chocolate brown color can be a good addition to your chocolate garden. Plant these perennials/annuals in the garden or in containers on your patio, balcony or rooftop garden where you can enjoy the fragrance of chocolate issued by the pleasant wind.
1. Chocolate Daisy

It is also known as the chocolate flower (Berlandiera lyrata) due to its delicious chocolate like smell. It is a yellow-flowering perennial nectar plant that not only smells good to humans, but is also an allurement for bees, bumblebees, and butterflies.
2. Chocolate Cosmos

Chocolate cosmos adorn itself with amazing deep brown or chocolate colored flowers that emit a smell of rich chocolate. This perennial grows up to 30 inches tall in the full sun to partial shade position. It enjoys a rich, moist soil and is hardy warm temperates and subtropical climates under USDA zones 8 to 10. You can expect a chocolate scent to be the strongest in the early evening after a warm summer day. It is a drought-tolerant plant and easy to grow.
3. Black Salsify

As garden a plant, the Black salsify (Scorzonera hispanica) is too little known since most appreciate only the edible lower part of the plant, namely the root. Its dandelion-like large yellow blooms emanate a soft delicate odor reminiscent of chocolate. The fragrance is most intense in morning hours and from afternoon it subsides.
4. Carolina Allspice (Sweetshrub)

Carolina allspice is a shrub that doesn’t exceed the height of 2-3 m, you can also grow it in containers. This amazing plant is not only useful for its fragrant flowers that smell like chocolate but also for foliage that emit a cinnamon-like odor. It also produces an edible and delicious spice. Just snip off its twigs and allow them to dry out in the sun, then smash up the bark and use it like cinnamon.
5. Chocolate Mint

Grow chocolate mint in a container or on the ground to add a hint of minty chocolate odor to your garden and food. This perennial grows well in USDA zones 3 to 9b. Plant in partial sun but beware when you plant it directly on the ground as it can be invasive.
6. Chocolate Orchid

Sharry baby orchid is a sweet chocolate scented orchid. It is one plant that can bring the chocolate smell in your room. Place this plant in a well-lit spot away from intense direct sunlight that is high in humidity. Grow it indoors, on an east-facing window where it would receive soft morning sun would be perfect. Also, place the plant in a tray on pebbles filled with water to increase the humidity.
7. Chocolate Vine (Akebia Quinata)

This vigorous perennial vine is famous for its chocolate scented flowers. Its fruits are edible too. You can also grow it in pots. Its unusual flowers look amazing and blooms prolifically in full sun to partial shade.
If you love chocolate, chocolate scented flowers and plants are must have in your garden. Several plants and flowers that smell like chocolate or with their chocolate brown color can be a good addition to your chocolate garden. Plant these perennials/annuals in the garden or in containers on your patio, balcony or rooftop garden where you can enjoy the fragrance of chocolate issued by the pleasant wind.
1. Chocolate Daisy

It is also known as the chocolate flower (Berlandiera lyrata) due to its delicious chocolate like smell. It is a yellow-flowering perennial nectar plant that not only smells good to humans, but is also an allurement for bees, bumblebees, and butterflies.
2. Chocolate Cosmos

Chocolate cosmos adorn itself with amazing deep brown or chocolate colored flowers that emit a smell of rich chocolate. This perennial grows up to 30 inches tall in the full sun to partial shade position. It enjoys a rich, moist soil and is hardy warm temperates and subtropical climates under USDA zones 8 to 10. You can expect a chocolate scent to be the strongest in the early evening after a warm summer day. It is a drought-tolerant plant and easy to grow.
3. Black Salsify

As garden a plant, the Black salsify (Scorzonera hispanica) is too little known since most appreciate only the edible lower part of the plant, namely the root. Its dandelion-like large yellow blooms emanate a soft delicate odor reminiscent of chocolate. The fragrance is most intense in morning hours and from afternoon it subsides.
4. Carolina Allspice (Sweetshrub)

Carolina allspice is a shrub that doesn’t exceed the height of 2-3 m, you can also grow it in containers. This amazing plant is not only useful for its fragrant flowers that smell like chocolate but also for foliage that emit a cinnamon-like odor. It also produces an edible and delicious spice. Just snip off its twigs and allow them to dry out in the sun, then smash up the bark and use it like cinnamon.
5. Chocolate Mint

Grow chocolate mint in a container or on the ground to add a hint of minty chocolate odor to your garden and food. This perennial grows well in USDA zones 3 to 9b. Plant in partial sun but beware when you plant it directly on the ground as it can be invasive.
6. Chocolate Orchid

Sharry baby orchid is a sweet chocolate scented orchid. It is one plant that can bring the chocolate smell in your room. Place this plant in a well-lit spot away from intense direct sunlight that is high in humidity. Grow it indoors, on an east-facing window where it would receive soft morning sun would be perfect. Also, place the plant in a tray on pebbles filled with water to increase the humidity.
7. Chocolate Vine (Akebia Quinata)

This vigorous perennial vine is famous for its chocolate scented flowers. Its fruits are edible too. You can also grow it in pots. Its unusual flowers look amazing and blooms prolifically in full sun to partial shade.
0
1
文章
Andy
2017年02月24日

Learn how to #grow feverfew. Growing feverfew plant is relatively easy. It is a useful medicinal herb, plus it embellishes itself with beautiful yellow-white #flowers .
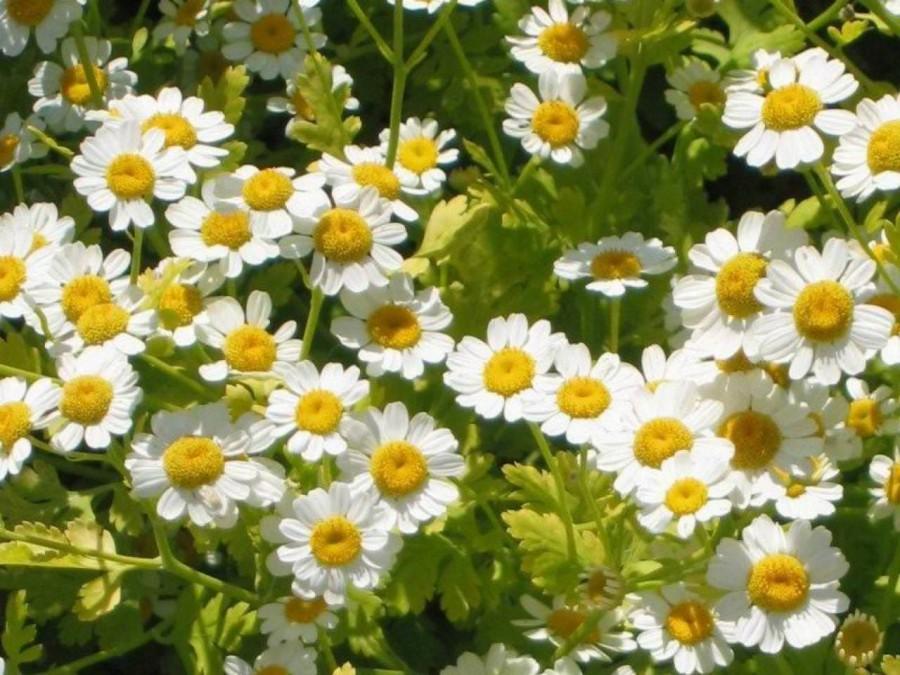
Difficulty — Easy
Other Names — Featherfew, Fever few, Febrifuge #plant , Featherfoil, Mid-summer daisy and wild chamomile .
Feverfew (Tanacetum parthenium) belong to the Asteraceae family (family of chrysanthemums). This plant is also called “false chamomile”. It is native to the Eastern Mediterranean. From there it was brought to Central and Western Europe a long time ago, where it was grown in gardens as a medicinal and ornamental plant.
In temperate areas, the feverfew is a short living perennial. Where the winters are harder, growing feverfew is possible as an annual plant. It is a low maintenance plant that loves to grow in typically variety of soil types and therefore frequently occurs as a garden weed.
Feverfew Uses
Feverfew is used to treat a wide range of health problems, such as fever, cold, rheumatism and cramps. It is also widely used to treat migraines. The flowers, stems and leaves are harvested for medicinal purposes. Parthenolide, a sesquiterpene lactone is considered the main biological active ingredient found in feverfew.
How to Grow FeverfewPropagation and Planting Feverfew
It can be propagated by seeds, cuttings and division.
To propagate it from seeds, since they are somewhat rare if you don’t find them locally, buy online. Sow them indoors in early spring in a seed tray using well draining starting mix. Scatter the seeds over the surface of soil and lightly tamp them. Cover the tray with plastic sheet or put in a plastic bag and keep that in a bright spot.
If you want to sow seeds directly on the ground wait until the temperature warms up around 60 F (15 C) and last frost date passes away in the spring. Keep the soil evenly moist until the germination. Germination occurs within one or two weeks after seed sowing.
To know more about feverfew propagation, read this article.
Requirements for Growing FeverfewLocation
Often this herb settles down by itself in the garden and is regarded by many gardeners wrongly as a weed. Ideal location to grow feverfew is full to partially sunny spot. Growing feverfew in pots, railing planters and window boxes is possible too, you can easily cultivate it on your balcony garden, just be careful not to keep it on windy spot.
Watering
Feverfew plants prefer soil which never dry out completely. Regular watering is important but overwatering can lead it to death, care in watering is required in cold weather conditions, in winter.
Soil
This undemanding plant grows in all soil types except heavy clay rich soil. Best to plant it in nutrient-rich, well drained and loose soil.
Feverfew Plant CareFertilizer
Growing feverfew doesn’t require fertilizer, if soil is rich in organic matter. However, you can apply a fertilizer you use for other flowers monthly.
Overwinter
Feverfew plants are grown as perennial and annual. Annual varieties die off in the winter and then germinate again in the spring. Feverfews are sensitive to extreme cold and need special care in winter time.
Mulching
Do protect mulching to protect the plant from severe cold in winters. Mulching also helps in summers in conserving moisture.
Pruning
Deadhead the faded flowers and slightly prune off the plant after the first flowering. Pruning stimulates the growth of new flowers. Prune long, leggy and diseased
branches with discolored leaves. You can prune off the plant up to about one-third of its size.
Pests and diseases
While growing feverfew plants, gardeners sometimes face problems due to wrong planting site and permanent waterlogging in soil. In pests and diseases, care feverfew plant from slugs, powdery mildew, spider mites and aphids. To prevent the pests, colonize geraniums, garlics or cress as companion plants.
Harvesting
1
0
文章
Joss
2017年02月24日

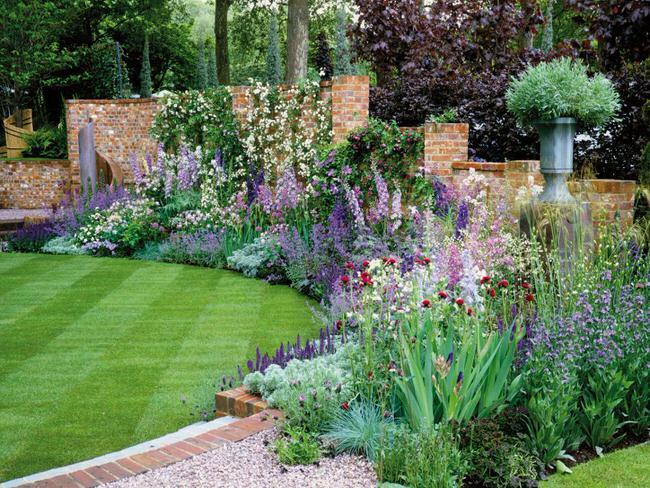
We love good #garden inspiration. And we love #flowers . Put ’em together, and you have fantastic flower beds, ready to make you run to the nursery or pull out those catalogs! So salivate over these photos, take some tips from design pros, and start designing that next flower bed. In this flower garden above, you can see that while the plants themselves seem a cottage garden jumble, this is actually a more formal garden design. Why? The hard lines of the hardscaping and the repeating pants within the bed are your clues. Just remember this if you have a garden you want to add a little “properness” too!
Need some spring flower bed inspiration? These two inspriational photos are full of tulips. This first one used a complimentary color scheme of blue and yellow, for a more calming and minimal feel.

For a little more energy, use warmer colors mixed with some perennials. The plants will fill in as the tulips fade to cover and distract from the browning foliage.

Have shrubbery or evergreen foundation plantings that are just boring? Add bright and happy colors in front of the shrub bed to create some fantastic energy! Keep the texture of the flower bed in contrast to the foliage. For instance, in this photo, the daylilies have strappy, coarse foliage and are contrasted nicely with fine textured, small flowers. This keeps things interesting!

This traditional style flower bed from ‘Houzz’ shows us that when using a lot of bright color, a pop of white will keep things grounded! Green will accomplish the same thing.
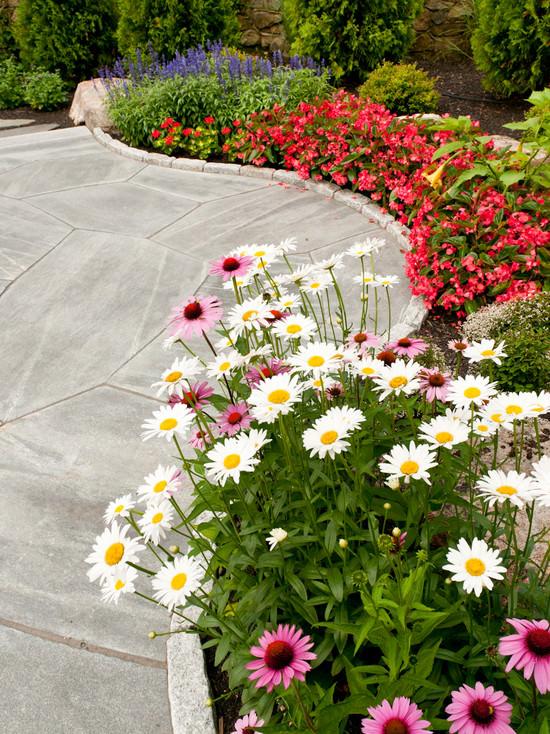
This informal flower bed from ‘BHG‘ is a great example of using layers in your plantings… You see more greenery and height in the back, working forward to shorter and brighter flowers. This is great design approach. I love the curved shape of this garden, it gives it a casual feel.

Now a couple from Pinterest…
This first Pinterest pick is a great example of using a color theme, and it’s my fav! Blues and pinks are a romantic and still colorful choice… If you want to tone it down, add white or grey!

Another amazing example of that color scheme, but this “River” of grape hyacinths from Pinterest is a show stopper! It wouldn’t be the same without the pink and white tulips. They visually slow you down, and add a little punch, but don’t take away from the mass of blue!

Ok, leaving the most fantastic for last… This is Chrissie D’Esopo’s garden, courtesy the ‘Connecticut Horticultural Society‘, photo by Steve Silk. She opened her home up for a garden tour for charity, and it is AMAZING. Have you ever seen such a colorful and uplifting garden? Nothing more to say about this, but WOW!

So are you running for the car, complete with gardening gloves so you can load up as soon as you get to the nursery? I’d like to tell you to slow down, take your time and think this through… but I’m already out the door. :)

Need some spring flower bed inspiration? These two inspriational photos are full of tulips. This first one used a complimentary color scheme of blue and yellow, for a more calming and minimal feel.

For a little more energy, use warmer colors mixed with some perennials. The plants will fill in as the tulips fade to cover and distract from the browning foliage.

Have shrubbery or evergreen foundation plantings that are just boring? Add bright and happy colors in front of the shrub bed to create some fantastic energy! Keep the texture of the flower bed in contrast to the foliage. For instance, in this photo, the daylilies have strappy, coarse foliage and are contrasted nicely with fine textured, small flowers. This keeps things interesting!

This traditional style flower bed from ‘Houzz’ shows us that when using a lot of bright color, a pop of white will keep things grounded! Green will accomplish the same thing.

This informal flower bed from ‘BHG‘ is a great example of using layers in your plantings… You see more greenery and height in the back, working forward to shorter and brighter flowers. This is great design approach. I love the curved shape of this garden, it gives it a casual feel.

Now a couple from Pinterest…
This first Pinterest pick is a great example of using a color theme, and it’s my fav! Blues and pinks are a romantic and still colorful choice… If you want to tone it down, add white or grey!

Another amazing example of that color scheme, but this “River” of grape hyacinths from Pinterest is a show stopper! It wouldn’t be the same without the pink and white tulips. They visually slow you down, and add a little punch, but don’t take away from the mass of blue!

Ok, leaving the most fantastic for last… This is Chrissie D’Esopo’s garden, courtesy the ‘Connecticut Horticultural Society‘, photo by Steve Silk. She opened her home up for a garden tour for charity, and it is AMAZING. Have you ever seen such a colorful and uplifting garden? Nothing more to say about this, but WOW!

So are you running for the car, complete with gardening gloves so you can load up as soon as you get to the nursery? I’d like to tell you to slow down, take your time and think this through… but I’m already out the door. :)
0
1
成长记
Sarah Reynolds
2017年02月22日

I new added a "Red Lion amaryllis opened up two more flowers today" in my "garden"


0
0
文章
Joss
2017年02月22日

I think I hear over and over, that #Peonies are one of the most favorited #flowers around. What’s not to love? Perfect colors, a romantic cupped shape, some are even fragrant! They are not that difficult to grow, but they do have some requirements that make them a little more high maintenance than, say, petunias. But they are worth it. Amazing in the garden, and as cut flowers, here’s how to grow Perfect Peonies! (and some of our fav’s to grow!)

There are both herbaceous peonies, and tree peonies. Herbaceous are the bush kind that are the most common, and easier to grow.
Peonies live for up to 50 years, so think of them as a long term investment in your garden.
They like full sun, thrive in zones 3-8, grow 3-4 feet and bloom in May and June, depending on the variety.
If you buy peony crowns in the fall, it’s a lot like choosing healthy bulbs. Choose a crown with at least three good bugs, then plant them facing up no more than 2 inches below the soil. Number one way to keep your peony from blooming? Plant it too deep.

Peonies like deep, fertile soil. Basically, that means before you plant your peony, dig deep, add lot’s of organic matter, and make really sure you’ve picked the right spot. They do NOT like to be transplanted. They make their home a forever home, so keep that in mind.
Peony do not have strong stems, so they tend to flop over, especially when in flower. The best way to deal with this is to create a “cage” of support just as the peony is peeking out of the ground in spring. That way, the plant grows into it’s support, gradually covers it, and never misses a beat!
At the end of the season after the plant has died back with the frost, cut back and discard the old foliage. Do not add it to your compost pile, to prevent disease.
That’s it! Love ’em and they might outlive their owners! And in the meantime, provide you with spring flowers that are beloved by both gardeners and non gardeners alike.

Here is a taste of Peony varieties that should be easily available and are good choices for any garden!
Sarah Bernhardt is one of the most planted peonies of all time, and is an old fashioned variety from the early 1900’s. It grows to 36 inches and blooms in June, and has a light fragrance.

Festiva Maxima is another old variety that is still extremely popular, and my fav white variety. Pure white and flecked with red, growing to 36 inches.

Raspberry Sundae is a two tone variety with a round cupped form.

Bartzella blooms mid season, and has a rare yellow peony flower.
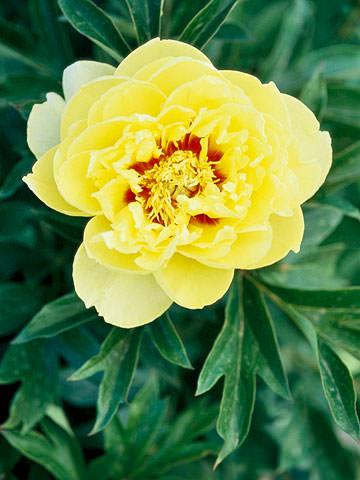
Gay Paree is another bi-color peony with strong seems and a mid season bloom.

Big Ben is a good choice for peony virgins, because of the natural vigor of the plant. Oh, and it’s fragrant!

America is our choice for a red blooming peony. It blooms early and has a nice, strong habit.

Finally, want to be more inspired?


There are both herbaceous peonies, and tree peonies. Herbaceous are the bush kind that are the most common, and easier to grow.
Peonies live for up to 50 years, so think of them as a long term investment in your garden.
They like full sun, thrive in zones 3-8, grow 3-4 feet and bloom in May and June, depending on the variety.
If you buy peony crowns in the fall, it’s a lot like choosing healthy bulbs. Choose a crown with at least three good bugs, then plant them facing up no more than 2 inches below the soil. Number one way to keep your peony from blooming? Plant it too deep.

Peonies like deep, fertile soil. Basically, that means before you plant your peony, dig deep, add lot’s of organic matter, and make really sure you’ve picked the right spot. They do NOT like to be transplanted. They make their home a forever home, so keep that in mind.
Peony do not have strong stems, so they tend to flop over, especially when in flower. The best way to deal with this is to create a “cage” of support just as the peony is peeking out of the ground in spring. That way, the plant grows into it’s support, gradually covers it, and never misses a beat!
At the end of the season after the plant has died back with the frost, cut back and discard the old foliage. Do not add it to your compost pile, to prevent disease.
That’s it! Love ’em and they might outlive their owners! And in the meantime, provide you with spring flowers that are beloved by both gardeners and non gardeners alike.

Here is a taste of Peony varieties that should be easily available and are good choices for any garden!
Sarah Bernhardt is one of the most planted peonies of all time, and is an old fashioned variety from the early 1900’s. It grows to 36 inches and blooms in June, and has a light fragrance.

Festiva Maxima is another old variety that is still extremely popular, and my fav white variety. Pure white and flecked with red, growing to 36 inches.

Raspberry Sundae is a two tone variety with a round cupped form.

Bartzella blooms mid season, and has a rare yellow peony flower.

Gay Paree is another bi-color peony with strong seems and a mid season bloom.

Big Ben is a good choice for peony virgins, because of the natural vigor of the plant. Oh, and it’s fragrant!

America is our choice for a red blooming peony. It blooms early and has a nice, strong habit.

Finally, want to be more inspired?

0
0
文章
Joss
2017年02月20日

Lavender blooms in many parts of the world , and there are few #flowers that are more cherished for romance, scent and form. What most gardeners don’t realize is that lavender is easy to grow and maintain, and can make a splash in your flower beds, add an old world touch to your flower gardens, or can have an entire garden design based around it, whether your style is modern, or old world. You can use the flowers for craft projects, aromatherapy, or even a relaxing tea! You don’t have to have a generous field of lavender in Provence to enjoy and appreciate all it can do for your garden. The featured photo above is from a recent trip to Vashon Island, WA. Simply gorgeous! Here are seven easy tips for growing lavender in any garden space!

1. Lavender needs one thing to grow well…good drainage. This is all fine and good if you have a naturally sandy or gravelly soil in your yard, but pretty problematic if your entire garden is pure clay! The solution? You can either grow your lavender in raised beds with good soil, or you can use containers. Regular planting mix is fine, just make sure there are plenty of drainage holes. If your lavender is yellowing, first thing to check is drainage.
2. Lavender is drought tolerant once established, but they do bloom better if they are watered as soon as the soil becomes dry one inch down.
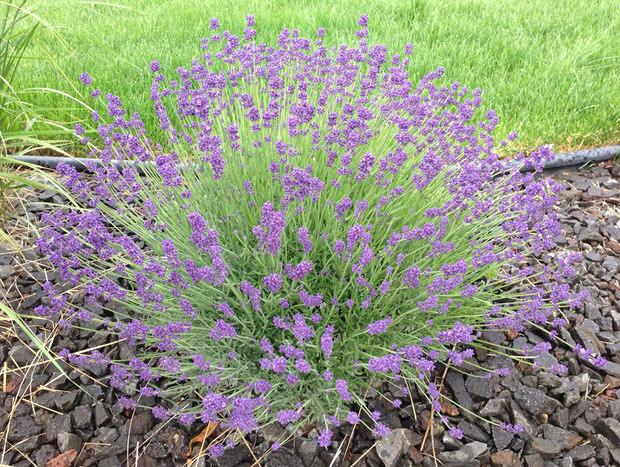
3. Lavender are short lived plants by nature. If they are happy in their spot, they will last a bit longer, but even under the best conditions, three years is not unusual for a plant to start dying out in the center. Here’s the up side of that. Lavender volunteers show up each year in droves, so there are always new plants ready to take over the ones that have passed their prime!
4. Lavender does not need much in the way of fertilizer, making them great low maintenance plants. Give them a dose of liquid fertilizer in the spring, then leave them alone, Too much fertilizer will produce plants that are large and spindly, with fewer flowers.

5. Early each spring, make sure you cut your lavender back, and don’t be a baby about it! Cut back most lavender to one third their height to rejuvenate the plant, and make sure your plant is flowering at it’s best.
6. Lavender blooms in early to mid summer, but may be convinced to re-bloom in later summer or fall. After the first flush of bloom has been harvested or died back, use scissors or shear to give the plant a light hair cut. Give it a dose of half strength liquid fertilizer, and leave it be. Chances are you will see more lavender later in the season!
7. To harvest lavender flowers, it’s best to cut them in bunches with long stems. Choosing to cut them in early morning maximizes the oils in the flowers, which gives them the best scent. You can use them fresh in vases with other cut flowers, or easily dry bunches by tying the ends together and hanging them upside down in a protected place. Dried lavender retains much of its scent and can be used in drawers, crafts or as decorative additions to wreaths or flower arrangements.
Note: Lavender is thought to help induce sleep and relaxation, either made into a tea, or tucked into pillow cases. You can even throw a sachet of lavender through the dryer with your sheets and towels for a natural scent to your laundry!
How to Make Lavender Dryer Sachets
Lavender is easy to grow, easy to find at most nurseries, and can be found in purples, blues, roses and whites. You can choose from hardy English lavender, larger French lavender that is the form you see in photos of the French countryside, or special Spanish lavender. Keep in mind that Spanish lavender, with its flower heads that remind me of butterflies, are great in containers, but are less hardy than its cousins.

Spanish Lavender
Grow lavender. Even if the only use you ever find for it is picking flowers and foliage as you pass by, and taking the time to smell that wonderful scent, fresh from your own garden.

1. Lavender needs one thing to grow well…good drainage. This is all fine and good if you have a naturally sandy or gravelly soil in your yard, but pretty problematic if your entire garden is pure clay! The solution? You can either grow your lavender in raised beds with good soil, or you can use containers. Regular planting mix is fine, just make sure there are plenty of drainage holes. If your lavender is yellowing, first thing to check is drainage.
2. Lavender is drought tolerant once established, but they do bloom better if they are watered as soon as the soil becomes dry one inch down.

3. Lavender are short lived plants by nature. If they are happy in their spot, they will last a bit longer, but even under the best conditions, three years is not unusual for a plant to start dying out in the center. Here’s the up side of that. Lavender volunteers show up each year in droves, so there are always new plants ready to take over the ones that have passed their prime!
4. Lavender does not need much in the way of fertilizer, making them great low maintenance plants. Give them a dose of liquid fertilizer in the spring, then leave them alone, Too much fertilizer will produce plants that are large and spindly, with fewer flowers.

5. Early each spring, make sure you cut your lavender back, and don’t be a baby about it! Cut back most lavender to one third their height to rejuvenate the plant, and make sure your plant is flowering at it’s best.
6. Lavender blooms in early to mid summer, but may be convinced to re-bloom in later summer or fall. After the first flush of bloom has been harvested or died back, use scissors or shear to give the plant a light hair cut. Give it a dose of half strength liquid fertilizer, and leave it be. Chances are you will see more lavender later in the season!
7. To harvest lavender flowers, it’s best to cut them in bunches with long stems. Choosing to cut them in early morning maximizes the oils in the flowers, which gives them the best scent. You can use them fresh in vases with other cut flowers, or easily dry bunches by tying the ends together and hanging them upside down in a protected place. Dried lavender retains much of its scent and can be used in drawers, crafts or as decorative additions to wreaths or flower arrangements.
Note: Lavender is thought to help induce sleep and relaxation, either made into a tea, or tucked into pillow cases. You can even throw a sachet of lavender through the dryer with your sheets and towels for a natural scent to your laundry!
How to Make Lavender Dryer Sachets
Lavender is easy to grow, easy to find at most nurseries, and can be found in purples, blues, roses and whites. You can choose from hardy English lavender, larger French lavender that is the form you see in photos of the French countryside, or special Spanish lavender. Keep in mind that Spanish lavender, with its flower heads that remind me of butterflies, are great in containers, but are less hardy than its cousins.

Spanish Lavender
Grow lavender. Even if the only use you ever find for it is picking flowers and foliage as you pass by, and taking the time to smell that wonderful scent, fresh from your own garden.
2
2
文章
Joss
2017年02月20日

Enticing butterflies to your garden is fun and simple too. Butterflies are easy to attract to your garden if you plant a garden where the caterpillar (pupa step) has plants to eat and then the butterfly has flowers from which to sip nectar. Butterfly gardens are simple to plant and will provide you and your friends and family a chance to peek butterflies in their natural environment.
The basics are an open space with tons of sunshine and a location that is not windy. Choose a spot with lots of sunlight with a few rocks or stones that can warm up on which the butterflies will bask in the afternoon sun. Strive to locate your #garden close to hedges or shrubs that will aid in shielding them from the hardy winds. If it is too windy, the butterflies won’t stay around for any length of time. The hedge or shrub needs to develop food for the caterpillar. You can find out what the caterpillar likes best from your Nursery Garden Center.
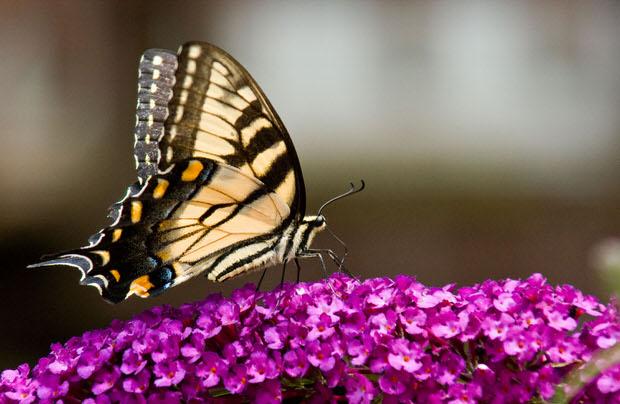
Butterflies relish mud puddles where they can drink the water and soak up minerals. A patch of moist soil will make them joyful. Most urgent of all is that the garden be pesticide free. Some gardeners like to utilize pesticides to chase away unwanted pests, unfortunately it will keep the butterflies from visiting your garden too. Plant your butterfly garden in a cranny where it will be free of chemical pesticides. Worthier still, ask your Garden Headquarters about organic gardening.
Flowers with nectar are a need for a butterfly garden. When planting these nectar sources try to put in plants that will provide nectar throughout the growing season since these are the origin of subsistence for the butterflies. Don’t discount shrubs and wildflowers. Roses, geraniums and lilies have no nectar so plant them somewhere else. Have your garden assorted to allure a the greater quantity of butterflies. Another ingredient for the butterfly garden is a source for larva food. The caterpillar needs food to develop into a butterfly. If there is no food present they will die. Plant some herbs for both of you. They love parsley, dill, and fennel for their meal. What herbs they don’t eat you can collect for home cooking with fresh herbs.
A butterfly garden can also be planted in containers. Purchase some elegant pots and plant them with flowers that retain a magnificent bouquet as well as vivid pretty colors (available at your Garden Center). Petunias, daylilies or sweet alyssum will do the trick. Of course the butterfly bushes are a given, or plant some hanging baskets with Impatients (shade will be necessary).
Some gardeners like to fashion there own feeder and solution. And it is easy to do. Put 4 parts water to 1 part sugar in a pot, bring it to a boil and cook it until the sugar dissolves. Bring it to room temperature. Use a container that is somewhat shallow, drench a paper towel with the solution and position it in the garden receptacle. Deposit a stone in the garden container so the butterflies have a seat to rest on while they are feeding.

This would be a great project for the kids. Have them maintain a diary of each of the various species that stop by your butterfly garden. Let them look up the butterflies on the computer to understand all about each special butterfly and it becomes not only enjoyable, but a learning experience besides.
Because there are so many growing zones in the United States you will want to speak with your Nursery Headquarters for suggestions of what plants to utilize for attracting butterflies in your individual zone.
There is an ancient American Indian Fable about butterflies:
“To have a dream come true you must seize a butterfly. Whisper to the butterfly what your request is and then set it free. This tiny messenger will carry your wish to the Great Spirit in the sky and it will become true.”
What a great folktale.
Happy Gardening!
The basics are an open space with tons of sunshine and a location that is not windy. Choose a spot with lots of sunlight with a few rocks or stones that can warm up on which the butterflies will bask in the afternoon sun. Strive to locate your #garden close to hedges or shrubs that will aid in shielding them from the hardy winds. If it is too windy, the butterflies won’t stay around for any length of time. The hedge or shrub needs to develop food for the caterpillar. You can find out what the caterpillar likes best from your Nursery Garden Center.

Butterflies relish mud puddles where they can drink the water and soak up minerals. A patch of moist soil will make them joyful. Most urgent of all is that the garden be pesticide free. Some gardeners like to utilize pesticides to chase away unwanted pests, unfortunately it will keep the butterflies from visiting your garden too. Plant your butterfly garden in a cranny where it will be free of chemical pesticides. Worthier still, ask your Garden Headquarters about organic gardening.
Flowers with nectar are a need for a butterfly garden. When planting these nectar sources try to put in plants that will provide nectar throughout the growing season since these are the origin of subsistence for the butterflies. Don’t discount shrubs and wildflowers. Roses, geraniums and lilies have no nectar so plant them somewhere else. Have your garden assorted to allure a the greater quantity of butterflies. Another ingredient for the butterfly garden is a source for larva food. The caterpillar needs food to develop into a butterfly. If there is no food present they will die. Plant some herbs for both of you. They love parsley, dill, and fennel for their meal. What herbs they don’t eat you can collect for home cooking with fresh herbs.
A butterfly garden can also be planted in containers. Purchase some elegant pots and plant them with flowers that retain a magnificent bouquet as well as vivid pretty colors (available at your Garden Center). Petunias, daylilies or sweet alyssum will do the trick. Of course the butterfly bushes are a given, or plant some hanging baskets with Impatients (shade will be necessary).
Some gardeners like to fashion there own feeder and solution. And it is easy to do. Put 4 parts water to 1 part sugar in a pot, bring it to a boil and cook it until the sugar dissolves. Bring it to room temperature. Use a container that is somewhat shallow, drench a paper towel with the solution and position it in the garden receptacle. Deposit a stone in the garden container so the butterflies have a seat to rest on while they are feeding.

This would be a great project for the kids. Have them maintain a diary of each of the various species that stop by your butterfly garden. Let them look up the butterflies on the computer to understand all about each special butterfly and it becomes not only enjoyable, but a learning experience besides.
Because there are so many growing zones in the United States you will want to speak with your Nursery Headquarters for suggestions of what plants to utilize for attracting butterflies in your individual zone.
There is an ancient American Indian Fable about butterflies:
“To have a dream come true you must seize a butterfly. Whisper to the butterfly what your request is and then set it free. This tiny messenger will carry your wish to the Great Spirit in the sky and it will become true.”
What a great folktale.
Happy Gardening!
1
0
文章
Joss
2017年02月20日

Few flower gardens would be complete without annual flowers. Their earliness and generosity of bloom will bring color and grace to any garden. Annual flower plants can be placed among perennials to fill in gaps in their bloom times, worked into bulb plantings, or just planted in a bed by themselves. Annuals are versatile, lovely, and colorful.

An annual plant is a plant which completes its entire life cycle in one growing season. The plant will germinate from seed, grow to maturity, flower, set seed and die in a span of a few months. Annuals generally will flower much more generously and over a longer period than perennial plants.
Annuals have been divided into three general hardiness classes, hardiness being how much cold weather, or frost they can endure and still live, grow, and bloom. The three classes are warm weather annuals, cool weather annuals, and frost hardy annuals.
Warm weather annuals will tolerate no frost at all. These are set out after the last frost date for the area in which they are to be grown. Warm weather annuals would include zinnias, marigolds, and nasturtiums.
Cool weather annual plants can tolerate some light frost and may be planted in the garden earlier. Indeed, some of these thrive in the cooler weather early in the season. These would include snapdragons, petunias, and calceolaria.

Frost hardy annuals can tolerate quite a bit of frost, indeed some, like the pansy, can be fall planted in a sheltered location and will over winter just fine. The pansy, if mild periods in winter occur, may even flower during the cold months of November, December, and March. In our southeastern Indiana garden I have had blooming pansies in January and February. Stock, calendula, and larkspur are also cold hardy annuals which can tolerate some frost.
An annual flower garden can be a very rewarding endeavor as annuals provide a bounty of color of a long period of time. Annual plants are quick to grow and bloom and will provide many months of bloom for your garden.

An annual plant is a plant which completes its entire life cycle in one growing season. The plant will germinate from seed, grow to maturity, flower, set seed and die in a span of a few months. Annuals generally will flower much more generously and over a longer period than perennial plants.
Annuals have been divided into three general hardiness classes, hardiness being how much cold weather, or frost they can endure and still live, grow, and bloom. The three classes are warm weather annuals, cool weather annuals, and frost hardy annuals.
Warm weather annuals will tolerate no frost at all. These are set out after the last frost date for the area in which they are to be grown. Warm weather annuals would include zinnias, marigolds, and nasturtiums.
Cool weather annual plants can tolerate some light frost and may be planted in the garden earlier. Indeed, some of these thrive in the cooler weather early in the season. These would include snapdragons, petunias, and calceolaria.

Frost hardy annuals can tolerate quite a bit of frost, indeed some, like the pansy, can be fall planted in a sheltered location and will over winter just fine. The pansy, if mild periods in winter occur, may even flower during the cold months of November, December, and March. In our southeastern Indiana garden I have had blooming pansies in January and February. Stock, calendula, and larkspur are also cold hardy annuals which can tolerate some frost.
An annual flower garden can be a very rewarding endeavor as annuals provide a bounty of color of a long period of time. Annual plants are quick to grow and bloom and will provide many months of bloom for your garden.
2
0


