文章
Dummer. ゛☀
2017年09月17日

Mealybugs are common pests of indoor plants. They can also be serious pests of outdoor plants in warmer climates, such as Florida and California.
Symptoms and Diagnosis
Adult females are oval, 1/5 to 1/3 inch long, and have a waxy, white, cottony appearance. They are slow moving and usually are in clusters along leaf veins, on the underside of leaves, and in hidden areas at joints. They are piercing-sucking insects, which feed on plant sap. The insects exude a honeydew, which can cause leaves to become sticky. Ants may be attracted to the sweet liquid. In time, a black mold, called sooty mold, can grow on the honeydew giving the leaves a dirty, sooty appearance. Plants infested with mealybugs become weak, may wilt and turn yellow, and eventually die.
Life Cycle
Indoors, eggs can be laid any time of year. Eggs hatch in about 2 weeks. The young mature in 6–8 weeks. Several generations can occur in the same year.
Integrated Pest Management Strategies
1. Remove insects. Dislodge as many insects as possible using a strong stream of water. A cotton swab soaked in rubbing alcohol will also effectively remove a few insects.
2. Use insecticidal soap. Insecticidal soaps specially formulated to kill insects and not damage plants are effective if used frequently until the problem is under control.
3. Use superior oil sprays. Highly refined oils sold as superior or horticultural oils are also very effective in controlling mealybugs. The oil suffocates the insects. Unlike dormant oils, these oils are highly refined and under proper conditions, can be applied to plants in foliage without damage. Follow label directions to avoid damage to some plants that may be sensitive. Superior oils are also considered nontoxic and are less likely to harm beneficial insects. When spraying indoors, protect surfaces that may be damaged by an oil residue.
4. Use chemical insecticides. Many insecticides registered for use indoors are available. Follow directions and, if possible, spray out-of-doors or in a garage, weather permitting.
5. To limit future problems, inspect plants regularly. With regular inspection, pest problems can be caught when just beginning and control is easier. It is also recommended to isolate newly acquired plants for 2–3 weeks to limit introducing pests indoors. Bringing plants indoors in the fall is another way of introducing insects indoors.
0
0
文章
Dummer. ゛☀
2017年09月17日
Spider mites are very common pests of outdoor plants. The mites suck juices from the plants, causing the plants to look dull and unhealthy. Mites also cause plants to lose vigor so that they may be unable to overcome a severe infestation, resulting in the plant's death. In Missouri, the most common outdoor spider mite is the two-spotted spider mite. The spruce spider mite infects conifers such as spruce, juniper, and arborvitae. They are less than 1/60th inch in size and difficult to see without a magnifying lens. They are not insects but rather a member of the spider family in which all members have eight legs.
Symptoms and Diagnosis
Spider mites are among the most ubiquitous of pests, attacking a wide variety of field, garden, greenhouse, nursery, and ornamental plants, as well as several weed species. Infestations of two-spotted spider mites result in the bleaching and stippling of leaves. Severe infestations may cause entire leaves to become bronzed, curled, and completely enveloped in sheets of webbing. Damage to the foliage may result in leaf drop and reduction in the overall vitality of the plant. When a leaf or branch is tapped over a white sheet of paper, the mites appear as small specks that resemble dust or pepper and may be seen to move.
Life Cycle
Adult female spider mites overwinter under loose bark, in cracks in the soil, in leaf litter, and in other protected places. In the spring, adults emerge and begin laying eggs. Each female typically deposits 70 eggs and lives for only 30 days. Eggs hatch in 5–7 days. As many as 10 generations may occur each year. The young look similar to the adults, but newly hatched young have only six legs and do not possess the characteristic dark spots on the back. Reproduction of the two-spotted spider mite is favored by hot, dry conditions, so serious damage is likely to occur in mid-July to September. The spruce spider mite is most active durng cooler weather in Spring and Fall.
Integrated Pest Management Strategies
1. Knock mites off plants with water. Spraying with a strong stream of water (particularly the undersides of leaves) will provide some control. Spray plants frequently to control future buildups. For severe infestations, affected plants or plant parts can be removed and destroyed. There are several natural predators that feed on spider mites. The use of chemical insecticides to control other garden pests can result in the death of these beneficial insects and a subsequent increase in the population of spider mites.
2. Use insecticidal soap. Insecticidal soaps specially formulated to kill insects and not damage plants are effective if used frequently until the problem is under control.
3. Use superior horticultural oil sprays. Highly refined oils sold as superior or horticultural oils are also very effective in controlling spider mites. The oil suffocates the mites. Unlike dormant oils, these oils are highly refined and under proper conditions, can be applied to plant foliage without damage. Follow label directions to avoid damage to some plants that may be sensitive. Superior oils are considered nontoxic and are less likely to kill beneficial insects.
4. Use chemical insecticides or miticides. A very safe product made from the seeds of a tropical tree is called Neem. It is commercially available under the name Margosan-O. Other chemical controls include malathion, bifenthrin, cyfluthrin, and kelthane. Be sure to follow all label directions when using pesticides. Many pesticides are very harmful to bees and fish when used improperly.
0
0
文章
Dummer. ゛☀
2017年09月15日
Whiteflies are harmful to both outdoor and indoor plants by sucking plant sap. Under certain conditions, they can also transmit disease. The whitefly parasite (Encarsia formosa) lays its eggs — as many as 50 to 100 — in both pupae and later larval stages of the white fly, destroying them before they can become adults. The host larva turns black as the parasite develops. It emerges, depending on conditions, in about two weeks. The adults will also feed on the larval juices released when they puncture the larvae.
Shop our large selection of beneficial insects, including whitefly parasites, at Planet Natural. One strip of cards — 500 parasitic wasps — treats up to 250 square feet and costs $29.50 with USPS Priority Mail shipping included!
Attracted to the flies by the smell of the honeydew they produce, E. formosa is an efficient biological control of whitefly and one of the most cost effective ways to control greenhouse and indoor infestations of the pest.
Humidity and strong light encourage the parasite’s activity. Temperature is also key as the parasite will not fly and seek out new prey at temperatures under 62 degrees. Its preference for warm, humid, well-lit conditions make the whitefly parasite the perfect solution for indoor and greenhouse whitefly problems.
Depending on pest levels, the following release rates have been established:
2-4 per square foot of infested area
1-2 per plant when pests are first noticed
Whitefly parasites are shipped as mature pupae in host eggs, glued to a paper card and almost ready to hatch as adult parasitic wasps. If pest levels are high, use a least-toxic, short-lived natural pesticide (insecticidal soap, botanical insecticide) to establish control, then release beneficials 2-3 weeks later to maintain control.
0
0
文章
Dummer. ゛☀
2017年09月14日
A common pest found in greenhouses and indoor/ outdoor gardens, thrips damage plants by sucking their juices and scraping at fruits, flowers and leaves. Plant leaves may turn pale, splotchy, and silvery, then die. Injured plants are twisted, discolored and scarred.
Adults are very small (less than 1/25 inch) straw-colored or black slender insects with two pairs of feathery wings. Without the use of a hand lens, they resemble tiny dark threads.
Damage
Extremely active, thrips feed in large groups. They leap or fly away when disturbed. Host plants include onions, beans, carrots, squash and many other garden vegetables, and many flowers, especially gladioli and roses. Both adults and the wingless larvae are attracted to white, yellow and other light colored blossoms and are responsible for spreading tomato spotted wilt virus and impatiens necrotic spot virus.
Life Cycle
Adults and pupae overwinter in garden soil. In spring, newly emerged females insert eggs into the tissues of flowers, leaves or stems. (They do not need to mate for reproduction.) Each female can produce up to 80 eggs, which hatch within days in warm weather or weeks to months in colder weather. They become wingless larvae (nymphs), which feed on plant sap. After two or more nymphal stages, many thrips drop to the soil to pupate. Emerging adults fly to the plant and repeat the cycle. There may be 12-15 generations per year with the entire cycle from egg to adult requiring less than 16 days in warm weather.
Control
Thrip management is a matter of garden maintenance — reducing the places where thrips may breed — and requires removing plant debris while it’s still on the ground and green. Thrips lay their eggs in slits they cut in live plant stems. Vigilance — spotting problems early and responding to them — is also required. Check your plants for damage and clusters of the pests at the place where leaves are attached to stems. Don’t wait to take action. Take the measures listed below. And be sure to use the safest, most proven products.
To get rid of thrips remove weeds and grass from around garden areas to eliminate alternate hosts. Clean up crop debris in the garden, especially onion leaves after harvest. (Dry mulch will not attract thrips. Green mulch will.)
Inspect all plants you import into the garden for signs of thrips or their damage. Discard any infested plants by securely bagging and putting in the trash.
Blue sticky traps are helpful for monitoring adult populations.
If found, use the Bug Blaster to hose off plants with a strong, encompassing spray of water to reduce pest numbers.
Release commercially available beneficial insects, such as minute pirate bugs, the effective thrips predator (feeds on eggs and larvae before they can become adults), ladybugs, and lacewing, (especially effective in green houses) to attack and destroy all stages of this pest. For best results, make releases after first knocking down severe infestations with water spray or other method.
Severe populations may require a least-toxic, short-lived botanical insecticide (pyrethrin) to reduce pest numbers. Follow-up with predatory insects to maintain control.
Safe, smothering insecticidal soaps made from naturally occurring plant oils and fats, are also effective for knocking down heavy infestations (and won’t harm most naturally occurring beneficial insects). Spinosad and neem oil can be used to spot treat heavily infested areas.
0
0
文章
Dummer. ゛☀
2017年09月14日
Many species of the spider mite (family: Tetranychidae), so common in North America, attack both indoor and outdoor plants. They can be especially destructive in greenhouses.
Spider mites are not true insects, but are classed as a type of arachnid, relatives of spiders, ticks and scorpions. Adults are reddish brown or pale in color, oval-shaped and very small (1/50 inch long) – about the size of the period at the end of this sentence. Immature stages resemble the adults except only smaller.
Mites live in colonies, mostly on the underside of leaves, and feed by piercing leaf tissue and sucking up the plant fluids. Feeding marks show up as light dots on the leaves. As feeding continues, the leaves turn yellow and may dry up and drop off.
Spider mites are most common in hot, dry conditions, especially where their natural enemies have been killed off by insecticide use. Some of the many species common in North America are predators of the plant-feeding mites, which make up the vast majority. They are also very prolific, which is why heavy infestations often build up unnoticed before plants begin to show damage.
Large populations are often accompanied by fine webbing. Host plants are many and include strawberries, melons, beans, tomatoes, eggplant, ornamental flowers, trees and most houseplants.
Life Cycle
Most mite species overwinter as eggs on the leaves and bark of host plants. In early spring, as temperatures warm, tiny six-legged larvae begin hatching and feed for a few days before seeking shelter where they molt into the first nymphal stage. Nymphs have eight-legs and pass through two more molts before becoming mature adults.
After mating, females continuously produce as many as 300 eggs over a couple of weeks. Hot, dry weather favors rapid development of these pests. During such conditions the time it takes to pass from egg to adult may occur in as little as 5 days. There are several overlapping generations per year.
Note: Spider mites are wind surfers. They disperse over wide areas riding their webbing on the breezes. Careful containment and disposal of infested plants is crucial.
Damage
Spider mites, almost too small to be seen, pass into our gardens without notice. No matter how few, each survives by sucking material from plant cells. Large infestations cause visible damage. Leaves first show patterns of tiny spots or stipplings. They may change color, curl and fall off. The mites activity is visible in the tight webs that are formed under leaves and along stems.
The University of California Agricultural and Natural Resources division’s Integrated Pest Management website says the following about the damage mites cause:
On annual vegetable crops — such as squash, melons and watermelons — loss of leaves can have a significant impact on yield and lead to sunburning.
On crops such as sugar peas and beans, where pods are attacked, spider mites can cause direct damage.
On ornamentals, mites are primarily an aesthetic concern, but they can kill plants if populations become very high on annual plants. Spider mites are also important pests of field-grown roses.
Control
Chemical pesticide use actually encourages the spread of spider mites by killing the beneficial insects that prey on them. Mites are also known to develop quick resistance to various pesticides. For these reasons, it’s important to control mites with effective natural and organic methods.
Prune leaves, stems and other infested parts of plants well past any webbing and discard in trash (and not in compost piles). Don’t be hesitant to pull entire plants to prevent the mites spreading to its neighbors.
Use the Bug Blaster to wash plants with a strong stream of water and reduce pest numbers.
Commercially available beneficial insects, such as ladybugs, lacewing and predatory mites are important natural enemies. For best results, make releases when pest levels are low to medium.
Nuke Em, a relatively new organic insecticide containing food-grade ingredients, works fast and kills most indoor gardening pests at the egg, larvae or adult stage. Best of all, it does this without leaving a residue on the leaves that can impact flavor.
If populations are high, use a least-toxic, short-lived pesticide (Take Down Spray, Doktor Doom Foggers) to reduce infestations, then release predatory mites to maintain control.
Insecticidal soap, neem oil or botanical insecticides can be used to spot treat heavily infested areas.
On fruit trees, horticultural oil should be applied early in the season or late in the fall to destroy overwintering eggs.
Dust on leaves, branches and fruit encourages mites. A mid-season hosing (or two!) to remove dust from trees is a worthwhile preventative.
Water stress makes both trees and garden plants more susceptible to mite infestations. Make sure your plants are properly watered.
0
0
文章
Dummer. ゛☀
2017年09月13日
Citrus mealybugs, first identified in the U.S. in 1879 can infest and destroy greenhouse and outdoor crops of plant hosts such as Tulips, Cannas, Begonias, Narcissus and Coleus.
Identification
Host plants may be dropping leaves, have distorted growth or areas of mold and waxy cottony secretions. Although they are tiny, less than 5 mm long (25.4 mm per inch), wingless female mealybugs with peripheral body filaments or winged males with tail filaments may be lurking and munching in plant crevices, looking as if they had been rolled in flour and ready to be tossed into a micro-sized frying pan.
Damage
The mealybugs suck out the host plants sap, injecting toxic saliva and secreting honeydew that grows mold and a cottony wax that can disfigure flowers and make them unsuitable for the market, dining room table or kitchen windowsill. Ants who feast on the tasty honeydew ferry the wingless females to neighboring plants.
Control
A first and final defense is to destroy the infested plants as mealybug infestations can be fatal to the host plant if left untreated. A second and less radical approach is to employ beneficial insects, such as Mealybug Destroyer beetles which feed voraciously on the pests and can be purchased from commercial suppliers.
Note: Like the pest insect, these beetles do not survive cold weather so they must either be released into greenhouses, outdoors in temperate climates or outdoors during warm seasons in colder climes. In addition, birds will prey on the beetles outdoors.
Also, spreading bone meal at the base of any plants or wrapping the trunk in cloth may discourage ants from visiting and spreading the tenacious pests.
Neighborhood Watch
Other botanical derivatives such as Rotenone and Pyrethrum have been effective in some applications and controls that work in one location may not work in another, so ask other local organic gardeners or the county extension service for suggestions.
0
0
文章
Dummer. ゛☀
2017年08月25日
Popular in Asian cuisine, lemongrass is a very low maintenance plant that can be grown outdoors in USDA zone 9 and above, and in an indoor/outdoor container in colder zones. It’s fast growing though, and can get a little unruly if not pruned back regularly. Keep reading to learn more about how to cut back lemongrass.
How to Cut Back Lemongrass Plants
If given plenty of sun, water, and fertilizer, lemongrass can grow to as big as 6 feet (1.8 m.) high and 4 feet (1.2 m.) wide. Pruning lemongrass plants is a good idea for keeping them a manageable size as well as encouraging new growth.
Cutting lemongrass stalks for cooking will keep the plant somewhat in check, but lemongrass grows so quickly that extra pruning is often necessary. The best time for trimming lemongrass is early spring, when the plant is still dormant. If your lemongrass has been left untended for a while, it has probably accumulated some dead material. The first thing to do is get rid of that.
Rake away anything that’s unattached underneath, then pull out any dead stalks that are still in the ground. These are probably mostly around the outside of the plant. Once all that remains of your plant is green, you can cut down the tops of the stalks to make it a more manageable size. Lemongrass is very forgiving and can be cut back quite drastically. Cut it down to as little as 3 feet (.9 m.) high and prune it regularly to keep it that size if you so desire.
Pruning Lemongrass in Colder Climates
If you live in a colder climate, your lemongrass may go dormant over the winter, with all of its leaves turning brown. If this is the case, wait until early spring for lemongrass pruning and cut all the leaves away, right down to the tender white part of the stalk. This may look extreme when you do it, but before long, fresh growth should come in to replace all that lost material.
0
0
文章
Dummer. ゛☀
2017年08月20日
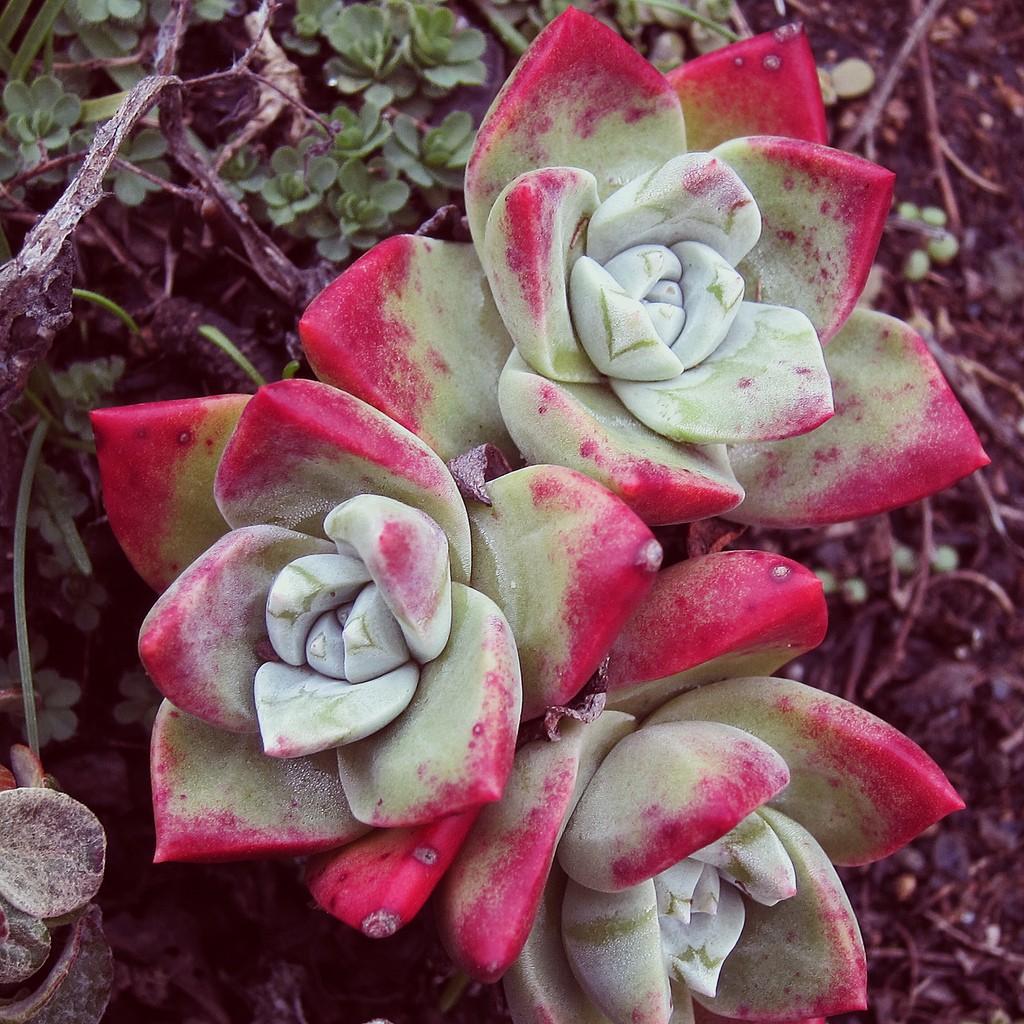
Succulents are a group of plants with one of the most diverse forms, colors and blooms. These easy to care for indoor and outdoor specimens are a dream for the busy gardener. What is a succulent plant? Succulents are specialized plants that store water in their leaves and/or stems. They are remarkably adapted to harsh climates where water is scarce or comes sporadically. Merriam Webster defines a succulent as “full of juice” or “juicy.” Read on for some fun succulent plant info so you can get started collecting the myriad of varieties available in this special class of plant.
What is a Succulent?
Oddly, some botanists and horticultural experts differ on which plants are technically succulents. Their appearance differs from species to species, but one common characteristic is swollen leaves, pads or stems. The exact classification of a certain plant will have to go to the experts, but whatever the case, all types of succulents or those that appear to be succulents are pleasing to the eye, minimal regarding care and produce delightful little surprises during their life cycle. Again, referring to the dictionary, a succulent plant has thick stems or leaves that store water. This unique adaptation allows the plant to survive in low moisture regions of the world. Succulents are often thought to be native only to arid regions, such as deserts, but they also belong in forest settings, high alpine regions, coasts and dry tropical areas. There are over 50 families that are classed as succulents. There are both xerophytic succulents that thrive in dry areas and halophytic types which live in boggy saline soil. The xerophytic succulents are the best known form and widely available as house or garden plants.

Succulent Plant Info
While most types of succulents require warm temperatures, moderately dry, well-draining soil and sunlight, some can withstand cooler or even downright cold temperatures. These hardy succulents are able to withstand brief freezes and fend off frost damage. Occasionally, cold snaps will force a plant into dormancy, but well established hardy types will spring back when warm weather returns. It is important to know if your succulent is a tropical or hardy variety in instances where it is planted outdoors. One of the main succulent plant characteristics is thick, fleshy leaves or pads but there are also non-succulent leaved varieties. This is why botanists and other experts disagree on some plant’s classification. The succulent vs. cactus question is often debated even among professional growers. This is because cacti produce the fleshy leaves but lack other characteristics familiar to the family. In actuality, a cactus is indeed a succulent due to the trait of harnessing and storing water shared by all species in the group. That said, a succulent is not considered a cactus.

Succulent Plant Types
If swollen leaves and stems are the main succulent plant characteristics visible, there are also other qualities which delineate the group. Shallow roots are one adaptation shared among the succulents. A few varieties have deeper tap roots but the majority has wide, surface root zones that allow maximum moisture capture when infrequent rains occur. Some of the succulent plant types commonly available are: Agaves Yucca Aloe Cacti Bromeliad Sedum Sempervivum Echeveria Various euphorbias Some types of orchids It is important to note their hardiness range, but many of these can thrive in the garden. Smaller succulents make varied and fascinating container displays for the indoors. Almost all species need at least 8 hours of light, warm daytime temperatures, consistent water during the growing season and well-drained soil.
What is a Succulent?
Oddly, some botanists and horticultural experts differ on which plants are technically succulents. Their appearance differs from species to species, but one common characteristic is swollen leaves, pads or stems. The exact classification of a certain plant will have to go to the experts, but whatever the case, all types of succulents or those that appear to be succulents are pleasing to the eye, minimal regarding care and produce delightful little surprises during their life cycle. Again, referring to the dictionary, a succulent plant has thick stems or leaves that store water. This unique adaptation allows the plant to survive in low moisture regions of the world. Succulents are often thought to be native only to arid regions, such as deserts, but they also belong in forest settings, high alpine regions, coasts and dry tropical areas. There are over 50 families that are classed as succulents. There are both xerophytic succulents that thrive in dry areas and halophytic types which live in boggy saline soil. The xerophytic succulents are the best known form and widely available as house or garden plants.
Succulent Plant Info
While most types of succulents require warm temperatures, moderately dry, well-draining soil and sunlight, some can withstand cooler or even downright cold temperatures. These hardy succulents are able to withstand brief freezes and fend off frost damage. Occasionally, cold snaps will force a plant into dormancy, but well established hardy types will spring back when warm weather returns. It is important to know if your succulent is a tropical or hardy variety in instances where it is planted outdoors. One of the main succulent plant characteristics is thick, fleshy leaves or pads but there are also non-succulent leaved varieties. This is why botanists and other experts disagree on some plant’s classification. The succulent vs. cactus question is often debated even among professional growers. This is because cacti produce the fleshy leaves but lack other characteristics familiar to the family. In actuality, a cactus is indeed a succulent due to the trait of harnessing and storing water shared by all species in the group. That said, a succulent is not considered a cactus.
Succulent Plant Types
If swollen leaves and stems are the main succulent plant characteristics visible, there are also other qualities which delineate the group. Shallow roots are one adaptation shared among the succulents. A few varieties have deeper tap roots but the majority has wide, surface root zones that allow maximum moisture capture when infrequent rains occur. Some of the succulent plant types commonly available are: Agaves Yucca Aloe Cacti Bromeliad Sedum Sempervivum Echeveria Various euphorbias Some types of orchids It is important to note their hardiness range, but many of these can thrive in the garden. Smaller succulents make varied and fascinating container displays for the indoors. Almost all species need at least 8 hours of light, warm daytime temperatures, consistent water during the growing season and well-drained soil.
3
3
文章
Dummer. ゛☀
2017年08月20日
The rubber tree is a large houseplant and most people find it is easy to grow and care for indoors. However, some people ask about growing outdoor rubber tree plants. In fact, in some areas, this plant is used as a screen or patio plant. So, can you grow rubber plant outside? Read more to learn about taking care of a rubber plant outside in your area.
Can You Grow Rubber Plants Outside?
Gardeners in USDA Hardiness Zones 10 and 11 can grow the plant outdoors, according to most rubber plant information. Outdoor rubber tree plants (Ficus elastica) may grow in Zone 9 if winter protection is offered. In this area, outdoor rubber tree plants should be planted on the north or east side of a building for protection from the wind. When the plant is young, prune it to a single trunk, as these plants tend to split when caught in the wind.
Rubber plant information also says to plant the tree in a shady area, although some plants accept light, dappled shade. Thick, glabrous leaves burn easily when exposed to sunlight. Those living in tropical zones outside of the United States can grow outdoor rubber tree plants easily, as this is their native environment. In the wild, outdoor rubber tree plants can reach 40 to 100 feet in height. When using this plant as an outdoor ornamental, pruning limbs and the top of the plant make it sturdier and more compact.
Rubber Plant Information for Northern Areas
If you live in a more northern area and want to grow outdoor rubber tree plants, plant them in a container. Taking care of a rubber plant growing in a container can include locating them outdoors during seasons of warm temperatures. Optimum temperatures for taking care of a rubber plant outdoors are 65 to 80 F. (18-27 C.) Outdoors, plants acclimated to cooler temperatures should be brought indoors before temperatures reach 30 F. (-1 C.).
Taking Care of a Rubber Plant Outdoors
Rubber plant information suggests plants require deep watering and then allow the soil to dry out almost completely. Some sources say containerized plants should be allowed to dry out completely between waterings. Still other sources say the drying of the soil causes leaves to drop. Keep an eye on your rubber tree growing outdoors and use good judgment on watering, depending on its location.
0
0
文章
Dummer. ゛☀
2017年08月20日
Pitcher plant care is relatively easy and they make interesting houseplants or outdoor specimens in milder climes. Do pitcher plants need fertilizer? In ideal conditions, the plant makes all the food it needs by supplementing with insects that provide nitrogen. Indoor plants may need a little help in the nitrogen department. Find out how to fertilize a pitcher plant and enjoy the distinctive appearance and habits of this amazing species.
Do Pitcher Plants Need Fertilizer?
Sarracenia is a large group of carnivorous plants found across the globe. More commonly known as pitcher plant, the genus is formed of plants that have found a unique way to survive in low nutrient soil. Sarracenia are North American natives. Nepenthes are the tropical varieties of pitcher plant, which need warm weather and plenty of humidity. The plants harvest insects by trapping them in their pitcher-shaped leaves. The insects provide nitrogen for the plant’s growth and health. In the wild they thrive without anyone feeding, but potbound plants will benefit from additional nutritional supplementation. Seedlings also need some food in addition to their soil medium since they do not have properly formed pitchers in which to catch gnats and other tiny insects.
Basic Pitcher Plant Care
Use any porous potting mix, such as orchid mix, for growing pitcher plants. It should be slightly acidic and well draining. Plant pitcher plants in an unglazed ceramic pot with good drainage holes. Both groups of the plant require plenty of water and should never be allowed to dry out. They love to be in a dish of water or even at the edge of a water garden. An important part of pitcher plant care is the type of water. These plants are sensitive to tap water and should be in contact with distilled or rain water only. Full sun locations are preferable with some shelter from the harshest midday rays. Outdoor plants have plenty of opportunity to catch flies while indoor plants may need you to hunt for them. Without supplemental insects, fertilizing pitcher plants is necessary to keep them healthy.
How to Fertilize a Pitcher Plant
Pitcher plants should not be fertilized over the soil. The plants are used to low nutrient soil in their native habitats and excess nutrients can actually kill them. Instead, if the plant is doing poorly, try to feed it an insect via the pitcher structures or add diluted liquid fertilizer directly into the tubular leaves. A high nitrogen pitcher plant fertilizer is perfect to fulfill the plant’s needs. A mild fish fertilizer diluted by one-quarter every two to four weeks can be added to the pitcher. Young plants and seedlings benefit more from fertilizer and may be soil fed. Dilute by half and follow any soil feeding with a drench of rainwater or distilled water. Make sure the pitcher is at least half full before fertilizing pitcher plants. Outdoor plants should be fine without extra feeding, provided they are in a moist, acidic soil and bright light. Some commercial formulas that work well as pitcher plant fertilizer are Osmocote, Miracid and Miracle Grow. Don’t forget to dilute the fertilizer heavily with mineral free water.
1
0
文章
Dummer. ゛☀
2017年08月17日
Prickly pear cacti, also known as Opuntia, are lovely cactus plants that can be planted in an outdoor desert garden or kept as a houseplant. Unfortunately, there are several common diseases that can attack these beautiful plants. One of the most serious diseases that affects prickly pear is cactus sunscald.

What is Cactus Sunscald?
So, what is cactus sunscald? Despite the name, cactus sunscald disease is not a result of sun exposure. It is actually a disease caused by the fungus Hendersonia opuntiae. This fungus infects the cladodes, or cactus pads, which are the thickened, flattened, green stems of Opuntia cacti. Cactus sunscald disease first causes discoloration and cracking in a localized area of one cladode, then gradually spreads. This eventually causes the entire cactus to rot.

Signs of Cactus Sunscald Disease
Cactus sunscald is common, so it is important to recognize the signs. The problems begin when a small, circular, greyish-brown spot appears on one of the cactus pads. The discolored area may also be cracked. The infected area will later expand across the cladode, and the outer portion may turn reddish-brown. Finally, the entire cactus will rot. Once cactus sunscald begins to attack a cactus, other fungi may also take advantage of the infection and begin growing in the damaged area. Mycosphaerella fungi can also cause a similar disease, also known as sunscald or scorch, on prickly pear cacti. This disease causes similar symptoms and will also eventually kill the cactus. Sunburn on cactus can appear similar to cactus sunscald, but the affected area will appear yellowish or white and will not appear to be gradually spreading from a small original area. Sunburn can be prevented by shielding the cactus from intense sun. As long as the sunburn is not severe, it will not kill the plant.

Cactus Sunscald Treatment
Unfortunately, treating cactus sunscald is difficult or impossible. There is no cure, and infected plants usually cannot be saved. If you have more than one Opuntia cactus, focus on preventing the disease from spreading to the healthy plants. The first step it to recognize the disease and to distinguish it from a sunburn. If your cactus does have sunscald, you should remove and dispose of the infected cactus as soon as possible to prevent the disease from spreading to healthy plants.
What is Cactus Sunscald?
So, what is cactus sunscald? Despite the name, cactus sunscald disease is not a result of sun exposure. It is actually a disease caused by the fungus Hendersonia opuntiae. This fungus infects the cladodes, or cactus pads, which are the thickened, flattened, green stems of Opuntia cacti. Cactus sunscald disease first causes discoloration and cracking in a localized area of one cladode, then gradually spreads. This eventually causes the entire cactus to rot.
Signs of Cactus Sunscald Disease
Cactus sunscald is common, so it is important to recognize the signs. The problems begin when a small, circular, greyish-brown spot appears on one of the cactus pads. The discolored area may also be cracked. The infected area will later expand across the cladode, and the outer portion may turn reddish-brown. Finally, the entire cactus will rot. Once cactus sunscald begins to attack a cactus, other fungi may also take advantage of the infection and begin growing in the damaged area. Mycosphaerella fungi can also cause a similar disease, also known as sunscald or scorch, on prickly pear cacti. This disease causes similar symptoms and will also eventually kill the cactus. Sunburn on cactus can appear similar to cactus sunscald, but the affected area will appear yellowish or white and will not appear to be gradually spreading from a small original area. Sunburn can be prevented by shielding the cactus from intense sun. As long as the sunburn is not severe, it will not kill the plant.
Cactus Sunscald Treatment
Unfortunately, treating cactus sunscald is difficult or impossible. There is no cure, and infected plants usually cannot be saved. If you have more than one Opuntia cactus, focus on preventing the disease from spreading to the healthy plants. The first step it to recognize the disease and to distinguish it from a sunburn. If your cactus does have sunscald, you should remove and dispose of the infected cactus as soon as possible to prevent the disease from spreading to healthy plants.
0
0
文章
Dummer. ゛☀
2017年08月15日
Root rot is a common disease in plants that is usually caused by poor drainage or improper watering. While more common in potted plants, root rot can also affect outdoor plants. Desert plants like succulents, cacti and agave are especially susceptible to root rot if they are planted in the wrong conditions. Continue reading to learn more about managing root rot in agave.

What is Agave Root Rot?
Agave, also commonly called century plant, is a desert plant native to Mexico. It grows best in dry conditions in full sun. Too much shade or soil that is too moist and drains poorly can cause the plant’s roots to rot. Weather fluctuations, such as unusual cold and rainy periods followed by extreme heat and humidity, can also contribute to root rot.
Agave is hardy in zones 8-10. They have been known to survive temperature down to 15 degrees F. (-9 C.) but when exposed to freezing temperatures, the plant will be damaged by frost in just a few hours. Weakened, damaged plant tissues become a perfect host for fungal and bacterial diseases and pests. Then as the earth heats up and humidity fills the air, fungal diseases quickly grow and spread. Because roots are under soil, root rot may go undetected until the whole plant tips over from having no roots to anchor it in place. Bacterial crown and root rot can also be common in agave, caused by the agave snout weevil. The adult agave snout weevil chews on the lower parts of the agave plant, injecting the plant tissues with a bacteria as it chews, which causes them to rot. It then lays its eggs in the rotting tissue and, when hatched, the agave snout weevil larvae feed on the rotting crown and roots.

Alleviating Root Problems of Agave Plants
Agave root rot symptoms may include a general unhealthy appearance of the plant, lesions around the plant crown, tipping over of the plant and roots that are gray/black and slimy. If caught before the entire root system has rotted, you can dig up the plant, remove all soil from the roots and cut off all the rotted parts. Then treat the plant and roots with a fungicide such as thiopanate methyl or neem oil. Move the plant to a different location with full sun and well-draining soil. Pumice can be mixed in with the soil for better drainage. If the roots have all rotted, all you can do is discard the plant and treat the soil with fungicide to prevent the fungal disease from spreading to other plants. To prevent agave root rot in the future, remember agave is a desert plant. It needs full sun and should be planted in an area that tends to be dry, like a rock garden.
What is Agave Root Rot?
Agave, also commonly called century plant, is a desert plant native to Mexico. It grows best in dry conditions in full sun. Too much shade or soil that is too moist and drains poorly can cause the plant’s roots to rot. Weather fluctuations, such as unusual cold and rainy periods followed by extreme heat and humidity, can also contribute to root rot.
Agave is hardy in zones 8-10. They have been known to survive temperature down to 15 degrees F. (-9 C.) but when exposed to freezing temperatures, the plant will be damaged by frost in just a few hours. Weakened, damaged plant tissues become a perfect host for fungal and bacterial diseases and pests. Then as the earth heats up and humidity fills the air, fungal diseases quickly grow and spread. Because roots are under soil, root rot may go undetected until the whole plant tips over from having no roots to anchor it in place. Bacterial crown and root rot can also be common in agave, caused by the agave snout weevil. The adult agave snout weevil chews on the lower parts of the agave plant, injecting the plant tissues with a bacteria as it chews, which causes them to rot. It then lays its eggs in the rotting tissue and, when hatched, the agave snout weevil larvae feed on the rotting crown and roots.
Alleviating Root Problems of Agave Plants
Agave root rot symptoms may include a general unhealthy appearance of the plant, lesions around the plant crown, tipping over of the plant and roots that are gray/black and slimy. If caught before the entire root system has rotted, you can dig up the plant, remove all soil from the roots and cut off all the rotted parts. Then treat the plant and roots with a fungicide such as thiopanate methyl or neem oil. Move the plant to a different location with full sun and well-draining soil. Pumice can be mixed in with the soil for better drainage. If the roots have all rotted, all you can do is discard the plant and treat the soil with fungicide to prevent the fungal disease from spreading to other plants. To prevent agave root rot in the future, remember agave is a desert plant. It needs full sun and should be planted in an area that tends to be dry, like a rock garden.
0
1
文章
Miss Chen
2017年08月14日

Flowering annuals grown in containers add color to an apartment terrace, a garden patio or any other outdoor spot. When choosing plants for potting, add some zinnias (Zinnia elegans) for blossoms that keep coming all season long. Zinnias grow as annuals in all parts of the United States and come in many different sizes, with flowers in varied shapes and vivid colors. Growing them in pots is easy, requiring only a little care at the start and some tidying during the season.
Getting Started

Zinnias are easy to start from seed, because their seeds are large and easy to handle, and they usually germinate quickly. Start seeds indoors about six weeks before the last spring frost, sowing them in a moistened, soilless mixture in flats or small pots. Cover them with mix to a depth of about 1/4 inch and keep them lightly moist until seedlings sprout; keep in a sunny spot at room temperature until you're ready to transplant them into larger containers.
You can also start by purchasing seedlings at a garden center or nursery, but don't buy them more than a day or two before you're ready to plant, so they're in top shape when they go in the ground. Choose compact, well-branched plants with flower buds and healthy, bright green leaves that aren't discolored. If you can't plant immediately, water the seedlings and keep them in a shady spot until you're ready.
Plant seedlings in outdoor containers any time after danger of frost has passed.
Potting and Planting

Zinnias grow well in any type of container, including plastic or clay pots, wooden half-barrels, a windowbox or a hanging basket, but choose a container that has at least one drainage hole to help prevent fungal growth in the soil. Disinfect a previously used container to kill disease organisms or pests before using by soaking it in a solution that's 1 part bleach to 9 parts water for 10 minutes, then clean it with water that contains a little dish detergent, and rinse well.
Zinnias come in many sizes, from varieties that grow 2 feet tall to dwarf cultivars only 6 inches high. You can plant any of these in a container. As they all spread to about 1 or 1 1/2 feet, a good rule of thumb for spacing is to set one zinnia in a 6-inch pot, three plants in a 10-inch pot and up to five zinnias in a 14-inch pot.
Soil, Sun, Water and Fertilizer

Plant zinnias in any commercial potting mix, or make your own. For example, for two 14-inch containers, combine 2 1/2 gallons peat moss, 2 1/2 gallons perlite, 1 1/4 gallons compost, 2 cups fine sand and 1/2 cup ground limestone. Don't use garden soil, which can harbor pests or disease-causing organisms.
Plant seedlings to the same level as they were in their original pot and water them in well. Keep zinnias in a sunny location that gets at least four hours of sun daily -- more sun means more flowers -- and water whenever the top inch or two of soil feels dry to the touch. Let the pot drain after watering and never keep it in a water-filled saucer.
To keep flowers coming all season, fertilize the pot weekly, using a water-soluble, 5-10-5 formula diluted at a rate of 1/4 teaspoon per gallon of water, but check your product label for additional directions.
Trimming and Possible Problems

Zinnias continue producing new flower buds until plants dieback in the fall. But you can help keep the plants full of blooms and tidy by trimming off flowers as they fade -- called deadheading. This also helps promote new branching behind the old flower, keeping the plant bushy. Using sharp shears, cut off the stem just behind the old flower but in front of any new shoots that may be growing on the stem. Clean your blades with rubbing alcohol between cuts to prevent spread of plant disease.
Zinnias are usually free of any pest problems, but they are susceptible to several fungal problems, including powdery mildew which causes a white powder to accumulate on leaves that eventually wilt and dry up. This is best prevented by keeping the container in a spot with good air circulation and watering only at the plant's base, keeping foliage dry.
Getting Started
Zinnias are easy to start from seed, because their seeds are large and easy to handle, and they usually germinate quickly. Start seeds indoors about six weeks before the last spring frost, sowing them in a moistened, soilless mixture in flats or small pots. Cover them with mix to a depth of about 1/4 inch and keep them lightly moist until seedlings sprout; keep in a sunny spot at room temperature until you're ready to transplant them into larger containers.
You can also start by purchasing seedlings at a garden center or nursery, but don't buy them more than a day or two before you're ready to plant, so they're in top shape when they go in the ground. Choose compact, well-branched plants with flower buds and healthy, bright green leaves that aren't discolored. If you can't plant immediately, water the seedlings and keep them in a shady spot until you're ready.
Plant seedlings in outdoor containers any time after danger of frost has passed.
Potting and Planting
Zinnias grow well in any type of container, including plastic or clay pots, wooden half-barrels, a windowbox or a hanging basket, but choose a container that has at least one drainage hole to help prevent fungal growth in the soil. Disinfect a previously used container to kill disease organisms or pests before using by soaking it in a solution that's 1 part bleach to 9 parts water for 10 minutes, then clean it with water that contains a little dish detergent, and rinse well.
Zinnias come in many sizes, from varieties that grow 2 feet tall to dwarf cultivars only 6 inches high. You can plant any of these in a container. As they all spread to about 1 or 1 1/2 feet, a good rule of thumb for spacing is to set one zinnia in a 6-inch pot, three plants in a 10-inch pot and up to five zinnias in a 14-inch pot.
Soil, Sun, Water and Fertilizer
Plant zinnias in any commercial potting mix, or make your own. For example, for two 14-inch containers, combine 2 1/2 gallons peat moss, 2 1/2 gallons perlite, 1 1/4 gallons compost, 2 cups fine sand and 1/2 cup ground limestone. Don't use garden soil, which can harbor pests or disease-causing organisms.
Plant seedlings to the same level as they were in their original pot and water them in well. Keep zinnias in a sunny location that gets at least four hours of sun daily -- more sun means more flowers -- and water whenever the top inch or two of soil feels dry to the touch. Let the pot drain after watering and never keep it in a water-filled saucer.
To keep flowers coming all season, fertilize the pot weekly, using a water-soluble, 5-10-5 formula diluted at a rate of 1/4 teaspoon per gallon of water, but check your product label for additional directions.
Trimming and Possible Problems
Zinnias continue producing new flower buds until plants dieback in the fall. But you can help keep the plants full of blooms and tidy by trimming off flowers as they fade -- called deadheading. This also helps promote new branching behind the old flower, keeping the plant bushy. Using sharp shears, cut off the stem just behind the old flower but in front of any new shoots that may be growing on the stem. Clean your blades with rubbing alcohol between cuts to prevent spread of plant disease.
Zinnias are usually free of any pest problems, but they are susceptible to several fungal problems, including powdery mildew which causes a white powder to accumulate on leaves that eventually wilt and dry up. This is best prevented by keeping the container in a spot with good air circulation and watering only at the plant's base, keeping foliage dry.
2
1
文章
Dummer. ゛☀
2017年08月12日
Weeping figs (Ficus benjamina) are elegant trees with slender gray trunks and a profusion of green leaves. Weeping fig tree care depends on whether you are growing weeping fig trees indoors or outdoors. Let’s learn more about outdoor care for weeping figs.
Weeping Fig Plant Information
Growing weeping fig trees indoors and growing weeping fig trees outdoors are completely different endeavors. It is almost as if indoor and outdoor weeping figs are different species.
Indoors, weeping figs are attractive container plants that rarely grow above 6 to 8 feet. Outdoors, however, the trees grow into huge specimens (up to 100 feet tall and 50 feet wide) and are often used for hedges. That being said, weeping figs only thrive outdoors in USDA plant hardiness zones 10 to 11. Therefore, most weeping figs are grown as indoor plants. If you are fortunate enough to live in one of these warm, tropical-like areas though, caring for weeping figs outdoors is something you need to know.
Weeping Fig Tree Care Outdoors
As indoor container plants, weeping figs grow quite slowly, but outside, it’s a different story. This plant can quickly become a monster of a tree if not kept pruned, which it tolerates well. In fact, with regards to weeping fig tree pruning, it readily accepts severe pruning, so don’t hesitate to remove any dead foliage when you see it. If you want to do weeping fig tree pruning to shape or reduce the size of the tree, you can take off up to one-third of the outer growth of the canopy at a time. Caring for weeping figs indoors is a matter of selecting an appropriate location. As its roots spread just as fast as it grows tall, the tree can potentially damage foundations. So, if choosing to grow outdoors, plant it well away from the home, at least 30 feet. If you read up on weeping fig plant information, you find that the plant prefers well-drained, moist, loamy soil and thrives in a location with bright, indirect sunlight indoors. Outdoors is pretty much the same with a few exceptions. The tree can grow well in full sun to shade.
Once established, creeping figs are fairly drought and heat tolerant. They are said to be hardy to 30 F. (-1 C.) but just one hard frost can cause severe damage to the tree. However, when grown in areas with less harsh winters, most will rebound provided the roots are protected. Adding a 3- to 4-inch layer of mulch can help. Outdoor problems with creeping figs include freezing temps; severe drought; high winds; and insect pests, especially thrips. Weeping fig tree care can be tricky since issues are often hard to diagnose. No matter what the problem, the tree reacts the same way: it drops leaves. Most experts agree that the number one cause of leaf drop in weeping fig is overwatering (especially indoors). A good rule of thumb is to keep your tree’s soil moist but never wet, backing off in the winter. You can provide the tree with liquid fertilizer about once a month during the growing season, but outdoors this isn’t usually necessary or advisable due to its faster growth.
0
0
文章
Miss Chen
2017年08月10日
Roses can experience two major types of flies: syrphid flies and rose midges. One of these is actually a beneficial insect and the other means big trouble for rose plants. Flies pass by rose plants because they're a naturally occurring outdoor insect, but if you notice flies hanging around your rose plants repeatedly, you may have a problem.

Cause
Plants that are neglected or are not receiving adequate care tend to experience more pests than those that receive better care, but there is no guarantee that your plant will have a fly-free season. Unfortunately, flies and other garden pests are natural. However, providing your rose with the right care and treating the flies can reduce any problems.
Types
The rose midge is a destructive fly that can greatly harm rose plants. Adult rose midges lay eggs in the flowers; hatched larvae munch on flower buds. The affected flowers can wither and turn black. Larvae pupate in the soil beneath the plant, leading to a new generation of flies near the roses. If you don't break the cycle, your plants will suffer. Syrphid flies also enjoy roses, but these insects are beneficial since they eat aphids, another rose pest. These flies look like wasps, not flies, and feed on rose nectar. If you see these flies, there's nothing to worry about.

Treatment
Control rose midges with insecticides. Look for an insecticide that is approved for use in your area and apply the insecticide per the manufacturer's instructions. If you prefer natural pest control, use beneficial insects to eat the flies. Purchase predatory wasps online or at your local nursery. Placing landscape cloth below your roses means the rose midge larvae will fall onto the cloth to pupate. You can scoop up the cloth and throw it out, reducing your midge population.
Care
Good care cuts down on pests. Prune off dead branches and deadhead spent blossoms to maintain a neat bush. Water roses when the soil feels dry to the touch, until the soil becomes saturated. Watch for signs of diseases or pests so you can take action quickly and reduce potential harm to your rose.
Cause
Plants that are neglected or are not receiving adequate care tend to experience more pests than those that receive better care, but there is no guarantee that your plant will have a fly-free season. Unfortunately, flies and other garden pests are natural. However, providing your rose with the right care and treating the flies can reduce any problems.
Types
The rose midge is a destructive fly that can greatly harm rose plants. Adult rose midges lay eggs in the flowers; hatched larvae munch on flower buds. The affected flowers can wither and turn black. Larvae pupate in the soil beneath the plant, leading to a new generation of flies near the roses. If you don't break the cycle, your plants will suffer. Syrphid flies also enjoy roses, but these insects are beneficial since they eat aphids, another rose pest. These flies look like wasps, not flies, and feed on rose nectar. If you see these flies, there's nothing to worry about.
Treatment
Control rose midges with insecticides. Look for an insecticide that is approved for use in your area and apply the insecticide per the manufacturer's instructions. If you prefer natural pest control, use beneficial insects to eat the flies. Purchase predatory wasps online or at your local nursery. Placing landscape cloth below your roses means the rose midge larvae will fall onto the cloth to pupate. You can scoop up the cloth and throw it out, reducing your midge population.
Care
Good care cuts down on pests. Prune off dead branches and deadhead spent blossoms to maintain a neat bush. Water roses when the soil feels dry to the touch, until the soil becomes saturated. Watch for signs of diseases or pests so you can take action quickly and reduce potential harm to your rose.
0
0

