文章
Dummer. ゛☀
2017年09月22日

Succulents are hardy plants that add a striking appearance to any garden or home. Performing best in U.S. Department of Agriculture hardiness zones 3 through 9, succulents are good plants for the novice and expert gardener alike, as they require little attention. Because succulents are desert plants, they should be watered sparingly. Succulents are typically not susceptible to insect or pest infestation, but overwatering can lead to root or stem rot, a preventable and easily fixable disease. Succulents with signs of root or stem rot should be treated immediately.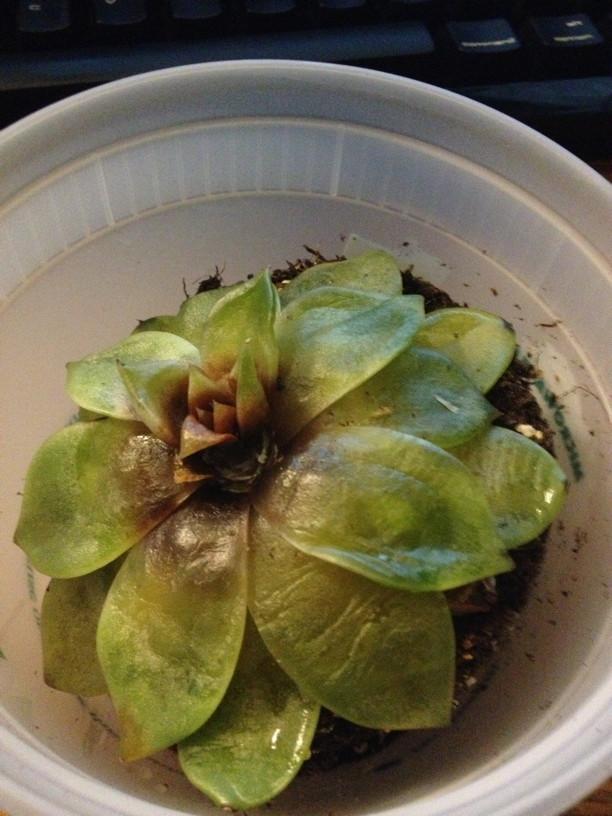
1. Check the plant for infected areas. These typically appear as dark brown to black spots or areas on the low part of the plant. Other signs of root or stem rot include puckered flesh with a dark tint around the infected area.
2. Stop watering a plant with rot. Remove the plant from its pot. Remove the soil mixture and clean out the pot thoroughly to ensure no remnants of the fungus are left.
3. Cut the infected black stem from the plant with a garden knife. Let the healthy portion of the plant dry naturally for several hours, keeping the succulent out of direct sunlight during this process. If other areas of the plant are showing minimal signs of rot, keep an eye on the plant. Succulents can recover from stem rot if properly watered and placed in a warm, dry location.
4. Using the cleaned out pot or a fresh one, combine equal parts soil, coarse sand and peat moss. Don’t reuse any of the materials used with the infected plant.
5. Pour roughly 2 inches (5 cm) of the mixture into the pot. Place the newly doctored succulent into the pot with the roots lying on top of the soil. Fill the pot with the soil mixture until it reaches the base of the stems. Firmly pat the soil around the plant.
6. Place the succulent in a brightly lit spot with warm temperatures. Succulents prefer dry climates, so don’t place the plant in a humid location.
7. Water the plant with just enough water to moisten the soil one week after repotting. After the soil has completely dried out, you can water more thoroughly.
Tip
Succulents grow best in well-drained soils that provide a high water-holding capacity. Planting succulents in a clay pot with a drainage hole ensures there is no sitting water and that the soil dries out between waterings. Succulents are dormant during the winter and should only be watered lightly at this time.

1. Check the plant for infected areas. These typically appear as dark brown to black spots or areas on the low part of the plant. Other signs of root or stem rot include puckered flesh with a dark tint around the infected area.
2. Stop watering a plant with rot. Remove the plant from its pot. Remove the soil mixture and clean out the pot thoroughly to ensure no remnants of the fungus are left.

3. Cut the infected black stem from the plant with a garden knife. Let the healthy portion of the plant dry naturally for several hours, keeping the succulent out of direct sunlight during this process. If other areas of the plant are showing minimal signs of rot, keep an eye on the plant. Succulents can recover from stem rot if properly watered and placed in a warm, dry location.
4. Using the cleaned out pot or a fresh one, combine equal parts soil, coarse sand and peat moss. Don’t reuse any of the materials used with the infected plant.

5. Pour roughly 2 inches (5 cm) of the mixture into the pot. Place the newly doctored succulent into the pot with the roots lying on top of the soil. Fill the pot with the soil mixture until it reaches the base of the stems. Firmly pat the soil around the plant.
6. Place the succulent in a brightly lit spot with warm temperatures. Succulents prefer dry climates, so don’t place the plant in a humid location.
7. Water the plant with just enough water to moisten the soil one week after repotting. After the soil has completely dried out, you can water more thoroughly.

Tip
Succulents grow best in well-drained soils that provide a high water-holding capacity. Planting succulents in a clay pot with a drainage hole ensures there is no sitting water and that the soil dries out between waterings. Succulents are dormant during the winter and should only be watered lightly at this time.
0
0
文章
Dummer. ゛☀
2017年09月22日

There are few plants more forgiving of sun and bad soil than Sedum plants. Growing them is easy, so easy, in fact, that even the most novice gardener can excel at it. With a large number of varieties to choose from, you will find one that works for your garden.
How to Grow Sedum
When growing Sedum, keep in mind that plants need very little attention or care. They will thrive in conditions that many other plants thrive in, but will do just as well in less hospitable areas. They are ideal for that part of your yard that gets too much sun or too little water to grow anything else. A common name for Sedum is Stonecrop, due to the fact that many gardeners joke that only stones need less care and live longer.
Sedum varieties vary in height. The smallest are just a few inches tall, and the tallest can be up to 3 feet (90 cm). The large majority of varieties are shorter and they are frequently used as ground covers in xeriscape gardens or rock gardens.
Sedum varieties also vary in their hardiness. Many are hardy to USDA zone 3, while others need a warmer climate. Make sure the Sedum that you plant is suited to your hardiness zone.
Sedums need no additional water or fertilizer. Overwatering and overfertilizing can hurt the plants far worse than not watering or fertilizing.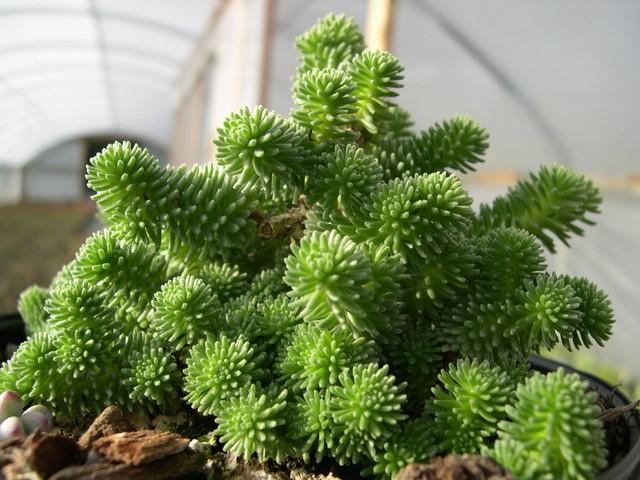
Tips for Planting Sedums
Sedum is easily planted. For shorter varieties, simply laying the plant on the ground where you want it to grow is normally enough to get the plant started there. They will send out roots from wherever the stem is touching the ground and root itself. If you would like to further ensure that the plant will start there, you can add a very thin covering of soil over the plant.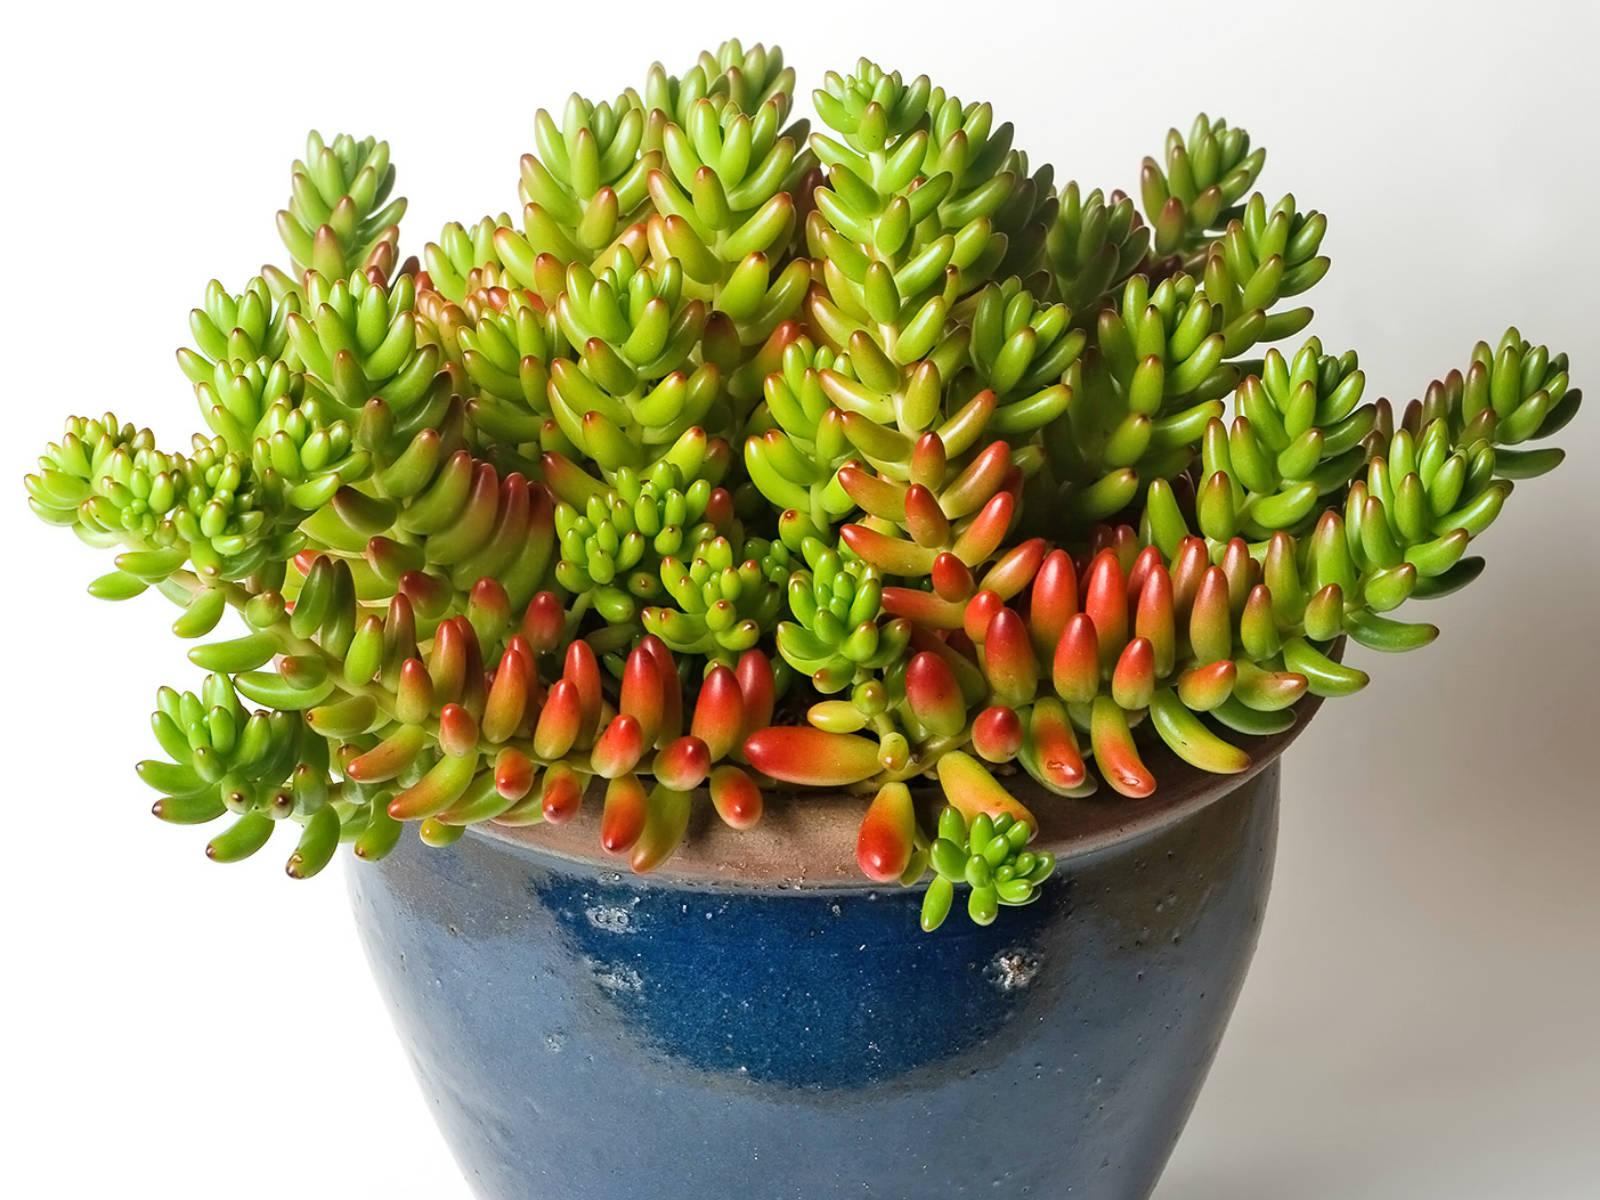
For taller varieties, you can break off one of the stems and push it into the ground where you would like to grow it. The stem will root very easily and anew plant will be established in a season or two.

How to Grow Sedum
When growing Sedum, keep in mind that plants need very little attention or care. They will thrive in conditions that many other plants thrive in, but will do just as well in less hospitable areas. They are ideal for that part of your yard that gets too much sun or too little water to grow anything else. A common name for Sedum is Stonecrop, due to the fact that many gardeners joke that only stones need less care and live longer.

Sedum varieties vary in height. The smallest are just a few inches tall, and the tallest can be up to 3 feet (90 cm). The large majority of varieties are shorter and they are frequently used as ground covers in xeriscape gardens or rock gardens.

Sedum varieties also vary in their hardiness. Many are hardy to USDA zone 3, while others need a warmer climate. Make sure the Sedum that you plant is suited to your hardiness zone.
Sedums need no additional water or fertilizer. Overwatering and overfertilizing can hurt the plants far worse than not watering or fertilizing.

Tips for Planting Sedums
Sedum is easily planted. For shorter varieties, simply laying the plant on the ground where you want it to grow is normally enough to get the plant started there. They will send out roots from wherever the stem is touching the ground and root itself. If you would like to further ensure that the plant will start there, you can add a very thin covering of soil over the plant.

For taller varieties, you can break off one of the stems and push it into the ground where you would like to grow it. The stem will root very easily and anew plant will be established in a season or two.
2
5
文章
Dummer. ゛☀
2017年09月19日

Succulents are hardy plants that add a striking appearance to any garden or home. Performing best in U.S. Department of Agriculture hardiness zones 3 through 9, succulents are good plants for the novice and expert gardener alike, as they require little attention. Because succulents are desert plants, they should be watered sparingly. Succulents are typically not susceptible to insect or pest infestation, but overwatering can lead to root or stem rot, a preventable and easily fixable disease. Succulents with signs of root or stem rot should be treated immediately.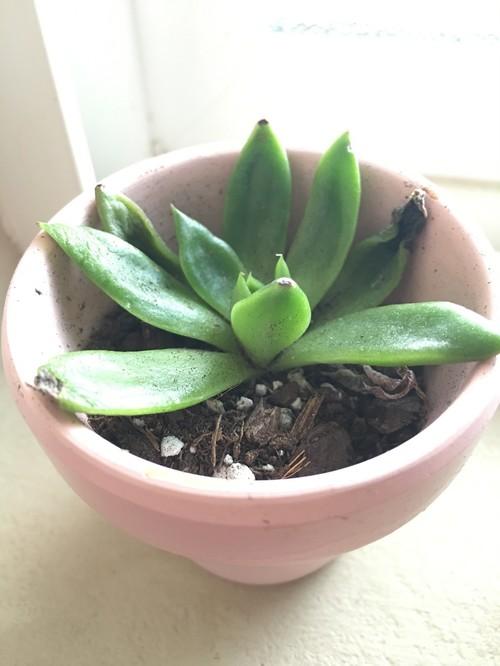
1. Check the plant for infected areas. These typically appear as dark brown to black spots or areas on the low part of the plant. Other signs of root or stem rot include puckered flesh with a dark tint around the infected area.
2. Stop watering a plant with rot. Remove the plant from its pot. Remove the soil mixture and clean out the pot thoroughly to ensure no remnants of the fungus are left.
3. Cut the infected black stem from the plant with a garden knife. Let the healthy portion of the plant dry naturally for several hours, keeping the succulent out of direct sunlight during this process. If other areas of the plant are showing minimal signs of rot, keep an eye on the plant. Succulents can recover from stem rot if properly watered and placed in a warm, dry location.
4. Using the cleaned out pot or a fresh one, combine equal parts soil, coarse sand and peat moss. Don’t reuse any of the materials used with the infected plant.
5. Pour roughly 2 inches (5 cm) of the mixture into the pot. Place the newly doctored succulent into the pot with the roots lying on top of the soil. Fill the pot with the soil mixture until it reaches the base of the stems. Firmly pat the soil around the plant.
6. Place the succulent in a brightly lit spot with warm temperatures. Succulents prefer dry climates, so don’t place the plant in a humid location.
7. Water the plant with just enough water to moisten the soil one week after repotting. After the soil has completely dried out, you can water more thoroughly.
Succulents grow best in well-drained soils that provide a high water-holding capacity. Planting succulents in a clay pot with a drainage hole ensures there is no sitting water and that the soil dries out between waterings. Succulents are dormant during the winter and should only be watered lightly at this time.

1. Check the plant for infected areas. These typically appear as dark brown to black spots or areas on the low part of the plant. Other signs of root or stem rot include puckered flesh with a dark tint around the infected area.
2. Stop watering a plant with rot. Remove the plant from its pot. Remove the soil mixture and clean out the pot thoroughly to ensure no remnants of the fungus are left.

3. Cut the infected black stem from the plant with a garden knife. Let the healthy portion of the plant dry naturally for several hours, keeping the succulent out of direct sunlight during this process. If other areas of the plant are showing minimal signs of rot, keep an eye on the plant. Succulents can recover from stem rot if properly watered and placed in a warm, dry location.
4. Using the cleaned out pot or a fresh one, combine equal parts soil, coarse sand and peat moss. Don’t reuse any of the materials used with the infected plant.

5. Pour roughly 2 inches (5 cm) of the mixture into the pot. Place the newly doctored succulent into the pot with the roots lying on top of the soil. Fill the pot with the soil mixture until it reaches the base of the stems. Firmly pat the soil around the plant.
6. Place the succulent in a brightly lit spot with warm temperatures. Succulents prefer dry climates, so don’t place the plant in a humid location.
7. Water the plant with just enough water to moisten the soil one week after repotting. After the soil has completely dried out, you can water more thoroughly.

Succulents grow best in well-drained soils that provide a high water-holding capacity. Planting succulents in a clay pot with a drainage hole ensures there is no sitting water and that the soil dries out between waterings. Succulents are dormant during the winter and should only be watered lightly at this time.
0
1
文章
Dummer. ゛☀
2017年09月13日

There is hardly a gardener out there who hasn’t encountered a Japanese beetle. The adult Japanese beetle is a shiny, metallic green with copper-brown wing covers and it’s about 3/8 of an inch in length. However, not all metallic green or copper beetles are Japanese Beetles. To make sure you're dealing with Japanese beetles check their undersides for five small, white tufts under the wing covers and an additional tuft at the end of the abdomen.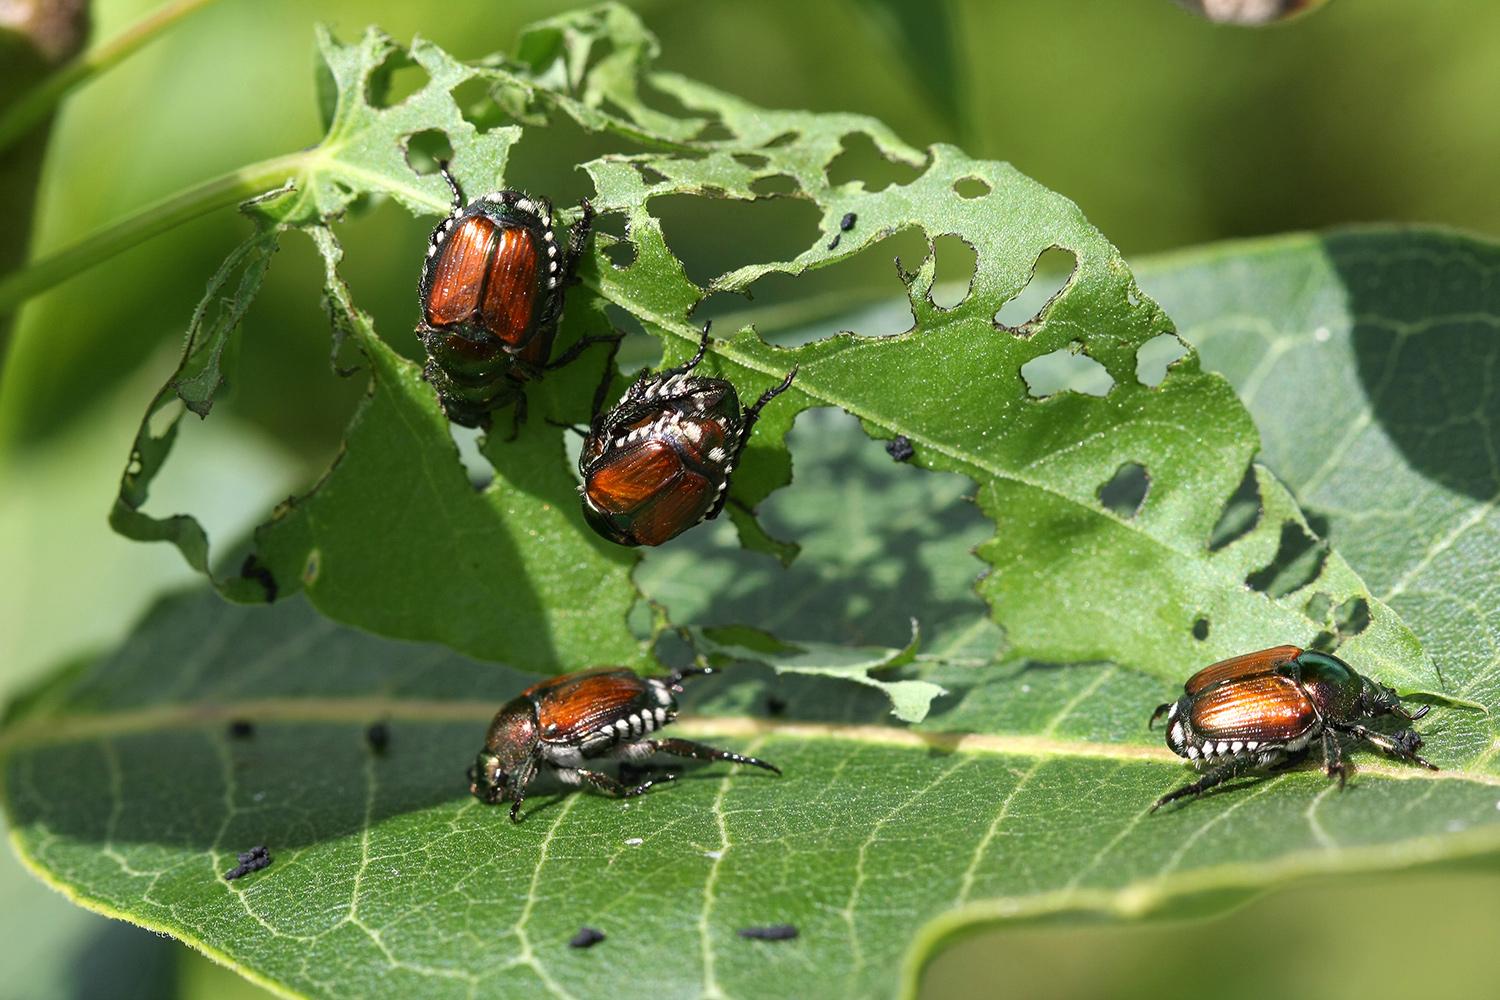
An individual Japanese beetle doesn’t do that much damage while feeding on a plant, but they tend to congregate in large numbers and can easily defoliate shrubs and trees. These bugs are hard to get rid of, but there are steps you can take to control them. Keep in mind that the adult Japanese beetles are only around for a little over a month, so don’t automatically reach for harsh chemicals unless they become a serious problem.
Stages of Development
Beetles typically go through 4 stages of development. It’s important to know when they are passing through each stage in your climate because control methods are different for each stage.
The life stages for the Japanese Beetle are:
Egg: Small, oval, white eggs. These are laid in the soil. If moisture is sufficient, they will absorb it and enlarge, becoming rounder as they do.
Larvae: This is the white grub stage that is so familiar in lawns. Japanese beetle larvae have a V-shaped series of bristles on their raster (the underside of the tip of the abdomen.) Grubs will grow in length as they feed and mature.
Pupae: The pupae stage is where the grub starts to transform into a beetle. Japanese beetle pupae start out cream colored and age to a reddish brown.
Adult Beetle: The adult beetles are about 3/8 inch long, and the shell is a shiny, metallic green with copper-brown wing covers. Adults emerge from the ground between May and June, depending on your area. They live for about 30 to 50 days.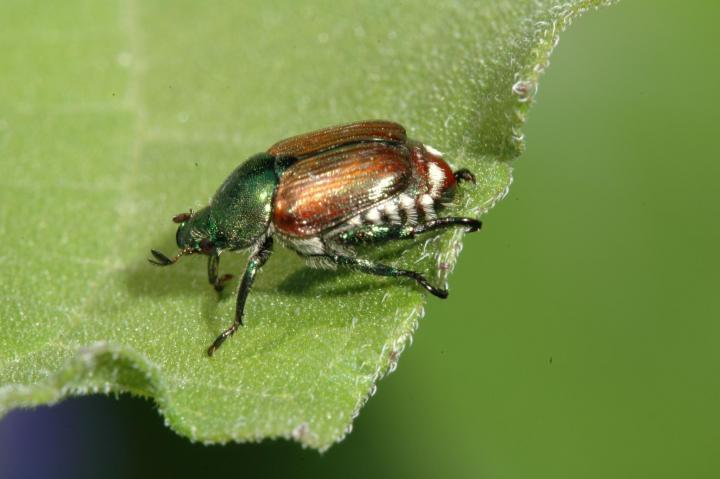
Life Cycle of the Japanese Beetle
The first beetles to emerge start to look for suitable plants to eat and start feeding immediately. They also send out an odor known as a congregation pheromone to signal later emerging beetles where to go. Mating starts soon after.
The females will feed on your plants for a couple of days and then burrow into the soil to lay their eggs. Shortly after, they will return to feeding and mating and start the cycle all over again. By the end of the season, each female Japanese beetle will have laid about 50 eggs.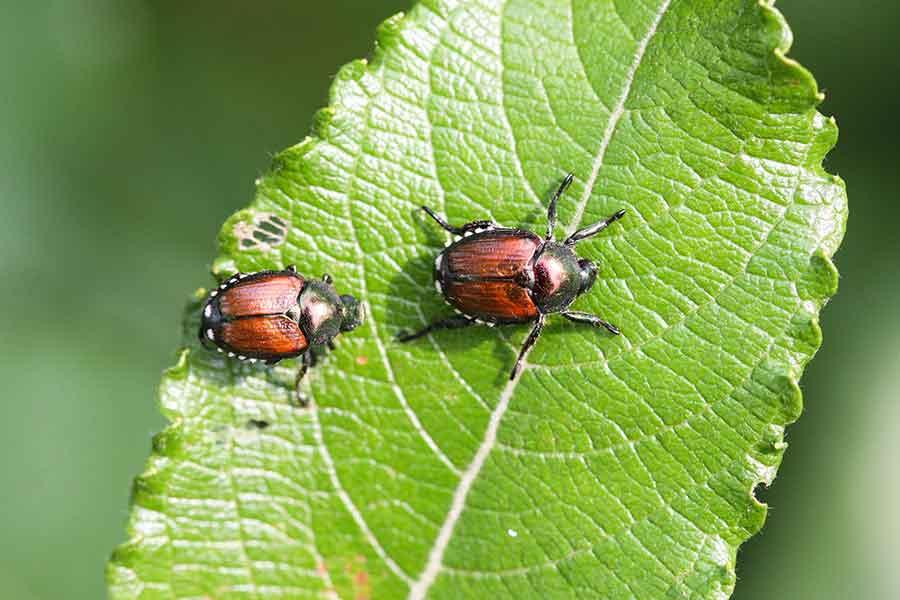
Eggs develop at different rates in different soil temperatures, developing most rapidly in warm soils of about 80 to 90 degrees F. Once they develop into larvae, they will move up toward the surface of the soil and start feeding on roots and organic matter. This is why grub control is usually applied in late summer to fall. The pesticide needs to be applied while the grubs are feeding on the grass roots.
As the soil cools and the grubs mature, they start moving back down deeper into the soil for winter. They’ll stay there until the soil warms in the spring, at which time they burrow back up toward the surface where they’ll pupate and eventually emerge as adults.
What Plants do Japanese Beetles Eat?
There’s a wide smorgasbord of plants for Japanese beetles to feast on, over 300 varieties of trees, shrubs and non-woody plants. Some of their favorites include roses, maples, elms, grapes and crab apples. However, they also feed on weeds like poison ivy and bracken.
How to Control Adult Japanese Beetles
It’s impossible to get rid of Japanese beetles entirely. More will fly in as the current crop are killed. There aren’t many natural controls for adult Japanese beetles. Birds aren’t partial to them, and although some predatory wasps and flies have been imported, their population isn’t large enough yet to control the Japanese beetle problem.
The most effective natural control is to go into your garden with a jar of soapy water and knock the beetles into it. Japanese beetles feed in groups, starting at the top of plants, so it’s pretty easy to fill a jar with them.
Insecticidal soap will kill adult Japanese beetles only if it is sprayed directly on the beetle. It does not have any residual effect, meaning that beetles that aren’t sprayed directly won’t be harmed.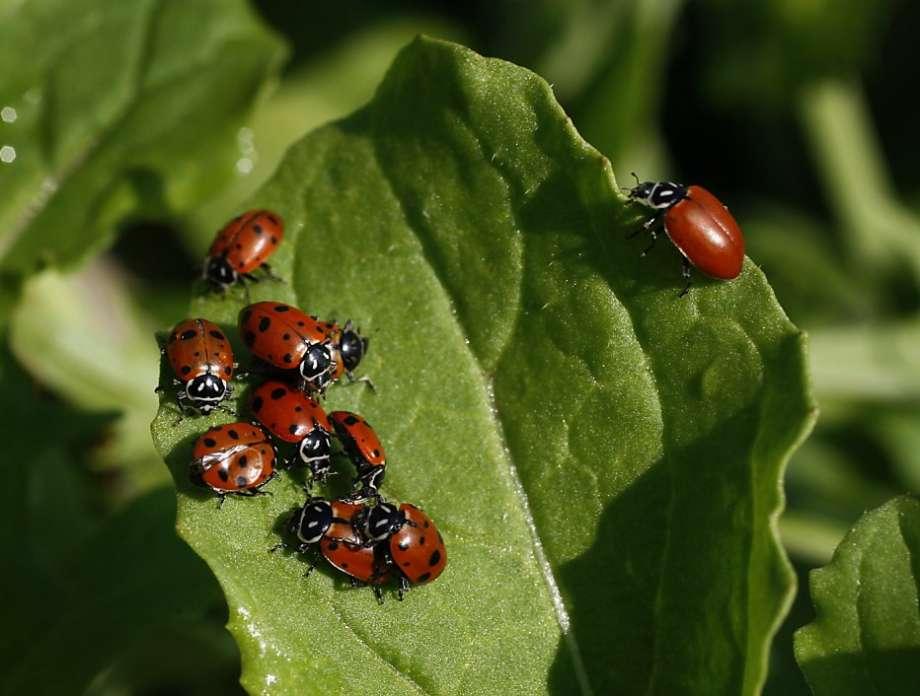
A word of caution about the pheromone beetle traps. They will attract beetles; you’ll probably wind up with more beetles coming into your yard than you would have without the trap. The original intention of the traps was to track when and how many Japanese beetles were in the area, not as a means of eradication.
Finally, if you have repeated intense infestations, you should check your soil in late summer to see if you have a large grub population. Lift a 1 square foot section of turf. If there are more than a dozen grubs in this small area, consider treating your lawn with some type of grub control. However, not every garden that has a Japanese beetle problem is associated with a lawn full of grubs. The beetles can hatch in your neighbor's lawn and find your tasty garden with very little effort.
More Toxic Controls (to Be Used With Caution)
There are several insecticides labeled for use on adult Japanese beetles. These sprays will kill on contact and also have some residual effect. Keep in mind that these sprays will kill more than just the Japanese beetles, so use them only for extreme infestations. And again, Japanese beetles are only a pest for a little over a month, so don’t overreact. Always read and follow label directions when using any pesticide.

An individual Japanese beetle doesn’t do that much damage while feeding on a plant, but they tend to congregate in large numbers and can easily defoliate shrubs and trees. These bugs are hard to get rid of, but there are steps you can take to control them. Keep in mind that the adult Japanese beetles are only around for a little over a month, so don’t automatically reach for harsh chemicals unless they become a serious problem.

Stages of Development
Beetles typically go through 4 stages of development. It’s important to know when they are passing through each stage in your climate because control methods are different for each stage.
The life stages for the Japanese Beetle are:
Egg: Small, oval, white eggs. These are laid in the soil. If moisture is sufficient, they will absorb it and enlarge, becoming rounder as they do.
Larvae: This is the white grub stage that is so familiar in lawns. Japanese beetle larvae have a V-shaped series of bristles on their raster (the underside of the tip of the abdomen.) Grubs will grow in length as they feed and mature.
Pupae: The pupae stage is where the grub starts to transform into a beetle. Japanese beetle pupae start out cream colored and age to a reddish brown.
Adult Beetle: The adult beetles are about 3/8 inch long, and the shell is a shiny, metallic green with copper-brown wing covers. Adults emerge from the ground between May and June, depending on your area. They live for about 30 to 50 days.

Life Cycle of the Japanese Beetle
The first beetles to emerge start to look for suitable plants to eat and start feeding immediately. They also send out an odor known as a congregation pheromone to signal later emerging beetles where to go. Mating starts soon after.
The females will feed on your plants for a couple of days and then burrow into the soil to lay their eggs. Shortly after, they will return to feeding and mating and start the cycle all over again. By the end of the season, each female Japanese beetle will have laid about 50 eggs.

Eggs develop at different rates in different soil temperatures, developing most rapidly in warm soils of about 80 to 90 degrees F. Once they develop into larvae, they will move up toward the surface of the soil and start feeding on roots and organic matter. This is why grub control is usually applied in late summer to fall. The pesticide needs to be applied while the grubs are feeding on the grass roots.
As the soil cools and the grubs mature, they start moving back down deeper into the soil for winter. They’ll stay there until the soil warms in the spring, at which time they burrow back up toward the surface where they’ll pupate and eventually emerge as adults.

What Plants do Japanese Beetles Eat?
There’s a wide smorgasbord of plants for Japanese beetles to feast on, over 300 varieties of trees, shrubs and non-woody plants. Some of their favorites include roses, maples, elms, grapes and crab apples. However, they also feed on weeds like poison ivy and bracken.
How to Control Adult Japanese Beetles
It’s impossible to get rid of Japanese beetles entirely. More will fly in as the current crop are killed. There aren’t many natural controls for adult Japanese beetles. Birds aren’t partial to them, and although some predatory wasps and flies have been imported, their population isn’t large enough yet to control the Japanese beetle problem.

The most effective natural control is to go into your garden with a jar of soapy water and knock the beetles into it. Japanese beetles feed in groups, starting at the top of plants, so it’s pretty easy to fill a jar with them.
Insecticidal soap will kill adult Japanese beetles only if it is sprayed directly on the beetle. It does not have any residual effect, meaning that beetles that aren’t sprayed directly won’t be harmed.

A word of caution about the pheromone beetle traps. They will attract beetles; you’ll probably wind up with more beetles coming into your yard than you would have without the trap. The original intention of the traps was to track when and how many Japanese beetles were in the area, not as a means of eradication.
Finally, if you have repeated intense infestations, you should check your soil in late summer to see if you have a large grub population. Lift a 1 square foot section of turf. If there are more than a dozen grubs in this small area, consider treating your lawn with some type of grub control. However, not every garden that has a Japanese beetle problem is associated with a lawn full of grubs. The beetles can hatch in your neighbor's lawn and find your tasty garden with very little effort.

More Toxic Controls (to Be Used With Caution)
There are several insecticides labeled for use on adult Japanese beetles. These sprays will kill on contact and also have some residual effect. Keep in mind that these sprays will kill more than just the Japanese beetles, so use them only for extreme infestations. And again, Japanese beetles are only a pest for a little over a month, so don’t overreact. Always read and follow label directions when using any pesticide.
0
0
文章
Dummer. ゛☀
2017年08月30日

Propagating dogwood cuttings is easy and inexpensive. You can easily make enough trees for your own landscape, and a few more to share with friends. For the home gardener, the easiest and fastest method of dogwood tree propagation is taking softwood cuttings. Find out how to grow dogwood cuttings in this article.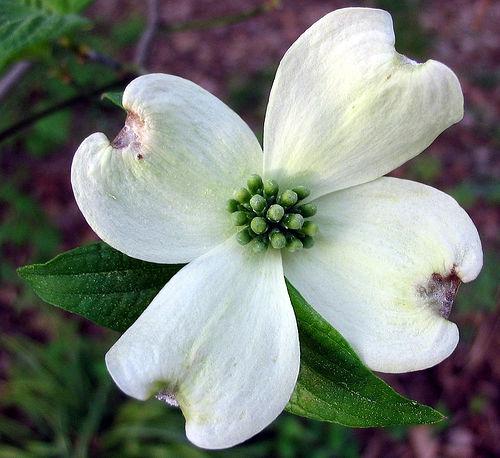
Propagating Dogwood Cuttings
Knowing when to take cuttings of dogwood stems can mean the difference between successful propagation and failure. The best time to cut is in the spring, as soon as the tree completes its bloom cycle. You know the stem is ready to cut if it snaps when you bend it in half.
Cuttings aren’t always successful, so take more than you need. The cuttings should be three to five inches long. Make the cut about an inch below a set of leaves. As you take cuttings, lay them in a plastic basin lined with damp paper towels and cover them with another damp towel.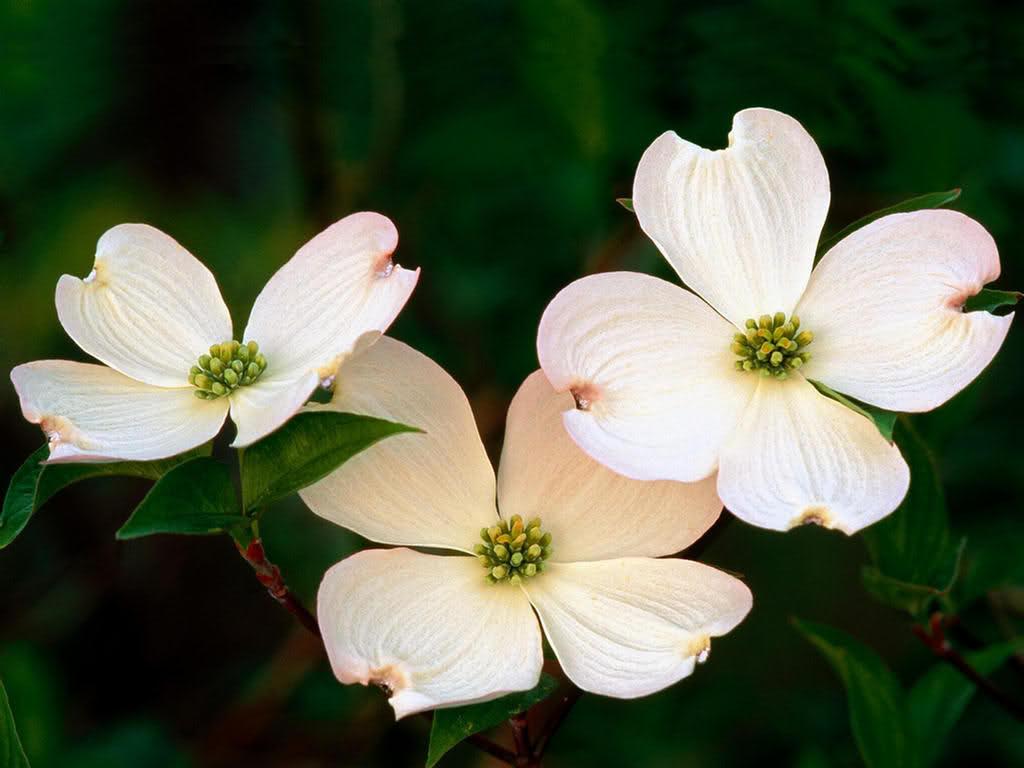
Here are the steps in starting dogwoods from cuttings:
Remove the bottom set of leaves from the stem. This creates wounds to let the rooting hormone in and encourage root growth. Cut the remaining leaves in half if they are long enough to touch the soil when you bury the end of the stem 1.5 inches deep. Keeping the leaves off the soil prevents rot, and shorter leaf surfaces lose less water.
Fill a three-inch pot with rooting medium. You can buy commercial medium or use a mixture of sand and perlite. Don’t use regular potting soil, which holds too much moisture and causes the stem to rot before it roots. Moisten the rooting medium with water. Role or dip the bottom 1.5 inches of the stem in rooting hormone and tap it to remove the excess.
Stick the lower 1.5 inches of the stem in the rooting medium and then firm the medium so that the stems stand straight. Mist the cutting with water. Place the potted cutting inside a large plastic bag and seal it to create a mini greenhouse. Make sure the leaves don’t touch the sides of the bag. If necessary, you can hold the bag away from the plant by placing clean wooden sticks around the edge of the pot. Check the dogwood cutting for roots once a week. You can look at the bottom of the pot to see if roots are coming through or give the stem a gentle tug. Once roots form, the stem will resist a tug. You should find that the cutting has roots within six weeks.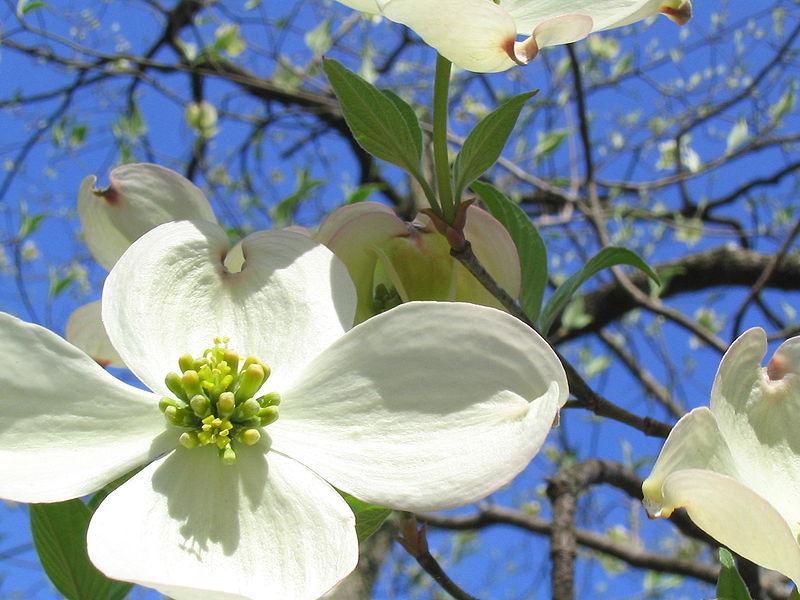
Remove the plastic bag when you’re sure you have roots, and place the new plant in a sunny window. Keep the soil moist at all times. Use half-strength liquid fertilizer every two weeks until the plant is growing well. When the dogwood cutting outgrows its little pot, repot it into a larger pot filled with regular potting soil.

Propagating Dogwood Cuttings
Knowing when to take cuttings of dogwood stems can mean the difference between successful propagation and failure. The best time to cut is in the spring, as soon as the tree completes its bloom cycle. You know the stem is ready to cut if it snaps when you bend it in half.
Cuttings aren’t always successful, so take more than you need. The cuttings should be three to five inches long. Make the cut about an inch below a set of leaves. As you take cuttings, lay them in a plastic basin lined with damp paper towels and cover them with another damp towel.

Here are the steps in starting dogwoods from cuttings:
Remove the bottom set of leaves from the stem. This creates wounds to let the rooting hormone in and encourage root growth. Cut the remaining leaves in half if they are long enough to touch the soil when you bury the end of the stem 1.5 inches deep. Keeping the leaves off the soil prevents rot, and shorter leaf surfaces lose less water.
Fill a three-inch pot with rooting medium. You can buy commercial medium or use a mixture of sand and perlite. Don’t use regular potting soil, which holds too much moisture and causes the stem to rot before it roots. Moisten the rooting medium with water. Role or dip the bottom 1.5 inches of the stem in rooting hormone and tap it to remove the excess.

Stick the lower 1.5 inches of the stem in the rooting medium and then firm the medium so that the stems stand straight. Mist the cutting with water. Place the potted cutting inside a large plastic bag and seal it to create a mini greenhouse. Make sure the leaves don’t touch the sides of the bag. If necessary, you can hold the bag away from the plant by placing clean wooden sticks around the edge of the pot. Check the dogwood cutting for roots once a week. You can look at the bottom of the pot to see if roots are coming through or give the stem a gentle tug. Once roots form, the stem will resist a tug. You should find that the cutting has roots within six weeks.

Remove the plastic bag when you’re sure you have roots, and place the new plant in a sunny window. Keep the soil moist at all times. Use half-strength liquid fertilizer every two weeks until the plant is growing well. When the dogwood cutting outgrows its little pot, repot it into a larger pot filled with regular potting soil.
0
0
文章
Dummer. ゛☀
2017年08月30日

Dogwoods are beautiful trees with striking spring flowers. They are impressive trees to have around, but not every gardener has the space or the means to take care of a large tree. Other gardeners may not live in a zone warm enough to overwinter a dogwood outside. With some skill and attention, though, you can keep a dogwood tree in a container. Keep reading to learn more about caring for potted dogwood trees.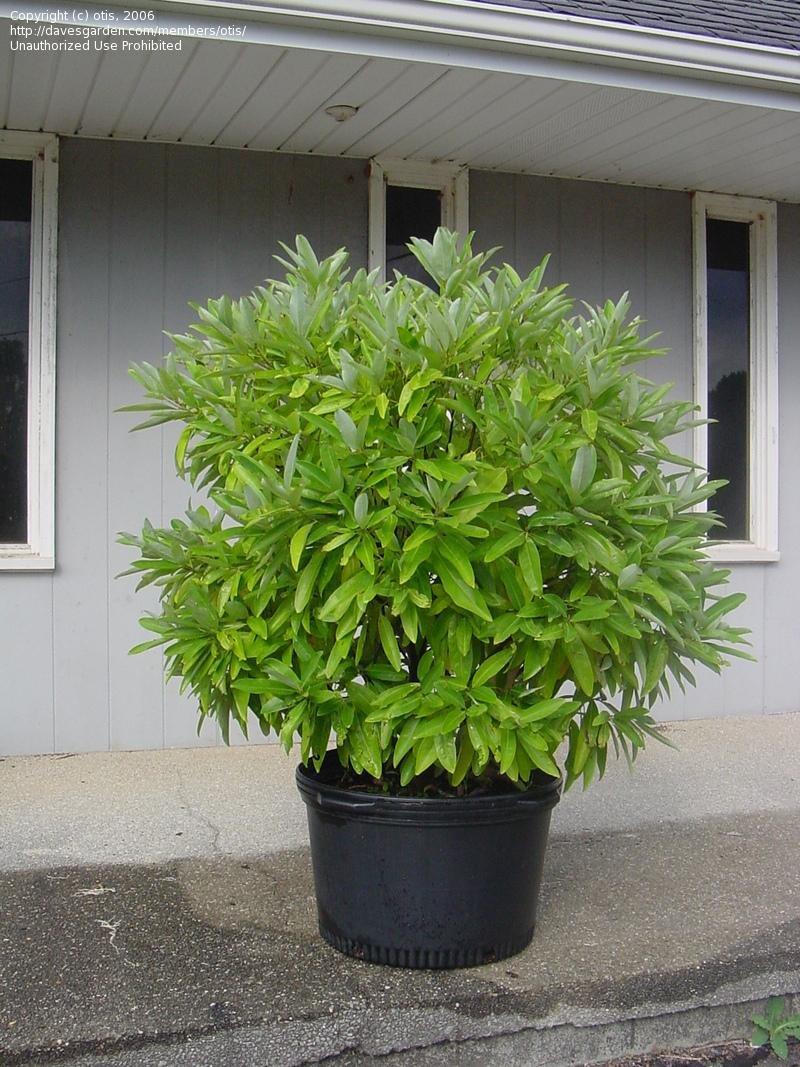
Can I Grow Dogwood In a Container?
Can I grow dogwood in a container? Technically, yes. It’s possible, but there are certain requirements to be met, and it’s not for the casual gardener. Dogwood trees have very dense, fast growing root systems that are less than ideal for container growing. They also need extremely well-draining soil, but at the same time the plants need lots of water, particularly in the first few years of life. Containers dry out quickly, so you’ll probably have to mulch heavily and water it every day or so.
How to Grow Dogwoods in a Container
When growing dogwood trees in pots, it’s important to give the roots plenty of room. This means you should opt for as big of a container as you can manage. Even so, you’ll want to remove the tree from its container to prune the roots back on occasion to keep it from becoming root bound. Again, container grown dogwoods will require plenty of moisture so you’ll have to water the tree frequently. You can also add a bit of mulch to the top of the soil, which should help it retain some of that moisture.
Caring for potted dogwood trees in the winter is also tricky. The plants need cold temperatures in order to go dormant during the winter. If you want to bring it inside, it’s best to put it somewhere protected but unheated, like a shed or a garage.

Can I Grow Dogwood In a Container?
Can I grow dogwood in a container? Technically, yes. It’s possible, but there are certain requirements to be met, and it’s not for the casual gardener. Dogwood trees have very dense, fast growing root systems that are less than ideal for container growing. They also need extremely well-draining soil, but at the same time the plants need lots of water, particularly in the first few years of life. Containers dry out quickly, so you’ll probably have to mulch heavily and water it every day or so.

How to Grow Dogwoods in a Container
When growing dogwood trees in pots, it’s important to give the roots plenty of room. This means you should opt for as big of a container as you can manage. Even so, you’ll want to remove the tree from its container to prune the roots back on occasion to keep it from becoming root bound. Again, container grown dogwoods will require plenty of moisture so you’ll have to water the tree frequently. You can also add a bit of mulch to the top of the soil, which should help it retain some of that moisture.

Caring for potted dogwood trees in the winter is also tricky. The plants need cold temperatures in order to go dormant during the winter. If you want to bring it inside, it’s best to put it somewhere protected but unheated, like a shed or a garage.
0
0
文章
Dummer. ゛☀
2017年08月30日

Rock cress is an herbaceous perennial and member of the Brassicaceae or mustard family. The flowers and leaves of rock cress are edible. Growing rock cress requires no special skill and this plant is well suited for the novice gardener. Rock cress has many uses in the garden but its most popular uses are as an attractive border in a rock garden or dangling down over a rock wall or ledge. Rock cresses are alpine plants and will thrive where other plants fail, such as on hills and slopes.
Purple rock cress ground cover (Aubrieta deltoidea) hugs the ground like a mat and displays rich purple flowers in April through the middle of May and has a lovely scent. Rock wall cress (Arabis caucasica) is more likely to bloom in white or pink. Both make attractive low mounds that look great at the edge of retaining wall where they get full sun and excellent drainage.
How to Grow Rock Cress
Rock cress plants are hardy in USDA plant hardiness zones 4-7. They are easily grown from seed and can be directly sown into the garden in early spring or started indoors four to six weeks before the date of your last expected frost. Rock cress prefers full sun but will tolerate some shade, especially in warmer climates. Space rock cress plants 15 to 18 inches apart and they will fill in quickly forming a mat in any open space.
Care of Rock Cress Plants
Regardless of the type you choose to grow, the care of rock cress plants is relatively minimal. Water new rock cress plants regularly and only when the soil is dry once they are established. Rock cress ground cover does well in fair soil that has good drainage, and is slightly acidic. Applying a light pine needle mulch helps retain moisture and increase acidity. A high nitrogen fertilizer can be applied when first planting and a phosphorus fertilizer just after blooming. Rock cress will bloom the second spring after planting and every year after that. Regular pruning to remove dead flowers will keep the plant healthy and encourage new growth.
It is seldom necessary to treat rock cress for pests or disease. Now that you know the basics on how to grow rock cress ground cover, you can add an attractive touch to a rock garden or wall

Purple rock cress ground cover (Aubrieta deltoidea) hugs the ground like a mat and displays rich purple flowers in April through the middle of May and has a lovely scent. Rock wall cress (Arabis caucasica) is more likely to bloom in white or pink. Both make attractive low mounds that look great at the edge of retaining wall where they get full sun and excellent drainage.

How to Grow Rock Cress
Rock cress plants are hardy in USDA plant hardiness zones 4-7. They are easily grown from seed and can be directly sown into the garden in early spring or started indoors four to six weeks before the date of your last expected frost. Rock cress prefers full sun but will tolerate some shade, especially in warmer climates. Space rock cress plants 15 to 18 inches apart and they will fill in quickly forming a mat in any open space.

Care of Rock Cress Plants
Regardless of the type you choose to grow, the care of rock cress plants is relatively minimal. Water new rock cress plants regularly and only when the soil is dry once they are established. Rock cress ground cover does well in fair soil that has good drainage, and is slightly acidic. Applying a light pine needle mulch helps retain moisture and increase acidity. A high nitrogen fertilizer can be applied when first planting and a phosphorus fertilizer just after blooming. Rock cress will bloom the second spring after planting and every year after that. Regular pruning to remove dead flowers will keep the plant healthy and encourage new growth.

It is seldom necessary to treat rock cress for pests or disease. Now that you know the basics on how to grow rock cress ground cover, you can add an attractive touch to a rock garden or wall
0
0
文章
Dummer. ゛☀
2017年08月29日

Grasses grown in the garden provide interesting contrast and often ease of care for the home gardener. Pennisetum glaucum, or ornamental millet grass, is a prime example of a show-stopping garden grass.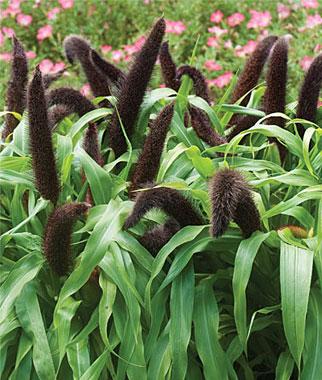
Information About Ornamental Millet Grass
Ornamental millet grass is derived from ordinary millet, a cereal grain that is an important food crop in semi-arid areas of Asia and Africa, and is cultivated in the United States as a forage crop. A millet breeder collecting millet germplasm from around the world grew a hybrid with stunning purple foliage and a spectacular seed spike. While this millet hybrid had no agriculture value, it became an award-winning specimen for the home landscape.
This ornamental grass bares 8 to 12 inch cattail-like flower plumes that change from gold to purple as they mature. This stunning purple is echoed in the burgundy red to amber/purple corn-like foliage of the grass. Ornamental millet plants grow 3 to 5 feet in height. The seed spikes of ornamental millet plants may be left on the plant to provide food for birds as they ripen or may be cut and used in dramatic floral arrangements.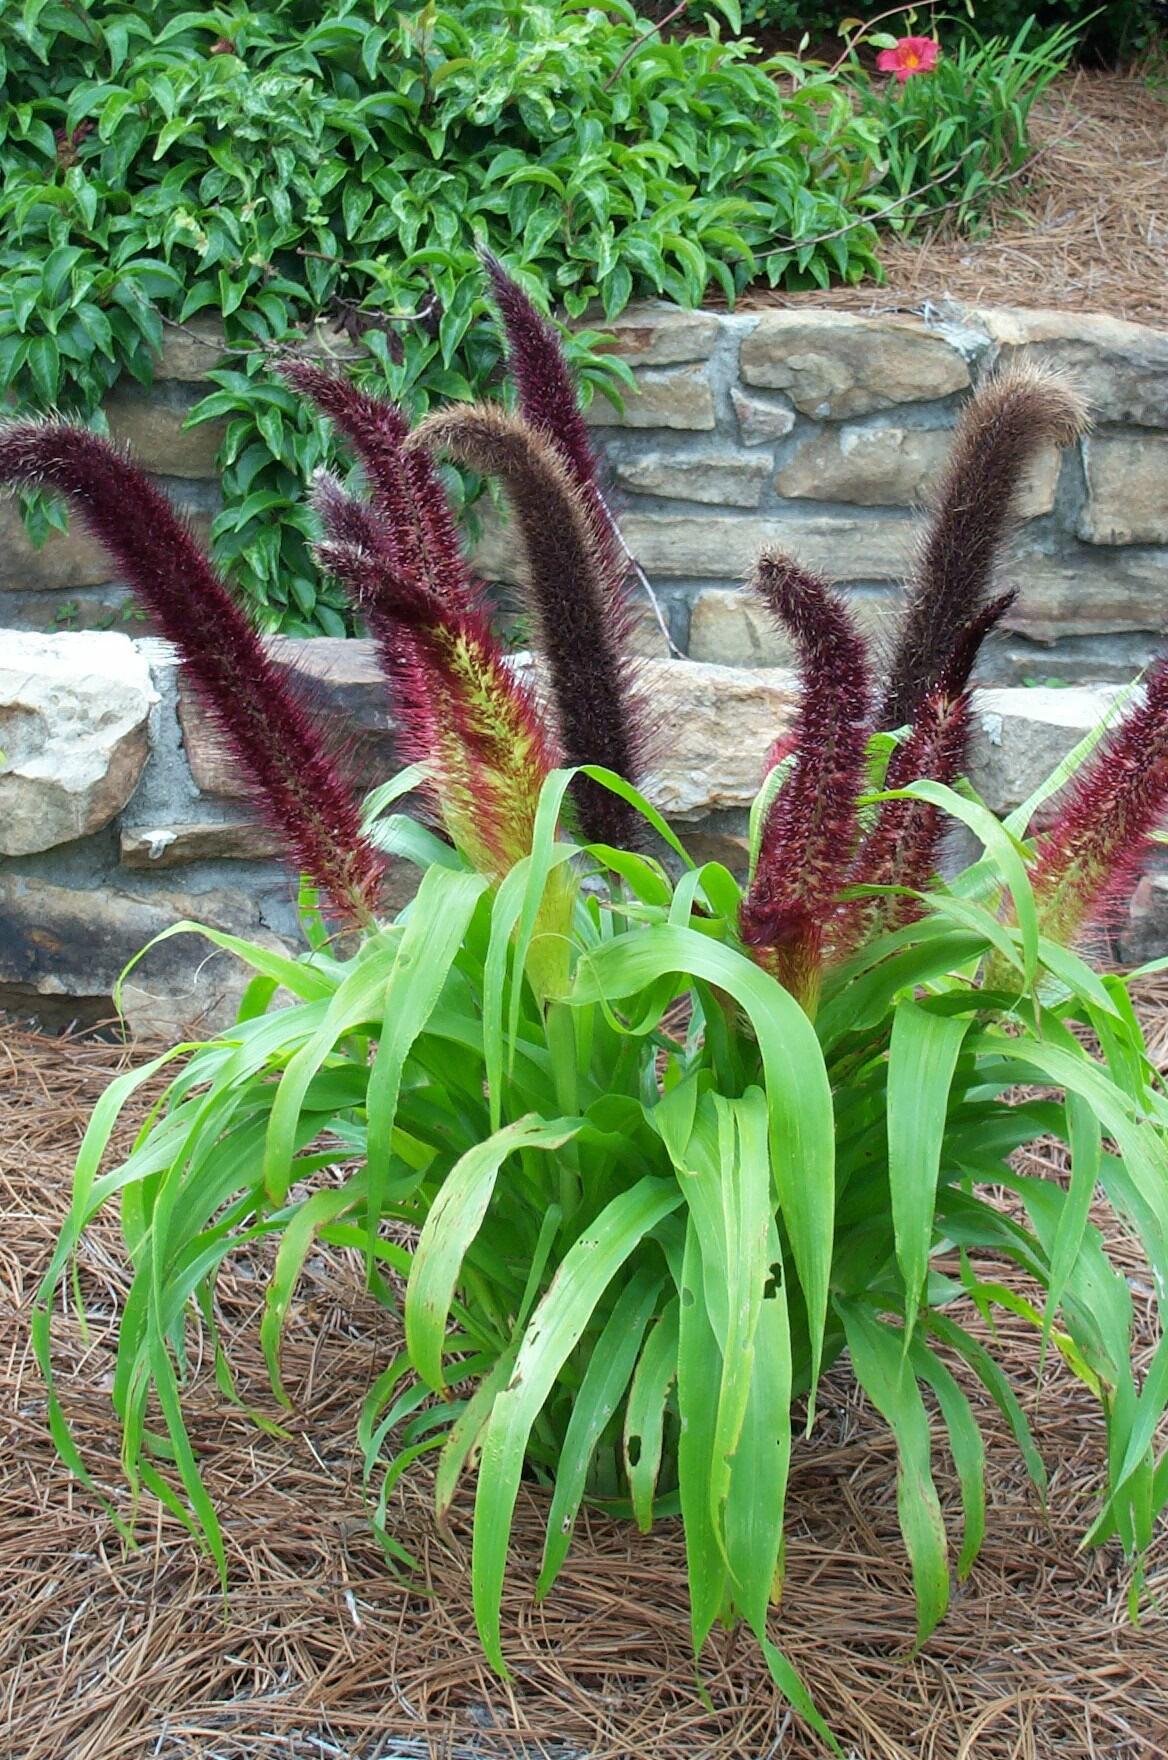
Best Time to Plant Millet
The purple foliage of ornamental millet plants adds a lovely counterpoint to a garden either in mass plantings or in combination with other plant specimens and even in container gardening when a tall focal point is required. The best time to plant millet is after the danger of frost has passed. Ornamental millet needs warm air and soil for germination, so even into June seeds may be sown, especially since ornamental millet plants grow quickly. It takes 60-70 days to go from seed to flower.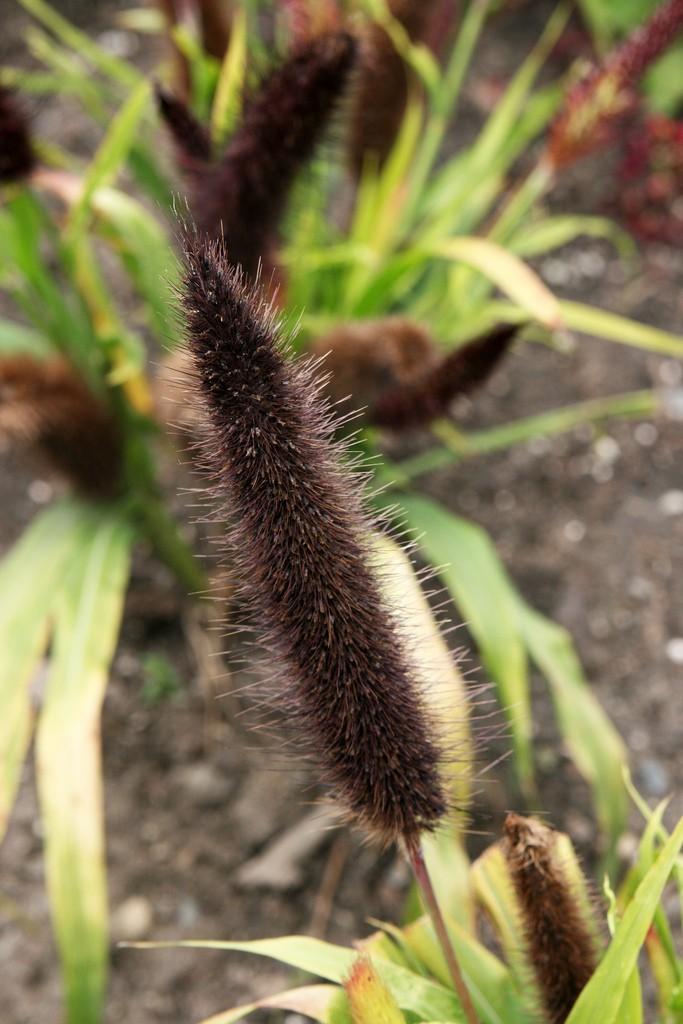
Care of Millet
Transplants for growing ornamental millet may be purchased from the local garden center or is easily grown from seed. If obtaining ornamental millet plants from a nursery, select those that are not root bound in the pot. When growing ornamental millet, you need to situate it in a location of full sun in USDA zones 10-11. An annual, growing ornamental millet not only needs a sunny exposure, but well draining soil. Care of millet also dictates keeping it moist, so mulch or other organic compost is a great idea around the base of the ornamental millet plants to retain moisture. However, growing ornamental millet may be susceptible to drowning and edema, so there is a fine line between overwatering and maintaining moist conditions.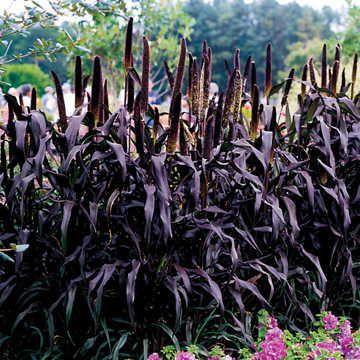
Ornamental Millet Grass Varietals
‘Purple Majesty’ is a commonly grown millet variety that will thrive if not stressed by factors such as over watering or cold temperatures and produces a profusion of blooms with 4 to 5 foot burgundy foliage. ‘Jester’ has 3-inch leaves in hues of burgundy, green and chartreuse with dark flower plumes. ‘Purple Baron’ is a compact 3 foot variety.

Information About Ornamental Millet Grass
Ornamental millet grass is derived from ordinary millet, a cereal grain that is an important food crop in semi-arid areas of Asia and Africa, and is cultivated in the United States as a forage crop. A millet breeder collecting millet germplasm from around the world grew a hybrid with stunning purple foliage and a spectacular seed spike. While this millet hybrid had no agriculture value, it became an award-winning specimen for the home landscape.
This ornamental grass bares 8 to 12 inch cattail-like flower plumes that change from gold to purple as they mature. This stunning purple is echoed in the burgundy red to amber/purple corn-like foliage of the grass. Ornamental millet plants grow 3 to 5 feet in height. The seed spikes of ornamental millet plants may be left on the plant to provide food for birds as they ripen or may be cut and used in dramatic floral arrangements.

Best Time to Plant Millet
The purple foliage of ornamental millet plants adds a lovely counterpoint to a garden either in mass plantings or in combination with other plant specimens and even in container gardening when a tall focal point is required. The best time to plant millet is after the danger of frost has passed. Ornamental millet needs warm air and soil for germination, so even into June seeds may be sown, especially since ornamental millet plants grow quickly. It takes 60-70 days to go from seed to flower.

Care of Millet
Transplants for growing ornamental millet may be purchased from the local garden center or is easily grown from seed. If obtaining ornamental millet plants from a nursery, select those that are not root bound in the pot. When growing ornamental millet, you need to situate it in a location of full sun in USDA zones 10-11. An annual, growing ornamental millet not only needs a sunny exposure, but well draining soil. Care of millet also dictates keeping it moist, so mulch or other organic compost is a great idea around the base of the ornamental millet plants to retain moisture. However, growing ornamental millet may be susceptible to drowning and edema, so there is a fine line between overwatering and maintaining moist conditions.

Ornamental Millet Grass Varietals
‘Purple Majesty’ is a commonly grown millet variety that will thrive if not stressed by factors such as over watering or cold temperatures and produces a profusion of blooms with 4 to 5 foot burgundy foliage. ‘Jester’ has 3-inch leaves in hues of burgundy, green and chartreuse with dark flower plumes. ‘Purple Baron’ is a compact 3 foot variety.
0
0
文章
Dummer. ゛☀
2017年08月27日

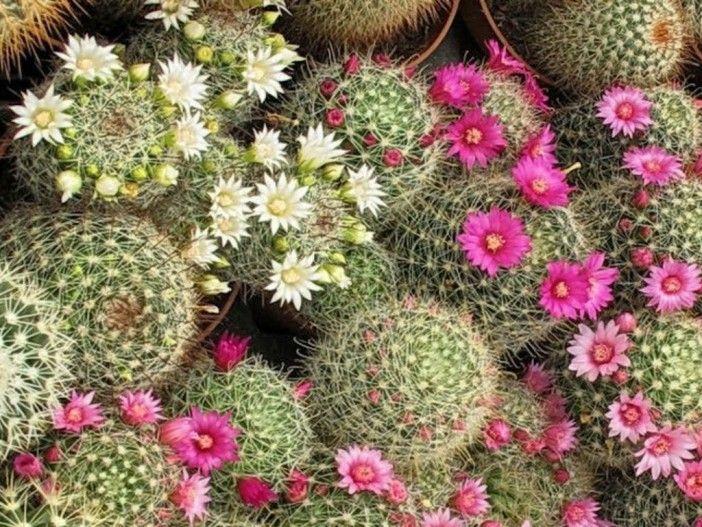
Growing pincushion cactus is an easy gardening project for the novice gardener. The plants are drought tolerant and native to the arid upper Sonoran desert. They are small cacti that make excellent additions to succulent displays. Pincushion cactus plant is a perennial that is most often found in heavily grazed pastureland and woody scrub.
Pincushion Cactus Plant Varieties
Pincushion cactus is a member of a family called Mammillaria, which includes 250 species of cactus. Some of the species of pincushion have colorful names. The Giant Snake or Crawling Log cactus (Mammillaria matudae) produce long stems. Snowball cushion cactus (Mammillaria candida) is a ball-shaped plant with white felt or fuzz on the skin of the plant. Old Lady cactus (Mammillaria hahniana) is a solitary cactus with white fuzzy hair-like spines and purplish red flowers. There are also Powder puff (Mammillaria bocasa-na) and Rose (Mammillaria zeilmanniana) among many others. Cactus and succulent stores can provide you with more pincushion cactus information.
Pincushion Cactus Information
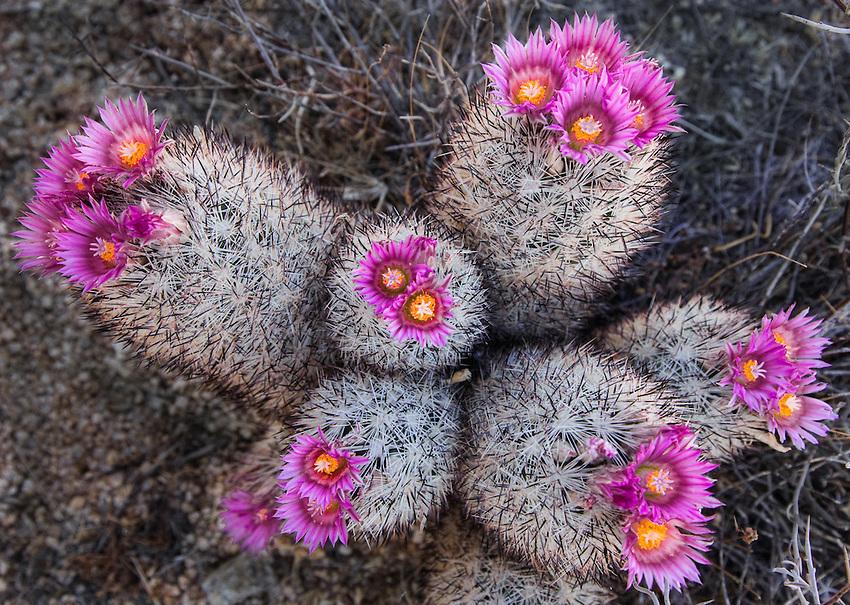
Pincushion cacti are small, squat plants that usually don’t grow more than 6 inches in height. They can be ball or barrel shaped, and are native to the warmer regions of the United States. The pincushion cactus plant is most commonly grown indoors but it can tolerate some chilling temperatures if grown outside. Pincushion cactus is so called because it is covered in white spines over the entire surface of the plant. It is a very prickly little specimen that is best handled with thick gloves.
Growing Pincushion Cactus
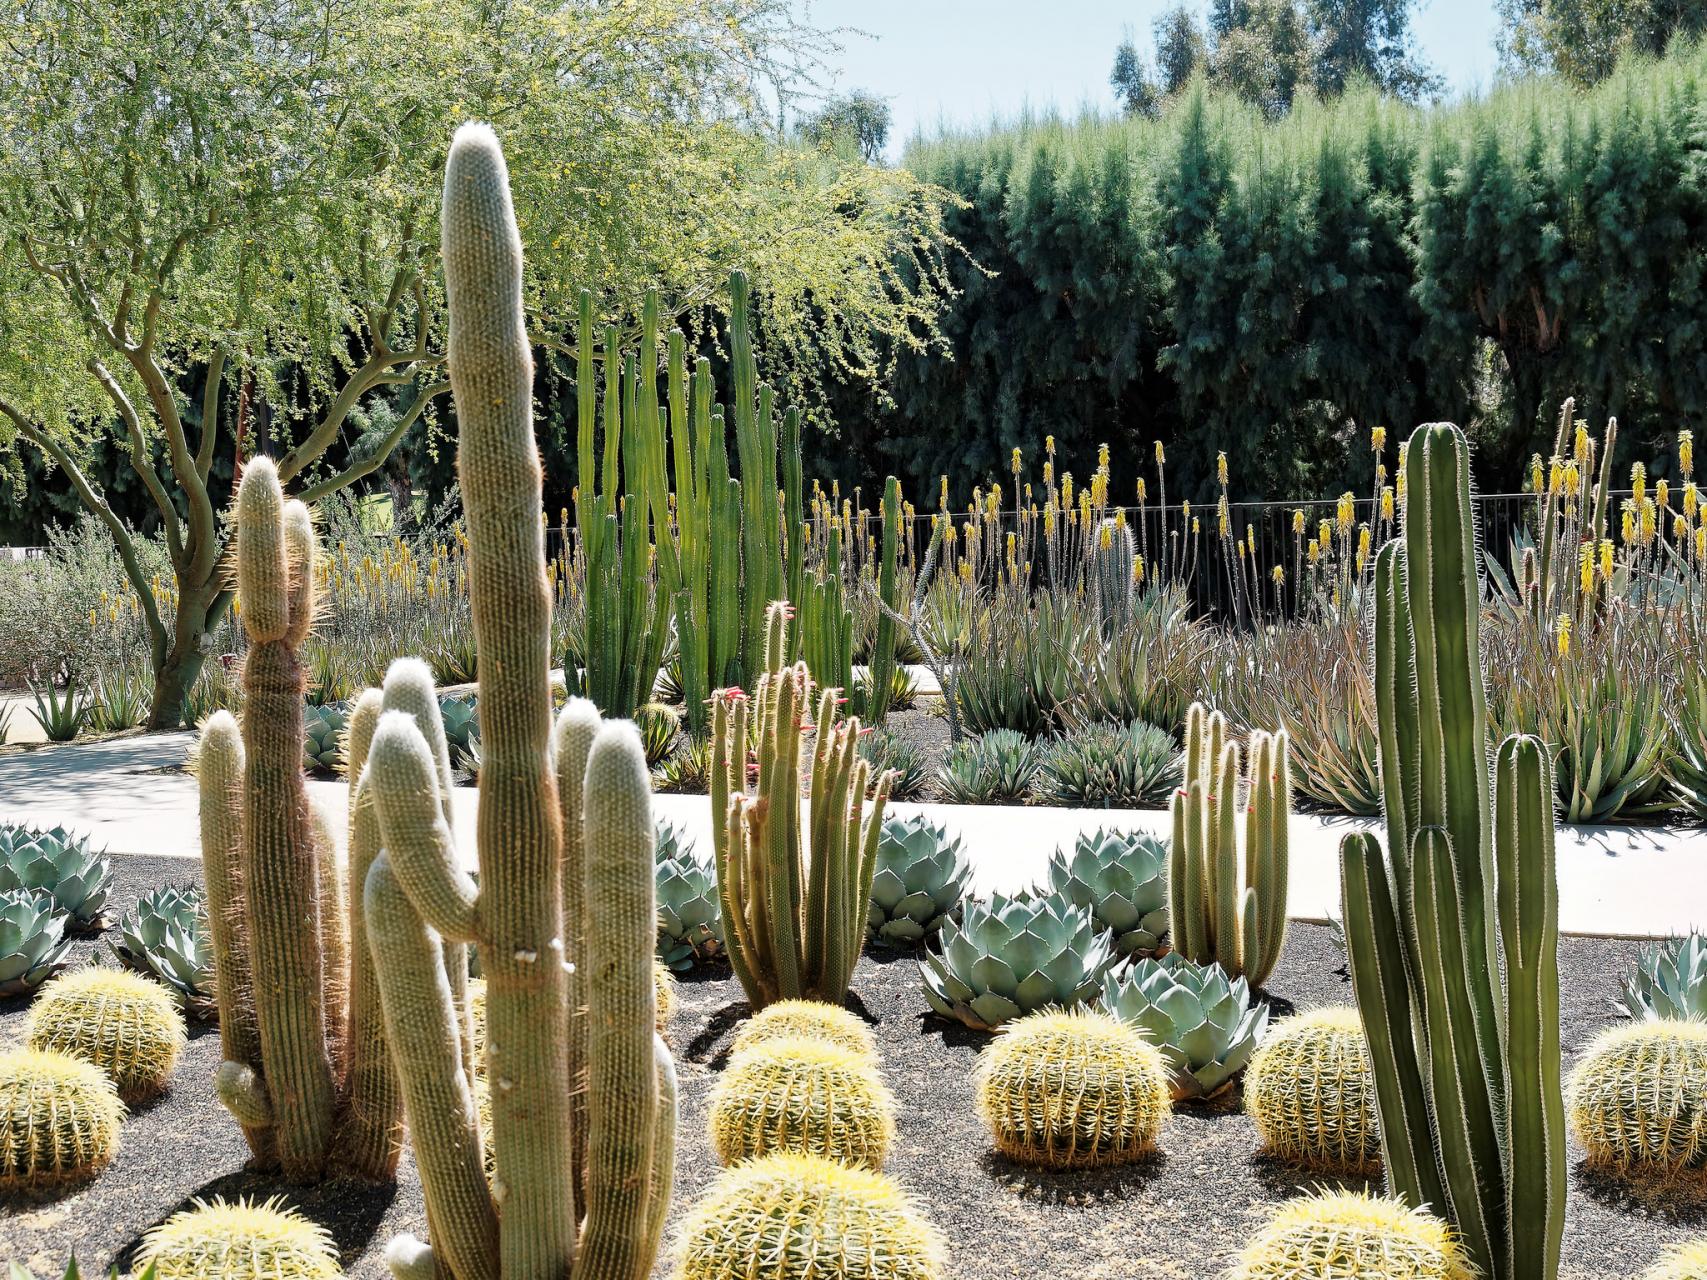
Pincushion cactus care is very simple and suitable for the beginning gardener. Cactus plants are used to dry conditions and limited fertility. The soil for a pincushion needs to be well drained and gritty. The soil needs to dry out between watering, which is best accomplished with a sandy topsoil. The cactus goes dormant in winter and needs no additional irrigation until spring. Potted plants do well in unglazed clay pots, which allow any extra moisture to evaporate. Temperatures should be between 50 and 75 F. (10-24 C.). Small gravel spread around the base of the plant out to the root zone will act as a mulch to deter stem rot. The cactus produces offsets when it is mature. These can be divided from the mother plant and potted in a sandy soil mixture. You can also start the plants from seed in spring. Plant seed in a flat filled with cactus mix. Surface sow and then sprinkle sand lightly over the top and moisten the soil evenly. Place the flat in a warm location of at least 70 F. (21 C.). Keep seeds wet when growing pincushion cactus. Seedlings are transplanted when they can easily be moved.
Flowering Pincushion Cactus
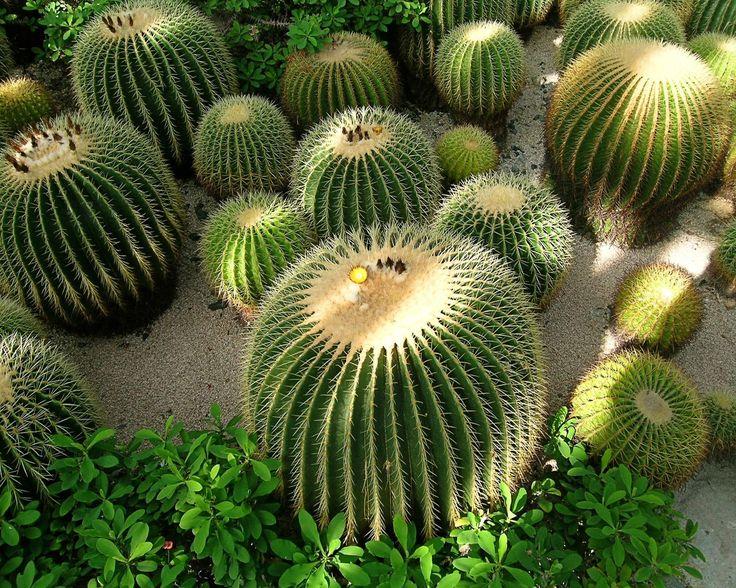
If optimum heat and watering conditions are met, the pincushion cactus may reward you with flowers in spring. Enhance the chance of blooming by holding off watering until several weeks into spring. You can also apply a cactus food in early spring to give the plant the nutrients it needs to produce blooms.

Pincushion Cactus Plant Varieties
Pincushion cactus is a member of a family called Mammillaria, which includes 250 species of cactus. Some of the species of pincushion have colorful names. The Giant Snake or Crawling Log cactus (Mammillaria matudae) produce long stems. Snowball cushion cactus (Mammillaria candida) is a ball-shaped plant with white felt or fuzz on the skin of the plant. Old Lady cactus (Mammillaria hahniana) is a solitary cactus with white fuzzy hair-like spines and purplish red flowers. There are also Powder puff (Mammillaria bocasa-na) and Rose (Mammillaria zeilmanniana) among many others. Cactus and succulent stores can provide you with more pincushion cactus information.

Pincushion Cactus Information
Pincushion cacti are small, squat plants that usually don’t grow more than 6 inches in height. They can be ball or barrel shaped, and are native to the warmer regions of the United States. The pincushion cactus plant is most commonly grown indoors but it can tolerate some chilling temperatures if grown outside. Pincushion cactus is so called because it is covered in white spines over the entire surface of the plant. It is a very prickly little specimen that is best handled with thick gloves.

Growing Pincushion Cactus
Pincushion cactus care is very simple and suitable for the beginning gardener. Cactus plants are used to dry conditions and limited fertility. The soil for a pincushion needs to be well drained and gritty. The soil needs to dry out between watering, which is best accomplished with a sandy topsoil. The cactus goes dormant in winter and needs no additional irrigation until spring. Potted plants do well in unglazed clay pots, which allow any extra moisture to evaporate. Temperatures should be between 50 and 75 F. (10-24 C.). Small gravel spread around the base of the plant out to the root zone will act as a mulch to deter stem rot. The cactus produces offsets when it is mature. These can be divided from the mother plant and potted in a sandy soil mixture. You can also start the plants from seed in spring. Plant seed in a flat filled with cactus mix. Surface sow and then sprinkle sand lightly over the top and moisten the soil evenly. Place the flat in a warm location of at least 70 F. (21 C.). Keep seeds wet when growing pincushion cactus. Seedlings are transplanted when they can easily be moved.

Flowering Pincushion Cactus
If optimum heat and watering conditions are met, the pincushion cactus may reward you with flowers in spring. Enhance the chance of blooming by holding off watering until several weeks into spring. You can also apply a cactus food in early spring to give the plant the nutrients it needs to produce blooms.
1
1
文章
Dummer. ゛☀
2017年08月26日

The attractive, feathery fronds of parrot feather plants (Myriophyllum aquaticum) often encourage the water gardener to use it in a bed or border. The delicate appearance of growing parrot feather compliments other foliage in your water feature or bog garden.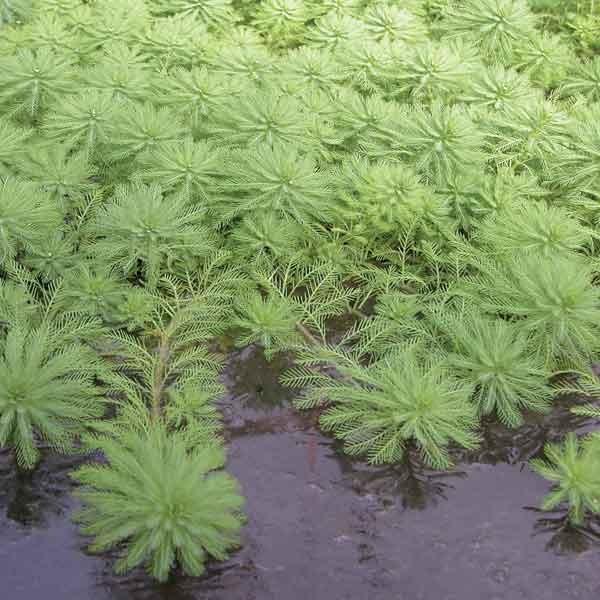
Parrot Feather Information
Stop: before you make the mistake of planting this seemingly innocent specimen in your landscape, you should know that parrot feather information indicates that these plants are highly invasive. Once planted, they have the potential to readily escape cultivation and overwhelm native plants. This has already happened in numerous areas in the United States. Only female specimens of the plant are known to grow in this country and multiply from root division and plant pieces in a process called fragmentation. Tiny bits of the plant have moved through waterways, on boats and located themselves aggressively in many areas. Several states have laws that prohibit growing parrot feather.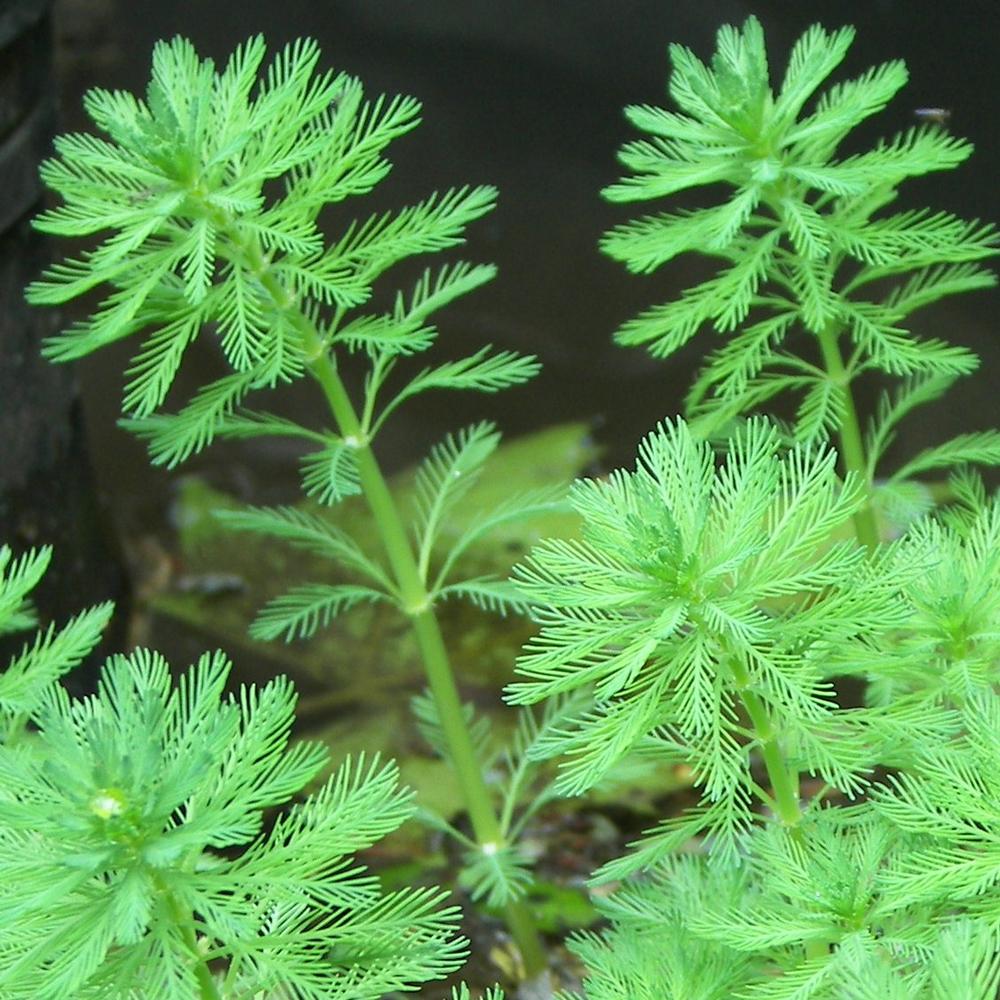
Growing Parrot Feather
Growing parrot feather began innocently enough in the United States. The South and Central American native came to the country in the 1800’s to decorate indoor and outdoor aquariums. The attractive, feathery plumes of parrot feather plants took hold and began to choke out native plants. If you choose to use parrot feather plants in your pond or water garden, keep in mind that parrot feather plant care will consist of keeping the plant under control. Keep growing parrot feather in bounds by only using in lined ponds and water features or in containers.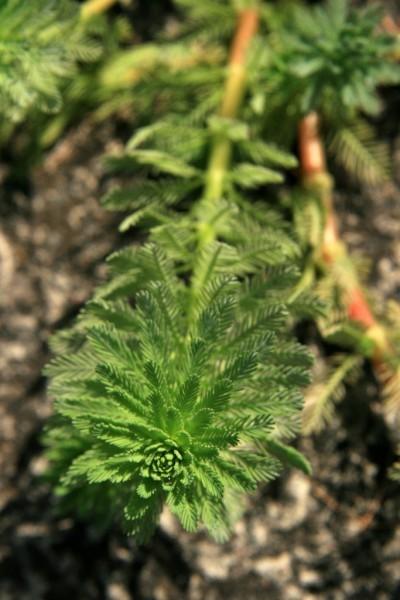
Parrot feather plants grow in fresh water areas from rhizomatous roots. Cutting the plant encourages it to grow, so control can be complicated if it grows to restrict your drainage pipe or begins to destroy beneficial algae. Aquatic herbicides are sometimes effective in parrot feather plant care and control. If you choose to grow parrot feather plants in or around your water feature or pond, make sure it is legal to grow it in your area. Plant only in a controlled situation, such as a container or indoor water feature.

Parrot Feather Information
Stop: before you make the mistake of planting this seemingly innocent specimen in your landscape, you should know that parrot feather information indicates that these plants are highly invasive. Once planted, they have the potential to readily escape cultivation and overwhelm native plants. This has already happened in numerous areas in the United States. Only female specimens of the plant are known to grow in this country and multiply from root division and plant pieces in a process called fragmentation. Tiny bits of the plant have moved through waterways, on boats and located themselves aggressively in many areas. Several states have laws that prohibit growing parrot feather.

Growing Parrot Feather
Growing parrot feather began innocently enough in the United States. The South and Central American native came to the country in the 1800’s to decorate indoor and outdoor aquariums. The attractive, feathery plumes of parrot feather plants took hold and began to choke out native plants. If you choose to use parrot feather plants in your pond or water garden, keep in mind that parrot feather plant care will consist of keeping the plant under control. Keep growing parrot feather in bounds by only using in lined ponds and water features or in containers.

Parrot feather plants grow in fresh water areas from rhizomatous roots. Cutting the plant encourages it to grow, so control can be complicated if it grows to restrict your drainage pipe or begins to destroy beneficial algae. Aquatic herbicides are sometimes effective in parrot feather plant care and control. If you choose to grow parrot feather plants in or around your water feature or pond, make sure it is legal to grow it in your area. Plant only in a controlled situation, such as a container or indoor water feature.
1
1
文章
Dummer. ゛☀
2017年08月25日

Lemon balm plants tend to be pass-along plants that a gardener ends up with from plant swaps or as gifts from other gardeners. This can leave a gardener wondering what to do with lemon balm and what is lemon balm used for exactly. While not as popular as other herbs, lemon balm is nevertheless a wonderful herb to have in your garden. Keep reading to learn more about how to grow lemon balm.
What is Lemon Balm?
The lemon balm plant (Melissa officinalis) is actually a member of the mint family and is a perennial herb. It grows as a bushy, leafy herb with a pleasant lemon smell and small white flowers. If not carefully controlled, lemon balm can quickly become invasive in the garden. Often, people mistakenly think that lemon balm is invasive due to its roots, like its cousins peppermint and spearmint, but in fact it is the seeds of the lemon balm plant that cause this herb to suddenly take over a garden. Removing the flowers of the plant as soon as they appear will make your lemon balm far less invasive.
How to Grow Lemon Balm Plants
Growing lemon balm is very easy. The plants aren’t picky about where they grow and will grow in almost any soil, but they prefer rich, well drained soil. Lemon balm plants will grow in part shade to full sun, but flourish best in full sun. It isn’t recommended that you fertilize lemon balm, as this can cause the strength of its scent to be reduced. Lemon balm is easily propagated from seeds, cuttings or plant divisions.
What is Lemon Balm Used For?
Once established, lemon balm can produce large amounts of its sweet, lemon smelling leaves. These leaves can be used for a variety of things. Most commonly, lemon balm leaves are used in teas and potpourris. You can also use lemon balm in cooking, in making essential oils and as an insect repellent.

What is Lemon Balm?
The lemon balm plant (Melissa officinalis) is actually a member of the mint family and is a perennial herb. It grows as a bushy, leafy herb with a pleasant lemon smell and small white flowers. If not carefully controlled, lemon balm can quickly become invasive in the garden. Often, people mistakenly think that lemon balm is invasive due to its roots, like its cousins peppermint and spearmint, but in fact it is the seeds of the lemon balm plant that cause this herb to suddenly take over a garden. Removing the flowers of the plant as soon as they appear will make your lemon balm far less invasive.

How to Grow Lemon Balm Plants
Growing lemon balm is very easy. The plants aren’t picky about where they grow and will grow in almost any soil, but they prefer rich, well drained soil. Lemon balm plants will grow in part shade to full sun, but flourish best in full sun. It isn’t recommended that you fertilize lemon balm, as this can cause the strength of its scent to be reduced. Lemon balm is easily propagated from seeds, cuttings or plant divisions.

What is Lemon Balm Used For?
Once established, lemon balm can produce large amounts of its sweet, lemon smelling leaves. These leaves can be used for a variety of things. Most commonly, lemon balm leaves are used in teas and potpourris. You can also use lemon balm in cooking, in making essential oils and as an insect repellent.
1
0
文章
Dummer. ゛☀
2017年08月25日

As with most herbs, dill (Anethum graveolens) is a fairly easy to grow plant. Even so, the gardener may have to deal with his or her share of dill plant problems, from pests to dill plant diseases. The following article contains information on identifying and treating diseases affecting dill plants.
Dill Plant Problems
Dill is an herbaceous plant grown as an annual. A member of the family Apiaceae, dill is cultivated for its leaves and seeds which are used in foods and medicinally. Dill means “to calm or soothe,” hinting at its ancient use to calm upset stomachs or colicky babies.
Believed to originate in the Mediterranean, dill (like other Mediterranean herbs) can be grown in a variety of soils but thrives in well-draining sandy loam, rich in organic matter. Again, like its Mediterranean relatives, dill is a sun lover and needs 6-8 hours of direct sun each day.
The plant is grown for either its seeds that are produced once the starburst shaped, yellow flower heads begin to die back or for its feathery, fern-like foliage. Dill does not like to be transplanted, so it is best to direct sow in the spring once all danger of frost has passed. Once the plants have emerged (7-21 days later), thin to 12-15 inches between plants. Thereafter, promote a bushy habit by regularly pruning the plants back and take care not to over water. Once the plants have established, they are less likely to succumb to dill plant problems. That said, there are always the aphids that seem to be drawn to anything green and a plethora of other pests that must be watched for. Dill plant diseases are generally more deadly than pest infestation, but pests often are the source of dill diseases. Identifying and prompt treating of these issues with dill are the keys to saving the dill plants.
Diseases of Dill
As mentioned, insects are often the vectors for disease and aphids are one of the major culprits. Aphid infestations may result in the dill acquiring Carrot Motley Dwarf disease. This disease is caused by two viruses, carrot redleaf virus and carrot mottle virus, both of which must be present to infect the plant. The disease causes yellow and red discoloration of leaves and general stunting of plant growth. As the name suggests, carrots have are the origin for this disease, the aphids just pass it along. To prevent this disease of dill, control aphids with insecticidal soap and avoid planting the herb near areas of the garden where carrots have overwintered. Other diseases affecting dill plants are not insect related at all but fungal. Cercospora leaf blight fungus is one such disease that causes necrotic areas on the plant accompanied by a characteristic halo. These dying blemishes begin to blend together, resulting in large necrotic regions with the result of leaf die off. This disease may be the result of infested seed that is then spread via wind, rain or irrigation. To thwart cercospora leaf blight, use disease free seeds, rotate crops, eliminate crop debris, and use fungicide sprays according to the manufacturer’s instructions. Another fungal disease, damping off, may also afflict dill. This disease results in soft, rotting seeds which do not germinate, or seedlings that emerge with reddish lesions around their stems and soon after die. Fungal spores can be spread in water, soil or on equipment. Treatment involves applying a fungicide to seeds prior to planting; planting in raised beds to aid in soil drainage; and avoiding planting in cool, wet, poorly draining soil. Additional fungal diseases that afflict dill are downy mildew fungus and powdery mildew fungus.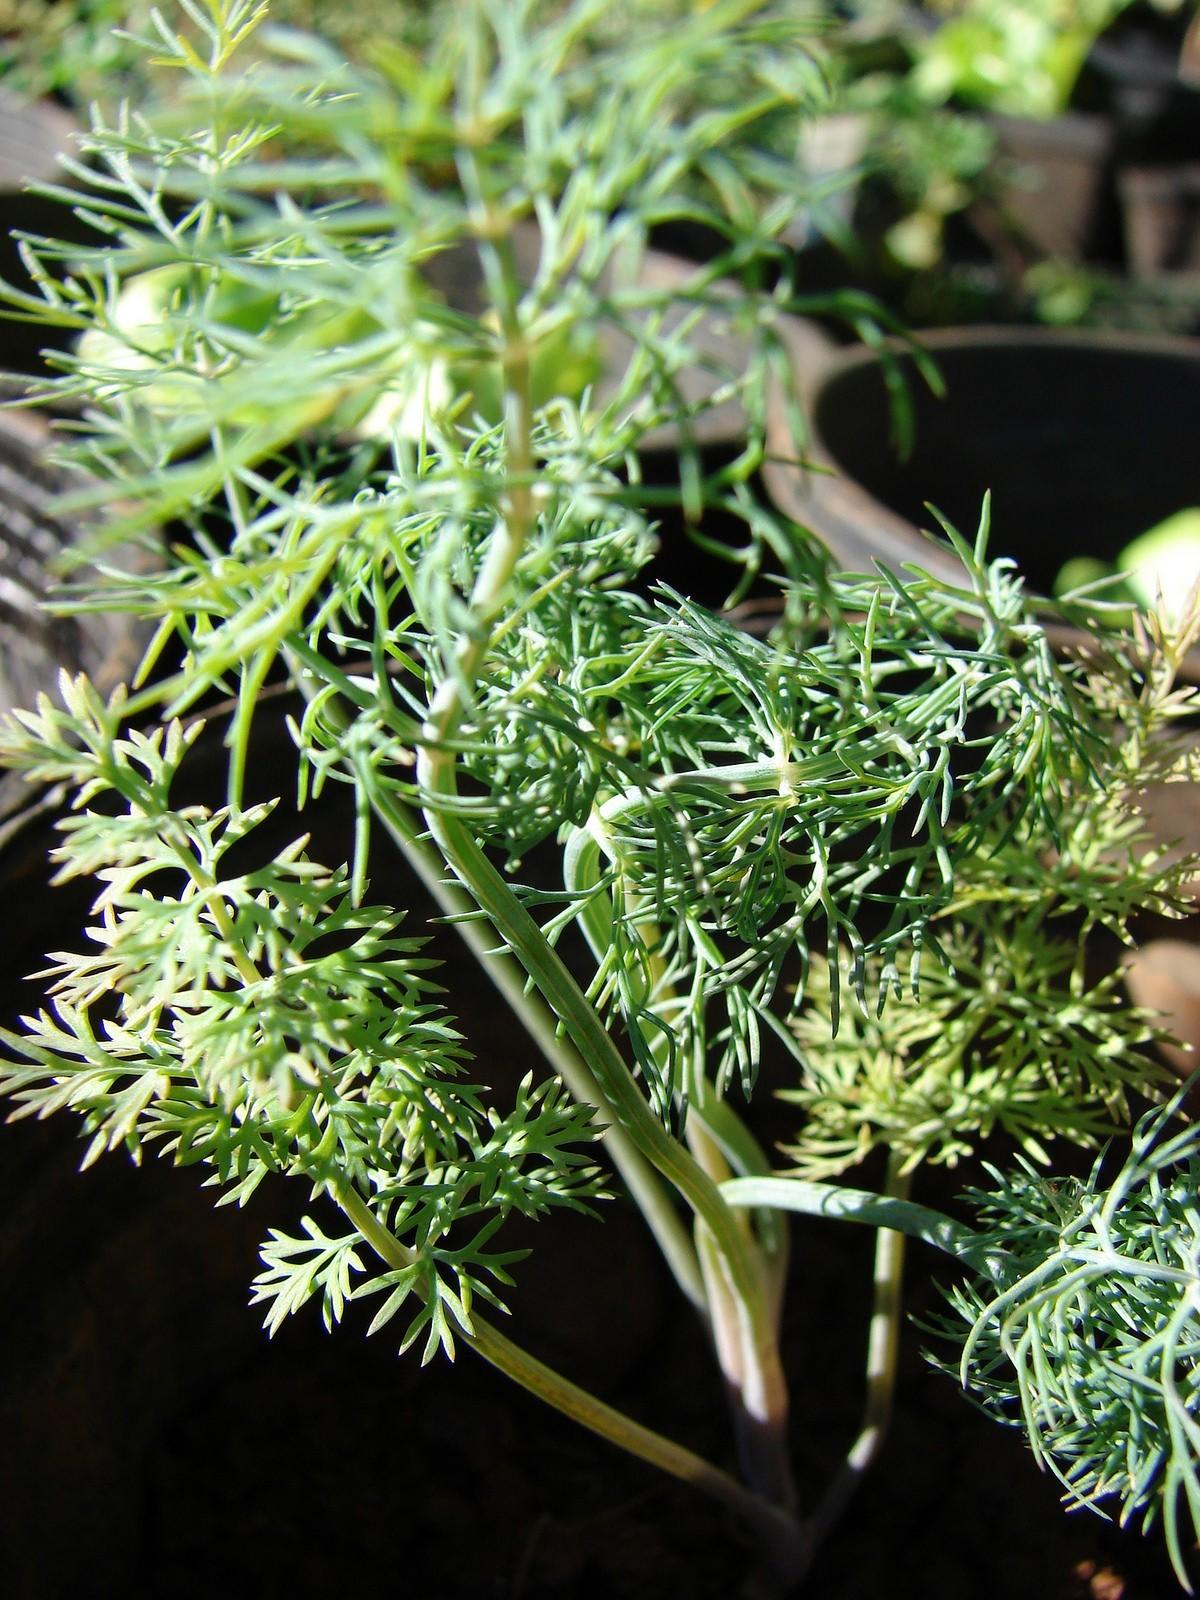
Downy mildew fungus appears as yellow spots on foliage accompanied by a white, fluffy growth on the underside of the leaves. As the disease progresses, the yellow spots begin to darken. This disease targets young, tender leaves and is fostered by wet leaves. Use disease free seed, don’t overcrowd the plants and rotate crops to minimize the incidence of downy mildew. Powdery mildew looks just what it sounds like, a powdery growth that attacks leaves and flower stalks. The results are chlorotic leaves and distorted blossoms. This fungal disease may float on air currents for long distances and is favored by conditions of high humidity combined with moderate temps. Avoid over fertilizing and apply protective fungicides to prevent this disease from affecting dill. If infection is spotted early in the season, treat with an application of sulfur.
Treating Issues with Dill
There are a few common denominators when treating disease issues with dill. These include:
Planting disease resistant seeds, when possible
Keeping the garden free of plant detritus and weeds that act as havens for disease and insects that transmit them
Treating insect infestations
Rotating crops
Planting dill in well-draining soil
Watering early in the morning at the base of the plants so the foliage does not stay wet
Using sanitation practices on tools, boots, and gloves to avoid the spread of disease

Dill Plant Problems
Dill is an herbaceous plant grown as an annual. A member of the family Apiaceae, dill is cultivated for its leaves and seeds which are used in foods and medicinally. Dill means “to calm or soothe,” hinting at its ancient use to calm upset stomachs or colicky babies.
Believed to originate in the Mediterranean, dill (like other Mediterranean herbs) can be grown in a variety of soils but thrives in well-draining sandy loam, rich in organic matter. Again, like its Mediterranean relatives, dill is a sun lover and needs 6-8 hours of direct sun each day.
The plant is grown for either its seeds that are produced once the starburst shaped, yellow flower heads begin to die back or for its feathery, fern-like foliage. Dill does not like to be transplanted, so it is best to direct sow in the spring once all danger of frost has passed. Once the plants have emerged (7-21 days later), thin to 12-15 inches between plants. Thereafter, promote a bushy habit by regularly pruning the plants back and take care not to over water. Once the plants have established, they are less likely to succumb to dill plant problems. That said, there are always the aphids that seem to be drawn to anything green and a plethora of other pests that must be watched for. Dill plant diseases are generally more deadly than pest infestation, but pests often are the source of dill diseases. Identifying and prompt treating of these issues with dill are the keys to saving the dill plants.

Diseases of Dill
As mentioned, insects are often the vectors for disease and aphids are one of the major culprits. Aphid infestations may result in the dill acquiring Carrot Motley Dwarf disease. This disease is caused by two viruses, carrot redleaf virus and carrot mottle virus, both of which must be present to infect the plant. The disease causes yellow and red discoloration of leaves and general stunting of plant growth. As the name suggests, carrots have are the origin for this disease, the aphids just pass it along. To prevent this disease of dill, control aphids with insecticidal soap and avoid planting the herb near areas of the garden where carrots have overwintered. Other diseases affecting dill plants are not insect related at all but fungal. Cercospora leaf blight fungus is one such disease that causes necrotic areas on the plant accompanied by a characteristic halo. These dying blemishes begin to blend together, resulting in large necrotic regions with the result of leaf die off. This disease may be the result of infested seed that is then spread via wind, rain or irrigation. To thwart cercospora leaf blight, use disease free seeds, rotate crops, eliminate crop debris, and use fungicide sprays according to the manufacturer’s instructions. Another fungal disease, damping off, may also afflict dill. This disease results in soft, rotting seeds which do not germinate, or seedlings that emerge with reddish lesions around their stems and soon after die. Fungal spores can be spread in water, soil or on equipment. Treatment involves applying a fungicide to seeds prior to planting; planting in raised beds to aid in soil drainage; and avoiding planting in cool, wet, poorly draining soil. Additional fungal diseases that afflict dill are downy mildew fungus and powdery mildew fungus.

Downy mildew fungus appears as yellow spots on foliage accompanied by a white, fluffy growth on the underside of the leaves. As the disease progresses, the yellow spots begin to darken. This disease targets young, tender leaves and is fostered by wet leaves. Use disease free seed, don’t overcrowd the plants and rotate crops to minimize the incidence of downy mildew. Powdery mildew looks just what it sounds like, a powdery growth that attacks leaves and flower stalks. The results are chlorotic leaves and distorted blossoms. This fungal disease may float on air currents for long distances and is favored by conditions of high humidity combined with moderate temps. Avoid over fertilizing and apply protective fungicides to prevent this disease from affecting dill. If infection is spotted early in the season, treat with an application of sulfur.
Treating Issues with Dill
There are a few common denominators when treating disease issues with dill. These include:
Planting disease resistant seeds, when possible
Keeping the garden free of plant detritus and weeds that act as havens for disease and insects that transmit them
Treating insect infestations
Rotating crops
Planting dill in well-draining soil
Watering early in the morning at the base of the plants so the foliage does not stay wet
Using sanitation practices on tools, boots, and gloves to avoid the spread of disease
0
0
文章
Dummer. ゛☀
2017年08月25日

Any gardener will tell you that you can’t go wrong with composting. Whether you want to add nutrients, break up dense soil, introduce beneficial microbes, or all three, compost is the perfect choice. But not all compost is the same. Many gardeners will tell you that the best stuff you can get is cotton burr compost. Keep reading to learn more about how to use cotton burr compost in your garden.
What is Cotton Burr Compost?
What is cotton burr compost? Usually, when cotton is harvested, the plant is run through a gin. This separates the good stuff (the cotton fiber) from the leftovers (the seeds, stems, and leaves). This leftover stuff is called cotton burr.
For a long time, cotton farmers didn’t know what to do with the leftover burr, and they often just burned it. Eventually, though, it became clear that it could be made into incredible compost. The benefits of cotton burr compost are great for a few reasons. Mainly, cotton plants famously use up a lot of nutrients. This means those beneficial minerals and nutrients are sucked out of the soil and up into the plant. Compost the plant and you’ll get all those nutrients back. It’s very good for breaking up heavy clay soil because it’s coarser than some other composts, like manure, and easier to wet than peat moss. It’s also full of beneficial microbes and bacteria, unlike some other varieties.
How to Use Cotton Burr Compost in Gardens
Using cotton burr compost in gardens is both easy to do and excellent for plants. If you want to add it to your soil before planting, simply mix in 2 to 3 inches of compost with your topsoil. Cotton burr compost has so many nutrients that you may not have to add more for two growing seasons. Many gardeners also use cotton burr compost as mulch. To do this, simply lay down an inch of compost around your plants. Water thoroughly and lay down a layer of woodchips or other heavy mulch on top to keep it from blowing away.

What is Cotton Burr Compost?
What is cotton burr compost? Usually, when cotton is harvested, the plant is run through a gin. This separates the good stuff (the cotton fiber) from the leftovers (the seeds, stems, and leaves). This leftover stuff is called cotton burr.
For a long time, cotton farmers didn’t know what to do with the leftover burr, and they often just burned it. Eventually, though, it became clear that it could be made into incredible compost. The benefits of cotton burr compost are great for a few reasons. Mainly, cotton plants famously use up a lot of nutrients. This means those beneficial minerals and nutrients are sucked out of the soil and up into the plant. Compost the plant and you’ll get all those nutrients back. It’s very good for breaking up heavy clay soil because it’s coarser than some other composts, like manure, and easier to wet than peat moss. It’s also full of beneficial microbes and bacteria, unlike some other varieties.

How to Use Cotton Burr Compost in Gardens
Using cotton burr compost in gardens is both easy to do and excellent for plants. If you want to add it to your soil before planting, simply mix in 2 to 3 inches of compost with your topsoil. Cotton burr compost has so many nutrients that you may not have to add more for two growing seasons. Many gardeners also use cotton burr compost as mulch. To do this, simply lay down an inch of compost around your plants. Water thoroughly and lay down a layer of woodchips or other heavy mulch on top to keep it from blowing away.
0
0
文章
Dummer. ゛☀
2017年08月24日

While pruning a rosemary plant is not needed to keep a rosemary healthy, there are several reasons why a gardener might want to prune a rosemary bush. It may be that they want to shape the rosemary or reduce the size of the rosemary shrub or to create a more bushy and productive plant. Whatever your reasons for wanting to prune your rosemary, there are a few things you need to know about how to prune a rosemary bush.
When to Prune Rosemary
Rosemary pruning can be done anytime during the spring or summer up until four to six weeks before the first frost. Pruning rosemary after this time, or in the fall and winter, can cause the rosemary shrub to focus on growing new, tender growth rather than hardening off and protecting the growth that it has. If a rosemary bush does not harden itself off, it will be more susceptible to winter damage which can kill it.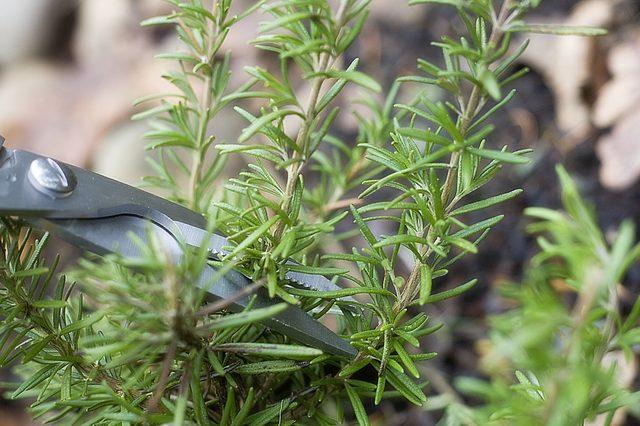
Tips for How to Prune a Rosemary Bush
Before you prune your rosemary bush, make sure that your pruning shears are sharp and clean. Blunt or dirty pruning shears can result in ragged cuts that can leave the rosemary plant vulnerable to bacteria and pests. The next step in how to trim rosemary bushes is to decide why you want to trim the plant. If you are trimming the rosemary to shape it, say as a hedge or a topiary, draw a mental picture of what you would like the plant to look like and trim away the branches that do not fall into that outline. If your shaping needs to remove more than one-third of any branch, you will need to prune the rosemary back in stages. You can prune back branches by one-quarter, but you will need to give them a season to recover before pruning again.
If you are doing rosemary pruning simply to create a busier plant, you can remove the end one to two inches of the branches. This will force the branch to split and will create a bushier plant. This technique is particularly helpful if you are growing rosemary for cooking, as this creates more foliage in a more compact space. You may also find that your rosemary plant is in need of some rejuvenation. Find tips for this here: Rejuvenating Rosemary Plants. The steps for how to prune a rosemary bush are simple but important. Knowing how to trim rosemary bushes properly will help you keep your rosemary happy and manageable.

When to Prune Rosemary
Rosemary pruning can be done anytime during the spring or summer up until four to six weeks before the first frost. Pruning rosemary after this time, or in the fall and winter, can cause the rosemary shrub to focus on growing new, tender growth rather than hardening off and protecting the growth that it has. If a rosemary bush does not harden itself off, it will be more susceptible to winter damage which can kill it.

Tips for How to Prune a Rosemary Bush
Before you prune your rosemary bush, make sure that your pruning shears are sharp and clean. Blunt or dirty pruning shears can result in ragged cuts that can leave the rosemary plant vulnerable to bacteria and pests. The next step in how to trim rosemary bushes is to decide why you want to trim the plant. If you are trimming the rosemary to shape it, say as a hedge or a topiary, draw a mental picture of what you would like the plant to look like and trim away the branches that do not fall into that outline. If your shaping needs to remove more than one-third of any branch, you will need to prune the rosemary back in stages. You can prune back branches by one-quarter, but you will need to give them a season to recover before pruning again.

If you are doing rosemary pruning simply to create a busier plant, you can remove the end one to two inches of the branches. This will force the branch to split and will create a bushier plant. This technique is particularly helpful if you are growing rosemary for cooking, as this creates more foliage in a more compact space. You may also find that your rosemary plant is in need of some rejuvenation. Find tips for this here: Rejuvenating Rosemary Plants. The steps for how to prune a rosemary bush are simple but important. Knowing how to trim rosemary bushes properly will help you keep your rosemary happy and manageable.
0
0
文章
Dummer. ゛☀
2017年08月22日

The borage herb is an old fashioned plant that can get up to 2 feet or more. It is native to the Middle East and has an ancient history in war as an enhancement for bravery and courage. Growing borage provides the gardener with cucumber-flavored leaves for tea and other beverages as well as bright starry blue flowers for decorating salads. All parts of the plant, except the roots, are flavorful and have culinary or medicinal uses.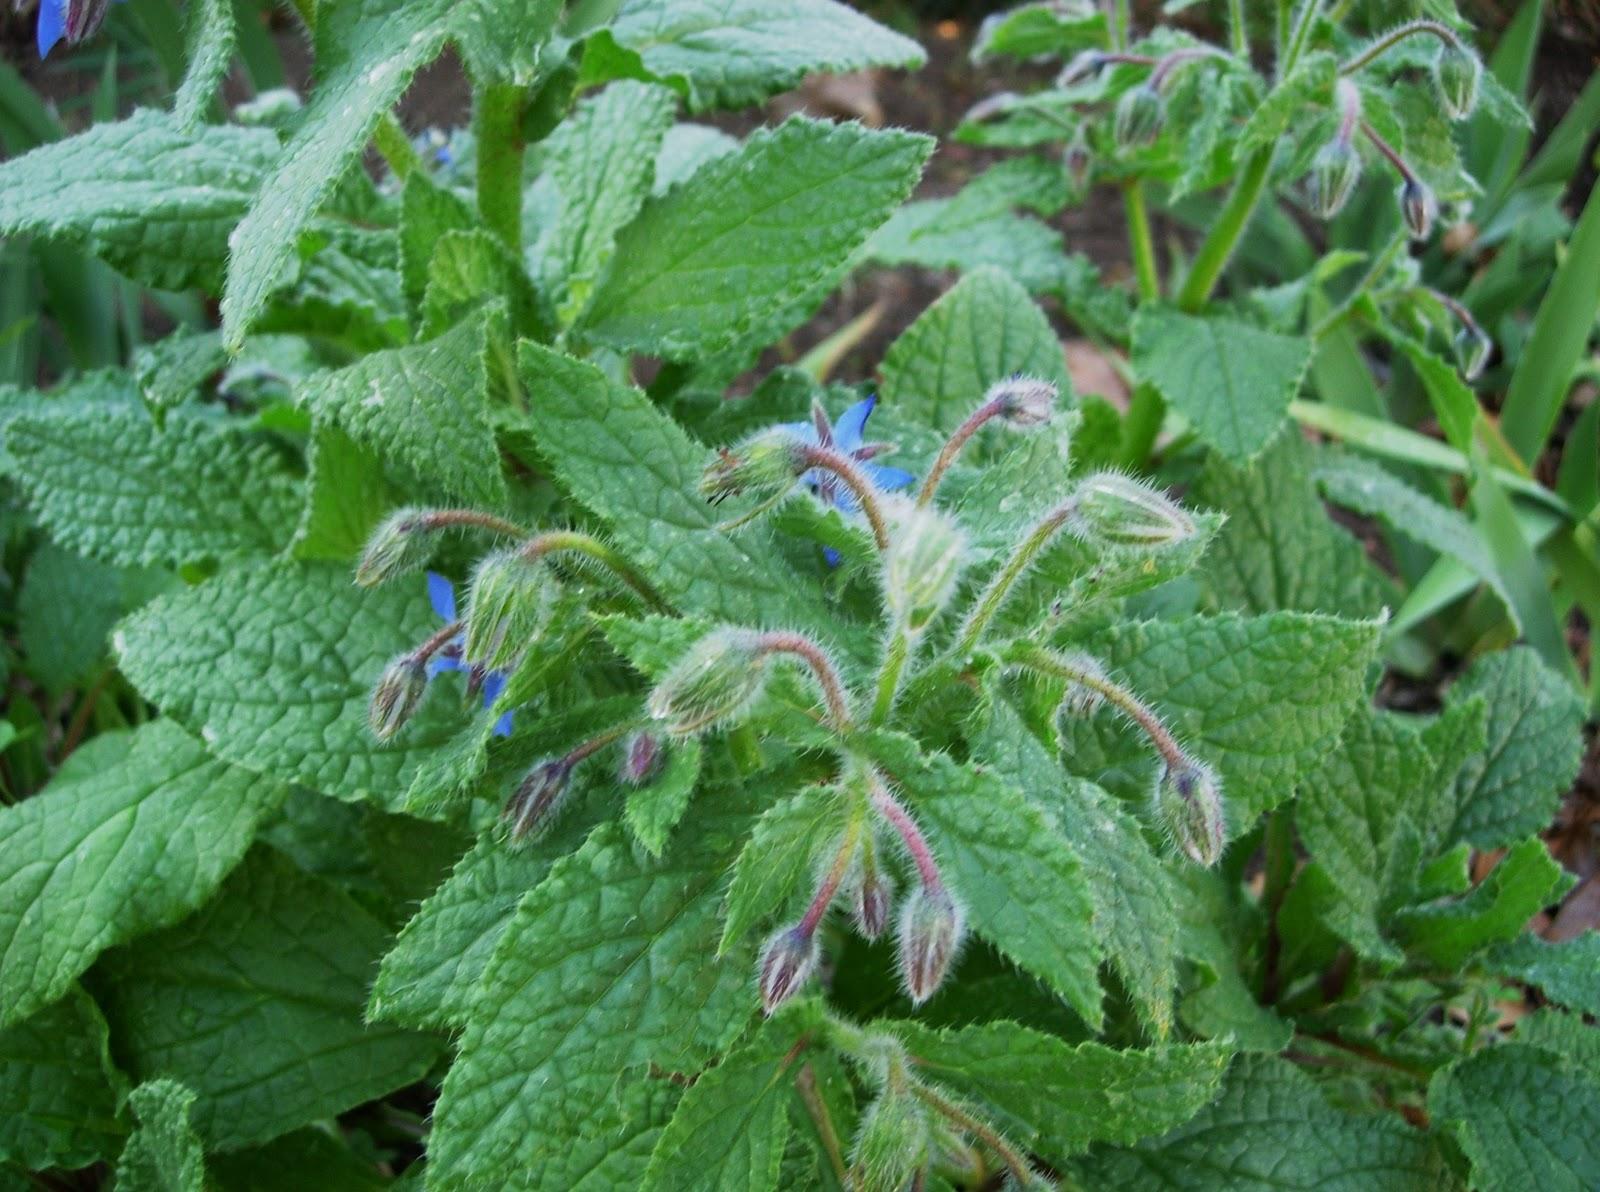
Borage Plant Info
While not as common as thyme or basil, borage herb (Borago officinalis) is a unique plant for the culinary garden. It grows quickly as an annual but will colonize a corner of the garden by self-seeding and reappearing year after year. June and July are heralded by the presence of the borage flower, an appealing, small, brilliant blue bloom with attracting qualities. Indeed, the plant should be include in the butterfly garden and brings pollinators to your veggies. The oval leaves are hairy and rough with the lower foliage pushing 6 inches in length. The borage plant may grow 12 or more inches wide in a tall bushy habit.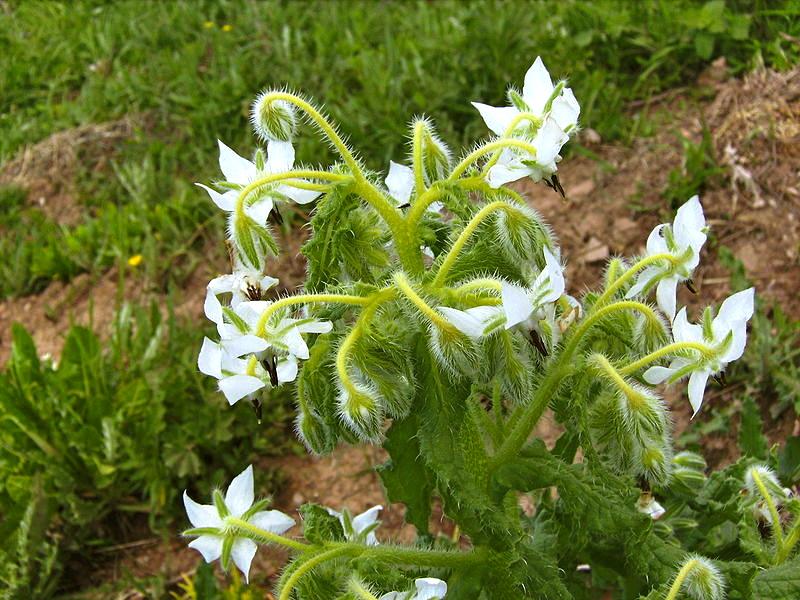
Growing Borage
Herb cultivation just takes a little gardening know how. Grow borage in an herb or flower garden. Prepare a garden bed that is well tilled with average organic matter. Ensure that the soil is well drained and in a medium pH range. Sow seeds directly into the garden after the last date of frost. Plant seeds ¼ to ½ inch under the soil in rows 12 inches apart. Thin the borage herb to at least 1 foot when the plants measure 4 to 6 inches tall. Planting borage with strawberries attracts bees and increases the yield of fruit. It has limited culinary use in today’s foods, but the borage flower is often used as a garnish. Traditionally the borage plant was used to treat many ailments, from jaundice to kidney problems. In medicinal use today it is limited, but the seeds are a source of linolenic acid. Borage flowers are also used in potpourris or candied for use in confections. Borage can be perpetuated by allowing the flowers to go to seed and self sow. Pinching the terminal growth will force a bushier plant but may sacrifice some of the flowers. Borage herb is not a fussy plant and has been known to grow in refuse piles and highway ditches. Be assured you want the plant to regrow annually or remove the flowers before it seeds. Growing borage requires a dedicated space in the home garden.
Borage Herb Harvest
Sowing the seeds every four weeks will ensure a ready supply of borage flowers. The leaves may be picked at any time and used fresh. Dried leaves have little of the characteristic flavor so the plant is best consumed after harvest. Leave the flowers alone if you are hosting a honeybee colony. The blooms produce an excellent flavored honey.

Borage Plant Info
While not as common as thyme or basil, borage herb (Borago officinalis) is a unique plant for the culinary garden. It grows quickly as an annual but will colonize a corner of the garden by self-seeding and reappearing year after year. June and July are heralded by the presence of the borage flower, an appealing, small, brilliant blue bloom with attracting qualities. Indeed, the plant should be include in the butterfly garden and brings pollinators to your veggies. The oval leaves are hairy and rough with the lower foliage pushing 6 inches in length. The borage plant may grow 12 or more inches wide in a tall bushy habit.

Growing Borage
Herb cultivation just takes a little gardening know how. Grow borage in an herb or flower garden. Prepare a garden bed that is well tilled with average organic matter. Ensure that the soil is well drained and in a medium pH range. Sow seeds directly into the garden after the last date of frost. Plant seeds ¼ to ½ inch under the soil in rows 12 inches apart. Thin the borage herb to at least 1 foot when the plants measure 4 to 6 inches tall. Planting borage with strawberries attracts bees and increases the yield of fruit. It has limited culinary use in today’s foods, but the borage flower is often used as a garnish. Traditionally the borage plant was used to treat many ailments, from jaundice to kidney problems. In medicinal use today it is limited, but the seeds are a source of linolenic acid. Borage flowers are also used in potpourris or candied for use in confections. Borage can be perpetuated by allowing the flowers to go to seed and self sow. Pinching the terminal growth will force a bushier plant but may sacrifice some of the flowers. Borage herb is not a fussy plant and has been known to grow in refuse piles and highway ditches. Be assured you want the plant to regrow annually or remove the flowers before it seeds. Growing borage requires a dedicated space in the home garden.

Borage Herb Harvest
Sowing the seeds every four weeks will ensure a ready supply of borage flowers. The leaves may be picked at any time and used fresh. Dried leaves have little of the characteristic flavor so the plant is best consumed after harvest. Leave the flowers alone if you are hosting a honeybee colony. The blooms produce an excellent flavored honey.
0
0


