文章
Dummer. ゛☀
2017年08月04日

Think Outside the Pot
If you've got a postage stamp for a yard or you're such an avid gardener that you've filled all your space, it's time to explore new gardening territory with vertical gardening. Follow the tips below for a few traditional and innovative ways to add new foliage to your small or plant-packed garden.

The Traditional Way: Grow Vines
Vines are growing machines. Some of them can grow to 50 feet in length. If you have a fence or wall in need of livening up, try vines. Clematis is tame, while trumpet vines are more adventurous and can tear up your siding, so be sure to pick a variety that's suitable to your setting. You can put up a trellis on your wall or fence for your vine to follow, or build an arbor or pergola. Either way, you can create a stunning assortment of flowers and greenery with vines alone, and attracts birds and butterflies to your yard.

Grow Down
With planters, you can create your own version of the Hanging Gardens of Babylon. Put containers along balconies or ledges and add trailing plants such as petunias or million bells, which will create a green and flowery curtain that sways in the breeze. Your hanging garden can also provide some much-needed shade during a hot summer.
Make a Living Wall
Grow plants on your interior or exterior walls using a hanging structure like ELT's living walls. You can use just about any kind of plant that has shallow roots to create beautiful designs that look more like a tapestry than a garden. ELT's vertical garden system is a 20 by 24 inch rectangular plastic structure that has 25 containers in which to place your plants. You can fasten any number of rectangles together to cover any surface you want. They also make a vertical garden for interiors, either on the floor or as a frame on the wall. If you have a sloped roof that's exposed to sun all day, you can put some rectangles up to create an inexpensive green roof. Green roofs are becoming popular in Europe as a means of slowing down runoff and cooling buildings without air conditioning.
If you've got a postage stamp for a yard or you're such an avid gardener that you've filled all your space, it's time to explore new gardening territory with vertical gardening. Follow the tips below for a few traditional and innovative ways to add new foliage to your small or plant-packed garden.

The Traditional Way: Grow Vines
Vines are growing machines. Some of them can grow to 50 feet in length. If you have a fence or wall in need of livening up, try vines. Clematis is tame, while trumpet vines are more adventurous and can tear up your siding, so be sure to pick a variety that's suitable to your setting. You can put up a trellis on your wall or fence for your vine to follow, or build an arbor or pergola. Either way, you can create a stunning assortment of flowers and greenery with vines alone, and attracts birds and butterflies to your yard.

Grow Down
With planters, you can create your own version of the Hanging Gardens of Babylon. Put containers along balconies or ledges and add trailing plants such as petunias or million bells, which will create a green and flowery curtain that sways in the breeze. Your hanging garden can also provide some much-needed shade during a hot summer.

Make a Living Wall
Grow plants on your interior or exterior walls using a hanging structure like ELT's living walls. You can use just about any kind of plant that has shallow roots to create beautiful designs that look more like a tapestry than a garden. ELT's vertical garden system is a 20 by 24 inch rectangular plastic structure that has 25 containers in which to place your plants. You can fasten any number of rectangles together to cover any surface you want. They also make a vertical garden for interiors, either on the floor or as a frame on the wall. If you have a sloped roof that's exposed to sun all day, you can put some rectangles up to create an inexpensive green roof. Green roofs are becoming popular in Europe as a means of slowing down runoff and cooling buildings without air conditioning.
0
1
文章
Micky
2017年05月23日

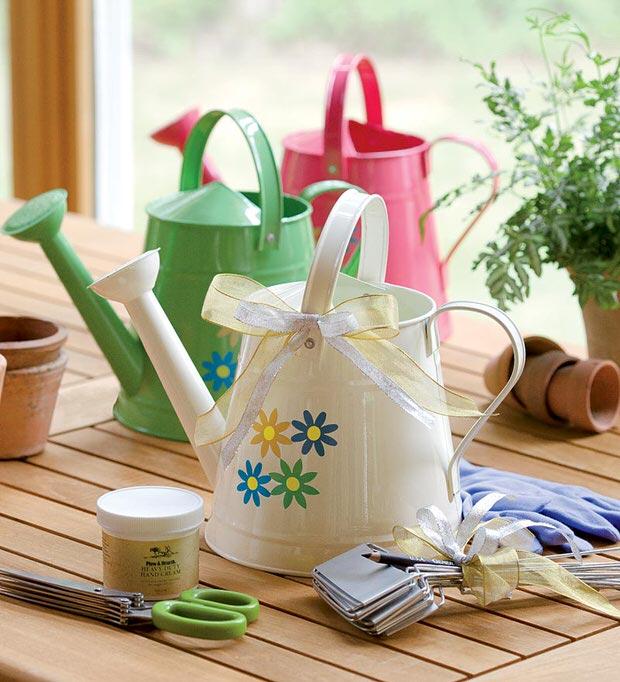
Welcome to TGG’s great garden gift guide! It doesn’t matter if you are looking for special ideas for the gardener you love, or for your own list to pass out to your loved ones, this is your list this year! We are including out favoratie finds for all garden lovers, and maybe you can inspire a new gardener with on of these gifts as well… Before you ask… no, we do not get a portion of any proceeds from the sale of these products… we just know they are on our list, so why not put them on yours! We did the hard work! Merry Christmas! Our featured gift, above, is the Gardener’s Gift Set by Plow and Hearth.
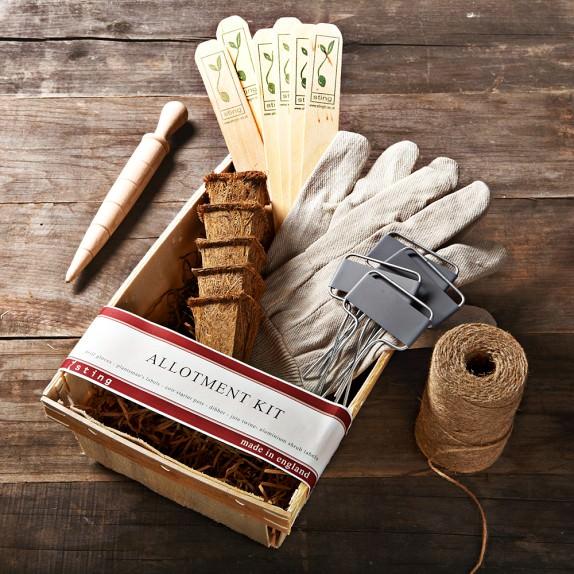
Garden Allotment Kit: From Williams-Sonoma, this basic gardeners kit is designed in a french wood tray, and has all the basics for getting started with your gardening chores at the first sign of spring… High quality set, and affordable – on sale for less than $20!
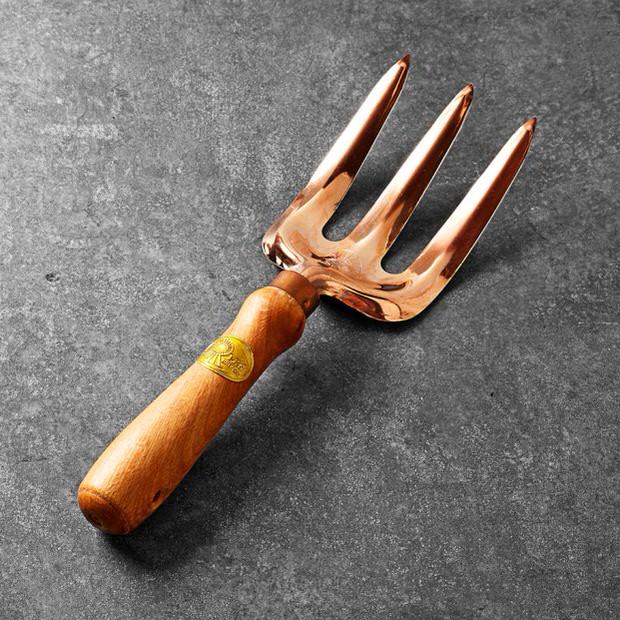
Copper Fork: This copper garden form is handmade in Austria, and is a high quality tool that should last your gardener for generations, with a solid beech handle. Copper is deposited into the soil in small amounts with use, which repels slugs and snails as a bonus! Even better, on sale for half price and free shipping while they last…Oh, and you can have it monogrammed for $7, which could turn a simple gift into and heirloom!
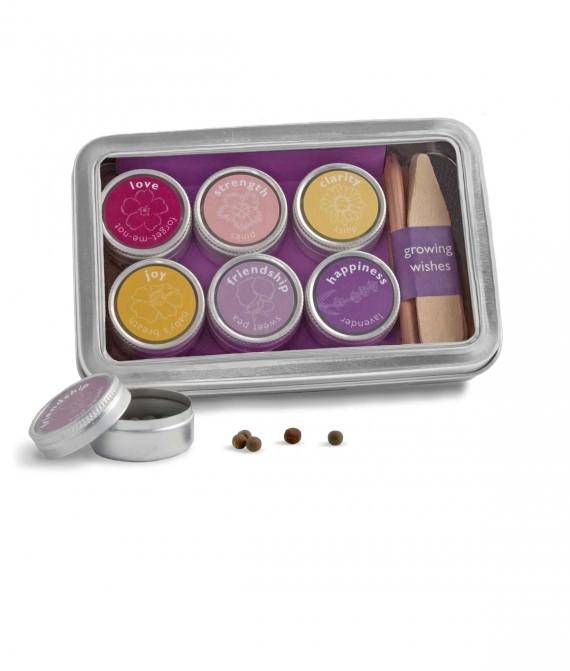
Growing Wishes Seed Kit: From Uncommon Goods, this seed kit is really inspiring, in that it reminds us what our garden does for us… Makes us happy, feel joy and strength… This is a really cool gifts for anyone who loves gardening, or you would like to inspire to love it!
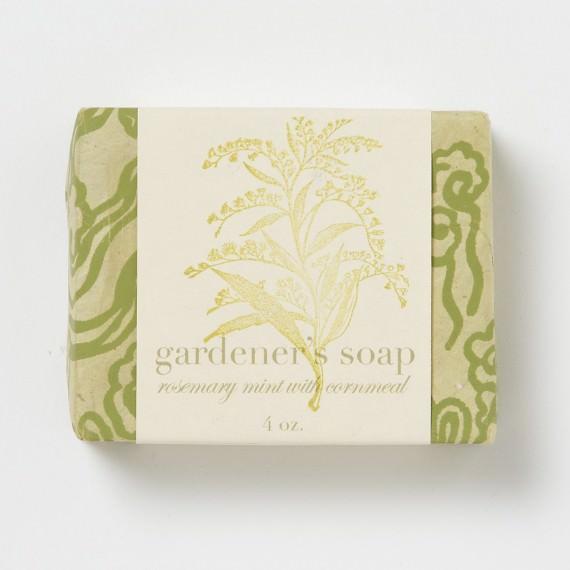
Gardener’s Soap: Shop Terrain has this great gardeners soap made in New York’s Hudson Valley. It smells like rosemary, and has Shea butter to moisturize and cornmeal to gently scrub.
Seed Packet Organizer: I wish I had this all the years I grew almost everything from seed. Organized and partitioned by month, it even has extra packets for collecting your own seed.

Flower Petal Bird Bath: For an inexpensive gift that counts, this flower petal bird bath is perfect for a small garden, or just for a little out of the way space to make feathered friends feel at home.

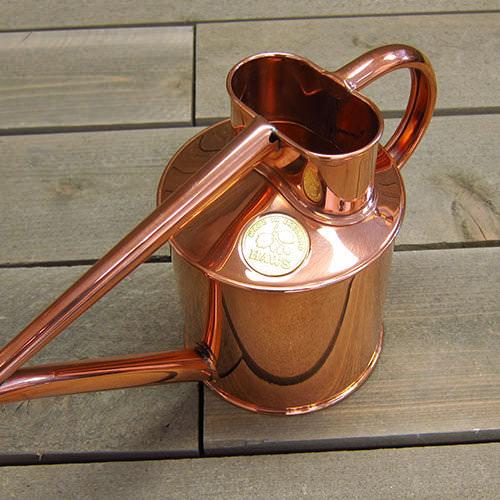
Copper Watering Can: I am in LOVE with this watering can from the famous Haws company… with proper care, this will last forever!
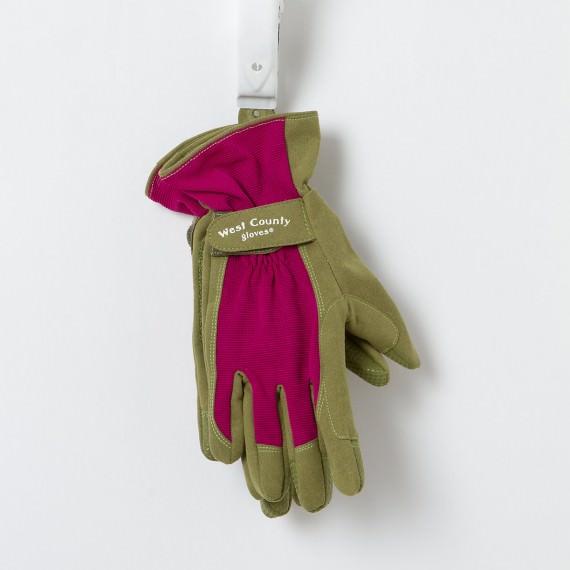
Finally, since we “The Garden Glove” after all, I had to include this Classic Garden Glove. The fabric allows your hands to breathe, and they are machine washable, yet sturdy, reinforced and comfortable.
0
0
文章
Eyin Thor
2017年05月23日

Do you kill your plants often? Well here’re 13 things you must avoid to make your container plants keep growing.

1. Overwatering
Many new gardener believes that the more they water the better. All plants (including non-potted plants) have the different watering needs and *those needs may also vary depending upon the time of the year or season, the amount of light and ambient temperature. The easiest solution to avoid this problem is knowing the moisture level required by each plant.
The majority of plants (except moisture loving plants) loves when the top surface of the substrate dries out between the watering spells, others require the soil to be kept slightly moist. A good method is to usually poke your finger into the soil about an inch deep and feel if it is wet or rather dry.
2. Underwatering
It is equally harmful to the plants. Back to the same point, it is essential to know the moisture requirements of each plant to keep them healthy. Also, it is obvious, in summer all the plants require more water and you should double the amount of water. When you water your plants, do it thoroughly, so that the entire substrate moisten well and the slight amount of water seeps out from the bottom holes of the pots and then wait for it to dry (with the method of poking your finger) and then water again.
3. You do not know everything about the plant
No two plants are identical. The number one thing you should do is read the instructions that come with the plant you have acquired. Always, when you purchase plants in the nursery ask them about the growing requirements. Whenever you get a new plant search about it thoroughly on the web. There are many gardening websites (ours too) and blogs of enthusiastic gardeners who have excellent information about plants.
4. Too little or too much sunlight
Yo might be wrong if you think all plants love the sun, there are some that require shade or part shade. According to experts, the plants themselves can tell us if they are getting the right amount of light or not. For example, the leaves may change color or become scorched or brownish if they are getting too much sunlight. On the other hand, if you notice that your plant is “stretching its neck” toward the light or the leaves are excessively bigger then they definitely need more light. One thing to be noted is that when the warm climate plants are grown in colder zones (whether they are grown there in full or part sun) they require full sun. Similarly, the temperate plants in warm tropics grow best in part sun or shade.
5. Moving or changing position of plants
Plants get used to the place they are placed on and do not like being moved constanly. If one of your plants is thriving correctly under certain temperatures and conditions, avoid moving it to another place as it could make difficult for the plant to adapt to its new place.
6. Incorrect soil
Each plant species has different planting needs and soil requirements. It is recommended that you do proper research about the soil type before planting any plant. However, in containers, well-draining soil is used to avoid root rot. You can make your own light and crumbly soilless mix or buy an organic potting mix of good quality.
7. No transplanting
Potted plants may feel “subjected” to their containers. The majority of them outgrow their pots over a period of about one to two years (depending on how quickly they grow), so it is important that you transplant them into a larger container with fresh and well-nourished potting soil. You can prune the roots of your plants if you don’t want to change their existing pot.
One of the signs to know when to transplant is when the leaves turn yellow, the plant stops growing or seems thirsty and requires water again and again. Even in some cases, you can see that the roots are coming out from the drainage holes.
8. Ignoring the pests
Some of the most common pests that can affect your potted plants are aphids, spider mites, scales, whiteflies and mealybugs. You can prevent pests from attacking your container garden with some techniques. Whenever you buy a new plant scrutinize it to see any sign of pests or diseases. Keep an eye on diseased or weak plants or the ones that are in stress; pests prefer to attack such plants. Look at the inside of leaves and tips of the plants, these are the parts that pests infest most. If pests are already damaging your plants, first identify what type of pests they are and then treat them appropriately, prefer organic pesticides.
9. Carelessness
Are you going on a vacation? It is good for you but not for your potted plants. Be sure to make arrangements for them. Ask someone to come and water the plants when you are away. Another option is to use self-watering containers, they are great especially if you’re a busy person and often forget about watering your plants.
10. Less or no fertilizer
Potted plants depend on soil nutrients and can often require supplements to grow better and healthy besides improving the production of flowers and fruits. Using a balanced fertilizer (easily available) regularly and according to the package instructions, you can ensure that your plants are getting all the nutrients they need. While most of your plants do well with balanced fertilizer, there may be some that require specific combination of nutrients.
11. Overfertilization
Overfertilization can also harm your plants. It can even kill them. Fertilizers when used in excess can damage the roots. If you see the symptoms like yellowing and wilting of lower leaves, browning leaf tips and its margins, defoliation, slow or no growth then it is possible that your plant is suffering from overfertilization.
12. No pinching, deadheading, and pruning
If you want bushier growth, pinch the tips of young plants. Also, many flowering plants require “deadheading”, which means picking and removing the old flowers to promote new ones. You will know when to remove them once the flowers start to fade or wilt or turn brownish.
Potted plants require pruning too and on time, some of the fruits and flowering plants produce only on new branches, so if you must not ignore pruning.
13. Exposing to extreme temperatures
If you research carefully about the plants you’ll find how much temperature (maximum or minimum) they tolerate best. In winters, if require, it is good if you protect such plants by keeping them indoors or in a greenhouse.
If you’re living in a warm climate where summers are hot, protect your plants from the intense sun in summer.

1. Overwatering
Many new gardener believes that the more they water the better. All plants (including non-potted plants) have the different watering needs and *those needs may also vary depending upon the time of the year or season, the amount of light and ambient temperature. The easiest solution to avoid this problem is knowing the moisture level required by each plant.
The majority of plants (except moisture loving plants) loves when the top surface of the substrate dries out between the watering spells, others require the soil to be kept slightly moist. A good method is to usually poke your finger into the soil about an inch deep and feel if it is wet or rather dry.
2. Underwatering
It is equally harmful to the plants. Back to the same point, it is essential to know the moisture requirements of each plant to keep them healthy. Also, it is obvious, in summer all the plants require more water and you should double the amount of water. When you water your plants, do it thoroughly, so that the entire substrate moisten well and the slight amount of water seeps out from the bottom holes of the pots and then wait for it to dry (with the method of poking your finger) and then water again.
3. You do not know everything about the plant
No two plants are identical. The number one thing you should do is read the instructions that come with the plant you have acquired. Always, when you purchase plants in the nursery ask them about the growing requirements. Whenever you get a new plant search about it thoroughly on the web. There are many gardening websites (ours too) and blogs of enthusiastic gardeners who have excellent information about plants.
4. Too little or too much sunlight
Yo might be wrong if you think all plants love the sun, there are some that require shade or part shade. According to experts, the plants themselves can tell us if they are getting the right amount of light or not. For example, the leaves may change color or become scorched or brownish if they are getting too much sunlight. On the other hand, if you notice that your plant is “stretching its neck” toward the light or the leaves are excessively bigger then they definitely need more light. One thing to be noted is that when the warm climate plants are grown in colder zones (whether they are grown there in full or part sun) they require full sun. Similarly, the temperate plants in warm tropics grow best in part sun or shade.
5. Moving or changing position of plants
Plants get used to the place they are placed on and do not like being moved constanly. If one of your plants is thriving correctly under certain temperatures and conditions, avoid moving it to another place as it could make difficult for the plant to adapt to its new place.
6. Incorrect soil

Each plant species has different planting needs and soil requirements. It is recommended that you do proper research about the soil type before planting any plant. However, in containers, well-draining soil is used to avoid root rot. You can make your own light and crumbly soilless mix or buy an organic potting mix of good quality.
7. No transplanting
Potted plants may feel “subjected” to their containers. The majority of them outgrow their pots over a period of about one to two years (depending on how quickly they grow), so it is important that you transplant them into a larger container with fresh and well-nourished potting soil. You can prune the roots of your plants if you don’t want to change their existing pot.
One of the signs to know when to transplant is when the leaves turn yellow, the plant stops growing or seems thirsty and requires water again and again. Even in some cases, you can see that the roots are coming out from the drainage holes.
8. Ignoring the pests
Some of the most common pests that can affect your potted plants are aphids, spider mites, scales, whiteflies and mealybugs. You can prevent pests from attacking your container garden with some techniques. Whenever you buy a new plant scrutinize it to see any sign of pests or diseases. Keep an eye on diseased or weak plants or the ones that are in stress; pests prefer to attack such plants. Look at the inside of leaves and tips of the plants, these are the parts that pests infest most. If pests are already damaging your plants, first identify what type of pests they are and then treat them appropriately, prefer organic pesticides.
9. Carelessness
Are you going on a vacation? It is good for you but not for your potted plants. Be sure to make arrangements for them. Ask someone to come and water the plants when you are away. Another option is to use self-watering containers, they are great especially if you’re a busy person and often forget about watering your plants.
10. Less or no fertilizer
Potted plants depend on soil nutrients and can often require supplements to grow better and healthy besides improving the production of flowers and fruits. Using a balanced fertilizer (easily available) regularly and according to the package instructions, you can ensure that your plants are getting all the nutrients they need. While most of your plants do well with balanced fertilizer, there may be some that require specific combination of nutrients.
11. Overfertilization
Overfertilization can also harm your plants. It can even kill them. Fertilizers when used in excess can damage the roots. If you see the symptoms like yellowing and wilting of lower leaves, browning leaf tips and its margins, defoliation, slow or no growth then it is possible that your plant is suffering from overfertilization.
12. No pinching, deadheading, and pruning

If you want bushier growth, pinch the tips of young plants. Also, many flowering plants require “deadheading”, which means picking and removing the old flowers to promote new ones. You will know when to remove them once the flowers start to fade or wilt or turn brownish.
Potted plants require pruning too and on time, some of the fruits and flowering plants produce only on new branches, so if you must not ignore pruning.
13. Exposing to extreme temperatures
If you research carefully about the plants you’ll find how much temperature (maximum or minimum) they tolerate best. In winters, if require, it is good if you protect such plants by keeping them indoors or in a greenhouse.
If you’re living in a warm climate where summers are hot, protect your plants from the intense sun in summer.
4
5
文章
Hande Salcan
2017年05月23日


One of the hardest decisions a new gardener must make is where to buy their garden seeds and supplies.
Here at The Garden Glove, we have several favorite seed catalogs and suppliers, and we update this list every January. This list has been updated for 2017. Here is some info on our top picks that we use ourselves, and our experience with them, along with their website information. Log onto their websites and request their catalogs today to have seeds in time for spring planting! Or order online like I do… And check out our favorite choices for buying live plants online at the end!
Update: Some companies, in order to save on waste, no longer print paper catalogs… Their catalogs are online only. While I do love curling up with a cup a tea and a stack of catalogs, consider doing the same with a tablet. I encourage companies to save all the trees they can, and besides… you get faster service with online ordering anyway!
#1
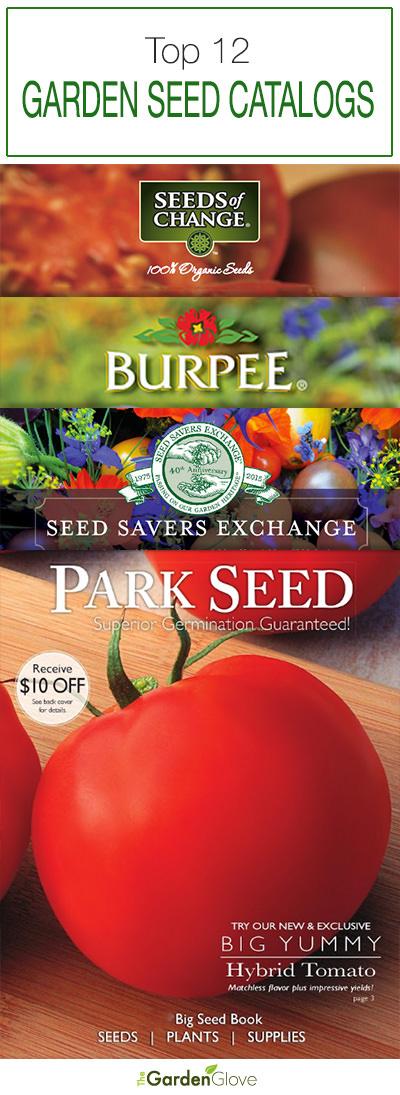
Park Seed
Park Seed always has a great selection of both flower and vegetable seeds, and some great herbs as well. Prices are affordable, and seed packets have plenty of seeds. Seed is always fresh, and we get good to excellent germination rates from them. Shipping is fast, usually just a couple of days from order to in my mailbox! Highly recommended. They also offer some live plants as well.
#2
Burpee Seeds
Burpee has always had one of the most colorful catalogs, and a wide selection of seeds. They are especially good at their vegetable selections, so all you veggie gardeners, take note! Their new varieties are the ones to beat each year!
#3
Thompson and Morgan
Thompson and Morgan is an English seed supplier, but the ultimate in unusual seeds for the serious gardener. If gardening is your passion, you need this catalog.
#4
Johnnys Selected Seeds
As recommended by a reader, this company needs to be added to our list! Not only do they have an extensive seed catalog, they have lots of tips and resources there as well. Johnny has a longstanding reputation as a quality company in the gardening community! Oh, and it’s an employee owned company!
#5
Pinetree Garden Seeds
Pinetree Garden Seeds was one of the first seed companies I ever used. They specialize in smaller packets for the average home gardener, at smaller prices. Most of us will never need the hundreds of seeds in the average seed packet, so why pay for it? They have a good selection, fast shipping and good customer service.
#6
Renee’s Garden Seeds
Renees Garden has grown into one of the most trusted suppliers of seeds for organic and heirloom varieties… So if you crave a little history with your salad, this is the spot for you!
#7
Select Seeds
If you grow flowers and want antique varieties your grandmother grew, this is the place. I love the idea of nostalgia in the garden…so did Thomas Jefferson, one of the most eminent gardeners in our country’s history.
#8
Seed Savers Exchange
Seed savers is a non profit company that is a wonderful source of information on heirloom and open pollinated seed, as well as one of the top sources for such seeds. Not only does the free catalog list all their seeds, their sites educates us on why it is important to save heirloom varieties, and even has an online garden planner that’s got a 30 day free trial. (No, you don’t have to give your credit card!) This is a time honored company and trusted company worth looking into if you wish to preserve our heritage plants!
#9
Seeds of Change
Going organic in the New Year? Seeds of Change is a catalog you need for your veggie garden. Great selection of 100% certified organic seeds.
#10
Cooks Garden
Are you a gourmet cook, or just want to be? Cooks Garden has veggie varieties that are difficult to find on your garden center rack… amazing in flavor and color… Beautiful catalog!
#11
Nichols Garden Nursery
This is a family owned business that has a stellar reputation for quality and customer service. They do not sell any seed that has been genetically modified, and they specialize in fine and rare seeds, herbs and goods for the gardener cook. Love their amazing selection!
#12
Bountiful Gardens
We wanted to include this selection this year because this company is a product of Ecology Action, a not for profit that teaches sustainable agriculture to end world hunger… Their catalog is full of great growing tips, and all their seed is heirloom, non GMO, and certified organic. To quote their website “It doesn’t take much to get started, no gizmos or expensive equipment. If you have some soil, all you need is simple tools, seeds, and the information to use them.”
Order some catalogs today, or visit their online catalogs for faster service, and start dreaming of your spring garden!
Plants
If you want to order top quality, affordable perennials and shrubs, I highly recommend Bluestone Perennials. I have ordered from them again and again, and never been disappointed. Check their internet specials often!
White Flower Farms has top of the line plants for decent prices, and partners with the like of Family Circle and BHG.
If you are looking for the latest varieties or unique plants, Wayside Gardens is the place… can be a little pricey, but thats because they offer varieties and quality seldom found online.
2
2
文章
Hande Salcan
2017年05月23日

If you are a gardener, chances are you have thought about starting a compost bin. Not only is it great for the planet, but it can help you create “garden gold” and transform your soil into a healthier home for all your plants! Although there are compost bins you can purchase, they tend to be expensive, hard to transport and sometimes downright inefficient. If you don’t know how composting works, take a couple minutes and visit our quick primer on composting techniques, then jump on back here and pick one of these 12 creative DIY compost bins, and get started! Feature photo below, is from ‘A-Z West‘.
Our first tutorial from ‘Practically Functional’ is a DIY compost bin that has the details… A latching lid, sturdy construction, access to soil at the bottom, and my fav… You can easily open the lid with one hand to dump in the kitchen scraps! Lot’s of step by step directions, photos and drawings.

For those of you who want to use the three bin system and get really serious, this DIY compost bin from ‘Apartment Therapy’ even looks good… Links on how to get the plans for this project are included in their post.

So we love the compact, easy nature of this DIY garbage can compost bin by ‘Full Measure of Happiness’, but unfortunately, that site has gone to the big bloggers resting place in the sky… No worries, keep reading!

Fortunately for all of us, Toni at ‘The Happy Housewife’ has a full tutorial on making a DIY compost bin from a garbage can! Love the pics of her boys “rotating” the bin!

So, maybe you don’t have adorable little boys (or girls!) to push your compost bin around the yard? (Or maybe you do, but they no longer think it’s a cool play-toy. ): ) Using the same idea, this garbage can composter from ‘Instructables’ is on a stand that you rotate the compost bin on. Pretty clever!

If you want to recycle while creating your bin, make this DIY compost bin from pallets from ‘DIY Ready’. Did we mention cheap?

Don’t want to go through a bunch of construction? Make your own compost bin from wire hardware cloth or chicken wire with this tutorial by ‘Mother Earth Living’.

Keep recycling and protecting the earth by making this shower door compost bin from ‘Organic Gardening Magazine’. The shower door acts like a bit of a greenhouse and heats up the compost, making it decompose faster. You can pick one up at a Habitat for Humanity Restore or a similar store near you.

This low cost compost bin from ‘Instructables’ allows you to remove any side, and the whole thing is easily movable as well. Made from inexpensive fence pickets, this is an easy garden project.

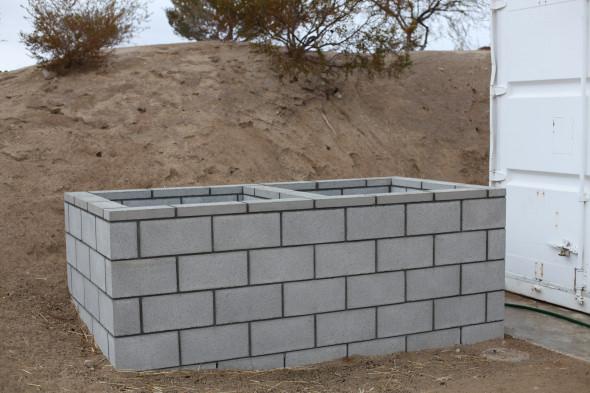
From ‘Blue Planet, Green Living’, this DIY compost bin is different in that it’s made using concrete blocks. This makes it easy to make the bin larger or smaller, depending on the needs of that season, keep out critters, or even remove blocks to allow for more ventilation.

Lastly, these compost bins from ‘Birds and Blooms’ are made of cedar, and allow the boards at the bottom to slide out. This lets you remove finished compost from the bottom of the pile, while continuing to add to the top of the pile.
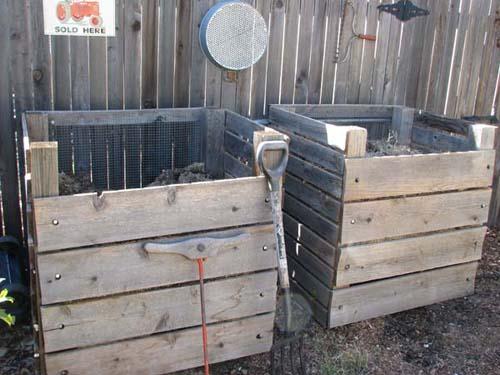

Our first tutorial from ‘Practically Functional’ is a DIY compost bin that has the details… A latching lid, sturdy construction, access to soil at the bottom, and my fav… You can easily open the lid with one hand to dump in the kitchen scraps! Lot’s of step by step directions, photos and drawings.

For those of you who want to use the three bin system and get really serious, this DIY compost bin from ‘Apartment Therapy’ even looks good… Links on how to get the plans for this project are included in their post.

So we love the compact, easy nature of this DIY garbage can compost bin by ‘Full Measure of Happiness’, but unfortunately, that site has gone to the big bloggers resting place in the sky… No worries, keep reading!

Fortunately for all of us, Toni at ‘The Happy Housewife’ has a full tutorial on making a DIY compost bin from a garbage can! Love the pics of her boys “rotating” the bin!

So, maybe you don’t have adorable little boys (or girls!) to push your compost bin around the yard? (Or maybe you do, but they no longer think it’s a cool play-toy. ): ) Using the same idea, this garbage can composter from ‘Instructables’ is on a stand that you rotate the compost bin on. Pretty clever!

If you want to recycle while creating your bin, make this DIY compost bin from pallets from ‘DIY Ready’. Did we mention cheap?

Don’t want to go through a bunch of construction? Make your own compost bin from wire hardware cloth or chicken wire with this tutorial by ‘Mother Earth Living’.

Keep recycling and protecting the earth by making this shower door compost bin from ‘Organic Gardening Magazine’. The shower door acts like a bit of a greenhouse and heats up the compost, making it decompose faster. You can pick one up at a Habitat for Humanity Restore or a similar store near you.

This low cost compost bin from ‘Instructables’ allows you to remove any side, and the whole thing is easily movable as well. Made from inexpensive fence pickets, this is an easy garden project.

From ‘Blue Planet, Green Living’, this DIY compost bin is different in that it’s made using concrete blocks. This makes it easy to make the bin larger or smaller, depending on the needs of that season, keep out critters, or even remove blocks to allow for more ventilation.

Lastly, these compost bins from ‘Birds and Blooms’ are made of cedar, and allow the boards at the bottom to slide out. This lets you remove finished compost from the bottom of the pile, while continuing to add to the top of the pile.

2
2
文章
Micky
2017年05月23日


As a gardener, I love to get holiday gifts that reflect my love of, well… gardens! In fact, I don’t know anyone who doesn’t love to get a living gift during the holiday season. Rather than be one of those people who just pick up a boring houseplant at the grocery store on the way to the party, (you know who you are!) this year put some thought into creating some DIY holiday plant gifts. We have some great ideas for how to take some simple plant material and turn it into a thoughtful, one of a kind gift, that keeps on giving. Our feature project above, is a simple burlap paperwhite pot from ‘Maya Made’… So easy, but the burlap pot wrap puts in that extra touch!
Another paperwhite project from ‘Domaphile’, these paperwhites in mason jars would make such cute hostess gifts!


From the community at ‘Home Depot’ learn to make these amazing mini rosemary topiaries. A fast project, and who wouldn’t want to be elbows deep in rosemary for an afternoon? The gifts are just a bonus!

More DIY rosemary topiaries from ‘City Farmhouse’…

From ‘Lolly Jane’, we love these chalk paint DIY succulent pots… You could do these in white, and wrap with a blue or silver Christmas ribbon.

If you want a unique gift, learn how to make these succulent Christmas trees, just like this one from ‘Canvas and Canopies‘… Here is a step by step video from ‘Urban Dirt’ on making succulent trees…

Here is an easy idea… pot up small transplants of aromatic herbs in recycled cans, then wrap with wide burlap ribbon in holiday style… From ‘Celebrate Magazine‘.

From ‘Gardenista‘, another easy way to take a simple plant gift, and dress up the delivery… And you probably already have all the supplies!

Lastly, another wrap idea, from ‘Segreto‘…

So give “green”!
>>> Want more info on how to force bulbs for holiday gifts? Check out our post on “How to Force Bulbs”
0
0
文章
Gina
2017年03月16日
Most of us gardeners are thinking about what we want to plant this year, but the choices can be daunting! Whether you are a new gardener or are an expert, with all the new plant choices each year, how do you choose what to plant? I have three guidelines to choosing what to plant, and also our recommendations for the Best New Plants.
1. You can’t have it all, so pick one or two new plants to try. I, too, have been guilty of excitedly filling my cart at the nursery with every new plant I find. Restraint is key for two reason…first, you could very well go broke. Second, incorporating too many new plants each year will make your garden appear disconnected and haphazard.
2. Make sure you choose for the sites you have. I LOVE all the new Hosta varieties out today, but the plain truth is, 99% of my gardens in full sun. Yes, I did try to cheat and make a shady “enough” garden on the side of a fenced area… it was NOT shady “enough”.
3. Do your research. New plant choices can sometimes cost a little more, or have to be ordered online. Make sure the variety you love isn’t a high maintenance plant, when you are a low maintenance gardener. Trust me, love dies quickly when the hope you had for that gorgeous rare poppy has you out in the garden for two hours a day in the hot sun staking and watering and fussing, or picking slugs off those Hosta plants every day of the year!
We have made our choices based on awards, ease of care and beauty. Let us know in the comments which are your favorites!
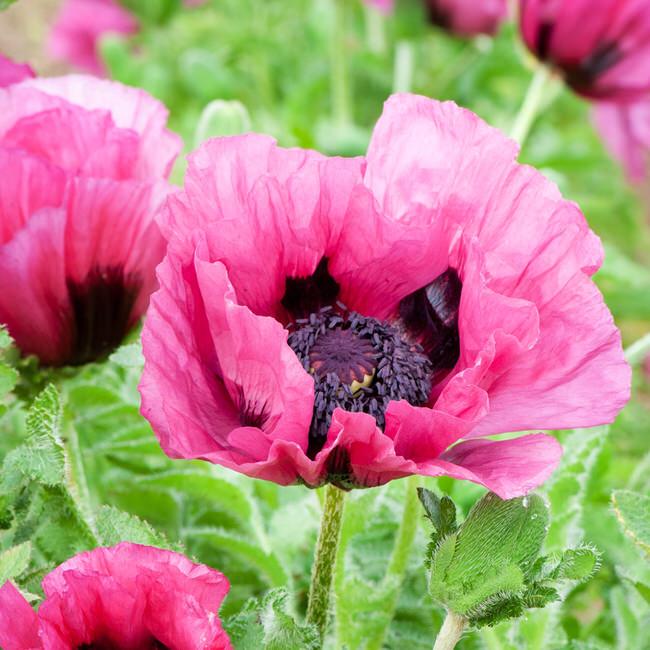
Our featured plant, above – “Plum Pudding” Poppy – This is one of the most gorgeous poppies I’ve seen. Easy to grow, this poppy blooms in June, lasts longer than most other poppies, and many times will re-bloom in the fall! You have to grow it for this color alone! Hardy to zone 3, highly recommended.
“Bloomerang” Lilac – This selection is the winner of the Green Thumb award, and it’s a fragrant lilac hardy down to zone 3. What is different about this lilac is that it blooms in the spring, then it re-blooms midsummer to fall! Growing 4-6 feet and dark purple in flower, it is a strong grower that is deer and compact. Frankly I personally have my reservations about traditionally spring blooming plants being bred to re-bloom, but I’m including it because I know many of you readers will love this plant.

Coneflower “Supreme Cantaloupe” – Coneflowers have had new plant elections every year for awhile now, but we love this new one! Like all coneflowers, they are drought resistant and love the sun, and flower all summer. About 2 1/2 feet high, this one opens looking like a gerber daisy, then expands to a full coneflower’s look with orange petals and a brown eye that turns orange as it matures. Hummingbirds and butterflies love this plant, hardy to zone 4.
The Perennial Plant Association just named an ornamental grass as plant of the year 2014… Panicum “Northwind”. We are big fans of grasses, and this Switchgrass has a wonderful blue green color which turns yellow in the fall. A strong upright grower, it withstands windy areas and blooms in September. Tolerates wet soil, but is also drought tolerant once established. Very low care, just cut back in early spring. Hardy to zone 2!

Russian Sage “Peek a Blue”- We grow a lot of Russian Sage in the high desert, but this new variety is a compact form growing just 2 feet tall, with bright blue spires all summer. Drought and heat resistant, this is a great choice for a full sun garden to zone 4.

We have bought into the sedum craze, and although our fav is still “Angelina”, a new variety called “Lime Zinger” has caught the attention of garden writers. Hardy to zone 4, these tough plants spread quickly to 18 inches, then bloom in summer with rosy pink clusters. Ideal for hot, dry spots and poor soil. Great in containers.

Our final choice for plants we want to try, “Sugarberry Ruffles” Lavender. This is not a hardy plant, best suited to containers in most parts of the country. It’s hardy to zone 8, but might be worth a try in a protected zone 7 garden. More resistant to heat and humidity than most lavender, its unique color of pink and lavender blooms and it’s tendency to re-bloom in the fall make it a great choice for your patio… Oh, and did I mention it’s heavenly fragrance? Already selling out, look quickly for this wonderful plant before it’s gone!
Try our choices for the best new plants for 2014, and remember it’s about the gardening journey!
1
1
文章
Gina
2017年03月15日


With every new growing season comes the need for outdoor planters… and we’ve rounded up some unique planter tutorials for every gardener, whether you want a traditional window box, or an up-cycled art piece. Most of these outdoor planter projects have complete instructions, so check them out, pick one or two, and plan some garden projects for the weekend! Our featured project, above, comes to us from Popular Mechanics. Learn how to make this simple DIY wood planter with this great tutorial and lots of step by step photos.
Lowes has a nice contemporary indoor outdoor planter project with step by step photos and a video.

This wooden planter box by Family Handyman can be built in less than an hour with their tutorial. I love this because you can easily change out plants, and even combine plants with different watering needs because they are in separate pots.

Tracie over at Cleverly Inspired wanted some large planters that were similar to some that are available at Restoration Hardware. She came up with these wonderful planters. See how she did it.

Want to make a large DIY planter on wheels? Then head over to Four Generations, One Roof, and find out how Jessica and her dad made this one! They have excellent step by step photos in their tutorial. This is great for small garden spaces… You can create an entire garden in this one planter! Love this!

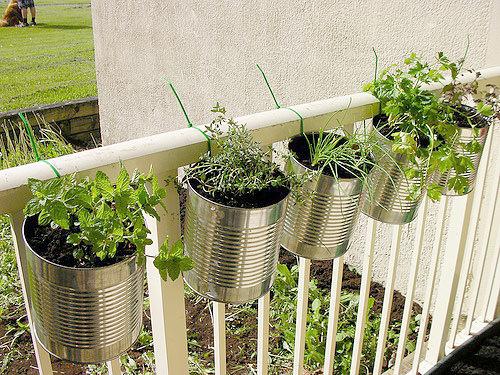
This is a clever idea we got from Christie on Flickr… Using recycled cans as planters, and drill holes to attach with zip ties! (Also for drainage). Obviously you can cut off the excess zip tie after they are hung, they are left to illustrate the project. Love this! What other kinds of containers could you up cycle?
These low cost drum planters have downloadable instructions, and are made with recycled drums and recycled wood. What a really cool idea for little cash! You could use this idea for a lot of recycled containers!

This Coppice Vertical Planter is sold on a UK website but we think it would be very easily DIY’able! Even better would be to use old wine crates as the boxes.

Gotta love these more modern patio paver planters by Stephanie Lynn we found on Apartment Therapy. She has a step by step for you, (its easy!) and even some suggested plants!

I like these simple pallet planters, they would look amazing growing small vegetables! From Creative Homemaking.

These Criss Cross Outdoor Planters from Centsational Girl look fantastic. Love them painted white but could look really nice in a natural stained finish as well. See how she made these.

From Kate Was Here, Check out this cool DIY vertical planter.
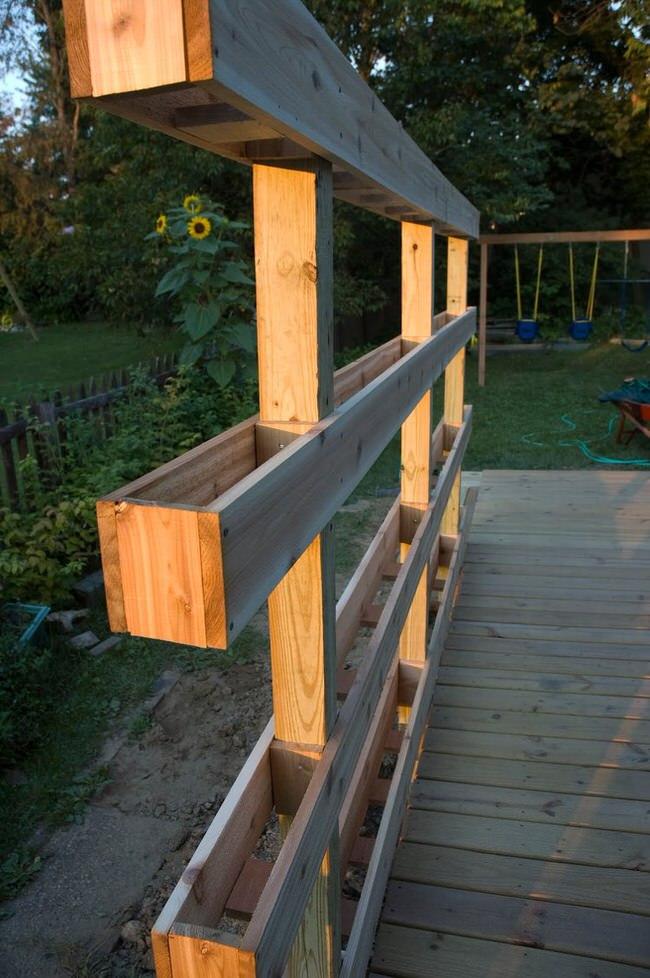
Learn how to make a garden trough that looks old, but isn’t! From This Old House.

From Ruffles and Truffles, this DIY vertical planter is really easy! Great for awkward corners of your garden. Good tutorial!

3
3
文章
Joss
2017年02月22日

Alliums are one of the best and easiest bulbs to #grow in the gardening world, but often overlooked. Gorgeous, show stopping blooms, easy growing requirements, and amazing architectural shape make these perfect for any gardener, beginner or seasoned veteran. The large round or oval #flowers are borne on single stalks that tower over the garden from 1-4 feet, usually in mid spring to early summer, but there are varieties that bloom even in the fall. Flowers can be tiny little globes, or large 6 inch giants. One of the best traits of the allium over other spring and summer bulbs is that most animals will avoid eating them. Apparently, people aren’t the only ones who want to avoid onion breath! That’s right, alliums are simply ornamental, or flowering onions. Don’t let images of big smelly onions growing in your garden dissuade you, these plants are nothing of the sort, with a gorgeous, sweet scent. Beautiful as cut flowers as well, they come in whites, blues, purples, pinks and even yellow. Your tulips and daffodils may still get top billing in the spring, but make sure you tuck some alliums into your flower beds as well. Here is how to grow those amazing alliums! Photo below by ‘Dutch Flower Bulbs‘.

Photo below by ‘Fine Gardening‘. Allium “Jeannine”.
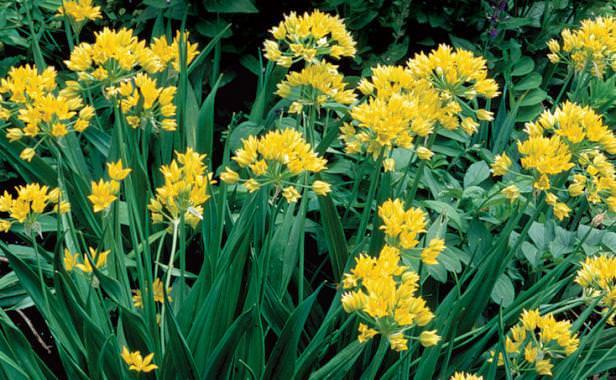
How To Grow Alliums
Buy allium bulbs from a good nursery or online resource. You want healthy bulbs with no cuts or soft spots. Research varieties to include several varieties of different bloom times to keep the show going!
Most varieties are hardy zones 3-9.
Like most bulbs, these look best planted in groups.
Plant the bulbs in the fall, before the ground freezes. Plant them to a depth of 3 times their diameter in a sunny or mostly sunny position. Generally, 6-8 inches.
Fertilize at planting and yearly in spring with bone meal or a bulb food.
Water well, then leave till they burst out in flower in spring and summer! After flowering, allium foliage will wither, brown, and go dormant.
Plant them under, behind, and around other perennial plants whose growing foliage will cover the allium foliage later in the summer when it browns.
Do not cut back the browning allium leaves until fall, that is how they store energy for flowers the next season. (This is why planting foliage plants around them is important.)
Photo below by ‘Gardener’s Supply‘.
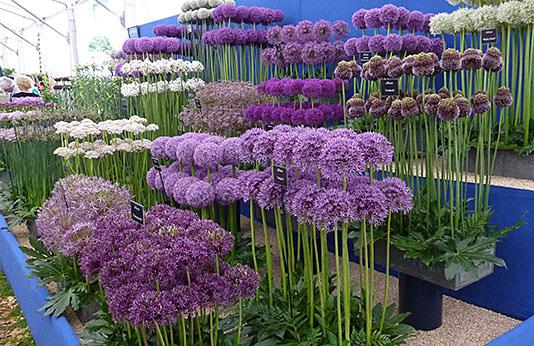
Our Favorite Allium Varieties
Gladiator – A giant variety. 3-4 feet tall, this showstopper blooms with 6 inch flowers in May-June. It prefers sun but will tolerate partial shade, and has a sweet scent. From ‘Eden Brothers‘. If you are looking to make a statement in your garden, this is it.

Globe Master – This one is the biggest giant we know of, with blooms topping out at a foot across! 36-40 inches high, it’s a gorgeous pick for any spring to early summer garden. Blooms are slightly more blue than Gladiator. From ‘American Meadows‘.

Allium obliquum – This unusual shade of yellow in a small flowered allium is a perfect selection for a naturalized planting. Growing to just 24 inches high, it’s fragrant and blooms late spring to early summer. From ‘Dutch Bulbs‘.
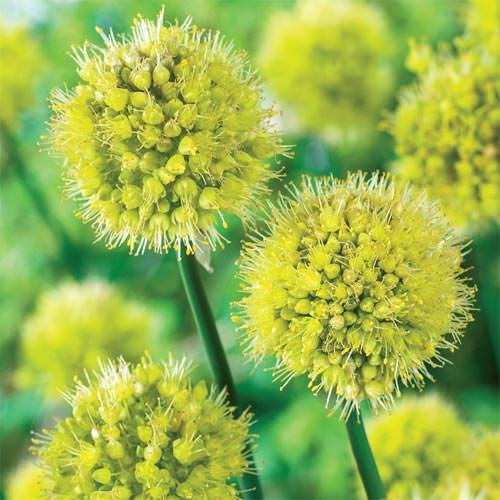
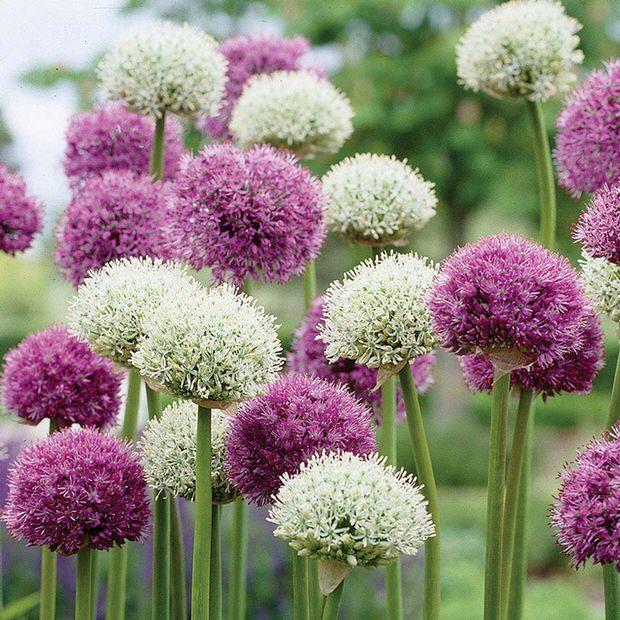
Mount Everest / Purple Sensation – Long the standard for garden alliums , “Purple Sensation” has 4-5 inch globes and grows to 24-30 inches high. It’s white partner here is “Mount Everest”, perfect in combination because they grow to similar sizes and have similar late spring – early summer bloom times. From ‘Longfield Gardens‘.
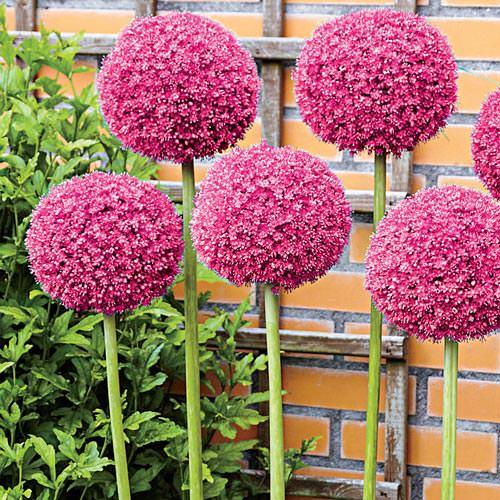
Twinkling Stars – This giant pink variety has 5-6 inch blooms and 3 1/2 – 4 foot stems, making it perfect for the back of the border. Blooms in May – June. From ‘Breck’s Bulbs‘.
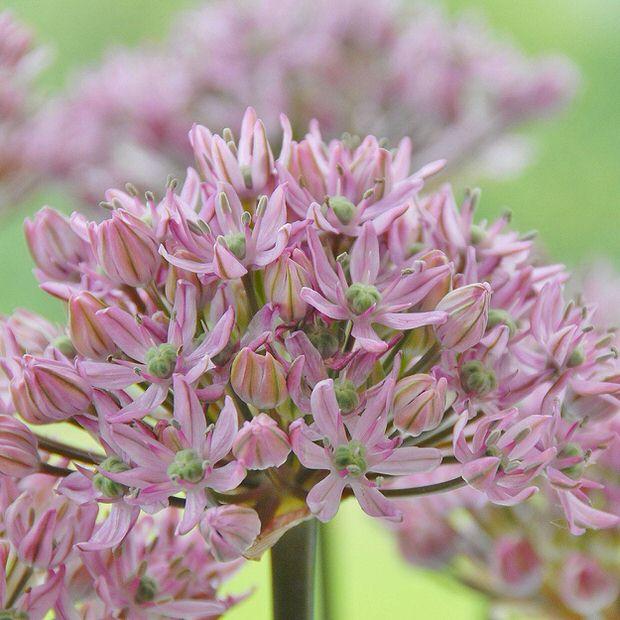
Pink Jewel – A later blooming allium, starting in June into July. This light pink selection grows to 24 inches high, and has 3 inch blooms. From ‘White Flower Farm‘.
Drumstick Allium – Our last selection is the drumstick allium, an oval shaped reddish bloom that grows to 24 inches high. This allium can actually be grown down to zone 2! Blooms early spring to early summer. Another variety great for naturalizing. From ‘American Meadows‘. So which is your favorite?
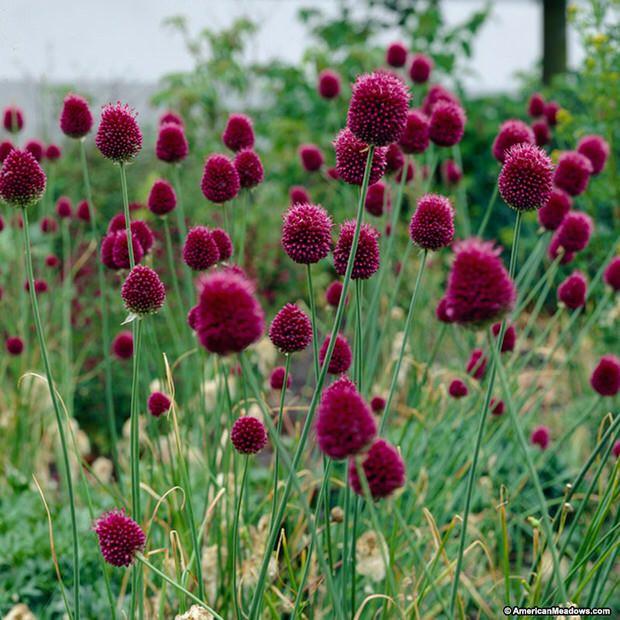

Photo below by ‘Fine Gardening‘. Allium “Jeannine”.

How To Grow Alliums
Buy allium bulbs from a good nursery or online resource. You want healthy bulbs with no cuts or soft spots. Research varieties to include several varieties of different bloom times to keep the show going!
Most varieties are hardy zones 3-9.
Like most bulbs, these look best planted in groups.
Plant the bulbs in the fall, before the ground freezes. Plant them to a depth of 3 times their diameter in a sunny or mostly sunny position. Generally, 6-8 inches.
Fertilize at planting and yearly in spring with bone meal or a bulb food.
Water well, then leave till they burst out in flower in spring and summer! After flowering, allium foliage will wither, brown, and go dormant.
Plant them under, behind, and around other perennial plants whose growing foliage will cover the allium foliage later in the summer when it browns.
Do not cut back the browning allium leaves until fall, that is how they store energy for flowers the next season. (This is why planting foliage plants around them is important.)
Photo below by ‘Gardener’s Supply‘.

Our Favorite Allium Varieties
Gladiator – A giant variety. 3-4 feet tall, this showstopper blooms with 6 inch flowers in May-June. It prefers sun but will tolerate partial shade, and has a sweet scent. From ‘Eden Brothers‘. If you are looking to make a statement in your garden, this is it.

Globe Master – This one is the biggest giant we know of, with blooms topping out at a foot across! 36-40 inches high, it’s a gorgeous pick for any spring to early summer garden. Blooms are slightly more blue than Gladiator. From ‘American Meadows‘.

Allium obliquum – This unusual shade of yellow in a small flowered allium is a perfect selection for a naturalized planting. Growing to just 24 inches high, it’s fragrant and blooms late spring to early summer. From ‘Dutch Bulbs‘.

Mount Everest / Purple Sensation – Long the standard for garden alliums , “Purple Sensation” has 4-5 inch globes and grows to 24-30 inches high. It’s white partner here is “Mount Everest”, perfect in combination because they grow to similar sizes and have similar late spring – early summer bloom times. From ‘Longfield Gardens‘.

Twinkling Stars – This giant pink variety has 5-6 inch blooms and 3 1/2 – 4 foot stems, making it perfect for the back of the border. Blooms in May – June. From ‘Breck’s Bulbs‘.

Pink Jewel – A later blooming allium, starting in June into July. This light pink selection grows to 24 inches high, and has 3 inch blooms. From ‘White Flower Farm‘.

Drumstick Allium – Our last selection is the drumstick allium, an oval shaped reddish bloom that grows to 24 inches high. This allium can actually be grown down to zone 2! Blooms early spring to early summer. Another variety great for naturalizing. From ‘American Meadows‘. So which is your favorite?

0
1
文章
Abigal
2017年02月16日


Bringing birds to your garden is one of the great joys of any gardener. Aside form providing food, providing water is must in creating a wildlife friendly garden. Here is a quick and easy and cheap birdbath that looks elegant and can be made from items you already own or can easily get from your local garden center.
Supplies
Tall pot or urn, or even a piece of large pipe.
A large saucer
Silicone glue, if desired.
Several rough stones
Place your pot or urn in the desired place for your birdbath, depending on the shape of the vessel, you might wish to turn it upside down. I filled mine with rocks to give it weight and prevent it from blowing over in the wind.
Place the saucer on top of the pot, glue with silicone to keep in place if desired.
Place rough stones in saucer to give birds a foothold, then fill saucer with water.

Plant around the base of the birdbath to soften and add a natural effect. Use low growing plants. Or, tuck your bird bath into an already existing garden bed.
Hint: Place your birdbath in an open area such as a lawn. Birds prefer to be able to view the area for enemies, and will use your bath more often if they are not tucked back where a predator can hide. (Helps you to chase off those neighborhood predators as well!)
1
0


