文章
Dummer. ゛☀
2017年08月20日

Off with your head! Cactus propagation is commonly done by grafting, a process where a cut piece of one species is grown onto a wounded piece of another. Grafting cactus plants is a straightforward method of propagation which even a novice gardener can try. Different species work better with different methods but a brief cactus grafting guide follows with basic instructions on how to graft a cactus. Cacti comprise some of my favorite plants due to their uniqueness of form and unusual characteristics. Propagation is through grafting, stem cuttings, leaf cuttings, seed or offsets. Growing cactus from seed is a long process, as germination may be unreliable and growth is at a snail’s pace. Broadly, cacti that do not produce offsets can be propagated by grafting as long as there is a compatible rootstock. The grafted part is called a scion and the base or rooted part is the rootstock.

Cactus Grafting Guide
Cacti are grafted for a variety of reasons. One may simply be to produce a different species mechanically, but the process also produces disease free stems, to provide a new stem for an existing stem that is rotting or to enhance photosynthesis in plants that lack the ability. Grafting cactus plants is also done to create unique forms, such as weeping plants. Grafting is common in fruiting plants because it increases the maturity of an existing cultivar for earlier fruit production. The scion becomes the top part of the plant with all the originating species’s characteristics. The rootstock becomes the roots and base of the plant. The union is at the vascular cambium where the wounds of scion and rootstock are sealed together to heal and join. Once the joining wounds have healed, no special grafted cactus care is required. Simply grow it as you would any other plant.

Rootstock Cactus for Grafting
The generally approved rootstocks for grafting cactus are: Hylocereus trigonus or undatus Cereus peruvianus Trichocereus spachianus Also, if the rootstock and scion are in the same species, the compatibility is excellent. Compatibility decreases as the family relationship decreases. Two plants in the same genus may possibly graft, but two in the same genera are rare and two in the same family are very rare. The appropriate cactus for grafting are, therefore, the ones in the same species and with as close a relationship as possible for the best outcome.

How to Graft Cactus
Use very clean, sterile instruments when making cuts. Choose healthy plants and prepare a scion. Cut off the top or at least a 1-inch stem. Then prepare the rootstock by beheading a cactus to within a few inches of the soil. Set the scion on top of the cut portion of the still rooted rootstock so both vascular cambium are situated together. Use rubber bands to hold the pieces joined as one. Grafted cactus care is the same as ungrafted cactus. Watch for any insects at the union or rot. In about two months, you can remove the rubber bands and the union should be sealed.

Cactus Grafting Guide
Cacti are grafted for a variety of reasons. One may simply be to produce a different species mechanically, but the process also produces disease free stems, to provide a new stem for an existing stem that is rotting or to enhance photosynthesis in plants that lack the ability. Grafting cactus plants is also done to create unique forms, such as weeping plants. Grafting is common in fruiting plants because it increases the maturity of an existing cultivar for earlier fruit production. The scion becomes the top part of the plant with all the originating species’s characteristics. The rootstock becomes the roots and base of the plant. The union is at the vascular cambium where the wounds of scion and rootstock are sealed together to heal and join. Once the joining wounds have healed, no special grafted cactus care is required. Simply grow it as you would any other plant.

Rootstock Cactus for Grafting
The generally approved rootstocks for grafting cactus are: Hylocereus trigonus or undatus Cereus peruvianus Trichocereus spachianus Also, if the rootstock and scion are in the same species, the compatibility is excellent. Compatibility decreases as the family relationship decreases. Two plants in the same genus may possibly graft, but two in the same genera are rare and two in the same family are very rare. The appropriate cactus for grafting are, therefore, the ones in the same species and with as close a relationship as possible for the best outcome.

How to Graft Cactus
Use very clean, sterile instruments when making cuts. Choose healthy plants and prepare a scion. Cut off the top or at least a 1-inch stem. Then prepare the rootstock by beheading a cactus to within a few inches of the soil. Set the scion on top of the cut portion of the still rooted rootstock so both vascular cambium are situated together. Use rubber bands to hold the pieces joined as one. Grafted cactus care is the same as ungrafted cactus. Watch for any insects at the union or rot. In about two months, you can remove the rubber bands and the union should be sealed.
1
0
文章
Dummer. ゛☀
2017年08月20日

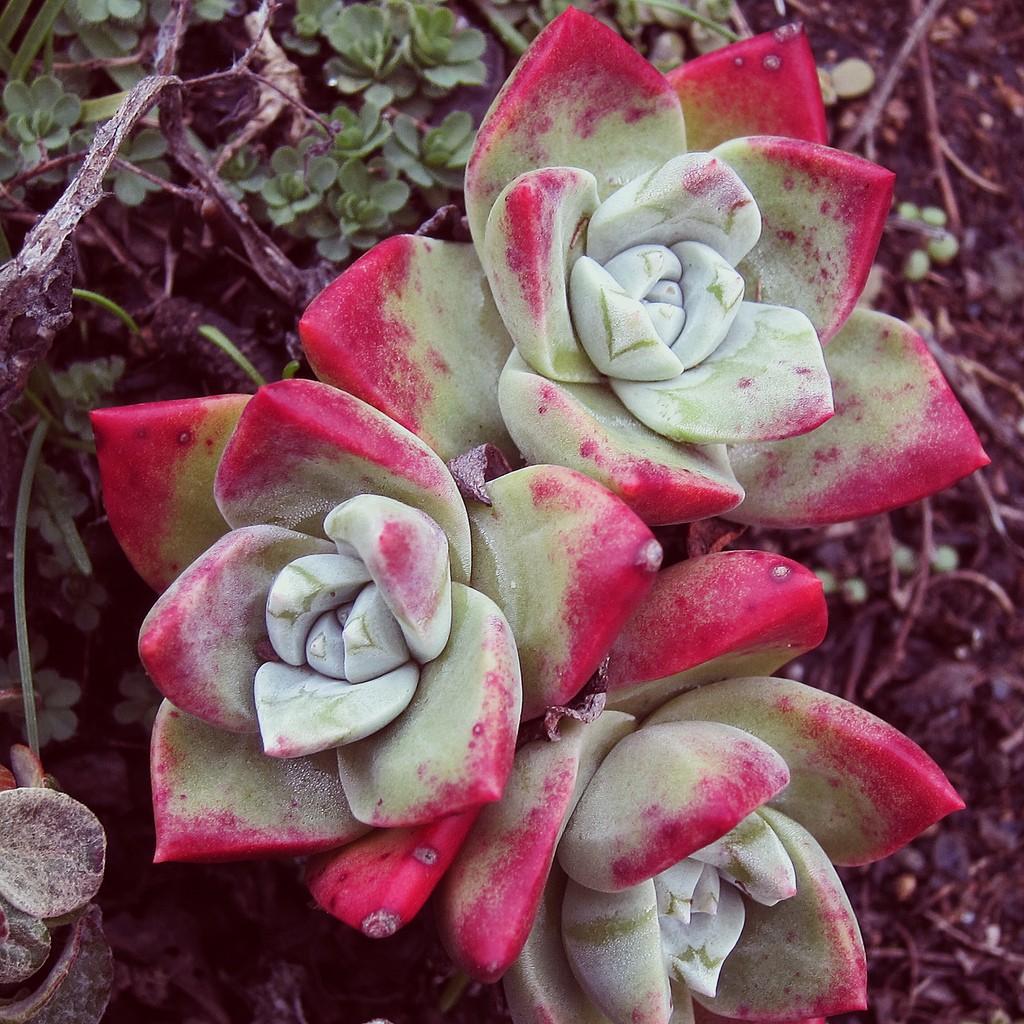
Succulents are a group of plants with one of the most diverse forms, colors and blooms. These easy to care for indoor and outdoor specimens are a dream for the busy gardener. What is a succulent plant? Succulents are specialized plants that store water in their leaves and/or stems. They are remarkably adapted to harsh climates where water is scarce or comes sporadically. Merriam Webster defines a succulent as “full of juice” or “juicy.” Read on for some fun succulent plant info so you can get started collecting the myriad of varieties available in this special class of plant.
What is a Succulent?
Oddly, some botanists and horticultural experts differ on which plants are technically succulents. Their appearance differs from species to species, but one common characteristic is swollen leaves, pads or stems. The exact classification of a certain plant will have to go to the experts, but whatever the case, all types of succulents or those that appear to be succulents are pleasing to the eye, minimal regarding care and produce delightful little surprises during their life cycle. Again, referring to the dictionary, a succulent plant has thick stems or leaves that store water. This unique adaptation allows the plant to survive in low moisture regions of the world. Succulents are often thought to be native only to arid regions, such as deserts, but they also belong in forest settings, high alpine regions, coasts and dry tropical areas. There are over 50 families that are classed as succulents. There are both xerophytic succulents that thrive in dry areas and halophytic types which live in boggy saline soil. The xerophytic succulents are the best known form and widely available as house or garden plants.

Succulent Plant Info
While most types of succulents require warm temperatures, moderately dry, well-draining soil and sunlight, some can withstand cooler or even downright cold temperatures. These hardy succulents are able to withstand brief freezes and fend off frost damage. Occasionally, cold snaps will force a plant into dormancy, but well established hardy types will spring back when warm weather returns. It is important to know if your succulent is a tropical or hardy variety in instances where it is planted outdoors. One of the main succulent plant characteristics is thick, fleshy leaves or pads but there are also non-succulent leaved varieties. This is why botanists and other experts disagree on some plant’s classification. The succulent vs. cactus question is often debated even among professional growers. This is because cacti produce the fleshy leaves but lack other characteristics familiar to the family. In actuality, a cactus is indeed a succulent due to the trait of harnessing and storing water shared by all species in the group. That said, a succulent is not considered a cactus.

Succulent Plant Types
If swollen leaves and stems are the main succulent plant characteristics visible, there are also other qualities which delineate the group. Shallow roots are one adaptation shared among the succulents. A few varieties have deeper tap roots but the majority has wide, surface root zones that allow maximum moisture capture when infrequent rains occur. Some of the succulent plant types commonly available are: Agaves Yucca Aloe Cacti Bromeliad Sedum Sempervivum Echeveria Various euphorbias Some types of orchids It is important to note their hardiness range, but many of these can thrive in the garden. Smaller succulents make varied and fascinating container displays for the indoors. Almost all species need at least 8 hours of light, warm daytime temperatures, consistent water during the growing season and well-drained soil.

What is a Succulent?
Oddly, some botanists and horticultural experts differ on which plants are technically succulents. Their appearance differs from species to species, but one common characteristic is swollen leaves, pads or stems. The exact classification of a certain plant will have to go to the experts, but whatever the case, all types of succulents or those that appear to be succulents are pleasing to the eye, minimal regarding care and produce delightful little surprises during their life cycle. Again, referring to the dictionary, a succulent plant has thick stems or leaves that store water. This unique adaptation allows the plant to survive in low moisture regions of the world. Succulents are often thought to be native only to arid regions, such as deserts, but they also belong in forest settings, high alpine regions, coasts and dry tropical areas. There are over 50 families that are classed as succulents. There are both xerophytic succulents that thrive in dry areas and halophytic types which live in boggy saline soil. The xerophytic succulents are the best known form and widely available as house or garden plants.

Succulent Plant Info
While most types of succulents require warm temperatures, moderately dry, well-draining soil and sunlight, some can withstand cooler or even downright cold temperatures. These hardy succulents are able to withstand brief freezes and fend off frost damage. Occasionally, cold snaps will force a plant into dormancy, but well established hardy types will spring back when warm weather returns. It is important to know if your succulent is a tropical or hardy variety in instances where it is planted outdoors. One of the main succulent plant characteristics is thick, fleshy leaves or pads but there are also non-succulent leaved varieties. This is why botanists and other experts disagree on some plant’s classification. The succulent vs. cactus question is often debated even among professional growers. This is because cacti produce the fleshy leaves but lack other characteristics familiar to the family. In actuality, a cactus is indeed a succulent due to the trait of harnessing and storing water shared by all species in the group. That said, a succulent is not considered a cactus.

Succulent Plant Types
If swollen leaves and stems are the main succulent plant characteristics visible, there are also other qualities which delineate the group. Shallow roots are one adaptation shared among the succulents. A few varieties have deeper tap roots but the majority has wide, surface root zones that allow maximum moisture capture when infrequent rains occur. Some of the succulent plant types commonly available are: Agaves Yucca Aloe Cacti Bromeliad Sedum Sempervivum Echeveria Various euphorbias Some types of orchids It is important to note their hardiness range, but many of these can thrive in the garden. Smaller succulents make varied and fascinating container displays for the indoors. Almost all species need at least 8 hours of light, warm daytime temperatures, consistent water during the growing season and well-drained soil.
3
3
文章
Dummer. ゛☀
2017年08月20日

Adding a pitcher plant or three to your garden or interior space adds a touch of the unusual. Beyond being interesting carnivorous specimens, the pitcher plant produces a beautiful bloom as a reward to a gardener who has cared for it well. When your pitcher plant turns yellow or brown, it’s not time to panic; these hardy plants are hard to keep down for long.
Is My Pitcher Plant Dying?
More than likely, your pitcher plant is just getting older; browning or yellowing pitcher plants are perfectly normal even when plants have received excellent care. As individual pitchers age, they may start to yellow, then brown and collapse. If it’s only the oldest or largest pitchers doing this, it’s nothing to worry about; your plant is just shedding its oldest pitchers. As fall approaches, a normal plant will begin to go dormant and stop replacing the shed pitchers. If you’re unsure about pitcher plant care and the pitcher plant turning brown or yellow is discolored all over, you may have bigger problems. Although pitcher plants are bog natives, they don’t tolerate standing water like their carnivorous contemporaries, immediately reduce watering to dry out the soil around the plant’s crown. If you’re watering with tap water, this could be causing problems as well. Many fanciers believe the heavy minerals in tap water can cause injury, so stick to purified or filtered water.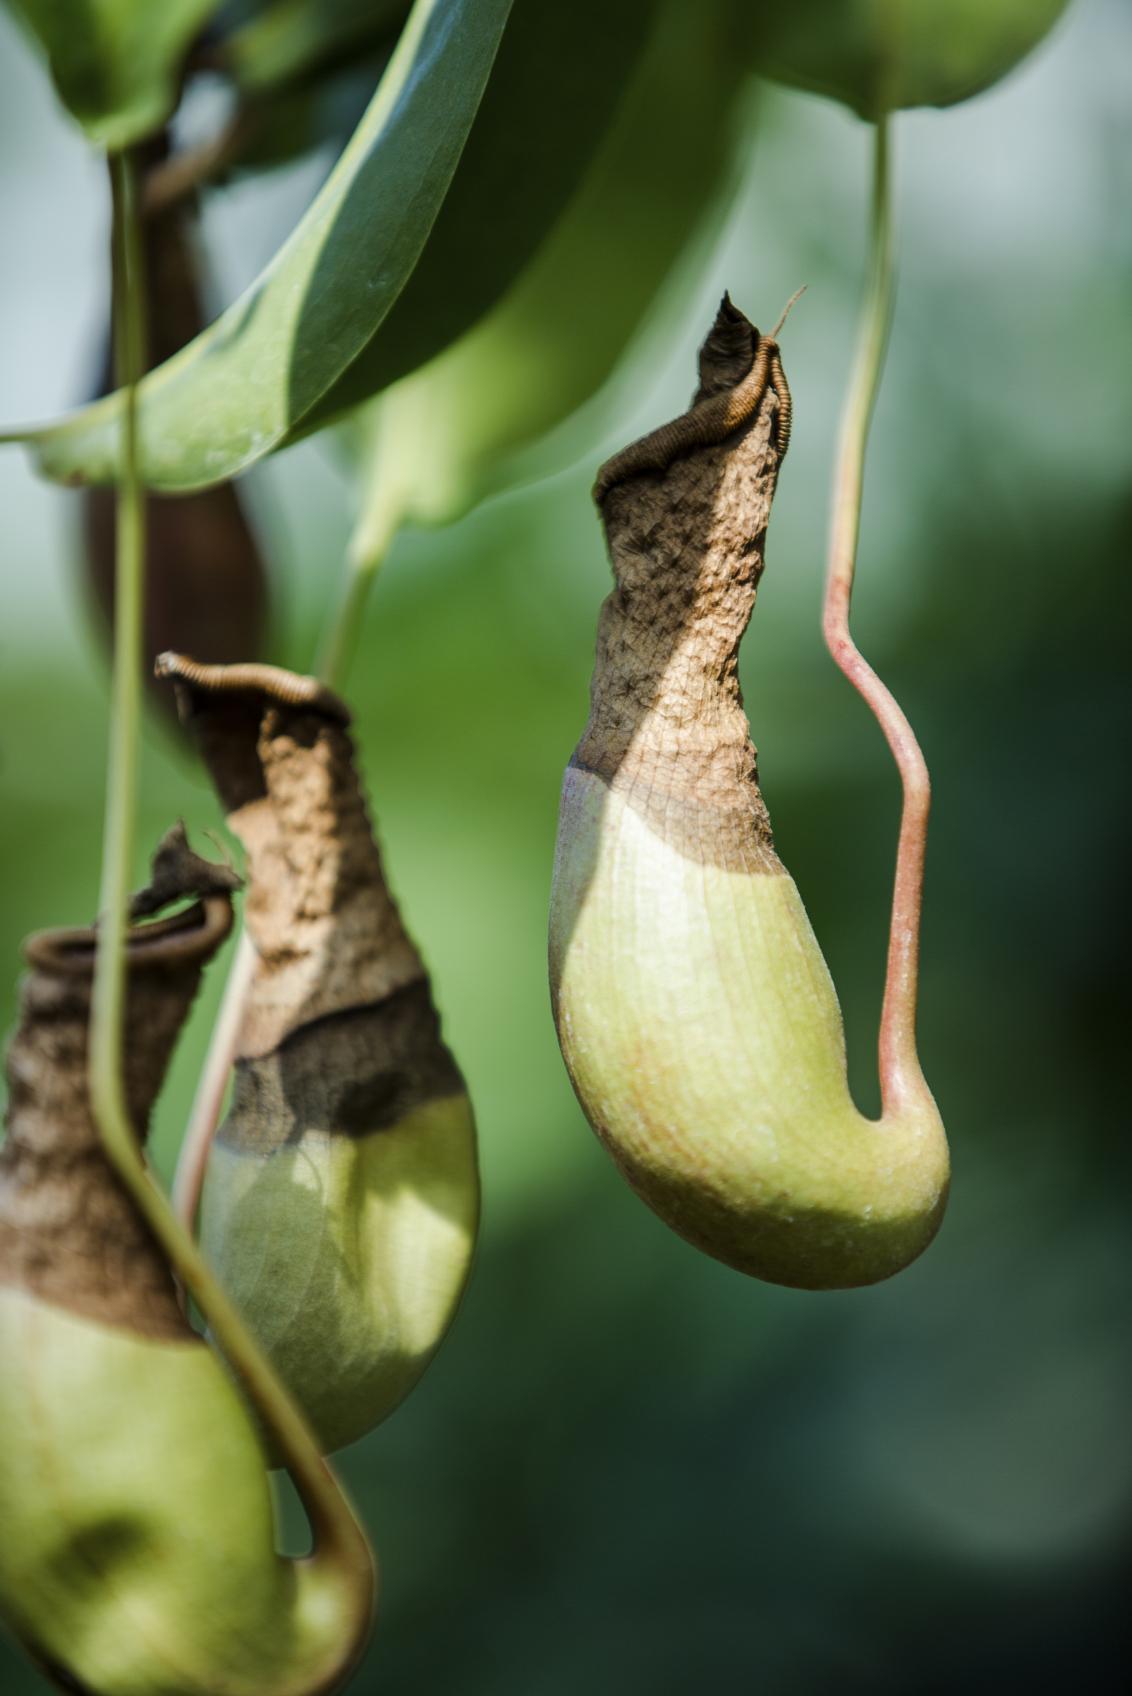
Other Causes of Environmental Stress
Pitcher plants that are changing color may be trying to tell you that something is wrong in their environment. This requires a total evaluation of the system where they live; these plants are not the same as your philodendrons or gerbera daisies and they have very unique needs. Your growing medium should be loose but absorbent, like the bogs from which these plants hail. A slightly acidic pH is also beneficial. Try moving your plant into a sunny area; pitcher plants need full sun to do their best. However, if you place them in a window with bright, direct sunlight, they may burn, so choose your location carefully.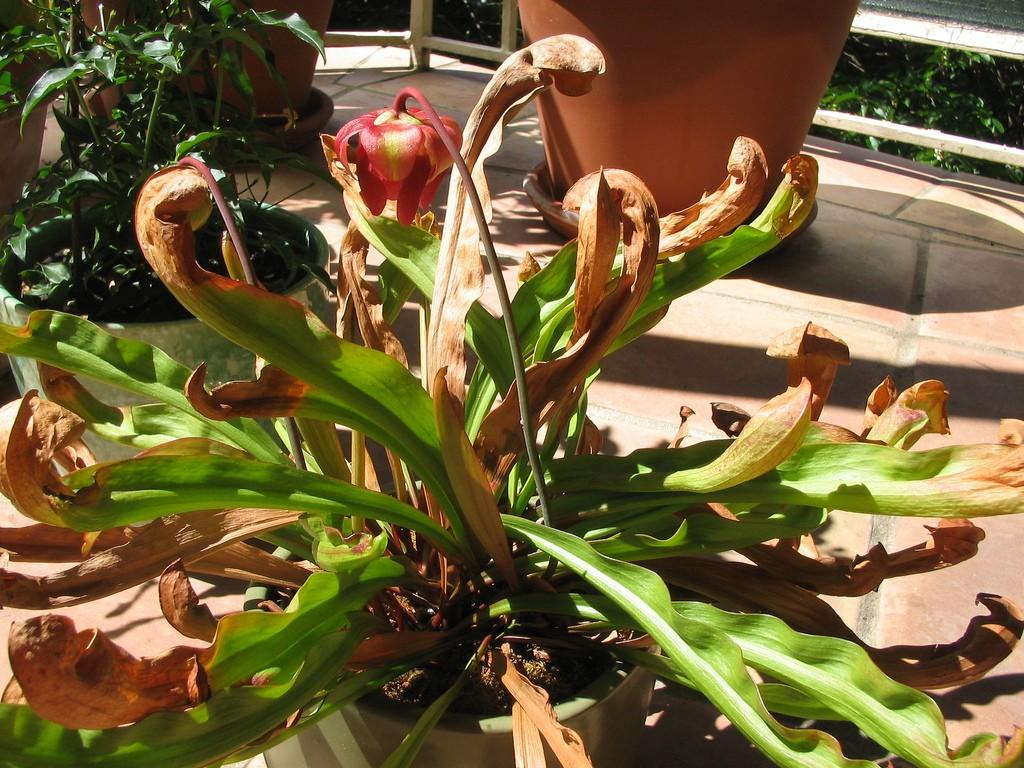
Humidity should be high, around 60 percent when possible. Moving your plant to a terrarium might improve its color. Remember that carnivorous plants thrive in poor soils and get most of their nutrition from consuming insects; fertilizer can be very damaging to these plants.

Is My Pitcher Plant Dying?
More than likely, your pitcher plant is just getting older; browning or yellowing pitcher plants are perfectly normal even when plants have received excellent care. As individual pitchers age, they may start to yellow, then brown and collapse. If it’s only the oldest or largest pitchers doing this, it’s nothing to worry about; your plant is just shedding its oldest pitchers. As fall approaches, a normal plant will begin to go dormant and stop replacing the shed pitchers. If you’re unsure about pitcher plant care and the pitcher plant turning brown or yellow is discolored all over, you may have bigger problems. Although pitcher plants are bog natives, they don’t tolerate standing water like their carnivorous contemporaries, immediately reduce watering to dry out the soil around the plant’s crown. If you’re watering with tap water, this could be causing problems as well. Many fanciers believe the heavy minerals in tap water can cause injury, so stick to purified or filtered water.

Other Causes of Environmental Stress
Pitcher plants that are changing color may be trying to tell you that something is wrong in their environment. This requires a total evaluation of the system where they live; these plants are not the same as your philodendrons or gerbera daisies and they have very unique needs. Your growing medium should be loose but absorbent, like the bogs from which these plants hail. A slightly acidic pH is also beneficial. Try moving your plant into a sunny area; pitcher plants need full sun to do their best. However, if you place them in a window with bright, direct sunlight, they may burn, so choose your location carefully.

Humidity should be high, around 60 percent when possible. Moving your plant to a terrarium might improve its color. Remember that carnivorous plants thrive in poor soils and get most of their nutrition from consuming insects; fertilizer can be very damaging to these plants.
0
0
文章
Dummer. ゛☀
2017年08月15日

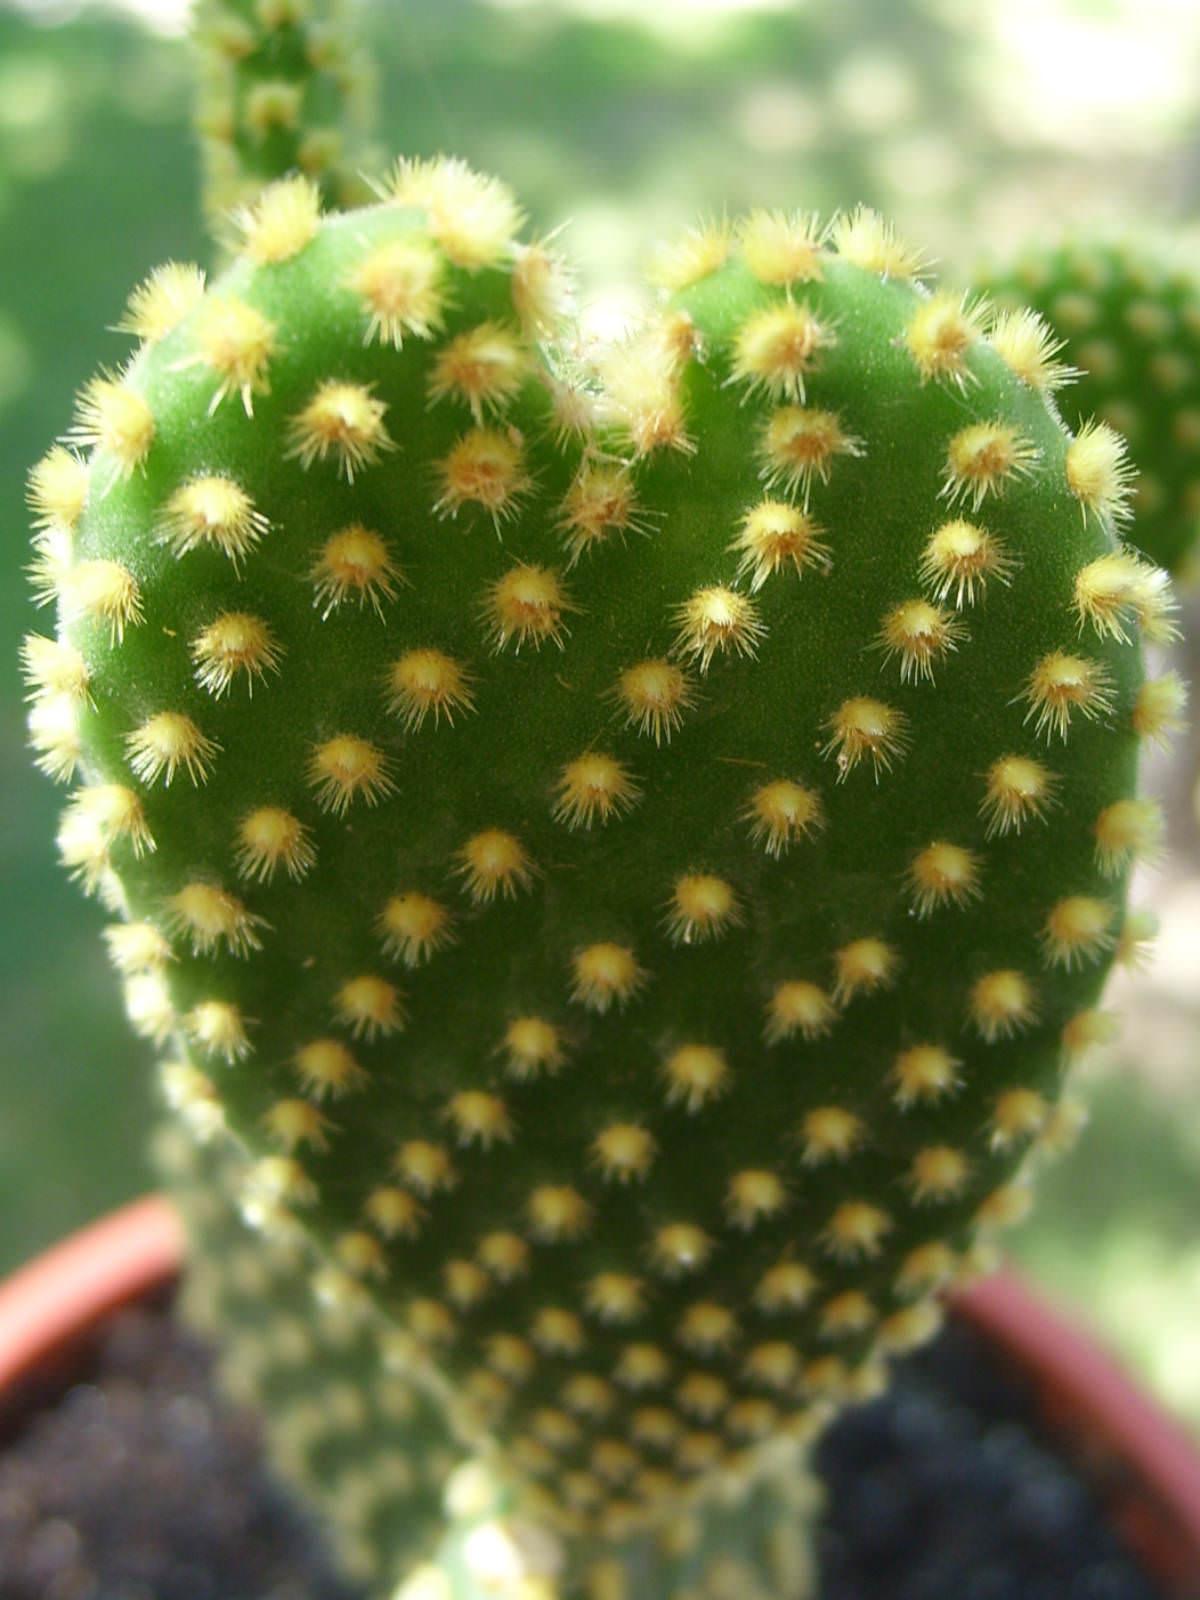
Cacti are the perfect plant for the novice gardener. They are also the perfect specimen for a neglectful gardener. Bunny ears cactus plant, also called angel’s wings, has ease of care combined with an original appearance. The thick pads of this plant are adorned with fuzzy glochids, or short bristles, that resemble the fur of rabbits and grow in earlike pairs. Even a beginner can learn how to grow bunny ears cactus and enjoy the soft appearance of the plant without a lot of typical houseplant fuss.
Bunny Ears Cactus Information
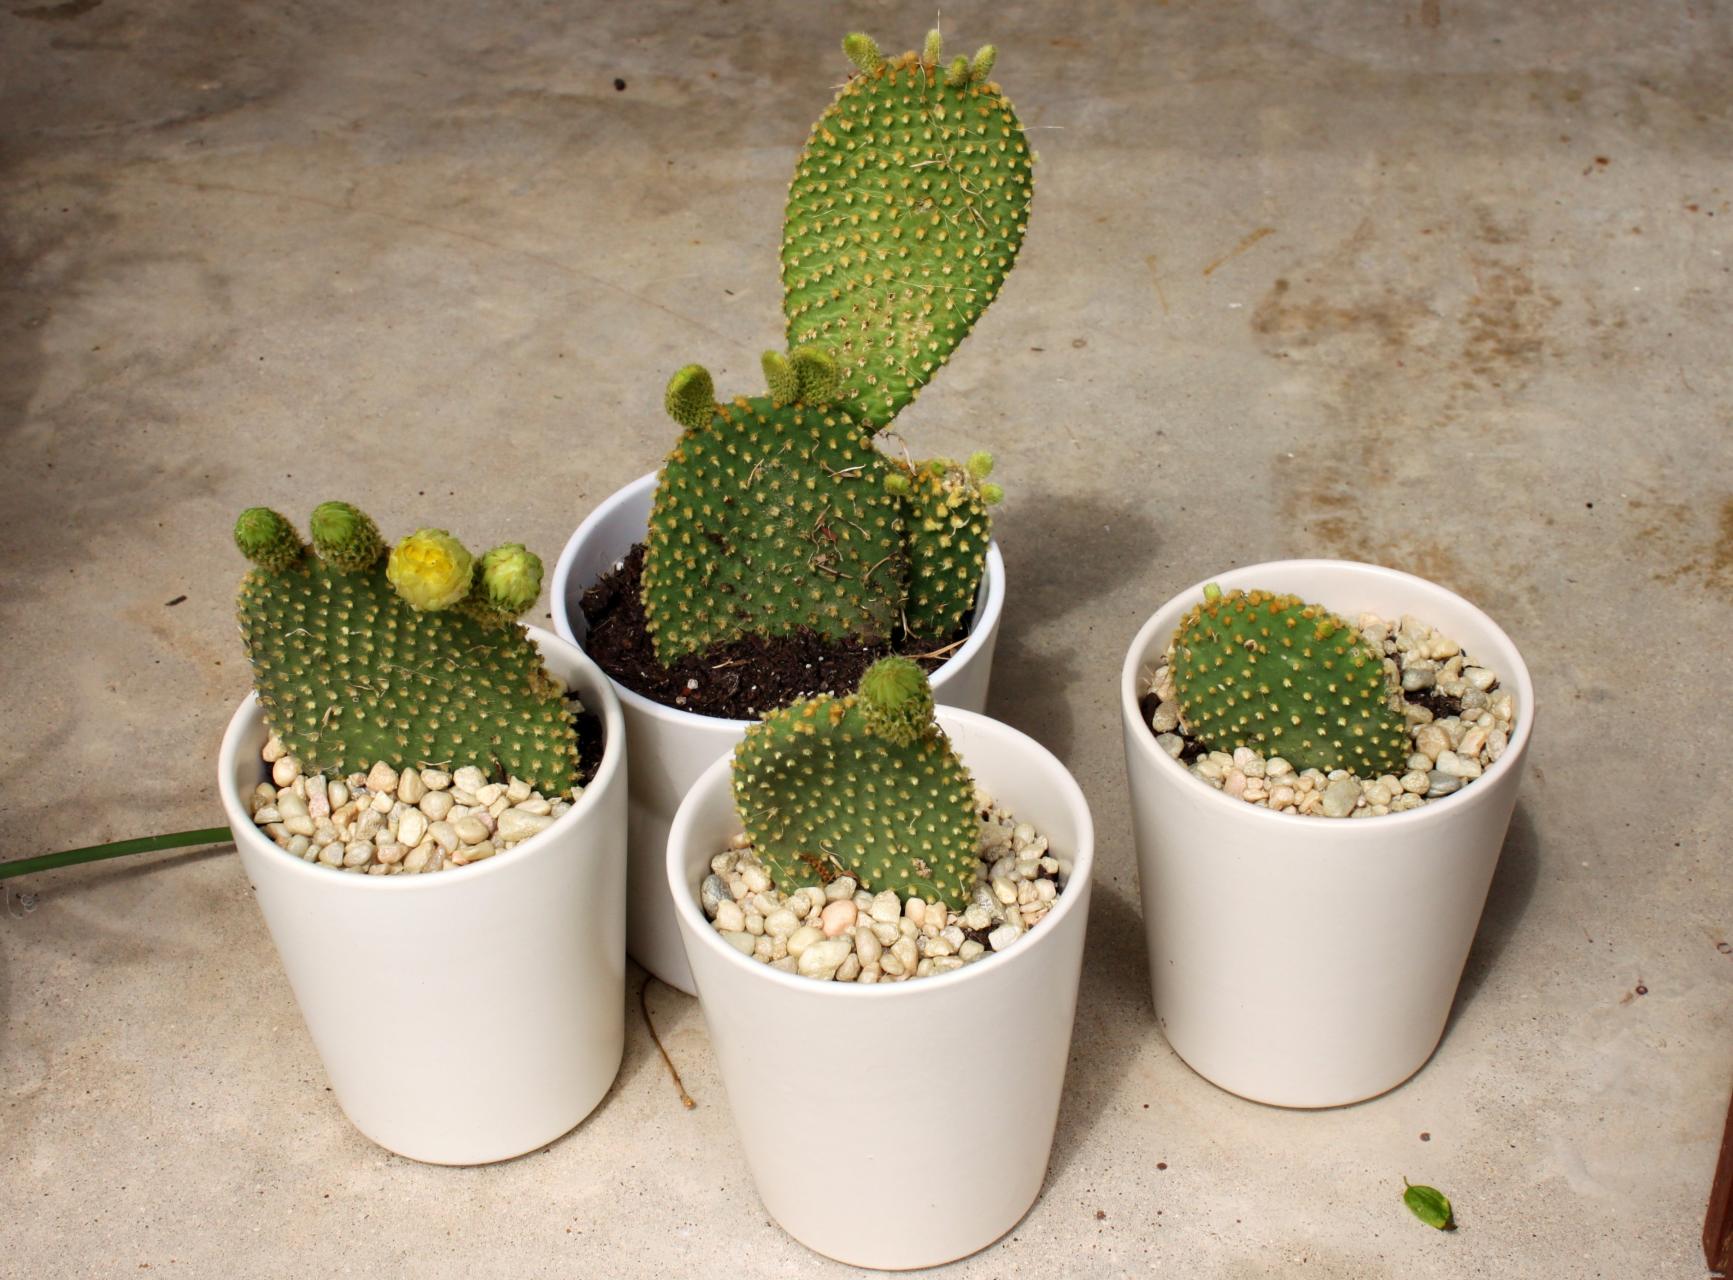
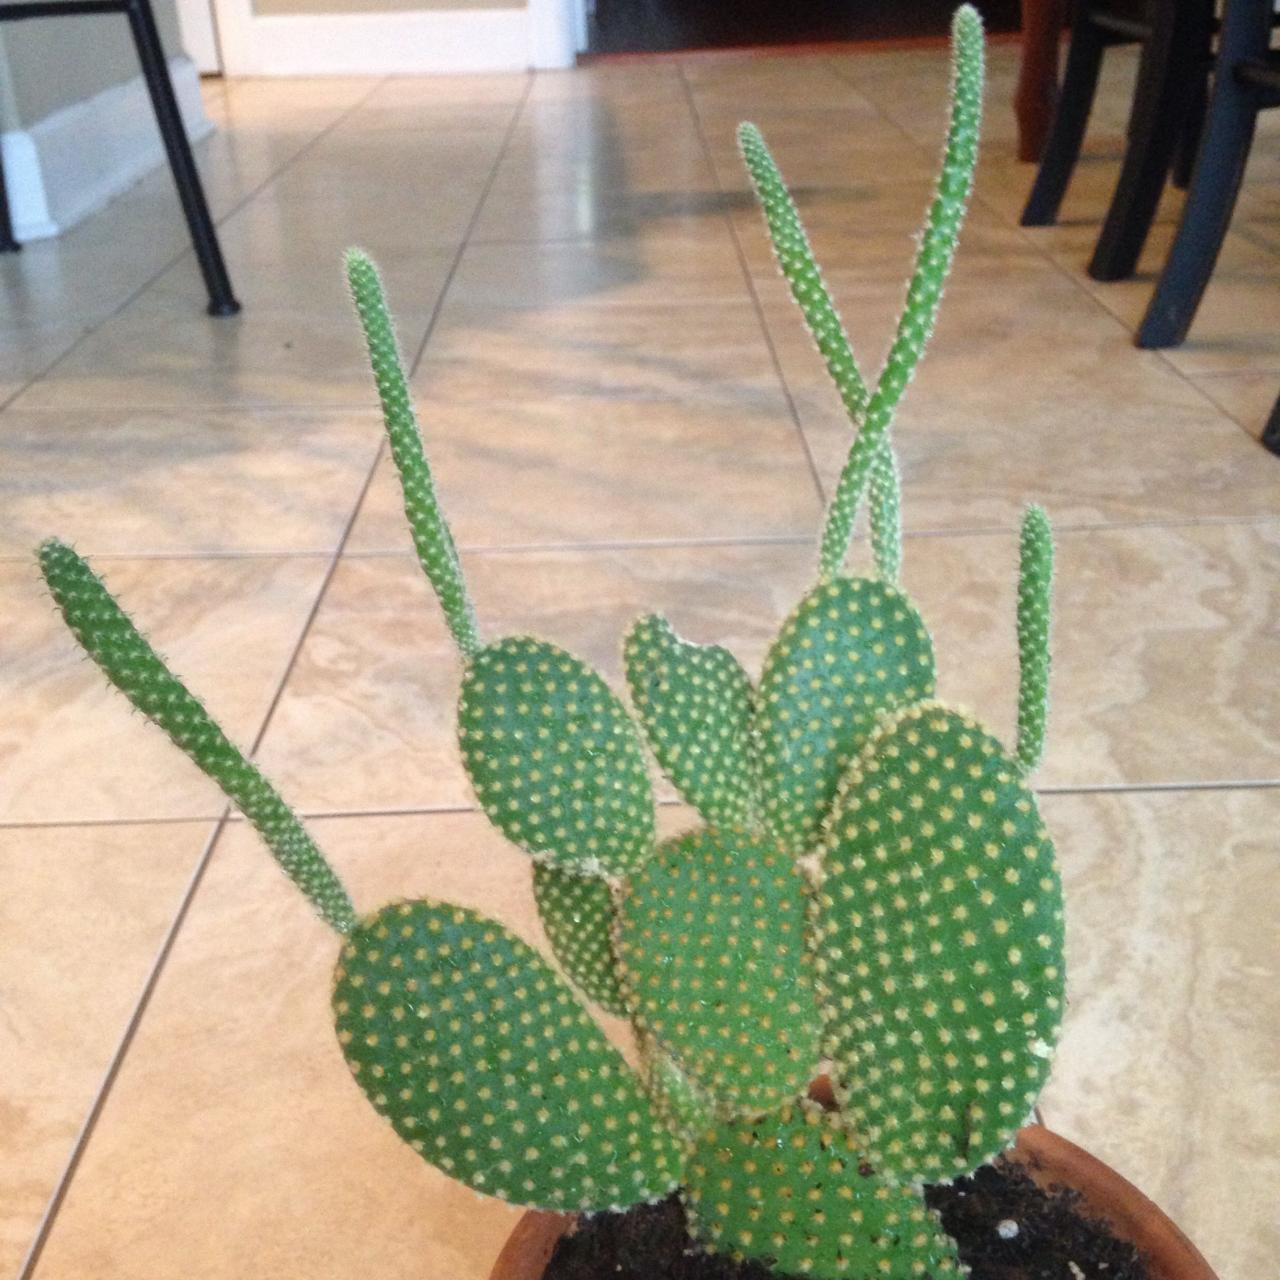
Bunny ears cactus (Opuntia microdasys) originated in Mexico and is a denizen of arid, desert-like areas. Growing bunny ears cactus is as simple as mimicking its native regional conditions. So if you have a dry, low humidity home and plenty of sunny exposure, bunny ears cactus plant might be the perfect plant for you. Bunny ears forms a 2- to 3-foot tall plant with a spread of 4 to 5 feet in its native habitat. In the home, it is a slow growing plant that will likely reach 2 feet in height and have about the same width. It makes an excellent container plant with its paired 3- to 6-inch long pads, which start out a rosy red and deepen to bright green. An interesting bit of bunny ears cactus information is that it does not develop spines. Instead, it grows glochids, which are short whitish brown prickles. These still have the ability to bite, so caution is urged when handling the cactus. If you are lucky, the plant may produce 2-inch wide creamy yellow flowers in summer, followed by globular purple fruits.
How to Grow Bunny Ears Cactus
As with most succulents, you can start new bunny ears plants with a pad taken from the cactus. Use extreme caution when removing a leaf because the glochids dislodge easily and are very difficult to remove from the skin. Use thick gloves or newspaper to pick up the pad. Allow the end to callus for a few days and then insert into cactus soil. Use a good cactus mix for growing bunny ears cactus, or make your own with 40 percent potting soil, 40 percent sand and 20 percent peat moss. The pad usually roots within a few weeks. Bunny ears cactus requires a well-drained container for indoor use. An unglazed clay pot allows for evaporation of excess moisture, which is a prime killer of these plants. They can also grow outdoors but are only hardy in United States Department of Agriculture zones 9 to 11.
Bunny Ears Cactus Care
These plants are a gardeners dream for their low maintenance and interesting appearance. Water can be the death of the plant but it does need consistent moisture during the growing season. Water the plant when the top one inch of soil is dry. Allow the water to drain out of the pot and remove any excess from the saucer. During fall and winter, water lightly only every 3 to 4 weeks. Fertilize the plant every other water period during spring and summer with a diluted houseplant food or cactus formula. Occasionally, the plant will be beleaguered by pests such as mealybugs and scale insects. Combat these with a cotton ball soaked in alcohol. Bunny ears cactus should be repotted every 1 to 2 years. Wait at least a week after repotting to water the plant. Other than these steps, bunny ears cactus care is limited and the plant should reward you with its abundant pads and interesting features for years.

Bunny Ears Cactus Information
Bunny ears cactus (Opuntia microdasys) originated in Mexico and is a denizen of arid, desert-like areas. Growing bunny ears cactus is as simple as mimicking its native regional conditions. So if you have a dry, low humidity home and plenty of sunny exposure, bunny ears cactus plant might be the perfect plant for you. Bunny ears forms a 2- to 3-foot tall plant with a spread of 4 to 5 feet in its native habitat. In the home, it is a slow growing plant that will likely reach 2 feet in height and have about the same width. It makes an excellent container plant with its paired 3- to 6-inch long pads, which start out a rosy red and deepen to bright green. An interesting bit of bunny ears cactus information is that it does not develop spines. Instead, it grows glochids, which are short whitish brown prickles. These still have the ability to bite, so caution is urged when handling the cactus. If you are lucky, the plant may produce 2-inch wide creamy yellow flowers in summer, followed by globular purple fruits.

How to Grow Bunny Ears Cactus
As with most succulents, you can start new bunny ears plants with a pad taken from the cactus. Use extreme caution when removing a leaf because the glochids dislodge easily and are very difficult to remove from the skin. Use thick gloves or newspaper to pick up the pad. Allow the end to callus for a few days and then insert into cactus soil. Use a good cactus mix for growing bunny ears cactus, or make your own with 40 percent potting soil, 40 percent sand and 20 percent peat moss. The pad usually roots within a few weeks. Bunny ears cactus requires a well-drained container for indoor use. An unglazed clay pot allows for evaporation of excess moisture, which is a prime killer of these plants. They can also grow outdoors but are only hardy in United States Department of Agriculture zones 9 to 11.

Bunny Ears Cactus Care
These plants are a gardeners dream for their low maintenance and interesting appearance. Water can be the death of the plant but it does need consistent moisture during the growing season. Water the plant when the top one inch of soil is dry. Allow the water to drain out of the pot and remove any excess from the saucer. During fall and winter, water lightly only every 3 to 4 weeks. Fertilize the plant every other water period during spring and summer with a diluted houseplant food or cactus formula. Occasionally, the plant will be beleaguered by pests such as mealybugs and scale insects. Combat these with a cotton ball soaked in alcohol. Bunny ears cactus should be repotted every 1 to 2 years. Wait at least a week after repotting to water the plant. Other than these steps, bunny ears cactus care is limited and the plant should reward you with its abundant pads and interesting features for years.
0
0
文章
Dummer. ゛☀
2017年08月15日

Can agave grow in pots? You bet! With so many varieties of agave available, container grown agave plants are an excellent choice for the gardener with limited space, less than perfect soil conditions, and a lack of abundant sunlight. Since most agaves thrive year round in warmer climates, container plants are also a wonderful choice for gardeners living in climates that experience colder temperatures.Potted agave also provide the flexibility of being mobile. Growing agave plants in pots allows you to move the containers to the location that provides the light, temperature and weather conditions that will help your agave thrive.

How to Grow Agave in Containers
Growing agave plants in pots is fun and rewarding. Any agave can be grown in a container, but the smaller varieties are the most popular. Agave plants love to be root bound, so growing them in pots make these plants excellent candidates for houseplants.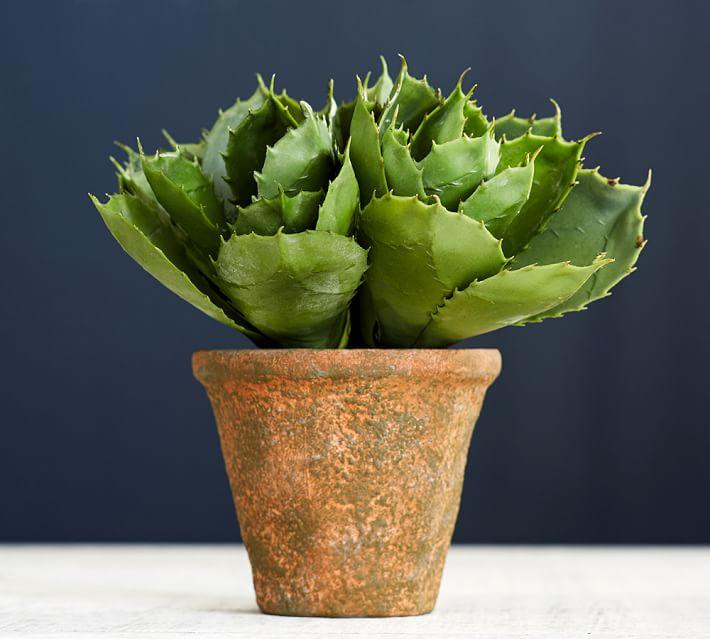
All container grown agave pants need a soil that dries slowly but drains quickly. For outdoor containers, you can make a good soil mixture by mixing equal parts of compost; potting mix or garden soil; and either gravel, pumice, or coarse sand. Do not use peat moss, which is undesirable for agave plant growing. For indoor grown agave, make sure you use a sterilized potting mix combined with either gravel, pumice, or coarse sand. When you pot your agave, do not bury the plant too deeply in the soil. Make sure the crown of the plant is above the soil line to prevent crown rot, a disease that is detrimental to agave plants.
Potted Agave Care
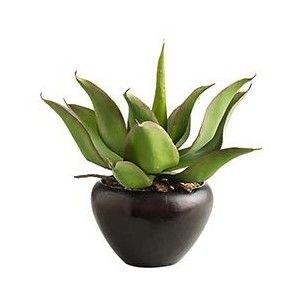
Agave plants need plenty of sunlight. If you are growing agave plants indoors, choose a bright, sunny window with as much sun possible. A south- or west-facing window works very well. Keep your agave sufficiently watered, and always water completely, making sure the soil is at least half dry before watering again. If you are not sure the soil is dry enough, it is better to wait a day to avoid over-watering your plant. Don’t forget to fertilize. Late spring and summer are the times to feed your container grown agave with a balanced (20-20-20), all-purpose liquid fertilizer at half-strength once a month.

How to Grow Agave in Containers
Growing agave plants in pots is fun and rewarding. Any agave can be grown in a container, but the smaller varieties are the most popular. Agave plants love to be root bound, so growing them in pots make these plants excellent candidates for houseplants.

All container grown agave pants need a soil that dries slowly but drains quickly. For outdoor containers, you can make a good soil mixture by mixing equal parts of compost; potting mix or garden soil; and either gravel, pumice, or coarse sand. Do not use peat moss, which is undesirable for agave plant growing. For indoor grown agave, make sure you use a sterilized potting mix combined with either gravel, pumice, or coarse sand. When you pot your agave, do not bury the plant too deeply in the soil. Make sure the crown of the plant is above the soil line to prevent crown rot, a disease that is detrimental to agave plants.

Potted Agave Care
Agave plants need plenty of sunlight. If you are growing agave plants indoors, choose a bright, sunny window with as much sun possible. A south- or west-facing window works very well. Keep your agave sufficiently watered, and always water completely, making sure the soil is at least half dry before watering again. If you are not sure the soil is dry enough, it is better to wait a day to avoid over-watering your plant. Don’t forget to fertilize. Late spring and summer are the times to feed your container grown agave with a balanced (20-20-20), all-purpose liquid fertilizer at half-strength once a month.
0
0
文章
Miss Chen
2017年08月15日

To a flower gardener, few things are more satisfying than a hanging basket overflowing with masses of blooms. Although wave petunias lack the stop-in-your-tracks scent of the traditional variety, they provide an eye-catching cascade of bright white, pink and purple flowers that last as long as the warm weather holds. If your once-beautiful wave petunias stop flowering before their season is over, a few approaches will likely remedy the situation.
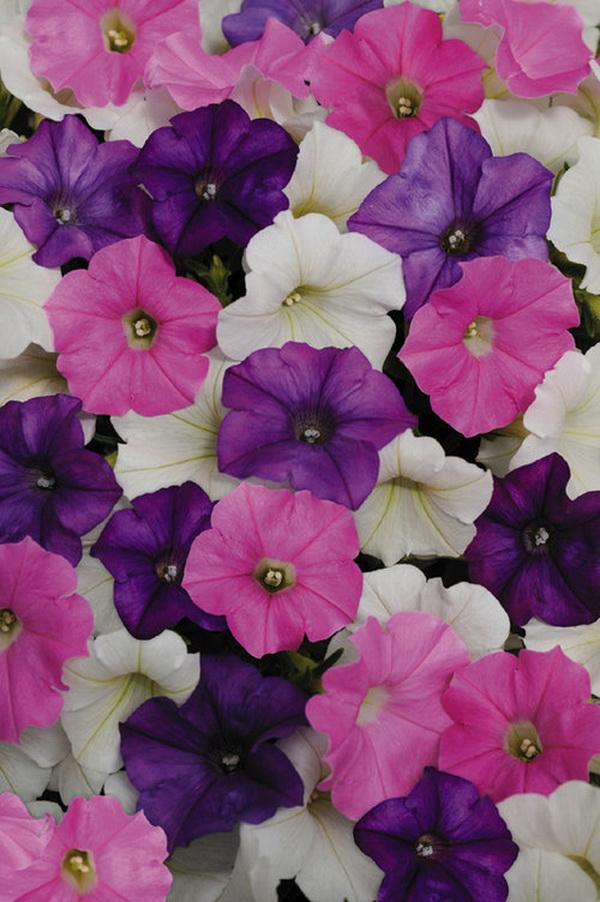
A Sense of Place
Petunias in general are fairly hardy plants during warm weather months and do well in most types of soil. Although they are somewhat drought-tolerant, they prefer a moist, well drained, loamy soil. When watering wave petunias planted as ground cover, direct the water toward their roots. Waterlogged blooms will turn to mush and fall off. Aphid attacks, though possible, are rare and tend not to affect the plant's ability to flower. Wash these tiny pests off with a light spray of water, and then gently shake the water off the blooms to avoid soft rot.
Regardless of soil conditions, a petunia plant will bloom either sparingly or not at all if it doesn't receive enough light. These sun-loving annuals bloom most abundantly in full sun and stand up to heat particularly well. If you have a hanging basket of wave petunias that aren't blooming or have stopped blooming, check whether it's in partial or full shade. Switching the plant to a south-facing porch or wall hook will provide the full sun exposure it needs, ensuring a magnificent display all season long. If you're using your multiflora as a ground cover, transplant it to an open space where taller plants won't rob it of sunlight.

Care and Feeding
Wave petunias are an increasingly popular class of the multiflora petunia hybrid. Their 1- to 1 1/2-inch flowers grow quickly and tend to out-bloom and outlast their larger, delicately scented counterparts. A well-fed petunia, regardless of variety, will reward you with healthy foliage and masses of color. To revive the blooms on your plant, once a month, add a phosphorus- and potassium-rich fertilizer to your watering can and give the petunias a good soak. The rest of the time, keep the soil moist. Hanging baskets in full sun often need watering once a day to thrive during the hottest days of the summer. You may get lucky and be able to completely revive a drooping petunia, but there's a fine line between droopy and dead, so watering often is highly recommended.
Drastic Measures, Dramatic Results
All varieties of petunia benefit from constant grooming. If the foliage is growing without blooms, pinch off the old withered blooms. This make the plant substantially more attractive and redirect the plant's energy into producing more flowers. Though you may be tempted to let the plant continue to grow in length (up to 3 feet for the wave variety), you'll discover it becomes less attractive and more scraggly when it's allowed to continue down this path. Mid-season, bite the bullet and cut back the petunia plant by half. Within a week you'll be rewarded with a resurrection of the bushy, flower-heavy plant that tempted your pocketbook at the beginning of the season. All season long, don't hesitate to cut back any rangy growth for the same result.

A Sense of Place
Petunias in general are fairly hardy plants during warm weather months and do well in most types of soil. Although they are somewhat drought-tolerant, they prefer a moist, well drained, loamy soil. When watering wave petunias planted as ground cover, direct the water toward their roots. Waterlogged blooms will turn to mush and fall off. Aphid attacks, though possible, are rare and tend not to affect the plant's ability to flower. Wash these tiny pests off with a light spray of water, and then gently shake the water off the blooms to avoid soft rot.
Regardless of soil conditions, a petunia plant will bloom either sparingly or not at all if it doesn't receive enough light. These sun-loving annuals bloom most abundantly in full sun and stand up to heat particularly well. If you have a hanging basket of wave petunias that aren't blooming or have stopped blooming, check whether it's in partial or full shade. Switching the plant to a south-facing porch or wall hook will provide the full sun exposure it needs, ensuring a magnificent display all season long. If you're using your multiflora as a ground cover, transplant it to an open space where taller plants won't rob it of sunlight.

Care and Feeding
Wave petunias are an increasingly popular class of the multiflora petunia hybrid. Their 1- to 1 1/2-inch flowers grow quickly and tend to out-bloom and outlast their larger, delicately scented counterparts. A well-fed petunia, regardless of variety, will reward you with healthy foliage and masses of color. To revive the blooms on your plant, once a month, add a phosphorus- and potassium-rich fertilizer to your watering can and give the petunias a good soak. The rest of the time, keep the soil moist. Hanging baskets in full sun often need watering once a day to thrive during the hottest days of the summer. You may get lucky and be able to completely revive a drooping petunia, but there's a fine line between droopy and dead, so watering often is highly recommended.
Drastic Measures, Dramatic Results
All varieties of petunia benefit from constant grooming. If the foliage is growing without blooms, pinch off the old withered blooms. This make the plant substantially more attractive and redirect the plant's energy into producing more flowers. Though you may be tempted to let the plant continue to grow in length (up to 3 feet for the wave variety), you'll discover it becomes less attractive and more scraggly when it's allowed to continue down this path. Mid-season, bite the bullet and cut back the petunia plant by half. Within a week you'll be rewarded with a resurrection of the bushy, flower-heavy plant that tempted your pocketbook at the beginning of the season. All season long, don't hesitate to cut back any rangy growth for the same result.
1
0
文章
Dummer. ゛☀
2017年08月13日

By the time the leaves change and the first storms of winter approach, the intrepid gardener is itching for some living green thing to nurture and bring color to the home. Flaming katy kalanchoe is an ideal plant to chase away the winter doldrums. In most zones the plant is used as an interior plant, but growing flaming katy outdoors is possible in the warmer climates. The shiny green, scalloped leaves and brilliant flowers enliven any situation and care for flaming katy is a breeze. Discover how to grow flaming katy plants and charge up your interior with some vibrant tones and unique foliage.
Information on Flaming Katy Kalanchoe
Flaming katy is grouped with the succulent variety of plants. This lovely specimen if often found in the gift floral section of your local supermarket or big box nursery, but don’t let its availability fool you. Flaming katy houseplant is a spectacle to behold, especially if you are starved for color and a new plant buddy. The leaves are thick and waxy like a jade plant but have a sculpted edge. Plants get about 12 inches high and just a little smaller in width. The flowers are a real show stopper in bright colors like pink, yellow, orange and red. The plants require well drained soil and prefer drier conditions. Flaming katy houseplants that get overwatered will show their displeasure with yellowing, dropping leaves and rotten stems.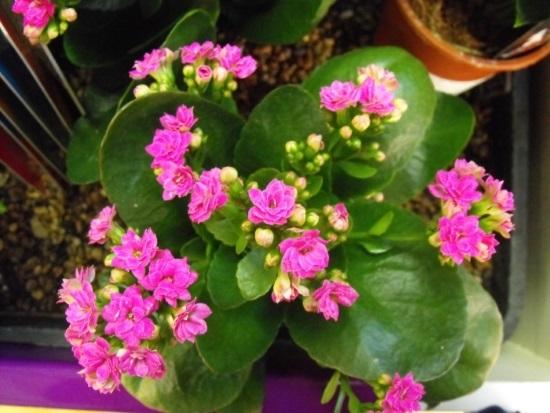
How to Grow Flaming Katy Plants
Kalanchoe is familiar as a houseplant but it is possible to grow them outside too. They need bright sun and temperatures of 65 to 70 F. (18-21 C.). The plants are native to Madagascar and do not tolerate boggy soil, cold temperatures or shade. Even a light freeze can kill the plant, but it makes an excellent patio plant in summer. Bring it inside when cold temperatures threaten and use it as a houseplant. Growing this plant from seed is not recommended. Starts are relatively cheap and thrive and grow quickly in sun to part shade. Lower light conditions promote greener foliage and the plants will still fill with blooms. Flaming katy kalanchoe needs at least six weeks of shorter days and up to 12 for more compact blooms. Use a sandy potting mix for container outdoor plants and amend garden beds with plenty of grit to ensure drainage. You rarely need to water unless you have endlessly hot, dry days. Apply water from the base of the plant to prevent water spotting and rot on the leaves. Allow the top of the soil to completely dry out before watering again.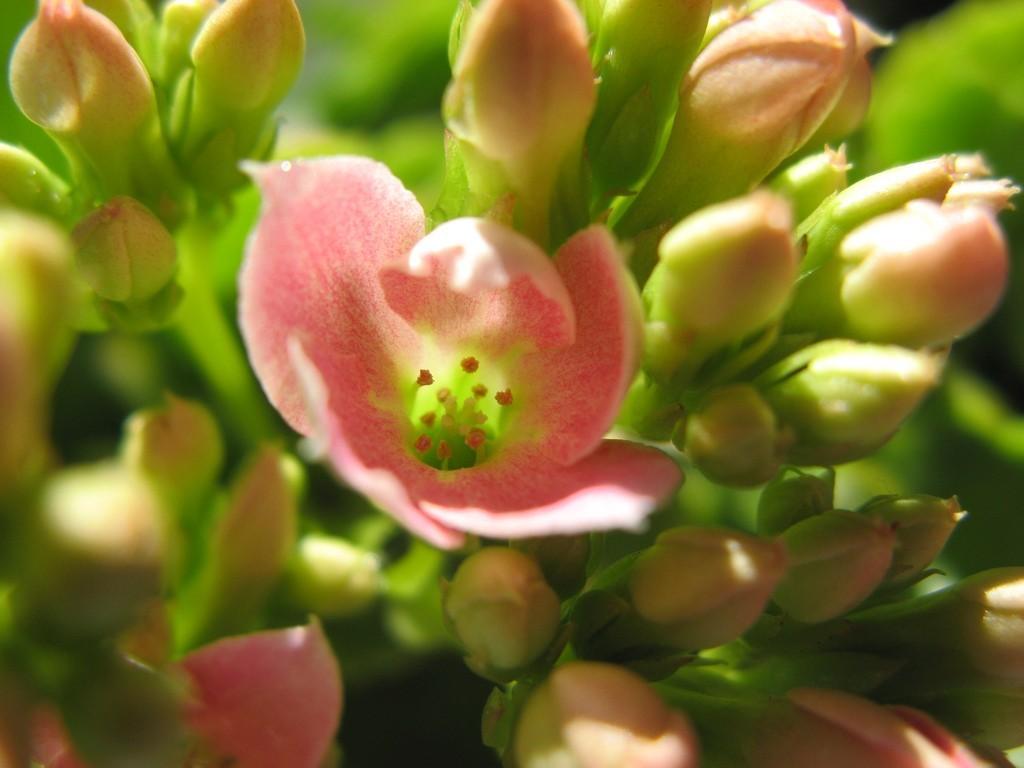
The importance of not overwatering cannot be stressed enough. The moderate moisture needs of the plant are one of the keys to care for flaming katy. During the blooming season, fertilize monthly with a diluted flowering plant food. Remove spent flowers and pinch off any dead leaves to enhance the appearance of the plant. It is a lovely foliage plant even when not in bloom and the thick leaves store moisture. Lightly wrinkled leaves signal that it is time to water. Follow these hints on care for flaming katy and you will have a proven winner for many seasons to come.

Information on Flaming Katy Kalanchoe
Flaming katy is grouped with the succulent variety of plants. This lovely specimen if often found in the gift floral section of your local supermarket or big box nursery, but don’t let its availability fool you. Flaming katy houseplant is a spectacle to behold, especially if you are starved for color and a new plant buddy. The leaves are thick and waxy like a jade plant but have a sculpted edge. Plants get about 12 inches high and just a little smaller in width. The flowers are a real show stopper in bright colors like pink, yellow, orange and red. The plants require well drained soil and prefer drier conditions. Flaming katy houseplants that get overwatered will show their displeasure with yellowing, dropping leaves and rotten stems.

How to Grow Flaming Katy Plants
Kalanchoe is familiar as a houseplant but it is possible to grow them outside too. They need bright sun and temperatures of 65 to 70 F. (18-21 C.). The plants are native to Madagascar and do not tolerate boggy soil, cold temperatures or shade. Even a light freeze can kill the plant, but it makes an excellent patio plant in summer. Bring it inside when cold temperatures threaten and use it as a houseplant. Growing this plant from seed is not recommended. Starts are relatively cheap and thrive and grow quickly in sun to part shade. Lower light conditions promote greener foliage and the plants will still fill with blooms. Flaming katy kalanchoe needs at least six weeks of shorter days and up to 12 for more compact blooms. Use a sandy potting mix for container outdoor plants and amend garden beds with plenty of grit to ensure drainage. You rarely need to water unless you have endlessly hot, dry days. Apply water from the base of the plant to prevent water spotting and rot on the leaves. Allow the top of the soil to completely dry out before watering again.

The importance of not overwatering cannot be stressed enough. The moderate moisture needs of the plant are one of the keys to care for flaming katy. During the blooming season, fertilize monthly with a diluted flowering plant food. Remove spent flowers and pinch off any dead leaves to enhance the appearance of the plant. It is a lovely foliage plant even when not in bloom and the thick leaves store moisture. Lightly wrinkled leaves signal that it is time to water. Follow these hints on care for flaming katy and you will have a proven winner for many seasons to come.
0
0
文章
Dummer. ゛☀
2017年08月13日

Grape ivy is one of the finest indoor vines a gardener can grow. It’s hardy, looks nice and springs back despite a great deal of neglect. Because of this, many people are surprised to hear about grape ivy plant problems, but they do suffer a few. Yellow leaves on grape ivy are by far the most common and can be caused by a couple of different mechanisms. Read on to learn more about grape ivy with yellow leaves.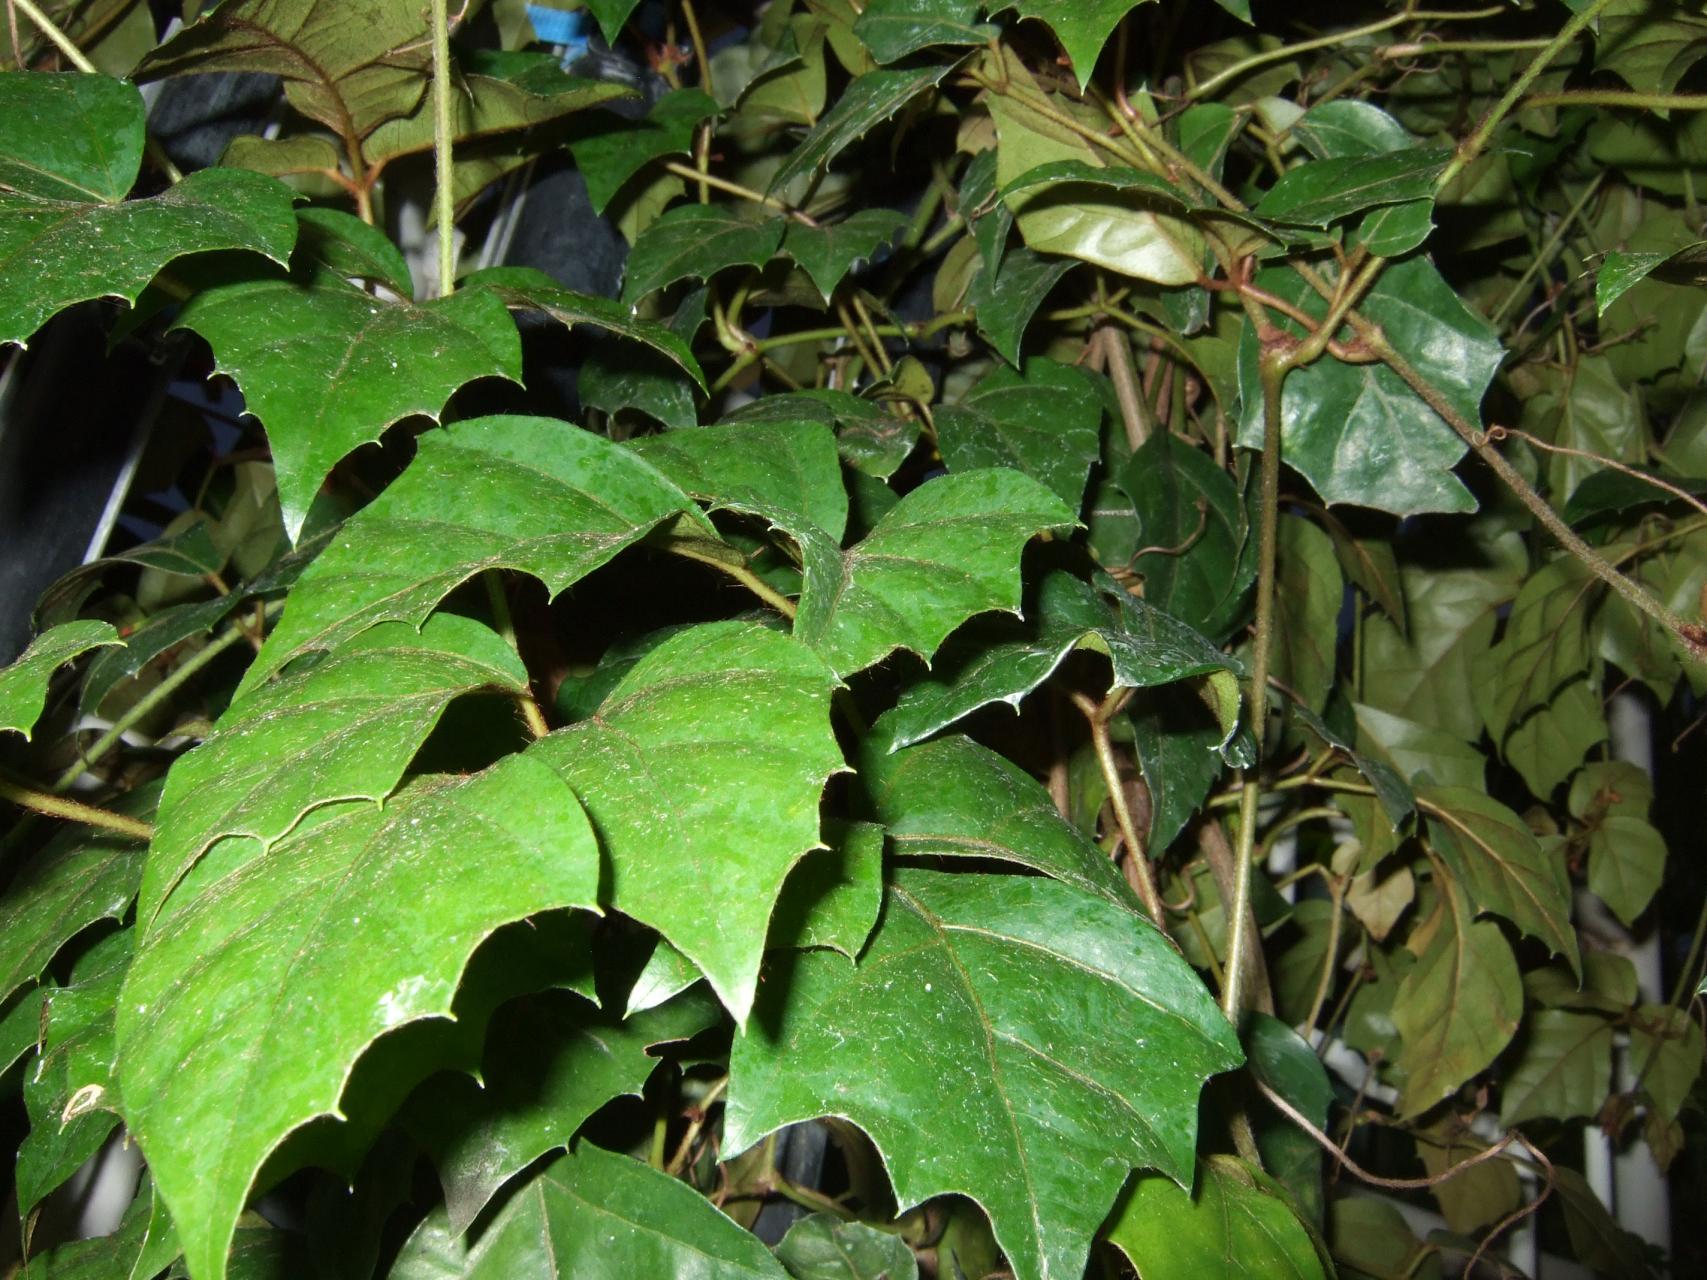
0Causes of Yellow Grape Ivy
When your grape ivy is turning yellow, you may be really concerned that it won’t survive the ordeal – and you may be right. Although there’s not much that can get these hardy plants down, yellow leaves can be a sign of serious distress. It’s time to do a little detective work to find out what’s causing your plant’s problem. By far, the two most common causes of yellow leaves on grape ivy are spider mites and root rot. Both are treatable if caught early. Here’s what to watch for and what to do if you find it:
Spider Mites. Spider mites leave a characteristic thin spider-like web on your plants, along with pin-sized yellow spots on leaves that aren’t fully affected yet. If you suspect spider mites, washing the plant thoroughly once a week and increasing the humidity around it can help keep them at bay. If they’re persistent, a miticide is in order. Apply it carefully, and per the package instructions.
Root Rot. Root rot is the direct result of overwatering. In a plant like grape ivy, which prefers a dry soil, root rot can be a serious problem long before you realize. It can manifest in several ways, but yellow or wilting leaves are typical signs that your plant’s roots aren’t doing their job.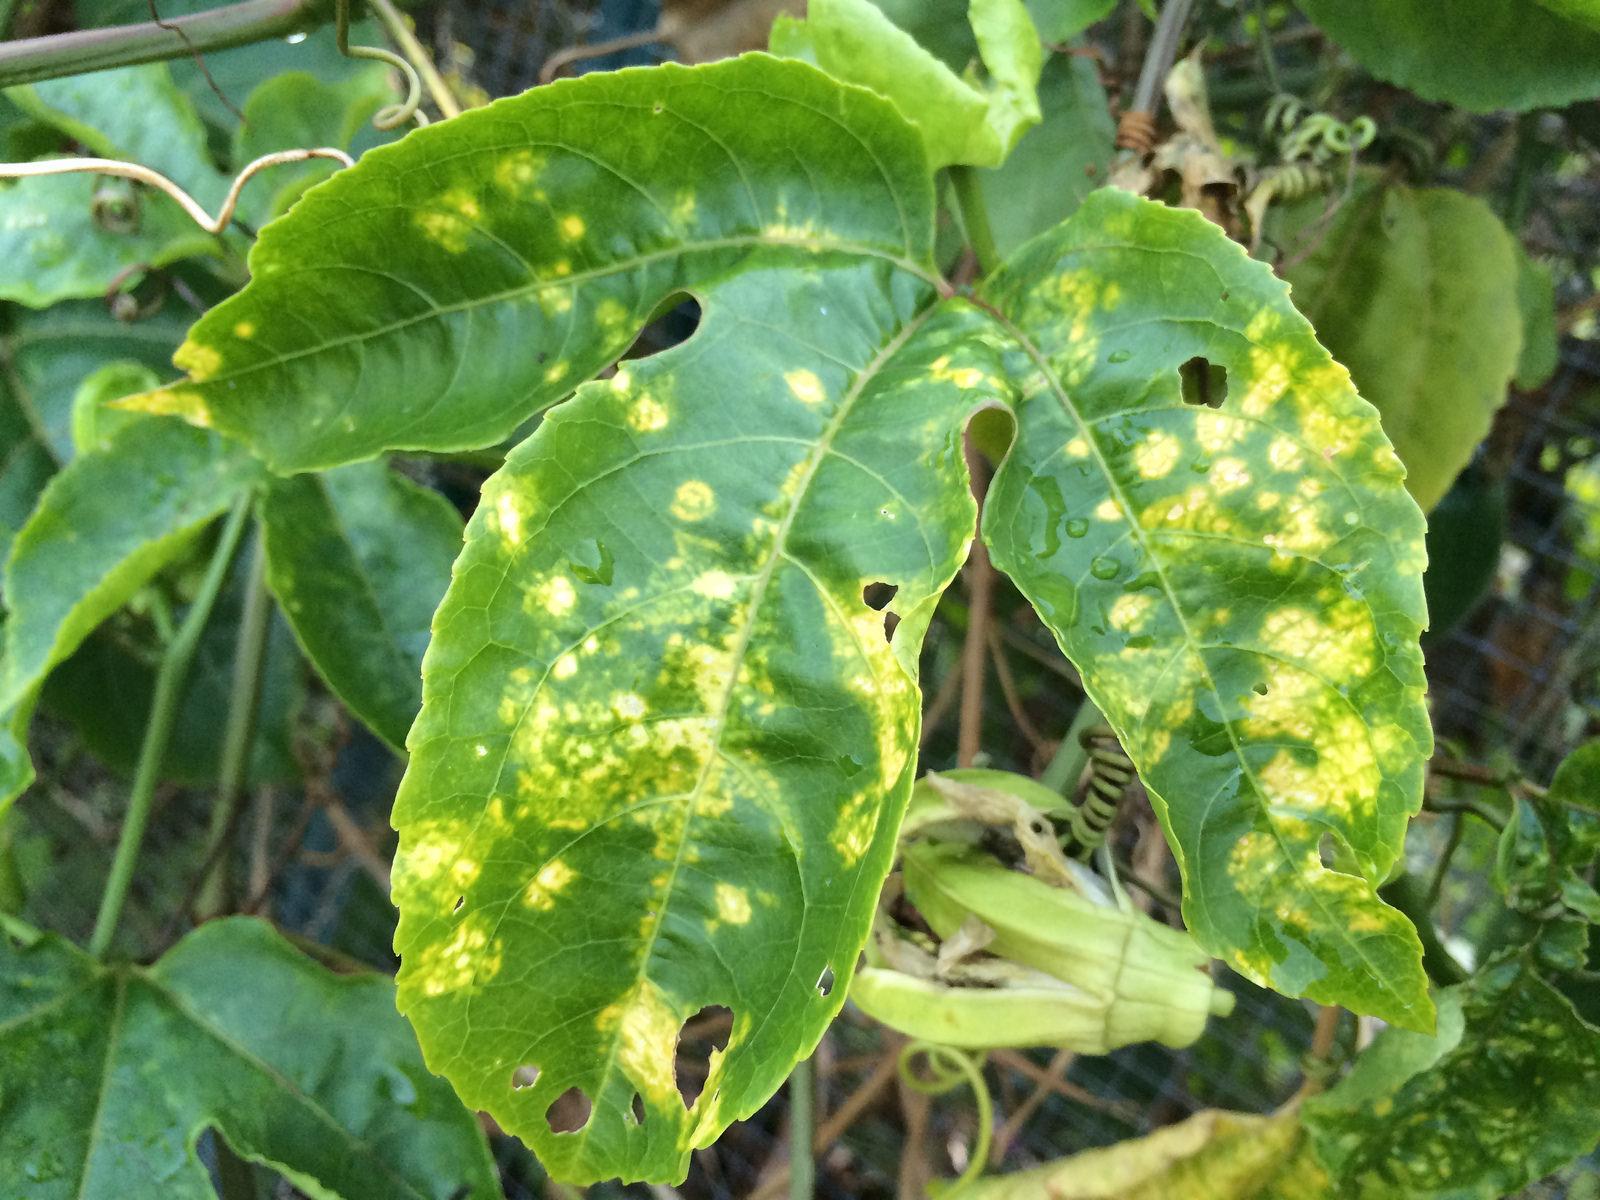
Remove the plant from its pot and clean the dirt out of the root ball gently. If many of the roots are brown, black, smell terrible or appear dead, you’ve got a problem. Trim back all the sickly roots and repot your plant into a container that drains quickly. Make sure to use a fast-draining potting soil, such as a palm or cactus mix. Water the plant when the soil feels dry and never leave it standing in a saucer full of water.

0Causes of Yellow Grape Ivy
When your grape ivy is turning yellow, you may be really concerned that it won’t survive the ordeal – and you may be right. Although there’s not much that can get these hardy plants down, yellow leaves can be a sign of serious distress. It’s time to do a little detective work to find out what’s causing your plant’s problem. By far, the two most common causes of yellow leaves on grape ivy are spider mites and root rot. Both are treatable if caught early. Here’s what to watch for and what to do if you find it:
Spider Mites. Spider mites leave a characteristic thin spider-like web on your plants, along with pin-sized yellow spots on leaves that aren’t fully affected yet. If you suspect spider mites, washing the plant thoroughly once a week and increasing the humidity around it can help keep them at bay. If they’re persistent, a miticide is in order. Apply it carefully, and per the package instructions.

Root Rot. Root rot is the direct result of overwatering. In a plant like grape ivy, which prefers a dry soil, root rot can be a serious problem long before you realize. It can manifest in several ways, but yellow or wilting leaves are typical signs that your plant’s roots aren’t doing their job.

Remove the plant from its pot and clean the dirt out of the root ball gently. If many of the roots are brown, black, smell terrible or appear dead, you’ve got a problem. Trim back all the sickly roots and repot your plant into a container that drains quickly. Make sure to use a fast-draining potting soil, such as a palm or cactus mix. Water the plant when the soil feels dry and never leave it standing in a saucer full of water.
0
0
文章
Dummer. ゛☀
2017年08月13日

Golden trumpet vine is a common sight in gardens with year-round warmth and plenty of sun. These needs make growing Allamanda indoors ideal where there is good southern or western exposure. Even the northernmost gardener can enjoy an indoor Allamanda flowering vine. You may have to invest in a good plant light and turn up the thermostat, but it’s worth it to bring the rich yellow flowers and lovely formed foliage. Allamanda plant care is similar to most tropical houseplants and can be mastered with a few tricks.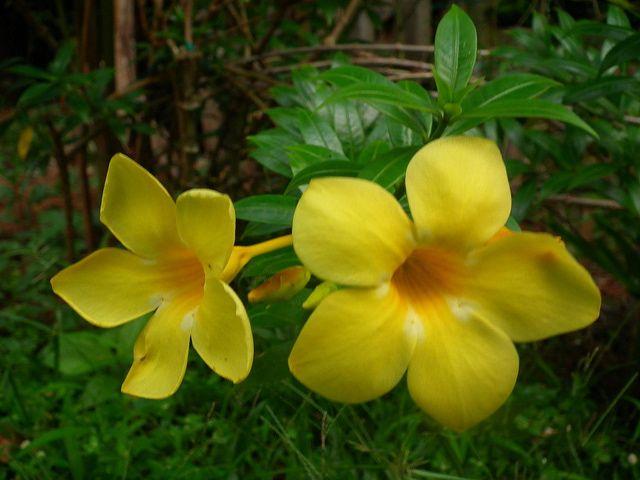
Golden Trumpet Flower
Allamanda is native to northern South America. As such it requires high light, consistently warm temperatures and humidity of at least 50 percent. These conditions are hard to simulate in the average home without grow lights, humidifiers and heaters. Greenhouse conditions are often ideal for Allamanda plant care. Indoors, we tend to have less moisture in the air and sun doesn’t penetrate the interior for as many hours as the plant needs. You can overwinter the vine and bring it out into the bright rays of light in spring and summer. There golden trumpet houseplants can recharge and produce the amazing bright yellow 5-inch blooms characteristic of the Allamanda.
Growing Allamanda Indoors
It can be quite tricky to mimic the native growing conditions of golden trumpet plants as indoor specimens. Indoor Allamanda flowering vine needs structural support for the rambling stems. You can keep it pruned for a more compact plant. Good care of Allamanda golden trumpet starts with the planting medium. Use a potting soil with equal parts peat, compost and sand. Golden trumpet houseplants need four hours or more of direct bright sunlight. The container should be at least a gallon with drainage holes. An unglazed pot is best since it will promote evaporation of excess moisture. Place the pot on a saucer filled with pebbles and water. This will create a humid atmosphere which is required for a healthy Allamanda. You can also use a humidifier. Keep the plant away from drafty doors and windows and several feet away from a heater.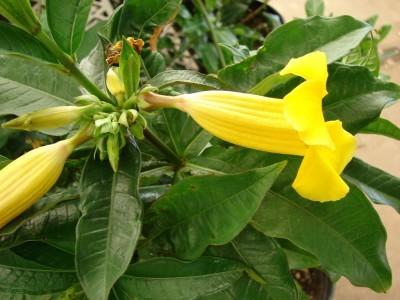
Care of Allamanda Golden Trumpet
Water deeply until the excess moisture runs out of the drainage holes but then wait until the top surface of the soil dries out before you irrigate again. Allamanda doesn’t like wet feet. Fertilize in spring through summer every two to three weeks with a good blooming plant food. Allow the plant to rest in winter. Suspend fertilizing in winter as part of good Allamanda plant care. Restart fertilizing in April and move the plant outside as soon as temperatures are above 60 F. (16 C.). Prune in early spring and cut stems back to pone to two nodes to promote tighter new growth. This plant is prone to spider mites and whiteflies, so watch carefully for these pests. At the first sign put the plant in the shower and hose off as many of the little guys as you can, then follow with daily applications of horticultural soap or a Neem spray.

Golden Trumpet Flower
Allamanda is native to northern South America. As such it requires high light, consistently warm temperatures and humidity of at least 50 percent. These conditions are hard to simulate in the average home without grow lights, humidifiers and heaters. Greenhouse conditions are often ideal for Allamanda plant care. Indoors, we tend to have less moisture in the air and sun doesn’t penetrate the interior for as many hours as the plant needs. You can overwinter the vine and bring it out into the bright rays of light in spring and summer. There golden trumpet houseplants can recharge and produce the amazing bright yellow 5-inch blooms characteristic of the Allamanda.

Growing Allamanda Indoors
It can be quite tricky to mimic the native growing conditions of golden trumpet plants as indoor specimens. Indoor Allamanda flowering vine needs structural support for the rambling stems. You can keep it pruned for a more compact plant. Good care of Allamanda golden trumpet starts with the planting medium. Use a potting soil with equal parts peat, compost and sand. Golden trumpet houseplants need four hours or more of direct bright sunlight. The container should be at least a gallon with drainage holes. An unglazed pot is best since it will promote evaporation of excess moisture. Place the pot on a saucer filled with pebbles and water. This will create a humid atmosphere which is required for a healthy Allamanda. You can also use a humidifier. Keep the plant away from drafty doors and windows and several feet away from a heater.

Care of Allamanda Golden Trumpet
Water deeply until the excess moisture runs out of the drainage holes but then wait until the top surface of the soil dries out before you irrigate again. Allamanda doesn’t like wet feet. Fertilize in spring through summer every two to three weeks with a good blooming plant food. Allow the plant to rest in winter. Suspend fertilizing in winter as part of good Allamanda plant care. Restart fertilizing in April and move the plant outside as soon as temperatures are above 60 F. (16 C.). Prune in early spring and cut stems back to pone to two nodes to promote tighter new growth. This plant is prone to spider mites and whiteflies, so watch carefully for these pests. At the first sign put the plant in the shower and hose off as many of the little guys as you can, then follow with daily applications of horticultural soap or a Neem spray.
0
0
文章
Miss Chen
2017年08月11日

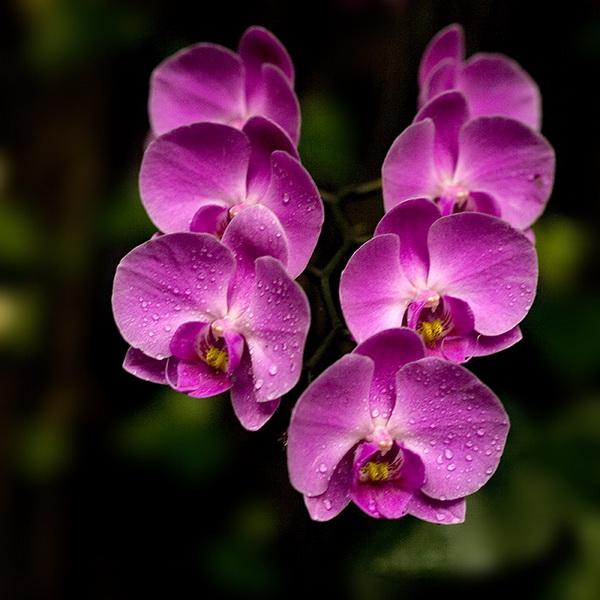
Most orchids these days are propagated by methods that would be difficult or impossible for the home gardener, including mericloning or the raising of seedlings in sterile flasks. Fortunately, many orchids also can be reproduced by easier means, including stem cuttings, back-bulb cuttings, top cuttings and keiki cuttings. To take cuttings, you'll need either a sharp knife or pruning shears. Disinfect these tools between cuts by dipping their blades in a solution of 1 part bleach to 9 parts water.
Stem Cuttings
For stem cuttings, you need a waterproof tray about 3 inches deep. Fill it either with damp sphagnum moss, damp sand or a mix of both. Then clip a cane that's at least 10 inches long, severing it near the orchid's base and just above a node, which is a leaf joint. Cut the cane into pieces that retain at least two nodes each, and coat the raw ends of the pieces with a powdered antifungal such as charcoal, cinnamon or sulfur.
After laying the pieces horizontally on top of the medium in the tray, press them only lightly into it so that their surfaces remain uncovered. Encase the tray in a transparent plastic bag and place it in a warm location where it will receive bright light but no direct sun.
In about three to four months, some of the cuttings may send up new plantlets from the nodes. This method can work for Dendrobium, Phaius and Epidendrum (all hardy in U.S. Department of Agriculture plant hardiness zones 9 through 12), or Ludisia and Thunia (both hardy in USDA zones 11 through 12) orchids, though the success rate may be low for some species.
Back-Bulb Cuttings
Pseudobulbs are the swollen bases of stems on the types of orchids that grow via horizontal rhizomes. Eventually the leaves drop off the oldest "bulbs." Although a bare-back bulb may appear worthless, it generally has dormant eyes peeking up from around its base. To force these eyes into growth, snip the rhizome connecting the back bulb to the rest of the orchid plant, using sterile pruning shears or a knife. Plant the bulb in a pot of fine orchid bark with its eyes just above the surface. If you position the pot in bright, indirect light, watering it as you would the parent plant, the bulb may begin to sprout and put down roots in a few weeks.

This should work for most orchids that make pseudobulbs, such as Cattleya (USDA zones 10 through 12) and Cymbidium (USDA zones 9 through 11) -- except for Odontoglossum (USDA zones 10 through 12), whose eyes lose viability quickly.
Top Cuttings
For orchids that produce lots of aerial roots on their stems, such as Epidendrum (USDA zones 9 or 10 through 12) and Vanda (USDA zone 12), you can simply remove and replant a cane that has grown too tall. When detaching it, find a node that is surrounded by aerial roots, both above and below. Cut beneath the node, so the cutting is already rooted when removed. Pot it in the same type of medium in which it originally grew, with the node and its accompanying roots beneath the surface. The cutting will need a stake for support until its roots take hold to anchor it in place.
Keiki Cuttings
A keiki -- Hawaiian for "baby" -- is a plantlet that may sometimes form on a stem or near the base of an orchid. Allow it to continue growing on the parent plant until it has roots at least 1 inch long and two or three leaves. Water the parent plant on the day before you plan to remove the keiki. Then cut its stem beneath the roots and plant it in a pot of fine orchid bark, keeping its roots near the surface. Keikis may appear on Epidendrum, Dendrobium, Phalaenopsis (USDA zones 11 through 12) or Vanda orchids and should bloom about 1 1/2 to 3 years after their appearance.

Stem Cuttings
For stem cuttings, you need a waterproof tray about 3 inches deep. Fill it either with damp sphagnum moss, damp sand or a mix of both. Then clip a cane that's at least 10 inches long, severing it near the orchid's base and just above a node, which is a leaf joint. Cut the cane into pieces that retain at least two nodes each, and coat the raw ends of the pieces with a powdered antifungal such as charcoal, cinnamon or sulfur.
After laying the pieces horizontally on top of the medium in the tray, press them only lightly into it so that their surfaces remain uncovered. Encase the tray in a transparent plastic bag and place it in a warm location where it will receive bright light but no direct sun.
In about three to four months, some of the cuttings may send up new plantlets from the nodes. This method can work for Dendrobium, Phaius and Epidendrum (all hardy in U.S. Department of Agriculture plant hardiness zones 9 through 12), or Ludisia and Thunia (both hardy in USDA zones 11 through 12) orchids, though the success rate may be low for some species.
Back-Bulb Cuttings
Pseudobulbs are the swollen bases of stems on the types of orchids that grow via horizontal rhizomes. Eventually the leaves drop off the oldest "bulbs." Although a bare-back bulb may appear worthless, it generally has dormant eyes peeking up from around its base. To force these eyes into growth, snip the rhizome connecting the back bulb to the rest of the orchid plant, using sterile pruning shears or a knife. Plant the bulb in a pot of fine orchid bark with its eyes just above the surface. If you position the pot in bright, indirect light, watering it as you would the parent plant, the bulb may begin to sprout and put down roots in a few weeks.

This should work for most orchids that make pseudobulbs, such as Cattleya (USDA zones 10 through 12) and Cymbidium (USDA zones 9 through 11) -- except for Odontoglossum (USDA zones 10 through 12), whose eyes lose viability quickly.
Top Cuttings
For orchids that produce lots of aerial roots on their stems, such as Epidendrum (USDA zones 9 or 10 through 12) and Vanda (USDA zone 12), you can simply remove and replant a cane that has grown too tall. When detaching it, find a node that is surrounded by aerial roots, both above and below. Cut beneath the node, so the cutting is already rooted when removed. Pot it in the same type of medium in which it originally grew, with the node and its accompanying roots beneath the surface. The cutting will need a stake for support until its roots take hold to anchor it in place.
Keiki Cuttings
A keiki -- Hawaiian for "baby" -- is a plantlet that may sometimes form on a stem or near the base of an orchid. Allow it to continue growing on the parent plant until it has roots at least 1 inch long and two or three leaves. Water the parent plant on the day before you plan to remove the keiki. Then cut its stem beneath the roots and plant it in a pot of fine orchid bark, keeping its roots near the surface. Keikis may appear on Epidendrum, Dendrobium, Phalaenopsis (USDA zones 11 through 12) or Vanda orchids and should bloom about 1 1/2 to 3 years after their appearance.
2
1
文章
Dummer. ゛☀
2017年08月10日

While most houseplants require a bit of effort in providing appropriate growing conditions (light, temperature, humidity, etc.), growing Chinese evergreens can make even the novice indoor gardener look like an expert. This tropical foliage plant is one of the most durable houseplants you can grow, tolerating poor light, dry air and drought.
Tips for Growing Chinese Evergreens Indoors
Growing Chinese evergreens (Aglaonema) is easy. This gem of a plant is one of the most popular houseplants grown in the home due to its ease of care. You can find Chinese evergreen plants in many varieties, including variegated forms. Although they are tolerant of many growing conditions, following certain recommendations will yield greater results. This includes placing them in well-draining soil, preferably an equal mix of potting soil, perlite and sand. Chinese evergreen plants thrive in medium to low light conditions, or indirect sunlight. Wherever you place it in the home, you should make sure that the plant receives warm temps and somewhat humid conditions. However, this flexible plant will tolerate less than ideal conditions if necessary. These plants prefer temperatures no lower than 60 F. (16 C.) with average indoor temps ranging between 70-72 F. (21-22 C.) being most favorable, but they can tolerate temps around 50-55 F.(10-13 C.). Keep Chinese evergreen plants away from drafts, which can cause browning of the foliage.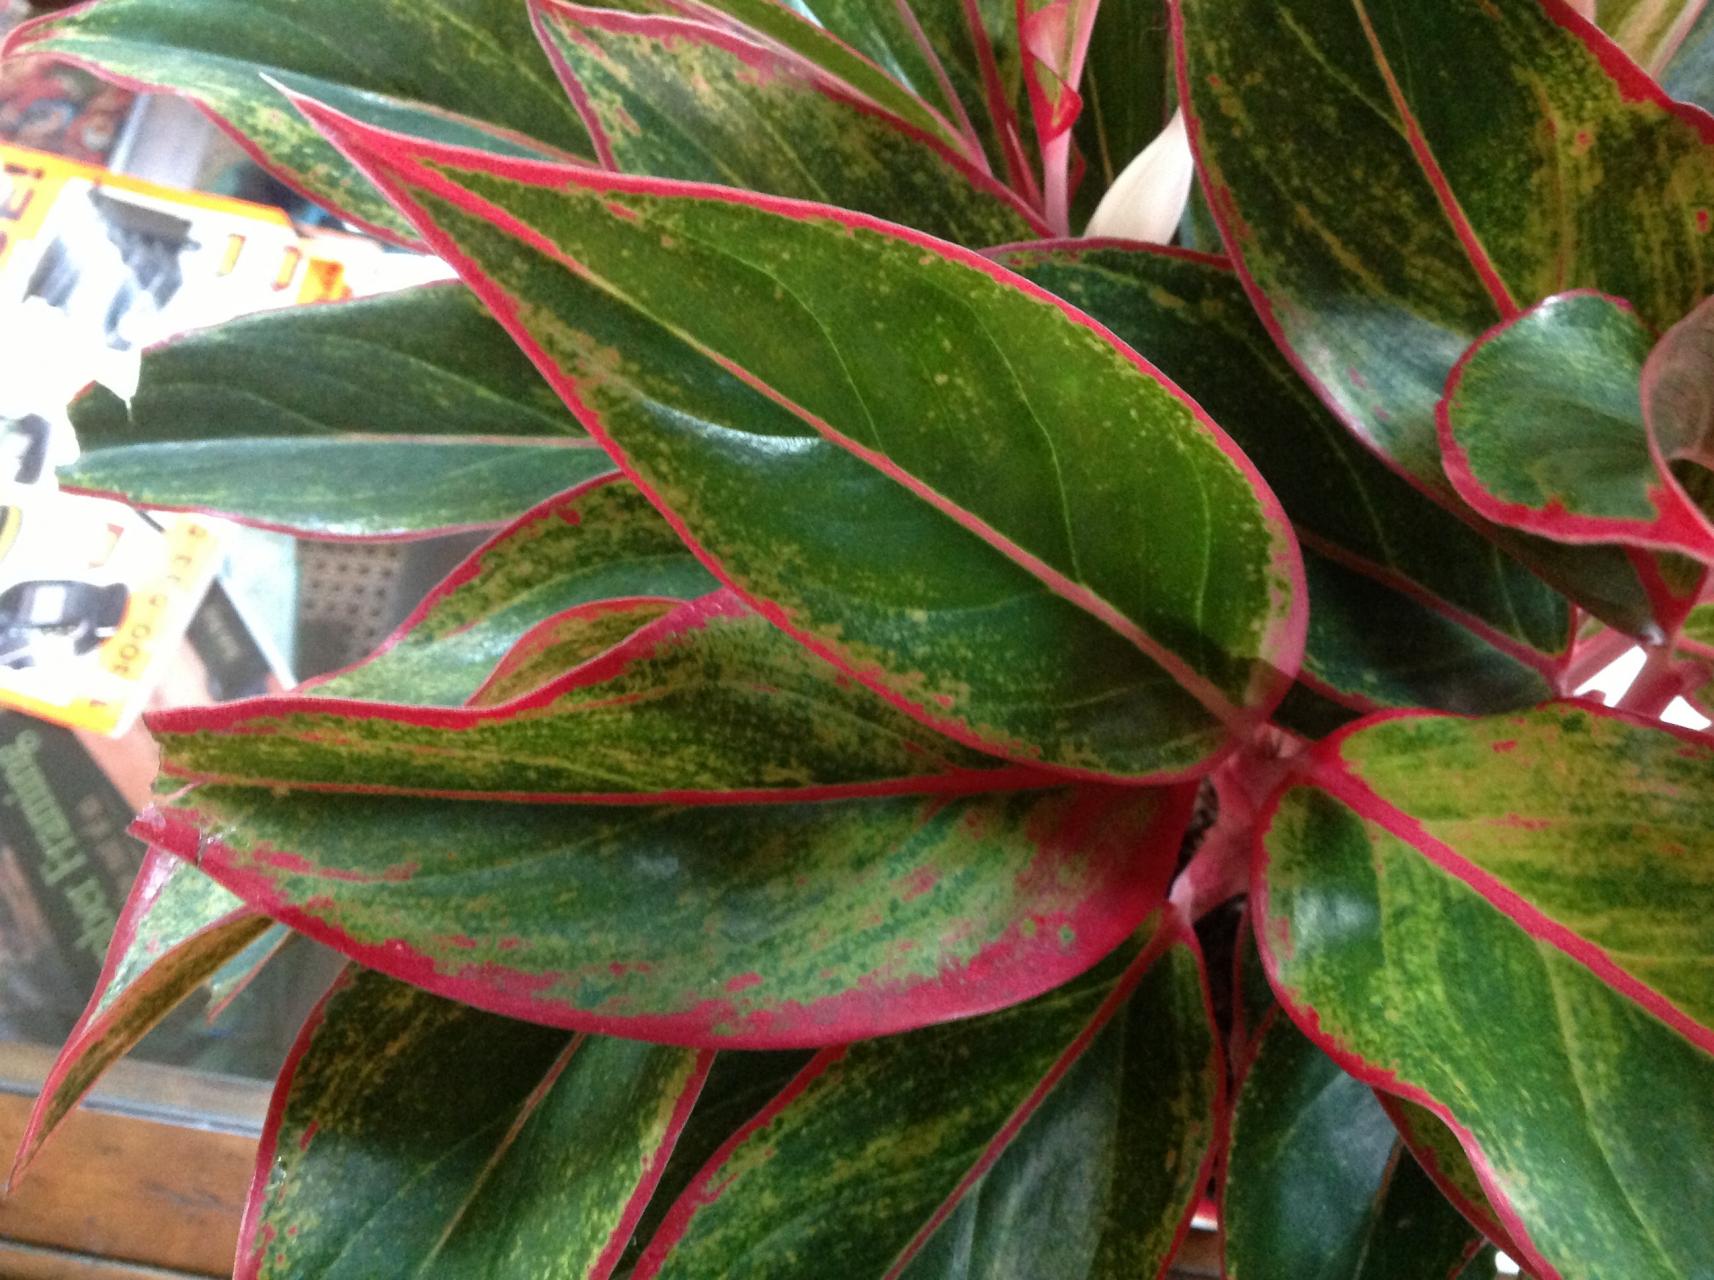
Chinese Evergreen Care
Caring for Chinese evergreen houseplants requires little effort when given the proper growing conditions. They enjoy moderate watering—not too much, not too little. Allow the plant to dry out some between watering. Overwatering will lead to root rot. As part of your Chinese evergreen care, you should fertilize older Chinese evergreens once or twice yearly using a water-soluble houseplant fertilizer. If your Chinese evergreen plant becomes too large or leggy, give the plant a quick trim. It’s also possible to save cuttings during the process for propagating new plants. Cuttings root easily in water. Older plants will sometimes produce flowers reminiscent of calla or peace lilies. This occurs in spring to summer. Most people choose to cut the blooms prior to seed productions, though you may choose to keep them and try your hand at seed growing them. Keep in mind, however, that this will take much longer.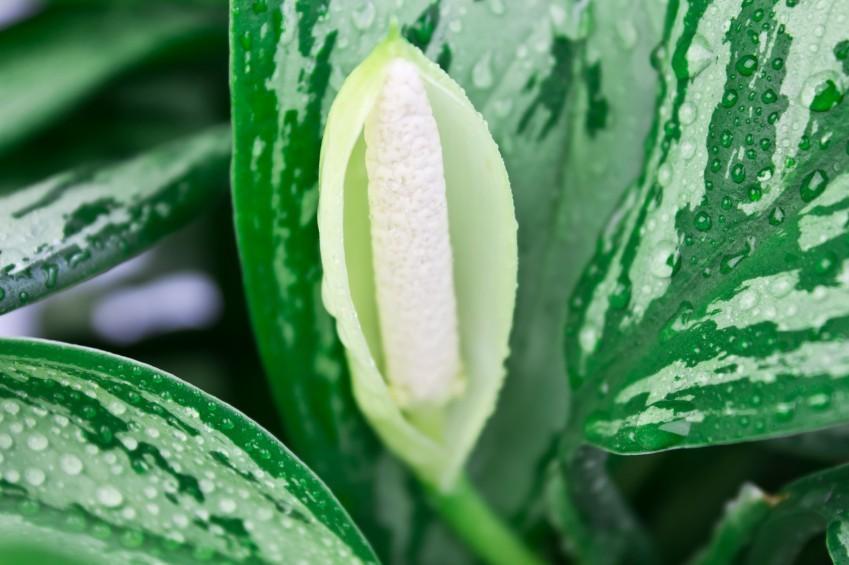
To limit the accumulation of dust build-up, clean the leaves occasionally by wiping them down with a soft, damp rag or simply place them in the shower and allow them to air dry. Chinese evergreen houseplants can be affected by spider mites, scale, mealybugs, and aphids. Routinely checking the leaves for signs of pests will help limit problems later. While it may seem overwhelming at first, especially if you are new at growing Chinese evergreens indoors, it’s actually easier than you may think.

Tips for Growing Chinese Evergreens Indoors
Growing Chinese evergreens (Aglaonema) is easy. This gem of a plant is one of the most popular houseplants grown in the home due to its ease of care. You can find Chinese evergreen plants in many varieties, including variegated forms. Although they are tolerant of many growing conditions, following certain recommendations will yield greater results. This includes placing them in well-draining soil, preferably an equal mix of potting soil, perlite and sand. Chinese evergreen plants thrive in medium to low light conditions, or indirect sunlight. Wherever you place it in the home, you should make sure that the plant receives warm temps and somewhat humid conditions. However, this flexible plant will tolerate less than ideal conditions if necessary. These plants prefer temperatures no lower than 60 F. (16 C.) with average indoor temps ranging between 70-72 F. (21-22 C.) being most favorable, but they can tolerate temps around 50-55 F.(10-13 C.). Keep Chinese evergreen plants away from drafts, which can cause browning of the foliage.

Chinese Evergreen Care
Caring for Chinese evergreen houseplants requires little effort when given the proper growing conditions. They enjoy moderate watering—not too much, not too little. Allow the plant to dry out some between watering. Overwatering will lead to root rot. As part of your Chinese evergreen care, you should fertilize older Chinese evergreens once or twice yearly using a water-soluble houseplant fertilizer. If your Chinese evergreen plant becomes too large or leggy, give the plant a quick trim. It’s also possible to save cuttings during the process for propagating new plants. Cuttings root easily in water. Older plants will sometimes produce flowers reminiscent of calla or peace lilies. This occurs in spring to summer. Most people choose to cut the blooms prior to seed productions, though you may choose to keep them and try your hand at seed growing them. Keep in mind, however, that this will take much longer.

To limit the accumulation of dust build-up, clean the leaves occasionally by wiping them down with a soft, damp rag or simply place them in the shower and allow them to air dry. Chinese evergreen houseplants can be affected by spider mites, scale, mealybugs, and aphids. Routinely checking the leaves for signs of pests will help limit problems later. While it may seem overwhelming at first, especially if you are new at growing Chinese evergreens indoors, it’s actually easier than you may think.
0
0
文章
Miss Chen
2017年08月10日

Any rose gardener knows that proper pruning is vital to the health of the bush and propagation of future blooms. They also know that disposal of the cuttings can be cumbersome and painful. The thorny branches are hard to handle and they don't degrade well in compost heaps. A good alternative is to burn your prunings.

Pruning Your Rose Bush
Pruning is vital to the proper growth of your rose bush. Wearing gloves and long sleeves, prune your plant, starting at its base. Use clean, sharp pruners to cut dead and diseased branches, shape the plant, and to foster new growth. Make cuts at 45 degree angles, above new buds.
When to Prune
Although your pruning season depends on the rose species and the USDA hardiness zone in which you live, the fall is generally considered a good time to cut back growth and ready the plant for winter. Long canes left exposed to the elements can become damaged under the weight of snow and ice and cause the roots to loosen from the safety of their soil. Plants that are at least two to three years old should also be pruned in the spring. If your plant has successfully grown to three or four feet, prune in the spring to hasten new growth, healthy blossoming and hardy root development.
Gather Cuttings
Collect all the cuttings from your bushes and leave them outdoors, exposed to sun. If you've got a patch of newly budding grass, the cuttings make a great deterrent for birds and pests. Otherwise, find a safe, sunlit spot where people and animals won't bump into your thorny pile. To fully dry your cuttings, expect to wait six months in most U.S. growing regions.
Use as Kindling
Once the rose cuttings are sufficiently dry, wear gloves and protective clothing and use sharp clippers to trim your prunings to a size that will fit properly to your fire pit. While there is no need to remove thorns, use care when handling the branches. Burn the cuttings outdoors as your community allows, or bring them indoors and use as kindling for woodstoves and fireplaces. Place along with paper below logs as an effective and economical fire starter.
0
0
文章
Miss Chen
2017年08月08日

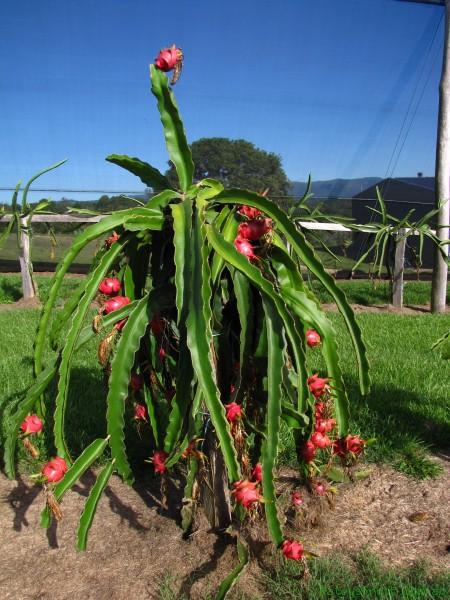
A cactus that has been growing upright but is now leaning like the Tower of Pisa should be a concern for the gardener. The plant may be perfectly healthy, or it may be sick. Careful observations can help determine why the plant is leaning. If a problem is detected early, solutions are available that will save the cactus.
Sunlight
Even if your cactus is planted in full sun, it may lean. Plants naturally grow toward the sunlight. The barrel cactus grows southward toward the sun so much that it practically lies over on one side. If the cactus is otherwise healthy, this is not a danger. However, if a cactus planted in partial shade is leaning, it may need more sunlight. A cactus in this condition will look sickly and have weak, flimsy stems that are yellow-green. The plant should gradually be exposed to stronger sunlight to prevent sunburn.
Improper Planting
If the cactus is leaning from the ground, it may be loosely planted in the soil. Improper watering may be the reason. After watering a cactus, the soil must be allowed to completely dry out before watering again. Watering too frequently prevents the soil from hardening around the base of the cactus and causes the soil to loosen. Provided there is no root rot, either transplanting the cactus in dry soil or packing more dirt around it is a solution. Also, adding a layer of small rocks or gravel on the surface can stabilize the cactus.
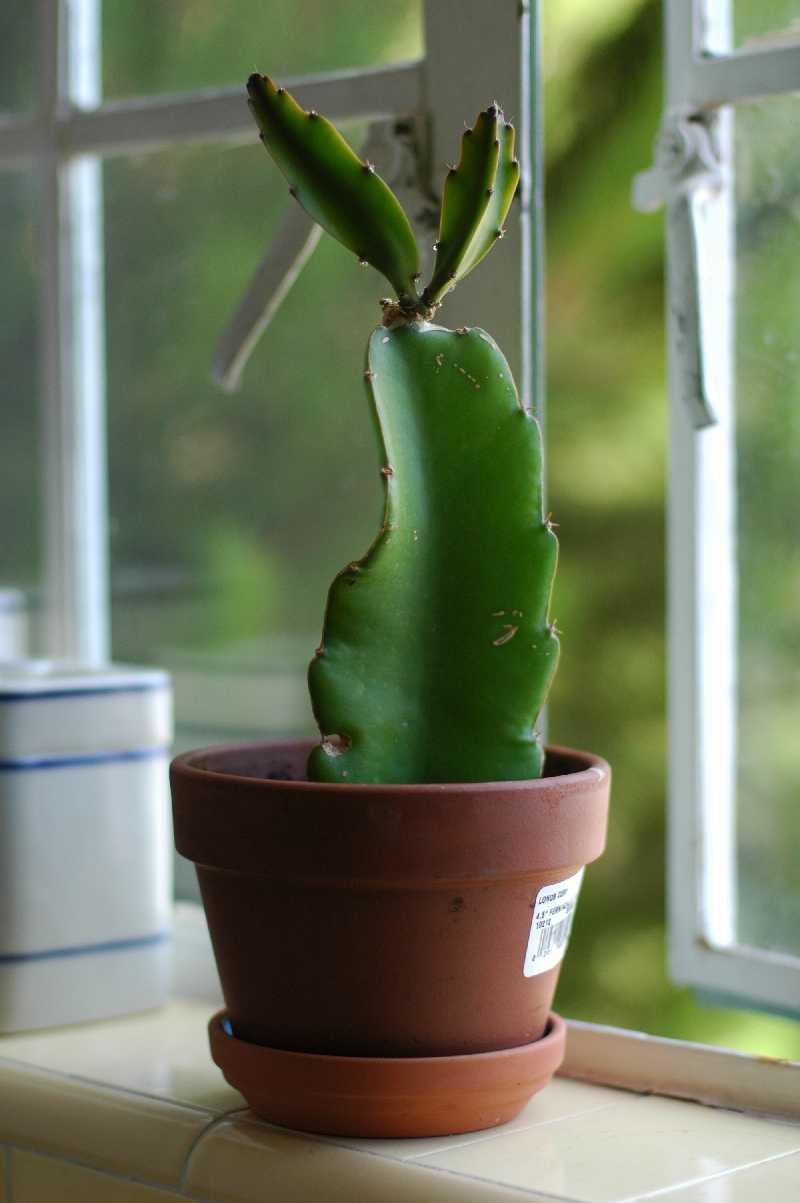
Rot
Rot is caused from fungi and bacteria growing on the plant. The most common reason for rot is watering the cactus too often. The infected spot will have a watery, slimy, black appearance. Rot begins at the base of the cactus and works its way to the top. Rotting plants start to lean, then collapse and die. If rot is detected early, dig up the cactus and replant it in dry soil. Otherwise, remove the cactus from the soil, and cut the healthy top away from the diseased part. Allow the top to dry, and dust the cut surface with a fungicide before replanting it in sandy soil.
Insects
Insects eating the stem of the cactus can weaken the plant and cause it to lean. A plant infested with mealy bugs will stop growing and take on a sickly, deformed appearance. Mealy bugs should be removed with tweezers or a cotton swab dipped in alcohol. Ants nesting at the base of the cactus eat away at the stem causing it to lean and eventually fall over. Wash away the ants with a strong, lukewarm stream of water. A cactus weakened by insects may develop fungi and rot and will die if not treated.
0
0
文章
Dummer. ゛☀
2017年08月08日

By Mary H. Dyer, Master Naturalist and Master Gardener What is clubroot? This difficult disease is caused by a soilborne fungus that affects cruciferous vegetables like: Broccoli Cauliflower Cabbage Turnips Mustard Clubroot is particularly nasty because it can live in the soil for as long as seven to 10 years, making the area unfit for growing susceptible plants. Symptoms of Clubroot The primary symptoms of clubroot include enlarged, deformed, club-shaped roots and stunted growth. Eventually, the swollen roots turn black and develop a rotten aroma. In some cases, the disease may cause wilted, yellowing or purple foliage, although the disease isn’t always apparent above the ground.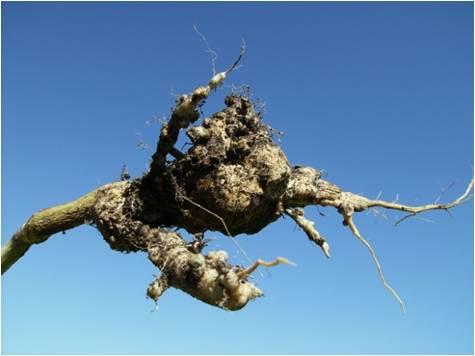
Clubroot Control Clubroot is extremely difficult to manage and the best way to control its spread is to rotate crops, which means not planting cruciferous plants in the same area more than once every three or four years. Clubroot thrives in acidic soil, so raising the pH to at least 7.2 may be one of the most effective means of attaining clubroot control. Ohio State University Extension advises that calcitic lime is the best way to raise the pH, unless your soil is low in magnesium. In this case, dolomitic lime may be more effective. If possible, lime the soil at least six weeks before planting time. Be careful not to raise the pH too high, as highly alkaline soil may affect the growth of non-cruciferous plants. To prevent transmission of spores to uninfected areas, be sure to clean and disinfect garden tools and machinery after working in infected soil. Never invite trouble by moving infected plants or contaminated soil from one planting area to another (including the mud on the soles of your shoes).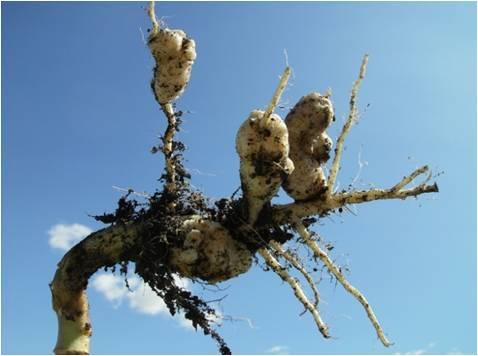
Take necessary steps to prevent soil run-off during rainfall. According to Ohio State University, certain fungicides may help to reduce development of clubroot disease. Your local Cooperative Extension Office can offer advice for your specific situation. Otherwise, there are no chemicals approved for clubroot treatment. Care for Plants with Clubroot If your garden soil is affected with clubroot, the only recourse is to pull and discard plants as soon as possible, as aggressive action is the only way to discourage spread of the disease.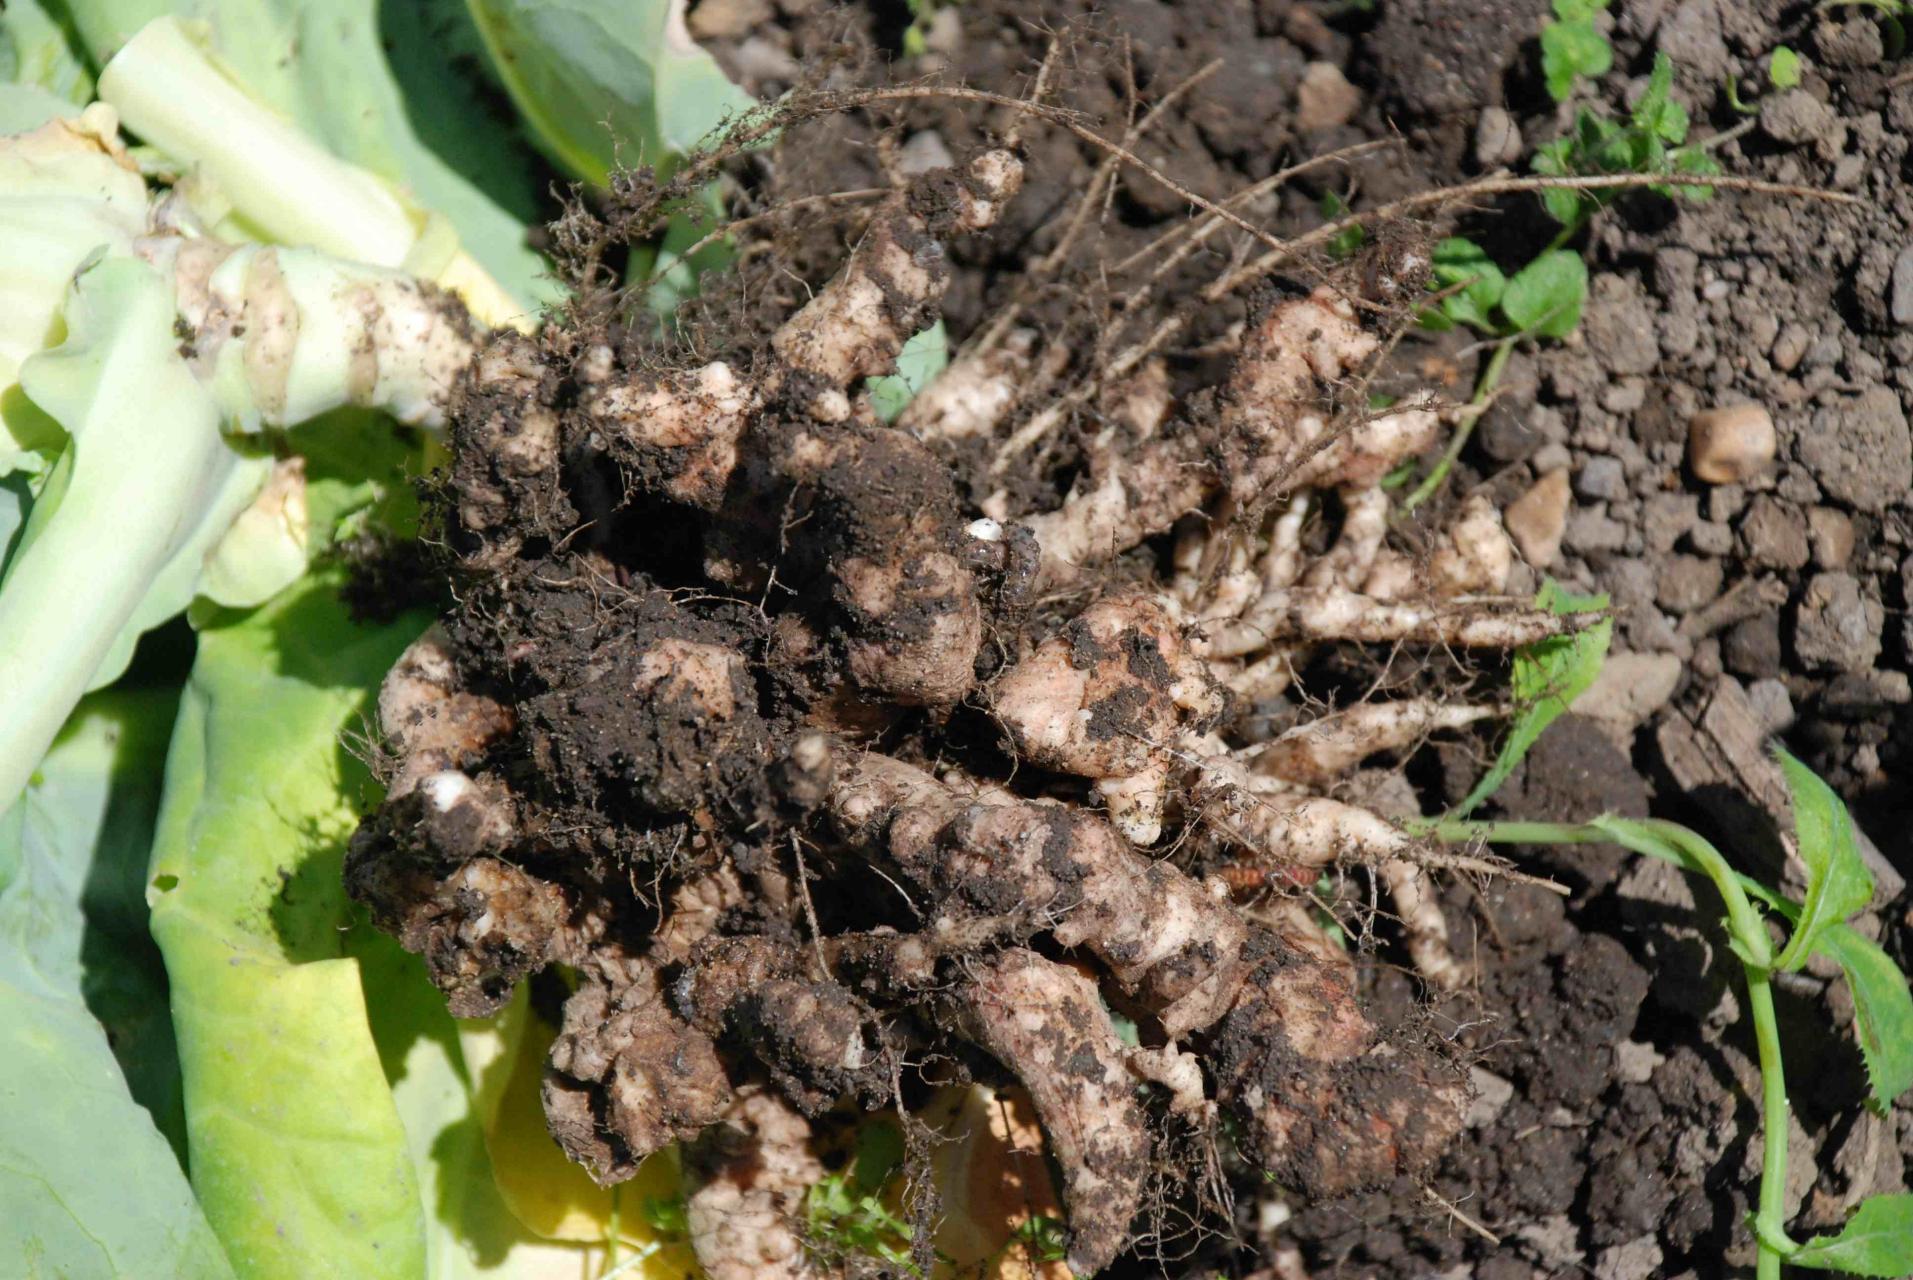
Dig around the plant and remove the entire root system to prevent the roots from breaking up and spreading the disease. Discard the plants properly and never put them on your compost pile. Next year, consider starting your own cruciferous plants from seed, using a sterile commercial potting soil. This is the best way to ensure you aren’t introducing the disease from an outside source. If you purchase seedlings, be sure to buy only plants that are guaranteed to be clubroot-free. Once again, be sure to rotate crops regularly.

Clubroot Control Clubroot is extremely difficult to manage and the best way to control its spread is to rotate crops, which means not planting cruciferous plants in the same area more than once every three or four years. Clubroot thrives in acidic soil, so raising the pH to at least 7.2 may be one of the most effective means of attaining clubroot control. Ohio State University Extension advises that calcitic lime is the best way to raise the pH, unless your soil is low in magnesium. In this case, dolomitic lime may be more effective. If possible, lime the soil at least six weeks before planting time. Be careful not to raise the pH too high, as highly alkaline soil may affect the growth of non-cruciferous plants. To prevent transmission of spores to uninfected areas, be sure to clean and disinfect garden tools and machinery after working in infected soil. Never invite trouble by moving infected plants or contaminated soil from one planting area to another (including the mud on the soles of your shoes).

Take necessary steps to prevent soil run-off during rainfall. According to Ohio State University, certain fungicides may help to reduce development of clubroot disease. Your local Cooperative Extension Office can offer advice for your specific situation. Otherwise, there are no chemicals approved for clubroot treatment. Care for Plants with Clubroot If your garden soil is affected with clubroot, the only recourse is to pull and discard plants as soon as possible, as aggressive action is the only way to discourage spread of the disease.

Dig around the plant and remove the entire root system to prevent the roots from breaking up and spreading the disease. Discard the plants properly and never put them on your compost pile. Next year, consider starting your own cruciferous plants from seed, using a sterile commercial potting soil. This is the best way to ensure you aren’t introducing the disease from an outside source. If you purchase seedlings, be sure to buy only plants that are guaranteed to be clubroot-free. Once again, be sure to rotate crops regularly.
0
0
文章
Dummer. ゛☀
2017年08月06日

BOTANICAL NAME: Iris germanica
PLANT TYPE: Flower
SUN EXPOSURE: Full SunPart Sun
SOIL TYPE: AnyLoamySandy
FLOWER COLOR: BlueMulticolorOrangePinkPurpleWhiteYellow
BLOOM TIME: Summer
Every gardener wants this perennial. Despite its divine origins, it is hardy, reliable, and easy to grow. Irises also attract butterflies and hummingbirds and make lovely cut flowers.
There are some 300 species in the genus Iris. The most familiar irises are the tall (at least 28 inches) bearded irises (Iris germanica).
The distinctive flowers have three large outer petals called “falls” and three inner upright petals called “standards.” The falls may have beards or crests. Bearded iris are so-called because they have soft hairs along the center of the falls. In crested iris, the hairs form a comb or ridge.
Most irises flower in early summer. Some, mostly bearded hybrids, are remontant, flowering again later in the summer.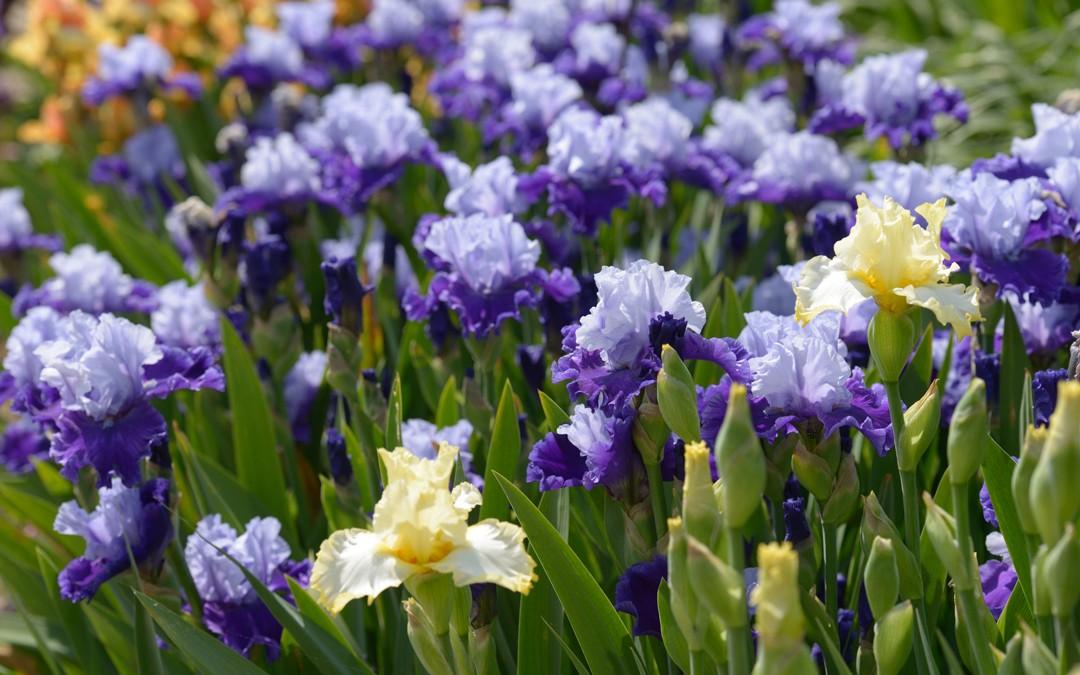
PLANTING
Irises need at least half a day of sun and well-drained soil. Without enough sun, they won’t bloom.
They prefer fertile, neutral to slightly acidic soil. If your soil is very acidic, sweeten it with a bit of lime, and forbear summer watering, which can lead to rot. Learn more about preparing soil for planting.
Bearded irises must not be shaded by other plants; many do best in a special bed on their own.
Soil drainage is very important. Loosen the soil with a tiller or garden fork to a depth of 12 to 15 inches, then mix in a 2- to 4-inch layer of compost.
Plant iris in mid- to late summer.
Bearded irises have rhizomes (fleshy roots) that should be partially exposed, or thinly covered with soil in hot climates.
Plant rhizomes singly or in groups of three with the fans outermost, 1 to 2 feet apart, depending on the size.
Dig a shallow hole 10 inches in diameter and 4 inches deep. Make a ridge of soil down the middle and place the rhizome on the ridge, spreading roots down both sides. Fill the hole with soil and firm it gently.
Water thoroughly.
When planting, top-dress with a low-nitrogen fertilizer, and again in early spring.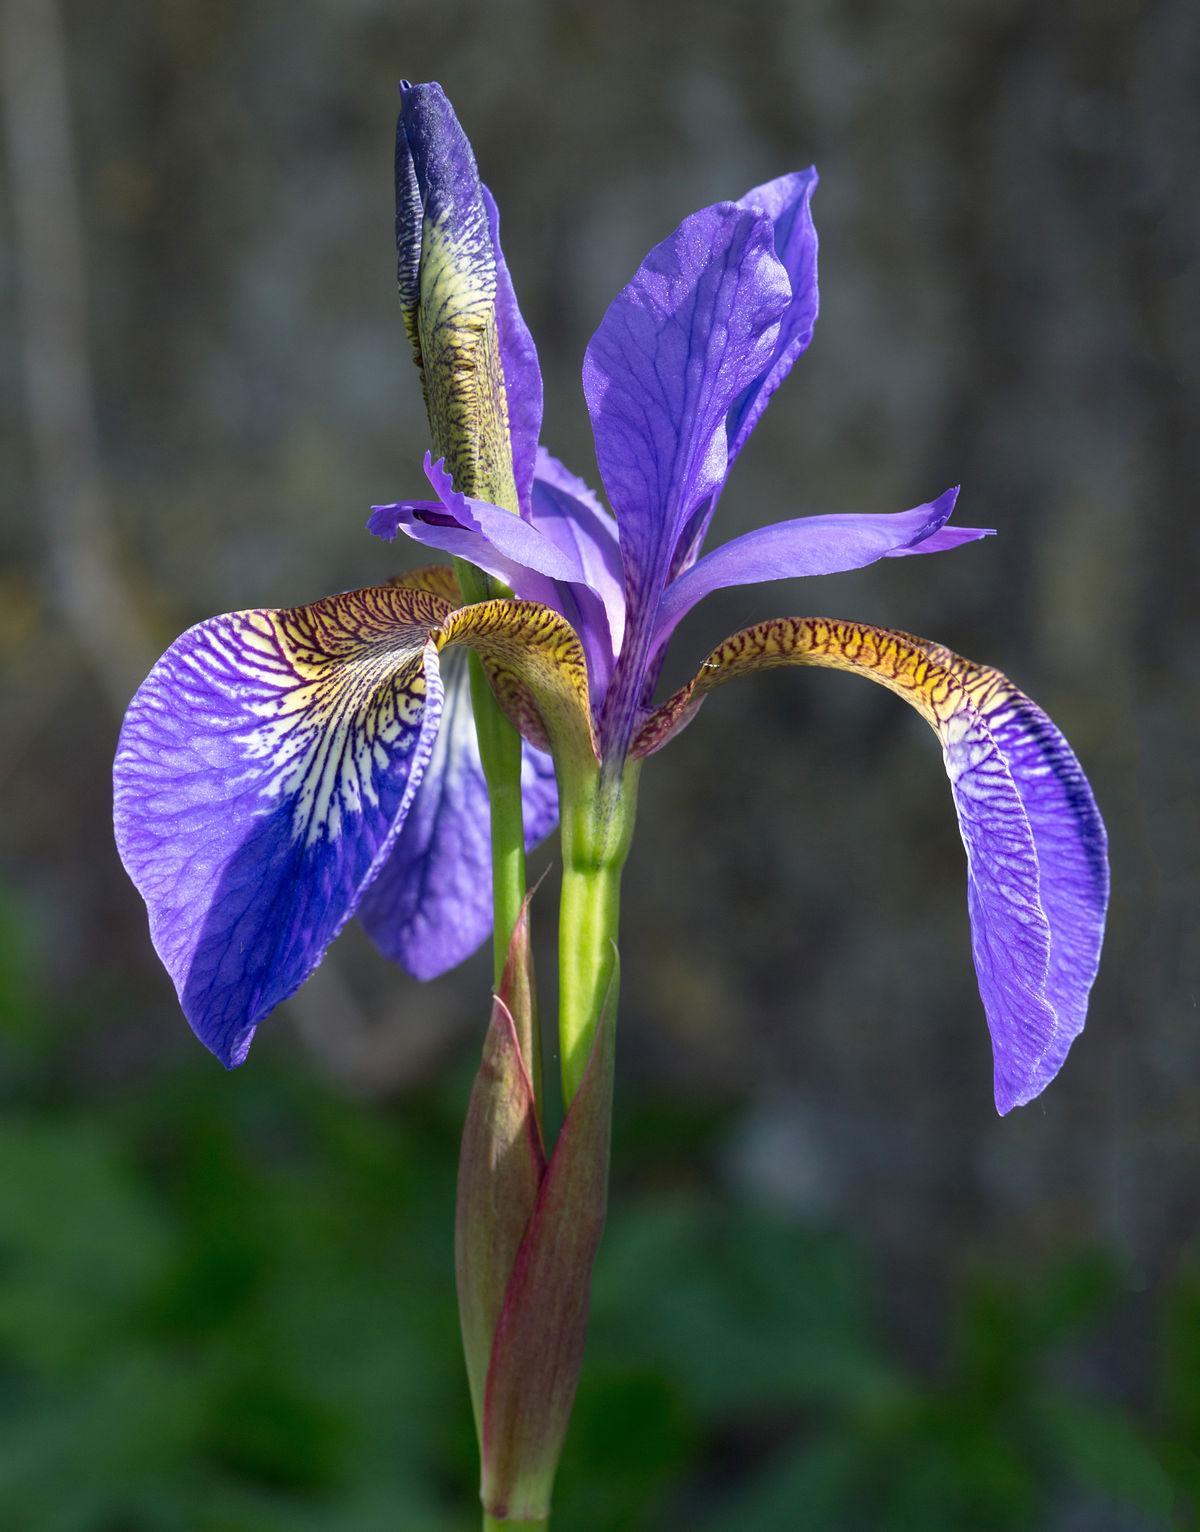
CARE
Avoid applying high-nitrogen fertilizers to the surface or carelessly mulching with organic matter, which may encourage rhizome rot.
Keep rhizomes exposed. Unlike bulbs, which thrive deep underground, iris rhizomes need a bit of sun and air to dry them out. If they’re covered with soil or crowded by other plants, they’ll rot. Irises may benefit from shallow mulching in the spring.
Don’t trim iris leaves. Leaves carry on photosynthesis for next year’s growth. Cut off brown tips—and cut the flowering stalk down to the rhizome to discourage rot.
If iris foliage is hit with heavy frost, remove and destroy it to eliminate borer eggs. See your local frost dates.
After 2 to 5 years, when clumps become congested or lose vitality and stop blooming, divide and replant sound rhizomes in fresh soil. The best time to replant irises is soon after bloom. Transplant them to places where they will have “wet feet, but dry knees.”
PESTS/DISEASES
Irises are deer-resistant and drought-tolerant. However, they are susceptible to borers, so check the rhizomes (fleshy roots) yearly for holes, discarding any infested ones.
Verbena bud moth, whiteflies, iris weevil, thrips, slugs and snails, aphids, and nematodes may also be troublesome.
PLANT TYPE: Flower
SUN EXPOSURE: Full SunPart Sun
SOIL TYPE: AnyLoamySandy
FLOWER COLOR: BlueMulticolorOrangePinkPurpleWhiteYellow
BLOOM TIME: Summer
Every gardener wants this perennial. Despite its divine origins, it is hardy, reliable, and easy to grow. Irises also attract butterflies and hummingbirds and make lovely cut flowers.
There are some 300 species in the genus Iris. The most familiar irises are the tall (at least 28 inches) bearded irises (Iris germanica).
The distinctive flowers have three large outer petals called “falls” and three inner upright petals called “standards.” The falls may have beards or crests. Bearded iris are so-called because they have soft hairs along the center of the falls. In crested iris, the hairs form a comb or ridge.
Most irises flower in early summer. Some, mostly bearded hybrids, are remontant, flowering again later in the summer.

PLANTING
Irises need at least half a day of sun and well-drained soil. Without enough sun, they won’t bloom.
They prefer fertile, neutral to slightly acidic soil. If your soil is very acidic, sweeten it with a bit of lime, and forbear summer watering, which can lead to rot. Learn more about preparing soil for planting.
Bearded irises must not be shaded by other plants; many do best in a special bed on their own.
Soil drainage is very important. Loosen the soil with a tiller or garden fork to a depth of 12 to 15 inches, then mix in a 2- to 4-inch layer of compost.
Plant iris in mid- to late summer.
Bearded irises have rhizomes (fleshy roots) that should be partially exposed, or thinly covered with soil in hot climates.
Plant rhizomes singly or in groups of three with the fans outermost, 1 to 2 feet apart, depending on the size.
Dig a shallow hole 10 inches in diameter and 4 inches deep. Make a ridge of soil down the middle and place the rhizome on the ridge, spreading roots down both sides. Fill the hole with soil and firm it gently.
Water thoroughly.
When planting, top-dress with a low-nitrogen fertilizer, and again in early spring.

CARE
Avoid applying high-nitrogen fertilizers to the surface or carelessly mulching with organic matter, which may encourage rhizome rot.
Keep rhizomes exposed. Unlike bulbs, which thrive deep underground, iris rhizomes need a bit of sun and air to dry them out. If they’re covered with soil or crowded by other plants, they’ll rot. Irises may benefit from shallow mulching in the spring.
Don’t trim iris leaves. Leaves carry on photosynthesis for next year’s growth. Cut off brown tips—and cut the flowering stalk down to the rhizome to discourage rot.
If iris foliage is hit with heavy frost, remove and destroy it to eliminate borer eggs. See your local frost dates.
After 2 to 5 years, when clumps become congested or lose vitality and stop blooming, divide and replant sound rhizomes in fresh soil. The best time to replant irises is soon after bloom. Transplant them to places where they will have “wet feet, but dry knees.”

PESTS/DISEASES
Irises are deer-resistant and drought-tolerant. However, they are susceptible to borers, so check the rhizomes (fleshy roots) yearly for holes, discarding any infested ones.
Verbena bud moth, whiteflies, iris weevil, thrips, slugs and snails, aphids, and nematodes may also be troublesome.
0
0


