文章
Miss Chen
2021年10月03日

Have you ever heard of the flowering penstemon? If not, don’t tell members of the American Penstemon Society. Yes, there is an organization dedicated to cultivating, propagating, and identifying species of this hardy native perennial, commonly known as beardtongue. If you still aren't sure about the beardtongue flower, perhaps the two men charged with felony theft in an attempt to steal 600 pounds of Palmer’s penstemon seedpods from Utah’s Zion National Park could tell you more about the value of this little plant. These men may regret exchanging their freedom for several bags of seed worth $25,000, but you won’t need to go to such extremes to grow the beardtongue flower in your landscape.
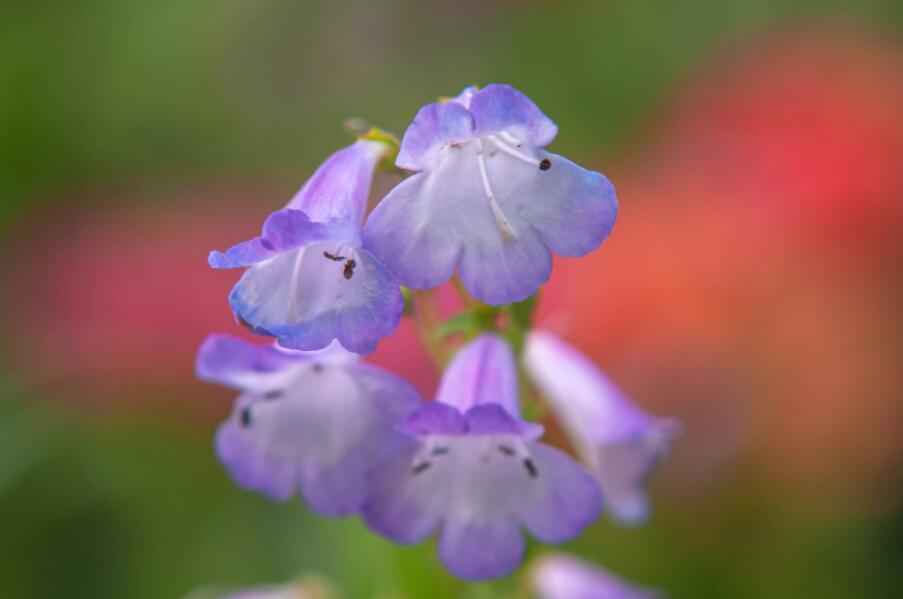
The plantain family (Plantaginaceae) gifts us with some wonderful ornamental flowering plants, including snapdragons, foxglove, and the valuable Penstemon genus, which contains more than 250 beardtongue species ready to grow in your garden. Penstemon plants are herbaceous perennials that feature lance-shaped foliage and spikes of tubular flowers. Flower colors include pink, red, white, purple, and (rarely) yellow. The nickname of bearded tongue refers to the pollen-free stamen that protrudes from the flower, resembling a bearded iris in this aspect. This perennial is easy to grow from seeds planted in spring to early summer. It's somewhat slow to start and needs 10 to 21 days to germinate.
Botanical Name Penstemon
Common Name Beardtongue
Plant Type Herbaceous perennial
Mature Size 6 inches to 8 feet tall and 8 to 20 inches wide
Sun Exposure Full sun
Soil Type Well-drained
Soil pH 5.8 to 6.2
Bloom Time Spring, early summer
Flower Color Purple, blue, orange, red, yellow, pink, white
Hardiness Zones 3 to 8
Native Area North America
How to Grow Beardtongue
Beardtongue plants typically bloom in early summer, filling that gap between the end of spring bulbs and the maturing of summer flowers like coneflowers, yarrow, and coreopsis. Most penstemons are 1 to 3 feet tall, but Palmer’s penstemon can grow up to 6 feet, giving you options for the middle and back of the border. Keep the penstemon flowerbed weeded regularly. A 3-inch layer of organic mulch can help to control weeds, and rock mulch is also a suitable choice. You can cut the spent flower stems back after blooming to help plants look tidy. Penstemons don’t compete well with other plants, so give them plenty of space in the garden.
Light
Plant your beardtongue in an area that receives full sun. Adequate sun exposure helps the tall stalks stay upright and not droopy.
Soil
The soil for beardtongue must drain very well. These plants are prairie natives and prefer rocky or sandy lean soil types over rich garden loam. It’s okay to amend the soil with compost to achieve proper tilth, but avoid manure applications.
Water
Penstemons tolerate drought, but 1 inch of water per week in the summer will keep plants vigorous and promote better blooming.
Temperature and Humidity
Gardeners in USDA growing zones 3 to 9 have the option to try penstemons, although some varieties may only be hardy to zones 4 or 5. It can thrive in a range of humidity conditions.
Fertilizer
Feed beardtongue plants once a year with an organic fertilizer, applied in the fall. Feeding these flowers with conventional bloom-boosting formula can promote too much growth and can shorten the life of the plants.
Varieties of Penstemon
'Dark Towers' is similar to Husker Red, but with pale pink flowers and darker foliage.
'Elfin Pink' is a good rock garden plant, topping out just shy of 12 inches.
'Husker Red' is perhaps the most well-known variety, due to being named perennial plant of the year in 1996; if features reddish-purple foliage and white flowers.
'Jingle Bells' has reddish-orange flowers that are beacons to hummingbirds.
'Piña Colada', a series of cultivars, features blue, rose, or white flowers on compact plants.
'Red Riding Hood' has red flowers and an upright growth habit.
Growing From Seeds
Penstemons are easy to start from seed, which is just as well, as many of the species are short-lived perennials. Seeds may germinate better after a period of aging, mimicking their conditions in the wild, so you can store seed for several years before planting. If you sow the seeds in the garden, do so in autumn, to allow a natural stratification period. Alternatively, you can stratify the seeds in the refrigerator for three months if you plan to start them indoors. If you purchase penstemon seeds, be sure to check the growing zone, as tender varieties like the ‘Tubular Bells’ series are often sold alongside the hardy perennial types.
Common Pests and Diseases
Penstemons don't suffer from too many insect problems, but slugs and snails may snack on leaves, especially in damp or shady areas.1 Sprinkle diatomaceous earth around plants to deter gnawing gastropods, and set out beer traps to catch any stragglers.

Penstemon plants are usually disease-free when given the proper culture of full sun and good drainage. Gardeners with heavy clay may lose plants to root rot, especially in areas with heavy snow that experience a long spring thaw. In Southern gardens, plants that don't have adequate soil drainage or are planted too closely together may succumb to powdery mildew2
or Southern blight, a fungal disease also known as white mold. Fungicide sprays treat symptoms but not the cause, so lighten your heavy soils with compost, or plant penstemons in raised beds to add air circulation to plant roots.
Landscape Uses for Beardtongue
Penstemon plants look best in groups of at least three to five plants. Smaller or alpine varieties work well in rock gardens, while tall penstemon types can provide a colorful backdrop along the back of the sunny mixed perennial border.
Penstemon flowers are a valuable source of nectar for bees, butterflies, and hummingbirds in a wildflower garden. They also make good cut flowers, although most people don’t think of them as bouquet candidates. The good news for those who prefer not to cut is that browsing deer avoid penstemon plants.
The plantain family (Plantaginaceae) gifts us with some wonderful ornamental flowering plants, including snapdragons, foxglove, and the valuable Penstemon genus, which contains more than 250 beardtongue species ready to grow in your garden. Penstemon plants are herbaceous perennials that feature lance-shaped foliage and spikes of tubular flowers. Flower colors include pink, red, white, purple, and (rarely) yellow. The nickname of bearded tongue refers to the pollen-free stamen that protrudes from the flower, resembling a bearded iris in this aspect. This perennial is easy to grow from seeds planted in spring to early summer. It's somewhat slow to start and needs 10 to 21 days to germinate.

Botanical Name Penstemon
Common Name Beardtongue
Plant Type Herbaceous perennial
Mature Size 6 inches to 8 feet tall and 8 to 20 inches wide
Sun Exposure Full sun
Soil Type Well-drained
Soil pH 5.8 to 6.2
Bloom Time Spring, early summer
Flower Color Purple, blue, orange, red, yellow, pink, white
Hardiness Zones 3 to 8
Native Area North America
How to Grow Beardtongue
Beardtongue plants typically bloom in early summer, filling that gap between the end of spring bulbs and the maturing of summer flowers like coneflowers, yarrow, and coreopsis. Most penstemons are 1 to 3 feet tall, but Palmer’s penstemon can grow up to 6 feet, giving you options for the middle and back of the border. Keep the penstemon flowerbed weeded regularly. A 3-inch layer of organic mulch can help to control weeds, and rock mulch is also a suitable choice. You can cut the spent flower stems back after blooming to help plants look tidy. Penstemons don’t compete well with other plants, so give them plenty of space in the garden.
Light
Plant your beardtongue in an area that receives full sun. Adequate sun exposure helps the tall stalks stay upright and not droopy.
Soil
The soil for beardtongue must drain very well. These plants are prairie natives and prefer rocky or sandy lean soil types over rich garden loam. It’s okay to amend the soil with compost to achieve proper tilth, but avoid manure applications.
Water
Penstemons tolerate drought, but 1 inch of water per week in the summer will keep plants vigorous and promote better blooming.
Temperature and Humidity
Gardeners in USDA growing zones 3 to 9 have the option to try penstemons, although some varieties may only be hardy to zones 4 or 5. It can thrive in a range of humidity conditions.
Fertilizer
Feed beardtongue plants once a year with an organic fertilizer, applied in the fall. Feeding these flowers with conventional bloom-boosting formula can promote too much growth and can shorten the life of the plants.
Varieties of Penstemon
'Dark Towers' is similar to Husker Red, but with pale pink flowers and darker foliage.
'Elfin Pink' is a good rock garden plant, topping out just shy of 12 inches.
'Husker Red' is perhaps the most well-known variety, due to being named perennial plant of the year in 1996; if features reddish-purple foliage and white flowers.
'Jingle Bells' has reddish-orange flowers that are beacons to hummingbirds.
'Piña Colada', a series of cultivars, features blue, rose, or white flowers on compact plants.
'Red Riding Hood' has red flowers and an upright growth habit.
Growing From Seeds
Penstemons are easy to start from seed, which is just as well, as many of the species are short-lived perennials. Seeds may germinate better after a period of aging, mimicking their conditions in the wild, so you can store seed for several years before planting. If you sow the seeds in the garden, do so in autumn, to allow a natural stratification period. Alternatively, you can stratify the seeds in the refrigerator for three months if you plan to start them indoors. If you purchase penstemon seeds, be sure to check the growing zone, as tender varieties like the ‘Tubular Bells’ series are often sold alongside the hardy perennial types.
Common Pests and Diseases
Penstemons don't suffer from too many insect problems, but slugs and snails may snack on leaves, especially in damp or shady areas.1 Sprinkle diatomaceous earth around plants to deter gnawing gastropods, and set out beer traps to catch any stragglers.

Penstemon plants are usually disease-free when given the proper culture of full sun and good drainage. Gardeners with heavy clay may lose plants to root rot, especially in areas with heavy snow that experience a long spring thaw. In Southern gardens, plants that don't have adequate soil drainage or are planted too closely together may succumb to powdery mildew2
or Southern blight, a fungal disease also known as white mold. Fungicide sprays treat symptoms but not the cause, so lighten your heavy soils with compost, or plant penstemons in raised beds to add air circulation to plant roots.
Landscape Uses for Beardtongue
Penstemon plants look best in groups of at least three to five plants. Smaller or alpine varieties work well in rock gardens, while tall penstemon types can provide a colorful backdrop along the back of the sunny mixed perennial border.
Penstemon flowers are a valuable source of nectar for bees, butterflies, and hummingbirds in a wildflower garden. They also make good cut flowers, although most people don’t think of them as bouquet candidates. The good news for those who prefer not to cut is that browsing deer avoid penstemon plants.
0
0
文章
Miss Chen
2021年09月26日

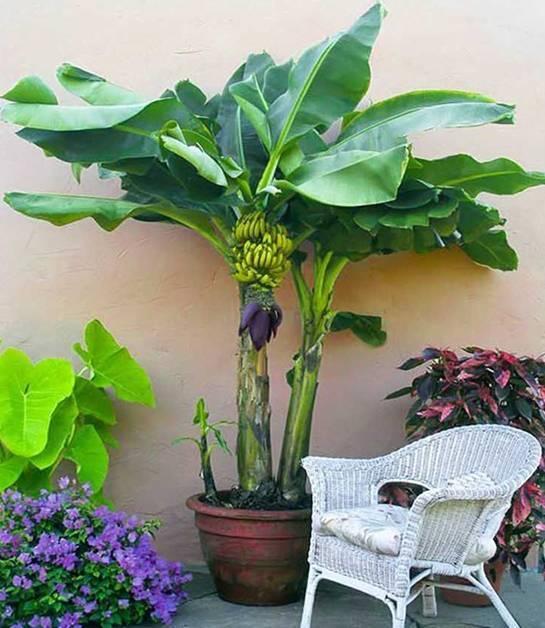
There are dozens of species and varieties of banana and plantain trees (Musa spp.). While these tropical fruiting plants are commonly referred to as trees, they’re technically huge herbaceous plants, meaning they don’t have a woody stem. Instead, they have fleshy, upright stalks from which large, oblong, bright green leaves grow. Showy flowers appear typically in the spring, giving way to the fleshy, elongated, green or yellow fruit.
No matter the size of your yard or home, there is a banana tree to fit. Plus, they can make good houseplants with enough light, though they typically don't bear fruit indoors. Banana trees generally have a fast growth rate and should be planted in the spring.
Common Names Banana tree, plantain tree
Botanical Name Musa spp.
Family Musaceae
Plant Type Herbaceous, perennial
Mature Size 2–30 ft. tall, 1–15 ft. wide (varies widely by species)
Sun Exposure Full
Soil Type Loamy, well-drained
Soil pH Acidic
Bloom Time Spring
Flower Color White, purple, orange
Hardiness Zones 9–11 (USDA)
Native Area Asia, Africa, Australia
Banana Tree Care
While most species grow best in warm climates, there also are somewhat cold-hardy banana trees. If you're planting the banana tree outdoors, choosing the right planting site is key to making care easy. Grow this plant in a location where it will be sheltered from strong winds, as it is very susceptible to damaged leaves. Prepare your planting site by mixing some compost into the soil. And make sure you have enough space for the height and spread of your particular species.
During the growing season (spring to fall), banana trees are water hogs. You might have to water daily, especially during hot weather, to maintain adequate soil moisture. The plants also will need regular fertilization throughout the growing season. Bananas form in the late summer in a cluster called a hand. Once the fruit is green but plumped up, it can be cut off the stalk and placed in a cool, dry space to finish ripening.
Light
Most types of bananas plants prefer to grow in full sun, meaning at least six hours of direct sunlight on most days. However, some varieties can scorch easily and will do better in partial shade.
Soil
These plants love organically rich, deep soil with good drainage and a slightly acidic soil pH. They typically have poor tolerance for salt in the soil.
Water
Banana trees are tropical and originate in rainforests, so they need a lot of water and plenty of moisture in the air. They do best when planted in groups fairly close together, as this helps to retain moisture in the leaves. Water regularly to make sure the soil stays evenly moist but not soggy. Avoid overwatering, which can cause root rot.
Temperature and Humidity
These plants thrive in warm, humid conditions, but they don't like temperature extremes. Even the hardy, cold-tolerant banana tree species prefer consistent temperatures ranging between 75 and 95 degrees Fahrenheit. Cold temperatures and dry conditions can cause the plants to quickly die back. To increase the level of humidity, mist the leaves daily.
Fertilizer
Banana trees are heavy feeders. Apply a balanced fertilizer regularly throughout the growing season, following label instructions. Also, mix compost into the soil annually to raise the level of organic matter.
Types of Banana Trees
There are roughly 70 species and even more varieties of banana trees, including:
Musa acuminata: This species reaches around 12 to 20 feet tall and is often grown for its ornamental foliage thanks to its paddle-shaped leaves that can reach around 6 to 10 inches long.
Musa ornata: Commonly referred to as the flowering banana, this species is mostly grown for its ornamental value; its small fruit is not typically eaten.
Musa basjoo: Known as the Japanese banana, this species has fairly good cold tolerance and reaches around 6 to 14 feet tall.
Pruning
Before the banana tree fruits, prune it so there is only one main stem. After it has been growing for six to eight months, leave one sucker (small shoot at the base of the stem). This plant will replace the main stem in the next growing season. After the fruit is removed, cut the main stem down to 2.5 feet. Remove the rest of the stem in a few weeks, leaving the replacement sucker intact.
Propagating Banana Trees
The best method of propagation is division. To divide banana plants, separate the suckers from the rhizome (horizontal underground stem) using a sharp spade. Before you do this, wait until the suckers are at least 3 feet tall and have their own roots. Once you separate a sucker from the parent plant, allow the surface of the rhizome section to dry for a day or so. At this point, it will be ready for replanting in any appropriate location.
Potting and Repotting Banana Trees
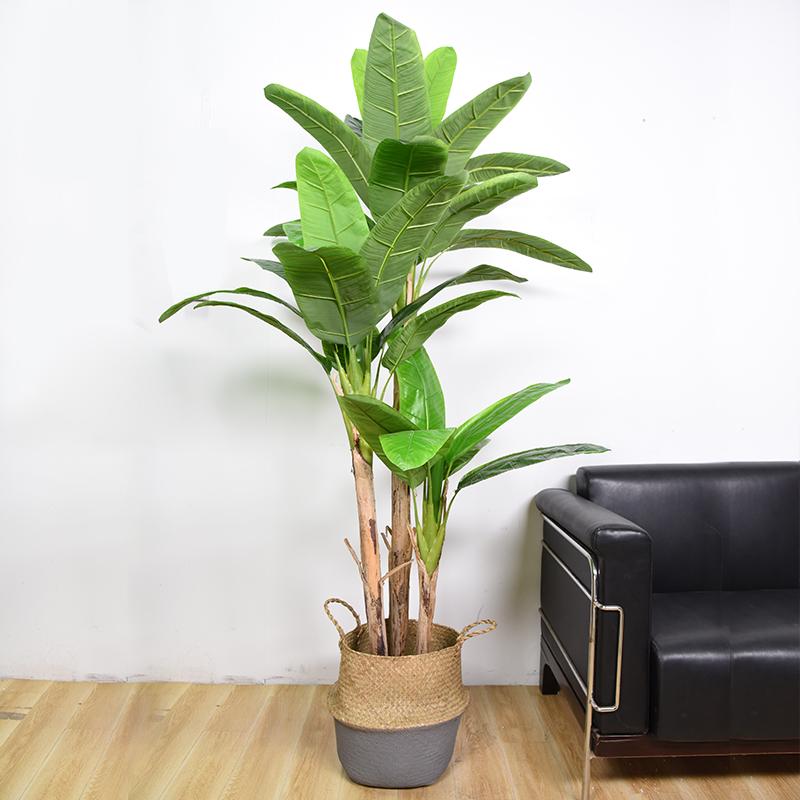
Banana trees can grow in containers, but they generally will need at least a 15-gallon pot at minimum for optimal growth. Ensure that the pot has drainage holes, and use a loose, organically rich potting mix. A benefit to potting your banana tree is you will be able to bring it indoors to shelter it from cold and inclement weather. However, potted banana trees tend to have higher watering and feeding needs, as they will use up what is in their limited soil faster than banana trees in the ground. In addition, they likely won't reach their maximum size and might not bear fruit. Still, many people prefer them for their foliage. You typically will need to divide and repot container banana trees every three years, separating any suckers from the parent plant.
Common Pests & Plant Diseases
Owners of banana trees need to stay vigilant of the many pests and diseases that can afflict a banana tree. Pests include the following:
Aphids: These pests cause curled and shriveled foliage and can also transmit other diseases that will affect any fruit produced.
Black weevils: If you see jelly-like sap oozing from the plant, you may have black weevils that can be eliminated with pesticides.
Nematodes: This is the banana tree's most common pest that will rot the plant and fruit.
Sap-sucking insects:Mealybugs and red spider mites are also common to banana trees.
Scarring beetle: This pest invades bunches of the plant's fruit and can be eliminated with pesticide.
Thrips: This pest will stain and split the peel of the plant's fruit.
There are many diseases common to banana trees in large orchards and are taken care of with commercial fungicides and pesticides. As for indoor potted banana trees, be on the lookout for root rot, leaf-spot disease, wilt, and powdery mildew.
No matter the size of your yard or home, there is a banana tree to fit. Plus, they can make good houseplants with enough light, though they typically don't bear fruit indoors. Banana trees generally have a fast growth rate and should be planted in the spring.

Common Names Banana tree, plantain tree
Botanical Name Musa spp.
Family Musaceae
Plant Type Herbaceous, perennial
Mature Size 2–30 ft. tall, 1–15 ft. wide (varies widely by species)
Sun Exposure Full
Soil Type Loamy, well-drained
Soil pH Acidic
Bloom Time Spring
Flower Color White, purple, orange
Hardiness Zones 9–11 (USDA)
Native Area Asia, Africa, Australia
Banana Tree Care
While most species grow best in warm climates, there also are somewhat cold-hardy banana trees. If you're planting the banana tree outdoors, choosing the right planting site is key to making care easy. Grow this plant in a location where it will be sheltered from strong winds, as it is very susceptible to damaged leaves. Prepare your planting site by mixing some compost into the soil. And make sure you have enough space for the height and spread of your particular species.
During the growing season (spring to fall), banana trees are water hogs. You might have to water daily, especially during hot weather, to maintain adequate soil moisture. The plants also will need regular fertilization throughout the growing season. Bananas form in the late summer in a cluster called a hand. Once the fruit is green but plumped up, it can be cut off the stalk and placed in a cool, dry space to finish ripening.
Light
Most types of bananas plants prefer to grow in full sun, meaning at least six hours of direct sunlight on most days. However, some varieties can scorch easily and will do better in partial shade.
Soil
These plants love organically rich, deep soil with good drainage and a slightly acidic soil pH. They typically have poor tolerance for salt in the soil.
Water
Banana trees are tropical and originate in rainforests, so they need a lot of water and plenty of moisture in the air. They do best when planted in groups fairly close together, as this helps to retain moisture in the leaves. Water regularly to make sure the soil stays evenly moist but not soggy. Avoid overwatering, which can cause root rot.
Temperature and Humidity
These plants thrive in warm, humid conditions, but they don't like temperature extremes. Even the hardy, cold-tolerant banana tree species prefer consistent temperatures ranging between 75 and 95 degrees Fahrenheit. Cold temperatures and dry conditions can cause the plants to quickly die back. To increase the level of humidity, mist the leaves daily.
Fertilizer
Banana trees are heavy feeders. Apply a balanced fertilizer regularly throughout the growing season, following label instructions. Also, mix compost into the soil annually to raise the level of organic matter.
Types of Banana Trees
There are roughly 70 species and even more varieties of banana trees, including:
Musa acuminata: This species reaches around 12 to 20 feet tall and is often grown for its ornamental foliage thanks to its paddle-shaped leaves that can reach around 6 to 10 inches long.
Musa ornata: Commonly referred to as the flowering banana, this species is mostly grown for its ornamental value; its small fruit is not typically eaten.
Musa basjoo: Known as the Japanese banana, this species has fairly good cold tolerance and reaches around 6 to 14 feet tall.
Pruning
Before the banana tree fruits, prune it so there is only one main stem. After it has been growing for six to eight months, leave one sucker (small shoot at the base of the stem). This plant will replace the main stem in the next growing season. After the fruit is removed, cut the main stem down to 2.5 feet. Remove the rest of the stem in a few weeks, leaving the replacement sucker intact.
Propagating Banana Trees
The best method of propagation is division. To divide banana plants, separate the suckers from the rhizome (horizontal underground stem) using a sharp spade. Before you do this, wait until the suckers are at least 3 feet tall and have their own roots. Once you separate a sucker from the parent plant, allow the surface of the rhizome section to dry for a day or so. At this point, it will be ready for replanting in any appropriate location.

Potting and Repotting Banana Trees
Banana trees can grow in containers, but they generally will need at least a 15-gallon pot at minimum for optimal growth. Ensure that the pot has drainage holes, and use a loose, organically rich potting mix. A benefit to potting your banana tree is you will be able to bring it indoors to shelter it from cold and inclement weather. However, potted banana trees tend to have higher watering and feeding needs, as they will use up what is in their limited soil faster than banana trees in the ground. In addition, they likely won't reach their maximum size and might not bear fruit. Still, many people prefer them for their foliage. You typically will need to divide and repot container banana trees every three years, separating any suckers from the parent plant.
Common Pests & Plant Diseases
Owners of banana trees need to stay vigilant of the many pests and diseases that can afflict a banana tree. Pests include the following:
Aphids: These pests cause curled and shriveled foliage and can also transmit other diseases that will affect any fruit produced.
Black weevils: If you see jelly-like sap oozing from the plant, you may have black weevils that can be eliminated with pesticides.
Nematodes: This is the banana tree's most common pest that will rot the plant and fruit.
Sap-sucking insects:Mealybugs and red spider mites are also common to banana trees.
Scarring beetle: This pest invades bunches of the plant's fruit and can be eliminated with pesticide.
Thrips: This pest will stain and split the peel of the plant's fruit.
There are many diseases common to banana trees in large orchards and are taken care of with commercial fungicides and pesticides. As for indoor potted banana trees, be on the lookout for root rot, leaf-spot disease, wilt, and powdery mildew.
0
0
文章
Miss Chen
2021年07月07日

No potting soil? No problem. You don’t need soil to keep your home full of gorgeous houseplants. Meet Tillandsia kolbii, a variety of air plant.
These plants actual absorb nutrients and water through their leaves, not their roots. Because of this, they don’t have big root systems like the usual houseplant. These plants can be set wherever you’d like a little greenery, no pot needed. In fact, you can even hang them.
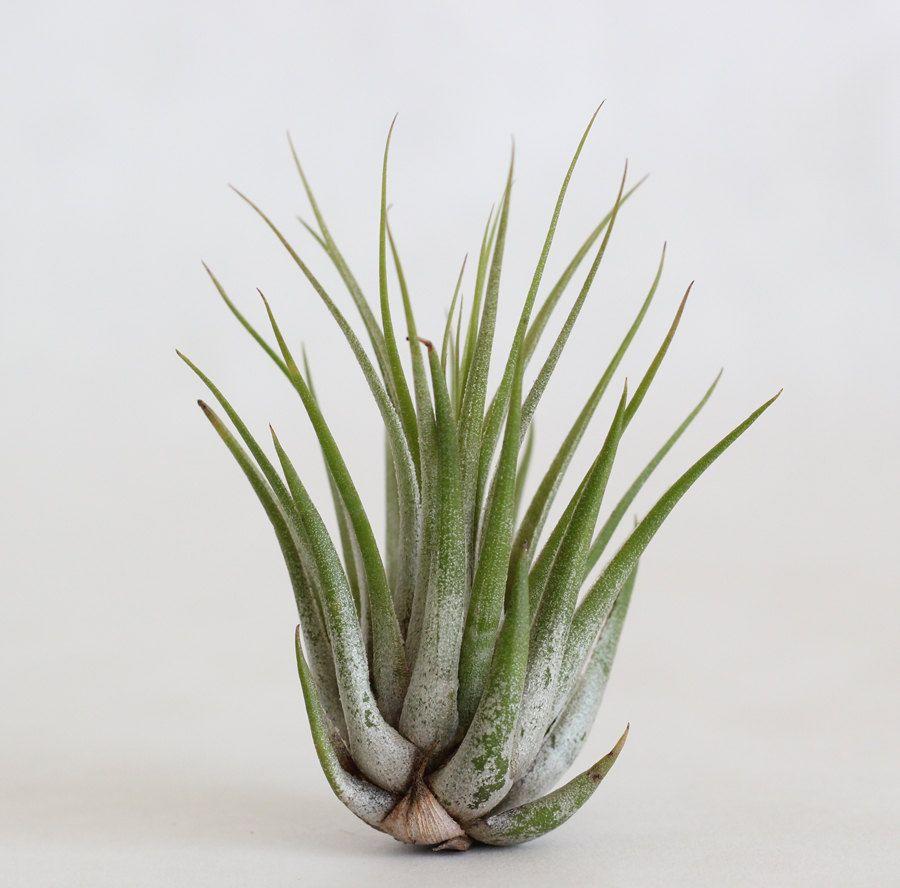
The Tillandsia kolbii has compact, fuzzy leaves that are a soft green color. With proper care, they may also produce beautiful, unique blooms in red, orange, or purple.

Botanical Name Tillandsia kolbii
Common Name Air plant
Plant Type Houseplant or annual
Mature Size 1 to 3 inches
Sun Exposure Bright, indirect light
Soil Type Not applicable
Soil pH Not applicable
Bloom Time Once, when fully matured
Flower Color Red, orange, or purple
Hardiness Zones 9 to 11, USA
Native Area Mexico and Guatemala
Tillandsia Kolbii Care
Caring for these plants is a breeze. Choose an area with bright, indirect lighting and good airflow to keep your Tillandsia kolbii the happiest. The biggest thing they require is regular watering. How do you water a plant with no soil, you may ask? Regular misting is a wonderful way to keep your plants humid.
With proper attention and care, your Tillandsia kolbii may even bloom. These amazing little plants only bloom once in their lifetime, and the process may take years.
Once they are mature, they will produce pups. These are new little air plants that will pop out of the base of the mother plant. You can either leave these attached so they slowly grow a huge connected colony of air plants, or remove them to create more plants to spread around. Occasionally, mealybugs and scale may pose pest problems.
Light
Tillandsia kolbii, like most air plants, loves bright, indirect lighting. Despite being native to Mexico and Guatemala, too much sunshine can actually harm or burn the plant. Signs of too much sun include burn marks or red-tipped leaves. The red coloring is caused by stress.
Soil
The name “air plants” has become a popular way to describe plants belonging to the Tillandsia family because they don't need to be grown in soil.
Instead, just set your Tillandsia kolbii wherever you’d like to add a little greenery. Whether that be your desk, atop a decorative piece of driftwood, or even in a hanging terrarium. In warm areas, these plants can even be grown outside and make a wonderful addition to your porch décor.
Water
Unlike most houseplants, the Tillandsia kolbii cannot be watered in the usual fashion. To give your air plant the water it needs, soak it in a bowl of water for 10 to 30 minutes every week or two. If your air plant is blooming, be sure to keep the delicate flower above the water during a soak to avoid damaging it.
Once you remove your air plant from the water, tip it upside-down to let the excess water drain from its foliage, and then return it to its display area. Let your air plant dry completely before the next soaking session. This will help avoid problems with rot.
Make sure to use clean water, like spring or filtered water. If you must use tap water, let it sit for at least 24 hours to allow the chlorine to dissipate.
Temperature and Humidity
Tillandsia kolbii loves humidity. Regularly misting it will provide the humidity and moisture that it needs. In drier areas, you may need to mist your air plant daily. In more humid areas, you may only need to mist it every three days or so.
These plants also love warmer temperatures. However, avoid placing them near heating or AC units. Too much heat or cold can damage the plants. Placing them in a well-ventilated area with bright indirect sunlight is ideal.
Fertilizer
Because air plants do not have soil, you will need to fertilize during their monthly soak by adding it to the water. Using a fertilizer designed for air plants is best.
However, fertilizer is not a huge need for these little plants. They will grow wonderfully even without additional feeding. Too much fertilizer can even kill your Tillandsia kolbii.
Propagating Tillandsia kolbii
Propagating an air plant is fun and easy. In fact, your air plant will tell you when. These plants create what are known as “pups” once they are mature. These pups are new air plants. Once your Tillandsia kolbii is mature and producing pups, here is how to remove them.
1. Wait until your pup is at least a third of the size of the mother plant.
2. Locate the base of the pup.
3. Gently pop the pup off the mother plant. Be sure to grip the pup at its base leaves so no tearing occurs on its top leaves. If the pup does not easily pop off, a sharp knife or pair of snips may be needed to trim the pup from the mother.
4. Once the pup is detached, place it in a well ventilated, bright spot of its own.
Before you know it, you’ll have a whole family of air plants. Don’t be discouraged if you do not see pups for some time, though. Air plants can take years to bloom and produce pups. Patience is key.
These plants actual absorb nutrients and water through their leaves, not their roots. Because of this, they don’t have big root systems like the usual houseplant. These plants can be set wherever you’d like a little greenery, no pot needed. In fact, you can even hang them.
The Tillandsia kolbii has compact, fuzzy leaves that are a soft green color. With proper care, they may also produce beautiful, unique blooms in red, orange, or purple.

Botanical Name Tillandsia kolbii
Common Name Air plant
Plant Type Houseplant or annual
Mature Size 1 to 3 inches
Sun Exposure Bright, indirect light
Soil Type Not applicable
Soil pH Not applicable
Bloom Time Once, when fully matured
Flower Color Red, orange, or purple
Hardiness Zones 9 to 11, USA
Native Area Mexico and Guatemala
Tillandsia Kolbii Care
Caring for these plants is a breeze. Choose an area with bright, indirect lighting and good airflow to keep your Tillandsia kolbii the happiest. The biggest thing they require is regular watering. How do you water a plant with no soil, you may ask? Regular misting is a wonderful way to keep your plants humid.
With proper attention and care, your Tillandsia kolbii may even bloom. These amazing little plants only bloom once in their lifetime, and the process may take years.
Once they are mature, they will produce pups. These are new little air plants that will pop out of the base of the mother plant. You can either leave these attached so they slowly grow a huge connected colony of air plants, or remove them to create more plants to spread around. Occasionally, mealybugs and scale may pose pest problems.
Light
Tillandsia kolbii, like most air plants, loves bright, indirect lighting. Despite being native to Mexico and Guatemala, too much sunshine can actually harm or burn the plant. Signs of too much sun include burn marks or red-tipped leaves. The red coloring is caused by stress.
Soil
The name “air plants” has become a popular way to describe plants belonging to the Tillandsia family because they don't need to be grown in soil.
Instead, just set your Tillandsia kolbii wherever you’d like to add a little greenery. Whether that be your desk, atop a decorative piece of driftwood, or even in a hanging terrarium. In warm areas, these plants can even be grown outside and make a wonderful addition to your porch décor.
Water
Unlike most houseplants, the Tillandsia kolbii cannot be watered in the usual fashion. To give your air plant the water it needs, soak it in a bowl of water for 10 to 30 minutes every week or two. If your air plant is blooming, be sure to keep the delicate flower above the water during a soak to avoid damaging it.
Once you remove your air plant from the water, tip it upside-down to let the excess water drain from its foliage, and then return it to its display area. Let your air plant dry completely before the next soaking session. This will help avoid problems with rot.
Make sure to use clean water, like spring or filtered water. If you must use tap water, let it sit for at least 24 hours to allow the chlorine to dissipate.

Temperature and Humidity
Tillandsia kolbii loves humidity. Regularly misting it will provide the humidity and moisture that it needs. In drier areas, you may need to mist your air plant daily. In more humid areas, you may only need to mist it every three days or so.
These plants also love warmer temperatures. However, avoid placing them near heating or AC units. Too much heat or cold can damage the plants. Placing them in a well-ventilated area with bright indirect sunlight is ideal.
Fertilizer
Because air plants do not have soil, you will need to fertilize during their monthly soak by adding it to the water. Using a fertilizer designed for air plants is best.
However, fertilizer is not a huge need for these little plants. They will grow wonderfully even without additional feeding. Too much fertilizer can even kill your Tillandsia kolbii.
Propagating Tillandsia kolbii
Propagating an air plant is fun and easy. In fact, your air plant will tell you when. These plants create what are known as “pups” once they are mature. These pups are new air plants. Once your Tillandsia kolbii is mature and producing pups, here is how to remove them.
1. Wait until your pup is at least a third of the size of the mother plant.
2. Locate the base of the pup.
3. Gently pop the pup off the mother plant. Be sure to grip the pup at its base leaves so no tearing occurs on its top leaves. If the pup does not easily pop off, a sharp knife or pair of snips may be needed to trim the pup from the mother.
4. Once the pup is detached, place it in a well ventilated, bright spot of its own.
Before you know it, you’ll have a whole family of air plants. Don’t be discouraged if you do not see pups for some time, though. Air plants can take years to bloom and produce pups. Patience is key.
0
0
文章
莹723
2020年10月14日

Winter is coming! But,whether you live in North or South, not everything in your garden will be asleep from December to March. Even in the coldest days, many annual flowers, perennial flowers, and flowering shrubs don’t wait to show off. And in mild climates, some winter flowers—like pansies, violas, and ornamental kale and cabbages—will bloom all season long.
Before setting your heart on any of these beauties, make sure you’ll be able to give a plant what it needs, such as full sun or shade. Pay attention to planting times too. Most winter bloomers, including bulbs, need put in the ground in the fall.
Not sure where to start? Check out our free garden plans right here.
1.English Primrose
While some varieties bloom in spring or summer, English primroses show in winter. Red, pink, purple, yellow, or white flowers with mounds of deep green foliage cover this plant.

2.Algerian Iris
Unlike other iris plants in your garden, this lesser-known variety blooms in winter to early spring! Its delicate silvery-purple blooms have a sweet fragrance.

3.Crocus
Sweet little cup-like flowers pop their heads up in late winter to early spring. These bulbs do tend to attract rodents, so don’t be surprised if they bloom somewhere other than where you planted them. Your rodent friends like to dig them up and replant elsewhere to store as food!

4. Pussy Willow
The little fuzzy flowers on these shrubs aren’t bright and showy like a lot of winter bloomers. But they display their considerable charms when winter snow is still on the ground,as a sign that spring is coming.

5.Pansy
Like their relatives, violas, pansies offer brilliant color in early spring. They’ll survive a light frost and bloom for most of the winter in mild climates.

6.Winter Jasmine
This shrub has pretty, yellow flowers on arching branches in late winter. It doesn’t have a fragrance like other types of jasmine, but it does offer a bright splash of sunshine in winter.

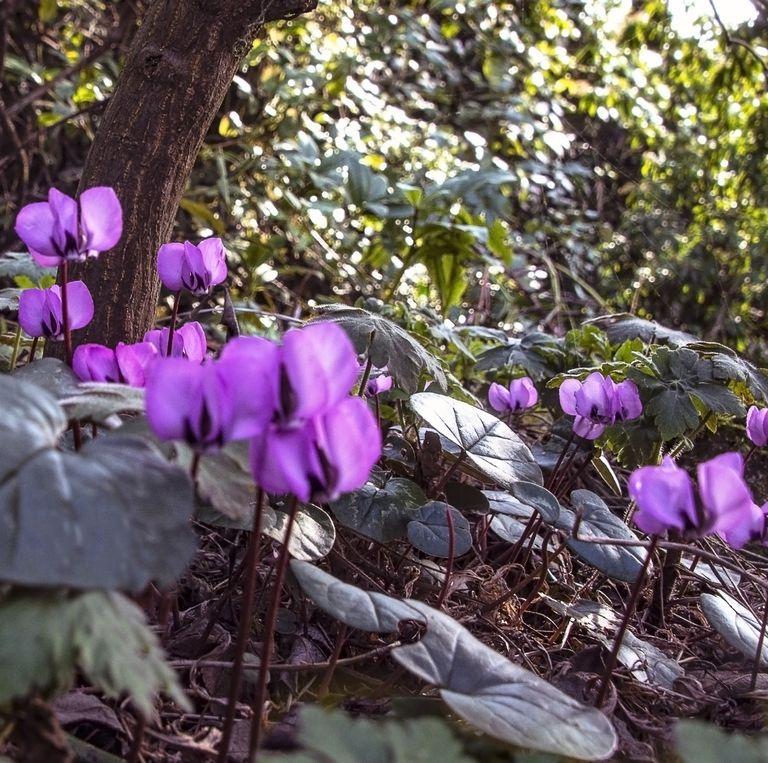
7.Cyclamen
These pretty, delicate-looking perennials in pinks, whites, and fuchsia are often sold as houseplants. But in mild climates, they do well as ground covers. They like to be under deciduous trees so they can soak up winter sun.
8.Winter Aconite
These happy little yellow blooms will pop up through the snow. Bonus: Deer and rodents usually leave these alone. Plant these bulbs in fall.

9.Viola
The brightly colored, charming violas are a welcome sight on chilly mornings. In mild climates, they’ll last all winter long. They self-seed freely, so you’ll get more baby plants in subsequent years.

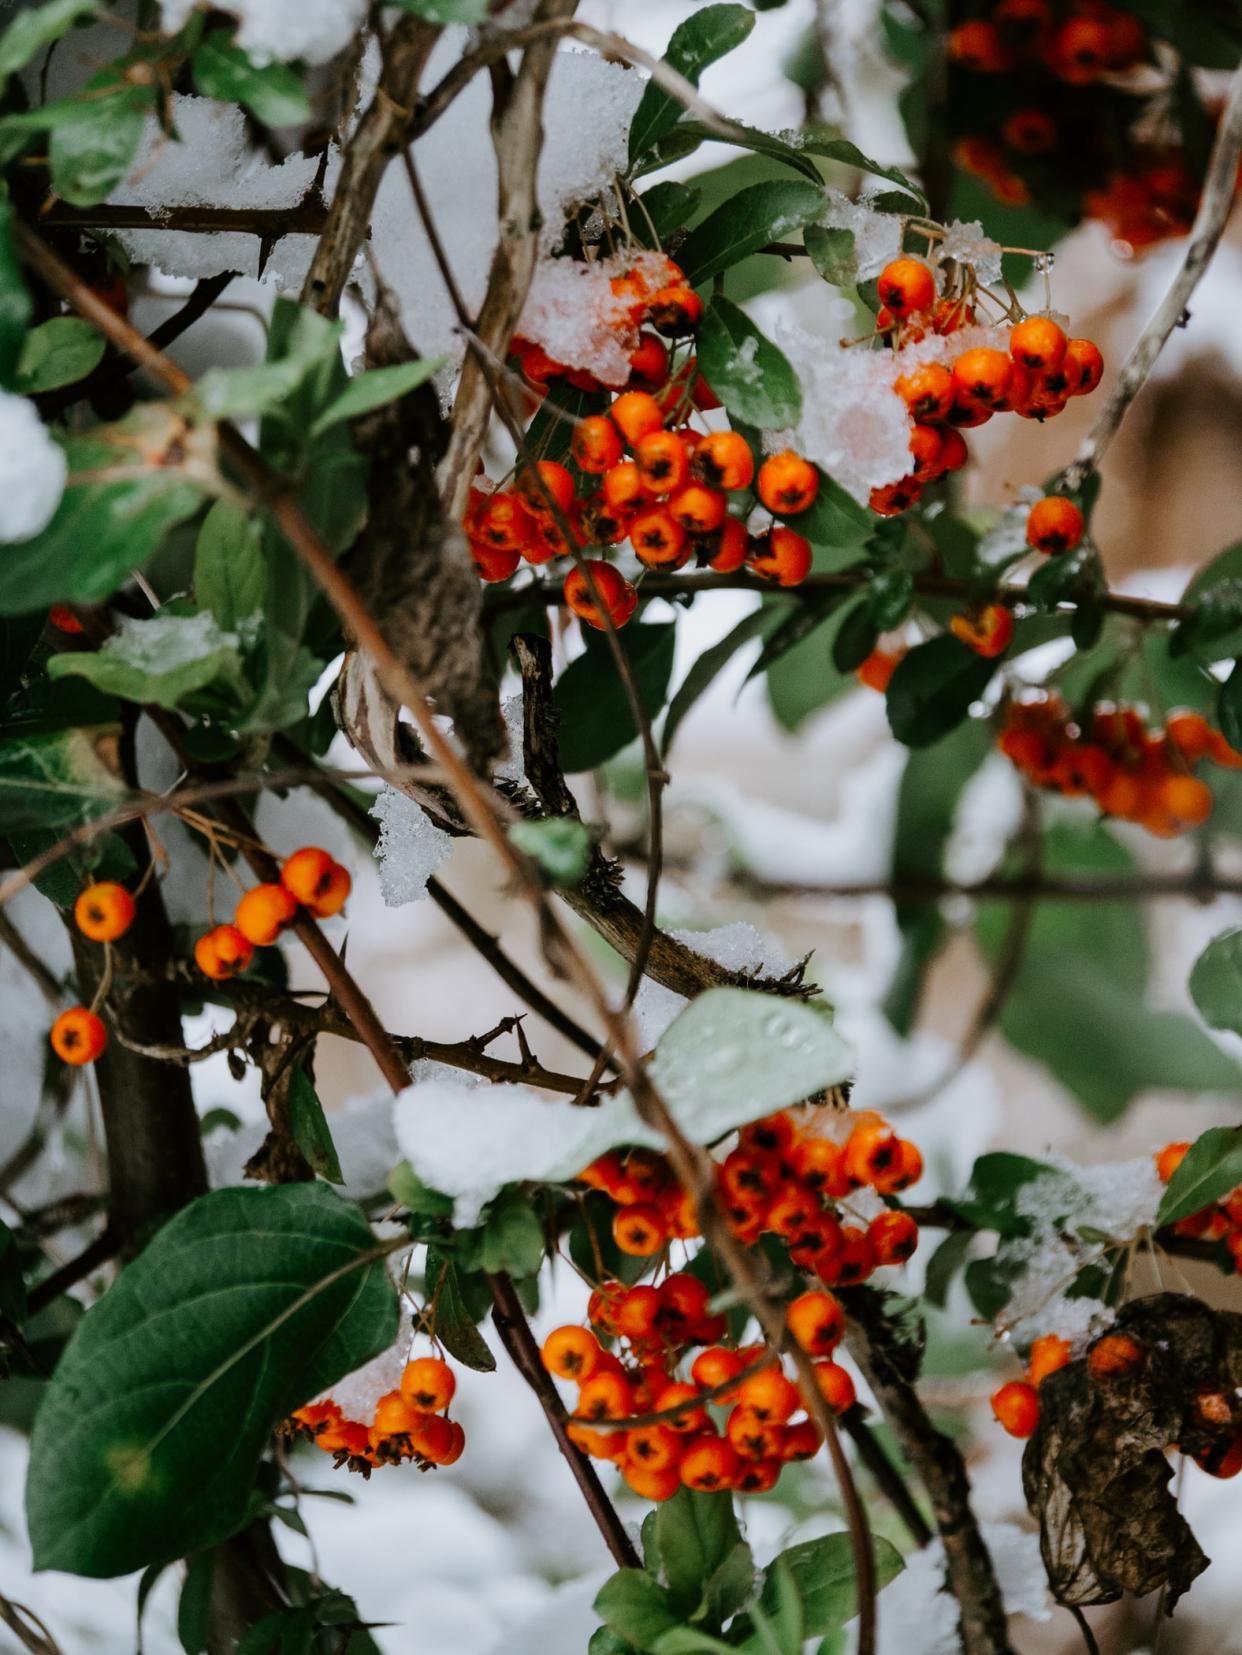
10.Winterberry
When cold weather strikes, this plant bursts with bright red berries that add cheery color to the evergreen shrubs. Clip some to bring for holiday cheer, but beware the sharp leaves!
11.Snowdrop
Adorable, drooping white and green flowers appear in late winter, often while there’s still snow. Plant a bunch of them, and get these bulbs in the ground in fall for winter blooms.

12.Daffodil
Daffodils are usually seen as one of the first signs of spring, they will begin growing as early as February. Don't worry about snow or freezing temperatures harming the foliage, they're extremely cold hardy.

Before setting your heart on any of these beauties, make sure you’ll be able to give a plant what it needs, such as full sun or shade. Pay attention to planting times too. Most winter bloomers, including bulbs, need put in the ground in the fall.
Not sure where to start? Check out our free garden plans right here.
1.English Primrose
While some varieties bloom in spring or summer, English primroses show in winter. Red, pink, purple, yellow, or white flowers with mounds of deep green foliage cover this plant.

2.Algerian Iris
Unlike other iris plants in your garden, this lesser-known variety blooms in winter to early spring! Its delicate silvery-purple blooms have a sweet fragrance.

3.Crocus
Sweet little cup-like flowers pop their heads up in late winter to early spring. These bulbs do tend to attract rodents, so don’t be surprised if they bloom somewhere other than where you planted them. Your rodent friends like to dig them up and replant elsewhere to store as food!

4. Pussy Willow
The little fuzzy flowers on these shrubs aren’t bright and showy like a lot of winter bloomers. But they display their considerable charms when winter snow is still on the ground,as a sign that spring is coming.

5.Pansy
Like their relatives, violas, pansies offer brilliant color in early spring. They’ll survive a light frost and bloom for most of the winter in mild climates.

6.Winter Jasmine
This shrub has pretty, yellow flowers on arching branches in late winter. It doesn’t have a fragrance like other types of jasmine, but it does offer a bright splash of sunshine in winter.

7.Cyclamen
These pretty, delicate-looking perennials in pinks, whites, and fuchsia are often sold as houseplants. But in mild climates, they do well as ground covers. They like to be under deciduous trees so they can soak up winter sun.

8.Winter Aconite
These happy little yellow blooms will pop up through the snow. Bonus: Deer and rodents usually leave these alone. Plant these bulbs in fall.

9.Viola
The brightly colored, charming violas are a welcome sight on chilly mornings. In mild climates, they’ll last all winter long. They self-seed freely, so you’ll get more baby plants in subsequent years.

10.Winterberry
When cold weather strikes, this plant bursts with bright red berries that add cheery color to the evergreen shrubs. Clip some to bring for holiday cheer, but beware the sharp leaves!

11.Snowdrop
Adorable, drooping white and green flowers appear in late winter, often while there’s still snow. Plant a bunch of them, and get these bulbs in the ground in fall for winter blooms.

12.Daffodil
Daffodils are usually seen as one of the first signs of spring, they will begin growing as early as February. Don't worry about snow or freezing temperatures harming the foliage, they're extremely cold hardy.

0
0
Josephine
2018年07月26日

Somebody please help!!! I don’t know what is wrong with my succulent!!


0
0
Oc.sipos:It looks over watered to me...? https://succulentsbox.com/blogs/blog/overwatered-vs-underwatered?utm_source=mailchimp&utm_medium=email&utm_campaign=Blog_Overwatered_Underwatered&utm_content=button&utm_source=1-2000&utm_campaign=4160dff7d2-Blog_Overwatered_Underwatered&utm_medium=email&utm_term=0_0392367618-4160dff7d2-70641485&goal=0_0392367618-4160dff7d2-70641485&mc_cid=4160dff7d2&mc_eid=94ebd452a0
libbybuie912@yahoo.com
2018年07月23日

My plant looks awful, I repotted the whole arrangement and the tall (used to be beautiful), green spiny plant is dying and I don’t know what I did wrong. Please help me



0
0
成长记
Lilly Varbovska
2017年11月13日

I don’t know what happend. Hope to be the beginning of new lifes.

0
0
蓝色风沙:everything goes well.
成长记
pzsoofi
2017年10月31日

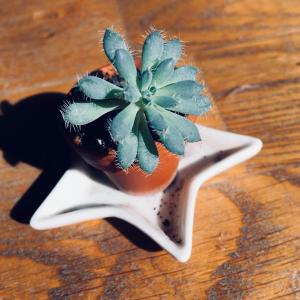
It’s growing but I still don’t know what it is.

0
0
pzsoofi:@Ueca well thank you, I guess the mystery is solved now :)
Ueca:Echeveria setosa var. deminuta
成长记
oh-0kay
2017年10月15日

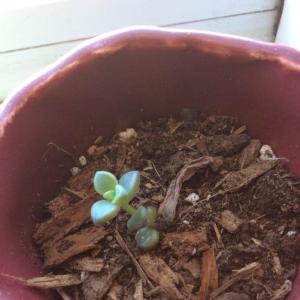
I now added "cute plant i don’t know the name of yet" in my "garden"

1
0
oh-0kay:@meriunkat yess hopefully !
meriunkat:I have one the same size and I'm still looking for it's id as well but today I found Sedeveria jet bead online that almost looks similar, hopefully when our plants grow a bit bigger we will be able to identify
文章
Dummer. ゛☀
2017年09月28日

Planting Speedwell (Veronica officinalis) in the garden is a great way to enjoy long-lasting blooms throughout the summer season. These easy-care plants don’t require much upkeep once established, making them ideal for the busy gardener.
An easy to care for perennial with flowers in an array of vibrant blues, pinks and white, the Speedwell is drought resistant but should be watered in the summer when there is less than an inch of rainfall per week. The plant has a long blooming season, from June to August, and is fairly pest and disease resistant as well, with the exception of some issues like powdery mildew, spider mites, and thrips.
Speedwell perennials are reportedly deer and rabbit resistant, but butterflies and hummingbirds are attracted to their dizzying hues. Flowers will bloom for six to eight weeks throughout the summer months and, as a result, make beautiful cut flower additions to vase arrangements or for container gardening in mixed flower groupings.
Growing Conditions
Speedwell thrives in conditions as wide ranging as full sun to partial shade and in loamy, sandy or clay dense soils. However, it does prefer a sunny location with well draining soil. The soil pH can be as liberal as neutral, alkaline or acidic, with moisture content from average to quite moist.
The hardy medium sized plant, with striking 1 to 3 foot (30 to 90 cm) flower spikes, flourishes in USDA hardiness zones 3-8. The Speedwell is tolerant of a variety of conditions but prefers full sun and well drained soil.
Speedwell can be sown from seed; however, it is more commonly purchased from a nursery so planting it in the garden can take place right away in spring.
General Care
Speedwell plant care is relatively low maintenance. In order to facilitate maximum blooming, it is advisable to remove the faded spikes from Speedwell and periodically divide the plant every few years in the early spring or fall.
The tallest Speedwell specimens generally require staking, and in late autumn after the first frost, cut stems back to an inch or so above ground level.

An easy to care for perennial with flowers in an array of vibrant blues, pinks and white, the Speedwell is drought resistant but should be watered in the summer when there is less than an inch of rainfall per week. The plant has a long blooming season, from June to August, and is fairly pest and disease resistant as well, with the exception of some issues like powdery mildew, spider mites, and thrips.

Speedwell perennials are reportedly deer and rabbit resistant, but butterflies and hummingbirds are attracted to their dizzying hues. Flowers will bloom for six to eight weeks throughout the summer months and, as a result, make beautiful cut flower additions to vase arrangements or for container gardening in mixed flower groupings.

Growing Conditions
Speedwell thrives in conditions as wide ranging as full sun to partial shade and in loamy, sandy or clay dense soils. However, it does prefer a sunny location with well draining soil. The soil pH can be as liberal as neutral, alkaline or acidic, with moisture content from average to quite moist.
The hardy medium sized plant, with striking 1 to 3 foot (30 to 90 cm) flower spikes, flourishes in USDA hardiness zones 3-8. The Speedwell is tolerant of a variety of conditions but prefers full sun and well drained soil.

Speedwell can be sown from seed; however, it is more commonly purchased from a nursery so planting it in the garden can take place right away in spring.
General Care
Speedwell plant care is relatively low maintenance. In order to facilitate maximum blooming, it is advisable to remove the faded spikes from Speedwell and periodically divide the plant every few years in the early spring or fall.

The tallest Speedwell specimens generally require staking, and in late autumn after the first frost, cut stems back to an inch or so above ground level.
1
1
文章
Dummer. ゛☀
2017年09月27日

Have you ever grown garlic or onions and been distressed to see that the plant has stunted gnarled, yellow streaked leaves? Upon closer inspection, you don’t really see any insects. Well, it’s quite possible they’re there but just too small to see without a microscope. You are probably looking at wheat curl mite damage. What are wheat curl mites and what wheat curl mite control is there? Read on to learn more.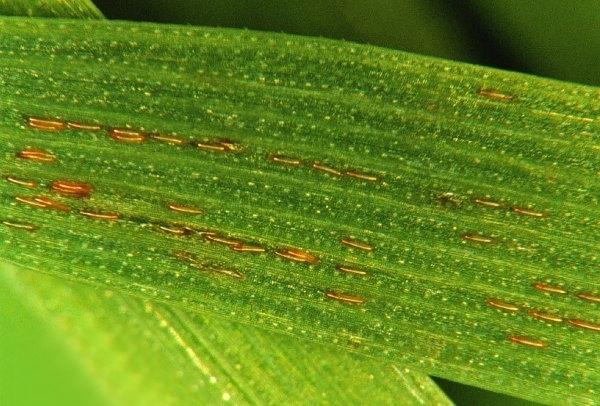
What are Wheat Curl Mites?
Wheat curl mites (Aceria tulipae) are tiny, almost microscopic plant feeding mites. They have 2 pairs of legs near the head which is perched atop a cigar-shaped body. Their favorite food, as the name suggests, is wheat, but they also infiltrate fields of onions and garlic. Wheat curl mites on plants become active in the spring and their populations virtually explode as temps increase; 75-85 degrees F. (23-29 C.) are prime reproduction temperatures. They lay their eggs in rows along leaf veins and when conditions are optimal, an entire generation can be completed in 10 days.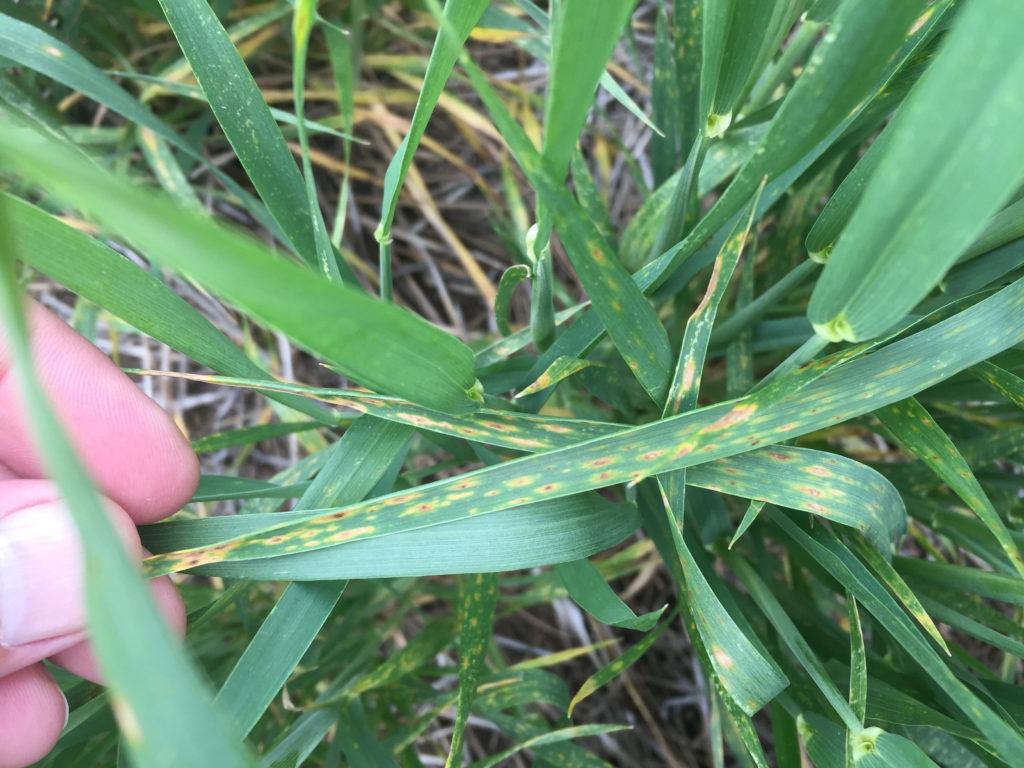
Wheat Curl Mite Damage
Not only do wheat curl mites cause twisted, yellow streaked leaves, but their feeding causes onion and garlic plants that are being stored to desiccate. Equally as damaging, wheat curl mites act as a vector for Wheat Streak Mosaic Virus, which is one of the most destructive diseases of wheat crops. They are also vectors of the High Plains Virus, which afflicts both corn and wheat in the Great Plains region, and Triticum Mosaic Virus, which is often seen in conjunction with Wheat Streak Mosaic Virus and can decimate a crop. Because of the serious damage and loss of capitol, treating wheat curl mites is of paramount importance. Sadly, there is very little wheat curl mite control at this juncture.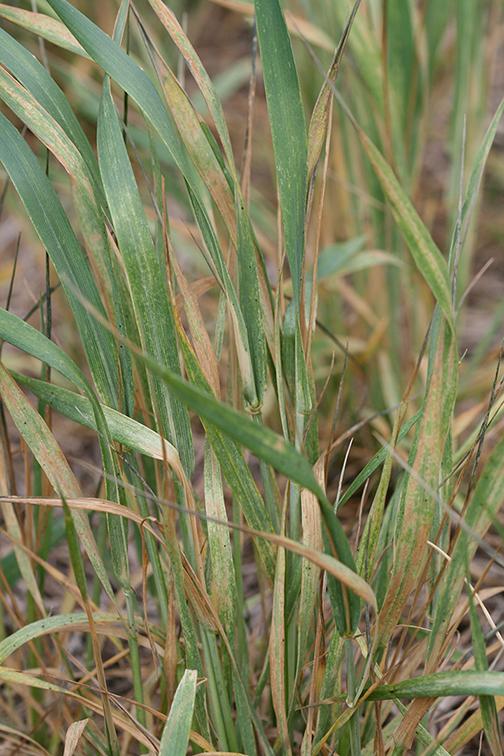
Wheat Curl Mite Control
Wheat curl mites on plants are found on the terminal leaves and move onto each new leaf as it emerges. Once the wheat dries down, the mites gather on the flag leaves where they are picked up by the wind and carried to other food sources, such as other grasses and corn. Once these die back, the wind carries the mites onto newly emerged winter wheat. Wheat curl mites can live for several days at temps below 0 degrees F. (-17 C.) and for several months at near freezing temperatures. This means they are present for an extended period of time, and ready and willing to do significant damage to successive crops from spring into winter. So how do you go about treating wheat curl mites?
There are no blanket controls for wheat curl mites. Flood irrigation in commercial crops or heavy winter rains can reduce field populations. Commercial growers treat seed garlic with hot water to reduce seed infestation and destroy volunteer wheat at least two weeks prior to planting winter wheat. No chemical treatments have been determined to eradicate the mites. Most home growers don’t plant wheat, but many of us grow onions and garlic. Don’t plant successive onion or garlic crops in the home garden that will just begin the mite reproduction process anew.
Treat bulbs prior to planting with hot water to reduce the population of mites. Soak the bulbs at 130 degrees F. (54 C.) for 10-20 minutes or at 140 degrees F. (60 C.) for 10-15 minutes. You can also try soaking affected garlic cloves for 24 hours in 2% soap (not detergent) and 2% mineral oil solution. Some sites suggest soaking cloves in alcohol for a few minutes prior to planting to kill any adult mites.

What are Wheat Curl Mites?
Wheat curl mites (Aceria tulipae) are tiny, almost microscopic plant feeding mites. They have 2 pairs of legs near the head which is perched atop a cigar-shaped body. Their favorite food, as the name suggests, is wheat, but they also infiltrate fields of onions and garlic. Wheat curl mites on plants become active in the spring and their populations virtually explode as temps increase; 75-85 degrees F. (23-29 C.) are prime reproduction temperatures. They lay their eggs in rows along leaf veins and when conditions are optimal, an entire generation can be completed in 10 days.

Wheat Curl Mite Damage
Not only do wheat curl mites cause twisted, yellow streaked leaves, but their feeding causes onion and garlic plants that are being stored to desiccate. Equally as damaging, wheat curl mites act as a vector for Wheat Streak Mosaic Virus, which is one of the most destructive diseases of wheat crops. They are also vectors of the High Plains Virus, which afflicts both corn and wheat in the Great Plains region, and Triticum Mosaic Virus, which is often seen in conjunction with Wheat Streak Mosaic Virus and can decimate a crop. Because of the serious damage and loss of capitol, treating wheat curl mites is of paramount importance. Sadly, there is very little wheat curl mite control at this juncture.

Wheat Curl Mite Control
Wheat curl mites on plants are found on the terminal leaves and move onto each new leaf as it emerges. Once the wheat dries down, the mites gather on the flag leaves where they are picked up by the wind and carried to other food sources, such as other grasses and corn. Once these die back, the wind carries the mites onto newly emerged winter wheat. Wheat curl mites can live for several days at temps below 0 degrees F. (-17 C.) and for several months at near freezing temperatures. This means they are present for an extended period of time, and ready and willing to do significant damage to successive crops from spring into winter. So how do you go about treating wheat curl mites?

There are no blanket controls for wheat curl mites. Flood irrigation in commercial crops or heavy winter rains can reduce field populations. Commercial growers treat seed garlic with hot water to reduce seed infestation and destroy volunteer wheat at least two weeks prior to planting winter wheat. No chemical treatments have been determined to eradicate the mites. Most home growers don’t plant wheat, but many of us grow onions and garlic. Don’t plant successive onion or garlic crops in the home garden that will just begin the mite reproduction process anew.

Treat bulbs prior to planting with hot water to reduce the population of mites. Soak the bulbs at 130 degrees F. (54 C.) for 10-20 minutes or at 140 degrees F. (60 C.) for 10-15 minutes. You can also try soaking affected garlic cloves for 24 hours in 2% soap (not detergent) and 2% mineral oil solution. Some sites suggest soaking cloves in alcohol for a few minutes prior to planting to kill any adult mites.
0
0


