文章
Dummer. ゛☀
2017年08月21日

Spider plants are very popular houseplants, and for good reason. They have a very unique look, with small little plantlets dangling on the ends of long stalks like spiders. They’re also extremely forgiving and easy to take care of – they don’t require much at all in the way of special care. Sometimes, however, you may encounter spider plant problems. Wilting spider plants are not uncommon, though they’re usually easy to cure. Keep reading to learn more about what to do when your spider plant looks wilted.
Why a Spider Plant Looks Wilted
So if you’re asking. “Why is my spider plant wilting,” you’ll need to do a bit of troubleshooting. When spider plant leaves look droopy, it can mean one of several things.
Water – One obvious problem is improper watering. Spider plants need a good amount of watering during the summer – the soil should not be allowed to dry out. Overwatering can also cause problems, however, with wilting and yellowing plants. Don’t let the soil get soggy in the summer, and in the winter let it dry out between light waterings. Light – The wrong amount of light or heat can also result in wilting spider plants. Spider plants do best in bright but indirect sunlight, like in a south-facing window or a space outside that receives less than 6 hours of sunlight. Overheating, a problem that often comes with too much sun, can also cause wilting spider plants.
If your spider plant has been drooping in bright direct sunlight, give it a good soak in a bucket of water for 15 minutes, then move it to a shadier, cooler spot. Of course, spider plants do need some sunlight. If your plant is wilting in full shade or far from a window indoors, move it to a sunnier spot and see if it perks up. Fertilizer – If your spider plant leaves look droopy, it may also be a problem with soil quality. You should feed your spider plant with a balanced fertilizer every other week in the summer and less frequently in winter.
Repotting – If your spider plant looks wilted and you can see roots coming out of the drainage holes, your plant is outgrowing its pot. Transplant it to a bigger pot, and water and feed it well. Spider plants can be a little fussy about water and light requirements, but they’re also very durable. If you notice your plant wilting and act to fix it, it should bounce back with no problem.

Why a Spider Plant Looks Wilted
So if you’re asking. “Why is my spider plant wilting,” you’ll need to do a bit of troubleshooting. When spider plant leaves look droopy, it can mean one of several things.
Water – One obvious problem is improper watering. Spider plants need a good amount of watering during the summer – the soil should not be allowed to dry out. Overwatering can also cause problems, however, with wilting and yellowing plants. Don’t let the soil get soggy in the summer, and in the winter let it dry out between light waterings. Light – The wrong amount of light or heat can also result in wilting spider plants. Spider plants do best in bright but indirect sunlight, like in a south-facing window or a space outside that receives less than 6 hours of sunlight. Overheating, a problem that often comes with too much sun, can also cause wilting spider plants.

If your spider plant has been drooping in bright direct sunlight, give it a good soak in a bucket of water for 15 minutes, then move it to a shadier, cooler spot. Of course, spider plants do need some sunlight. If your plant is wilting in full shade or far from a window indoors, move it to a sunnier spot and see if it perks up. Fertilizer – If your spider plant leaves look droopy, it may also be a problem with soil quality. You should feed your spider plant with a balanced fertilizer every other week in the summer and less frequently in winter.

Repotting – If your spider plant looks wilted and you can see roots coming out of the drainage holes, your plant is outgrowing its pot. Transplant it to a bigger pot, and water and feed it well. Spider plants can be a little fussy about water and light requirements, but they’re also very durable. If you notice your plant wilting and act to fix it, it should bounce back with no problem.
0
0
文章
Dummer. ゛☀
2017年08月20日

One of the easiest methods of plant propagation for cacti is by removing cactus pups. These don’t have furry ears and a tail but are the smaller versions of the parent plant at the base. Many species of cactus are known for growing cactus pups, which carry the identical characteristics of the parent without the capriciousness of seeds, which may produce plants with different characteristics. Removing offsets from cactus, also known as pups, not only produces another complete plant but is useful in containers that are overcrowded. Cactus propagation via offsets is easier than the slow growth of seed, the surgical precision of grafting and the variability of cuttings. The little cacti are small but complete copies of the parent species and simply need to be removed from the adult.

Types of Cacti That Grow Offsets
Not all cacti are capable of growing cactus pups, but many of the barrel and rosette types do. You can also find offsets on succulents such as aloe and yucca. In nature, big barrel cacti will form offsets and provide a nursery for them in the form of shared nutrients and water and by shading the young plant from harsh sun. Most offsets form at the base of the plant but some also form along the stem or even on the pads. You can remove any of these and root it for a whole new plant. Cactus propagation via offsets is easy as long as you take clean cuts, provide the right medium and allow the offset to callus. Any healthy mature cactus with offsets is suitable for removing cactus pups for propagation.

How to Remove Cactus Pups on Plants
The first step is to learn how to remove cactus pups on a plant. Get a very sharp knife and wipe the blade with some alcohol or a 10 percent bleach solution. This will prevent pathogens from entering the cut areas. Locate a pup and cut it away at a 45 degree angle. A slanted cut on the parent will deflect water so the area doesn’t rot before it can callus. Some propagators like to dust the cut end of the offset with sulfur powder to prevent fungal issues and rot. This is not necessary in most cases as long as you allow the cut end to callus fully. This may take a couple of weeks or even months. The end should be dry and hardened, slightly shriveled and whitish.

Growing Cactus Pups
After removing offsets from cactus and allowing them to callus, it is time to pot them up. The correct medium is well draining and gritty. You can purchase a cactus mixture or make your own with 50 percent pumice or perlite and 50 percent peat or compost. Cuttings only need a pot just a little larger than their diameter at the base. Cover one-third to one-half of the base with the medium or enough so the offset doesn’t fall over. Place the pup in indirect, but bright, sunlight and keep the medium lightly moist. Most cacti root in four to six weeks but some can take months. You can tell when it has rooted by noting any new green growth which indicates the roots have taken off and the plantlet is receiving nutrients and water.

Types of Cacti That Grow Offsets
Not all cacti are capable of growing cactus pups, but many of the barrel and rosette types do. You can also find offsets on succulents such as aloe and yucca. In nature, big barrel cacti will form offsets and provide a nursery for them in the form of shared nutrients and water and by shading the young plant from harsh sun. Most offsets form at the base of the plant but some also form along the stem or even on the pads. You can remove any of these and root it for a whole new plant. Cactus propagation via offsets is easy as long as you take clean cuts, provide the right medium and allow the offset to callus. Any healthy mature cactus with offsets is suitable for removing cactus pups for propagation.

How to Remove Cactus Pups on Plants
The first step is to learn how to remove cactus pups on a plant. Get a very sharp knife and wipe the blade with some alcohol or a 10 percent bleach solution. This will prevent pathogens from entering the cut areas. Locate a pup and cut it away at a 45 degree angle. A slanted cut on the parent will deflect water so the area doesn’t rot before it can callus. Some propagators like to dust the cut end of the offset with sulfur powder to prevent fungal issues and rot. This is not necessary in most cases as long as you allow the cut end to callus fully. This may take a couple of weeks or even months. The end should be dry and hardened, slightly shriveled and whitish.

Growing Cactus Pups
After removing offsets from cactus and allowing them to callus, it is time to pot them up. The correct medium is well draining and gritty. You can purchase a cactus mixture or make your own with 50 percent pumice or perlite and 50 percent peat or compost. Cuttings only need a pot just a little larger than their diameter at the base. Cover one-third to one-half of the base with the medium or enough so the offset doesn’t fall over. Place the pup in indirect, but bright, sunlight and keep the medium lightly moist. Most cacti root in four to six weeks but some can take months. You can tell when it has rooted by noting any new green growth which indicates the roots have taken off and the plantlet is receiving nutrients and water.
1
0
文章
Dummer. ゛☀
2017年08月20日

Cacti are low maintenance plants for the home with a ton of character and a vast array of form. They are relatively maintenance free except for infrequent watering and annual food. Many gardeners ask “should I repot my cactus?” They don’t need repotting often, but once in a while for soil replenishment and when the plant needs a larger pot. When to repot a cactus plant depends upon the plant and its condition. Read on for tips on how to repot a cactus and do it without spending the rest of the day picking spines out of your hands.

Tools for Cactus Repotting
Cacti are succulents and tend to favor dry, hot conditions. They store moisture in their pads and use their spines as both defense and to provide some protection from burning hot sun rays. Cactus grown in the home can almost be ignored but they do require light, warmth, water and repotting to refresh the soil. Cactus repotting requires a special soil mix, well-draining container and some tactical protection. The first issue to deal with is the handling of a spiny plant. There are a couple of ways to go about this. You can wrap the plant in several layers of newspaper and secure lightly with tape or twine. You can also use a pair of leather gloves or, for smaller plants, just grab your oven mitts. One of the safest repotting tips is to use kitchen tongs. You will also need a cactus mix which you may purchase or make. A good combination is equal parts sand or bird gravel, potting soil and leaf mold. Your container must have excellent drainage holes and preferably be unglazed so the clay can direct away and evaporate any excess moisture.

When to Repot a Cactus Plant
You will know when to repot a cactus plant if you see roots coming out the bottom of the container. This indicates it is overly root bound. Most cacti find small spaces very cozy and can stay in their container for years. The sight of roots will let you know it has expanded too much and will need repotting. The next size up container will be appropriate since they like it snug. A general rule of thumb is to repot every 2 to 4 years. If you fertilize annually, the latter is more appropriate but if you don’t fertilize, repot in two years to replenish soil fertility. The best time is during active growth in January or February.

How to Repot a Cactus
Once you have answered the question, “should I repot my cactus,” it is time to gather your tools and trade in the old soil or container. Not every cactus needs a new container, but fresh soil is a good idea. Only pot bound plants need a larger pot. Wrap, glove or tong the plant gently out of its pot. They usually come out readily if the soil is dry but you may have to run a trowel around the edges to loosen the soil. Shake off the old soil and plant the cactus at the same depth it was growing in the old soil. Fill in around the roots with your medium and place it in a sunny southeast or east window. Among important repotting cactus tips is to not water the plant yet, as it is adjusting to being handled and new soil conditions. After a few weeks, you can water the plant and allow it to dry out before watering again.

Tools for Cactus Repotting
Cacti are succulents and tend to favor dry, hot conditions. They store moisture in their pads and use their spines as both defense and to provide some protection from burning hot sun rays. Cactus grown in the home can almost be ignored but they do require light, warmth, water and repotting to refresh the soil. Cactus repotting requires a special soil mix, well-draining container and some tactical protection. The first issue to deal with is the handling of a spiny plant. There are a couple of ways to go about this. You can wrap the plant in several layers of newspaper and secure lightly with tape or twine. You can also use a pair of leather gloves or, for smaller plants, just grab your oven mitts. One of the safest repotting tips is to use kitchen tongs. You will also need a cactus mix which you may purchase or make. A good combination is equal parts sand or bird gravel, potting soil and leaf mold. Your container must have excellent drainage holes and preferably be unglazed so the clay can direct away and evaporate any excess moisture.

When to Repot a Cactus Plant
You will know when to repot a cactus plant if you see roots coming out the bottom of the container. This indicates it is overly root bound. Most cacti find small spaces very cozy and can stay in their container for years. The sight of roots will let you know it has expanded too much and will need repotting. The next size up container will be appropriate since they like it snug. A general rule of thumb is to repot every 2 to 4 years. If you fertilize annually, the latter is more appropriate but if you don’t fertilize, repot in two years to replenish soil fertility. The best time is during active growth in January or February.

How to Repot a Cactus
Once you have answered the question, “should I repot my cactus,” it is time to gather your tools and trade in the old soil or container. Not every cactus needs a new container, but fresh soil is a good idea. Only pot bound plants need a larger pot. Wrap, glove or tong the plant gently out of its pot. They usually come out readily if the soil is dry but you may have to run a trowel around the edges to loosen the soil. Shake off the old soil and plant the cactus at the same depth it was growing in the old soil. Fill in around the roots with your medium and place it in a sunny southeast or east window. Among important repotting cactus tips is to not water the plant yet, as it is adjusting to being handled and new soil conditions. After a few weeks, you can water the plant and allow it to dry out before watering again.
2
0
文章
Dummer. ゛☀
2017年08月19日

Don’t invest too much in this plant’s name. Ponytail palm (Beaucarnea recurvata) is neither a real palm nor does it really have ponytails. Its swollen base looks like a palm and the long, thin leaves curve outward, then hang down like ponytails. But does ponytail palm flower? If you are hoping for flowers and fruit from this plant, there is good news and bad news. While you can get flowering on a ponytail palm, you may have to wait up to 30 years to see it.
Does Ponytail Palm Flower?
You can grow ponytail palm in the ground or in very large pots. In either case, given sufficient patience, you may be lucky enough to see it flower. Flowering on a ponytail palm does not occur the first year you purchase a small plant, nor, likely during the next decade. Before the plant flowers, it increases significantly in size and girth. The plant’s palm-like trunk sometimes grows to 18 feet high and widens t 6 feet in diameter. But size alone does not trigger first flowering on a ponytail palm. Experts believe that a combination of factors, including weather, can be instrumental in causing initial ponytail palm flowering. Once the plant blooms, it will flower every summer.
Ponytail Palm Flower Spike
You will know that ponytail palm flowering is near when the ponytail palm flower spike appears. The spike looks like a feather plume and it will produce myriad small branches holding hundreds of tiny flowers. The ponytail palm is dioecious. This means that it produces male flowers on some plants and female flowers on others. You can tell whether your flowering ponytail plants are male or female by the flower colors. Females have pink flowers; male flowers are ivory. Bees and other insects flock to the blooms.
Flowering on a Ponytail Palm
bear fruit after flowering. However, they will only do so if there are male flowering ponytail plants nearby. The seed capsules on the ponytail palm flower spike are papery capsules. They contain tan seeds the size and shape of peppercorns. Once flowering and fruiting is completed, each ponytail palm flower spike dries up and withers. Cut it off at this point to enhance the beauty of the plant.

Does Ponytail Palm Flower?
You can grow ponytail palm in the ground or in very large pots. In either case, given sufficient patience, you may be lucky enough to see it flower. Flowering on a ponytail palm does not occur the first year you purchase a small plant, nor, likely during the next decade. Before the plant flowers, it increases significantly in size and girth. The plant’s palm-like trunk sometimes grows to 18 feet high and widens t 6 feet in diameter. But size alone does not trigger first flowering on a ponytail palm. Experts believe that a combination of factors, including weather, can be instrumental in causing initial ponytail palm flowering. Once the plant blooms, it will flower every summer.

Ponytail Palm Flower Spike
You will know that ponytail palm flowering is near when the ponytail palm flower spike appears. The spike looks like a feather plume and it will produce myriad small branches holding hundreds of tiny flowers. The ponytail palm is dioecious. This means that it produces male flowers on some plants and female flowers on others. You can tell whether your flowering ponytail plants are male or female by the flower colors. Females have pink flowers; male flowers are ivory. Bees and other insects flock to the blooms.

Flowering on a Ponytail Palm
bear fruit after flowering. However, they will only do so if there are male flowering ponytail plants nearby. The seed capsules on the ponytail palm flower spike are papery capsules. They contain tan seeds the size and shape of peppercorns. Once flowering and fruiting is completed, each ponytail palm flower spike dries up and withers. Cut it off at this point to enhance the beauty of the plant.
1
1
文章
Dummer. ゛☀
2017年08月13日

You might have to be a fan of the once popular television show MASH to know Loretta Swit, the actress who played Hotlips Hoolihan. However, you don’t have to be a fan to find an excellent representation of the name in the plant world. Hot lips plant has just the kind of pucker you might expect from the moniker, but the pair of lips are actually the plant’s flower. What is hot lips plant? Read on for more hot lips plant info and tips on growing this unique specimen.
What is Hot Lips Plant?
There are over 2,000 species of Psychotria, the genus under which hot lips falls. Where does hot lips grow? Psychotria elata is part of the tropical rainforest understory flora of the Americas. It is a unique plant with uninteresting flowers but fabulous lip-like bracts. The plant can be difficult to grow and has very special cultivation conditions. Hot lips grows as a shrub or small tree. The plant has deeply veined simple leaves of matte green. The flower is actually a pair of modified leaves that pout around the tiny star-like white to cream flowers. These become small bluish-black berries. The plant is very attractive to butterflies and hummingbirds. Unfortunately, the plant is severely threatened due to habitat destruction and development. It is nearly impossible to get the plant or seeds here in the States. It is a common gift plant in Central America, however, usually for Valentine’s Day.
Additional hot lips plant info tells us that the plant is also called hooker’s lips but hot lips is a little more family friendly. Interestingly, this plant contains the chemical dimethyltryptamine, a psychedelic. It is also used as traditional medicine among the Amazon people to treat aches and arthritis, infertility and impotency.
Where Does Hot Lips Plant Grow?
Hot lips plant is from Central and South America, especially in areas like Columbia, Ecuador, Costa Rica and Panama. It grows where the soil is rich and humic from leaf litter — moist and sheltered from the most powerful sun rays by upper story trees. Interior growers turn to plants from around the world to add exotic touches to the home. Hot lips plant fits the bill but requires a tropical environment. For this reason, it is mostly a collector’s plant for much of the United States. Growing hot lips plants requires a heated greenhouse or solarium, high humidity and shelter from harsh solar rays.
Growing hot lips plant means mimicking the understory tropical environment for which it is suited. Most potting soil will not have both the excellent drainage and moisture retentiveness necessary to raise these plants. Add a bit of vermiculite and peat moss before potting up the plant. Place it in an area with temperatures of at least 70 F. (21 C.), humidity of at least 60 percent and indirect bright lighting.

What is Hot Lips Plant?
There are over 2,000 species of Psychotria, the genus under which hot lips falls. Where does hot lips grow? Psychotria elata is part of the tropical rainforest understory flora of the Americas. It is a unique plant with uninteresting flowers but fabulous lip-like bracts. The plant can be difficult to grow and has very special cultivation conditions. Hot lips grows as a shrub or small tree. The plant has deeply veined simple leaves of matte green. The flower is actually a pair of modified leaves that pout around the tiny star-like white to cream flowers. These become small bluish-black berries. The plant is very attractive to butterflies and hummingbirds. Unfortunately, the plant is severely threatened due to habitat destruction and development. It is nearly impossible to get the plant or seeds here in the States. It is a common gift plant in Central America, however, usually for Valentine’s Day.

Additional hot lips plant info tells us that the plant is also called hooker’s lips but hot lips is a little more family friendly. Interestingly, this plant contains the chemical dimethyltryptamine, a psychedelic. It is also used as traditional medicine among the Amazon people to treat aches and arthritis, infertility and impotency.
Where Does Hot Lips Plant Grow?
Hot lips plant is from Central and South America, especially in areas like Columbia, Ecuador, Costa Rica and Panama. It grows where the soil is rich and humic from leaf litter — moist and sheltered from the most powerful sun rays by upper story trees. Interior growers turn to plants from around the world to add exotic touches to the home. Hot lips plant fits the bill but requires a tropical environment. For this reason, it is mostly a collector’s plant for much of the United States. Growing hot lips plants requires a heated greenhouse or solarium, high humidity and shelter from harsh solar rays.

Growing hot lips plant means mimicking the understory tropical environment for which it is suited. Most potting soil will not have both the excellent drainage and moisture retentiveness necessary to raise these plants. Add a bit of vermiculite and peat moss before potting up the plant. Place it in an area with temperatures of at least 70 F. (21 C.), humidity of at least 60 percent and indirect bright lighting.
0
0
文章
Dummer. ゛☀
2017年08月13日

Houseplants and cats: sometimes the two just don’t mix! Felines are innately curious, which means that protecting houseplants from cats can be a major challenge. Read on for helpful tips on how to protect indoor plants from cats, as well as a list of houseplants cats will leave alone (probably!).How to Protect Indoor Plants from Cats
Protecting houseplants from cats is largely a matter of trial and error, and the following tips may or may not work for you and your kitty. However, they’re worth a try, and they may just be successful!
Chunks of citrus peels on the surface of the soil are often effective houseplant cat deterrents. Most cats aren’t crazy about the aroma of citrus. Arrange a few large rocks in pots, with the rough edges facing up. The rocks add interest and actually help keep moisture in the soil, but kitties don’t like the feel of rough stuff on their paws. If you don’t have rocks in your yard, look at a hobby shop or aquarium store. Other ideas include oyster shells or chunks of broken terracotta pots.
Cut a piece of chicken wire or hardware cloth slightly smaller than the diameter of the container. Cover the wire with a thin layer of potting soil topped with colorful stones or pea gravel. Safe houseplant cat deterrents include pine cones nestled into the top of the soil. Cats usually don’t appreciate the feel or the smell. Give kitty his/her own pot of catnip or catmint. The cat may be so delighted that it will leave your other plants alone. Cats also tend to like barley, oatgrass, or wheatgrass (The down side is that this may simply tell your kitty that eating plants is acceptable.). Play with your kitty every day. Provide scratching posts and various toys to stimulate your kitty and prevent boredom, which is one of the reasons houseplants become attractive. Pick up a cat houseplant deterrent spray at your local pet store. Bitter apple tends to be very effective.
Houseplants Cats will Leave Alone
In most cases, cats tend to avoid the following plants: Rosemary – Most cats hate it, but felines are unpredictable. Some may actually love it. Coleus canina – This attractive plant, also known as scaredy-cat plant, can be grown indoors or outdoors. Lemon balm – Cats don’t like the citrusy aroma or the rough texture of the foliage. Curry plant (Helichrysum italicum) – Don’t confuse this herb with real curry (Murraya koenigii). Geraniums – The aroma and the thick texture of the leaves may keep cats away. Cactus, miniature roses and other prickly or thorny plants also seem to deter cats.
Protecting houseplants from cats is largely a matter of trial and error, and the following tips may or may not work for you and your kitty. However, they’re worth a try, and they may just be successful!
Chunks of citrus peels on the surface of the soil are often effective houseplant cat deterrents. Most cats aren’t crazy about the aroma of citrus. Arrange a few large rocks in pots, with the rough edges facing up. The rocks add interest and actually help keep moisture in the soil, but kitties don’t like the feel of rough stuff on their paws. If you don’t have rocks in your yard, look at a hobby shop or aquarium store. Other ideas include oyster shells or chunks of broken terracotta pots.

Cut a piece of chicken wire or hardware cloth slightly smaller than the diameter of the container. Cover the wire with a thin layer of potting soil topped with colorful stones or pea gravel. Safe houseplant cat deterrents include pine cones nestled into the top of the soil. Cats usually don’t appreciate the feel or the smell. Give kitty his/her own pot of catnip or catmint. The cat may be so delighted that it will leave your other plants alone. Cats also tend to like barley, oatgrass, or wheatgrass (The down side is that this may simply tell your kitty that eating plants is acceptable.). Play with your kitty every day. Provide scratching posts and various toys to stimulate your kitty and prevent boredom, which is one of the reasons houseplants become attractive. Pick up a cat houseplant deterrent spray at your local pet store. Bitter apple tends to be very effective.

Houseplants Cats will Leave Alone
In most cases, cats tend to avoid the following plants: Rosemary – Most cats hate it, but felines are unpredictable. Some may actually love it. Coleus canina – This attractive plant, also known as scaredy-cat plant, can be grown indoors or outdoors. Lemon balm – Cats don’t like the citrusy aroma or the rough texture of the foliage. Curry plant (Helichrysum italicum) – Don’t confuse this herb with real curry (Murraya koenigii). Geraniums – The aroma and the thick texture of the leaves may keep cats away. Cactus, miniature roses and other prickly or thorny plants also seem to deter cats.
0
0
文章
Dummer. ゛☀
2017年08月12日

Ficus are one of the most common and easy to grow houseplants. In fact, they are so easy to grow indoors that occasionally the plants outgrow their site. Ficus plants don’t like to be moved, so the best option is to prune the plant to keep it manageable. Let’s talk about how to prune a ficus tree and, more importantly for the plant’s health, when should ficus be pruned? Ficus are not winter hardy and are generally grown as houseplants in the United States and other parts of the world. They are native to tropical and subtropical regions and are considered part of this type of exterior landscaping in warm zones. Indoor plants have slow, steady growth but can become heavy on the ends and lose their arching shape. Rejuvenation pruning will make the plant more compact and enhance proper branch formation.
When Should Ficus Be Pruned?
Obviously, trimming ficus trees is necessary if the plant has grown into a byway or is touching the ceiling. Trimming to diminish size is a common reason for pruning any woody plant. Timing is also an issue. Ficus tree pruning needs to take place when the plant is no longer actively growing. Most plants are vegetatively active in spring and summer, with growth dying down in fall. By winter, the plant has gone into dormancy and is less susceptible to injury. Therefore, winter is the best time for trimming ficus trees. You can prune out dead material at any time during the year.
How to Prune a Ficus Tree
Use a clean sharp pair of bypass pruners and don a pair of gloves. Ficus have a latex sap that may be irritating to skin. First, look at the tree overall and decide what areas need to be minimized. If the tree is too tall, this is clearly where you start, but if you need to create a better silhouette, you will have to make a plan before you start cutting. There are some cutting rules for ficus tree pruning in order to create a better appearance and keep cuts from looking obvious. Once you have decided which vegetation needs to go, the first step is to remove any dead or broken branches. This will give you an even better idea of the remaining necessary cuts.
Ficus Pruning Tips
Cut just before a growth node so that new growth will sprout there and cover the stump. Another tip is to remove a branch back to another branch that is one of its size. This will prevent unsightly stubs and restore the size and appearance of the ficus. Cut at a slant away from the node or secondary branch. If you have a damaged ficus with lots of dead growth, prune away no more than one-third of the material. You can cut more off later as the plant recovers. The best time to try this sort of pruning is after the plant has started re-sprouting so you can ensure that you are not removing recovered material.

When Should Ficus Be Pruned?
Obviously, trimming ficus trees is necessary if the plant has grown into a byway or is touching the ceiling. Trimming to diminish size is a common reason for pruning any woody plant. Timing is also an issue. Ficus tree pruning needs to take place when the plant is no longer actively growing. Most plants are vegetatively active in spring and summer, with growth dying down in fall. By winter, the plant has gone into dormancy and is less susceptible to injury. Therefore, winter is the best time for trimming ficus trees. You can prune out dead material at any time during the year.

How to Prune a Ficus Tree
Use a clean sharp pair of bypass pruners and don a pair of gloves. Ficus have a latex sap that may be irritating to skin. First, look at the tree overall and decide what areas need to be minimized. If the tree is too tall, this is clearly where you start, but if you need to create a better silhouette, you will have to make a plan before you start cutting. There are some cutting rules for ficus tree pruning in order to create a better appearance and keep cuts from looking obvious. Once you have decided which vegetation needs to go, the first step is to remove any dead or broken branches. This will give you an even better idea of the remaining necessary cuts.

Ficus Pruning Tips
Cut just before a growth node so that new growth will sprout there and cover the stump. Another tip is to remove a branch back to another branch that is one of its size. This will prevent unsightly stubs and restore the size and appearance of the ficus. Cut at a slant away from the node or secondary branch. If you have a damaged ficus with lots of dead growth, prune away no more than one-third of the material. You can cut more off later as the plant recovers. The best time to try this sort of pruning is after the plant has started re-sprouting so you can ensure that you are not removing recovered material.
0
0
文章
Dummer. ゛☀
2017年08月10日

Your brilliant indoor croton plant, the one you admire and prize, is now dropping leaves like crazy. Don’t panic. Leaf drop on croton plants can be expected any time the plant is stressed or out of balance. You just need to get to know your croton and how to give croton what it needs to thrive. Read on to learn more about why croton leaves fall off.
Why is My Croton Dropping Leaves?
Change can be difficult for a croton plant. A croton plant dropping leaves is often a new plant’s response to being transplanted or transported from the greenhouse to your home. It’s natural for a croton to drop leaves as it adjusts to environmental changes. Once settled, in three or four weeks, your plant will begin to produce new growth. If you haven’t changed the plant’s location recently and your croton leaves fall off, then it’s time to look at other possibilities. Heat and humidity – Croton plants are tropicals, meaning they thrive in warm and humid conditions. If your croton’s leaves fall off, it could be that it’s exposed to cold or hot extremes such as open doors or air ducts. A humidifier or a regular misting with distilled water will also help your croton feel at home. Light – Croton leaf drop and a lack of fiery color can be caused by insufficient sunlight. There are more than 750 varieties of croton plant, some needing more light than others. In general, the more variegated the plant, the more light it craves.
Water – The watering schedule for your other houseplants may not be suitable for your croton. Overwatering can damage the roots and cause croton leaf drop. When the soil on top feels dry, water until the overflow begins to pool in the tray. To prevent root rot, use a pebbled tray or pour off any pooled water after 30 minutes. Underwatering can also cause leaf drop on croton plants. If you’re watering and misting consistently and your croton still seems dry, consider transplanting in fresh, high-quality potting soil that includes peat moss to help retain moisture. Diseases and pests – If you think you’ve taken care of every possible environmental reason your croton plant is dropping leaves, look again. Inspect underneath the leaves for signs of disease or insect pests and treat accordingly.
Here’s the best news: crotons are tough. Even if your croton is brown and leafless, it doesn’t mean that your lovely plant is gone forever. Gently scratch the main stem. If the tissue underneath is still green, your plant is alive and may recover. Continue to care for your plant’s watering and environmental needs. In several weeks, it’s quite likely that your patience and care will be rewarded with the first of new, bright leaves.

Why is My Croton Dropping Leaves?
Change can be difficult for a croton plant. A croton plant dropping leaves is often a new plant’s response to being transplanted or transported from the greenhouse to your home. It’s natural for a croton to drop leaves as it adjusts to environmental changes. Once settled, in three or four weeks, your plant will begin to produce new growth. If you haven’t changed the plant’s location recently and your croton leaves fall off, then it’s time to look at other possibilities. Heat and humidity – Croton plants are tropicals, meaning they thrive in warm and humid conditions. If your croton’s leaves fall off, it could be that it’s exposed to cold or hot extremes such as open doors or air ducts. A humidifier or a regular misting with distilled water will also help your croton feel at home. Light – Croton leaf drop and a lack of fiery color can be caused by insufficient sunlight. There are more than 750 varieties of croton plant, some needing more light than others. In general, the more variegated the plant, the more light it craves.

Water – The watering schedule for your other houseplants may not be suitable for your croton. Overwatering can damage the roots and cause croton leaf drop. When the soil on top feels dry, water until the overflow begins to pool in the tray. To prevent root rot, use a pebbled tray or pour off any pooled water after 30 minutes. Underwatering can also cause leaf drop on croton plants. If you’re watering and misting consistently and your croton still seems dry, consider transplanting in fresh, high-quality potting soil that includes peat moss to help retain moisture. Diseases and pests – If you think you’ve taken care of every possible environmental reason your croton plant is dropping leaves, look again. Inspect underneath the leaves for signs of disease or insect pests and treat accordingly.

Here’s the best news: crotons are tough. Even if your croton is brown and leafless, it doesn’t mean that your lovely plant is gone forever. Gently scratch the main stem. If the tissue underneath is still green, your plant is alive and may recover. Continue to care for your plant’s watering and environmental needs. In several weeks, it’s quite likely that your patience and care will be rewarded with the first of new, bright leaves.
0
0
文章
Dummer. ゛☀
2017年08月10日

The cast iron plant (Aspidistra elatior), also known as iron plant and ballroom plant, is an extremely hardy houseplant and a perennial favorite in some regions. Growing cast iron plants is especially favored by those who don’t have a lot of time for plant care, as this species can survive even the most extreme conditions where other plants would shrivel and die, which makes cast iron plant care a snap. Keep reading to learn more about how to grow a cast iron plant indoors or using cast iron plants in the landscape.
How to Grow a Cast Iron Plant Indoors
Growing cast iron indoors is extremely easy and rewarding. This China native is a member of the lily family. The plant has small purple flowers that only appear near the soil surface and are hidden in its foliage. For what this plant may lack in glitz, however, it makes up for in robust, healthy dark green leaves. The cast iron plant grows well in low light indoors and is not finicky about regular water either. Although a slow grower, this reliable performer will live for many years, reaching a mature height of around 2 feet.
Growing Cast Iron Plants Outdoors
Various cast iron cultivars succeed where other vegetation will not. Using cast iron plant in the landscape is common as a ground cover under trees where other plants fail to thrive and in other hard-to-grow areas. You can also use is as a background plant in your flower bed or along with azaleas for a nice in-between filler plant.
Cast Iron Plant Care
Although the cast iron plant will tolerate extreme conditions, it’s always a good idea to provide plenty of water, especially during very dry periods. This plant also responds well to organic soil and an annual dose of all-purpose fertilizer. Propagate cast iron plants by division. Although new plants are slow to grow, with some patience and time, the new plant will thrive. This hardy plant thrives in very hot, dry summers and isn’t easily damaged by cold winters. Insects seem to leave it alone, and it very rarely is bothered by disease of any kind. When you want a plant with such ease of care and flexibility or when all else fails, give this easy-care plant a try. Grow cast iron indoors or try your hand at using cast iron plant in the landscape for a unique look.

How to Grow a Cast Iron Plant Indoors
Growing cast iron indoors is extremely easy and rewarding. This China native is a member of the lily family. The plant has small purple flowers that only appear near the soil surface and are hidden in its foliage. For what this plant may lack in glitz, however, it makes up for in robust, healthy dark green leaves. The cast iron plant grows well in low light indoors and is not finicky about regular water either. Although a slow grower, this reliable performer will live for many years, reaching a mature height of around 2 feet.

Growing Cast Iron Plants Outdoors
Various cast iron cultivars succeed where other vegetation will not. Using cast iron plant in the landscape is common as a ground cover under trees where other plants fail to thrive and in other hard-to-grow areas. You can also use is as a background plant in your flower bed or along with azaleas for a nice in-between filler plant.

Cast Iron Plant Care
Although the cast iron plant will tolerate extreme conditions, it’s always a good idea to provide plenty of water, especially during very dry periods. This plant also responds well to organic soil and an annual dose of all-purpose fertilizer. Propagate cast iron plants by division. Although new plants are slow to grow, with some patience and time, the new plant will thrive. This hardy plant thrives in very hot, dry summers and isn’t easily damaged by cold winters. Insects seem to leave it alone, and it very rarely is bothered by disease of any kind. When you want a plant with such ease of care and flexibility or when all else fails, give this easy-care plant a try. Grow cast iron indoors or try your hand at using cast iron plant in the landscape for a unique look.
0
0
文章
Dummer. ゛☀
2017年08月04日

Brighten a shady corner of your yard with a variety of gorgeous hostas. These leafy perennials bring color and texture to garden beds, yet don’t demand intense upkeep to look their best. In fact, the toughest part of growing hostas may simply be choosing which kind to grow.
Here is everything you need to know to grow hostas.
Where to Plant Hostas
To plant hostas, select a spot that receives part to full shade. Most types of hostas can withstand morning, but prefer a shady setting. It’s important to know that these perennials grow best in soil that’s fertile and full of organic matter. Avoid planting hostas in heavy clay soil, which won’t offer enough drainage. In areas that receive a lot of snow in the winter, to protect stems and leaves, place hostas where snow tends to pile up.
How to Plant Hostas
The best time of year to plant hostas is in early spring or early fall (as soon as summer heat breaks), and before the rainy season if your area has one. Hosta varieties come in different sizes. To determine the right spacing in the garden, check the plant tag. All but the smallest types of hostas typically take a few years to reach their full size, and it’s important to give plants enough elbow room to mature. When planting, place the plant so that the root ball is at the same depth in soil as it was in the pot. Afterwards, be sure to water well.
How to Plant Hostas in Containers
The right container size depends on how large your hosta will become. In general, use a pot that is at least 2 inches larger than the container the plant came in. If you plant a hosta in a pot that is several times larger than the one it came in, take care not to overwater. Until roots become well established, they will retain moisture longer, which provides an ideal breeding ground for root diseases. Once you have chosen the container, follow the planting guidelines listed above.
How to Water Hostas
It is especially important to give hostas consistent moisture during the first growing season, while they are taking root. Check the soil weekly (more often in the summertime), and water when the top inch is dry. Once hosta plants are firmly established, they can often survive on rainfall, except during times of drought. When growing hostas under trees, however, tree roots typically gobble available moisture, so you’ll need to water. The same goes with larger hostas, whose leaves can form a canopy that sheds overhead water, not allowing any to reach the ground (and their roots).
How to Divide Hostas
Hostas typically grow best when they’re left alone to grow. Many hosta varieties don’t even reach maturity for five years. Once they have matured, however, you may want to divide them.
Divide hostas in spring or early fall, before the rainiest part of the season arrives. If you just want to multiply your plants to place around your yard, simply dig up any smaller plants that have formed around the main clump and replant them. To divide a large clump, unearth it, digging out as many roots as possible. (With a large hosta, you may have to dig down 18 inches to get enough root mass.) Shift the plant onto a tarp, and use your hands, a shovel, or a knife to divide it into smaller sections. Replant the sections, following the guidelines above.
How to Use Hostas
In the garden, try growing hostas to provide an eye-catching shade planting, as well as to attract hummingbirds. Planting multiple large hostas can form an effective ground cover or hedge. A row of hostas can also soften a fence, skirt a tree, or edge a driveway. Small types of hostas work well as edging plants in a shade bed.
Hosta leaves make a nice addition to garden floral bouquets. If you’re growing hostas with different leaf colors, try creating an arrangement of leaves in a vase. Hosta flowers, especially the fragrant types, bring a sweet aroma to indoor settings. The flower stalk opens blooms from bottom to top, so it’s best to pick after at least one-half of the buds have opened.
Here is everything you need to know to grow hostas.
Where to Plant Hostas
To plant hostas, select a spot that receives part to full shade. Most types of hostas can withstand morning, but prefer a shady setting. It’s important to know that these perennials grow best in soil that’s fertile and full of organic matter. Avoid planting hostas in heavy clay soil, which won’t offer enough drainage. In areas that receive a lot of snow in the winter, to protect stems and leaves, place hostas where snow tends to pile up.

How to Plant Hostas
The best time of year to plant hostas is in early spring or early fall (as soon as summer heat breaks), and before the rainy season if your area has one. Hosta varieties come in different sizes. To determine the right spacing in the garden, check the plant tag. All but the smallest types of hostas typically take a few years to reach their full size, and it’s important to give plants enough elbow room to mature. When planting, place the plant so that the root ball is at the same depth in soil as it was in the pot. Afterwards, be sure to water well.
How to Plant Hostas in Containers
The right container size depends on how large your hosta will become. In general, use a pot that is at least 2 inches larger than the container the plant came in. If you plant a hosta in a pot that is several times larger than the one it came in, take care not to overwater. Until roots become well established, they will retain moisture longer, which provides an ideal breeding ground for root diseases. Once you have chosen the container, follow the planting guidelines listed above.
How to Water Hostas
It is especially important to give hostas consistent moisture during the first growing season, while they are taking root. Check the soil weekly (more often in the summertime), and water when the top inch is dry. Once hosta plants are firmly established, they can often survive on rainfall, except during times of drought. When growing hostas under trees, however, tree roots typically gobble available moisture, so you’ll need to water. The same goes with larger hostas, whose leaves can form a canopy that sheds overhead water, not allowing any to reach the ground (and their roots).

How to Divide Hostas
Hostas typically grow best when they’re left alone to grow. Many hosta varieties don’t even reach maturity for five years. Once they have matured, however, you may want to divide them.
Divide hostas in spring or early fall, before the rainiest part of the season arrives. If you just want to multiply your plants to place around your yard, simply dig up any smaller plants that have formed around the main clump and replant them. To divide a large clump, unearth it, digging out as many roots as possible. (With a large hosta, you may have to dig down 18 inches to get enough root mass.) Shift the plant onto a tarp, and use your hands, a shovel, or a knife to divide it into smaller sections. Replant the sections, following the guidelines above.

How to Use Hostas
In the garden, try growing hostas to provide an eye-catching shade planting, as well as to attract hummingbirds. Planting multiple large hostas can form an effective ground cover or hedge. A row of hostas can also soften a fence, skirt a tree, or edge a driveway. Small types of hostas work well as edging plants in a shade bed.
Hosta leaves make a nice addition to garden floral bouquets. If you’re growing hostas with different leaf colors, try creating an arrangement of leaves in a vase. Hosta flowers, especially the fragrant types, bring a sweet aroma to indoor settings. The flower stalk opens blooms from bottom to top, so it’s best to pick after at least one-half of the buds have opened.
0
0
文章
Gina
2017年05月23日


If your vision of growing cactus involves a dry desert look, think again. Cactus and succulents are one of the hottest garden trends going on right now, and we all should give them a little look. Live in a northern climate and don’t think you can grow them? We cover that too. Here’s how to grow cactus, and some great inspiration in using them as a modern design element to update any garden or landscaping .
Basics Needs of Cactus
First of all, when most of us think of cactus, we think of the varieties meant for desert environments. While there are many beautiful ones that grow down south, most people don’t know that there are several hardy varieties as well. Check with your local nursery, then check out our guidelines for growing in northern gardens. So number one is that they need to be well matched with their planting zone.
Second, all cacti need well drained soil. Grow them in a mix of 50 percent soil to 50 percent coarse sand. If growing in containers, use a commercially available cacti mix.
They need very little water. If you live in an area that gets rain in the summer, than that is probably all they need. If they grow in containers, let them dry out completely before watering.
They need little fertilizer. For blooming varieties, you may wish to give them a diluted drink of liquid fertilizer just as they start setting buds.
They need full sun. Duh.
Growing them in the North
So the only trick to growing cacti in the north is to grow the proper varieties. Better Homes and Gardens has a good article on just that right here.
Contain Your Cactus
If you don’t want to be held back by your climate, keep in mind cacti do well in containers. They can be brought inside during the winter to a sun room or other bright warm space. Three tips for you…
Use gloves. Another duh.
Use a well drained soil mix made for cacti.
Don’t over water.

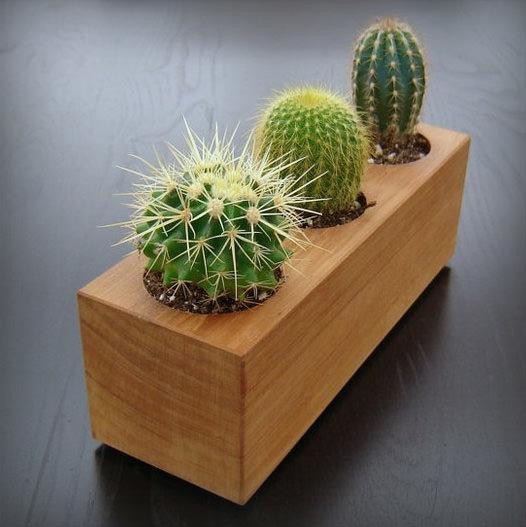

Texture, Design and Interest
So here is where the appreciation for cacti comes in. Fewer plants on this earth have such amazing adaptive qualities. They are a lesson in form and function, in the beauty of Mother Nature and a lesson in her harshness as well. Used in a repeat pattern they are an exceptional design element. Nothing adds more texture and interest to a garden. Aren’t convinced? Check out these inspiring photos.
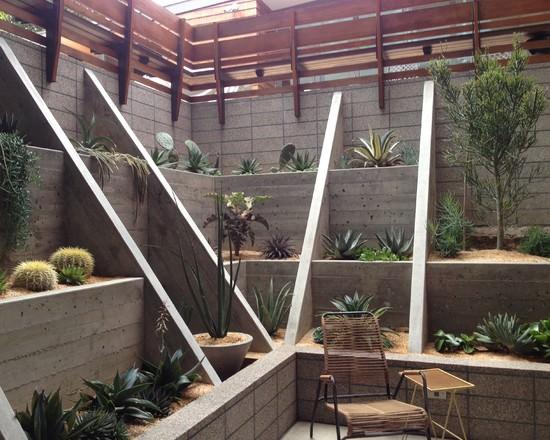


Growing cactus can be an adventure in modern gardening, and can be the beginning of a whole new obsession no matter where you live!
0
0
文章
Hande Salcan
2017年05月23日


There are ways to get free plants for your garden, and I don’t mean bribing the checker at the home improvement store. Nope, these are more satisfying anyway! The way to get free plants is to propagate plants that already exist, either from your own garden, or a neighbor or gardening buddies. To propagate means to basically cause the plant to multiply… thus taking one plant, and turning it into several, or even many! Free plants!
There are many ways to propagate plants, but many of them are too complicated for the average gardener, and usually take extreme patience and a greenhouse. I’m going to concentrate on the ones that are easy and within the ability of even a beginner. These methods include gathering seed, division, softwood cuttings, and leaf cuttings. Our feature photo, above, is a great example of division by cuttings… ‘Cafe Sucre Furine’ shows us how to propagate basil by cuttings. (Keep reading, we cover it!)
I’m not going to get detailed about seed saving, because we just did a post on that, but you should jump over to learn all our seed saving tips.
Division is an easy process that splits one plant into several, best done in spring or fall. Any plant that grows with more than one central “stalk” is technically a candidate for division, but certain plants are easier pickings. In other words, plants that grow in “clumps”. Good choices? Most perennials without a taproot, such as hostas, day lilies, iris, grasses, phlox, coneflower, black eyed susans, asters and astilbe. (And many, many more!) The basic steps?
Dig up the plant with a sharp spade
Separate the crowns to make new plants. You can tease the roots apart with your fingers with some plants, but others you may have to cut them with a knife. Don’t worry, they will be fine!
Replant each crown you separated as a new plant immediately, and water well until they get established.
Check out this video on dividing perennials from ‘Fine Gardening’.
Softwood cuttings are kind of like when we cut a stem of a houseplant and stick it in a glass of water until it grows roots, except we stick it into moist potting soil and trap it with a plastic bag. (OK, you can just stick some plants into water, let’s be honest… some are just so easy!) Photo credit below – Education Outside at AFY.
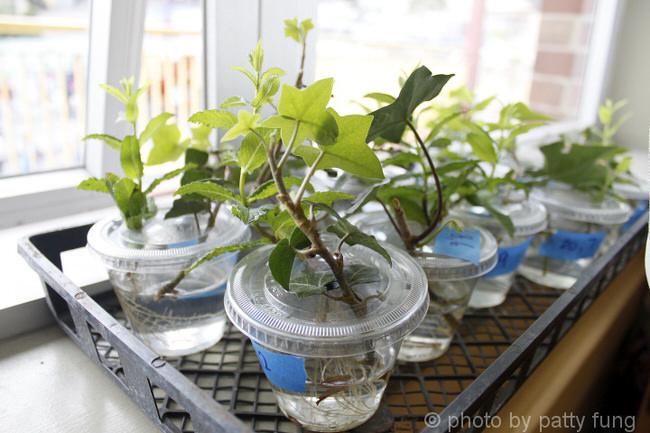
If you want to try softwood cuttings on plants with tougher stems, like hydrangeas, follow this tutorial by ‘This Old House‘… this should work for many soft stemmed shrubs. This is just a touch more work, but don’t let it scare you. And when they mention rooting hormone powder and you start to panic, don’t worry. Just ask for it at your local nursery, it looks like cornstarch and just helps… you can do it without though. Don’t believe me? Here is a softwood cutting tutorial for softer stemmed perennials and herbs from ‘Mother Earth Living’… and they agree with me, it doesn’t have to be that complicated!

The last easy method is propagation by leaf cuttings. What this means is you basically cut off a leaf and some of the stem, then plant it into soil medium just like you did for softwood cuttings. This works really well with succulents, which are so popular right now. In fact in my garden, these propagate themselves. When a windstorm breaks off some stem or leaves, they replant themselves everywhere! So really, how hard can it be? (My sedum “Angelina” is a main offender, but I love it!) Wikihow has a great tutorial on how to propagate succulents by leaf cutting.
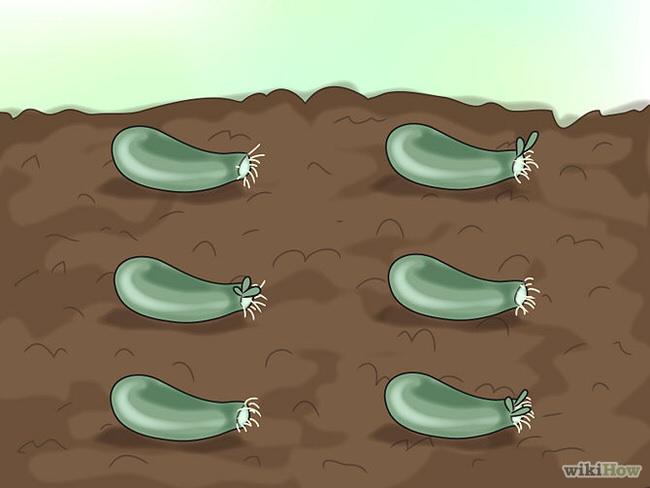
Ok, so that’s it! Easy ways to make free plants for your garden, or host a swap party with family and friends and share!
8
9
文章
Colorful
2017年05月23日

9 different colors of houseplants and how they impact your lifestyle! Learn about them and bring them in to beat the winter blues!
If you are suddenly feeling anxious, tired or sad and that you’re lacking energy, well join the club and don’t worry; winter is coming. Days are way too short, temperatures are low, sun is absent of the picture and summer gave way to a colder and heavier season. Yes, it’s tough, but winter also has advantages: snowfalls, holidays, skiing. If winter activities are not enough to kick the blues, we have lots of suggestions for ways to lift your spirits up and get rid of the winter melancholies.
You miss the light, the greenery and the colors of summer? So let’s bring them home! A lot of studies have shown that indoor plants can have positive effects on wellbeing. Besides providing a soothing environment, reducing stress or making you relax, indoor plants also stimulate us. This is exactly what we need to beat the winter blues, isn’t it?
And to make the solution even more effective, you should include flowers in the mix. Indeed, colors have healing powers that can cheer anyone up! Garden design trends are also incorporating color therapy. Meaning, that the arrangements include colorful flowers which trigger happy emotions, heightens feelings of life satisfaction and affects social behavior in a positive manner, as analyzed by behavioral studies led at Rutgers University. Let’s explore colors, shall we?
1. Red
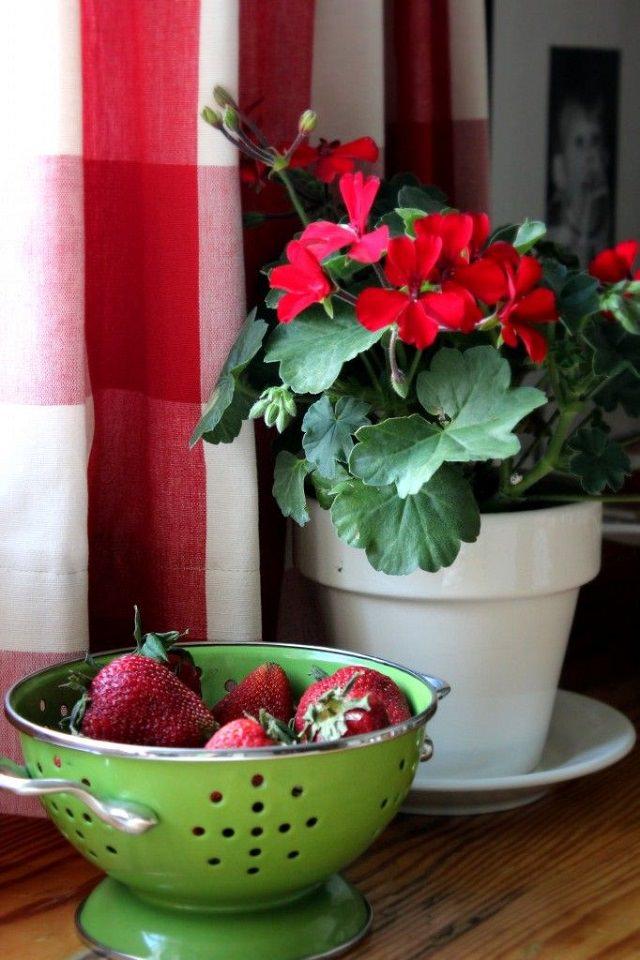
Even if red is not a recommended when it comes to the wall of your new bedroom, this color triggers a sense of vitality and boosts energy. This warm color is good for passive people and for those who always feel tired. Red also multiplies by ten the senses such as hearing, vision and touch. So what do you think about a Ranunculus bouquet in your bedroom or poisettias, Christmas cactus, geraniums, you have plenty of options.
2. Orange
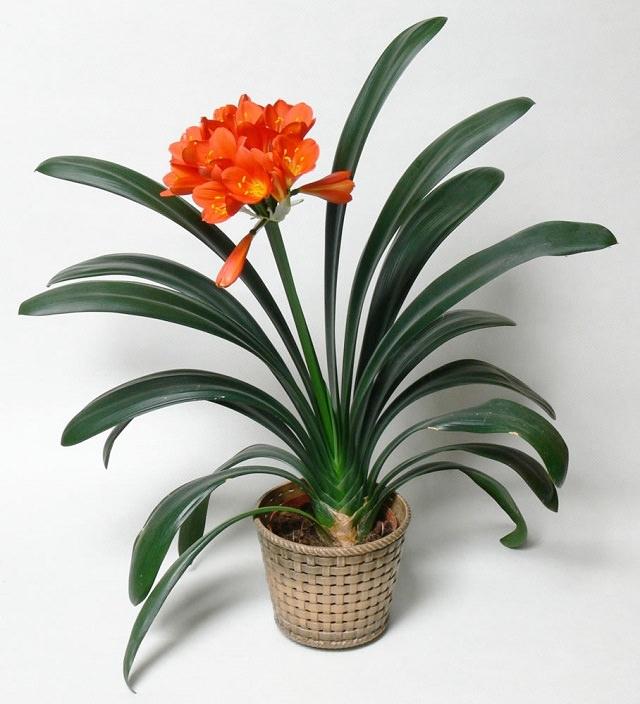
Don’t forget to add some orange in your indoor landscape design. Like red, it is a warm color but it’s less exciting. It still cheers people up but in a softer way. By seeing orange flowers such as begonias, people feel their body and mind relieved from pressures. Plus, orange fosters creative thinking, by helping people at rock bottom get out of it and imagine new possibilities in life.
3. Yellow
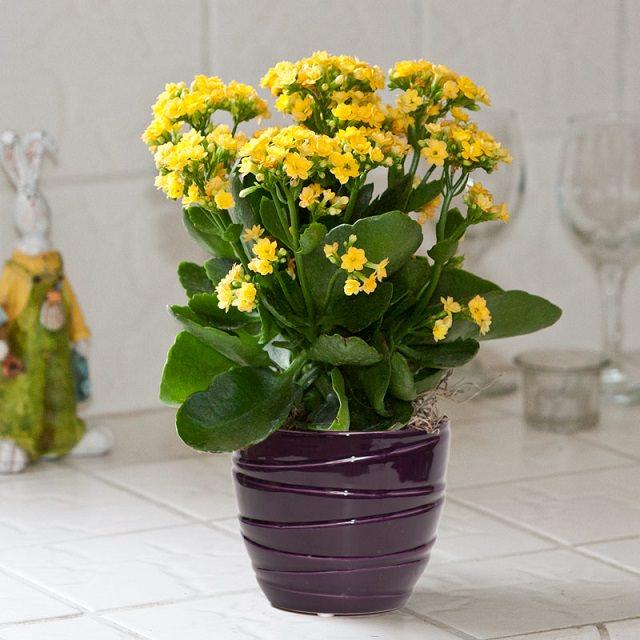
If creative people love yellow, it is because it allows them to be even more creative. This cheerful color, associated to the brightness of the sun, helps stimulate intelligence. Just be careful not to overuse it because it can lead to insomnia for example. So, just avoid putting those wonderful sunflowers in your bedroom. However, you have many other planting options like sweet potato vine, kalenchoe, black eyed susan etc.
4. Green
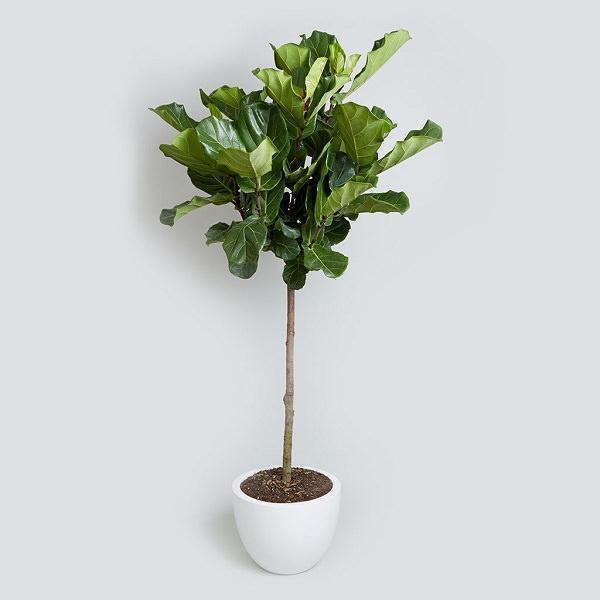
Because green is the color of nature and that represents the Earth, it symbolizes growth and renewal. So green bring balance and comforts you. A Spider Plant is perfect to bring harmony into a home.
5. Blue
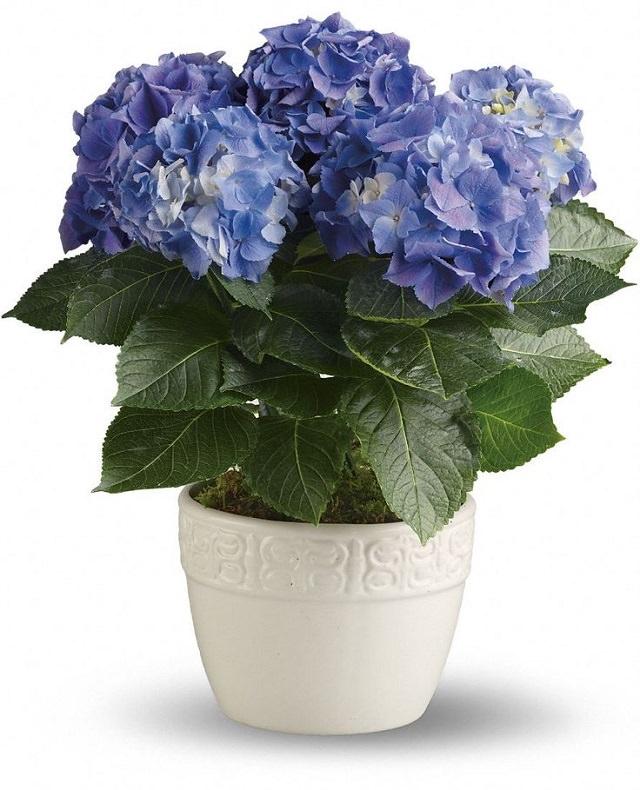
Blue is probably the most famous color in terms of soothing. As the color symbolizing the sky and the sea, it is linked with serenity. Blue calms strong emotions such as anger or hysteria. Grow Iris or hydrangea inside your home and you will definitely get rid of any rage signs. If you feel distressed, the blue color will lower blood pressure as well as your heart rate. Tranquility boost guaranteed.
6. Violet
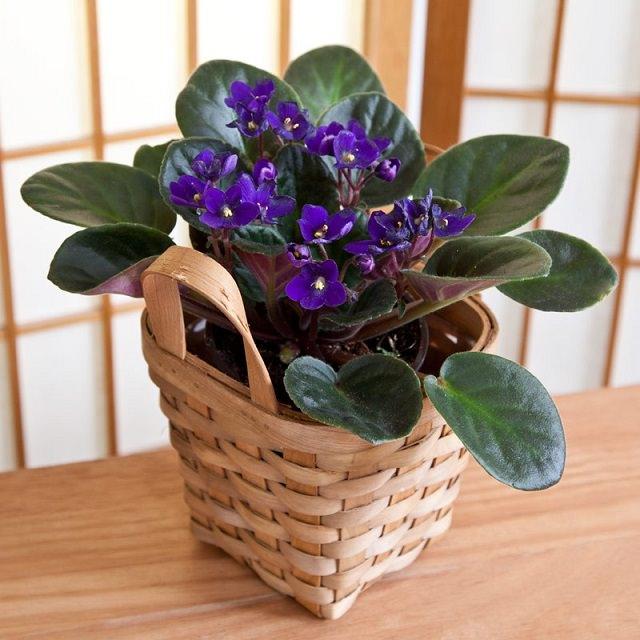
Along with purple and lavender, the violet color is linked with the cerebral and nervous systems, and for that reason, it relaxes the mind by releasing any kind of emotional stress. Violet heals different states of mind like melancholy or hysteria by bringing spiritual insights. For that matter, violet gives way to renewal and motivates the transformation. Simply grow Pansies in your bedroom, it will help you sleep, and dreams will positively affect the day coming next.
7. White
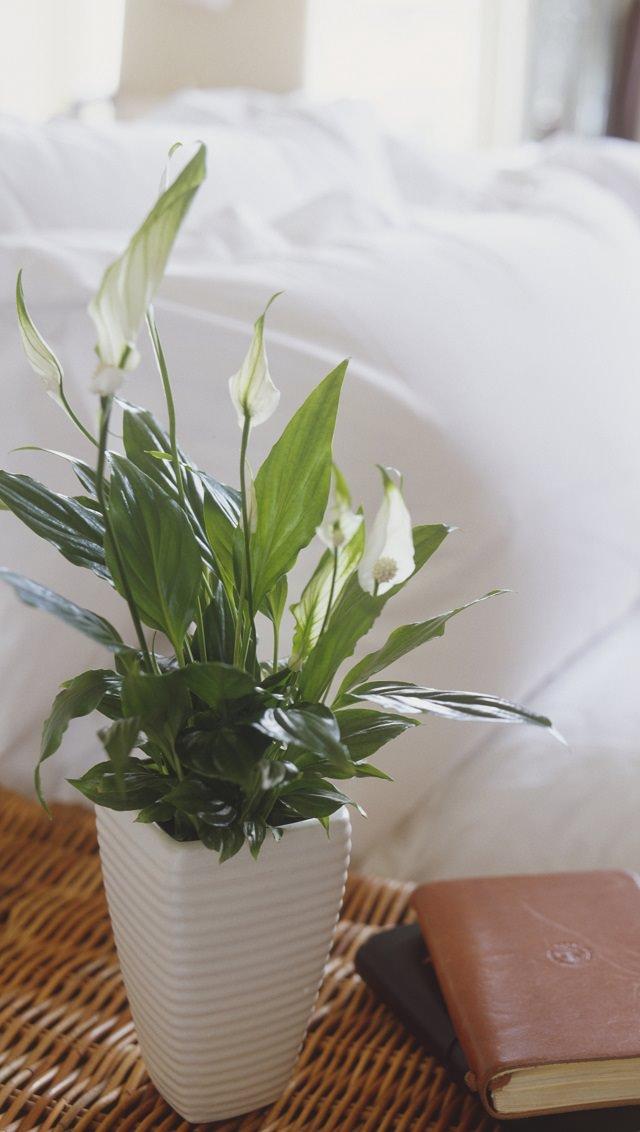
White is a sign of pureness, and that is why it helps to get rid of all the negative moods and reach the truth. If winter makes you feel insecure, simply add Paperwhites into your indoor landscape design and you’ll immediately feel the harmony getting the upper hand in every aspects of your life. There are many other beautiful houseplants that provide white color like peace lily, jasmine, gardenia.
8. Magenta
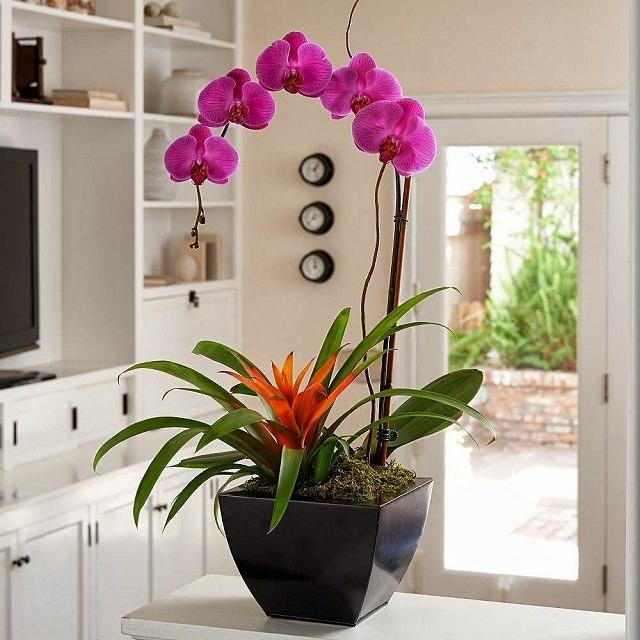
Like violet, magenta is also a spiritual color. It helps strengthen the link with your life purpose. And because it is a little bit flashier than purple, it boosts adrenaline. At home, Tulips do the job perfectly well or you can grow the orchids.
9. Pink
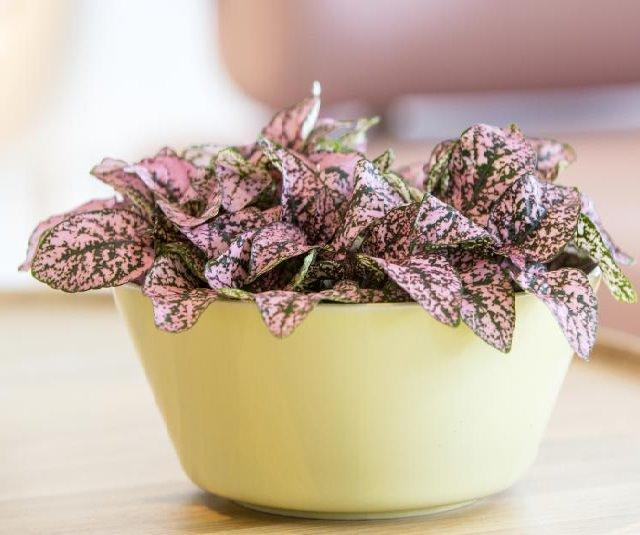
You see pink and you automatically see candies and tender images from your childhood. Pink definitely brings some youth back, and heals your grief and sadness, because it means affection and protection. For that matter, this bouquet of roses is going to please all the family. You can also look at other plants like pink hibiscus, geraniums, polka-dot plant, and begonia.
Now that you know how to set up your indoor garden to battle the winter blues, you don’t need to be afraid! Simply use flowers and plants from all different colors to boost your mood, and you will be the happiest person in the world!
If you are suddenly feeling anxious, tired or sad and that you’re lacking energy, well join the club and don’t worry; winter is coming. Days are way too short, temperatures are low, sun is absent of the picture and summer gave way to a colder and heavier season. Yes, it’s tough, but winter also has advantages: snowfalls, holidays, skiing. If winter activities are not enough to kick the blues, we have lots of suggestions for ways to lift your spirits up and get rid of the winter melancholies.
You miss the light, the greenery and the colors of summer? So let’s bring them home! A lot of studies have shown that indoor plants can have positive effects on wellbeing. Besides providing a soothing environment, reducing stress or making you relax, indoor plants also stimulate us. This is exactly what we need to beat the winter blues, isn’t it?
And to make the solution even more effective, you should include flowers in the mix. Indeed, colors have healing powers that can cheer anyone up! Garden design trends are also incorporating color therapy. Meaning, that the arrangements include colorful flowers which trigger happy emotions, heightens feelings of life satisfaction and affects social behavior in a positive manner, as analyzed by behavioral studies led at Rutgers University. Let’s explore colors, shall we?
1. Red

Even if red is not a recommended when it comes to the wall of your new bedroom, this color triggers a sense of vitality and boosts energy. This warm color is good for passive people and for those who always feel tired. Red also multiplies by ten the senses such as hearing, vision and touch. So what do you think about a Ranunculus bouquet in your bedroom or poisettias, Christmas cactus, geraniums, you have plenty of options.
2. Orange

Don’t forget to add some orange in your indoor landscape design. Like red, it is a warm color but it’s less exciting. It still cheers people up but in a softer way. By seeing orange flowers such as begonias, people feel their body and mind relieved from pressures. Plus, orange fosters creative thinking, by helping people at rock bottom get out of it and imagine new possibilities in life.
3. Yellow

If creative people love yellow, it is because it allows them to be even more creative. This cheerful color, associated to the brightness of the sun, helps stimulate intelligence. Just be careful not to overuse it because it can lead to insomnia for example. So, just avoid putting those wonderful sunflowers in your bedroom. However, you have many other planting options like sweet potato vine, kalenchoe, black eyed susan etc.
4. Green

Because green is the color of nature and that represents the Earth, it symbolizes growth and renewal. So green bring balance and comforts you. A Spider Plant is perfect to bring harmony into a home.
5. Blue

Blue is probably the most famous color in terms of soothing. As the color symbolizing the sky and the sea, it is linked with serenity. Blue calms strong emotions such as anger or hysteria. Grow Iris or hydrangea inside your home and you will definitely get rid of any rage signs. If you feel distressed, the blue color will lower blood pressure as well as your heart rate. Tranquility boost guaranteed.
6. Violet

Along with purple and lavender, the violet color is linked with the cerebral and nervous systems, and for that reason, it relaxes the mind by releasing any kind of emotional stress. Violet heals different states of mind like melancholy or hysteria by bringing spiritual insights. For that matter, violet gives way to renewal and motivates the transformation. Simply grow Pansies in your bedroom, it will help you sleep, and dreams will positively affect the day coming next.
7. White

White is a sign of pureness, and that is why it helps to get rid of all the negative moods and reach the truth. If winter makes you feel insecure, simply add Paperwhites into your indoor landscape design and you’ll immediately feel the harmony getting the upper hand in every aspects of your life. There are many other beautiful houseplants that provide white color like peace lily, jasmine, gardenia.
8. Magenta

Like violet, magenta is also a spiritual color. It helps strengthen the link with your life purpose. And because it is a little bit flashier than purple, it boosts adrenaline. At home, Tulips do the job perfectly well or you can grow the orchids.
9. Pink

You see pink and you automatically see candies and tender images from your childhood. Pink definitely brings some youth back, and heals your grief and sadness, because it means affection and protection. For that matter, this bouquet of roses is going to please all the family. You can also look at other plants like pink hibiscus, geraniums, polka-dot plant, and begonia.
Now that you know how to set up your indoor garden to battle the winter blues, you don’t need to be afraid! Simply use flowers and plants from all different colors to boost your mood, and you will be the happiest person in the world!
0
0
文章
Colorful
2017年05月23日

Growing cat grass indoors will keep your cats busy and entertain them. This way they don’t need to go outside for grazing, where the grass may be treated with pesticides and fertilizer!
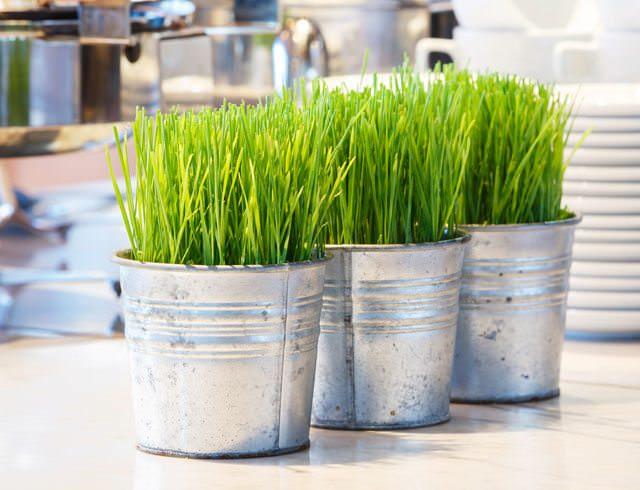
Growing cat grass indoors will keep your cats from going outside to look for grass to satisfy their craving. The grass grown outside may have been treated with pesticides that can be toxic to your feline friend.What is Cat Grass
Cat grass is something cats love to gnaw on; it’s healthy too. Usually, grown from a mix of seeds of wheat, oat, barley or rye. Growing cat grass indoors is also possible.
Oat Grass
Oats grass is mildly sweet, healthy and tastes better than wheat grass or any other cat grass. It requires direct sunlight to grow well.
Wheat Grass
Wheatgrass contains minerals, vitamins, and amino acids. It’s not only beneficial for your cat but also helps human living a healthy life if added in the diet.
Rye Grass
Rye grass has smaller blades compared to the other types of cat grass. Perfect for creating a grass tray that the cat can lounge on.
Barley Grass
This grass provides vital minerals, enzymes, vitamins, and amino acids and the nutrients that are readily absorbed into the bloodstream.
Also Read: How to Start an Indoor Cat Garden
Requirements for Growing Cat Grass Indoors
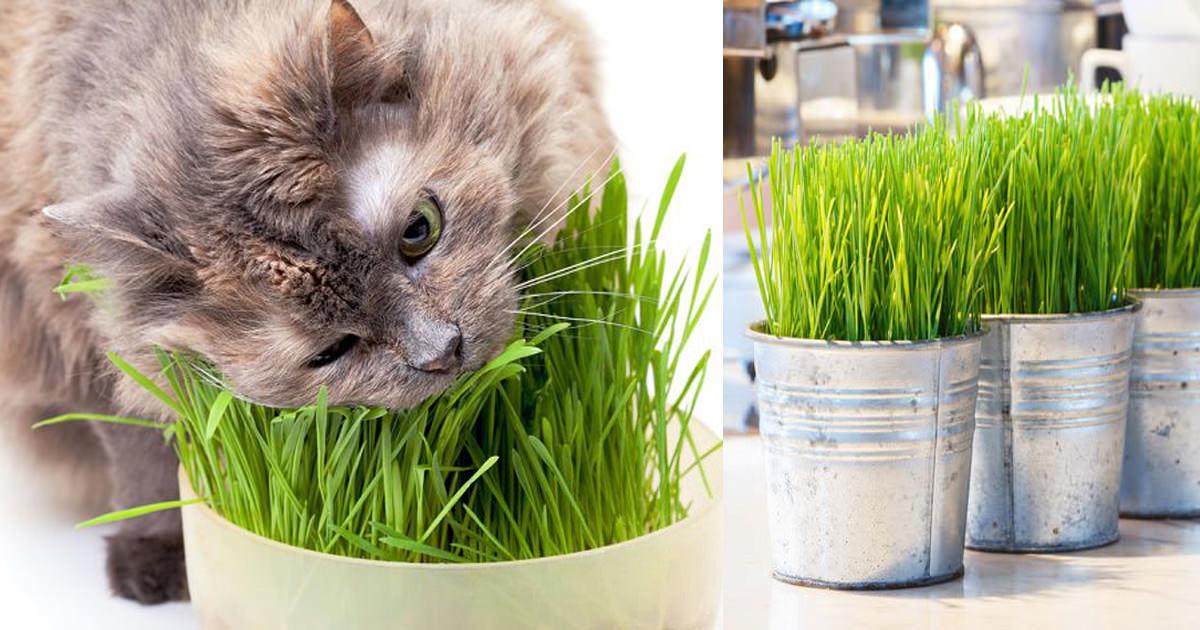
To grow, all you need is a right container (window box is good), plastic wrap, sterilized organic soil, cat grass seeds and water. It is important to use organic soil to provide your cat with healthy grass and safe soil to dig into. Fertilizer is not required since the grass will grow and dies in a few weeks itself.
Planting
To grow the cat grass indoors, fill the pot with soil just about 2 inches from the top then scatter some seeds on top of the soil and put a thin layer of soil over it to about ¼ inch.
Germination and Growing Cat Grass
Take a sprayer or using hands spill the water to make the soil moist, remember to do this gently or else the seeds will be dispersed. Once the soil is evenly moist, cover the container with a plastic wrap, allow some perforations for air flow. Set the container aside in a cool and dark place to help the seeds germinate
In two to three days you’ll be able to see the tiny sprouts emerging, while ensuring the soil is moist, remove the plastic wrap carefully and start to keep the pot in the desired spot. Usually, in a place where your germinating sprouts can receive some sun and indirect light, a windowsill is perfect for this. Continue to wait until about ten to twelve days, when the grass start to grow above 4 to 6 inches high, reduce it to this height. If you let it rise higher than this, your cat may pick up all the plants, wreak havoc and destroy her cat grass garden.
Growing cat grass indoors is a fantastic job aimed at making your cat happy and healthy. Here’re a few more tips to help you in that!Before sprouting, keep the seeds evenly moist but don’t soak them. After sprouting, reduce watering to keep the soil slightly moist only.Keeping it in a naturally well-lit place will make it grow well with regular watering. You can also use grow lights.Don’t overwater!As soon as the grass begins to turn color or wilt, renew the planting again.

Growing cat grass indoors will keep your cats from going outside to look for grass to satisfy their craving. The grass grown outside may have been treated with pesticides that can be toxic to your feline friend.What is Cat Grass
Cat grass is something cats love to gnaw on; it’s healthy too. Usually, grown from a mix of seeds of wheat, oat, barley or rye. Growing cat grass indoors is also possible.
Oat Grass
Oats grass is mildly sweet, healthy and tastes better than wheat grass or any other cat grass. It requires direct sunlight to grow well.
Wheat Grass
Wheatgrass contains minerals, vitamins, and amino acids. It’s not only beneficial for your cat but also helps human living a healthy life if added in the diet.
Rye Grass
Rye grass has smaller blades compared to the other types of cat grass. Perfect for creating a grass tray that the cat can lounge on.
Barley Grass
This grass provides vital minerals, enzymes, vitamins, and amino acids and the nutrients that are readily absorbed into the bloodstream.
Also Read: How to Start an Indoor Cat Garden
Requirements for Growing Cat Grass Indoors

To grow, all you need is a right container (window box is good), plastic wrap, sterilized organic soil, cat grass seeds and water. It is important to use organic soil to provide your cat with healthy grass and safe soil to dig into. Fertilizer is not required since the grass will grow and dies in a few weeks itself.
Planting
To grow the cat grass indoors, fill the pot with soil just about 2 inches from the top then scatter some seeds on top of the soil and put a thin layer of soil over it to about ¼ inch.
Germination and Growing Cat Grass
Take a sprayer or using hands spill the water to make the soil moist, remember to do this gently or else the seeds will be dispersed. Once the soil is evenly moist, cover the container with a plastic wrap, allow some perforations for air flow. Set the container aside in a cool and dark place to help the seeds germinate
In two to three days you’ll be able to see the tiny sprouts emerging, while ensuring the soil is moist, remove the plastic wrap carefully and start to keep the pot in the desired spot. Usually, in a place where your germinating sprouts can receive some sun and indirect light, a windowsill is perfect for this. Continue to wait until about ten to twelve days, when the grass start to grow above 4 to 6 inches high, reduce it to this height. If you let it rise higher than this, your cat may pick up all the plants, wreak havoc and destroy her cat grass garden.
Growing cat grass indoors is a fantastic job aimed at making your cat happy and healthy. Here’re a few more tips to help you in that!Before sprouting, keep the seeds evenly moist but don’t soak them. After sprouting, reduce watering to keep the soil slightly moist only.Keeping it in a naturally well-lit place will make it grow well with regular watering. You can also use grow lights.Don’t overwater!As soon as the grass begins to turn color or wilt, renew the planting again.
6
4
文章
Selina
2017年05月23日

You don’t need a big yard to have a great garden; it is even possible in smallest of space. Take a look!
If you’re looking to exercise your green thumb but don’t have acres of land, have no fear; a great garden can bloom even in the smallest spaces! All it takes are a few creative techniques, and you can be well on your way to flourishing greenery. Read on to find out some strategic ways to cultivate the most out of your space.
Create Levels and Depth

Create more space by making different levels in your personal patch. In simple words, divide your garden into sections! The division will create an illusion of a large garden– It will also make your garden look lively and interesting.
Do this by planting in tiered beds or adding soil mounds. Also, grow large shrubs or small trees wherever the division is intended. For a more organized look, use stones or lines of grass to separate the different sections of your garden. This is a very good idea for small patios or rooftops.
You can also grow grasses in containers, take a look at some of the best ornamental grasses!
Also Read: Watering grass seed
Another way to add space is by growing your plants vertically. Make a living wall or trellis using wire, bamboo or even pockets of netting. Plants like herbs and vines can easily be transplanted here. If you have a column-like structure, you can make a garden tower that grows florals like orchids.
Also Read: Best Vines for Pergolas
Pro Tip: Care for your vertical plants by targeting their roots when you water them. This prevents wastage from the runoff you’d get when watering from the top.
Food is Your Friend

An edible garden gives you great versatility regarding what you can plant, despite the limited space. Compared to a garden full of wide patches of grass and non-edibles, planting what you can eat requires less water and constant mowing. Plus, edible plants tend to be less picky about where they are planted. And the best thing is the organic harvest that is healthy, fresh, and organic.
Also Read: Best Vegetables to Grow in Containers
Herbs like rosemary, oregano, basil and the like can grow almost anywhere- you can place them in small tin containers, tiered beds and planter boxes. Juicy tomatoes are just one example of a plant that grows well in hanging baskets or pots. Acid-loving plants like blueberries thrive in containers because it’s easier to control the pH level of the soil. Even larger veggies like lettuce will free up space, simply because they are harvested very quickly.
Also Read: Best Fruits You can Grow in Containers
Square Foot Gardening can Be a Solution

Using an excellent technique called Square Foot Gardening, split a soil-filled box into several 1 square foot sections and grow veggies in each of them. Select vegetables that will be productive, but take up less space. A few examples are the crops like carrots, beets, lettuce, and radishes. Examples of medium sized plants are spinach and turnips, while larger ones are heads of cabbages and broccoli.
Also Read: Fast Growing Vegetables
Save Space and Learn Vertical Gardening

Image Credit: BHG
Opt for vertical gardening, especially if you have a veranda, backyard, rooftop or porch, or a BALCONY. The best tip here— Work with your existing furniture and fixtures. Line railings and window ledges with planter boxes or hanging pots. You can grow can annuals in them, or herbs. Strawberries, cherry tomatoes, and a few other edible crops can be considered too.
Also Read: Genius Vertical Gardening Ideas for Small Space
For pet owners, a dog or cat house is a great makeshift shelf for additional plants, as you can simply place additional pots or netting on top.For those who like to grow vertically, you can create a living wall using wooden shutters by anchoring succulents in between each slat.
Once you begin opening your eyes to what you already have and looking for unusual ideas, the possibilities are endless! Cast your eye about, and you’ll find that your greens can grow virtually anywhere.Indoor Gardening

Time to break out the houseplants. Succulents like Aloe and Christmas Cactus are fairly common and extremely hardy (just don’t overwater!). If you’re looking to spice things up, however, throw in micro-greens. If you have a windowsill that receives some sun, you can grow most of the edibles. Learn how to create a windowsill vegetable garden here!
Also Read: How to Grow Ginger in Pots
If you’re willing to scale things up, look for a few dwarf citrus trees, like lemons and oranges. These plants can be grown strategically indoors by using large, well-draining pots placed near a sunny window. When they get nearer to their full size, carefully transfer them to a soil plot or larger pot in your outdoor garden.
Also Read: How to Grow Lemon Tree in a Pot
There are many techniques to getting the most out of your space. Just remember, your space may be limited, but your imagination is boundless! Get creative, and you’ll be surprised with just how swiftly your garden will come alive.
If you’re looking to exercise your green thumb but don’t have acres of land, have no fear; a great garden can bloom even in the smallest spaces! All it takes are a few creative techniques, and you can be well on your way to flourishing greenery. Read on to find out some strategic ways to cultivate the most out of your space.
Create Levels and Depth

Create more space by making different levels in your personal patch. In simple words, divide your garden into sections! The division will create an illusion of a large garden– It will also make your garden look lively and interesting.
Do this by planting in tiered beds or adding soil mounds. Also, grow large shrubs or small trees wherever the division is intended. For a more organized look, use stones or lines of grass to separate the different sections of your garden. This is a very good idea for small patios or rooftops.
You can also grow grasses in containers, take a look at some of the best ornamental grasses!
Also Read: Watering grass seed
Another way to add space is by growing your plants vertically. Make a living wall or trellis using wire, bamboo or even pockets of netting. Plants like herbs and vines can easily be transplanted here. If you have a column-like structure, you can make a garden tower that grows florals like orchids.
Also Read: Best Vines for Pergolas
Pro Tip: Care for your vertical plants by targeting their roots when you water them. This prevents wastage from the runoff you’d get when watering from the top.
Food is Your Friend

An edible garden gives you great versatility regarding what you can plant, despite the limited space. Compared to a garden full of wide patches of grass and non-edibles, planting what you can eat requires less water and constant mowing. Plus, edible plants tend to be less picky about where they are planted. And the best thing is the organic harvest that is healthy, fresh, and organic.
Also Read: Best Vegetables to Grow in Containers
Herbs like rosemary, oregano, basil and the like can grow almost anywhere- you can place them in small tin containers, tiered beds and planter boxes. Juicy tomatoes are just one example of a plant that grows well in hanging baskets or pots. Acid-loving plants like blueberries thrive in containers because it’s easier to control the pH level of the soil. Even larger veggies like lettuce will free up space, simply because they are harvested very quickly.
Also Read: Best Fruits You can Grow in Containers
Square Foot Gardening can Be a Solution

Using an excellent technique called Square Foot Gardening, split a soil-filled box into several 1 square foot sections and grow veggies in each of them. Select vegetables that will be productive, but take up less space. A few examples are the crops like carrots, beets, lettuce, and radishes. Examples of medium sized plants are spinach and turnips, while larger ones are heads of cabbages and broccoli.
Also Read: Fast Growing Vegetables
Save Space and Learn Vertical Gardening

Image Credit: BHG
Opt for vertical gardening, especially if you have a veranda, backyard, rooftop or porch, or a BALCONY. The best tip here— Work with your existing furniture and fixtures. Line railings and window ledges with planter boxes or hanging pots. You can grow can annuals in them, or herbs. Strawberries, cherry tomatoes, and a few other edible crops can be considered too.
Also Read: Genius Vertical Gardening Ideas for Small Space
For pet owners, a dog or cat house is a great makeshift shelf for additional plants, as you can simply place additional pots or netting on top.For those who like to grow vertically, you can create a living wall using wooden shutters by anchoring succulents in between each slat.
Once you begin opening your eyes to what you already have and looking for unusual ideas, the possibilities are endless! Cast your eye about, and you’ll find that your greens can grow virtually anywhere.Indoor Gardening

Time to break out the houseplants. Succulents like Aloe and Christmas Cactus are fairly common and extremely hardy (just don’t overwater!). If you’re looking to spice things up, however, throw in micro-greens. If you have a windowsill that receives some sun, you can grow most of the edibles. Learn how to create a windowsill vegetable garden here!
Also Read: How to Grow Ginger in Pots
If you’re willing to scale things up, look for a few dwarf citrus trees, like lemons and oranges. These plants can be grown strategically indoors by using large, well-draining pots placed near a sunny window. When they get nearer to their full size, carefully transfer them to a soil plot or larger pot in your outdoor garden.
Also Read: How to Grow Lemon Tree in a Pot
There are many techniques to getting the most out of your space. Just remember, your space may be limited, but your imagination is boundless! Get creative, and you’ll be surprised with just how swiftly your garden will come alive.
2
1


