文章
Micky
2017年05月23日


Some of us really look forward to our outdoor Christmas lighting each year… to some of us it’s just an obligatory pain… That’s kind of sad, becasue it gives us a reason to celebrate the outdoors at a time of year when we don’t get out into the garden much. I think those who dread it only feel that way becasue they haven’t been inspired! So here are some great ideas for DIY Christmas outdoor lighting to really make you want to celebrate the season!
When I saw these Christmas light balls for the first time, all I could think was “wow”. Simple, using ordinary chicken wire and lights, and such an impact! Find out how to create these Christmas light balls from Christmas Lights Etc…

Rose Knows Coupons has a tutorial on creating these outdoor lighted holiday gift boxes. Much less expensive than the ones in the store!

Wanna know how to make these shooting star lights? Go see the tutorial here!

Write a message in lights to share with all who pass by. Here they used LED rope lighting. The rope lighting is secured to a grid of wire wreath forms with heavy-duty cable ties.

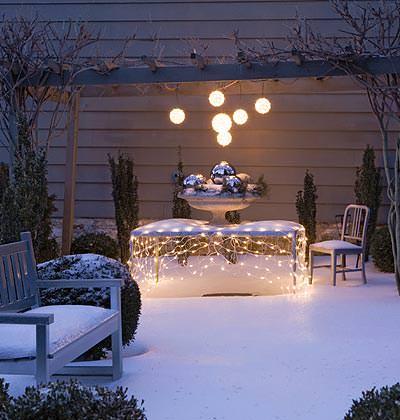
This is one of the most creative DIY lighting projects I’ve seen… net lights draped over an outdoor table, and lighted globes hung as a “chandelier”… Like party time for the Christmas creatures!
Love this message lighting sign by Little Bit Funky. Find out how they made this giant lighted star for less than $5. I would either use dark paint, or lights with white wires to make it a little neater looking during the day, but whatever you like!

This is a great idea for the patio…fill your hanging baskets with led lights, then push some through to the outside… Fill the basket with some garden goodies!

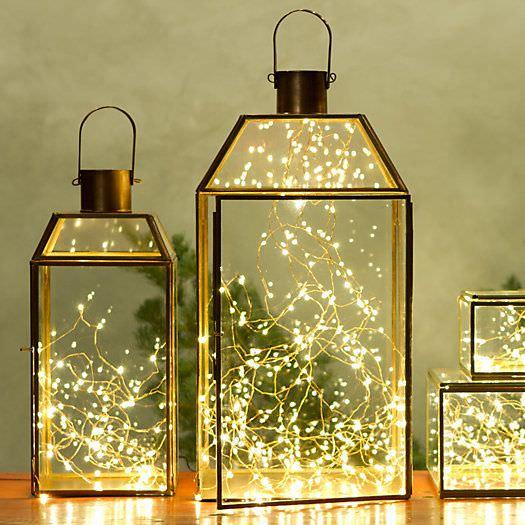
Lighted lanterns…just insert led lights into anything clear!
This last one is just plain old good inspiration…old fashioned bulb multi lights wrapped around an older bicycle… Charming!

0
0
文章
粉团
2017年05月23日

Don’t wait till spring for gardening, begin with 6 things in February so that you’ll have a good start when the weather gets warm again.
USDA Plant Hardiness Zones break down the country into regions based on what their average extreme low temperature can reach for the year. They range from zones 1a to 13b. The majority of the United States falls in between zone 3a, which has a low temperature of between -40 and -35 degrees (F), and zone 8a, with a low of 10 to 15 degrees. That means that most of us have some sort of off season during the winter months when most of our outdoor gardening is put on hold. By December, most annual plants have finished their cycles and been taken up, and many perennials are dormant.
February, right in the middle of the winter, is the perfect time to start strategizing your garden for the upcoming spring. Depending on where you live, February falls somewhere between 6-12 weeks out from when you can start planting outside. The following ideas are some things you can be working on now to have better results from your garden when the weather gets warm.
1. Map Your Garden
Gardening is fun and rewarding whether you have a plan or not. There have been times where I planted seeds very late in the season because I forgot to earlier and still got results. I’ve planted things next to each other that you aren’t supposed to and still gotten results. To have the best turnout, however, a little planning goes a long way.
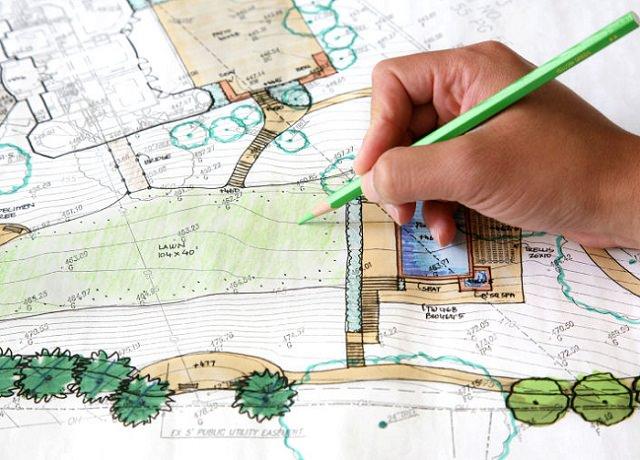
An easy way to plan your garden is to map it out and divide it into square feet. Depending on the vegetable, you can plant a certain amount of seeds per square foot. The following can be used as a guide:
Seedlings Per Square FootWhat to Plant1 per 2 square feetwatermelon, vining squash1tomato, basil, broccoli, cauliflower, hot peppers2cucumbers4lettuce, other leafy greens8bush beans, snap peas16beets, radishes, turnips, carrots, onions
See an example map of a square foot garden plan.
When mapping out your garden you should also consider companion planting. Companion planting is the practice of planting vegetables or flowers that complement each other and produce higher yields and quality when planted in closer proximity. For almost any garden vegetable, marigolds are a good companion plant because they deter pests like beetles. Plan on including marigolds in your garden layout!
2. Order Seeds
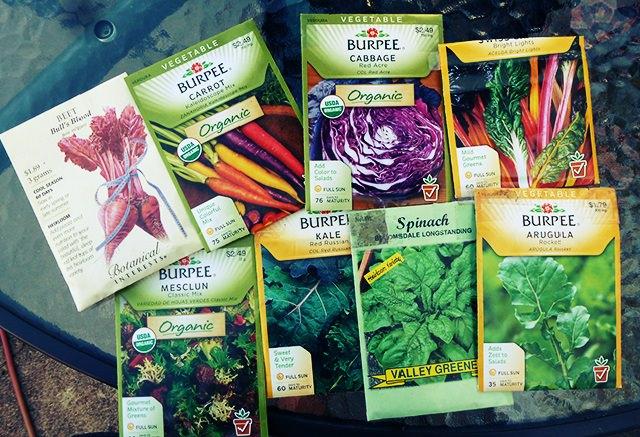
Now that you have your plan, you should have an idea of what seeds you are going to need. If you have been gardening for a while, you’ve probably signed up to receive seed catalogs from a few companies. The catalogs usually start arriving
sometime around January 1st. If you’ve had a chance to look through them and have decided what you would like to plant, now is the time to place your order. You want to may sure they get to you in time if you are going to be starting seeds indoors. If you will be purchasing your seeds from a garden store, you can do that now, too.
If you’ve saved seeds from last year’s crops or from organic veggies you’ve purchased at the store, that’s great! You’re one step ahead.
3. Start Seedlings Indoors
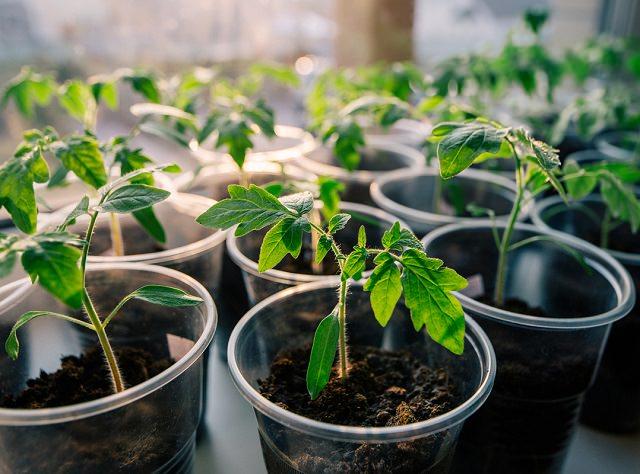
Depending on your hardiness zone, your lasts frost date (and when you can start planting outside) falls somewhere between April 1-May 15. If you live in a more northern zone with an early first frost date like September or October 1st, that window doesn’t give your plants a whole lot of time to flourish if you are starting from seed. Many seedlings will fare better and will have more time to produce a full crop if started indoors first. February is the perfect time to start seedlings indoors so they will be strong enough to harden off and plant outside once its warm enough.
To start seedlings inside, you’ll just need a seedling tray or small containers with drainage holes, sterile seed starter mix, some plastic wrap, and a sunny window. Plant your seeds 1-2 per cell or container in the moistened mix. Cover with plastic wrap. Check each day that the medium is moist. Once seedlings emerge, you can remove the plastic wrap. Provided they get enough water and strong sunlight, your seedlings should be strong enough within the next 2-3 months to go outside. (Make sure to harden them off first).
4. Start Composting

Composting is a garden project you can start in winter or any time of year. Having your own compost bin will save you money in the long run—its cheaper than expensive fertilizer from garden stores, and it uses waste you’d otherwise be filling your garbage bags with. There are a lot of options for compost systems to try, depending on if you’re doing it inside or outside, if you want to use worms or not, etc. For a worm bin compost or a no-turn (i.e. low maintenance) outdoor compost, the turnaround process is 3 months or more, so if you start now it will be ready during the early part of the growing season to start using in your garden. The decomposition process is slower in winter with the cooler temperatures, but there are a few things you can do to speed up the process if you start late and are going to want to start using your compost sooner.
5. Build a Hoop House
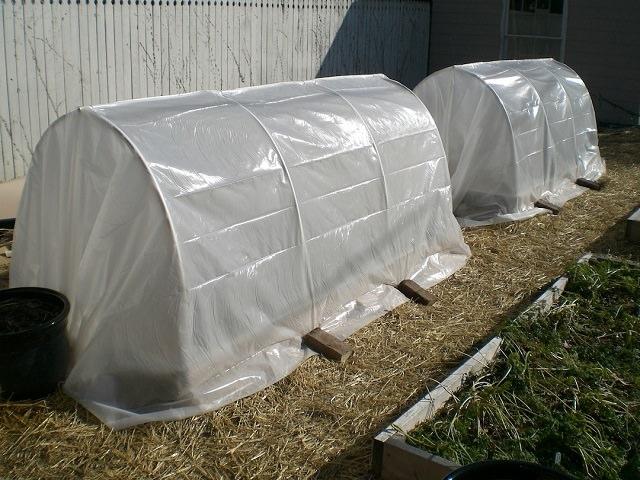
If you are especially anxious to get some plants in the ground outside, you can consider building a hoop house. A hoop house is a series of parallel hoops arching over your garden, covered in a heat retaining greenhouse material. This dome acts as a mini greenhouse to protect your plants from frost. It can extend your growing season by as many as 8 weeks in spring and fall. By the middle of February, you should be able to plant cold hardy plants (think arugula, onions, broccoli) in your hoop house. You can try plants less forgiving of frost if you add an extra layer of material inside the dome.
You can try making a hoop house yourself, or they can also be purchased at your local garden store.
6. Plant Fall Bulbs, If You Forgot Earlier
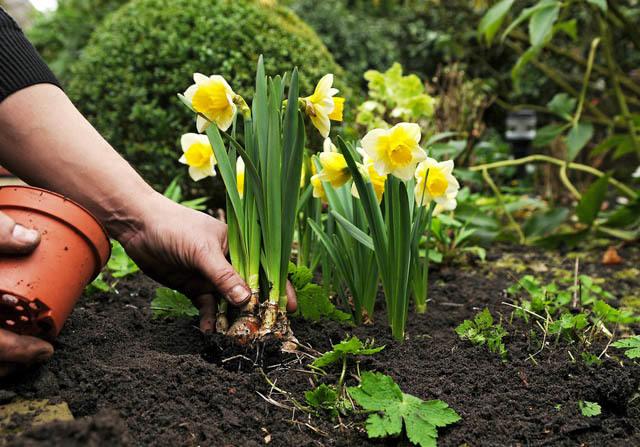
Oh no, you forgot to plant your tulip and daffodil bulbs before Thanksgiving! Plant them now anyway. Fall bulbs need a period of cold to bloom once the weather gets warm. Ideally, they should be planted between September and December, but many will still bloom just fine if planted later, as long as they have some time on the ground in the cold. Bulbs are different from seeds—they won’t make it until next year, so you might as well try to plant them now while they still have a chance at success.
If you have spring bulbs like gladiolus, don’t plant those now! They will need to wait until the soil is warmer and there is no chance of frost, as they do not work the same way as for fall bulbs and won’t survive winter temperatures.
For devoted gardeners, winter can be a dull time. Its natural to be antsy when there’s not much you can do for your garden. Even though I know you’ll be happier once last frost hits and you can get outside digging in the dirt, at least you can chase off the winter blues for now with some of these things on your garden to-do list. After getting started planning and planting your seedlings, the last frost will be here before you know it. Happy gardening!
USDA Plant Hardiness Zones break down the country into regions based on what their average extreme low temperature can reach for the year. They range from zones 1a to 13b. The majority of the United States falls in between zone 3a, which has a low temperature of between -40 and -35 degrees (F), and zone 8a, with a low of 10 to 15 degrees. That means that most of us have some sort of off season during the winter months when most of our outdoor gardening is put on hold. By December, most annual plants have finished their cycles and been taken up, and many perennials are dormant.
February, right in the middle of the winter, is the perfect time to start strategizing your garden for the upcoming spring. Depending on where you live, February falls somewhere between 6-12 weeks out from when you can start planting outside. The following ideas are some things you can be working on now to have better results from your garden when the weather gets warm.
1. Map Your Garden

Gardening is fun and rewarding whether you have a plan or not. There have been times where I planted seeds very late in the season because I forgot to earlier and still got results. I’ve planted things next to each other that you aren’t supposed to and still gotten results. To have the best turnout, however, a little planning goes a long way.
An easy way to plan your garden is to map it out and divide it into square feet. Depending on the vegetable, you can plant a certain amount of seeds per square foot. The following can be used as a guide:
Seedlings Per Square FootWhat to Plant1 per 2 square feetwatermelon, vining squash1tomato, basil, broccoli, cauliflower, hot peppers2cucumbers4lettuce, other leafy greens8bush beans, snap peas16beets, radishes, turnips, carrots, onions
See an example map of a square foot garden plan.
When mapping out your garden you should also consider companion planting. Companion planting is the practice of planting vegetables or flowers that complement each other and produce higher yields and quality when planted in closer proximity. For almost any garden vegetable, marigolds are a good companion plant because they deter pests like beetles. Plan on including marigolds in your garden layout!
2. Order Seeds

Now that you have your plan, you should have an idea of what seeds you are going to need. If you have been gardening for a while, you’ve probably signed up to receive seed catalogs from a few companies. The catalogs usually start arriving
sometime around January 1st. If you’ve had a chance to look through them and have decided what you would like to plant, now is the time to place your order. You want to may sure they get to you in time if you are going to be starting seeds indoors. If you will be purchasing your seeds from a garden store, you can do that now, too.
If you’ve saved seeds from last year’s crops or from organic veggies you’ve purchased at the store, that’s great! You’re one step ahead.
3. Start Seedlings Indoors

Depending on your hardiness zone, your lasts frost date (and when you can start planting outside) falls somewhere between April 1-May 15. If you live in a more northern zone with an early first frost date like September or October 1st, that window doesn’t give your plants a whole lot of time to flourish if you are starting from seed. Many seedlings will fare better and will have more time to produce a full crop if started indoors first. February is the perfect time to start seedlings indoors so they will be strong enough to harden off and plant outside once its warm enough.
To start seedlings inside, you’ll just need a seedling tray or small containers with drainage holes, sterile seed starter mix, some plastic wrap, and a sunny window. Plant your seeds 1-2 per cell or container in the moistened mix. Cover with plastic wrap. Check each day that the medium is moist. Once seedlings emerge, you can remove the plastic wrap. Provided they get enough water and strong sunlight, your seedlings should be strong enough within the next 2-3 months to go outside. (Make sure to harden them off first).
4. Start Composting

Composting is a garden project you can start in winter or any time of year. Having your own compost bin will save you money in the long run—its cheaper than expensive fertilizer from garden stores, and it uses waste you’d otherwise be filling your garbage bags with. There are a lot of options for compost systems to try, depending on if you’re doing it inside or outside, if you want to use worms or not, etc. For a worm bin compost or a no-turn (i.e. low maintenance) outdoor compost, the turnaround process is 3 months or more, so if you start now it will be ready during the early part of the growing season to start using in your garden. The decomposition process is slower in winter with the cooler temperatures, but there are a few things you can do to speed up the process if you start late and are going to want to start using your compost sooner.
5. Build a Hoop House

If you are especially anxious to get some plants in the ground outside, you can consider building a hoop house. A hoop house is a series of parallel hoops arching over your garden, covered in a heat retaining greenhouse material. This dome acts as a mini greenhouse to protect your plants from frost. It can extend your growing season by as many as 8 weeks in spring and fall. By the middle of February, you should be able to plant cold hardy plants (think arugula, onions, broccoli) in your hoop house. You can try plants less forgiving of frost if you add an extra layer of material inside the dome.
You can try making a hoop house yourself, or they can also be purchased at your local garden store.
6. Plant Fall Bulbs, If You Forgot Earlier

Oh no, you forgot to plant your tulip and daffodil bulbs before Thanksgiving! Plant them now anyway. Fall bulbs need a period of cold to bloom once the weather gets warm. Ideally, they should be planted between September and December, but many will still bloom just fine if planted later, as long as they have some time on the ground in the cold. Bulbs are different from seeds—they won’t make it until next year, so you might as well try to plant them now while they still have a chance at success.
If you have spring bulbs like gladiolus, don’t plant those now! They will need to wait until the soil is warmer and there is no chance of frost, as they do not work the same way as for fall bulbs and won’t survive winter temperatures.
For devoted gardeners, winter can be a dull time. Its natural to be antsy when there’s not much you can do for your garden. Even though I know you’ll be happier once last frost hits and you can get outside digging in the dirt, at least you can chase off the winter blues for now with some of these things on your garden to-do list. After getting started planning and planting your seedlings, the last frost will be here before you know it. Happy gardening!
3
2
文章
小马奥
2017年05月23日

Learn about the Best Plants For Hanging Baskets. Hanging baskets filled with colorful flowers and plants are very showy and elegant and adorn any garden. You don’t need a lot of space to display them, too!A variety of flowers and plants can be grown in hanging baskets. The choice of plants in baskets depends on both the size of the basket and the growing conditions where the basket has to be placed. The baskets, which are kept in the shade and less windy space are easier to look after as they require less watering.Nasturtium

If you are looking for a quick growing and low maintenance plant, nasturtium is the plant you should consider. The trailing varieties of nasturtium work especially well and it is one of best plants for hanging baskets. Nasturtium loves the warmth and sun, though they can tolerate partial shade. They prefer poor soil and doesn’t need much fertilizer.
Petunia

Petunia is one of the most popular flowers and best plant for hanging the basket. It covers hanging basket quickly and blooms profusely. There are many varieties of petunias that come in myriads of colors including black.
Tomatoes

Growing tomatoes (cherry tomatoes) in hanging baskets is an apt way to use vertical space, plus they adapt easily unlike other vegetables. Basically, your success in growing tomatoes depends on three factors— yours choosing right variety, basket, and providing it appropriate conditions, if you satisfy all of the three, you’ll get rich homegrown tomatoes in harvesting season. Learn how to grow tomatoes in a hanging basket.
Also Read: How to Grow Tomatoes on a Balcony
Portulaca

Portulaca or moss rose is an excellent trailing ground cover plant, not only the colorful flowers, its needle-like succulent foliage looks wonderful too. This tropical beauty can be grown as an annual plant in non-tropical places and as a perennial in tropics in both containers and hanging baskets.
Begonia

Begonias are the perfect plant for shady places. It blooms continuously in summer and fall and in shades of pink, red and white. The best Begonias for hanging baskets are trailing varieties. Begonias require moist soil, however, you shouldn’t not over water begonias, as the plant is susceptible to root rot.
Philodendron and Spider Plant

Both the spider plant and species of philodendron are considered as houseplants, but they can also be grown outdoors in protected conditions. They do better when grown alone in a hanging planter. Spider plant forms a rosette or grouping of the bush like light green and white variegated foliage.
Philodendrons have solidly light green or variegated, waxy, heart-shaped leaves and have a vine like growing habit. They require indirect sunlight and grow well in the shade outdoors or in low light, indoors.
Diascia

Diascia is another hanging basket plant that you can grow. This short-lived perennial is often grown as an annual, it is hardy in warmer zones (USDA Zones 9-11), however, some varieties are hardy down to Zone 7. Its beautiful colorful flowers are rather small, of bright colors and appear in clusters from spring to fall.
Geranium

The Geranium is another plant that can be grown in baskets. Both the foliage and flowers are beautiful. Geraniums prefer a sunny spot and well-draining soil to flower.
Verbena

It is possible to grow verbena in a hanging basket, this sun-loving plant is suitable for South facing places. Verbenas come in a variety of colors and shades including pink, purple, white, red and lavender etc. The cluster of flowers blooms continuously throughout the summer in a cold climate. Whereas, in tropics verbenas are perennial.
Fuchsia

Fuchsia is an elegant and colorful flowering hanging basket plant that prefers shade and cool summers. Flowers from over 120 varieties of fuchsia plants can grow to a length of 4 inches. The trailing stems cascade out over the hanging basket with a mass of colorful flowers. Fuchsia flowers are often deep pink or orange with purple or white vibrant trimmings.
Impatiens

The impatiens grow best in shade space and in moist soil. It comes in a variety of colors including salmon, cherry, pink, white and lavender. If growing in baskets, apply a balanced fertilizer in every two to three weeks. Impatiens grow very easily from seed and cuttings.
Dianthus

Dianthus comes in over 300 varieties and usually grown as an annual. This well-known flower is good for borders, ground covers, for cut flowers and several species are compact enough for planting in the hanging baskets, offering a profusion of flowers during the summer.
Ivy

Evergreen, perennial plant, ivy comes with a variety of leaf shapes and variegated foliage types. It is a perfect plant that provides a background for the gaudiest colors. It trails gracefully in hanging baskets. Most ivy varieties thrive inside the home, as they do not require direct sunlight and only need minimal care. However, it grows outside easily in shade.
Pansy

Pansies are a fast growing plant that provides masses of beautiful flowers during the summer in many shades. Deadhead them to extend bloom time.
Lobelia

One of the best flowers that grows easily in containers. Popular for the colors. The leaves are small, smooth, shiny and tiny flowers appear in blue, purple, pink or white. It blooms all summer long. Abundant and long flowering is promoted by regular trimming of withered shoots.
Sweet Alyssum

Sitting near a sweet alyssum hanging basket is a joy. This amazing fragrant flower is perfect for balcony and roof top gardens. The trailing habit makes it is a perfect plant for hanging baskets.
Lantana

Small weeping varieties are more suitable for hanging baskets shrubby ones. The lantana flowers are fragrant, colorful, pleasing, attract pollinators but invasive perennial in warm frost free areas. But in hanging baskets or in pots they are controllable. You can also grow lantana in colder regions as an annual.
Also Read: How to Grow Lantana
Calibrachoa

Also called “Million Bells”, this beautiful cousin of petunia is more suitable for hanging baskets than petunias and more durable to changing weather conditions and diseases. It can grow up to 8 inches tall. The plant produces blooms all summer long and in fall in moderate climates until the first frost. Whereas in tropics, it blooms in winter and spring.
Also Read: Calibrachoa Care
Nemesia

Nemesia is one of the easiest annuals that you can grow in both pots and in hanging baskets. It is a hardy perennial in USDA Zones 9-10. Its flowers are double-lipped with a spur in small pansy-like appearance and lobelia-like size.

If you are looking for a quick growing and low maintenance plant, nasturtium is the plant you should consider. The trailing varieties of nasturtium work especially well and it is one of best plants for hanging baskets. Nasturtium loves the warmth and sun, though they can tolerate partial shade. They prefer poor soil and doesn’t need much fertilizer.
Petunia

Petunia is one of the most popular flowers and best plant for hanging the basket. It covers hanging basket quickly and blooms profusely. There are many varieties of petunias that come in myriads of colors including black.
Tomatoes

Growing tomatoes (cherry tomatoes) in hanging baskets is an apt way to use vertical space, plus they adapt easily unlike other vegetables. Basically, your success in growing tomatoes depends on three factors— yours choosing right variety, basket, and providing it appropriate conditions, if you satisfy all of the three, you’ll get rich homegrown tomatoes in harvesting season. Learn how to grow tomatoes in a hanging basket.
Also Read: How to Grow Tomatoes on a Balcony
Portulaca

Portulaca or moss rose is an excellent trailing ground cover plant, not only the colorful flowers, its needle-like succulent foliage looks wonderful too. This tropical beauty can be grown as an annual plant in non-tropical places and as a perennial in tropics in both containers and hanging baskets.
Begonia

Begonias are the perfect plant for shady places. It blooms continuously in summer and fall and in shades of pink, red and white. The best Begonias for hanging baskets are trailing varieties. Begonias require moist soil, however, you shouldn’t not over water begonias, as the plant is susceptible to root rot.
Philodendron and Spider Plant

Both the spider plant and species of philodendron are considered as houseplants, but they can also be grown outdoors in protected conditions. They do better when grown alone in a hanging planter. Spider plant forms a rosette or grouping of the bush like light green and white variegated foliage.
Philodendrons have solidly light green or variegated, waxy, heart-shaped leaves and have a vine like growing habit. They require indirect sunlight and grow well in the shade outdoors or in low light, indoors.
Diascia

Diascia is another hanging basket plant that you can grow. This short-lived perennial is often grown as an annual, it is hardy in warmer zones (USDA Zones 9-11), however, some varieties are hardy down to Zone 7. Its beautiful colorful flowers are rather small, of bright colors and appear in clusters from spring to fall.
Geranium

The Geranium is another plant that can be grown in baskets. Both the foliage and flowers are beautiful. Geraniums prefer a sunny spot and well-draining soil to flower.
Verbena

It is possible to grow verbena in a hanging basket, this sun-loving plant is suitable for South facing places. Verbenas come in a variety of colors and shades including pink, purple, white, red and lavender etc. The cluster of flowers blooms continuously throughout the summer in a cold climate. Whereas, in tropics verbenas are perennial.
Fuchsia

Fuchsia is an elegant and colorful flowering hanging basket plant that prefers shade and cool summers. Flowers from over 120 varieties of fuchsia plants can grow to a length of 4 inches. The trailing stems cascade out over the hanging basket with a mass of colorful flowers. Fuchsia flowers are often deep pink or orange with purple or white vibrant trimmings.
Impatiens

The impatiens grow best in shade space and in moist soil. It comes in a variety of colors including salmon, cherry, pink, white and lavender. If growing in baskets, apply a balanced fertilizer in every two to three weeks. Impatiens grow very easily from seed and cuttings.
Dianthus

Dianthus comes in over 300 varieties and usually grown as an annual. This well-known flower is good for borders, ground covers, for cut flowers and several species are compact enough for planting in the hanging baskets, offering a profusion of flowers during the summer.
Ivy

Evergreen, perennial plant, ivy comes with a variety of leaf shapes and variegated foliage types. It is a perfect plant that provides a background for the gaudiest colors. It trails gracefully in hanging baskets. Most ivy varieties thrive inside the home, as they do not require direct sunlight and only need minimal care. However, it grows outside easily in shade.
Pansy

Pansies are a fast growing plant that provides masses of beautiful flowers during the summer in many shades. Deadhead them to extend bloom time.
Lobelia

One of the best flowers that grows easily in containers. Popular for the colors. The leaves are small, smooth, shiny and tiny flowers appear in blue, purple, pink or white. It blooms all summer long. Abundant and long flowering is promoted by regular trimming of withered shoots.
Sweet Alyssum

Sitting near a sweet alyssum hanging basket is a joy. This amazing fragrant flower is perfect for balcony and roof top gardens. The trailing habit makes it is a perfect plant for hanging baskets.
Lantana

Small weeping varieties are more suitable for hanging baskets shrubby ones. The lantana flowers are fragrant, colorful, pleasing, attract pollinators but invasive perennial in warm frost free areas. But in hanging baskets or in pots they are controllable. You can also grow lantana in colder regions as an annual.
Also Read: How to Grow Lantana
Calibrachoa

Also called “Million Bells”, this beautiful cousin of petunia is more suitable for hanging baskets than petunias and more durable to changing weather conditions and diseases. It can grow up to 8 inches tall. The plant produces blooms all summer long and in fall in moderate climates until the first frost. Whereas in tropics, it blooms in winter and spring.
Also Read: Calibrachoa Care
Nemesia

Nemesia is one of the easiest annuals that you can grow in both pots and in hanging baskets. It is a hardy perennial in USDA Zones 9-10. Its flowers are double-lipped with a spur in small pansy-like appearance and lobelia-like size.
0
1
文章
Carol
2017年05月23日

You love to garden but don’t find time to maintain it. Don’t bother, imply these easy landscaping tips to make a low maintenance garden.
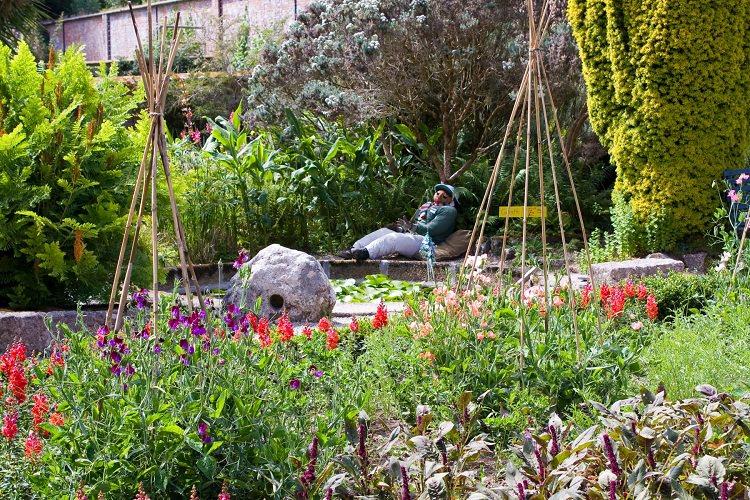
Easy Landscaping Tips for a Low Maintenance Garden
Unfortunately, there is no plant that is maintenance-free and every garden requires regular care and seasonal cleanup work. However, by making some changes you can reduce your efforts.
Grow plants that are low maintenance
1. So what are the plants that do not require special care? The answer is simple, native plants and the plants that are most suitable for your climate and growing conditions you have for them in your garden.
2. For a low maintenance garden, you’ll have to do a sacrifice. Instead of exotic plants, choose indigenous species, preferably those that occur naturally around your area. Such plants are easy to adapt, tough and resilient and will grow well even without special attention.
Group plants according to their requirements
3. Group plants according to their requirements at the right location, plants that require full sun or shade must be planted carefully together. Plants that require moist soil must not be planted with the ones that have low watering needs.
4. Give preference to drought tolerant plants as they require less watering. Also, the plants that grow slowly are a good option as they need less pruning. Those plants that spread widely must be planted too as they cover space, which means fewer plants. Also, don’t forget about the plants that resist pests and diseases.
Plant conifers
5. There are a variety of conifers that do not shed their needles in the winter, so in this period when everything seems dull they will look good in your garden. Conifers do not require regular care from pests too.
Opt for perennials
6. Instead of sowing seeds of annual plants routinely, opt for perennials. You will only need to do deadheading and pruning sometimes. Once grown, most of the perennials do well with infrequent watering. These plants are also quite resistant to pests than annuals. If you would like to grow annuals, grow the ones that are self-seeding and require less care.
No lawn please!

7. If you want a low care garden, avoid having a lawn. Instead, design a rock garden there or plan something unique. Plant a flower bed or grow lawn alternatives. Growing ground covers, small shrubs, and bushes is also a good idea. You can also create a wildflower meadow there, this will give a chance to wildlife to thrive.
Don’t overcrowd your garden
8. Plant moderately, don’t overcrowd your garden. The more plants you have, the more your garden will require treatment and attention.
Do something about watering
9. An indispensable solution may be the automatic irrigation system, which practically does not require maintenance, it allows to save time so that you would have to spend on watering the garden. Garden is irrigated by sprinklers or drip irrigation lines. The system is activated at a time you set and dispense the correct amount of water to particular groups of plants.
10. Automated watering system may be expensive, however, there are a few more hacks that can save your time like growing drought tolerant plants or those that prefer dry soil.
11. Large shrubs, long living trees, fruit plants once become established get water from nature and require watering sparingly. Also, you can replace your ordinary containers with self-watering ones.
Use slow release fertilizers
12. Slow release fertilizers limit the use of frequent fertilization. In addition, in the long run, they provide the plants the amount of nutrients they need, gradually.
Do mulching

13. Mulching is the part of easy landscaping. Do mulching everywhere, this will help in keeping the soil moist, water will evaporate less and roots will get ample moisture. Also, thick mulching (2-3 inches at least) helps in eliminating weeds. Around your garden beds, you can also cover the soil with pebbles and gravels. This will make your garden more attractive and it works as a mulch too.
14. You can also cover the empty space of your garden with sun blocking plastic sheeting, it may not look good but doesn’t allow weed seeds to germinate and spread.

Easy Landscaping Tips for a Low Maintenance Garden
Unfortunately, there is no plant that is maintenance-free and every garden requires regular care and seasonal cleanup work. However, by making some changes you can reduce your efforts.
Grow plants that are low maintenance
1. So what are the plants that do not require special care? The answer is simple, native plants and the plants that are most suitable for your climate and growing conditions you have for them in your garden.
2. For a low maintenance garden, you’ll have to do a sacrifice. Instead of exotic plants, choose indigenous species, preferably those that occur naturally around your area. Such plants are easy to adapt, tough and resilient and will grow well even without special attention.
Group plants according to their requirements
3. Group plants according to their requirements at the right location, plants that require full sun or shade must be planted carefully together. Plants that require moist soil must not be planted with the ones that have low watering needs.
4. Give preference to drought tolerant plants as they require less watering. Also, the plants that grow slowly are a good option as they need less pruning. Those plants that spread widely must be planted too as they cover space, which means fewer plants. Also, don’t forget about the plants that resist pests and diseases.
Plant conifers
5. There are a variety of conifers that do not shed their needles in the winter, so in this period when everything seems dull they will look good in your garden. Conifers do not require regular care from pests too.
Opt for perennials
6. Instead of sowing seeds of annual plants routinely, opt for perennials. You will only need to do deadheading and pruning sometimes. Once grown, most of the perennials do well with infrequent watering. These plants are also quite resistant to pests than annuals. If you would like to grow annuals, grow the ones that are self-seeding and require less care.
No lawn please!

7. If you want a low care garden, avoid having a lawn. Instead, design a rock garden there or plan something unique. Plant a flower bed or grow lawn alternatives. Growing ground covers, small shrubs, and bushes is also a good idea. You can also create a wildflower meadow there, this will give a chance to wildlife to thrive.
Don’t overcrowd your garden
8. Plant moderately, don’t overcrowd your garden. The more plants you have, the more your garden will require treatment and attention.
Do something about watering
9. An indispensable solution may be the automatic irrigation system, which practically does not require maintenance, it allows to save time so that you would have to spend on watering the garden. Garden is irrigated by sprinklers or drip irrigation lines. The system is activated at a time you set and dispense the correct amount of water to particular groups of plants.
10. Automated watering system may be expensive, however, there are a few more hacks that can save your time like growing drought tolerant plants or those that prefer dry soil.
11. Large shrubs, long living trees, fruit plants once become established get water from nature and require watering sparingly. Also, you can replace your ordinary containers with self-watering ones.
Use slow release fertilizers
12. Slow release fertilizers limit the use of frequent fertilization. In addition, in the long run, they provide the plants the amount of nutrients they need, gradually.
Do mulching

13. Mulching is the part of easy landscaping. Do mulching everywhere, this will help in keeping the soil moist, water will evaporate less and roots will get ample moisture. Also, thick mulching (2-3 inches at least) helps in eliminating weeds. Around your garden beds, you can also cover the soil with pebbles and gravels. This will make your garden more attractive and it works as a mulch too.
14. You can also cover the empty space of your garden with sun blocking plastic sheeting, it may not look good but doesn’t allow weed seeds to germinate and spread.
0
0
文章
Joss
2017年05月23日

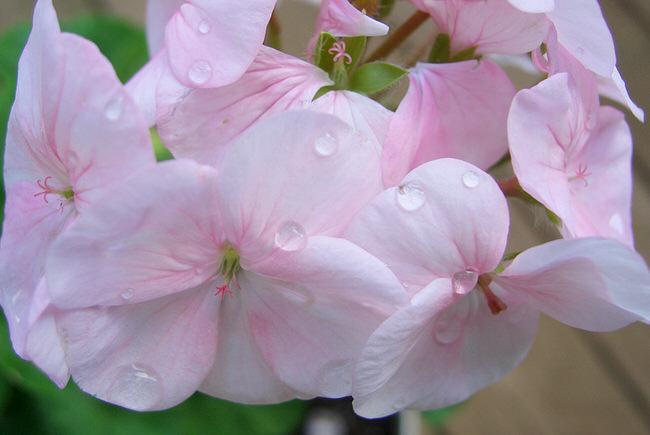
When the garden catalogs come out and the nurseries start stocking plants, gardeners start thinking about how to get the most bloom for their buck. That can be a really tough job when you have a shaded garden that needs some color. You don’t have to have an all foliage garden just because your garden is shaded, and you don’t have to settle for just a few weeks of bloom. Here are our top picks for choosing garden plants that bloom in the shade, all summer long!
Geranium – This is not your typical annual geranium that fills window boxes everywhere… in truth, those are Pelargoniums. True geraniums are a perennial that does well in partial shade, and blooms pink or blue all summer. In addition, many varieties’ foliage turns bronze or red in the fall. We love Geranium “Rozanne”. Its blooms are big and blue, and the plant grows to 20 inches.
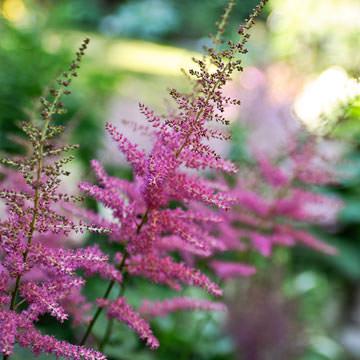
Astilbe – Astilbe have foliage that is glossy and attractive, and bloom from late spring into summer. If you cut them back after blooming, they can bloom again. In pinks, purples and whites, they are a fluffy spire that can brighten any shady spot.
Spiderwort – Known for growing in almost any conditions, Spiderwort has strap like foliage and interesting flowers of white, pink or purple all summer.
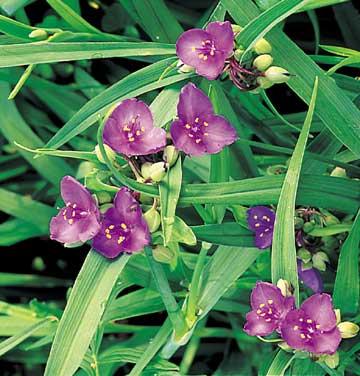
This variety has bright green leaves and is called “Sweet Kate”. Great for brightening up a shady garden!

Hardy Fuchsia – There are several cultivars of hardy Fuchsias, which are just as beautiful as the basket variety, but usually larger and more up right. The most common variety grown in the Pacific is Fuchsia magellanica. This Fuchsia is a shrub like plant covered with tubular blooms that hummingbirds LOVE, and blooms spring to first frost. Growing 6-10 feet high and as wide, it’s winter hardy down to zone 6, though it might die back during the coldest months. It will come alive again in spring!

Impatiens – No conversation about long blooming shade plants would be complete without talking about Impatiens. There are two types, the one we are talking about is the bedding Impatiens, which are the kind you find in every nursery in six packs and lots of colors. While these are annuals and die back each winter, they perform better than any other flowering shade plant. They are tender, so be sure not to plant them too early…Wait until the soil starts to warm. Planting them when it’s still cold can stunt them. Also, they need moisture and are heavy feeders. Cut them back by a third if they start to get leggy, and give them a dose of liquid fertilizer. My favorite are white Impatiens, but they come in many colors, from neon brights to pastels. They, much like petunias and marigolds, have gotten a bad wrap by gardening snobs as being cliche, and boring. Any plant can be boring if you don’t use it properly. So use them the way they shine…in large drifts of all one color..and watch those snobs eat their words!
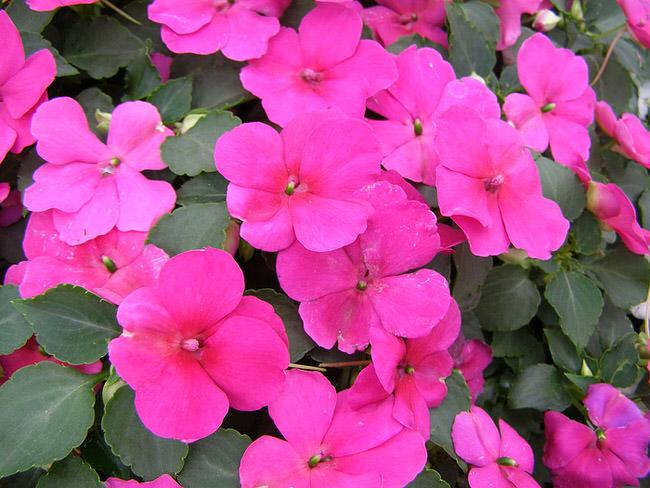

So don’t use your shady garden as an excuse not to have flowers in bloom all summer long. Pick one, two or all of these and create a shade garden that blooms all summer!
3
4
文章
Micky
2017年05月23日


The holidays are finally here, and what better way to greet your holiday guests than with a creative holiday front porch display? Even if you don’t have much time to decorate for the holidays indoors, you can use these quick and inexpensive ideas to add a personal touch to the front porch in a flash!
Door Candy
I love to hang a holiday wreath each year, but since its the first point visitors see of my home, I try to make it special. Easy ways to add a creative touch to your holiday doorway, without breaking the budget?
Hang an old picture frame painted in your holiday color scheme instead of a wreath. Inside the frame hang a cool element that reflects your personality. Ideas? Ice skates, colorful shatterproof ornaments, mittens, wooden letters representing your last name, toy car or train, a bunch of holly tied with ribbon…the possibilities are endless. See how they did this one – from A vegas Girl At Heart.

Create a nature wreath with a wreath base, a glue gun, and mosses, pine cones and a little bit of sparkle. Make it simple and modern, or ornate and traditional. Top it off by tying a large Christmas ribbon off center at the top. Tip: A wreath base can be anything from a store bought wreath, to a piece of old plywood, all the way down to sturdy cardboard. Make sure your wreath has some protection for t he weather.

Check out the tutorial for this super easy wreath from The Creek Line House.

Instead of a wreath this year, how about creating cute holiday signs to hang on the front door? All is takes is a blank wooden template from the craft store, or even a scrap piece of wood. The more age, the better. Use stencils or stamps, and welcome Santa (and everyone else!) with style! Some catchy phrases for your sign? Keep it simple and use “Believe”, “Joy”, or “Let It Snow”. Be cute with “Santa, Define Good…” or “Baby It’s Cold Outside”, or choose something more spiritual to reflect your family.

Here’s the tutorial for this sign from our friends at Love Of Family And Home.

Pot up Some Holiday
Create an easy holiday planter or flower pot for your front porch decorating. Think in layers, like a cake. Make a base inside your container with stones or rock to secure your arrangement. Now using evergreen branches, “plant” them in the pot. Leave a clear spot in the center of the container to pile shatterproof ball ornaments. (This is the “cake” filling). I use a glue gun to secure them to each other to make them more stable. Now add some long bare branches into the arrangement for height and texture. Tie on a ribbon if you like. Easy, fast, stylish and best of all, you can collect most of the items for the planter in your yard or neighborhood! Kim at ‘Kim Power Style‘ made this charming little Christmas bucket using battery operated lights & large pine cones. Love those birch logs!
Wrap up some empty cardboard boxes like gifts, and pile them by the front door, on a bench, or in an entry. Pick up the gift wrap and the ribbon at the dollar shop, and it’s a frugal way to make fun and festive holiday impact! Or go all out and create these amazing DIY outdoor lighted gift boxes! DIY Vintage Chic tells you how to do it.

Use craft foam and scissors to cut out stars or another holiday shape, and attach like wall paper to your front door or entry. Poster putty is a great temporary adhesive that doesn’t not leave any damage or marks on your door or siding.
Watch Your Step!
Finally don’t forget your front door mat. After all, this time of year, it gets a lot of use, and a lot of attention. Use craft paints and inexpensive mats from the home improvement store to make a custom door entry perfect for your family. You can stencil directly on them with a stiff brush, or use a pre-made stamp. Snowflakes, anyone? We love this one from the Lisa Leonard Blog. Here’s the tutorial.

Use these creative ways to decorate your front porch for the holidays, and share your love of this season with your neighbors, friends and family!
0
0
文章
小马奥
2017年05月23日

Want to grow FRESH & ORGANIC vegetables but short of space? No problem, you can even do this near your kitchen window. Just learn about the Windowsill Vegetable Gardening and 11 best vegetables you can grow there!
So what if you don’t have a big outdoor space to grow your own food, you can also grow your own fresh and organic vegetables in a small space– on your windowsill. Improvise and act, get some window boxes, hanging baskets or make some cool DIY containers.
Also Read: Windowsill Herb Garden
It’s fun and exciting and you’ll be successful if you care about a few things: Your window must receive minimum 4-5 hours of sunlight, you should fertilize your plants correctly and the balance in watering must be maintained (avoiding both overwatering and underwatering).
Also Read: How to Water Container Plants
1. Green Onions

Fresh green onions can be a wonderful and delicious addition to your salad bowls and sandwiches. In a small space like a windowsill, you can get enough harvest. You can even grow green onions in water. See the tutorial! If you want, you can try to grow onions, too. Also, vertically in plastic bottles. Check out this post.
A Tip: If you’re growing green onions in water, replace the water every day.
2. Loose Leaf Lettuce

After green onions growing lettuce is one of the easiest things in the windowsill gardening! It doesn’t require a sunny window, a few hours of sunlight is enough, if not, you can also use artificial light. And the best part is you can make decorative arrangements, combining red or green leaf lettuces in the same pot or choosing variegated ones.
A Tip: Wide-shallow containers are sufficient and provide you small crop. Learn how to grow lettuce in a pot here.
3. Tomatoes

Growing tomatoes on a windowsill is easy if it is sunny. A great way to grow and enjoy fresh, organic, juicy tomatoes indoors. For best results, choose dwarf varieties (cherry tomatoes, are perfect). Also, some varieties that grow well on windowsill includes Early Salad, Red Cushion, Pretty Patio and Tiny Tim.
Also Read: How to Grow So Many Tomatoes in So Little Space
A Tip: Cherry tomatoes don’t require a big deep pot, you can use a small to medium sized container. If you like to grow them in hanging baskets near your windows, it is possible too. Learn how to do this here.
4. Spinach

You can have your own spinach and you don’t need a big yard for this. You can grow it on a windowsill if it receives only a few hours of sun. Here’s the helpful guide on growing spinach in containers.
A Tip: Keep the soil slightly moist and provide shallow but wide planter, a 6 inches deep pot would be sufficient.
5. Chillies

Exotic, hot, spicy, and colorful– You can grow chilies on your kitchen windowsill. But only if it is sunny and warm. Also, the pot you use should be at least 8-10 inches deep. It’s fun and you’ll love your plants once they’ll start to flower and fruit. You can make your curry recipes spicier this way.
Also Read: How to Grow Banana Peppers
A Tip: Provide as much sun as possible and keep your eyes on pests.
6. Carrots
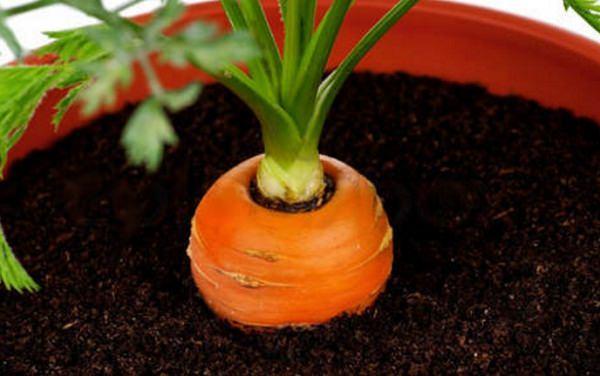
Growing carrot on a windowsill is possible and you can expect a decent homegrown harvest in small pots or window boxes. Carrot plants need regular watering, otherwise, the roots (carrots) will dry out and crack. Growing this root vegetable in containers is easy and it doesn’t take much space too. Read this to learn how to grow carrots in containers.
A Tip: Choose smaller varieties.
7. Sprouts

The healthiest stuff you can grow– Almost anywhere in your home, also on the windowsill. It is such a rewarding experience as they grow easily and quickly. All you need is a quart jar, a few tablespoons of sprouting seeds and water. In a week, you’ll have a jar full of healthy delicate sprouts that you can sprinkle on salads, add to sandwiches or toss into soups for a delicious and healthful twist on your favorite recipes.
A Tip: Just read these two articles– here and here.
8. Garlic

No need to teach you about the GARLIC glories! Let’s come to the point– Garlic will grow happily on your windowsill. To grow it, buy some fresh garlic from a grocery store. Plant a large, unpeeled clove with the pointed side up, in well-draining soil. Keep the soil moist and in a few days, you should see a green shoot. You can use its leaves in many recipes in place of garlic, will taste delicious. To harvest the leaves, cut them off with a sharp scissor, only a few inches at a time. When the leaves dry, dig up the soil to harvest the garlic bulbs.
A Tip: Choose at least 6 inches deep pot.
9. Microgreens

A big bowl of green leaves can be a prime source of vitamins A, C, K and folic acid. And microgreens (aka seedlings of herbs and vegetables) maybe even more nutrient-rich and tasty than the mature ones. Here is everything about growing microgreens.
A Tip: To grow microgreens you will need seeds of various greens and a wide but shallow tray.
10. Radishes

Radishes grow so fast and require little care and don’t mind the small pots. Plus, there leaves are also edible and you can prepare delicious exotic recipes from them. They need sunny windowsill and a moist soil.
A Tip: Ensure the pots you use have sufficient drainage holes and the potting soil must be well-drained and rich in organic matter.
11. Beans and Peas

Both the beans and peas can be grown on windowsills if there is space. Pole beans if planted in window boxes can be trained and supported by tying a string or wire from the planter to the window frame.
A Tip: Dwarf and bushier bean varieties and peas don’t require any special support, thus more suitable for windowsill gardening.
So what if you don’t have a big outdoor space to grow your own food, you can also grow your own fresh and organic vegetables in a small space– on your windowsill. Improvise and act, get some window boxes, hanging baskets or make some cool DIY containers.
Also Read: Windowsill Herb Garden
It’s fun and exciting and you’ll be successful if you care about a few things: Your window must receive minimum 4-5 hours of sunlight, you should fertilize your plants correctly and the balance in watering must be maintained (avoiding both overwatering and underwatering).
Also Read: How to Water Container Plants
1. Green Onions

Fresh green onions can be a wonderful and delicious addition to your salad bowls and sandwiches. In a small space like a windowsill, you can get enough harvest. You can even grow green onions in water. See the tutorial! If you want, you can try to grow onions, too. Also, vertically in plastic bottles. Check out this post.
A Tip: If you’re growing green onions in water, replace the water every day.
2. Loose Leaf Lettuce

After green onions growing lettuce is one of the easiest things in the windowsill gardening! It doesn’t require a sunny window, a few hours of sunlight is enough, if not, you can also use artificial light. And the best part is you can make decorative arrangements, combining red or green leaf lettuces in the same pot or choosing variegated ones.
A Tip: Wide-shallow containers are sufficient and provide you small crop. Learn how to grow lettuce in a pot here.
3. Tomatoes

Growing tomatoes on a windowsill is easy if it is sunny. A great way to grow and enjoy fresh, organic, juicy tomatoes indoors. For best results, choose dwarf varieties (cherry tomatoes, are perfect). Also, some varieties that grow well on windowsill includes Early Salad, Red Cushion, Pretty Patio and Tiny Tim.
Also Read: How to Grow So Many Tomatoes in So Little Space
A Tip: Cherry tomatoes don’t require a big deep pot, you can use a small to medium sized container. If you like to grow them in hanging baskets near your windows, it is possible too. Learn how to do this here.
4. Spinach

You can have your own spinach and you don’t need a big yard for this. You can grow it on a windowsill if it receives only a few hours of sun. Here’s the helpful guide on growing spinach in containers.
A Tip: Keep the soil slightly moist and provide shallow but wide planter, a 6 inches deep pot would be sufficient.
5. Chillies

Exotic, hot, spicy, and colorful– You can grow chilies on your kitchen windowsill. But only if it is sunny and warm. Also, the pot you use should be at least 8-10 inches deep. It’s fun and you’ll love your plants once they’ll start to flower and fruit. You can make your curry recipes spicier this way.
Also Read: How to Grow Banana Peppers
A Tip: Provide as much sun as possible and keep your eyes on pests.
6. Carrots

Growing carrot on a windowsill is possible and you can expect a decent homegrown harvest in small pots or window boxes. Carrot plants need regular watering, otherwise, the roots (carrots) will dry out and crack. Growing this root vegetable in containers is easy and it doesn’t take much space too. Read this to learn how to grow carrots in containers.
A Tip: Choose smaller varieties.
7. Sprouts

The healthiest stuff you can grow– Almost anywhere in your home, also on the windowsill. It is such a rewarding experience as they grow easily and quickly. All you need is a quart jar, a few tablespoons of sprouting seeds and water. In a week, you’ll have a jar full of healthy delicate sprouts that you can sprinkle on salads, add to sandwiches or toss into soups for a delicious and healthful twist on your favorite recipes.
A Tip: Just read these two articles– here and here.
8. Garlic

No need to teach you about the GARLIC glories! Let’s come to the point– Garlic will grow happily on your windowsill. To grow it, buy some fresh garlic from a grocery store. Plant a large, unpeeled clove with the pointed side up, in well-draining soil. Keep the soil moist and in a few days, you should see a green shoot. You can use its leaves in many recipes in place of garlic, will taste delicious. To harvest the leaves, cut them off with a sharp scissor, only a few inches at a time. When the leaves dry, dig up the soil to harvest the garlic bulbs.
A Tip: Choose at least 6 inches deep pot.
9. Microgreens

A big bowl of green leaves can be a prime source of vitamins A, C, K and folic acid. And microgreens (aka seedlings of herbs and vegetables) maybe even more nutrient-rich and tasty than the mature ones. Here is everything about growing microgreens.
A Tip: To grow microgreens you will need seeds of various greens and a wide but shallow tray.
10. Radishes

Radishes grow so fast and require little care and don’t mind the small pots. Plus, there leaves are also edible and you can prepare delicious exotic recipes from them. They need sunny windowsill and a moist soil.
A Tip: Ensure the pots you use have sufficient drainage holes and the potting soil must be well-drained and rich in organic matter.
11. Beans and Peas

Both the beans and peas can be grown on windowsills if there is space. Pole beans if planted in window boxes can be trained and supported by tying a string or wire from the planter to the window frame.
A Tip: Dwarf and bushier bean varieties and peas don’t require any special support, thus more suitable for windowsill gardening.
3
1
文章
扭扭
2017年05月23日

Learn how to make a vertical succulent wall planter in a few steps without spending money. You don’t need to be a great DIYer to have this DIY succulent frame in your home.

Succulents are easiest plants to grow on earth. They are not demanding and most of them grow in severe conditions, plus they come in different colors, sizes, and shapes. All this makes them perfect for vertical gardening.
Things you’ll need to make DIY succulent wall planter

SucculentA tape to measureChicken wireA hammerNailsA pencil or MarkerGlueSpecial potting mix for cacti and succulentsMore succulents4 equal size thick sticks or frame moulding to make frameMoss (Optional)A piece of board (plywood or something else) to adhere behind the frame.Staple gun or whatever you find easily to attach the chicken wire to the frame.Pincer or wire cutter to cut wiresSteps to Follow
Step 1
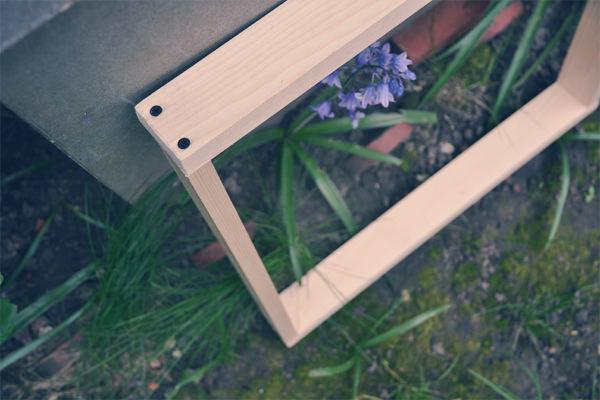
Make a frame by joining the pieces of wood. (See the photo above)
Step 2
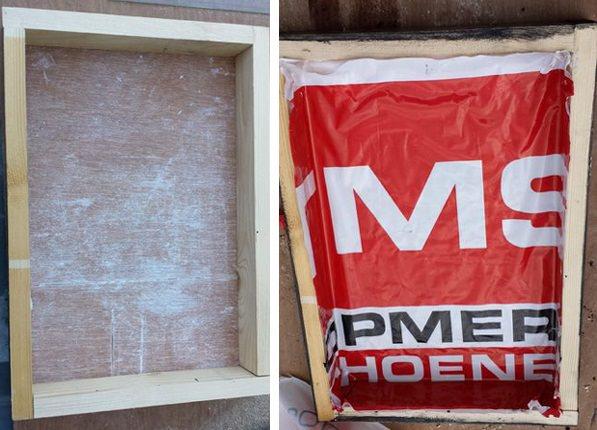
Measure and cut the plyboard or picture frame board to cover the frame from behind according to the dimensions of the frame. Once you join it to the frame with nails and glue, stick a plastic bag or film over it. To make your vertical succulent wall waterproof.
Step 3
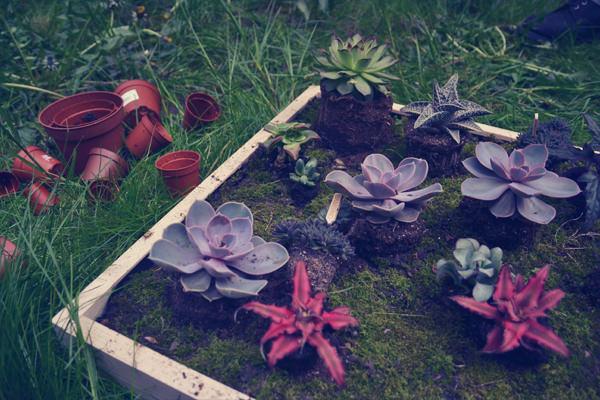
Evenly spread the soil in your frame. Stop filling just before the soil reaches the edge of the frame.
Step 4
Before fixing the chicken wire on your succulent wall planter, distribute moss over the soil (optional) and put succulents to see and adjust them according to colors, shapes and sizes. This is fun! Once you have found the ideal location for your small plants, remove them again.
Step 5
Attach the chicken wire using a staple gun on the edges of the frame. You can skip this step if you want but chicken wire is used to support the succulents and soil.
Step 6
Now plant the succulents. Skip this step if you are planting them from cuttings but if you are planting potted succulents you may need to cut chicken wire mesh to create a few small planting holes to transplant succulents with the help of a pincer or wire cutter.
Step 7
Poke holes in the soil and then gently tuck the plants in and close the hole and mist the soil to moisten it.
Wait a few days before hanging your DIY succulent wall planter or putting it vertically until the plants recover and establish well.
How to Care for Succulent Wall PlanterPosition
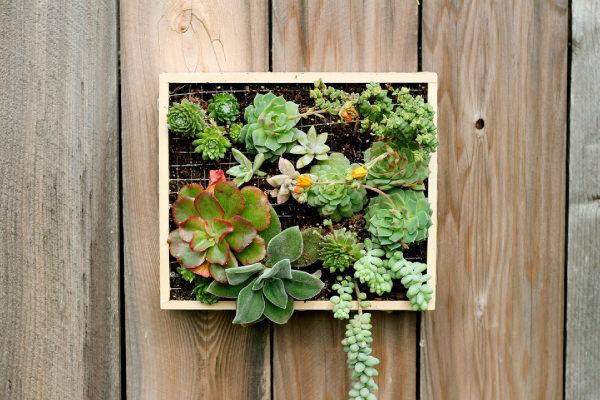
Keep the succulent wall planter on a table, near a windowsill, in your living room, somewhere where it will receive some sun or indirect sunlight. You can also hang it on the wall but for this, you’ll need to attach a picture hanger to your frame.
Watering
Spray water on your vertical succulent wall to keep the soil slightly moist in the next few days. Once established water only when the substrate is slightly dry. Be attentive to it and observe when the plants need water.
Soil
Right kind of soil is the key as you’re growing plants vertically in a too small space. Use succulent potting mix for this.

Succulents are easiest plants to grow on earth. They are not demanding and most of them grow in severe conditions, plus they come in different colors, sizes, and shapes. All this makes them perfect for vertical gardening.
Things you’ll need to make DIY succulent wall planter

SucculentA tape to measureChicken wireA hammerNailsA pencil or MarkerGlueSpecial potting mix for cacti and succulentsMore succulents4 equal size thick sticks or frame moulding to make frameMoss (Optional)A piece of board (plywood or something else) to adhere behind the frame.Staple gun or whatever you find easily to attach the chicken wire to the frame.Pincer or wire cutter to cut wiresSteps to Follow
Step 1

Make a frame by joining the pieces of wood. (See the photo above)
Step 2

Measure and cut the plyboard or picture frame board to cover the frame from behind according to the dimensions of the frame. Once you join it to the frame with nails and glue, stick a plastic bag or film over it. To make your vertical succulent wall waterproof.
Step 3

Evenly spread the soil in your frame. Stop filling just before the soil reaches the edge of the frame.
Step 4
Before fixing the chicken wire on your succulent wall planter, distribute moss over the soil (optional) and put succulents to see and adjust them according to colors, shapes and sizes. This is fun! Once you have found the ideal location for your small plants, remove them again.
Step 5
Attach the chicken wire using a staple gun on the edges of the frame. You can skip this step if you want but chicken wire is used to support the succulents and soil.
Step 6
Now plant the succulents. Skip this step if you are planting them from cuttings but if you are planting potted succulents you may need to cut chicken wire mesh to create a few small planting holes to transplant succulents with the help of a pincer or wire cutter.
Step 7
Poke holes in the soil and then gently tuck the plants in and close the hole and mist the soil to moisten it.
Wait a few days before hanging your DIY succulent wall planter or putting it vertically until the plants recover and establish well.
How to Care for Succulent Wall PlanterPosition

Keep the succulent wall planter on a table, near a windowsill, in your living room, somewhere where it will receive some sun or indirect sunlight. You can also hang it on the wall but for this, you’ll need to attach a picture hanger to your frame.
Watering
Spray water on your vertical succulent wall to keep the soil slightly moist in the next few days. Once established water only when the substrate is slightly dry. Be attentive to it and observe when the plants need water.
Soil
Right kind of soil is the key as you’re growing plants vertically in a too small space. Use succulent potting mix for this.
1
0
文章
Carol
2017年05月23日

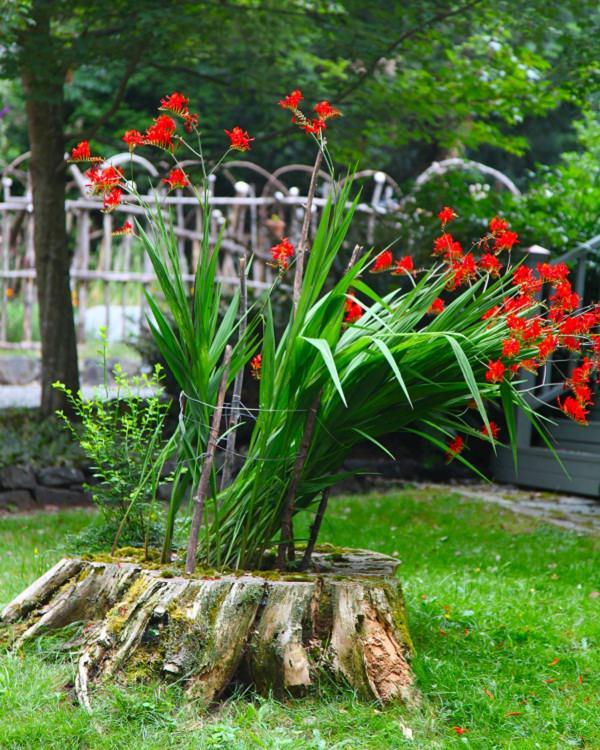
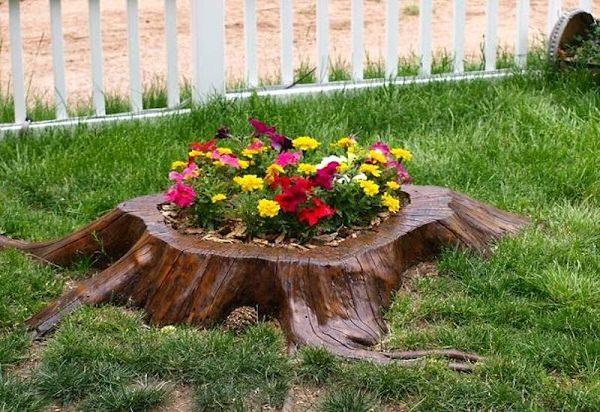
Don’t miss these 19 blazing tree stump planter ideas. A rigid, dead tree stump can become one of the assets of your garden, a striking focal point that can impress your guests.
Often the gardeners face a common problem– what to do with the saw cut stumps of old or diseased trees. Uprooting them is a laborious task and also not cheap.
In such a case, landscapers offer a variety of solutions. But you can solve it on your own by turning a stump into a tree stump planter.
Also Read: How to Make a Tree Stump Planter
Here in this post, you’ll find 19 blazing tree stump planter ideas that’ll entice you to have one in your gardenPlants for a Tree Stump Planter

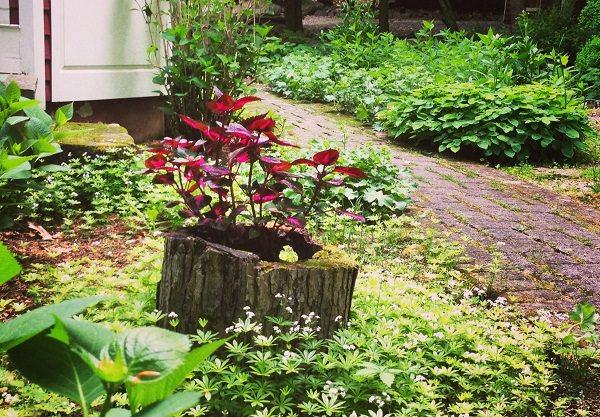
You can create a fabulous planter out of a tree stump. Plants you grow in it may not necessarily be flowering and colorful ones. It can be a climbing plant, creating a great frame around the stump or even moss, if it is in a shade you can choose interesting foliage plants that thrive in less sunlight.

Pick plants that are suitable to the style of your garden. It can either be a few blooming or grassy species. Petunias, nasturtiums, pansies or whatever you like.

Ferns, a variety of wildflowers, cornflower, marigolds, phlox, there are so many options. You can grow other plants around it. This tree stump planter will not go unnoticed and become one of the most beautiful focal points of your garden.
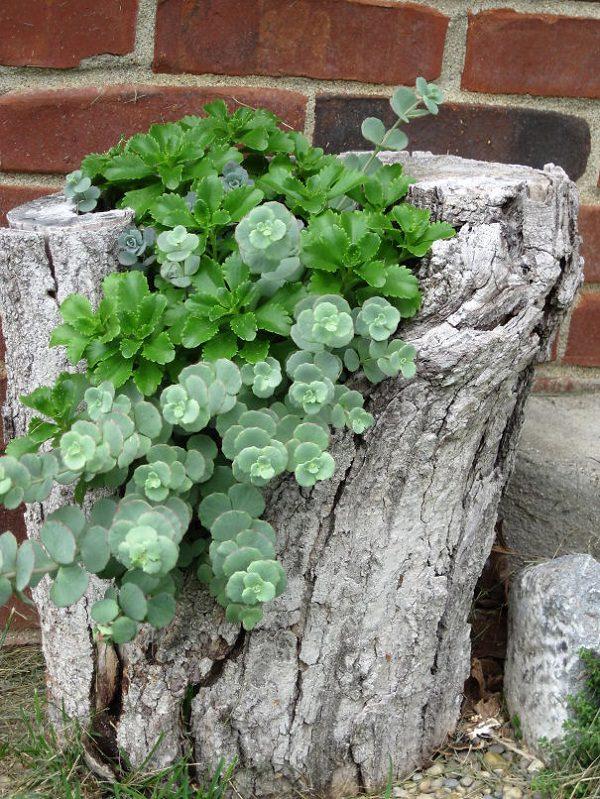
Whatever plant you choose to grow in your tree stump planter but remember, shallow root plants are most successful in it.
Tree Stump Planter Ideas#1. Tree Stump Planter

#2. Tree Stump Planter
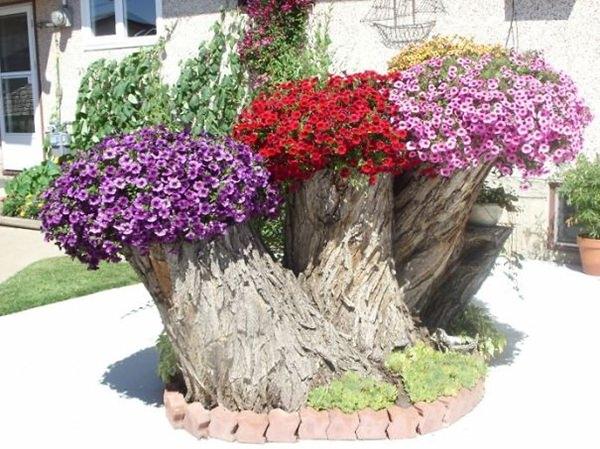
#3. Tree Stump Planter

#4. Tree Stump Planter
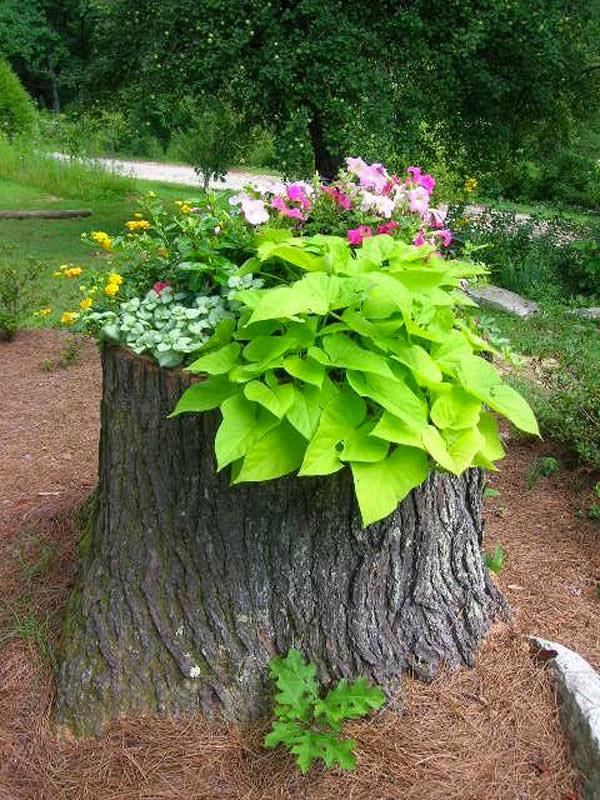
#5. Tree Stump Planter

#6. Tree Stump Planter

#7. Tree Stump Planter

#8. Tree Stump Planter

#9. Tree Stump Planter
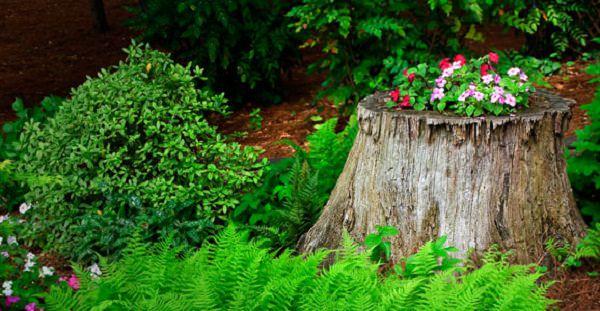
#10. Tree Stump Planter

#11. Tree Stump Planter

#12. Tree Stump Planter
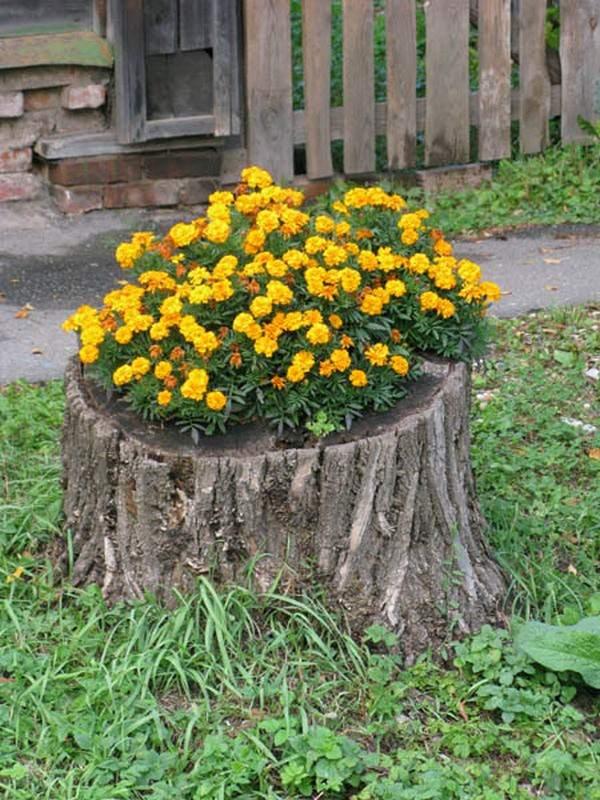
#13. Tree Stump Planter

#14. Tree Stump Planter
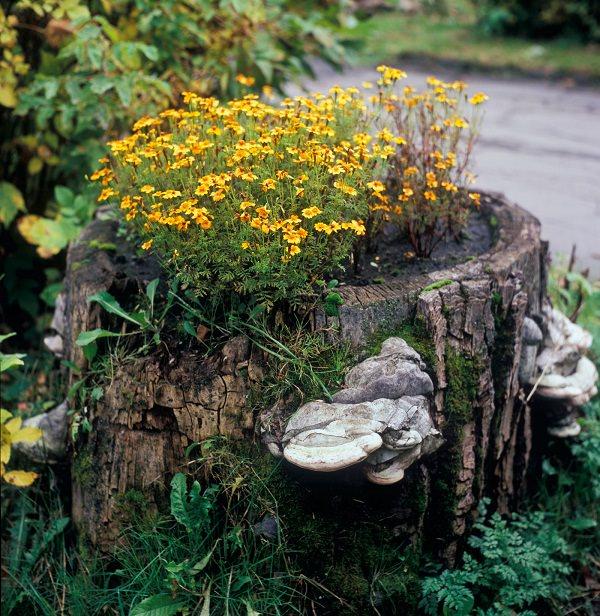
#15. Tree Stump Planter
#16. Tree Stump Planter

#17. Tree Stump Planter

#18. Tree Stump Planter
#19. Tree Stump Planter
Often the gardeners face a common problem– what to do with the saw cut stumps of old or diseased trees. Uprooting them is a laborious task and also not cheap.
In such a case, landscapers offer a variety of solutions. But you can solve it on your own by turning a stump into a tree stump planter.
Also Read: How to Make a Tree Stump Planter
Here in this post, you’ll find 19 blazing tree stump planter ideas that’ll entice you to have one in your gardenPlants for a Tree Stump Planter


You can create a fabulous planter out of a tree stump. Plants you grow in it may not necessarily be flowering and colorful ones. It can be a climbing plant, creating a great frame around the stump or even moss, if it is in a shade you can choose interesting foliage plants that thrive in less sunlight.

Pick plants that are suitable to the style of your garden. It can either be a few blooming or grassy species. Petunias, nasturtiums, pansies or whatever you like.

Ferns, a variety of wildflowers, cornflower, marigolds, phlox, there are so many options. You can grow other plants around it. This tree stump planter will not go unnoticed and become one of the most beautiful focal points of your garden.

Whatever plant you choose to grow in your tree stump planter but remember, shallow root plants are most successful in it.
Tree Stump Planter Ideas#1. Tree Stump Planter

#2. Tree Stump Planter

#3. Tree Stump Planter

#4. Tree Stump Planter

#5. Tree Stump Planter

#6. Tree Stump Planter

#7. Tree Stump Planter

#8. Tree Stump Planter

#9. Tree Stump Planter

#10. Tree Stump Planter

#11. Tree Stump Planter

#12. Tree Stump Planter

#13. Tree Stump Planter

#14. Tree Stump Planter

#15. Tree Stump Planter

#16. Tree Stump Planter

#17. Tree Stump Planter

#18. Tree Stump Planter

#19. Tree Stump Planter
0
0
文章
Eyin Thor
2017年05月23日

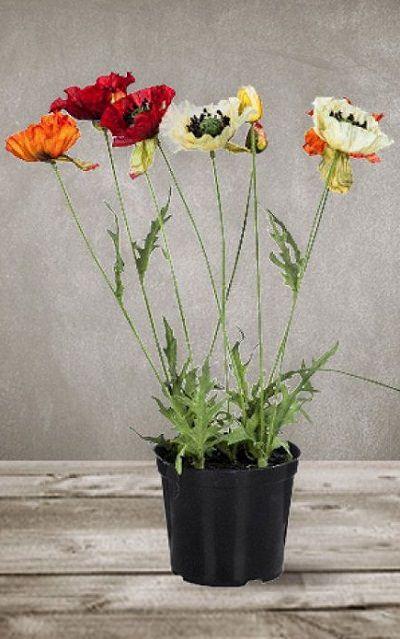
Learn how to grow poppies in this article. Even if you don’t have a space for large flower beds, by growing poppies in pots you can still enjoy the colorful blooms of this stately flowering plant.

Beautiful and seemingly delicate, the poppies are the plants not particularly very easy to grow but the beauty of the flowering plant makes it a popular classic. Those who want to enjoy the intense blooms in their container gardens must grow poppies in pots.
Best Poppy Varieties
There are some of the varieties of poppies that are popular and can grow well in a pot:
Oriental poppy
Most of the oriental poppy cultivars have large strikingly beautiful flowers that usually appears in late spring to early summer in bright colors like orange and red. There are also softer colors of this perennial flowering plant: pink, white and purple, with or without a central spot.
Height: 0.40 to 1.20 m.
USDA Hardiness Zones: 2-9
Iceland poppy
Usually grown as an annual or biennial.This short living perennial is self-seeding and come year after year, does not like the hot summers. Lightly perfumed flowers appear from mid spring to mid summer in colors like yellow, orange, red, pink and white. Flowers of this cultivar fade slowly than other poppies.
Height: 0.30 to 0.6 m.
USDA Hardiness zones: 3-9
California poppy
The showy state flower of California is a short-lived perennial in warm temperate and subtropical climates (USDA Zone 8-10). If you want to grow poppy in a tropical climate, try California poppy, keeping the plant in partial shade in summer.
Height: 0.15 to 0.45 m.
USDA Zones: 6-10b
Shirley poppy
One of the most beautiful and delicate poppies. Shirley Poppy is the name given to an ornamental cultivar group derived from the European wild field poppy (Papaver rhoeas).
Height: up to 0.6 m
USDA Zones: 3-9, can be grown in zones 10 & 11 as annual but doesn’t tolerate tropical heat well.
Choosing a Pot
Growing poppies in pots is easy, the plant is best grown in a medium sized pot. As poppies don’t tolerate waterlogged soil, ensure the pot has sufficient drainage holes in the bottom so that the water will drain freely.
How to Grow PoppiesSowing Seeds and Planting
1. Poppy grows well from seeds. Make sure that you place the pot in a bright position after planting seeds as poppy seeds require light to germinate. Also, most of the poppies do not like being transplanted, so either choose a pot that biodegradable or plant seeds in the exact pot in which you wish to grow poppy plants later.
2. Disperse seeds by hand in the pot. As the poppy seeds are very small, gardeners often mix them with sand to achieve a more equitable distribution. This also helps to see where the seeds were sown.
3. Tamp the seeds lightly down on the soil so that they are covered by a very thin layer of soil or sand. This keeps the seeds in place and they’ll also get plenty of light for germination. Once the seeds are planted moisten the soil making sure you don’t move the seeds.
4. Keep the soil constantly moist until germination. Germination depends on the climate and species but usually occurs within 25 days.
5. Poppies have a very delicate root system in the beginning so once the seedlings sprout water them gently. Thin out the seedlings 4-6 inches apart, when they reach a height of 5 inches. If you are planting in a medium to the large sized pot you can easily keep more than one plant per pot.
Requirements for Growing Poppies in Pots

Location
Poppies love the sun, so place your pots in a spot that receives ample sunlight, at least 6-7 hours daily. However, if you live in a warm climate where the sun is intense, grow poppies in partial sun.
Soil
Poppies can thrive on a variety of soils unless it is clay rich and blocks the drainage, the best is to use humus rich, loamy potting mix. The substrate should be neither too loose, nor prone to compaction and must be well draining. Slightly acidic to neutral soil pH is recommended.
Watering
When the poppies are in bloom or about to bloom in warm season, watering must be moderate and regular. On the contrary, once you get past the period of flowering, best to leave the soil dry as much as possible and watering must be done only when the top one inch surface of soil seems dry.
Poppy Plant Care
Fertilizer
Poppies are not heavy feeders; on the ground, they tolerate poor soil and thrive on their own but when growing poppies in pots you’ll need to fertilize the plant. At the time of planting or at the beginning of growing season, usually, spring (fall in warm frost-free climates), add a slow-release fertilizer to provide a steady supply of nutrition to plant during the whole season.
If you haven’t added a slow release fertilizer start to feed the plant with balanced liquid fertilizer on a bi-weekly basis once the plant has exceeded the height of 5 inches or when new growth emerges in spring. You can also feed the plant with flower fertilizer during the flowering period. Cease the application of fertilizer once the growing period ends.
Also, poppies are prone to magnesium and iron deficiency, application of Epsom salt is recommended.
Deadheading
Cut off the faded flowers to encourage more blooms.
Pests and Diseases
If the pot is not well draining or if you overwater the plant, it may die due to root rot. It also suffers from powdery mildew. In pests, keep an eye on aphids and spider mites.

Beautiful and seemingly delicate, the poppies are the plants not particularly very easy to grow but the beauty of the flowering plant makes it a popular classic. Those who want to enjoy the intense blooms in their container gardens must grow poppies in pots.
Best Poppy Varieties
There are some of the varieties of poppies that are popular and can grow well in a pot:
Oriental poppy
Most of the oriental poppy cultivars have large strikingly beautiful flowers that usually appears in late spring to early summer in bright colors like orange and red. There are also softer colors of this perennial flowering plant: pink, white and purple, with or without a central spot.
Height: 0.40 to 1.20 m.
USDA Hardiness Zones: 2-9
Iceland poppy
Usually grown as an annual or biennial.This short living perennial is self-seeding and come year after year, does not like the hot summers. Lightly perfumed flowers appear from mid spring to mid summer in colors like yellow, orange, red, pink and white. Flowers of this cultivar fade slowly than other poppies.
Height: 0.30 to 0.6 m.
USDA Hardiness zones: 3-9
California poppy
The showy state flower of California is a short-lived perennial in warm temperate and subtropical climates (USDA Zone 8-10). If you want to grow poppy in a tropical climate, try California poppy, keeping the plant in partial shade in summer.
Height: 0.15 to 0.45 m.
USDA Zones: 6-10b
Shirley poppy
One of the most beautiful and delicate poppies. Shirley Poppy is the name given to an ornamental cultivar group derived from the European wild field poppy (Papaver rhoeas).
Height: up to 0.6 m
USDA Zones: 3-9, can be grown in zones 10 & 11 as annual but doesn’t tolerate tropical heat well.
Choosing a Pot
Growing poppies in pots is easy, the plant is best grown in a medium sized pot. As poppies don’t tolerate waterlogged soil, ensure the pot has sufficient drainage holes in the bottom so that the water will drain freely.
How to Grow PoppiesSowing Seeds and Planting
1. Poppy grows well from seeds. Make sure that you place the pot in a bright position after planting seeds as poppy seeds require light to germinate. Also, most of the poppies do not like being transplanted, so either choose a pot that biodegradable or plant seeds in the exact pot in which you wish to grow poppy plants later.
2. Disperse seeds by hand in the pot. As the poppy seeds are very small, gardeners often mix them with sand to achieve a more equitable distribution. This also helps to see where the seeds were sown.
3. Tamp the seeds lightly down on the soil so that they are covered by a very thin layer of soil or sand. This keeps the seeds in place and they’ll also get plenty of light for germination. Once the seeds are planted moisten the soil making sure you don’t move the seeds.
4. Keep the soil constantly moist until germination. Germination depends on the climate and species but usually occurs within 25 days.
5. Poppies have a very delicate root system in the beginning so once the seedlings sprout water them gently. Thin out the seedlings 4-6 inches apart, when they reach a height of 5 inches. If you are planting in a medium to the large sized pot you can easily keep more than one plant per pot.
Requirements for Growing Poppies in Pots

Location
Poppies love the sun, so place your pots in a spot that receives ample sunlight, at least 6-7 hours daily. However, if you live in a warm climate where the sun is intense, grow poppies in partial sun.
Soil
Poppies can thrive on a variety of soils unless it is clay rich and blocks the drainage, the best is to use humus rich, loamy potting mix. The substrate should be neither too loose, nor prone to compaction and must be well draining. Slightly acidic to neutral soil pH is recommended.
Watering
When the poppies are in bloom or about to bloom in warm season, watering must be moderate and regular. On the contrary, once you get past the period of flowering, best to leave the soil dry as much as possible and watering must be done only when the top one inch surface of soil seems dry.
Poppy Plant Care

Fertilizer
Poppies are not heavy feeders; on the ground, they tolerate poor soil and thrive on their own but when growing poppies in pots you’ll need to fertilize the plant. At the time of planting or at the beginning of growing season, usually, spring (fall in warm frost-free climates), add a slow-release fertilizer to provide a steady supply of nutrition to plant during the whole season.
If you haven’t added a slow release fertilizer start to feed the plant with balanced liquid fertilizer on a bi-weekly basis once the plant has exceeded the height of 5 inches or when new growth emerges in spring. You can also feed the plant with flower fertilizer during the flowering period. Cease the application of fertilizer once the growing period ends.
Also, poppies are prone to magnesium and iron deficiency, application of Epsom salt is recommended.
Deadheading
Cut off the faded flowers to encourage more blooms.
Pests and Diseases
If the pot is not well draining or if you overwater the plant, it may die due to root rot. It also suffers from powdery mildew. In pests, keep an eye on aphids and spider mites.
4
1
文章
Micky
2017年05月23日


As a gardener, I love to get holiday gifts that reflect my love of, well… gardens! In fact, I don’t know anyone who doesn’t love to get a living gift during the holiday season. Rather than be one of those people who just pick up a boring houseplant at the grocery store on the way to the party, (you know who you are!) this year put some thought into creating some DIY holiday plant gifts. We have some great ideas for how to take some simple plant material and turn it into a thoughtful, one of a kind gift, that keeps on giving. Our feature project above, is a simple burlap paperwhite pot from ‘Maya Made’… So easy, but the burlap pot wrap puts in that extra touch!
Another paperwhite project from ‘Domaphile’, these paperwhites in mason jars would make such cute hostess gifts!


From the community at ‘Home Depot’ learn to make these amazing mini rosemary topiaries. A fast project, and who wouldn’t want to be elbows deep in rosemary for an afternoon? The gifts are just a bonus!

More DIY rosemary topiaries from ‘City Farmhouse’…

From ‘Lolly Jane’, we love these chalk paint DIY succulent pots… You could do these in white, and wrap with a blue or silver Christmas ribbon.

If you want a unique gift, learn how to make these succulent Christmas trees, just like this one from ‘Canvas and Canopies‘… Here is a step by step video from ‘Urban Dirt’ on making succulent trees…

Here is an easy idea… pot up small transplants of aromatic herbs in recycled cans, then wrap with wide burlap ribbon in holiday style… From ‘Celebrate Magazine‘.

From ‘Gardenista‘, another easy way to take a simple plant gift, and dress up the delivery… And you probably already have all the supplies!

Lastly, another wrap idea, from ‘Segreto‘…

So give “green”!
>>> Want more info on how to force bulbs for holiday gifts? Check out our post on “How to Force Bulbs”
0
0
文章
Gina
2017年05月23日


I love having fresh herbs at my fingertips, without having to trek all the way through the garden for a few sprigs of basil. (Not that I don’t love an excuse to trek through the garden!) But having a container garden full of fresh herbs makes it a lot more likely that you will actually use them. And now that I finally have Steve softening on the idea of basil, I want a kitchen herb garden! We found these insanely cool herb garden container ideas, and I can’t wait to use one of them. In fact, I have my eye on one of these projects for some container veggies too! Our feature project above, is from Summer at ‘Simple Stylings’. Can I just say I LOVE this DIY paint can herb garden! I have a stretch of house siding like this right outside my backdoor, and I’ve been looking for a way to accent it so it isn’t so boring. Now I can have herbs close by too! BTW, if you don’t have paint cans, you can buy empty new ones at home Depot…
Michael from ‘Inspired by Charm’ created this DIY chicken feeder herb garden. I love the idea of repurposing things from times gone past… History belongs in a garden, especially farm history. Check out all the photos on how he made this!
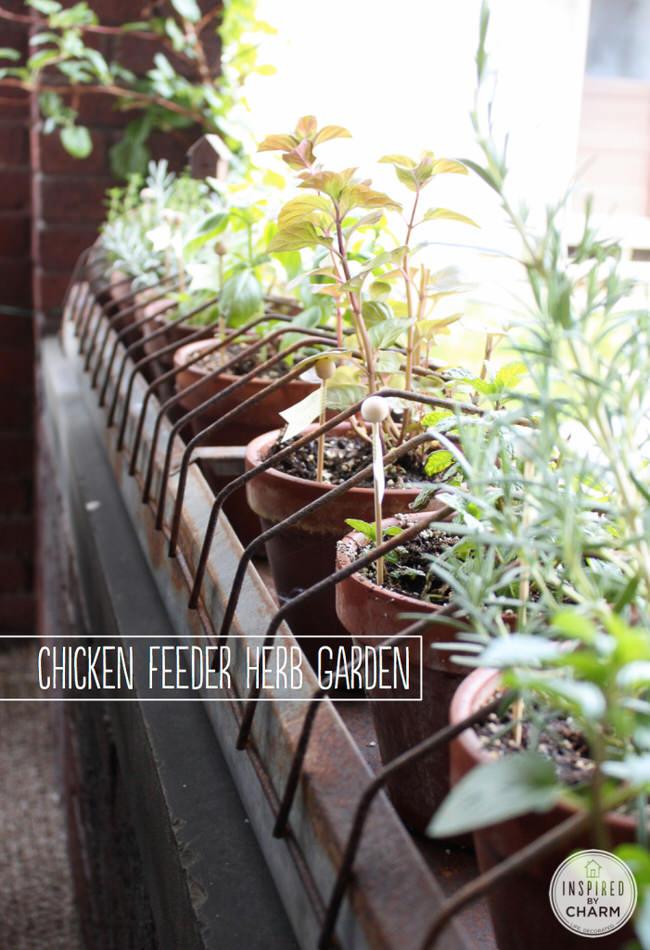
From ‘Design Sponge’, this filing cabinet planter is a touch of modern genius! I think the trick would be to find a cabinet that has a flat bottom, and no major dents. And to use a really cool color. And wheels. They planted this with succulents, but I think I would mix herbs and even some small veggies in this! Step by step photos!
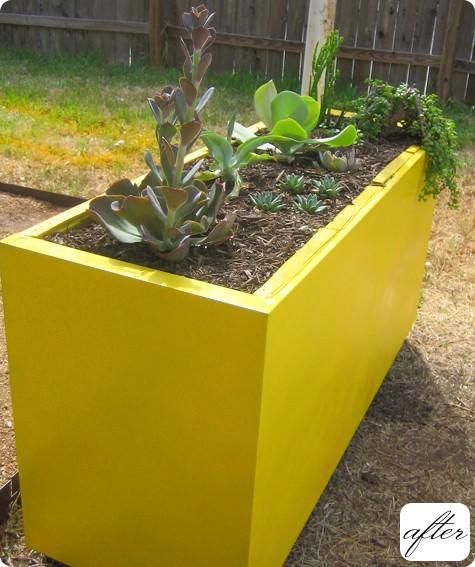
From ‘Ikeahackers’, this Bjuron herb garden is really simple… Two boards, five Ikea planters and some hardware! Very simple tutorial.
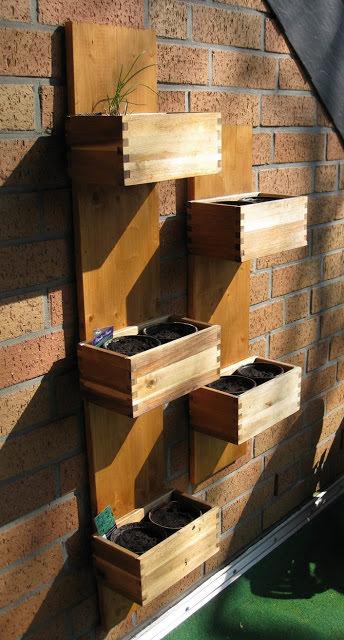
From ‘Remodelista‘, these vintage planters are from the shop ‘Love the Design‘ in Toronto. These are just mounted as a collage to the entry wall of their shop!

Our very own DIY cinder block planter would look amazing with herbs planted in it! (We do have a little lavender in there in front!)

‘Young House Love’ shows us how to make an herb garden in a metal tub. Make sure you don’t leave a metal container in an area of hot sun without adequate water!
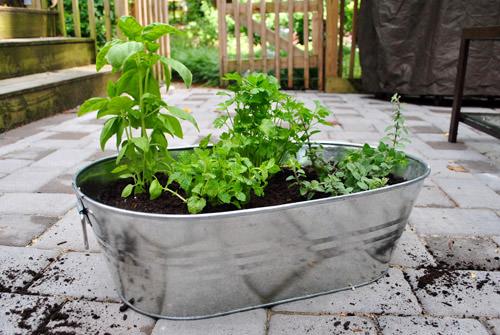
From Carrie at ‘Making Lemonade’, this DIY trellis planter is another touch of Ikea brilliance! She uses those little pots with hooks that you find in their utensil storage systems, and hangs them on an ordinary trellis. Instant herb garden! This is part of a post on making a Mommy oasis, so definitely read on through!
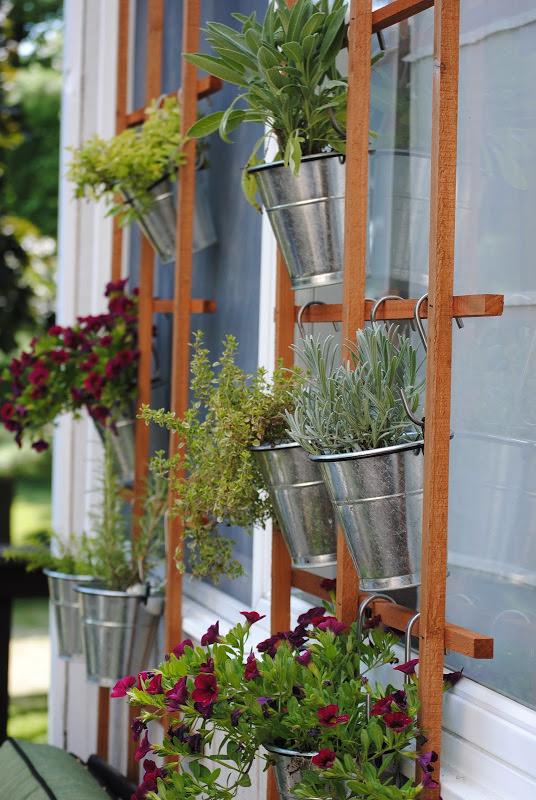
Want to get simpler? This trough herb garden by ‘Pottery Barn‘ could be DIY’ed by picking up a cool wooden container at a thrift or antique store, and lining it with plastic using a staple gun. Or just insert pots with saucers. Voila!
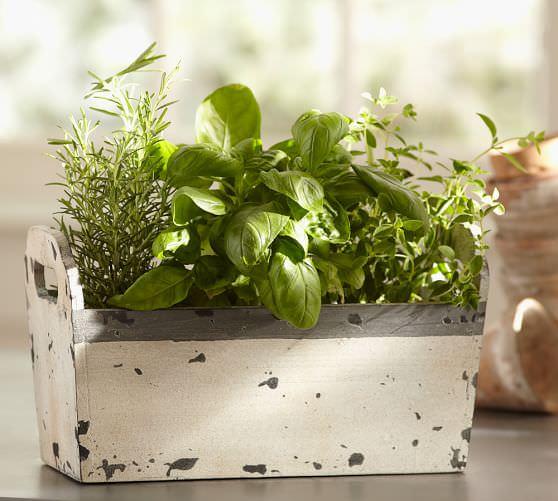
Make a raised bed garden on wheels, from ‘A Beautiful Mess‘. They made this project using plans from ‘Sunset‘. I love the ideas of the wheels… not only can you move things around easily, you can move plants into sunnier or shadier conditions, based on their needs.
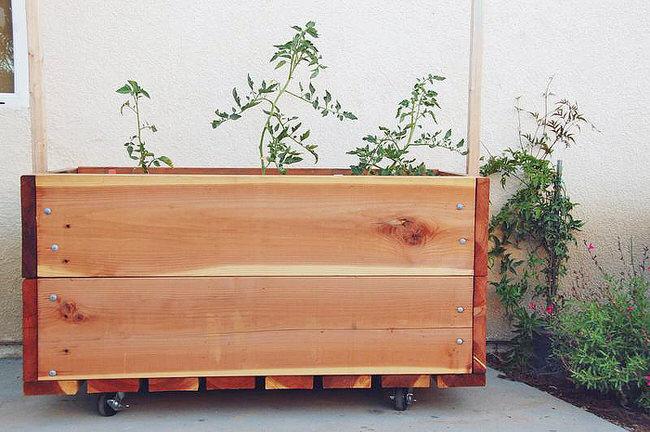
Lastly, this galvanized pot idea comes from ‘Popsugar‘, through photos they took at the San Francisco Decorator’s Showcase in 2010. I like these because they are tall and deep for good root growth, but don’t take up too much of a footprint… perfect for patio or balcony gardens!

Do you prefer to grow your herbs in the ground, or in containers? Why? Share in comments!
2
1
文章
Gina
2017年05月23日

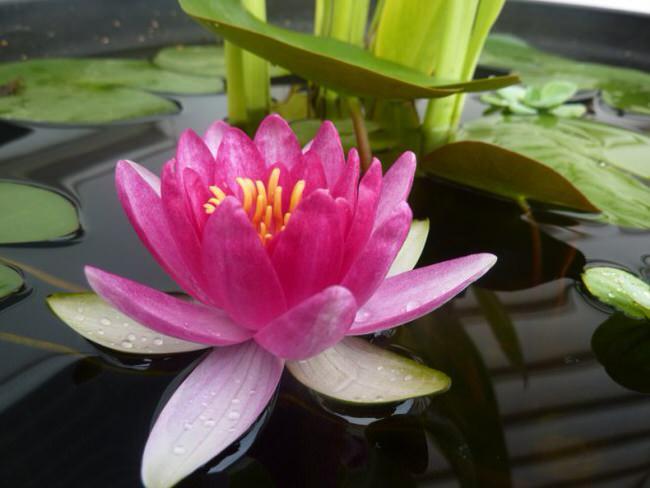
We love water in a garden because its one of the basic elements of life… And it reminds us of a pleasant stream or idyllic pond, right in our own backyard space! However, if you have a small garden, or simply don’t want to go to all the work of digging out an in ground water feature, DIY container water gardens are an easy and fun project. You can create a simple fountain, or grow pretty pond plants as well. Check out these projects perfect for any DIY gardener! And if you need some help with what to plant in your new container, check out our post on pond plants.
Our feature project above and below, is from Vidya at ‘What’s Ur Home Story?’. Her tutorial on her DIY container water garden lets you create this mini pond on any patio, and it’s easy! She tells you how to control mosquitos, and how to add fish as well. Her water lilies turned out so pretty!
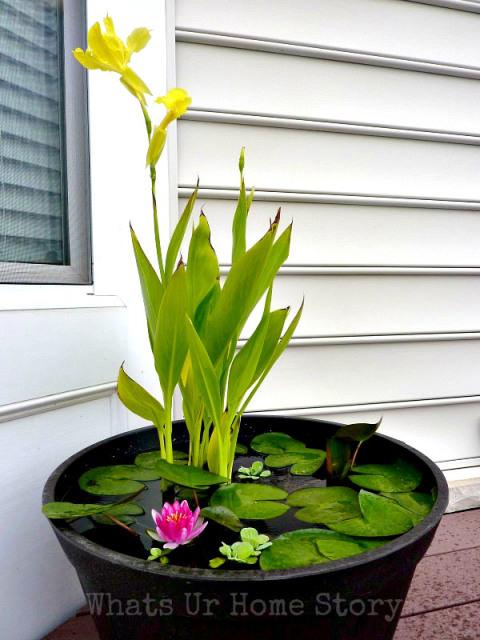
‘Midwest Living’ shows us how to make 3 easy water gardens, complete with good explanations on how this little biosystem works.

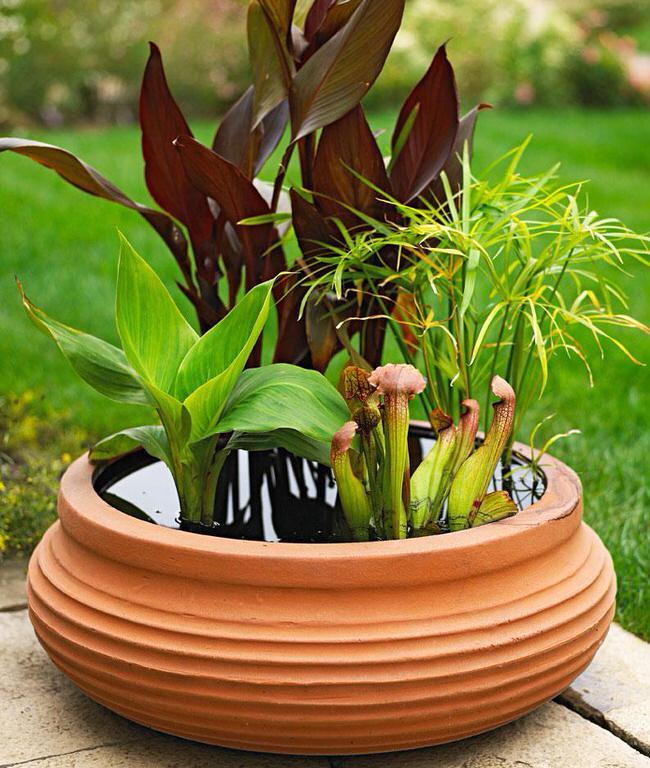
Don’t know where to get supplies for your water garden? ‘Martha’ gives us her list of their favorite mail order companies for water plants and supplies.

Your local public garden may put on free classes on creating a water garden, like this one at ‘Wave Hill‘ garden and cultural center in NY. This pic is also a good example of keeping it simple… You don’t need a lot of different pond plants to make your water garden work.
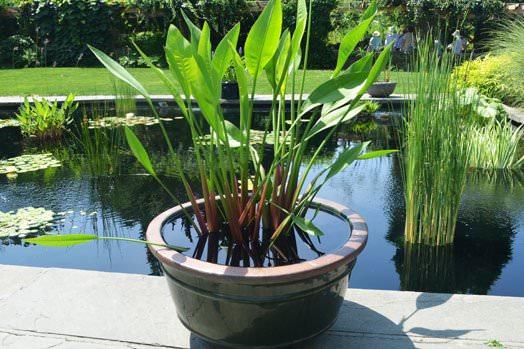
Here is a great idea from ‘BJL Aquascapes‘… Use underwater lighting in your container garden and make it a perfect evening focal point! Even if you don’t spend much time in the garden after dark, if it can be seen indoors, it’s a great design element that looks high end for just a few dollars. Check with local nurseries or online suppliers.
Lastly, if you want to grow the most desired water plants of all time, the water lily, then check out these tips from ‘Blue Lotus Farm‘! The tropical varieties are more expensive then the hardy ones, so don’t get discouraged if the first lilies you see at the nursery seem pricey.
0
0
文章
Joss
2017年05月22日


Many of us have trouble keeping plants alive in our garden, and have quite the “black thumb”. Either we are too busy to maintain them, or our gardens have issues that make it difficult; hot, dry sites, poor soil or bad weather. Don’t let that stop you from growing flowers! There is hope for even the most murderous of gardeners… you can grow flowers, and you can plant them today and trust they will still be there next year and the year after that. Yes, you still have to make sure they get the occasional drink of water, and make sure you aren’t planting them deep in the barren wasteland of the Arctic…but other than that? Here are TGG’s best picks for easy to grow flowers for any garden. (Oh, and these plants are favs of expert gardeners too!)
Number 5
Thyme (pictured above)
While most of you recognize this as a spice from the kitchen cupboard, there are many very ornamental varieties that can offer texture, color and scent in your garden. Oh, and did I mention they grow like weeds? In a good way, of course. Drought resistant and sun lovers, these plants come in creeping forms to tuck between pavers, and larger varieties that fit right into any garden bed. Flowers are usually white, pink or red, and cover the plants spring through fall. They are fragrant when crushed, make great filler for flower arrangements, and attract butterflies like crazy! These plants come back every year, and yes, you can use them in the kitchen!
Number 4
Cosmos

This flower is an annual, which means it dies after one season, but it reseeds itself so prolifically you would never know it! Each season new seedlings will come up on their own, with no help from you at all. Beautiful daisy like flowers are borne on tall ferny foliage in purples, pinks and whites. All they need is a little water and at least half a day of sun, and they will provide you with armfuls of cut flowers all season long. This is our best budget pick… easily grown from one packet of seeds, and renews itself each year after that with no more seeding needed. Simply rake your spot smooth, sprinkle seeds, lightly cover with dirt and water…That’s it! They will do the rest… This flower is great as filler in a garden bed that has empty spots, or makes a dramatic show as aw hole bed in itself.
Number 3
Mexican Feather Grass
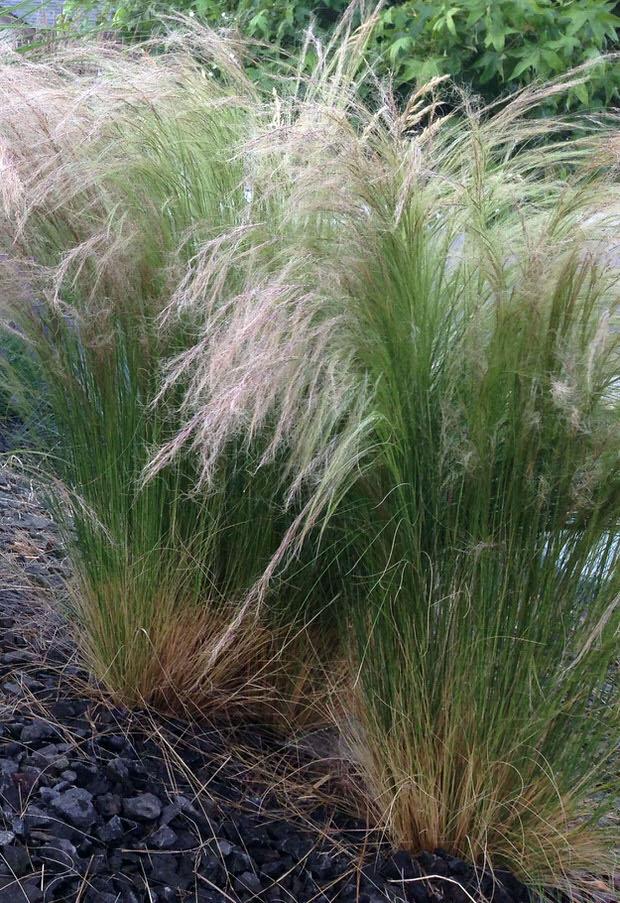
Mexican feather grass is my choice for an unbeatable ornamental grass for my area, but there are similar grasses if you live in a zone colder than 6. This feather grass (Nasella, formerly Stipa) is incredible drought and heat tolerant, self seeds like crazy (may drive you nuts, but eay to pull out if they seed in an unlikely place) and add n updated look to any garden. These little grasses grow to 24 inches and as wide, and are topped with fluffy white “flowers” through the summer. Which, by the way, look fantastic right through the winter after the grass has turned golden brown. You can plant these gems in a modern, more orderly way, or let them create a more natural garden effect. You can pot them into containers, and use them to add texture and movement to a stale garden bed. At TGG we are big fans of all ornamental grasses, but this is one of our go-tos!
Number 2
Coneflowers

The hottest perennial in any nursery right now are coneflowers, and with good reason. Originally purple wildflowers from the prairie states, these new hybrids have been bred to provide incredible color varieties, compact form and still retain the drought and disease resistance of the original plant. We love some of the new tropical colors, like “Flame Thrower” or “Indian Summer”. Also, green and white varieties, and even double flowering forms! Some varieties are great for containers, try Pow Wow Wild Berry, one of our new favs… They require occasional watering, and they bloom better if their spent blooms are removed, although not necessary in may of the newer varieties. Fun fact: The parent plant, Echinacea, is the same herbal supplement many use to ward off colds and fevers!
Our top pick for easiest flower to grow – Number one!
Yarrow

2
2
文章
Mirella
2017年05月22日

Growing ginger in a pot is easy! It’s a great idea if you live in a cool temperate climate or you don’t have a plenty of space.
If you live in USDA Zone 9b and above or any other subtropical or tropical climates around the globe you can easily grow ginger as a perennial both on the ground and in a container year round. If you live below Zone 9b and down to USDA Zone 7b, please note that the leaves of the ginger plants growing outside on the ground will die but come back again after the winter. Below the Zone 7 or in any other cooler part you live, you may need to grow ginger in pots to keep the plant indoors in winters.
Ginger is a warm climate spice or herb, like garlic or turmeric, it is termed as SUPERFOOD. It has anti-inflammatory and anti-biotic properties. It’s ability to expedite the digestion power is well-known.

Growing Ginger in Pots
Growing ginger roots is easy, find or purchase fresh ginger rhizomes (roots), measuring almost 3 to 5 inches. Look for pieces with growth buds or eyes. These little green buds look similar to that of potatoes. Store-bought ginger is sometimes treated with growth retardant chemicals so it’s a good idea that you keep the rhizomes in water overnight or for a few hours.
Planting and Propagation
The best time to start growing ginger is spring, however, if you live in a frost-free warm climate you can try to grow ginger in container anytime but the best time is an early wet season.
Plant the rhizomes (2-3 cm) 1 inch deep in the potting soil with the buds facing upwards. Ginger plants will start to emerge in a couple of weeks. It is noted that the ginger plants gets up to four to five feet tall.
Choosing a Pot
For growing ginger, choose a medium sized 14-15 inches pot that is deep rather than shallow to provide the ample space to roots to grow.
Requirements for Growing Ginger in PotPosition
In its natural climate, ginger is known to be gro
wn in partial sun, so it’s a good idea that you keep your pot in a spot that receives full sun but shade in afternoon. However, if you live in a really cold climate keep the plant in a sunny spot.
Soil
Loose, well drained, and sandy-loamy soil that is rich in compost is best for growing ginger indoors or outdoors in a pot. Soil that blocks the moisture must be avoided.
Watering
The ginger plant requires deep and regular watering as it prefers slightly moist soil. However, it should be noted that overwatering and waterlogging may thwart the growth and cause the root rot. Also, watering should be reduced in winter.
Temperature
As ginger prefers a warm climate it can’t tolerate drafts and cold temperature, it is advised to keep your ginger plants indoors when the temperature starts to dip below the level of 50 F (10 C).
Plant Care

It requires to cut off a finger and ensure that the section is at least 2 inches in length. Then the cut pieces are dried for a couple of days in a warm place before putting them in ground.
Fertilizer
Ginger requires soil that is rich in organic matter, you can top the pot with compost or well-rotted manure. Additionally, you can apply all-purpose fertilizer during the growing season.
Pests and Diseases
Pests including white grub, shoot borer, shoot boring weevil attack the ginger plant. It is also attacked by bacterial wilt, soft rot, dry rot and leaf spot viruses. It is highly recommended to keep the plant safe from these diseases and pests.
Harvesting
Your ginger roots are going to get ready for harvest within 8-10 months, once the leaves start to become yellow.
If you live in USDA Zone 9b and above or any other subtropical or tropical climates around the globe you can easily grow ginger as a perennial both on the ground and in a container year round. If you live below Zone 9b and down to USDA Zone 7b, please note that the leaves of the ginger plants growing outside on the ground will die but come back again after the winter. Below the Zone 7 or in any other cooler part you live, you may need to grow ginger in pots to keep the plant indoors in winters.
Ginger is a warm climate spice or herb, like garlic or turmeric, it is termed as SUPERFOOD. It has anti-inflammatory and anti-biotic properties. It’s ability to expedite the digestion power is well-known.

Growing Ginger in Pots
Growing ginger roots is easy, find or purchase fresh ginger rhizomes (roots), measuring almost 3 to 5 inches. Look for pieces with growth buds or eyes. These little green buds look similar to that of potatoes. Store-bought ginger is sometimes treated with growth retardant chemicals so it’s a good idea that you keep the rhizomes in water overnight or for a few hours.
Planting and Propagation
The best time to start growing ginger is spring, however, if you live in a frost-free warm climate you can try to grow ginger in container anytime but the best time is an early wet season.
Plant the rhizomes (2-3 cm) 1 inch deep in the potting soil with the buds facing upwards. Ginger plants will start to emerge in a couple of weeks. It is noted that the ginger plants gets up to four to five feet tall.
Choosing a Pot
For growing ginger, choose a medium sized 14-15 inches pot that is deep rather than shallow to provide the ample space to roots to grow.
Requirements for Growing Ginger in PotPosition
In its natural climate, ginger is known to be gro
wn in partial sun, so it’s a good idea that you keep your pot in a spot that receives full sun but shade in afternoon. However, if you live in a really cold climate keep the plant in a sunny spot.
Soil
Loose, well drained, and sandy-loamy soil that is rich in compost is best for growing ginger indoors or outdoors in a pot. Soil that blocks the moisture must be avoided.
Watering
The ginger plant requires deep and regular watering as it prefers slightly moist soil. However, it should be noted that overwatering and waterlogging may thwart the growth and cause the root rot. Also, watering should be reduced in winter.
Temperature
As ginger prefers a warm climate it can’t tolerate drafts and cold temperature, it is advised to keep your ginger plants indoors when the temperature starts to dip below the level of 50 F (10 C).
Plant Care

It requires to cut off a finger and ensure that the section is at least 2 inches in length. Then the cut pieces are dried for a couple of days in a warm place before putting them in ground.
Fertilizer
Ginger requires soil that is rich in organic matter, you can top the pot with compost or well-rotted manure. Additionally, you can apply all-purpose fertilizer during the growing season.
Pests and Diseases
Pests including white grub, shoot borer, shoot boring weevil attack the ginger plant. It is also attacked by bacterial wilt, soft rot, dry rot and leaf spot viruses. It is highly recommended to keep the plant safe from these diseases and pests.
Harvesting
Your ginger roots are going to get ready for harvest within 8-10 months, once the leaves start to become yellow.
0
0


