文章
Dummer. ゛☀
2017年09月23日

Lumps, bumps and weird cottony fluff on your plants are more than just some strange coincidence, they’re probably soft scale insects! Don’t worry, we have the answers to your burning soft scale questions.
What is Soft Scale?
Plants that are droopy, yellowing or have developed sticky spots and black mold on leaves can be really alarming to find in your landscape or garden. These are plants that look to be on the brink of immediate death, but things aren’t always that straightforward. If your plants are sagging and looking terrible, it may not be a terminal plant disease, but soft scale insects to blame.
Soft scale insects are relatively large sap-sucking insects, measuring a tenth to a quarter of an inch long (two to six millimeters), with a distinct protective covering firmly attached to their bodies. Some mimic their surroundings, others produce a waxy coating that can make them resemble fluffy insect casings. They come in a range of colors and sizes, but they all result in the same kinds of problems. Soft scale feed directly from the vascular systems of host plants, which can quickly result in a plant that looks like it’s not feeling so hot. Drought stress can speed up the plant’s decline, since it’s fighting these soft scale insects for liquids.
One of the most distinguishing features in determining soft scale versus armored scale infestations is the production of copious amounts of clear, sticky liquid called honeydew. Only the soft scale bugs produce this liquid, which tends to drip on leaves and objects below it. This sets up a dangerous cycle, because the sweet liquid attracts both ants and a non-pathogenic fungus called sooty mold. Often, ant infestations are among the first signs of soft scale. These smart, industrial insects have actually been known to use soft scale insects as a means of farming honeydew, just as they do with aphids. Ants will tend them lovingly and then harvest the fruits of their labor for the ant colony. Because soft scale can’t move, their ant partners will move them to more promising plants or to uninfested parts of the existing host, creating a huge problem for the plant owner.
How to Get Rid of Soft Scale
Destroying soft scale is a relatively easy process, except for those ants. If you’re seeing ants in the same plant as the scale bugs, you’ll have to get the ants under control at the same time that you treat the invaders. Otherwise, the ants will rush in to save the soft scale insects and move as many as possible to a new, safe location. Baiting and applying a sticky barrier to affected plants will rid you of the ants, making it easier to control the scale.
Neem or horticultural oil sprays are recommended to get the scale themselves under control. This way, the predators of scale insects are largely preserved and can help to keep more scale from invading. Always test foliage before spraying your entire plant with any sort of oil. Phytotoxicity can occur, though it is unlikely if your plant is well hydrated.

What is Soft Scale?
Plants that are droopy, yellowing or have developed sticky spots and black mold on leaves can be really alarming to find in your landscape or garden. These are plants that look to be on the brink of immediate death, but things aren’t always that straightforward. If your plants are sagging and looking terrible, it may not be a terminal plant disease, but soft scale insects to blame.

Soft scale insects are relatively large sap-sucking insects, measuring a tenth to a quarter of an inch long (two to six millimeters), with a distinct protective covering firmly attached to their bodies. Some mimic their surroundings, others produce a waxy coating that can make them resemble fluffy insect casings. They come in a range of colors and sizes, but they all result in the same kinds of problems. Soft scale feed directly from the vascular systems of host plants, which can quickly result in a plant that looks like it’s not feeling so hot. Drought stress can speed up the plant’s decline, since it’s fighting these soft scale insects for liquids.

One of the most distinguishing features in determining soft scale versus armored scale infestations is the production of copious amounts of clear, sticky liquid called honeydew. Only the soft scale bugs produce this liquid, which tends to drip on leaves and objects below it. This sets up a dangerous cycle, because the sweet liquid attracts both ants and a non-pathogenic fungus called sooty mold. Often, ant infestations are among the first signs of soft scale. These smart, industrial insects have actually been known to use soft scale insects as a means of farming honeydew, just as they do with aphids. Ants will tend them lovingly and then harvest the fruits of their labor for the ant colony. Because soft scale can’t move, their ant partners will move them to more promising plants or to uninfested parts of the existing host, creating a huge problem for the plant owner.

How to Get Rid of Soft Scale
Destroying soft scale is a relatively easy process, except for those ants. If you’re seeing ants in the same plant as the scale bugs, you’ll have to get the ants under control at the same time that you treat the invaders. Otherwise, the ants will rush in to save the soft scale insects and move as many as possible to a new, safe location. Baiting and applying a sticky barrier to affected plants will rid you of the ants, making it easier to control the scale.

Neem or horticultural oil sprays are recommended to get the scale themselves under control. This way, the predators of scale insects are largely preserved and can help to keep more scale from invading. Always test foliage before spraying your entire plant with any sort of oil. Phytotoxicity can occur, though it is unlikely if your plant is well hydrated.
0
0
文章
Dummer. ゛☀
2017年09月23日

Armored scale insects are hiding under your nose right now and you probably don’t even know it. These master mimics are everywhere, but you can learn how to detect and eliminate them from your plants in this article. Read on to learn more about these strange sap-sucking insects. What is Armored Scale? Of all the garden pests you’ll meet as you cultivate and love your garden, armored scale insects may be the most interesting and frustrating. If your plant has suddenly developed a lot of unusual bumps, lumps or things that look almost like they might be new growths in the wrong spots, armored scale is probably responsible.
Scale insects are tiny sap-sucking pests, about the same size as an aphid. Unlike aphids, though, scale insects hide under elaborate coverings meant to protect them from predators and the elements, as well as acting as cover for their eggs. In armored scale, these covers are waxy, hard, circular or rounded in shape and detached from their bodies. Females spend the bulk of their lives under these covers, eventually losing any obvious appendages and permanently affixing themselves to their host plant. Signs of armored scale are more subtle than soft scale, because armored scale don’t produce the sticky substance known as honeydew. This is because they consume plant juices differently.
Instead of focusing on locating the vascular system of host plants, armored scale rupture and destroy the cells they’re feeding on directly. The lower amount of available water eliminates the need for honeydew production as a byproduct of feeding. Even so, infected plants may suddenly appear weak or yellow dramatically when numbers climb. The most telling sign of armored versus soft scale are the hard coverings. If you lift one, you’ll find a small soft-bodied insect inside, whereas with soft scale, the covering is often part of their body. Armored scale also don’t draw ants or sooty mold since they don’t produce honeydew. How to Get Rid of Armored Scale Armored scale insects would be a breeze to eliminate if not for their thick outer coatings.
The insects themselves are quite vulnerable, so you don’t need to go in with a huge arsenal. Horticultural oil is the very best way to destroy armored scale while preserving the predators that will readily feed on their young during the mobile “crawler” stage. Ideally, timing your application with the emergence of crawlers from their mothers’ covers will eliminate an entire generation all at once.
Repeat sprays at five to six week intervals will knock the colony back, and persistence will destroy them entirely. Before applying horticultural oil, ensure that your plant is well hydrated and not heat stressed. Most plants won’t have a problem with horticultural oil mixed appropriately, but the odd bush or tree might experience phytotoxicity, so try a small spot first a few days ahead of when you plan to spray the whole plant.

Scale insects are tiny sap-sucking pests, about the same size as an aphid. Unlike aphids, though, scale insects hide under elaborate coverings meant to protect them from predators and the elements, as well as acting as cover for their eggs. In armored scale, these covers are waxy, hard, circular or rounded in shape and detached from their bodies. Females spend the bulk of their lives under these covers, eventually losing any obvious appendages and permanently affixing themselves to their host plant. Signs of armored scale are more subtle than soft scale, because armored scale don’t produce the sticky substance known as honeydew. This is because they consume plant juices differently.

Instead of focusing on locating the vascular system of host plants, armored scale rupture and destroy the cells they’re feeding on directly. The lower amount of available water eliminates the need for honeydew production as a byproduct of feeding. Even so, infected plants may suddenly appear weak or yellow dramatically when numbers climb. The most telling sign of armored versus soft scale are the hard coverings. If you lift one, you’ll find a small soft-bodied insect inside, whereas with soft scale, the covering is often part of their body. Armored scale also don’t draw ants or sooty mold since they don’t produce honeydew. How to Get Rid of Armored Scale Armored scale insects would be a breeze to eliminate if not for their thick outer coatings.

The insects themselves are quite vulnerable, so you don’t need to go in with a huge arsenal. Horticultural oil is the very best way to destroy armored scale while preserving the predators that will readily feed on their young during the mobile “crawler” stage. Ideally, timing your application with the emergence of crawlers from their mothers’ covers will eliminate an entire generation all at once.

Repeat sprays at five to six week intervals will knock the colony back, and persistence will destroy them entirely. Before applying horticultural oil, ensure that your plant is well hydrated and not heat stressed. Most plants won’t have a problem with horticultural oil mixed appropriately, but the odd bush or tree might experience phytotoxicity, so try a small spot first a few days ahead of when you plan to spray the whole plant.
0
0
文章
Dummer. ゛☀
2017年09月23日

A genus of plants native to the Canary Islands, Aeoniums have leaf rosettes at branch ends that look like large flowers. Most Aeoniums form a small shrub or small tree-like plant, but some don’t branch. There are about 35 species as well as hybrid cultivars.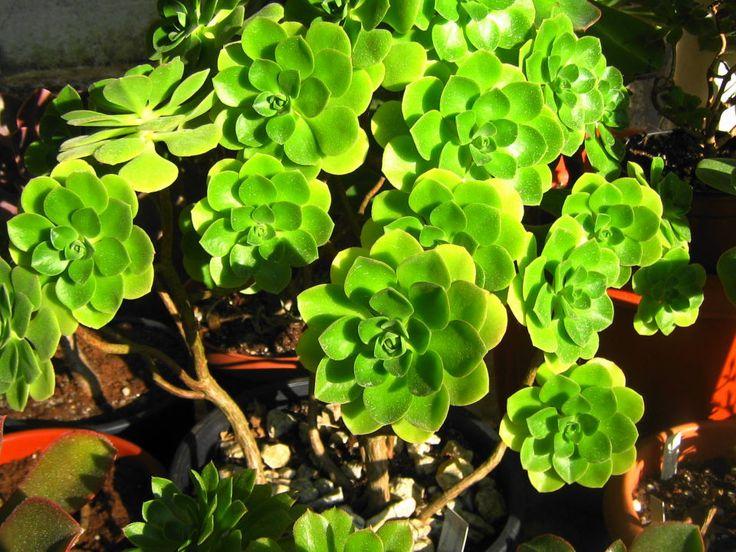
Propagate Aeoniums by stem cuttings, except for unbranched species such as Dinner Plate Plant (Aeonium tabuliforme), which die after flowering and are propagated from seed. Aeoniums are hardy in U.S. Department of Agriculture plant hardiness zones 9 through 11.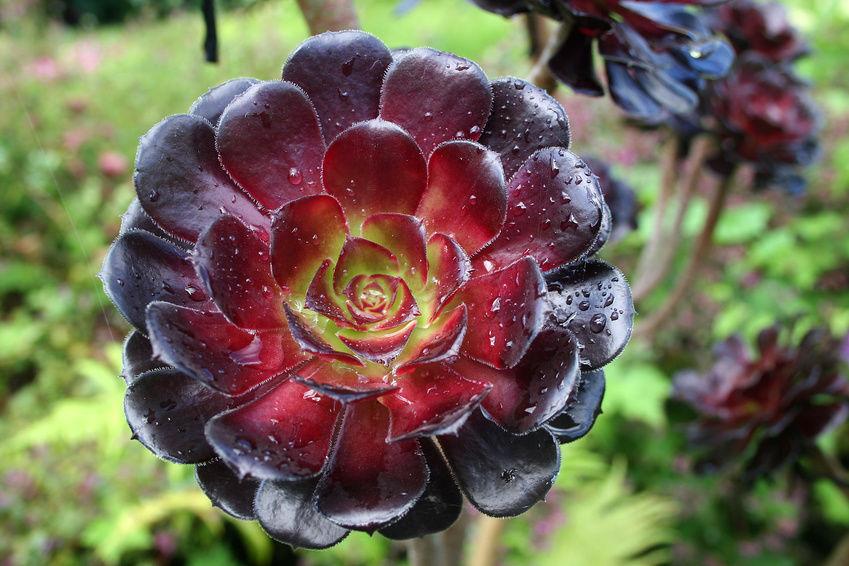
Stem Cuttings
Clean a sharp pruning shears by dipping it in rubbing alcohol.
Decide how long a stem cutting to take; for tree-like forms with bare stems it may be 5 to 6 inches (12.5 to 15 cm) long, and for small shrub-like forms it could be 0.5 inch (1.3 cm) or shorter. Cut off the piece of stem containing the leaf rosette with the pruning shears.
Allow the end of the cutting to heal in a shaded place for at least three days, longer if the stem is thick and succulent.
Fill a clean nursery container that has drainage holes with a mixture of half cactus and succulent potting mix and half perlite, well mixed and slightly moistened. Use a pot just big enough to contain the cutting.
Put the cutting into the rooting medium, burying just enough of it to hold the cutting upright. Put the cutting in bright indirect light, watering it lightly once a week.
Resume regular watering when the Aeonium develops roots. Water thoroughly, then let the top 2 inches of soil dry out before watering again.
Seeds
Collect seeds after the Aeonium has finished blooming. Put them in a paper bag and allow them to dry.
Fill a shallow clean nursery flat with the same mixture you used for rooting the cuttings.
Sow the seeds on top of the mix, scattering them evenly. Cover them with twice their thickness of the potting mix. Water the flat well.
Put the flat in bright indirect light and cover it with plastic wrap. Keep the potting mix moist until germination occurs. Remove the plastic wrap when germination starts.
Prick out individual seedlings when they have reached 0.5 inch (1.3 cm) in diameter. Give each seedling its own 2-inch (5 cm) nursery pot, transferring it to just the next bigger pot size as the plant grows. Keep the soil level the same so the flat plant isn’t buried.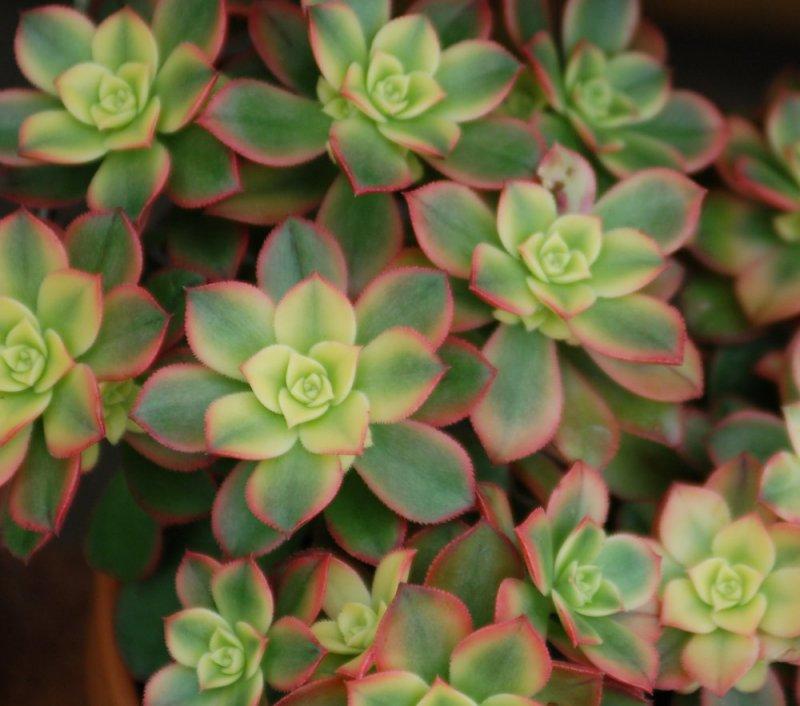
Things You Will Need
Pruning shears
Rubbing alcohol
Nursery containers
Cactus and succulent potting mix
Perlite
Nursery flat
Plastic wrap
Tip
Take cuttings when the plant is actively growing, usually fall in USDA zones 9 through 11. Aeoniums go dormant in summer; cuttings taken while plants are dormant don’t root. Each leaf rosette dies after it blooms.

Propagate Aeoniums by stem cuttings, except for unbranched species such as Dinner Plate Plant (Aeonium tabuliforme), which die after flowering and are propagated from seed. Aeoniums are hardy in U.S. Department of Agriculture plant hardiness zones 9 through 11.

Stem Cuttings
Clean a sharp pruning shears by dipping it in rubbing alcohol.
Decide how long a stem cutting to take; for tree-like forms with bare stems it may be 5 to 6 inches (12.5 to 15 cm) long, and for small shrub-like forms it could be 0.5 inch (1.3 cm) or shorter. Cut off the piece of stem containing the leaf rosette with the pruning shears.

Allow the end of the cutting to heal in a shaded place for at least three days, longer if the stem is thick and succulent.
Fill a clean nursery container that has drainage holes with a mixture of half cactus and succulent potting mix and half perlite, well mixed and slightly moistened. Use a pot just big enough to contain the cutting.
Put the cutting into the rooting medium, burying just enough of it to hold the cutting upright. Put the cutting in bright indirect light, watering it lightly once a week.

Resume regular watering when the Aeonium develops roots. Water thoroughly, then let the top 2 inches of soil dry out before watering again.
Seeds
Collect seeds after the Aeonium has finished blooming. Put them in a paper bag and allow them to dry.
Fill a shallow clean nursery flat with the same mixture you used for rooting the cuttings.

Sow the seeds on top of the mix, scattering them evenly. Cover them with twice their thickness of the potting mix. Water the flat well.
Put the flat in bright indirect light and cover it with plastic wrap. Keep the potting mix moist until germination occurs. Remove the plastic wrap when germination starts.

Prick out individual seedlings when they have reached 0.5 inch (1.3 cm) in diameter. Give each seedling its own 2-inch (5 cm) nursery pot, transferring it to just the next bigger pot size as the plant grows. Keep the soil level the same so the flat plant isn’t buried.

Things You Will Need
Pruning shears
Rubbing alcohol
Nursery containers
Cactus and succulent potting mix
Perlite
Nursery flat
Plastic wrap

Tip
Take cuttings when the plant is actively growing, usually fall in USDA zones 9 through 11. Aeoniums go dormant in summer; cuttings taken while plants are dormant don’t root. Each leaf rosette dies after it blooms.
0
1
文章
Dummer. ゛☀
2017年09月23日

Cotyledon orbiculata, also known as Pig’s Ear Plant, sometimes grow in an expansive pattern, which can impede on other plants. While they don’t take up too much water, they can still steal sunlight and root space for your other flora in your arid garden. You may just want to divide your Pig’s Ear because you want to have more of them. Either way, with the right tools and environment, you can get clippings to grow so you can have multiple Cotyledons in your possession.
Step 1 – Divide Cutting
When you divide a Cotyledon, you’re simply taking a branch off. Succulents don’t like metal cutting them. It’s best to snap your cutting off of the plant with your own two fingers. This minimizes the wound in the succulent branch, which should be firm, but slightly spongy when you pinch it. It would be like pinching an artery to slow the flow of blood; so it is with the sap in your Pig’s Ear stems. Make sure you wash your hands! You don’t want to cause infection to your plant because of some dirt on your fingers.
Find the appropriate stem, which should have at least 2 inches (5 cm) of stem length and at least 1 or 2 nodes of leaves on it. Pinch it, and break it off.
Step 2 – Get it to Root
Now you have to get your cutting to root. First, dip your cutting stem-end first in rooting hormone, enough to coat the part that was broken off of the plant.
Next, wet your paper towel sheets (about 3 of them) in your warm water, and wring out some of the water—you want them just one step above damp. You don’t want them to be wet enough to cause rot.
Wrap your paper towel around the stem and lay it on a plate, but try to keep the leaves dry. Put it in a warm, sunny spot, keep the paper towel clean and change it out as necessary, repeating the wetting and wrapping process whenever you change the paper towel. Keep the paper towel damp, keep your cutting in the sun as much as possible, and in about 3 to 4 weeks, you should have a rooted cutting.
Step 3 – Plant Cotyledon
Now all you have to do is pot or plant your Cotyledon orbiculata. Do this by putting it in very well drained soil, which is made from cactus mix with a handful of pea gravel. Mix the two together, and make a well in the center using 2 or 3 of your fingers. You only want the hole as deep as the root is long, no longer. Gently place the rooted Pig’s Ear plant into the hole, and pat the soil around it. Mist the soil with a little water, keeping it sparing, and if you want to fertilize the soil, you can use an organic cactus-mix compost to do that. Just follow the directions on the package.
Step 4 – Take Care
You’re finished with the planting part, but that’s only half the story. You have to take care of it and ensure it grows into a healthy adult plant. Water it sparingly now, maybe once a week with a misting bottle right around the base of the plant. Keep your Cotyledon in full sun, or at least partial sun, and it should flourish for you with no problem.
That’s it, you’re done. You’ve got a brand new plant exactly like the parent plant, and you can put it in any sunny spot you please.

Step 1 – Divide Cutting
When you divide a Cotyledon, you’re simply taking a branch off. Succulents don’t like metal cutting them. It’s best to snap your cutting off of the plant with your own two fingers. This minimizes the wound in the succulent branch, which should be firm, but slightly spongy when you pinch it. It would be like pinching an artery to slow the flow of blood; so it is with the sap in your Pig’s Ear stems. Make sure you wash your hands! You don’t want to cause infection to your plant because of some dirt on your fingers.

Find the appropriate stem, which should have at least 2 inches (5 cm) of stem length and at least 1 or 2 nodes of leaves on it. Pinch it, and break it off.
Step 2 – Get it to Root
Now you have to get your cutting to root. First, dip your cutting stem-end first in rooting hormone, enough to coat the part that was broken off of the plant.

Next, wet your paper towel sheets (about 3 of them) in your warm water, and wring out some of the water—you want them just one step above damp. You don’t want them to be wet enough to cause rot.
Wrap your paper towel around the stem and lay it on a plate, but try to keep the leaves dry. Put it in a warm, sunny spot, keep the paper towel clean and change it out as necessary, repeating the wetting and wrapping process whenever you change the paper towel. Keep the paper towel damp, keep your cutting in the sun as much as possible, and in about 3 to 4 weeks, you should have a rooted cutting.

Step 3 – Plant Cotyledon
Now all you have to do is pot or plant your Cotyledon orbiculata. Do this by putting it in very well drained soil, which is made from cactus mix with a handful of pea gravel. Mix the two together, and make a well in the center using 2 or 3 of your fingers. You only want the hole as deep as the root is long, no longer. Gently place the rooted Pig’s Ear plant into the hole, and pat the soil around it. Mist the soil with a little water, keeping it sparing, and if you want to fertilize the soil, you can use an organic cactus-mix compost to do that. Just follow the directions on the package.

Step 4 – Take Care
You’re finished with the planting part, but that’s only half the story. You have to take care of it and ensure it grows into a healthy adult plant. Water it sparingly now, maybe once a week with a misting bottle right around the base of the plant. Keep your Cotyledon in full sun, or at least partial sun, and it should flourish for you with no problem.

That’s it, you’re done. You’ve got a brand new plant exactly like the parent plant, and you can put it in any sunny spot you please.
0
0
文章
Dummer. ゛☀
2017年09月23日

One of the amazing things about succulents is how easy they are to grow. From one plant you can easily get multiple plants, making them an investment worth indulging in! Regrowing you own succulents can be quick and easy, and you don’t even need the greenest of thumbs. Take a look below at how to regrow succulents in a few easy steps, so you can enjoy multiple pots of these gorgeous plants.
How to Cut
First, let’s talk about harvesting the succulent you want to grow your plant from. You want to take a leaf that looks healthy, green, and full. Snip it as close to the base of the plant as possible. If the plant has been pulled from the soil, go ahead and keep the roots intact. Use clean scissors that are sharp and make a clean cut.
How to Plant
Fill your pot with a quality and nutrient rich soil. You want it to be soil that is well aerated and loose. This gives roots the room they need to grow. Place the ends of the cutting directly into the soil about 0.5 inch (1.3 cm) deep. Pack the soil in around the stem. You can place several stems per 8-10 inch (20-25 cm) pot. Just keep each cutting 3-4 inches (7.5-10 cm) from each other so they have room to grow and spread.
How to Care
You will now start caring for your cuttings so they begin to grow into a full plant. Water once a week with a spray bottle or mister to avoid over feeding. Keep your soil damp but not saturated. You can also begin using a slow release fertilizer (preferably liquid) to give the plants the nutrients they need to get a strong start. Place the pot in warm area with ample sun.
Soon, your succulents will begin to grow and you will have full sized plants. As those plants grow, feel free to take cuttings from them and start the growing process all over again. This is a great way to keep providing yourself with new plants without great cost.

How to Cut
First, let’s talk about harvesting the succulent you want to grow your plant from. You want to take a leaf that looks healthy, green, and full. Snip it as close to the base of the plant as possible. If the plant has been pulled from the soil, go ahead and keep the roots intact. Use clean scissors that are sharp and make a clean cut.

How to Plant
Fill your pot with a quality and nutrient rich soil. You want it to be soil that is well aerated and loose. This gives roots the room they need to grow. Place the ends of the cutting directly into the soil about 0.5 inch (1.3 cm) deep. Pack the soil in around the stem. You can place several stems per 8-10 inch (20-25 cm) pot. Just keep each cutting 3-4 inches (7.5-10 cm) from each other so they have room to grow and spread.

How to Care
You will now start caring for your cuttings so they begin to grow into a full plant. Water once a week with a spray bottle or mister to avoid over feeding. Keep your soil damp but not saturated. You can also begin using a slow release fertilizer (preferably liquid) to give the plants the nutrients they need to get a strong start. Place the pot in warm area with ample sun.

Soon, your succulents will begin to grow and you will have full sized plants. As those plants grow, feel free to take cuttings from them and start the growing process all over again. This is a great way to keep providing yourself with new plants without great cost.
1
1
文章
Dummer. ゛☀
2017年09月23日

Sometimes it is very easy to identify the best way to propagate a cactus or succulent, and other times it is not as obvious. However before you start, the first thing to ask yourself is: What kind of plant do I have? If you don’t know the easiest way to learn is to organize the information you know about your plant into categories. How is it shaped? Is it tall and thin, short and round, or does it have many little leaves? How does it grow? Does it grow all by itself, are there many branches, or are there similar tiny plants that poke up out of the soil near it? Does it flower?
Questions like these are the first ones to ask your self when considering propagation. The next thing to think about is how to propagate your cactus or succulent.
Seeds
Most cacti can be propagated by seed; however due to the slow growth of some species, sometimes other methods are more practical. Cacti with solitary growth habits are usually propagated by seed. Several species grow in this manner including:
Notocactus spp. (now included in the genus Parodia)
Neoporteria spp. (now included in the genus Eriosyce).
Stem Cuttings
Propagation by stem cuttings is easy and practical. Many cacti and succulents can be propagated by stem cuttings. In general, if the plant has an elongated stem region that is actively growing, propagation by stem cuttings should be a successful route. Some recommendations are:
Prickly Pears and Chollas: Opuntia
Columnar Cacti: Cereus, Trichocereus (now included in the genus Echinopsis)
Pincushion and Globular Cacti: Echinopsis, Mammillaria
Euphorbia
Stapeliads
Bryophyllum
Kalanchoe
Graptopetalum.
Leaf Cuttings
Most succulents are usually propagated by leaf cuttings. Genera typically propagated by leaf cuttings include but are not limited to:
Gasteria
Haworthia, Sansevieria
Crassulaceae family (Kalanchoe, Sedum, Graptopetalum, etc.).
Grafting
Grafting requires a hardy rootstock which is compatible with the desired propagation candidate. This compatibility is very important. Without it, success in grafting in unlikely. For cacti and succulents the following rules and some successful grafts have been reported and are shown below:
Rootstock: Hylocereus trigonus
Compatible scions: Gymnocalycium mihanovichii, Echinopsis chamaecereus, Gymnocalycium denudatum, Parodia leninghausii, Cereus cristata, Parodia scopa, Mammillaria theresae, Rebutia pulchra
Rootstock: Hylocereus undatus
Compatible scions: Epiphytic cacti, like Christmas Cacti, most cylindrical and globular cacti
Rootstock: Cereus repandus
Compatible scions: Melanocactus, Rebutia muscula, Gymnocalycium mihanovichii ‘Hibotan’
Rootstock:Echinopsis spachiana
Compatible scions: Cereus, Espotoa, Echinocactus, Lobivia (now included in the genus Echinopsis), Melocactus.
Bulbils, Tubers, Plantlets, and Offsets
Many succulents asexually propagate been means of underground lateral shoots. These shoots give rise to offsets or plantlets which can be severed in the spring or summer from the parent lateral shoot to produce a self-sustaining new plant. Aloe spp. and some Agave spp. form plantlets or bulbils on their flowing stalks. These plantlets and bulbils can be removed and planted as well. Kalanchoe spp. produce small plantlets on the scalloped edges of their leaves. These plantlets can also be potted in warm conditions to produce self-sustaining plants.
Bulbils and Plantlets: Kalanchoe, Aloe, Agave murpheyi, Agave vilmoriniana, Agave fourcroydes
Offsets: Echinopsis, Mammillaria, Agave, Aloe, Haworthia, Crassulaceae family, Kalanchoe, Sedum, Graptopetalum
Tubers: Ceropegia.

Questions like these are the first ones to ask your self when considering propagation. The next thing to think about is how to propagate your cactus or succulent.

Seeds
Most cacti can be propagated by seed; however due to the slow growth of some species, sometimes other methods are more practical. Cacti with solitary growth habits are usually propagated by seed. Several species grow in this manner including:
Notocactus spp. (now included in the genus Parodia)
Neoporteria spp. (now included in the genus Eriosyce).
Stem Cuttings

Propagation by stem cuttings is easy and practical. Many cacti and succulents can be propagated by stem cuttings. In general, if the plant has an elongated stem region that is actively growing, propagation by stem cuttings should be a successful route. Some recommendations are:
Prickly Pears and Chollas: Opuntia
Columnar Cacti: Cereus, Trichocereus (now included in the genus Echinopsis)
Pincushion and Globular Cacti: Echinopsis, Mammillaria
Euphorbia
Stapeliads
Bryophyllum
Kalanchoe
Graptopetalum.
Leaf Cuttings

Most succulents are usually propagated by leaf cuttings. Genera typically propagated by leaf cuttings include but are not limited to:
Gasteria
Haworthia, Sansevieria
Crassulaceae family (Kalanchoe, Sedum, Graptopetalum, etc.).
Grafting

Grafting requires a hardy rootstock which is compatible with the desired propagation candidate. This compatibility is very important. Without it, success in grafting in unlikely. For cacti and succulents the following rules and some successful grafts have been reported and are shown below:
Rootstock: Hylocereus trigonus
Compatible scions: Gymnocalycium mihanovichii, Echinopsis chamaecereus, Gymnocalycium denudatum, Parodia leninghausii, Cereus cristata, Parodia scopa, Mammillaria theresae, Rebutia pulchra
Rootstock: Hylocereus undatus
Compatible scions: Epiphytic cacti, like Christmas Cacti, most cylindrical and globular cacti
Rootstock: Cereus repandus

Compatible scions: Melanocactus, Rebutia muscula, Gymnocalycium mihanovichii ‘Hibotan’
Rootstock:Echinopsis spachiana
Compatible scions: Cereus, Espotoa, Echinocactus, Lobivia (now included in the genus Echinopsis), Melocactus.
Bulbils, Tubers, Plantlets, and Offsets

Many succulents asexually propagate been means of underground lateral shoots. These shoots give rise to offsets or plantlets which can be severed in the spring or summer from the parent lateral shoot to produce a self-sustaining new plant. Aloe spp. and some Agave spp. form plantlets or bulbils on their flowing stalks. These plantlets and bulbils can be removed and planted as well. Kalanchoe spp. produce small plantlets on the scalloped edges of their leaves. These plantlets can also be potted in warm conditions to produce self-sustaining plants.

Bulbils and Plantlets: Kalanchoe, Aloe, Agave murpheyi, Agave vilmoriniana, Agave fourcroydes
Offsets: Echinopsis, Mammillaria, Agave, Aloe, Haworthia, Crassulaceae family, Kalanchoe, Sedum, Graptopetalum
Tubers: Ceropegia.
1
0
成长记
softwpeach
2017年09月22日

I new added a "i don’t know" in my "garden"

1
0
meriunkat:some kind of mamillaria maybe?
成长记
softwpeach
2017年09月22日

I new added a "i don’t know" in my "garden"


0
0
Abby Gill:Looks like some kind of species of Haworthia.
文章
Dummer. ゛☀
2017年09月22日

Cacti are low maintenance plants for the home with a ton of character and a vast array of form. They are relatively maintenance free except for infrequent watering and annual food. Many gardeners ask “should I repot my cactus?” They don’t need repotting often, but once in a while for soil replenishment and when the plant needs a larger pot. When to repot a cactus plant depends upon the plant and its condition. Read on for tips on how to repot a cactus and do it without spending the rest of the day picking spines out of your hands.
Tools for Repotting
Cacti are succulents and tend to favor dry, hot conditions. They store moisture in their pads and use their spines as both defense and to provide some protection from burning hot sun rays. Cactus grown in the home can almost be ignored but they do require light, warmth, water and repotting to refresh the soil. Cactus repotting requires a special soil mix, well-draining container and some tactical protection.
The first issue to deal with is the handling of a spiny plant. There are a couple of ways to go about this. You can wrap the plant in several layers of newspaper and secure lightly with tape or twine. You can also use a pair of leather gloves or, for smaller plants, just grab your oven mitts.
One of the safest repotting tips is to use kitchen tongs. You will also need a cactus mix which you may purchase or make. A good combination is equal parts sand or bird gravel, potting soil and leaf mold. Your container must have excellent drainage holes and preferably be unglazed so the clay can direct away and evaporate any excess moisture.
When to Repot
You will know when to repot a cactus if you see roots coming out the bottom of the container. This indicates it is overly root bound. Most cacti find small spaces very cozy and can stay in their container for years. The sight of roots will let you know it has expanded too much and will need repotting.
The next size up container will be appropriate since they like it snug. A general rule of thumb is to repot every 2 to 4 years. If you fertilize annually, the latter is more appropriate but if you don’t fertilize, repot in two years to replenish soil fertility. The best time is during active growth in January or February.
How to Repot
Once you have answered the question, “should I repot my cactus?”, it is time to gather your tools and trade in the old soil or container. Not every cactus needs a new container, but fresh soil is a good idea. Only pot bound plants need a larger pot.
Wrap, glove or tong the plant gently out of its pot. They usually come out readily if the soil is dry but you may have to run a trowel around the edges to loosen the soil. Shake off the old soil and plant the cactus at the same depth it was growing in the old soil. Fill in around the roots with your medium and place it in a sunny southeast or east window.
Among important repotting cactus tips is to not water the plant yet, as it is adjusting to being handled and new soil conditions. After a few weeks, you can water the plant and allow it to dry out before watering again.

Tools for Repotting
Cacti are succulents and tend to favor dry, hot conditions. They store moisture in their pads and use their spines as both defense and to provide some protection from burning hot sun rays. Cactus grown in the home can almost be ignored but they do require light, warmth, water and repotting to refresh the soil. Cactus repotting requires a special soil mix, well-draining container and some tactical protection.

The first issue to deal with is the handling of a spiny plant. There are a couple of ways to go about this. You can wrap the plant in several layers of newspaper and secure lightly with tape or twine. You can also use a pair of leather gloves or, for smaller plants, just grab your oven mitts.

One of the safest repotting tips is to use kitchen tongs. You will also need a cactus mix which you may purchase or make. A good combination is equal parts sand or bird gravel, potting soil and leaf mold. Your container must have excellent drainage holes and preferably be unglazed so the clay can direct away and evaporate any excess moisture.

When to Repot
You will know when to repot a cactus if you see roots coming out the bottom of the container. This indicates it is overly root bound. Most cacti find small spaces very cozy and can stay in their container for years. The sight of roots will let you know it has expanded too much and will need repotting.

The next size up container will be appropriate since they like it snug. A general rule of thumb is to repot every 2 to 4 years. If you fertilize annually, the latter is more appropriate but if you don’t fertilize, repot in two years to replenish soil fertility. The best time is during active growth in January or February.

How to Repot
Once you have answered the question, “should I repot my cactus?”, it is time to gather your tools and trade in the old soil or container. Not every cactus needs a new container, but fresh soil is a good idea. Only pot bound plants need a larger pot.

Wrap, glove or tong the plant gently out of its pot. They usually come out readily if the soil is dry but you may have to run a trowel around the edges to loosen the soil. Shake off the old soil and plant the cactus at the same depth it was growing in the old soil. Fill in around the roots with your medium and place it in a sunny southeast or east window.

Among important repotting cactus tips is to not water the plant yet, as it is adjusting to being handled and new soil conditions. After a few weeks, you can water the plant and allow it to dry out before watering again.
6
6
文章
Dummer. ゛☀
2017年09月22日

For a typical leafy plant, for good growth you keep the soil moist and don’t skimp on the watering. When dealing with succulent plants, different rules apply. Succulent plants store extra water in their leaves, roots or stems to survive long periods of heat and no rainfall. If you are overly generous, they fill up their water storage tissues, become bloated and can actually split open. Soil kept too wet prevents air from reaching the roots, and they die, leading to soft rot.
Diagnosing Overwatering
The main cause of potted plant death is overwatering, and this is especially true for succulents. You can usually tell an overwatered succulent by its puffy-looking stems or leaves. The plant can also look generally unhealthy. Reduce the watering and see if the plant responds. When the roots die from too-wet soil, the plant can look like it needs water, with shriveled leaves and no new growth. It does need water, but it has no live roots and can’t take water up. Unpot the plant and check for healthy roots. If the roots are alive and the soil is dry, give the plant water and it should respond. If the roots are dead and the soil is wet, your succulent is in trouble.
Treating Overwatered Succulents
If rot organisms have invaded the stem of the succulent plant through the roots and mushy areas are present, you can amputate the rot if it is limited in occurrence. Use a sharp knife dipped in alcohol, and excise the rotten tissue until all you see is clean and white. Put the treated plant where it gets bright light and good air circulation, let the wounds heal, then try re-rooting it in well-draining mix. Discard all infected materials, and disinfect the tools and work area. If the plant is mushy inside, discard it and the soil instead of composting them.
Good Watering Practices
Prevent overwatering by watching your succulents for growth cycles. When succulents are growing, they thrive on thorough watering alternating with partial drying out of the soil. When they are dormant they don’t use much water and the soil needs to be drier. Most succulents grow in spring and summer, but some grow in winter. The top layers of soil will tell you when your succulent needs water. Put your finger in the pot and feel if the soil 1 to 2 inches down in the pot is dry or moist. Don’t water if you feel moisture. When plants are dormant, dry soil should extend at least halfway down the pot. For spiny plants, use a chopstick or a wooden pencil as a probe, and check the tip for moist soil particles. If you are in doubt, don’t water the plant. Succulents can recover from underwatering, but you can’t take extra water out of the plant.
Soil Mix
A well-draining soil mix goes a long way to keep from overwatering succulents. Use a commercial cactus and succulent potting soil mix or make your own, combining equal parts of an organic element such as compost or peat, coarse horticultural-grade sand, and a gritty element such as horticultural pumice, perlite or lava fines. To help the potting mix dry out more quickly, give succulents a pot they can just comfortably fit in plus 1 inch (2.5 cm) of extra space. Repot them yearly as they grow into just the next pot size.

Diagnosing Overwatering
The main cause of potted plant death is overwatering, and this is especially true for succulents. You can usually tell an overwatered succulent by its puffy-looking stems or leaves. The plant can also look generally unhealthy. Reduce the watering and see if the plant responds. When the roots die from too-wet soil, the plant can look like it needs water, with shriveled leaves and no new growth. It does need water, but it has no live roots and can’t take water up. Unpot the plant and check for healthy roots. If the roots are alive and the soil is dry, give the plant water and it should respond. If the roots are dead and the soil is wet, your succulent is in trouble.

Treating Overwatered Succulents
If rot organisms have invaded the stem of the succulent plant through the roots and mushy areas are present, you can amputate the rot if it is limited in occurrence. Use a sharp knife dipped in alcohol, and excise the rotten tissue until all you see is clean and white. Put the treated plant where it gets bright light and good air circulation, let the wounds heal, then try re-rooting it in well-draining mix. Discard all infected materials, and disinfect the tools and work area. If the plant is mushy inside, discard it and the soil instead of composting them.

Good Watering Practices
Prevent overwatering by watching your succulents for growth cycles. When succulents are growing, they thrive on thorough watering alternating with partial drying out of the soil. When they are dormant they don’t use much water and the soil needs to be drier. Most succulents grow in spring and summer, but some grow in winter. The top layers of soil will tell you when your succulent needs water. Put your finger in the pot and feel if the soil 1 to 2 inches down in the pot is dry or moist. Don’t water if you feel moisture. When plants are dormant, dry soil should extend at least halfway down the pot. For spiny plants, use a chopstick or a wooden pencil as a probe, and check the tip for moist soil particles. If you are in doubt, don’t water the plant. Succulents can recover from underwatering, but you can’t take extra water out of the plant.

Soil Mix
A well-draining soil mix goes a long way to keep from overwatering succulents. Use a commercial cactus and succulent potting soil mix or make your own, combining equal parts of an organic element such as compost or peat, coarse horticultural-grade sand, and a gritty element such as horticultural pumice, perlite or lava fines. To help the potting mix dry out more quickly, give succulents a pot they can just comfortably fit in plus 1 inch (2.5 cm) of extra space. Repot them yearly as they grow into just the next pot size.
3
6


