成长记
Deanna Dubbs
2017年09月27日

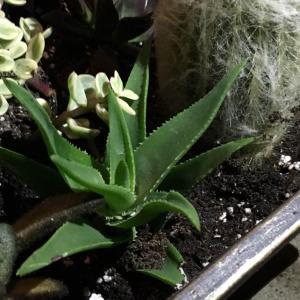
This is a photo from 9-13-17. The day I bought my first 8 Succs. I didn’t think that this one had grown any, but now that I look at this photo it has indeed gotten taller!

0
0
文章
Dummer. ゛☀
2017年09月27日

Gloriosa Lilies (the genus Gloriosa), also known as Flame Lilies and Glory Lilies, thrive in fertile, well-drained soil in full to partial sun. Hardy in USDA plant hardiness zones 10 and 11, they can be overwintered successfully in zone 9 with winter mulch. In cooler areas, Gloriosa Lilies can be grown successfully during the summer and lifted and stored for the winter.
These exotic-looking lilies produce an abundance of yellow and red flowers with petals that curl backward to resemble a flash of brilliant flames. They can reach heights of 8 feet (2.4 m) and require a trellis or wall to climb. Although climbing lilies do not produce tendrils, the specialized leaves of the Gloriosa Lily cling to the trellis or other plant material, to pull the vine upward.
Growing Conditions
Select a location that receives six to eight hours of direct sunlight a day. In southern climates, a location that allows the vines to grow in full sun while the roots of the plant remain shaded is the best location for growing a Gloriosa Lily plant. Some protection from afternoon sun may be needed as well.
Prepare the soil by tilling to a depth of 8 inches (20 cm) and amending with generous amounts of organic matter such as peat moss, compost or well-rotted manure. Organic matter improves both drainage and aeration and provides a slow-release fertilizer to your Gloriosa Lilies.
Erect a 6-to 8-foot (1.8 to 2.4 m) trellis for your Gloriosa Lilies prior to planting. Check that it is secure and will not topple under the weight of the growing Gloriosa Lilies.
The ideal time for Gloriosa Lily planting is in the spring after the soil has warmed and all danger of frost has passed. Plant the Gloriosa Lily tubers approximately 3 to 4 inches (7.5 to 10 cm) from the trellis. Dig a hole to the depth of 2 to 4 inches (5 to 10 cm) and lay the tuber on its side in the hole.
Space the tubers 6 to 8 inches (15 to 20 cm) apart to allow room for the mature plants to grow. Cover the tubers and gently firm the soil down to remove air pockets and secure the tubers.
General Care
Water the newly planted tuber to saturate the soil to a depth of 2 to 3 inches (5 to 7.5 cm) to give your Gloriosa Lily a good start. Keep the soil evenly moist until shoots appear in two to three weeks. Reduce water to once or twice a week or whenever the soil feels dry an inch below the surface. Gloriosa Lilies typically require an inch of rain and week and need supplemental watering during dry periods.
Train the vines to climb the trellis by tying them to the trellis with soft plant ties, if necessary. Although Gloriosa Lilies cling to the trellis once established, they may need some help from you to get them started.
Fertilize Gloriosa Lilies every two weeks with water-soluble fertilizer designed for flowering plants. This provides the nutrients needed to promote healthy blooming.
Cut the vines back in the fall after they are killed by the frost. Tubers can be lifted and stored in moist peat moss in a cool, dark place for the winter and replanted in the spring.

These exotic-looking lilies produce an abundance of yellow and red flowers with petals that curl backward to resemble a flash of brilliant flames. They can reach heights of 8 feet (2.4 m) and require a trellis or wall to climb. Although climbing lilies do not produce tendrils, the specialized leaves of the Gloriosa Lily cling to the trellis or other plant material, to pull the vine upward.

Growing Conditions
Select a location that receives six to eight hours of direct sunlight a day. In southern climates, a location that allows the vines to grow in full sun while the roots of the plant remain shaded is the best location for growing a Gloriosa Lily plant. Some protection from afternoon sun may be needed as well.
Prepare the soil by tilling to a depth of 8 inches (20 cm) and amending with generous amounts of organic matter such as peat moss, compost or well-rotted manure. Organic matter improves both drainage and aeration and provides a slow-release fertilizer to your Gloriosa Lilies.
Erect a 6-to 8-foot (1.8 to 2.4 m) trellis for your Gloriosa Lilies prior to planting. Check that it is secure and will not topple under the weight of the growing Gloriosa Lilies.

The ideal time for Gloriosa Lily planting is in the spring after the soil has warmed and all danger of frost has passed. Plant the Gloriosa Lily tubers approximately 3 to 4 inches (7.5 to 10 cm) from the trellis. Dig a hole to the depth of 2 to 4 inches (5 to 10 cm) and lay the tuber on its side in the hole.
Space the tubers 6 to 8 inches (15 to 20 cm) apart to allow room for the mature plants to grow. Cover the tubers and gently firm the soil down to remove air pockets and secure the tubers.

General Care
Water the newly planted tuber to saturate the soil to a depth of 2 to 3 inches (5 to 7.5 cm) to give your Gloriosa Lily a good start. Keep the soil evenly moist until shoots appear in two to three weeks. Reduce water to once or twice a week or whenever the soil feels dry an inch below the surface. Gloriosa Lilies typically require an inch of rain and week and need supplemental watering during dry periods.
Train the vines to climb the trellis by tying them to the trellis with soft plant ties, if necessary. Although Gloriosa Lilies cling to the trellis once established, they may need some help from you to get them started.

Fertilize Gloriosa Lilies every two weeks with water-soluble fertilizer designed for flowering plants. This provides the nutrients needed to promote healthy blooming.
Cut the vines back in the fall after they are killed by the frost. Tubers can be lifted and stored in moist peat moss in a cool, dark place for the winter and replanted in the spring.
0
0
文章
Dummer. ゛☀
2017年09月27日

Tulips (genus Tulipa) and Daffodils (genus Narcissus) are often the first flowers of spring. Tulips are available for U.S. Department of Agriculture plant hardiness zones 3 through 9, while daffodils grow in USDA zones 3 through 11. Most daffodils feature bright yellow tubular flowers, while tulips come in a rainbow of colors. Mixing the two bulbs in a single bed creates a colorful spring display and can increase the flowering period if you mix early-flowering daffodils with midseason or late-blooming tulips. Both flowers grow best with full, all-day sunlight and have similar care needs, making them amiable companions.
1. Spread a 2-inch (5 cm) thick layer of compost and 1 pound (450 g) of 10-10-10 fertilizer over every 50 square feet (4.6 square meters) of garden bed in the fall. Dig the compost and fertilizer into the top 6 inches (15 cm) of soil with a shovel.
2. Arrange the tulip and daffodil bulbs on the soil surface. Generally, cluster 5 to 7 bulbs together, spacing the bulbs 4 to 6 inches (10 to 15 cm) apart within the cluster but setting clusters 12 inches (30 cm) apart. Alternate the bulbs in the cluster between tulips and daffodils so that each cluster contains both flowers for an informal look. For a more formal look, alternate clusters only containing daffodils with clusters only containing tulips.
3. Dig a planting hole for each bulb using a trowel. Make the hole deep enough that the flat bottom of the bulb is at a depth equal to about three times the bulb’s width. Set the bulbs in their holes, and fill the holes in with soil.
4. Water the bulb bed immediately after planting to help settle the soil. The tulips daffodils require no further care until growth begins in spring.
5. Resume watering when the bulbs send up shoots in spring. Provide about 1 inch (2.5 cm) of water weekly, or enough to moisten the top 6 inches (15 cm) of soil, if spring rain doesn’t keep the soil moist.
6. Sprinkle 1 pound (450 g) of 10-10-10 fertilizer over every 50 square feet (4.6 square meters) of bed, applying the fertilizer to the soil between bulb clusters, after shoots appear. Water the fertilizer into the soil so that the roots can access the nutrients.
7. Cut off the flowers as soon as they begin to wilt. Depending on the variety, daffodils may bloom earlier than tulips, so removing the old daffodils prevents them from detracting from the tulips’ beauty. Cut back the foliage after it dies back naturally, usually about six weeks after flowering.
Tips
Most tulip and daffodil bulbs require no further maintenance after they go dormant in summer as long as winters drop below 45°F (7°C) for at least 8 weeks. If a cold-enough winter isn’t expected, dig up the bulbs after the foliage dies and store them between 40 and 45 °F (4.5 and 7 °C) to provide this cold treatment. Replant the bulbs in late winter for spring flowering.
You can apply a 2- to 3-inch (5 to 7.5 cm) layer of mulch to prevent weeds from invading the dormant bulb bed, if desired.

1. Spread a 2-inch (5 cm) thick layer of compost and 1 pound (450 g) of 10-10-10 fertilizer over every 50 square feet (4.6 square meters) of garden bed in the fall. Dig the compost and fertilizer into the top 6 inches (15 cm) of soil with a shovel.
2. Arrange the tulip and daffodil bulbs on the soil surface. Generally, cluster 5 to 7 bulbs together, spacing the bulbs 4 to 6 inches (10 to 15 cm) apart within the cluster but setting clusters 12 inches (30 cm) apart. Alternate the bulbs in the cluster between tulips and daffodils so that each cluster contains both flowers for an informal look. For a more formal look, alternate clusters only containing daffodils with clusters only containing tulips.

3. Dig a planting hole for each bulb using a trowel. Make the hole deep enough that the flat bottom of the bulb is at a depth equal to about three times the bulb’s width. Set the bulbs in their holes, and fill the holes in with soil.
4. Water the bulb bed immediately after planting to help settle the soil. The tulips daffodils require no further care until growth begins in spring.
5. Resume watering when the bulbs send up shoots in spring. Provide about 1 inch (2.5 cm) of water weekly, or enough to moisten the top 6 inches (15 cm) of soil, if spring rain doesn’t keep the soil moist.

6. Sprinkle 1 pound (450 g) of 10-10-10 fertilizer over every 50 square feet (4.6 square meters) of bed, applying the fertilizer to the soil between bulb clusters, after shoots appear. Water the fertilizer into the soil so that the roots can access the nutrients.
7. Cut off the flowers as soon as they begin to wilt. Depending on the variety, daffodils may bloom earlier than tulips, so removing the old daffodils prevents them from detracting from the tulips’ beauty. Cut back the foliage after it dies back naturally, usually about six weeks after flowering.

Tips
Most tulip and daffodil bulbs require no further maintenance after they go dormant in summer as long as winters drop below 45°F (7°C) for at least 8 weeks. If a cold-enough winter isn’t expected, dig up the bulbs after the foliage dies and store them between 40 and 45 °F (4.5 and 7 °C) to provide this cold treatment. Replant the bulbs in late winter for spring flowering.

You can apply a 2- to 3-inch (5 to 7.5 cm) layer of mulch to prevent weeds from invading the dormant bulb bed, if desired.
0
0
文章
玲儿
2017年09月24日

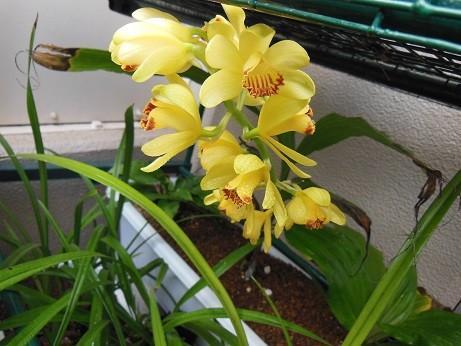
エビネ(夏咲き)の育て方・栽培方法
育て方のポイント
栽培環境・日当たり・置き場
風が強く当たらない日陰で育てます。6月から9月は70%、それ以外の季節は50%の遮光をします。空中湿度は年間を通して60~70%にします。冬は室内か温室に取り込み、最低温度10℃強、理想的には15℃強を保ちます。
水やり
鉢土の表面が乾いたら十分に与えます。冬も意外に乾きやすく、注意が必要です。
芽が出て葉が成長しきるまでの間は、上から水をかけてはいけません。芽に水がたまって軟腐病になるおそれがあります。
肥料
芽が出てきたら9月まで月1回、油かすと骨粉を等量配合した肥料の親指大のものを、5号鉢なら4つ、月ごとに位置を変えて鉢縁に埋め込みます。同時に週1回、観葉植物用の液体肥料を3000~4000倍に薄めて施します。葉の成長が終わったら、液体肥料はリン酸とカリウムのみのものに切り替えて、4000倍に薄めて週に1回施します。
病気と害虫
病気:ウイルス病、軟腐病
ウイルス病は、エビネ栽培で最も恐ろしい病気です。治療不能であるため、発病した株と用土は処分し、その周辺の株も隔離します。予防するには、ウイルスを媒介するアブラムシなどを防除します。作業でハサミを使うときは、1株ごとに刃を火であぶってウイルスの伝染を防ぎます。
軟腐病は、新芽が腐って抜けたり、倒れて枯れたりする病気で、「すっぽ抜け」とも呼ばれます。腐った部分は悪臭がします。

害虫:アブラムシ、ハダニ、カイガラムシ、ケムシ類、ナメクジ
アブラムシは主に5月から8月に、ハダニやカイガラムシは夏に多く発生します。ナメクジは新芽や蕾、花を食害します。葉を食害するケムシが5月から7月に発生することもあります。
用土(鉢植え)
ヤシ殻チップの中粒と大粒を等量で混ぜたものか、ヤシ殻チップ5、硬質鹿沼土小粒3、軽石小粒2の割合で配合したものを使います。ヤシ殻チップは軽く水を含ませてから混ぜ合わせましょう。
植えつけ、 植え替え
植え替えは2~3年に1回、新芽発生直後か開花直後に行います。新芽発生直後の場合は、新芽を傷めないように注意して扱います。鉢は5号以上の駄温鉢やプラスチック鉢など、乾きにくいものを使います。植えつけの際に、新芽のあるほうを広く開けて、偽鱗茎が成長するスペースを確保します。
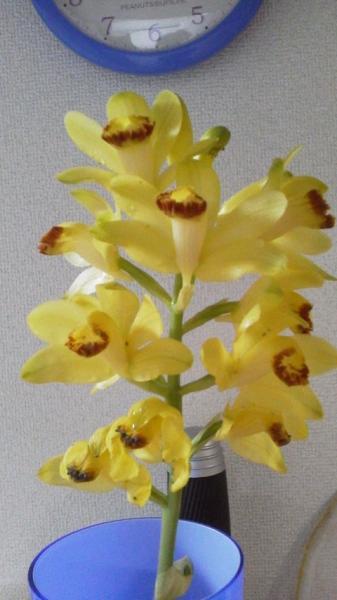
ふやし方
株分け:大きい株は分けることができます。新芽と3~5個分の偽鱗茎をつけて1株とします。
バックバルブ吹き:葉のついていない古い偽鱗茎を1~2個ずつに分け、水ゴケで植えつけます。3~6か月で新しい芽が出て、小苗となります。
タネまき:秋にとりまきができますが、自然に実ったタネからは親株以上の花を期待できません。苗床は、親と同じ用土に段ボールを混ぜたものか、ツルランや交配種を根を広げて植えた大きい平鉢を使います。
主な作業
花がら摘み:花が半ば以上終わったら、株の根元をしっかりと押さえ、花茎をしっかりと握って、ねじるように回して上に引っ張ります。
育て方のポイント
栽培環境・日当たり・置き場
風が強く当たらない日陰で育てます。6月から9月は70%、それ以外の季節は50%の遮光をします。空中湿度は年間を通して60~70%にします。冬は室内か温室に取り込み、最低温度10℃強、理想的には15℃強を保ちます。
水やり
鉢土の表面が乾いたら十分に与えます。冬も意外に乾きやすく、注意が必要です。
芽が出て葉が成長しきるまでの間は、上から水をかけてはいけません。芽に水がたまって軟腐病になるおそれがあります。

肥料
芽が出てきたら9月まで月1回、油かすと骨粉を等量配合した肥料の親指大のものを、5号鉢なら4つ、月ごとに位置を変えて鉢縁に埋め込みます。同時に週1回、観葉植物用の液体肥料を3000~4000倍に薄めて施します。葉の成長が終わったら、液体肥料はリン酸とカリウムのみのものに切り替えて、4000倍に薄めて週に1回施します。
病気と害虫
病気:ウイルス病、軟腐病
ウイルス病は、エビネ栽培で最も恐ろしい病気です。治療不能であるため、発病した株と用土は処分し、その周辺の株も隔離します。予防するには、ウイルスを媒介するアブラムシなどを防除します。作業でハサミを使うときは、1株ごとに刃を火であぶってウイルスの伝染を防ぎます。
軟腐病は、新芽が腐って抜けたり、倒れて枯れたりする病気で、「すっぽ抜け」とも呼ばれます。腐った部分は悪臭がします。

害虫:アブラムシ、ハダニ、カイガラムシ、ケムシ類、ナメクジ
アブラムシは主に5月から8月に、ハダニやカイガラムシは夏に多く発生します。ナメクジは新芽や蕾、花を食害します。葉を食害するケムシが5月から7月に発生することもあります。
用土(鉢植え)
ヤシ殻チップの中粒と大粒を等量で混ぜたものか、ヤシ殻チップ5、硬質鹿沼土小粒3、軽石小粒2の割合で配合したものを使います。ヤシ殻チップは軽く水を含ませてから混ぜ合わせましょう。
植えつけ、 植え替え
植え替えは2~3年に1回、新芽発生直後か開花直後に行います。新芽発生直後の場合は、新芽を傷めないように注意して扱います。鉢は5号以上の駄温鉢やプラスチック鉢など、乾きにくいものを使います。植えつけの際に、新芽のあるほうを広く開けて、偽鱗茎が成長するスペースを確保します。

ふやし方
株分け:大きい株は分けることができます。新芽と3~5個分の偽鱗茎をつけて1株とします。
バックバルブ吹き:葉のついていない古い偽鱗茎を1~2個ずつに分け、水ゴケで植えつけます。3~6か月で新しい芽が出て、小苗となります。
タネまき:秋にとりまきができますが、自然に実ったタネからは親株以上の花を期待できません。苗床は、親と同じ用土に段ボールを混ぜたものか、ツルランや交配種を根を広げて植えた大きい平鉢を使います。
主な作業
花がら摘み:花が半ば以上終わったら、株の根元をしっかりと押さえ、花茎をしっかりと握って、ねじるように回して上に引っ張ります。
0
0
文章
Dummer. ゛☀
2017年09月23日

Kiwi Aeonium (Aeonium ‘Kiwi’) adds year-round color and texture to gardens with its colorful foliage, which has shades of chartreuse, cream and red. It grows U.S. Department of Agriculture plant hardiness zones 9 to 11, where it grows equally well in containers and low-water landscaping beds. Kiwi Aeonium propagates best by vegetative methods, but they will also grow from seed. Seed-grown plants sometimes differ in appearance because they’re hybrids.
Seed Propagation
Propagating Kiwi Aeonium from seed is a gamble because the resulting seedlings may not closely resemble the parent plant. The seeds are highly viable and will germinate freely if sown while still fresh. Sow the seeds in a nursery flat filled with a neutral, fast-draining medium. Mix the minuscule, dustlike seed with a pinch of fine sand to make sowing easier. Sprinkle the sand and seed mixture across the surface of the medium and do not cover it with soil. Expose the seeds to temperatures around 70 degrees Fahrenheit (21 degrees Celsius), keep them moderately moist and watch for the first seedlings in five to 10 days. Thin out the seedlings so only one remains in each 1 square inch (6.5 square cm) area, then transplant them into small pots once they produce a mature set of leaves.
Stem Cutting Propagation
Stem cutting propagation is the simplest and most effective means of propagating Kiwi Aeonium. The cuttings will root any time of year, although those taken during the spring and summer months root fastest and are least likely to develop rot. Take a 3-6-inch (7.6-15 cm) tip cutting and place it in a warm, dry spot out of direct sun for two to five days, or until the severed end calluses over. Pinch off the lowest sets of leaves and pot the cutting in a pot filled with porous, fast-draining medium. Keep it in a bright spot, water it lightly and watch for renewed growth in around four weeks.
Division Propagation
Older, well-established Kiwi Aeonium produce an abundance of offshoots, or pups, which can be divided to grow new plants. The offshoots emerge around the base of the plant and are connected to the main stem. It is best to wait until the offshoot has developed a root system before cutting it from the main plant and potting it, but it isn’t absolutely necessary to wait. Unrooted offshoots can be severed, allowed to callus over and potted in a similar way as cuttings. The offshoots perform best when potted in spring or summer, but they will root any time of year if kept under warm, bright conditions.
Planting and Aftercare
No matter how you propagate Kiwi Aeonium, the resulting plants must be allowed to produce a viable root system before planting them into a garden bed. Grow the immature Kiwi Aeonium in a sheltered spot with morning shade and afternoon sun until they produce several sets of leaves. Slowly acclimate them to full, all-day sun over the course of a week. Water deeply but infrequently so the soil has a chance to dry out slightly between waterings. Move the Kiwi Aeonium into a sunny bed or permanent planter in fall, just as they enter dormancy. Water them occasionally during their first summer, but only if no rain has fallen for longer than three weeks.

Seed Propagation
Propagating Kiwi Aeonium from seed is a gamble because the resulting seedlings may not closely resemble the parent plant. The seeds are highly viable and will germinate freely if sown while still fresh. Sow the seeds in a nursery flat filled with a neutral, fast-draining medium. Mix the minuscule, dustlike seed with a pinch of fine sand to make sowing easier. Sprinkle the sand and seed mixture across the surface of the medium and do not cover it with soil. Expose the seeds to temperatures around 70 degrees Fahrenheit (21 degrees Celsius), keep them moderately moist and watch for the first seedlings in five to 10 days. Thin out the seedlings so only one remains in each 1 square inch (6.5 square cm) area, then transplant them into small pots once they produce a mature set of leaves.

Stem Cutting Propagation
Stem cutting propagation is the simplest and most effective means of propagating Kiwi Aeonium. The cuttings will root any time of year, although those taken during the spring and summer months root fastest and are least likely to develop rot. Take a 3-6-inch (7.6-15 cm) tip cutting and place it in a warm, dry spot out of direct sun for two to five days, or until the severed end calluses over. Pinch off the lowest sets of leaves and pot the cutting in a pot filled with porous, fast-draining medium. Keep it in a bright spot, water it lightly and watch for renewed growth in around four weeks.

Division Propagation
Older, well-established Kiwi Aeonium produce an abundance of offshoots, or pups, which can be divided to grow new plants. The offshoots emerge around the base of the plant and are connected to the main stem. It is best to wait until the offshoot has developed a root system before cutting it from the main plant and potting it, but it isn’t absolutely necessary to wait. Unrooted offshoots can be severed, allowed to callus over and potted in a similar way as cuttings. The offshoots perform best when potted in spring or summer, but they will root any time of year if kept under warm, bright conditions.

Planting and Aftercare
No matter how you propagate Kiwi Aeonium, the resulting plants must be allowed to produce a viable root system before planting them into a garden bed. Grow the immature Kiwi Aeonium in a sheltered spot with morning shade and afternoon sun until they produce several sets of leaves. Slowly acclimate them to full, all-day sun over the course of a week. Water deeply but infrequently so the soil has a chance to dry out slightly between waterings. Move the Kiwi Aeonium into a sunny bed or permanent planter in fall, just as they enter dormancy. Water them occasionally during their first summer, but only if no rain has fallen for longer than three weeks.
1
2
文章
Dummer. ゛☀
2017年09月23日

Portulacaria afra, (known as Elephant Bush) is a perennial succulent native to South Africa. It thrives in Sunset Climate Zones 8 through 9 and 12 through 24. This plant reaches heights of 3 feet (90 cm) with a spread of 4 feet (1.2 m) and adapts to either full sun or shade. Elephant Bush also adapts to a range of soil and is not particular about the pH, but does require well-drained soil.
1. Cut a 4- to 6-inches (10- to 15-cm) cutting from the growing tip of your Elephant Bush with a clean sterilized razor blade. Pruning shears or scissors can bruise the stem causing delayed healing.
2. Remove the bottom leaves from the stem cutting, leaving a 2- to 4-inches (5- to 10-cm) section of the stem bare.
3. Dip the bottom 2 inches (5 cm) of the stem of your Elephant Bush cutting in rooting compound. Tap the stem against the container to remove excess powder. Many prefer to pour the rooting powder into a paper cup and then dispose of the excess powder and cup together. This prevents contaminating the container of rooting powder.
4. Place the cutting in a warm well-ventilated area to heal and form a callous. Healing time varies, but typically ranges from a few days to a week for Elephant Bush.
5. Mix four parts sand or perlite with one part potting soil and fill a 4-inch (10-cm) pot with the mixture. Firm the soil down with your hands to level the surface. This creates soil that drains well and provides good aeration for your cuttings.
6. Insert the stem of your Elephant Bush into the mixture to a depth of 2 inches (5 cm). Firm the soil around the stem of your cutting with your hands to secure it in the soil.
7. Add a 1/4- to 1/2-inch (0.6- to 1.2-cm) layer of gravel over the top of the pot to conserve water and prevent soil from spilling over the edges when watering.
8. Water to moisten the soil. Although Elephant Bush does not typically require frequent watering, it needs even moisture for young roots to grow.
9. Place your cutting in a sunny, warm, well-ventilated area. Move your Elephant Bush to its permanent location once roots have formed and the plant shows new growth.

1. Cut a 4- to 6-inches (10- to 15-cm) cutting from the growing tip of your Elephant Bush with a clean sterilized razor blade. Pruning shears or scissors can bruise the stem causing delayed healing.
2. Remove the bottom leaves from the stem cutting, leaving a 2- to 4-inches (5- to 10-cm) section of the stem bare.

3. Dip the bottom 2 inches (5 cm) of the stem of your Elephant Bush cutting in rooting compound. Tap the stem against the container to remove excess powder. Many prefer to pour the rooting powder into a paper cup and then dispose of the excess powder and cup together. This prevents contaminating the container of rooting powder.
4. Place the cutting in a warm well-ventilated area to heal and form a callous. Healing time varies, but typically ranges from a few days to a week for Elephant Bush.

5. Mix four parts sand or perlite with one part potting soil and fill a 4-inch (10-cm) pot with the mixture. Firm the soil down with your hands to level the surface. This creates soil that drains well and provides good aeration for your cuttings.
6. Insert the stem of your Elephant Bush into the mixture to a depth of 2 inches (5 cm). Firm the soil around the stem of your cutting with your hands to secure it in the soil.

7. Add a 1/4- to 1/2-inch (0.6- to 1.2-cm) layer of gravel over the top of the pot to conserve water and prevent soil from spilling over the edges when watering.
8. Water to moisten the soil. Although Elephant Bush does not typically require frequent watering, it needs even moisture for young roots to grow.

9. Place your cutting in a sunny, warm, well-ventilated area. Move your Elephant Bush to its permanent location once roots have formed and the plant shows new growth.
1
2


