文章
Dummer. ゛☀
2017年09月22日

Succulents are hardy plants that add a striking appearance to any garden or home. Performing best in U.S. Department of Agriculture hardiness zones 3 through 9, succulents are good plants for the novice and expert gardener alike, as they require little attention. Because succulents are desert plants, they should be watered sparingly. Succulents are typically not susceptible to insect or pest infestation, but overwatering can lead to root or stem rot, a preventable and easily fixable disease. Succulents with signs of root or stem rot should be treated immediately.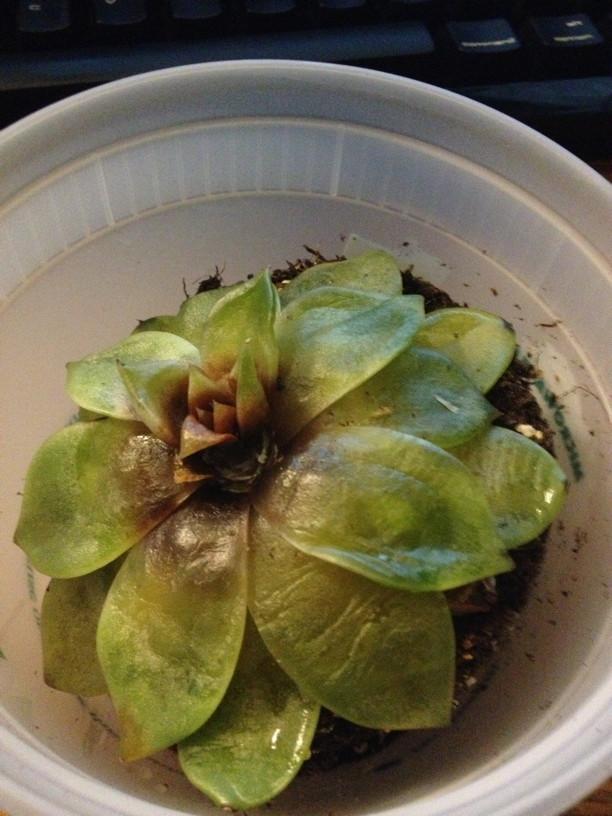
1. Check the plant for infected areas. These typically appear as dark brown to black spots or areas on the low part of the plant. Other signs of root or stem rot include puckered flesh with a dark tint around the infected area.
2. Stop watering a plant with rot. Remove the plant from its pot. Remove the soil mixture and clean out the pot thoroughly to ensure no remnants of the fungus are left.
3. Cut the infected black stem from the plant with a garden knife. Let the healthy portion of the plant dry naturally for several hours, keeping the succulent out of direct sunlight during this process. If other areas of the plant are showing minimal signs of rot, keep an eye on the plant. Succulents can recover from stem rot if properly watered and placed in a warm, dry location.
4. Using the cleaned out pot or a fresh one, combine equal parts soil, coarse sand and peat moss. Don’t reuse any of the materials used with the infected plant.
5. Pour roughly 2 inches (5 cm) of the mixture into the pot. Place the newly doctored succulent into the pot with the roots lying on top of the soil. Fill the pot with the soil mixture until it reaches the base of the stems. Firmly pat the soil around the plant.
6. Place the succulent in a brightly lit spot with warm temperatures. Succulents prefer dry climates, so don’t place the plant in a humid location.
7. Water the plant with just enough water to moisten the soil one week after repotting. After the soil has completely dried out, you can water more thoroughly.
Tip
Succulents grow best in well-drained soils that provide a high water-holding capacity. Planting succulents in a clay pot with a drainage hole ensures there is no sitting water and that the soil dries out between waterings. Succulents are dormant during the winter and should only be watered lightly at this time.

1. Check the plant for infected areas. These typically appear as dark brown to black spots or areas on the low part of the plant. Other signs of root or stem rot include puckered flesh with a dark tint around the infected area.
2. Stop watering a plant with rot. Remove the plant from its pot. Remove the soil mixture and clean out the pot thoroughly to ensure no remnants of the fungus are left.

3. Cut the infected black stem from the plant with a garden knife. Let the healthy portion of the plant dry naturally for several hours, keeping the succulent out of direct sunlight during this process. If other areas of the plant are showing minimal signs of rot, keep an eye on the plant. Succulents can recover from stem rot if properly watered and placed in a warm, dry location.
4. Using the cleaned out pot or a fresh one, combine equal parts soil, coarse sand and peat moss. Don’t reuse any of the materials used with the infected plant.

5. Pour roughly 2 inches (5 cm) of the mixture into the pot. Place the newly doctored succulent into the pot with the roots lying on top of the soil. Fill the pot with the soil mixture until it reaches the base of the stems. Firmly pat the soil around the plant.
6. Place the succulent in a brightly lit spot with warm temperatures. Succulents prefer dry climates, so don’t place the plant in a humid location.
7. Water the plant with just enough water to moisten the soil one week after repotting. After the soil has completely dried out, you can water more thoroughly.

Tip
Succulents grow best in well-drained soils that provide a high water-holding capacity. Planting succulents in a clay pot with a drainage hole ensures there is no sitting water and that the soil dries out between waterings. Succulents are dormant during the winter and should only be watered lightly at this time.
0
0
文章
Dummer. ゛☀
2017年09月22日

The succulent Jade Plant (Crassula ovata) grows wild in its native southern Africa, where it can reach 8 to 9 feet tall and spread about as wide. The fleshy oval leaves measure about 1 inch long at maturity. Mature stems are barklike, with softer tip growth. The plant responds to leaf pruning or removal by quickly sending out new, small leaves. Use this natural trait to your advantage with jade bonsai to keep the leaves in scale and to help keep a mature jade from becoming top-heavy.
1. Prune unwieldy branches with bonsai pruners or small, sharp-pointed scissors to achieve a tree framework. Do this in stages, if necessary, allowing the plant to fill in with new growth between prunings so you can better envision the shape of the mature bonsai. Remove large leaves to open the plant and allow light to reach inner stems where you want new, smaller leaves to grow. Pruning cuts should be flush with the main branch so they can form a smooth callus. Both stubs and scooped-out cuts create conditions for stem rot infections.
2. Trim jade once or twice a week to control the size and density of the leaf buds. Pinch off oversized leaves, or pinch off leaf buds growing in unwanted places, such as on the lower trunk of the plant. Nip the tips of leggy branches to encourage clusters of new leaf buds to develop. Long tweezers make it easy to reach within the plant to remove pruned bits.
3. Avoid using wound sealant. Instead, let pruned areas air dry and form a callus. Pathogens trapped under sealant can cause bacterial or fungal rot. Clean the pruning cutter blades with rubbing alcohol after each cut to prevent the spread of disease, especially if you use the same tools with several plants.
4. Train longer branches into interesting configurations by gently coiling copper wire around each branch you want to manipulate. The coil should be loose. Carefully bend the branch once or twice a week in small increments, nudging it into the desired shape. Jade responds quickly to wiring and can maintain its new form in as little as three weeks. If the wire leaves small imprints where it contacted the branch, the marks typically disappear as water replenishes the branch after the wire is removed.
Things You Will Need
Sharp-pointed small scissors or bonsai pruners
Rubbing alcohol
Long tweezers
Copper wire, optional.
Tip
Don’t water jade immediately before wiring. After watering, jade cells fill with water, making the stems rigid and more likely to break during the wiring process. Resume normal watering after the wire is in place.
A similar plant sometimes sold as a jade, Portulacaria afra has naturally smaller, 1/2-inch leaves. It is useful for creating a smaller scale bonsai with minimum pruning. The space between leaf nodes is also shorter, so Portulacaria afra bonsai appears to be more compact than Crassula ovata.

1. Prune unwieldy branches with bonsai pruners or small, sharp-pointed scissors to achieve a tree framework. Do this in stages, if necessary, allowing the plant to fill in with new growth between prunings so you can better envision the shape of the mature bonsai. Remove large leaves to open the plant and allow light to reach inner stems where you want new, smaller leaves to grow. Pruning cuts should be flush with the main branch so they can form a smooth callus. Both stubs and scooped-out cuts create conditions for stem rot infections.

2. Trim jade once or twice a week to control the size and density of the leaf buds. Pinch off oversized leaves, or pinch off leaf buds growing in unwanted places, such as on the lower trunk of the plant. Nip the tips of leggy branches to encourage clusters of new leaf buds to develop. Long tweezers make it easy to reach within the plant to remove pruned bits.

3. Avoid using wound sealant. Instead, let pruned areas air dry and form a callus. Pathogens trapped under sealant can cause bacterial or fungal rot. Clean the pruning cutter blades with rubbing alcohol after each cut to prevent the spread of disease, especially if you use the same tools with several plants.

4. Train longer branches into interesting configurations by gently coiling copper wire around each branch you want to manipulate. The coil should be loose. Carefully bend the branch once or twice a week in small increments, nudging it into the desired shape. Jade responds quickly to wiring and can maintain its new form in as little as three weeks. If the wire leaves small imprints where it contacted the branch, the marks typically disappear as water replenishes the branch after the wire is removed.

Things You Will Need
Sharp-pointed small scissors or bonsai pruners
Rubbing alcohol
Long tweezers
Copper wire, optional.
Tip
Don’t water jade immediately before wiring. After watering, jade cells fill with water, making the stems rigid and more likely to break during the wiring process. Resume normal watering after the wire is in place.

A similar plant sometimes sold as a jade, Portulacaria afra has naturally smaller, 1/2-inch leaves. It is useful for creating a smaller scale bonsai with minimum pruning. The space between leaf nodes is also shorter, so Portulacaria afra bonsai appears to be more compact than Crassula ovata.
1
2
文章
玲儿
2017年09月21日

センペルビウム(センペルビブム)の育て方・栽培方法
育て方のポイント
栽培環境・日当たり・置き場
春秋生育型の多肉植物として栽培します。3月から6月ごろの春から初夏までと、9月から11月の秋に生育期し、その間の暑い夏期と寒い冬期には休眠します。
全般に耐寒性は強く、強い霜に当たっても傷むことはありません。その一方高温多湿には弱いため、梅雨から夏にかけては雨の当たらない、風通しのよい半日陰になる場所で夏越しをさせます。
真夏以外の時期は戸外の日当たりのよい場所で管理し、雨に当ててもかまいません。晩秋に気温が下がってくると紅葉し始め、冬を越して春に暖かくなってくると紅葉色がさめ、生育期の美しい発色を見せてくれます。
庭植えにする場合は水はけがよく、夏場に半日陰になる場所がよいでしょう。

水やり
春と秋の生育期には用土の表面が乾いたらたっぷりと与えます。梅雨明けから夏の休眠期に用土が湿りすぎていると根腐れを起こすことがあるので水やりは控え、雨も当てないようにします。冬の休眠期は戸外で雨ざらしになってもかまいません。
肥料
春と秋の生育期には緩効性化成肥料か液体肥料を少量施します。

病気と害虫
病気:問題となる病気は特にありません。
害虫:カイガラムシ、アブラムシ、ネジラミ
茎や葉にカイガラムシやアブラムシ、根にネジラミ(サボテンネコナカイガラムシ)が発生することがあります。
用土(鉢植え)
水はけのよい用土を用います。鹿沼土小粒2、赤玉土小粒2、ピートモス2、川砂2、くん炭2などの配合土がよいでしょう。
植えつけ、 植え替え
植え替えは2~3年に1回行います。生育期ならいつでもできますが、生育期の直前か初期が適期です。このときに群生している株は株分け、茎が伸びてしまった株は剪定やさし木をしてもよいでしょう。

ふやし方
株分け、さし芽、タネまきでふやします。適期はいずれも3月から5月、9月から10月です。
株分け:群生している株は、植え替え時に株分けをしてもよいでしょう。
さし芽:伸びてしまったランナーの先の子株を剪定し、切った芽でさし木ができます。
タネまき:原種は、タネをまいてふやすこともできます。

主な作業
花茎の整理:春ごろから不定期に花茎を伸ばしますが、花を咲かせたロゼットは枯れてしまいます。花茎を早めに整理して、子株の生育を促しましょう。
育て方のポイント
栽培環境・日当たり・置き場
春秋生育型の多肉植物として栽培します。3月から6月ごろの春から初夏までと、9月から11月の秋に生育期し、その間の暑い夏期と寒い冬期には休眠します。
全般に耐寒性は強く、強い霜に当たっても傷むことはありません。その一方高温多湿には弱いため、梅雨から夏にかけては雨の当たらない、風通しのよい半日陰になる場所で夏越しをさせます。
真夏以外の時期は戸外の日当たりのよい場所で管理し、雨に当ててもかまいません。晩秋に気温が下がってくると紅葉し始め、冬を越して春に暖かくなってくると紅葉色がさめ、生育期の美しい発色を見せてくれます。
庭植えにする場合は水はけがよく、夏場に半日陰になる場所がよいでしょう。

水やり
春と秋の生育期には用土の表面が乾いたらたっぷりと与えます。梅雨明けから夏の休眠期に用土が湿りすぎていると根腐れを起こすことがあるので水やりは控え、雨も当てないようにします。冬の休眠期は戸外で雨ざらしになってもかまいません。
肥料
春と秋の生育期には緩効性化成肥料か液体肥料を少量施します。

病気と害虫
病気:問題となる病気は特にありません。
害虫:カイガラムシ、アブラムシ、ネジラミ
茎や葉にカイガラムシやアブラムシ、根にネジラミ(サボテンネコナカイガラムシ)が発生することがあります。
用土(鉢植え)
水はけのよい用土を用います。鹿沼土小粒2、赤玉土小粒2、ピートモス2、川砂2、くん炭2などの配合土がよいでしょう。
植えつけ、 植え替え
植え替えは2~3年に1回行います。生育期ならいつでもできますが、生育期の直前か初期が適期です。このときに群生している株は株分け、茎が伸びてしまった株は剪定やさし木をしてもよいでしょう。

ふやし方
株分け、さし芽、タネまきでふやします。適期はいずれも3月から5月、9月から10月です。
株分け:群生している株は、植え替え時に株分けをしてもよいでしょう。
さし芽:伸びてしまったランナーの先の子株を剪定し、切った芽でさし木ができます。
タネまき:原種は、タネをまいてふやすこともできます。

主な作業
花茎の整理:春ごろから不定期に花茎を伸ばしますが、花を咲かせたロゼットは枯れてしまいます。花茎を早めに整理して、子株の生育を促しましょう。
0
0
文章
Dummer. ゛☀
2017年09月20日

The Aloe vera plant grows on kitchen windowsills across the United States. Hardy in U.S. Department of Agriculture hardiness zones 9 through 11, Aloe vera is grown outdoors in mild winter locations along the West Coast, the Southwest and the South. A native of Africa, it thrives in warm, mild climates outdoors or as a houseplant in brightly lit windows and sunrooms. With sufficient light, water and fertilizer, a mature Aloe vera may produce a spike, up to 3 foot (90 cm) tall with yellow flowers in late winter. The real Aloe vera has yellow flowers, but many of the clones available have orange flowers.
Remove the babies, or pups, from your Aloe vera plant. Cut the connection between the mother plant and babies with a sharp knife if necessary. Allow the cut edges to dry for 24 hours before planting the babies in fresh potting soil. The baby plants take energy that the mother plant will now put into blooming.
Repot your mature Aloe vera in the fall. Select a new flowerpot three to four times the width of the old flowerpot. Remove the Aloe vera from the flowerpot and nestle it into a new planting mix of 1 part perlite and 2 parts potting soil. Tamp the soil gently around the roots and water thoroughly.
Place the Aloe vera in a brightly lit, south-facing window. Your Aloe vera requires as much light as possible to bloom.
Soak the soil with water when the top inch of soil is dry. Avoid overwatering; allow the soil to dry out between waterings. Aloe vera are succulents and require sufficient water to bloom.
Fertilize in December or January with a diluted 10-40-10 liquid fertilizer. Mix the fertilizer with double the recommended amount of water. Water the plant as usual, then drench the soil with the fertilizer solution. Fertilize after watering rather than during watering to avoid damaging the plant’s root system.
Maintain a daytime temperature of 70 to 85 degrees Fahrenheit (20 to 30 degrees Celsius). Aloe vera are subtropical plants, blooming in the summer in their native habitat. They require warmth to produce flower stalks.
Fill a tray with pebbles and water. Place the Aloe vera‘s flowerpot onto the tray to maintain the humidity around the plant. If your home is dry due to central heating, run a warm steam humidifier to raise the humidity in the room.
Place a small fan in the room to keep the air circulating. Good air circulation discourages mold, mildew and some pests, such as spider mites, from infesting your houseplants.
Tips
A mature Aloe vera plant is 4 or more years old. A cactus potting mix is a suitable substitute for the perlite and potting soil mixture. If the fleshy leaves begin to shrivel, water thoroughly and monitor the plant to ensure it’s receiving enough water.
Warnings
Aloe vera have spines on the ends of their fleshy leaves. Work cautiously when repotting to avoid puncture wounds. Never allow your Aloe vera to stand in water; the roots will rot and the plant will die.

Remove the babies, or pups, from your Aloe vera plant. Cut the connection between the mother plant and babies with a sharp knife if necessary. Allow the cut edges to dry for 24 hours before planting the babies in fresh potting soil. The baby plants take energy that the mother plant will now put into blooming.
Repot your mature Aloe vera in the fall. Select a new flowerpot three to four times the width of the old flowerpot. Remove the Aloe vera from the flowerpot and nestle it into a new planting mix of 1 part perlite and 2 parts potting soil. Tamp the soil gently around the roots and water thoroughly.

Place the Aloe vera in a brightly lit, south-facing window. Your Aloe vera requires as much light as possible to bloom.
Soak the soil with water when the top inch of soil is dry. Avoid overwatering; allow the soil to dry out between waterings. Aloe vera are succulents and require sufficient water to bloom.
Fertilize in December or January with a diluted 10-40-10 liquid fertilizer. Mix the fertilizer with double the recommended amount of water. Water the plant as usual, then drench the soil with the fertilizer solution. Fertilize after watering rather than during watering to avoid damaging the plant’s root system.

Maintain a daytime temperature of 70 to 85 degrees Fahrenheit (20 to 30 degrees Celsius). Aloe vera are subtropical plants, blooming in the summer in their native habitat. They require warmth to produce flower stalks.
Fill a tray with pebbles and water. Place the Aloe vera‘s flowerpot onto the tray to maintain the humidity around the plant. If your home is dry due to central heating, run a warm steam humidifier to raise the humidity in the room.
Place a small fan in the room to keep the air circulating. Good air circulation discourages mold, mildew and some pests, such as spider mites, from infesting your houseplants.

Tips
A mature Aloe vera plant is 4 or more years old. A cactus potting mix is a suitable substitute for the perlite and potting soil mixture. If the fleshy leaves begin to shrivel, water thoroughly and monitor the plant to ensure it’s receiving enough water.

Warnings
Aloe vera have spines on the ends of their fleshy leaves. Work cautiously when repotting to avoid puncture wounds. Never allow your Aloe vera to stand in water; the roots will rot and the plant will die.
0
0
文章
Dummer. ゛☀
2017年09月19日

Zones
Hardy succulents are hardy zone 3-9 unless otherwise labeled. Plants shipped in early spring are dormant. They will appear dull in color and have some dry edges. This is normal and when placed in sunlight they will intensify in color. Sempervivums change color with the seasons and each variety has its own most colorful time of the year.
Light
Most varieties need at least half a day to a full day of sunlight. In extremely hot areas some afternoon shade is recommended.
Planting
Remove plants from their pots and plant making sure the soil level remains the same depth on the plant. Once established, your succulents will benefit from a layer of pebbles or pea gravel spread on the soil around the plant. This is also very decorative.
Soil
Succulents need good draining soil. When planting in the garden, make sure the area drains well and is not in a low spot that would stay wet. For container planting you can purchase cactus soil or incorporate sand, gravel or volcanic rock for better drainage. The container you are planting in should have a drainage hole or put crushed rock on the bottom before your planting medium.
Watering
After planting, water in well and allow the soil to dry slightly between waterings. Succulents don’t like to have wet feet. When you do water, water thoroughly.
Fertilizer
Most succulents need very little fertilizer. Watering with a well balanced fertilizer once a month will be all they need.
Flowering
Sedum all have different bloom times and colors ranging from pink, red and yellow. Sempervivums will bloom after the second or third year. A flower stalk will shoot up from the center of the main rosette with a cluster of flowers. After the flower dies, gently twist off the stalk. The main rosette has put on new offsets that will fill in.
Uses
The planting possibilities using succulents are endless. The different colors, textures and habits make the most interesting containers and troughs. Succulents make beautiful rock garden plants. With a wide variety of bloom times there is always something with color.
Hardy succulents are hardy zone 3-9 unless otherwise labeled. Plants shipped in early spring are dormant. They will appear dull in color and have some dry edges. This is normal and when placed in sunlight they will intensify in color. Sempervivums change color with the seasons and each variety has its own most colorful time of the year.

Light
Most varieties need at least half a day to a full day of sunlight. In extremely hot areas some afternoon shade is recommended.
Planting
Remove plants from their pots and plant making sure the soil level remains the same depth on the plant. Once established, your succulents will benefit from a layer of pebbles or pea gravel spread on the soil around the plant. This is also very decorative.

Soil
Succulents need good draining soil. When planting in the garden, make sure the area drains well and is not in a low spot that would stay wet. For container planting you can purchase cactus soil or incorporate sand, gravel or volcanic rock for better drainage. The container you are planting in should have a drainage hole or put crushed rock on the bottom before your planting medium.
Watering
After planting, water in well and allow the soil to dry slightly between waterings. Succulents don’t like to have wet feet. When you do water, water thoroughly.

Fertilizer
Most succulents need very little fertilizer. Watering with a well balanced fertilizer once a month will be all they need.
Flowering
Sedum all have different bloom times and colors ranging from pink, red and yellow. Sempervivums will bloom after the second or third year. A flower stalk will shoot up from the center of the main rosette with a cluster of flowers. After the flower dies, gently twist off the stalk. The main rosette has put on new offsets that will fill in.

Uses
The planting possibilities using succulents are endless. The different colors, textures and habits make the most interesting containers and troughs. Succulents make beautiful rock garden plants. With a wide variety of bloom times there is always something with color.
2
4
文章
Dummer. ゛☀
2017年09月19日

Eulychnia is a genus of candelabriform or arborescent cacti, comprising between 6 and 9 species depending on the authority. These relatively large plants which reach up to 23 feet (7 m) high can survive under very hot conditions—temperatures can reach up to 122 °F (50 °C). Furthermore, this breed of cacti can also survive in some of the driest places in the world such as the Atacama Desert, the driest desert in the world.
The stems are covered with many long spines arranged on tuberculate ribs. The floral tubes are covered in spines, wool, scales, or all three and are round in shape and when the flower opens, resemble a ball that popped open on one side.
Eulychnia is not common in cultivation and only collectors with a specific interest in the genus seem to grow them.
Growing Conditions
Light: Eulychnia requires full sun or light shade to keep plant compact with strong colored spines. Tends to bronze in strong light, which encourages flowering and heavy spine production. Light shadow my be useful in the hottest summer days.
Water: It requires light but regular waterings in summer, but let the soil dry between waterings. Keep the soil dry in winter.
Temperature: Eulychnia need to be kept in a cool place during winter rest and are resistant to light frost if kept on the dry side prior to, and during, cold weather. They are hardy to 28 °F (-2 °C) in short periods.
Soil: Eulychnia likes very coarse mineral cactus mix soil, but can become too elongated if compost is too rich.
Fertilizer: Feed with a high potassium fertilizer in summer.
Propagation
Propagation is from seed or cuttings.
Pests and Diseases
Eulychnia may be attractive to a variety of insects, but plants in good condition should be nearly pest-free, particularly if they are grown in a mineral potting-mix, with good exposure and ventilation.

The stems are covered with many long spines arranged on tuberculate ribs. The floral tubes are covered in spines, wool, scales, or all three and are round in shape and when the flower opens, resemble a ball that popped open on one side.
Eulychnia is not common in cultivation and only collectors with a specific interest in the genus seem to grow them.

Growing Conditions
Light: Eulychnia requires full sun or light shade to keep plant compact with strong colored spines. Tends to bronze in strong light, which encourages flowering and heavy spine production. Light shadow my be useful in the hottest summer days.
Water: It requires light but regular waterings in summer, but let the soil dry between waterings. Keep the soil dry in winter.
Temperature: Eulychnia need to be kept in a cool place during winter rest and are resistant to light frost if kept on the dry side prior to, and during, cold weather. They are hardy to 28 °F (-2 °C) in short periods.

Soil: Eulychnia likes very coarse mineral cactus mix soil, but can become too elongated if compost is too rich.
Fertilizer: Feed with a high potassium fertilizer in summer.
Propagation
Propagation is from seed or cuttings.
Pests and Diseases
Eulychnia may be attractive to a variety of insects, but plants in good condition should be nearly pest-free, particularly if they are grown in a mineral potting-mix, with good exposure and ventilation.
0
0
文章
Dummer. ゛☀
2017年09月19日

Aeonium arboreum ‘Zwartkop’, commonly called Black Rose, is an ornamental succulent grown for its purplish-black foliage, which is arranged in a rosette shape. It grows outdoors in U.S. Department of Agriculture plant hardiness zones 9 through 11, where it adds year-round visual interest to garden beds. Although typically problem-free, Black Rose plants may sometimes drop leaves. Most causes are temporary or avoidable, although some may indicate a serious issue that must be addressed to save the plant’s life.
Seasonal Dormancy
Black Rose plants grow actively in spring and early summer and from fall into early winter. They enter dormancy as summer temperatures climb, dropping their foliage rosettes to direct energy toward their stems, or growing tips, and roots. Fall rain revives the plants until colder temperatures set in and prompt a second, less profound dormancy period in winter. Leaf loss from seasonal dormancy is temporary and natural and is not accompanied by other worrying symptoms such as wilting, discoloration or stem dieback. You don’t need to do anything except wait and water the plant occasionally so the stem doesn’t dry out.
Cultural Problems
Cultural problems can cause massive damage to Black Rose plants, including leaf loss. Soggy soil and over-watering are perhaps the most common and serious cultural issues for Black Rose plants because too much water will drown the roots and may lead to root rot, particularly during cold weather. Temperatures below 20 degrees Fahrenheit will also badly damage the leaf tips and may cause foliage loss. Conversely, direct sun exposure and temperatures above 100 F will also cause foliage loss and damage, particularly if the soil is too dry. Growing Black Rose plants in a fast-draining bed with light afternoon shade in hot, dry inland areas will help limit stress-related leaf loss, as will providing cover during cold or frosty weather.
Disease Damage
Root rot strikes when Black Rose plants are in cold, wet soil. It causes mushy, blackened stems and a general decline in the plant’s appearance and vigor, as well as leaf drop. Little can be done to help Black Rose plants afflicted with root rot, so prevention is key. Plant them in a bed or pot with gritty, fast-draining soil and provide adequate sun exposure to help keep the soil warm and dry. If symptoms of root rot appear, such as soft spots on the stem or minor leaf loss, stop all watering for several weeks to see if the problem will correct itself. If the symptoms persist and worsen, the plant may need to be replaced.
Pest Infestations
Serious infestations of mealybugs and spider mites may cause foliage loss in Black Rose plants, although it is rare in healthy, unstressed plants. Accompanying symptoms include discolored leaves, stem dieback and sticky or cottony reside between the leaves. Infestations of either type of pest can be treated with a liberal application of ready-to-use insecticidal soap applied to the tops and undersides of the leaves at seven- to 10-day intervals. Proper care will help prevent serious pest infestations in Black Rose plants, as will planting them in a bug-free site away from areas where infestations have previously occurred.
Seasonal Dormancy
Black Rose plants grow actively in spring and early summer and from fall into early winter. They enter dormancy as summer temperatures climb, dropping their foliage rosettes to direct energy toward their stems, or growing tips, and roots. Fall rain revives the plants until colder temperatures set in and prompt a second, less profound dormancy period in winter. Leaf loss from seasonal dormancy is temporary and natural and is not accompanied by other worrying symptoms such as wilting, discoloration or stem dieback. You don’t need to do anything except wait and water the plant occasionally so the stem doesn’t dry out.

Cultural Problems
Cultural problems can cause massive damage to Black Rose plants, including leaf loss. Soggy soil and over-watering are perhaps the most common and serious cultural issues for Black Rose plants because too much water will drown the roots and may lead to root rot, particularly during cold weather. Temperatures below 20 degrees Fahrenheit will also badly damage the leaf tips and may cause foliage loss. Conversely, direct sun exposure and temperatures above 100 F will also cause foliage loss and damage, particularly if the soil is too dry. Growing Black Rose plants in a fast-draining bed with light afternoon shade in hot, dry inland areas will help limit stress-related leaf loss, as will providing cover during cold or frosty weather.

Disease Damage
Root rot strikes when Black Rose plants are in cold, wet soil. It causes mushy, blackened stems and a general decline in the plant’s appearance and vigor, as well as leaf drop. Little can be done to help Black Rose plants afflicted with root rot, so prevention is key. Plant them in a bed or pot with gritty, fast-draining soil and provide adequate sun exposure to help keep the soil warm and dry. If symptoms of root rot appear, such as soft spots on the stem or minor leaf loss, stop all watering for several weeks to see if the problem will correct itself. If the symptoms persist and worsen, the plant may need to be replaced.

Pest Infestations
Serious infestations of mealybugs and spider mites may cause foliage loss in Black Rose plants, although it is rare in healthy, unstressed plants. Accompanying symptoms include discolored leaves, stem dieback and sticky or cottony reside between the leaves. Infestations of either type of pest can be treated with a liberal application of ready-to-use insecticidal soap applied to the tops and undersides of the leaves at seven- to 10-day intervals. Proper care will help prevent serious pest infestations in Black Rose plants, as will planting them in a bug-free site away from areas where infestations have previously occurred.
0
0
文章
Dummer. ゛☀
2017年09月19日

Succulents are hardy plants that add a striking appearance to any garden or home. Performing best in U.S. Department of Agriculture hardiness zones 3 through 9, succulents are good plants for the novice and expert gardener alike, as they require little attention. Because succulents are desert plants, they should be watered sparingly. Succulents are typically not susceptible to insect or pest infestation, but overwatering can lead to root or stem rot, a preventable and easily fixable disease. Succulents with signs of root or stem rot should be treated immediately.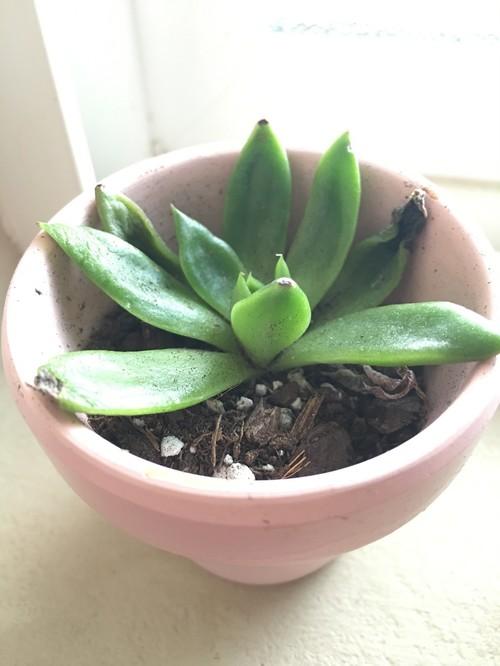
1. Check the plant for infected areas. These typically appear as dark brown to black spots or areas on the low part of the plant. Other signs of root or stem rot include puckered flesh with a dark tint around the infected area.
2. Stop watering a plant with rot. Remove the plant from its pot. Remove the soil mixture and clean out the pot thoroughly to ensure no remnants of the fungus are left.
3. Cut the infected black stem from the plant with a garden knife. Let the healthy portion of the plant dry naturally for several hours, keeping the succulent out of direct sunlight during this process. If other areas of the plant are showing minimal signs of rot, keep an eye on the plant. Succulents can recover from stem rot if properly watered and placed in a warm, dry location.
4. Using the cleaned out pot or a fresh one, combine equal parts soil, coarse sand and peat moss. Don’t reuse any of the materials used with the infected plant.
5. Pour roughly 2 inches (5 cm) of the mixture into the pot. Place the newly doctored succulent into the pot with the roots lying on top of the soil. Fill the pot with the soil mixture until it reaches the base of the stems. Firmly pat the soil around the plant.
6. Place the succulent in a brightly lit spot with warm temperatures. Succulents prefer dry climates, so don’t place the plant in a humid location.
7. Water the plant with just enough water to moisten the soil one week after repotting. After the soil has completely dried out, you can water more thoroughly.
Succulents grow best in well-drained soils that provide a high water-holding capacity. Planting succulents in a clay pot with a drainage hole ensures there is no sitting water and that the soil dries out between waterings. Succulents are dormant during the winter and should only be watered lightly at this time.

1. Check the plant for infected areas. These typically appear as dark brown to black spots or areas on the low part of the plant. Other signs of root or stem rot include puckered flesh with a dark tint around the infected area.
2. Stop watering a plant with rot. Remove the plant from its pot. Remove the soil mixture and clean out the pot thoroughly to ensure no remnants of the fungus are left.

3. Cut the infected black stem from the plant with a garden knife. Let the healthy portion of the plant dry naturally for several hours, keeping the succulent out of direct sunlight during this process. If other areas of the plant are showing minimal signs of rot, keep an eye on the plant. Succulents can recover from stem rot if properly watered and placed in a warm, dry location.
4. Using the cleaned out pot or a fresh one, combine equal parts soil, coarse sand and peat moss. Don’t reuse any of the materials used with the infected plant.

5. Pour roughly 2 inches (5 cm) of the mixture into the pot. Place the newly doctored succulent into the pot with the roots lying on top of the soil. Fill the pot with the soil mixture until it reaches the base of the stems. Firmly pat the soil around the plant.
6. Place the succulent in a brightly lit spot with warm temperatures. Succulents prefer dry climates, so don’t place the plant in a humid location.
7. Water the plant with just enough water to moisten the soil one week after repotting. After the soil has completely dried out, you can water more thoroughly.

Succulents grow best in well-drained soils that provide a high water-holding capacity. Planting succulents in a clay pot with a drainage hole ensures there is no sitting water and that the soil dries out between waterings. Succulents are dormant during the winter and should only be watered lightly at this time.
0
1
文章
Dummer. ゛☀
2017年09月19日

Crassula ovata also known as Jade Plant is a succulent often used as a houseplant. This well-behaved plant blends into the landscape in USDA hardiness zones 9 through 11, where it thrives on neglect. Few pests or diseases affect Jade Plant, but when white powdery mold appears on its leaves, it is often the result of environmental problems. If you have white mold on your Jade Plant, you’re more likely dealing with powdery mildew. True to their easy-care nature, though, Jade Plants bounce back from powdery mildew once it is properly treated. 
Powdery Mildew
Powdery mildew is caused by several different fungi that grow in a thin layer on plant tissues. In perennial plants such as Jade Plant, the fungal bodies can overwinter in buds, re-emerging when conditions are ideal for their growth. Spores are often distributed by the wind to new, uninfected plants or spread in greenhouses from plant to plant. Temperatures between 60 and 80 degrees Fahrenheit (16 and 27 degrees Celsius) are required for germination, along with a relative humidity above 90 percent. Standing water on leaves is not necessary and can actually inhibit spore germination in some cases. Standing water encourages other fungal growth, through, so it should be discouraged.
Damage
Powdery mildew begins as a white powdery coating on the plant’s leaf surfaces, but soon spreads, penetrating plant tissues and sending out spores. Emerging vegetation may be dwarfed or distorted and covered in white mildew. Jade Plants also develop corky brown lesions where powdery mildew is taking hold. If not addressed, this mildew will spread farther, resulting in leaf drop and the eventual death of the Jade Plant.
Cultural Control
Cultural control is effective for powdery mildew. Plant Jade Plants in full sun and trim them to encourage better air circulation. Reduce watering if the plant’s soil is often moist; always allow the soil to dry before watering Jade Plants. Powdery mildew spores can be killed with water, but be careful to wet the plant early in the day so that it can dry completely. Stop misting house Jade Plants, instead water them at the base of the plant since humidity around the plant is what encourages the growth of powdery mildew.
Chemical Control
Several chemicals are available for chronically infested plants or those that are victims of environmental conditions beyond the control of the gardener. Test a safer pesticide such as horticultural or neem oil on a small spot on your Jade Plant before spraying the entire plant thoroughly. If an outside Jade Plant yellows or shows signs of sunburn, utilize a sunshade until signs of powdery mildew are gone to prevent serious damage. Never apply horticultural oils when temperatures are above 90 degrees Fahrenheit (32 degrees Celsius).

Powdery Mildew
Powdery mildew is caused by several different fungi that grow in a thin layer on plant tissues. In perennial plants such as Jade Plant, the fungal bodies can overwinter in buds, re-emerging when conditions are ideal for their growth. Spores are often distributed by the wind to new, uninfected plants or spread in greenhouses from plant to plant. Temperatures between 60 and 80 degrees Fahrenheit (16 and 27 degrees Celsius) are required for germination, along with a relative humidity above 90 percent. Standing water on leaves is not necessary and can actually inhibit spore germination in some cases. Standing water encourages other fungal growth, through, so it should be discouraged.

Damage
Powdery mildew begins as a white powdery coating on the plant’s leaf surfaces, but soon spreads, penetrating plant tissues and sending out spores. Emerging vegetation may be dwarfed or distorted and covered in white mildew. Jade Plants also develop corky brown lesions where powdery mildew is taking hold. If not addressed, this mildew will spread farther, resulting in leaf drop and the eventual death of the Jade Plant.

Cultural Control
Cultural control is effective for powdery mildew. Plant Jade Plants in full sun and trim them to encourage better air circulation. Reduce watering if the plant’s soil is often moist; always allow the soil to dry before watering Jade Plants. Powdery mildew spores can be killed with water, but be careful to wet the plant early in the day so that it can dry completely. Stop misting house Jade Plants, instead water them at the base of the plant since humidity around the plant is what encourages the growth of powdery mildew.

Chemical Control
Several chemicals are available for chronically infested plants or those that are victims of environmental conditions beyond the control of the gardener. Test a safer pesticide such as horticultural or neem oil on a small spot on your Jade Plant before spraying the entire plant thoroughly. If an outside Jade Plant yellows or shows signs of sunburn, utilize a sunshade until signs of powdery mildew are gone to prevent serious damage. Never apply horticultural oils when temperatures are above 90 degrees Fahrenheit (32 degrees Celsius).
0
0


