文章
Dummer. ゛☀
2017年09月15日

A serious disorder of tomato, pepper, cucumber and eggplant, blossom end rot is an environmental problem (not fungal) most often caused by uneven watering or by calcium deficiency. (These can be related; uneven watering can interfere with the uptake of calcium.) This common garden “disease” is often brought on by rapid growth from too much fertilizer, high salt levels or drought.
Blossom end rot symptoms occur on both green and ripe fruits and is identified by water-soaked areas that gradually widen and mature into sunken, brown, leathery spots on the bottom end. In many cases, secondary pathogens, which appear as a black, fuzzy-like growth, attack the affected area and cause complete rotting of the fruit. Blossom end rot will not spread from plant to plant.
Treatment
Since this plant problem is physiological in nature, fungicides will not work as a control measure. We recommend the following:
Choose resistant vegetable varieties whenever possible.
Prevent problems by keeping soil evenly moist and by foliar spraying plants with a kelp or calcium solution.
Adding high levels of calcium — bone meal, oyster shell or gypsum — to the soil at planting time usually prevents this problem from developing.
A layer of mulch (straw, compost, grass ) will help conserve soil moisture during the hot, dry days of July and August.
Foliar applications of Liquid Calcium 5% (1-2 Tbsp/ gallon of water) can be used to correct or prevent deficiencies of this essential nutrient. For best results, combine with a natural surfactant to increase adhesion and spray leaves to the point of run-off.
Mulching plants will help conserve moisture and provide a more uniform water supply.
Avoid using high nitrogen fertilizers which accelerate vegetative growth and reduce the uptake of calcium by plants. A large selection of balanced organic fertilizers are available at Planet Natural.

Blossom end rot symptoms occur on both green and ripe fruits and is identified by water-soaked areas that gradually widen and mature into sunken, brown, leathery spots on the bottom end. In many cases, secondary pathogens, which appear as a black, fuzzy-like growth, attack the affected area and cause complete rotting of the fruit. Blossom end rot will not spread from plant to plant.

Treatment
Since this plant problem is physiological in nature, fungicides will not work as a control measure. We recommend the following:
Choose resistant vegetable varieties whenever possible.
Prevent problems by keeping soil evenly moist and by foliar spraying plants with a kelp or calcium solution.
Adding high levels of calcium — bone meal, oyster shell or gypsum — to the soil at planting time usually prevents this problem from developing.
A layer of mulch (straw, compost, grass ) will help conserve soil moisture during the hot, dry days of July and August.
Foliar applications of Liquid Calcium 5% (1-2 Tbsp/ gallon of water) can be used to correct or prevent deficiencies of this essential nutrient. For best results, combine with a natural surfactant to increase adhesion and spray leaves to the point of run-off.

Mulching plants will help conserve moisture and provide a more uniform water supply.
Avoid using high nitrogen fertilizers which accelerate vegetative growth and reduce the uptake of calcium by plants. A large selection of balanced organic fertilizers are available at Planet Natural.
0
0
文章
Miss Chen
2017年08月29日

The classic beauty of the rose makes it a garden favorite. Its trademark blossom comes in an array of hues and subtle distinctions. There are many varieties of rose bushes, some are climbers and others are shrubs. A climbing rose bush can weave itself over a trellis, or a row of shrubs can form a colorful hedge. Dedicated rose gardeners know that the fragrant flower requires periodic nurturing.

Step 1
Stop cutting roses off your bush by late fall. This allows the seeds to develop which signals the bush to move into dormancy. As the weather gets colder, this dormancy with help protect the plant.
Step 2
Stop dead heading by late fall. This means to stop removing the dead flowers.
Step 3
Don't prune for winter. You will need to prune after the frost.
Step 4
Prune tall rose bushes only if necessary for winter covering. Put on protective gloves.
Step 5
Clean your pruning shears, to avoid spreading disease.
Step 6
Cut at a 45 degree angle to the stem axis. Keep pruning to a minimum, removing only what is necessary for covering the plant.
1
0
文章
Miss Chen
2017年08月15日

To brighten your summer garden with vividly colored flowers, include zinnias (Zinnia elegans) when choosing plants. An old-fashioned favorite that's especially easy-to-grow, the zinnia plant produces masses of colorful blossom throughout summer and early fall. Zinnias grow as annuals in all parts of the United States, thriving in any sunny spot when given just basic care and some trimming now and then.

Off to a Good Start
Start zinnias indoors from seeds four to six weeks before your last frost date, or direct-sow zinnia seeds in the garden once temperatures remain above about 60 degrees Fahrenheit. It's important to give plants enough space to grow without crowding, so thin direct-sown seedlings or space indoor-grown seedlings to allow about 6 inches between shorter varieties and about 12 inches between plants for types that become 2 or more feet tall.
To ensure season-long flowers, sow more seed every two or three weeks until early summer; new plants will produce healthy flower buds when the first plants are beginning to slow their growth and shut down flower production as fall approaches.
Watering and Feeding
Water newly planted zinnias frequently during the first week or two, keeping the soil evenly moist until roots become established. Then water whenever soil feels dry an inch or two below the surface, aiming for about 1 inch of water each week, including rain. Adding 3 or 4 inches of organic mulch such as straw or shredded bark under each plant's canopy also helps conserve soil moisture while keeping down weeds, but keep the mulch back a few inches from each plant's base to discourage fungal growth.
Fertilizing zinnias helps keep new flower buds coming non-stop through most of the season. Give an initial feeding when seedlings are about 4 inches tall, using a 5-10-5, water-soluble formula. Dilute the fertilizer to 1/4 strength, or 1/4 teaspoon per 4 gallons of water, but check your product label for additional directions. Feed again in mid-summer to keep the plants growing and flowering as long as possible.

Trimming and Deadheading
Zinnias are naturally bushy plants, especially when grown in full sun, but pinching out new growth on young plants helps promote extra branching, making plants even fuller and providing more stems that produce blossoms. If you do this when shoots are young and tender, you can pinch out soft new growth with your fingers. To trim back slightly larger stems, use sharp shears, disinfecting the blades by wiping them with rubbing alcohol between cuts to discourage spread of plant disease.
As flowers fade on zinnia plants, cut these off just ahead of the first set of leaves on the flower stem -- called deadheading. This helps spur production of new flower buds on the remaining stems and also helps keep the plant looking tidy. Because zinnias are annuals, they don't survive winter, but leaving a few spent flowers on the plant allows seeds to mature that can drop to the ground. These may produce new, "volunteer" seedlings the following spring.
Preventing Problems
Zinnias are susceptible to several fungal disorders, including powdery mildew, which makes zinnia leaves look whitish and sprinkled with powder. Eventually, leaves turn brown, then dry up and fall from the plant. Mildew is best prevented by choosing mildew-resistant varieties, spacing plants properly and watering plants with a soaker hose or drip irrigation that helps keep foliage dry.
Zinnias can attract a few pests, including Japanese beetles and some caterpillars that chew foliage, slowing plant growth and potentially stopping flower development. Destroy these pests by handpicking them. You might also see whiteflies, tiny white flying insects, and soft-bodied, yellowish aphids; these insects suck plant juices and slow flowering. Rid the plant of these pests by spraying it until dripping with insecticidal soap, diluted at a rate of 5 tablespoons per gallon of water. Repeat the spray every two weeks as needed.

Off to a Good Start
Start zinnias indoors from seeds four to six weeks before your last frost date, or direct-sow zinnia seeds in the garden once temperatures remain above about 60 degrees Fahrenheit. It's important to give plants enough space to grow without crowding, so thin direct-sown seedlings or space indoor-grown seedlings to allow about 6 inches between shorter varieties and about 12 inches between plants for types that become 2 or more feet tall.
To ensure season-long flowers, sow more seed every two or three weeks until early summer; new plants will produce healthy flower buds when the first plants are beginning to slow their growth and shut down flower production as fall approaches.
Watering and Feeding
Water newly planted zinnias frequently during the first week or two, keeping the soil evenly moist until roots become established. Then water whenever soil feels dry an inch or two below the surface, aiming for about 1 inch of water each week, including rain. Adding 3 or 4 inches of organic mulch such as straw or shredded bark under each plant's canopy also helps conserve soil moisture while keeping down weeds, but keep the mulch back a few inches from each plant's base to discourage fungal growth.
Fertilizing zinnias helps keep new flower buds coming non-stop through most of the season. Give an initial feeding when seedlings are about 4 inches tall, using a 5-10-5, water-soluble formula. Dilute the fertilizer to 1/4 strength, or 1/4 teaspoon per 4 gallons of water, but check your product label for additional directions. Feed again in mid-summer to keep the plants growing and flowering as long as possible.

Trimming and Deadheading
Zinnias are naturally bushy plants, especially when grown in full sun, but pinching out new growth on young plants helps promote extra branching, making plants even fuller and providing more stems that produce blossoms. If you do this when shoots are young and tender, you can pinch out soft new growth with your fingers. To trim back slightly larger stems, use sharp shears, disinfecting the blades by wiping them with rubbing alcohol between cuts to discourage spread of plant disease.
As flowers fade on zinnia plants, cut these off just ahead of the first set of leaves on the flower stem -- called deadheading. This helps spur production of new flower buds on the remaining stems and also helps keep the plant looking tidy. Because zinnias are annuals, they don't survive winter, but leaving a few spent flowers on the plant allows seeds to mature that can drop to the ground. These may produce new, "volunteer" seedlings the following spring.
Preventing Problems
Zinnias are susceptible to several fungal disorders, including powdery mildew, which makes zinnia leaves look whitish and sprinkled with powder. Eventually, leaves turn brown, then dry up and fall from the plant. Mildew is best prevented by choosing mildew-resistant varieties, spacing plants properly and watering plants with a soaker hose or drip irrigation that helps keep foliage dry.
Zinnias can attract a few pests, including Japanese beetles and some caterpillars that chew foliage, slowing plant growth and potentially stopping flower development. Destroy these pests by handpicking them. You might also see whiteflies, tiny white flying insects, and soft-bodied, yellowish aphids; these insects suck plant juices and slow flowering. Rid the plant of these pests by spraying it until dripping with insecticidal soap, diluted at a rate of 5 tablespoons per gallon of water. Repeat the spray every two weeks as needed.
0
0
文章
Miss Chen
2017年08月10日

The classic flower for the wedding bouquet is the white rose. Eventually the white roses in your bouquet, corsage or floral arrangement will begin to turn brown, a natural occurrence as the blossom starts to fade. While this happens to all roses, the browning is more evident in white roses, as there is no color to conceal the evidence of the transformation. Taking special care when handling your roses can delay the process, allowing you to enjoy the flowers longer.

Step 1
Don't touch the blossom petals, to avoid bruising and browning the flower.
Step 2
Keep the roses in a cool location, away from heat sources, and avoid sudden changes of temperature or drafts of cold or hot air.
Step 3
Cut 1/2 inch from the stem, if it is a stemmed white rose, before placing it in a vase of water. Remove any leaves that will be covered with water when placed in the vase. Add the floral preservative that comes with the flower to the water, following the directions on the package.
Step 4
Keep the corsage or bouquet in the florist box until you are ready to wear it. This includes when you are traveling to your destination site.

Step 5
Wear the corsage blossom up, stem down.
Step 6
Store the florist box of white roses in the bottom shelf of the refrigerator.
Step 7
Add water to the foam of the corsage daily.

Step 1
Don't touch the blossom petals, to avoid bruising and browning the flower.
Step 2
Keep the roses in a cool location, away from heat sources, and avoid sudden changes of temperature or drafts of cold or hot air.
Step 3
Cut 1/2 inch from the stem, if it is a stemmed white rose, before placing it in a vase of water. Remove any leaves that will be covered with water when placed in the vase. Add the floral preservative that comes with the flower to the water, following the directions on the package.
Step 4
Keep the corsage or bouquet in the florist box until you are ready to wear it. This includes when you are traveling to your destination site.

Step 5
Wear the corsage blossom up, stem down.
Step 6
Store the florist box of white roses in the bottom shelf of the refrigerator.
Step 7
Add water to the foam of the corsage daily.
0
0
文章
Dummer. ゛☀
2017年08月08日

Choanenphora wet rot control is essential for those of us who love to grow squash, cucumbers and other cucurbits. What is Choaneephora fruit rot? You may not know the disease as Choaenephora, but you probably know what blossom end rot is. It is evidenced by soft, rotting ends on squash and other cucurbits. The disease is caused by fungal mold and it isn’t easy to get rid of once you have it, but it is easy to prevent. What is Choanephora Fruit Rot? Choanephora wet rot in plants begins in the flowers, which will bear a powdery white residue. 
Once fruits begin to form and the flower withers away, the flower end of the fruit shows signs of mushiness and rot along with white or purplish powder. It progresses into the fruit, stunting growth and destroying much of the edible tissue. Once the disease is on your plants, it can spread quickly, so controlling Choanephora fruit rot immediately is essential to saving the crop. Choanephora fruit fungus can overwinter in garden debris. Fungal spores spread in spring by wind and insect movement. Warm, wet conditions encourage the growth of the fungus, which is one of the fastest growing fungal diseases. You can use a hand magnifier and see whisker-like growth on the fruit to differentiate it from another common fungal disease, Rhizopus soft rot. In areas with high humidity and moist conditions, the fungus can blight as much as 90 percent of a crop. Choanephora wet rot in plants is difficult to control because new flowers are forming daily and are newly susceptible to the spores. Choanephora Fruit Rot Treatment There is no prescribed Choanephora fruit rot treatment. Some growers suggest using fungicides, but these are only affective on the flowers that are treated. Over the course of a day or two, these flowers are replaced by new ones so you would be faced with treating the plant every couple of days. This is not a safe solution for developing fruits, so fungicides are, therefore, not considered useful. Some gardeners swear by the addition of calcium to soil to prevent the disease by adding Epsom salts or crushed eggshells to the soil at planting. This will certainly bolster the health of the plant but will not prevent spores from eating into the fruit.
Choanephora wet rot control actually begins when you are planning the vegetable garden. Before you plant a single seed, consider crop rotation. This will prevent any cucurbits from being planted in the same soil as the previous year where soil may be contaminated by the fungus. Space the plants well so there is plenty of air circulation to dry out the leaves and stems. Avoid irrigating overhead in the evening when plants cannot have time to dry off. Planting squash and other susceptible plants in raised beds with drip irrigation also seems to be helpful. Clean up infected plant debris. You may still get one or two infected fruits, but you should be able to save the bulk of the crop with these practices.

Once fruits begin to form and the flower withers away, the flower end of the fruit shows signs of mushiness and rot along with white or purplish powder. It progresses into the fruit, stunting growth and destroying much of the edible tissue. Once the disease is on your plants, it can spread quickly, so controlling Choanephora fruit rot immediately is essential to saving the crop. Choanephora fruit fungus can overwinter in garden debris. Fungal spores spread in spring by wind and insect movement. Warm, wet conditions encourage the growth of the fungus, which is one of the fastest growing fungal diseases. You can use a hand magnifier and see whisker-like growth on the fruit to differentiate it from another common fungal disease, Rhizopus soft rot. In areas with high humidity and moist conditions, the fungus can blight as much as 90 percent of a crop. Choanephora wet rot in plants is difficult to control because new flowers are forming daily and are newly susceptible to the spores. Choanephora Fruit Rot Treatment There is no prescribed Choanephora fruit rot treatment. Some growers suggest using fungicides, but these are only affective on the flowers that are treated. Over the course of a day or two, these flowers are replaced by new ones so you would be faced with treating the plant every couple of days. This is not a safe solution for developing fruits, so fungicides are, therefore, not considered useful. Some gardeners swear by the addition of calcium to soil to prevent the disease by adding Epsom salts or crushed eggshells to the soil at planting. This will certainly bolster the health of the plant but will not prevent spores from eating into the fruit.

Choanephora wet rot control actually begins when you are planning the vegetable garden. Before you plant a single seed, consider crop rotation. This will prevent any cucurbits from being planted in the same soil as the previous year where soil may be contaminated by the fungus. Space the plants well so there is plenty of air circulation to dry out the leaves and stems. Avoid irrigating overhead in the evening when plants cannot have time to dry off. Planting squash and other susceptible plants in raised beds with drip irrigation also seems to be helpful. Clean up infected plant debris. You may still get one or two infected fruits, but you should be able to save the bulk of the crop with these practices.
0
0
文章
Dummer. ゛☀
2017年08月07日

Cherry Blossoms are some of the most beautiful flowers, coming in bright colors. The Cherry Blossom tree in full bloom, during the arrival of spring, is one of the most beautiful sights to behold.
The Cherry Blossom is so popular that festivals are celebrated in its honor- the Cherry Blossom Festival, celebrated in the months of March and April.
The Cherry Blossom is Japan's unofficial National Flower. Somei Yoshino is a favorite Cherry Blossom variety of the Japanese. The flowers are almost pure white, tinged with the palest pink, especially near the stem.
The Somei Yoshino Cherry Blossoms bloom, and usually fall within a week, before the leaves come out. The trees, thus look nearly white from top to bottom. Other Cherry Blossom varieties include yamazakura, yaezakura, and shidarezakura. The yaezakura Cherry Blossom have large flowers, thick with rich pink petals.
The shidarezakura Cherry Blossom, or weeping Cherry, has branches that fall like those of a weeping willow, bearing cascades of pink flowers.
The Japanese Cherry starts flowering profusely from the first warmer days in April, heralding the coming of spring. The pink or white flowers grow in racemose clusters at nodes on short spurs. They are past flowering early in May.
The Cherries can be divided into three groups - the European, the American, and the Oriental. In general, the Oriental types (Prunus serrulata) are less hardy. This genus - Prunus comprises over 400 species and numerous cultivars of trees and shrubs growing in temperate climates mostly in the Northern Hemisphere.
It includes evergreen shrubs, flowering fruit trees, and all the stone fruits - almonds, apricots, cherries, nectarines, peaches, plums, and prunes. They are also very ornamental.
The National Cherry Blossom Festival is an annual celebration in Washington, D.C., commemorating the March 27, 1912, gift to the city of 3,000 Japanese cherry trees from the Mayor of Tokyo to strengthen the growing friendship between the United States and Japan. Cherry Blossoms are rooted deep in the culture of Japan and were used in ancient Japan to forecast how crops for the coming year would do. Modern Japan still celebrates Hanami - gatherings of friends to picnic under a canopy of Cherry Blossoms, enjoying the brief burst of the beauty of nature and springtime. Through the centuries, the Japanese have developed many different varieties of the Cherry tree. All of these trees bloom for a short time with pink or white flowers. Cherries are part of the rose family and like roses, most cherry trees bloom during the spring. A few varieties are grown to flower later and actually show their blossoms in autumn or even during winter! Normally, it is just a week to ten days before all of the blossoms are carried away by the wind.
Growing Cherry Blossoms
Cherries are propagated by budding them on seedling stocks in the nursery and are sold for planting stock as one or two-year-old trees. Sweet and Sour Cherries are fairly easy to grow. Sour Cherries, which are smaller and more tolerant of cold and heat, are easier to grow than sweet Cherries.
Sour cherries are self-pollinating so you don't have to plant two kinds. Sour Cherries also bloom later, which makes them less vulnerable to harm from late spring frosts.
Because of the fact that Cherry Blossom trees bloom early in spring and are susceptible to damage from late spring frosts, the site for growing Cherries should be slightly higher and sloped than the surrounding ground to prevent frosty air from settling in the low spots.
Cherry Blossom trees should be placed in a sheltered location with full sun, in soil that is deep, fertile and moist, but well drained.
Full sun exposure for Cherry Blossom trees is necessary to produce delicious Cherries and strong trees.
Cherry Blossom trees grown in shade will produce spindly branches and fewer cherries that are less sweet.
Sweet and sour Cherries are susceptible to most of the same problems.
Cherry Blossom Plant Care
Maintaining a clean surrounding is very important to keep pest and disease problems down for Cherry Blossom trees.
Bird problems on Cherry Blossom trees can be prevented by planting your trees near people or pets and by netting.
Diseased fruit, leaves, and prunings on Cherry Blossom trees should be removed immediately and either burned to kill insect larvae and disease spores or destroyed in a hot compost pile.
Some common problems seen in Cherry Blossom trees are Plum curculio, Brown rot, cherry fruit flies, cherry leaf spot and bacterial canker.
The Cherry Blossom is so popular that festivals are celebrated in its honor- the Cherry Blossom Festival, celebrated in the months of March and April.

The Cherry Blossom is Japan's unofficial National Flower. Somei Yoshino is a favorite Cherry Blossom variety of the Japanese. The flowers are almost pure white, tinged with the palest pink, especially near the stem.
The Somei Yoshino Cherry Blossoms bloom, and usually fall within a week, before the leaves come out. The trees, thus look nearly white from top to bottom. Other Cherry Blossom varieties include yamazakura, yaezakura, and shidarezakura. The yaezakura Cherry Blossom have large flowers, thick with rich pink petals.
The shidarezakura Cherry Blossom, or weeping Cherry, has branches that fall like those of a weeping willow, bearing cascades of pink flowers.
The Japanese Cherry starts flowering profusely from the first warmer days in April, heralding the coming of spring. The pink or white flowers grow in racemose clusters at nodes on short spurs. They are past flowering early in May.

The Cherries can be divided into three groups - the European, the American, and the Oriental. In general, the Oriental types (Prunus serrulata) are less hardy. This genus - Prunus comprises over 400 species and numerous cultivars of trees and shrubs growing in temperate climates mostly in the Northern Hemisphere.
It includes evergreen shrubs, flowering fruit trees, and all the stone fruits - almonds, apricots, cherries, nectarines, peaches, plums, and prunes. They are also very ornamental.
The National Cherry Blossom Festival is an annual celebration in Washington, D.C., commemorating the March 27, 1912, gift to the city of 3,000 Japanese cherry trees from the Mayor of Tokyo to strengthen the growing friendship between the United States and Japan. Cherry Blossoms are rooted deep in the culture of Japan and were used in ancient Japan to forecast how crops for the coming year would do. Modern Japan still celebrates Hanami - gatherings of friends to picnic under a canopy of Cherry Blossoms, enjoying the brief burst of the beauty of nature and springtime. Through the centuries, the Japanese have developed many different varieties of the Cherry tree. All of these trees bloom for a short time with pink or white flowers. Cherries are part of the rose family and like roses, most cherry trees bloom during the spring. A few varieties are grown to flower later and actually show their blossoms in autumn or even during winter! Normally, it is just a week to ten days before all of the blossoms are carried away by the wind.
Growing Cherry Blossoms
Cherries are propagated by budding them on seedling stocks in the nursery and are sold for planting stock as one or two-year-old trees. Sweet and Sour Cherries are fairly easy to grow. Sour Cherries, which are smaller and more tolerant of cold and heat, are easier to grow than sweet Cherries.
Sour cherries are self-pollinating so you don't have to plant two kinds. Sour Cherries also bloom later, which makes them less vulnerable to harm from late spring frosts.
Because of the fact that Cherry Blossom trees bloom early in spring and are susceptible to damage from late spring frosts, the site for growing Cherries should be slightly higher and sloped than the surrounding ground to prevent frosty air from settling in the low spots.
Cherry Blossom trees should be placed in a sheltered location with full sun, in soil that is deep, fertile and moist, but well drained.
Full sun exposure for Cherry Blossom trees is necessary to produce delicious Cherries and strong trees.
Cherry Blossom trees grown in shade will produce spindly branches and fewer cherries that are less sweet.
Sweet and sour Cherries are susceptible to most of the same problems.

Cherry Blossom Plant Care
Maintaining a clean surrounding is very important to keep pest and disease problems down for Cherry Blossom trees.
Bird problems on Cherry Blossom trees can be prevented by planting your trees near people or pets and by netting.
Diseased fruit, leaves, and prunings on Cherry Blossom trees should be removed immediately and either burned to kill insect larvae and disease spores or destroyed in a hot compost pile.
Some common problems seen in Cherry Blossom trees are Plum curculio, Brown rot, cherry fruit flies, cherry leaf spot and bacterial canker.
1
1
文章
安小宝
2017年05月23日


Anyone who has a small garden realizes their small garden space can be both a blessing and a curse. Cursed because you just will not have all the room to plant every garden bloom and blossom you have ever admired. Blessed because, from a design perspective, a small space is easier to design, maintain and even harvest! But if you are looking at your small garden space and are confused as to where to start, here are some great design tips to help you create a special space just for you.
Focus Your Attention
When your space is small, don’t feel that you have to shove a plant into every last square inch of ground. Focus your attention in the space on a focal point, and create a design that simply points the way. Fill the empty space with hardscaping. Now you have a space to impress, with less work, money and time, but much more wow!

Don’t Ignore Space
We often tend to ignore certain spaces in a garden, and when you have a small yard to begin with, thats a waste. Utilize forgotten areas such as a side yard to create green space. Keep it simple so it doesn’t get overgrown. Pick 3-5 plants that will grow well in the space, then repeat them.

Use Ornaments to Add Oomph.
When our garden design must be limited due to space, one of the tricks of the trade is to use garden ornaments to add a little pizzazz and keep a simple space from looking boring. It also serves to slow the eye down so that it doesn’t take in the small garden too quickly. Try placing them at natural stopping points in the flow of the garden.

Go Crazy.
If you are a plant lover like me, restraint probably isn’t your strong suit. So pack it in! Create a lush oasis by planting closer than you normally would, especially in borders. Add containers to up the effect. Remember, if you plant closely like this, you need to compensate with extra water and fertilizer throughout the season.

Go Up!
Vertical gardens are trendy, and right on point for a small garden design. Check out our post on DIY vertical gardens for more info.

Lastly, remember when your space is small, to make it an extension of your indoor living space. Use hardscaping to create entertaining areas, and open those doors wide and let the spaces work together. Use furnishings outdoors, plant grass for “carpet,” add planter “accents” and remember to just enjoy the space you have to it’s fullest, no matter what its size!


0
0
成长记
riverrun
2017年05月01日

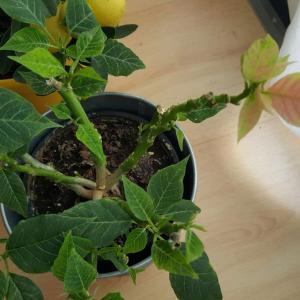
wtf Matilda is starting to blossom again, thats not supposed to happen yet girl but alright 😏

0
0
文章
笼岛 みどり
2017年03月13日


梅(ウメ)の花言葉
梅(ウメ)の花言葉は 「不屈の精神」「高潔」
梅(ウメ)について
科・属
バラ科サクラ属
和名
梅(ウメ)
英名
Japanese apricot, Plum blossom
学名
Prunus mume
原産地
中国
開花時期
1月~3月
花名の由来
花名の「梅(ウメ)」の語源は諸説ありますが、中国語の「梅(メイ)」が転訛したとする説、薬用として燻製にした実が「烏梅(ウメイ)」として転訛したとする説、花の美しさからより「愛目(ウメ)」が転じたという説などがあります。

梅(ウメ)の花言葉と由来
梅(ウメ)の花言葉は、「高潔」「潔白」「忠実」「忍耐」「高潔な心」「澄んだ心」「気品(白梅)」。
花言葉の「忠実」は、争いに敗れ大宰府へ左遷された平安時代の貴族 菅原道真のあとを追って空を飛んだといわれる、ウメの伝説に由来しているようです。白梅の花言葉の「気品」は、華やかな紅梅に対し、凜として上品な白梅のその花姿にちなんでいます。
梅の豆知識
6月~7月中旬の雨を指す「梅雨」。なぜ「梅」という漢字が使われるか気になったことはありませんか?
梅雨の語源には諸説ありますが、「梅の実が熟した頃に降る雨」という意味で、中国の長江流域では「梅雨(ばいう)」と呼んでいたという説があります。また「黴(カビ)が生えやすい時期の雨」という意味から「黴雨(ばいう)」と呼んでいたものが、カビでは語感が良くないことから同じ読みで季節に合った「梅」の字を使い「梅雨」になったという説もあります。
「梅雨」は江戸時代から日本に伝わり「梅雨(つゆ)」と呼ばれるようになりますが、その由来もいくつかあり「露」から連想されたというものや、梅の実が熟しつぶれる時期なので「潰ゆ」と関連させたという説があります。
梅にまつわることわざ・言い伝え
塩梅
塩梅とは、本来は塩と梅酢のことをいいます。昔は、酸味と塩味で料理の味を引き立てる「梅酢」が調味料として使われてそれが味付けの基本であることから、料理の味を調えること、またその味や塩加減の意味となり、今では、とても具合のよいことを「いい塩梅」といい、幅広く使われるようになっています。
梅干しは三毒を断つ
三毒とは「食の毒」「血の毒」「水の毒」の3つを意味します。「食の毒」は、暴飲暴食や不規則な食事など、食生活により体内のバランスが乱れた状態のことで、梅干しのもつ殺菌作用や解毒作用などにより、それらを断ち切ることが可能です。
「血の毒」とは、血液の代謝が良くないことが原因でできる毒で、梅に含まれるクエン酸の働きなどによって断ち切ることができます。
「水の毒」は体内の水分汚れのことで、梅干しの抗菌作用などで改善することができると言われています。

0
0


