文章
Miss Chen
2017年08月11日

Orchids, members of the Orchidaceae family, are prized for their attractive and exotic flowers. Considered difficult for amateurs to grow from seed, orchid species may be hardy from USDA zones 4 through 12. From hardy natives to tropical beauties, orchid seeds contain few food reserves, naturally relying on a symbiotic relationship with a fungus to provide their nutrients. Home growers imitate this relationship by sowing orchid seeds on a gelled, algae-based nutrient solution known as agar. Because the seeds and agar are generally kept in a flask, this process is called flasking. Agar or nutrient agar mixtures can be purchased. Alternatively, home growers can make an orchid-flasking, agar medium of their own.

Step 1
Mix water, gelatin, sugar and beef bouillon cubes or granules together in a saucepan. The amount of each used will depend on the amount of growing medium desired, but a sample mixture would have the following ingredient proportions: 4 cups of water, four packets of plain gelatin or a substitutable amount of agar, 8 teaspoons of sugar and four bouillon cubes or 4 teaspoons of bouillon granules.
Step 2
Boil this mixture, stirring constantly.
Step 3
Cool the mixture once it has been brought to a boil and all of the ingredients have dissolved. Keep the mixture sterile. Avoid exposing it to any surfaces, skin or other materials that may harbor any amount of bacteria. Keep it covered to prevent contamination and let it cool for no more than eight minutes.
Step 4
Pour the mixture into sterilized flasks. Purchase sterilized flasks and avoid opening them and exposing them to microorganisms until immediately before they will be filled with the growing medium, or sterilize the flasks in a pressure cooker or oven. In a pressure cooker, sterilize the flasks for 15 minutes at 15 psi (pounds per square inch). For oven sterilization, put glassware in the oven for two to three hours at 350 degrees Fahrenheit.
Step 5
Cover the flasks and let them cool until the gelatin has set. The flasks may be refrigerated to encourage setting.

Step 6
Keep the flasks cool, ideally refrigerated, until the orchid seeds are ready to sow. For best results, the medium should be put to use within three days after you have made it.

Step 1
Mix water, gelatin, sugar and beef bouillon cubes or granules together in a saucepan. The amount of each used will depend on the amount of growing medium desired, but a sample mixture would have the following ingredient proportions: 4 cups of water, four packets of plain gelatin or a substitutable amount of agar, 8 teaspoons of sugar and four bouillon cubes or 4 teaspoons of bouillon granules.
Step 2
Boil this mixture, stirring constantly.
Step 3
Cool the mixture once it has been brought to a boil and all of the ingredients have dissolved. Keep the mixture sterile. Avoid exposing it to any surfaces, skin or other materials that may harbor any amount of bacteria. Keep it covered to prevent contamination and let it cool for no more than eight minutes.
Step 4
Pour the mixture into sterilized flasks. Purchase sterilized flasks and avoid opening them and exposing them to microorganisms until immediately before they will be filled with the growing medium, or sterilize the flasks in a pressure cooker or oven. In a pressure cooker, sterilize the flasks for 15 minutes at 15 psi (pounds per square inch). For oven sterilization, put glassware in the oven for two to three hours at 350 degrees Fahrenheit.
Step 5
Cover the flasks and let them cool until the gelatin has set. The flasks may be refrigerated to encourage setting.

Step 6
Keep the flasks cool, ideally refrigerated, until the orchid seeds are ready to sow. For best results, the medium should be put to use within three days after you have made it.
0
0
求助
Abby Gill
2017年08月10日

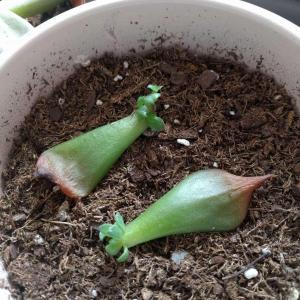
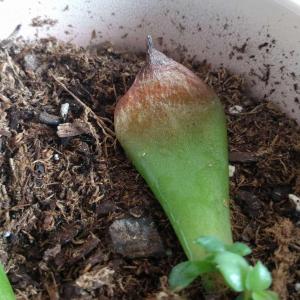
Two of my propogated leaves are starting to shrivel up at the ends. Their roots are about 2-4 millimeters long, and I spray them once daily. Am I watering them too much or too little? Should I start watering them normally once a week, or keep spraying them daily until they grow to a moderate size?


0
0
Aria:It's normal for a leaf to start to die as the roots are growing. I usually spray my leafs daily and sometimes even twice. Only thing I can think of is it's getting too much sun hence the quicker dying ends. I had a leaf shrivel up when I left it too long out in the sun, luckily it's still growing nicely
Ebunny:The main leaf will die off. Not sure about the watering.
文章
Miss Chen
2017年08月10日


Floribunda roses present clusters of two to three blooms on each cane, growing from 2 to 4 feet tall. These lovely specimens are a hybrid created by crossing hybrid tea roses with polyanthas. Bred to be hardy and disease-resistant, they require minimal maintenance. With just a little effort, you can have glorious blooms all season long.
Floribunda Rose Care
Step 1
Prune canes once leaf buds appear in the spring to stimulate plant growth. Cut each cane back by half. Use sharp scissors or clippers.
Step 2
Fertilize floribunda roses each spring once new growth appears. Use a rose-specific fertilizer and follow label directions carefully. Rose fertilizer is available as a liquid concentrate and as pellets. Liquid concentrate is mixed with water and poured at the base of the plant. Pellet form fertilizer is shaken on the soil around the plant. Either application is effective; pellets are applied less often than the liquid concentrate.
Step 3
Work shredded leaves, compost or other organic material into the ground around the rose bush. Do not disturb the plant's roots.

Step 4
Shovel a 1- to 3-inch layer of mulch on top of the soil surrounding the floribunda rose; this helps the plant retain moisture and limits weed growth. Avoid laying mulch up against the base of plant as that could cause stem rot.
Step 5
Water plant once or twice a week, supplementing the natural rainfall. Water deeply and aim for the base of the plant. Roses require 4-5 gallons of water per week during the growing season. Shallow watering may cause the development of weak roots.
Step 6
Prune the rose bush as flowers finish blooming. This will stimulate new growth. Once a flower is done blooming, cut back that cane. Perform the cut with sharp scissors or clippers and aim for a spot directly above a leaf bud. New growth will appear just below the cut.
0
0
文章
Miss Chen
2017年08月10日

Tree roses, also called standard roses, are bush roses that have been budded onto a tall stem or trunk. Tree roses grow up to 4 feet tall.

Types
Tree roses can be grafted from almost any rose variety. The most common types are hybrid tea, grandiflora and floribunda. Hybrid tea roses bloom on single stems and come in a vast array of colors. Floribunda roses are short, hardy bush roses that bloom in clusters. Grandiflora roses are like hybrid tea roses in their plant height and popularity as cut flowers, but have several blooms per stem and bloom more frequently than hybrid tea varieties.
Features
Prune tree roses according to the type of rose that is grafted onto the stem. Varieties that bloom only once per season should be pruned after flowering. Varieties that bloom repeatedly should be pruned during their dormant season.

Geography
Roses grow best in full sun and well-drained acidic soil with a pH between 5.5 and 7.0. Amend soil with organic matter prior to planting to encourage drainage and help prevent iron deficiency. Mulch after planting to a depth of 2 to 4 inches.

Types
Tree roses can be grafted from almost any rose variety. The most common types are hybrid tea, grandiflora and floribunda. Hybrid tea roses bloom on single stems and come in a vast array of colors. Floribunda roses are short, hardy bush roses that bloom in clusters. Grandiflora roses are like hybrid tea roses in their plant height and popularity as cut flowers, but have several blooms per stem and bloom more frequently than hybrid tea varieties.
Features
Prune tree roses according to the type of rose that is grafted onto the stem. Varieties that bloom only once per season should be pruned after flowering. Varieties that bloom repeatedly should be pruned during their dormant season.

Geography
Roses grow best in full sun and well-drained acidic soil with a pH between 5.5 and 7.0. Amend soil with organic matter prior to planting to encourage drainage and help prevent iron deficiency. Mulch after planting to a depth of 2 to 4 inches.
0
0
文章
Dummer. ゛☀
2017年08月10日

Boston ferns are fabulously popular houseplants. Hardy in USDA zones 9-11, they are kept indoors in pots in most regions. Capable of growing 3 feet (0.9 m) high and 4 feet (1.2 m) wide, Boston ferns can brighten any room with their lush green foliage. That’s why it can be so disheartening to see your vibrant green fern fronds turning black or brown. Keep reading to learn what causes a Boston fern with black fronds, and what to do about it.
Boston Fern Fronds Turning Black Isn’t Always Bad
There is one case in which a Boston fern with black fronds is perfectly natural, and it’s good to be able to spot it. You may see small black spots on the undersides of your fern’s leaves, lined up in regular rows. These spots are spores, and they’re the fern’s way of reproducing. Eventually, the spores will drop to the soil below and grow into reproductive structures. If you see these spots, don’t take any action! It’s a sign that your fern is healthy. Your fern will also experience some natural browning as it ages. As new growth emerges, the oldest leaves at the bottom of the fern will wither and turn brown to black to make way for new growth. This is totally normal. Cut away the discolored leaves to keep the plant looking fresh.
When Boston Fern Fronds Turning Black is Not Good
Boston fern fronds turning brown or black may also signal trouble, however. If your fern’s leaves are suffering from brown or black spots or strips, there may be nematodes in the soil. Add lots of compost to the soil – this will encourage the growth of beneficial fungi that should destroy the nematodes. If the infestation is bad, remove any infected plants. Small, but spreading, soft brown to black spots with an unpleasant odor are most likely a sign of bacterial soft rot. Destroy any infected plants.
Small, but spreading, soft brown to black spots with an unpleasant odor are most likely a sign of bacterial soft rot. Destroy any infected plants. Leaf tip burn manifests as browning and withering tips on fronds and leaves. Destroy any infected plants. Rhizoctonia Blight appears as irregular brownish-black spots that start near the crown of the fern but spread very rapidly. Spray with fungicide.

Boston Fern Fronds Turning Black Isn’t Always Bad
There is one case in which a Boston fern with black fronds is perfectly natural, and it’s good to be able to spot it. You may see small black spots on the undersides of your fern’s leaves, lined up in regular rows. These spots are spores, and they’re the fern’s way of reproducing. Eventually, the spores will drop to the soil below and grow into reproductive structures. If you see these spots, don’t take any action! It’s a sign that your fern is healthy. Your fern will also experience some natural browning as it ages. As new growth emerges, the oldest leaves at the bottom of the fern will wither and turn brown to black to make way for new growth. This is totally normal. Cut away the discolored leaves to keep the plant looking fresh.

When Boston Fern Fronds Turning Black is Not Good
Boston fern fronds turning brown or black may also signal trouble, however. If your fern’s leaves are suffering from brown or black spots or strips, there may be nematodes in the soil. Add lots of compost to the soil – this will encourage the growth of beneficial fungi that should destroy the nematodes. If the infestation is bad, remove any infected plants. Small, but spreading, soft brown to black spots with an unpleasant odor are most likely a sign of bacterial soft rot. Destroy any infected plants.

Small, but spreading, soft brown to black spots with an unpleasant odor are most likely a sign of bacterial soft rot. Destroy any infected plants. Leaf tip burn manifests as browning and withering tips on fronds and leaves. Destroy any infected plants. Rhizoctonia Blight appears as irregular brownish-black spots that start near the crown of the fern but spread very rapidly. Spray with fungicide.
0
0
文章
Colour_
2017年08月09日

怎样使#酒瓶兰 安全越冬
①创造一个阳光充足、空气流通、水分充足、养料均匀的良性生态环境。提高抗寒能力。
a.在4~11月生长期内,花盆的位置和朝向要纹丝不动,相邻的花木也不轻易迁移,保证植株占有一块固定的领地。
b.观察盆土的干湿、叶色的深浅,适时适量地浇水施肥,既不积水,也不失水;肥料成分要搭配好,不施生肥和浓肥。
c.注意虫情,做到每月喷1次乐果或敌杀死,每年喷1~2次百菌清。
②加强保温措施。1~2月移入不加温的玻璃温室后,要注意:
a.置于室内阳光充足处,使植株在晴日能整天晒到太阳。
b.防止冷空气侵入室内,,维持室温在3以上。遇到天气骤变,温度过低,应及时采取临时增温措施。
c.1~3月控水从严,每月只需浇1次与室温相同的透水。
d.坚持清明后出室。若在北方居室越冬,则花盆位置既要选择向阳处,又要远离暖气片。若在南方居室内越冬,有空调者应避开空调直接作用区,无空调者,最好将盆株置于自制简易保温箱内。
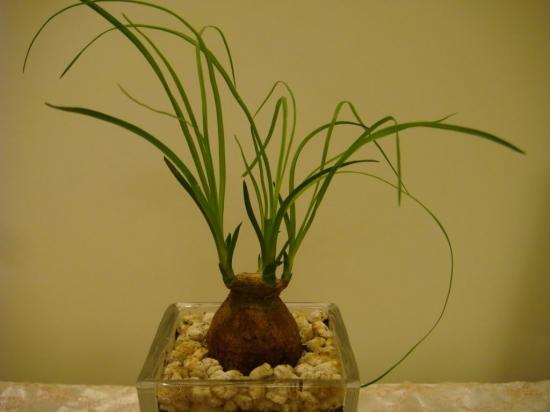
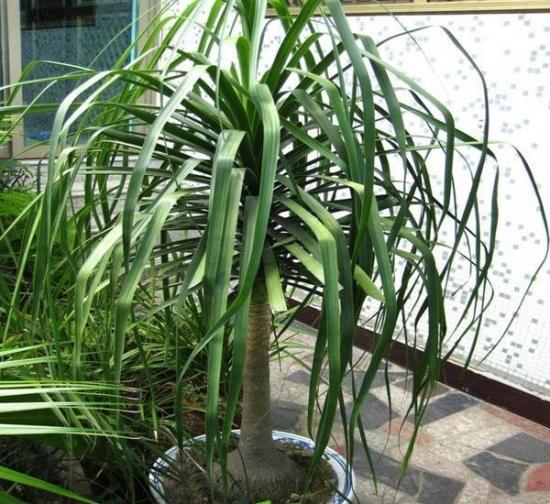
拓展:酒瓶兰的树型奇特有趣,习性强健,能耐干旱与低温;株高达2—3米,细长的绿叶在茎的前端向四方扩展。其最大的特征是:茎基肥大如酒瓶,老株的茎基直径可达1米以上,肥大的茎基可储存水分,耐干旱力特别强。要养好酒瓶兰,应掌握以下要点:
①日照与温度。日照必须充足,耐寒性较其他观叶类植株优秀,但冬季必须移到室内,温度保持在10℃以上。
②浇水。浇水以少量为宜,但不能断水由于植株生长的速度很快,所以在夏季和气候干燥的地方,每天需要浇1次以上的水,浇水时特别注意不可过度潮湿,避免根部腐烂。
③培养土。像仙人掌类植物一样,宜种植在排水良好的培养土中。以沙质壤土为主,加入20%—30%的腐叶土。
④肥料。夏季生长期间,需施2次腐熟的豆饼水或油粕。
⑤移植、繁殖。酒瓶兰生长缓慢,不易结实,必须每隔2—3年移植1次。一般采用播种法繁殖,将种子放置在有肥沃沙质壤土的浅盆中。
①创造一个阳光充足、空气流通、水分充足、养料均匀的良性生态环境。提高抗寒能力。
a.在4~11月生长期内,花盆的位置和朝向要纹丝不动,相邻的花木也不轻易迁移,保证植株占有一块固定的领地。
b.观察盆土的干湿、叶色的深浅,适时适量地浇水施肥,既不积水,也不失水;肥料成分要搭配好,不施生肥和浓肥。
c.注意虫情,做到每月喷1次乐果或敌杀死,每年喷1~2次百菌清。
②加强保温措施。1~2月移入不加温的玻璃温室后,要注意:
a.置于室内阳光充足处,使植株在晴日能整天晒到太阳。
b.防止冷空气侵入室内,,维持室温在3以上。遇到天气骤变,温度过低,应及时采取临时增温措施。
c.1~3月控水从严,每月只需浇1次与室温相同的透水。
d.坚持清明后出室。若在北方居室越冬,则花盆位置既要选择向阳处,又要远离暖气片。若在南方居室内越冬,有空调者应避开空调直接作用区,无空调者,最好将盆株置于自制简易保温箱内。

拓展:酒瓶兰的树型奇特有趣,习性强健,能耐干旱与低温;株高达2—3米,细长的绿叶在茎的前端向四方扩展。其最大的特征是:茎基肥大如酒瓶,老株的茎基直径可达1米以上,肥大的茎基可储存水分,耐干旱力特别强。要养好酒瓶兰,应掌握以下要点:
①日照与温度。日照必须充足,耐寒性较其他观叶类植株优秀,但冬季必须移到室内,温度保持在10℃以上。
②浇水。浇水以少量为宜,但不能断水由于植株生长的速度很快,所以在夏季和气候干燥的地方,每天需要浇1次以上的水,浇水时特别注意不可过度潮湿,避免根部腐烂。
③培养土。像仙人掌类植物一样,宜种植在排水良好的培养土中。以沙质壤土为主,加入20%—30%的腐叶土。
④肥料。夏季生长期间,需施2次腐熟的豆饼水或油粕。
⑤移植、繁殖。酒瓶兰生长缓慢,不易结实,必须每隔2—3年移植1次。一般采用播种法繁殖,将种子放置在有肥沃沙质壤土的浅盆中。

0
0
文章
Dummer. ゛☀
2017年08月09日

Identification
Cistus albidus grows up to 1.5m in height, although most plants are little more than half this height. The hairy pale grey-green leaves are oblong to elliptical and have three prominent veins. The flowers are 4 to 6 cm across and have five purplish-pink petals backed by five sepals.
The leaves of cistus plants are very tough. The flowers, by comparison, seem very fragile and have wafer-thin, crumpled looking petals: they are nontheless beautiful for that, and it is easy to see why cistus is considered such a well-loved addition to northern European gardens.
Habitat
In the UK these shrubs are much-loved garden plants, but it is in the Mediterranean region that they really come into their own: vast tracts of hillsides (particularly in Portugal and Spain) are smothered with various species of these members of the Rockrose family.
Blooming times
Grey-leaved Cistus produces flowers from March to June and can be found in maquis, garrigue, open woodland, on steep slopes and rocky ground. Some of the other cistus species to be found in the Mediterranean include Cistus ladanifer (Gum Cistus), and Cistus salviifoloius (Sage-leaved Cistus).
Cistus albidus grows up to 1.5m in height, although most plants are little more than half this height. The hairy pale grey-green leaves are oblong to elliptical and have three prominent veins. The flowers are 4 to 6 cm across and have five purplish-pink petals backed by five sepals.

The leaves of cistus plants are very tough. The flowers, by comparison, seem very fragile and have wafer-thin, crumpled looking petals: they are nontheless beautiful for that, and it is easy to see why cistus is considered such a well-loved addition to northern European gardens.

Habitat
In the UK these shrubs are much-loved garden plants, but it is in the Mediterranean region that they really come into their own: vast tracts of hillsides (particularly in Portugal and Spain) are smothered with various species of these members of the Rockrose family.

Blooming times
Grey-leaved Cistus produces flowers from March to June and can be found in maquis, garrigue, open woodland, on steep slopes and rocky ground. Some of the other cistus species to be found in the Mediterranean include Cistus ladanifer (Gum Cistus), and Cistus salviifoloius (Sage-leaved Cistus).
0
0
文章
Colour_
2017年08月08日

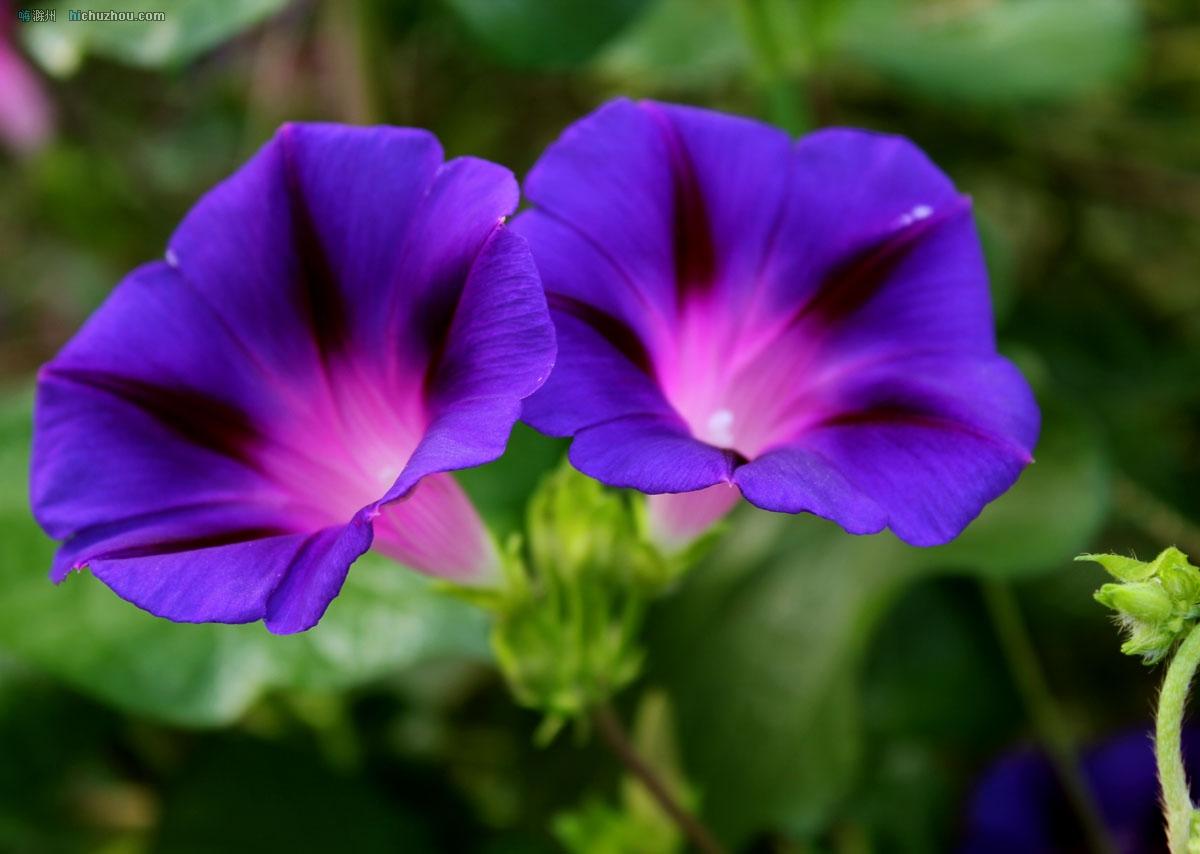
#牵牛花 ,原名:牵牛,别名:喇叭花、筋角拉子、大牵牛花、勤娘子,拉丁文名:Pharbitis nil (L.) Choisy.旋花科、牵牛属一年生蔓性缠绕草本花卉。
牵牛花在夏季早晨4时开花,花喇叭形,意在催农民牵牛犁地,而得名喇叭花。其花清晨花开殊盛,朝日而蔫,又名朝颜花。普通牵牛花的花语有虚幻的爱情、冷静;矮牵牛花语:安全感、与你同心。
形态特征
一年生缠绕草本,茎上被倒向的短柔毛及杂有倒向或开展的长硬毛。叶宽卵形或近圆形,深或浅的3裂,偶5裂,长4-15厘米,宽4.5-14厘米,基部圆,心形,中裂片长圆形或卵圆形,渐尖或骤尖,侧裂片较短,三角形,裂口锐或圆,叶面或疏或密被微硬的柔毛;叶柄长2-15厘米,毛被同茎。
花腋生,单一或通常2朵着生于花序梗顶,花序梗长短不一,长1.5-18.5厘米,通常短于叶柄,有时较长,毛被同茎;苞片线形或叶状,被开展的微硬毛;花梗长2-7毫米;小苞片线形;萼片近等长,长2-2.5厘米,披针状线形,内面2片稍狭,外面被开展的刚毛,基部更密,有时也杂有短柔毛;花冠漏斗状,长5-8(-10)厘米,蓝紫色或紫红色,花冠管色淡;雄蕊及花柱内藏;雄蕊不等长;花丝基部被柔毛;子房无毛,柱头头状。
蒴果近球形,直径0.8-1.3厘米,3瓣裂。种子卵状三棱形,长约6毫米,黑褐色或米黄色,被褐色短绒毛。
牵牛花生性强健,喜气候温和、光照充足、通风适度,对土壤适应性强,较耐干旱盐碱,不怕高温酷暑,属深根性植物,地栽土壤宜深厚。
生长习性
生于海拔100-200(-1600)米的山坡灌丛、干燥河谷路边、园边宅旁、山地路边,或为栽培。
地理分布
原产热带美洲,我国各地普遍栽培,供观赏。我国除西北和东北的一些省外,大部分地区都有分布。
紫色牵牛花
紫色牵牛花 (更多图片)
亚种种类
牵牛花约有60多种。常见栽培的有以下三类:
裂叶牵牛,叶具深三裂,花中型1朵至3朵腋生,有莹蓝、玫红或白色。
圆叶牵牛,叶阔心脏形,全缘,花型小,有白、玫红、莹蓝等色。
大花牵牛,也是当前最流行的品种;叶大柄长,具三裂,中央裂片较大,叶易长具不规则的黄白斑块。花1朵至3朵腋生,总梗短于叶柄,花大型,花径可达10厘米或更大,原产亚洲和非洲热带。本种在日本栽培最盛,称朝颜花,并选育出众多园艺品种,花型变化多样,花色丰富多彩,各地广为流行。
牵牛花知识扩展
牵牛花花色鲜艳美丽。除栽培供观赏外,种子为常用中药,名丑牛子(云南)、黑丑、白丑、二丑(黑、白种子混合),入药多用黑丑,白丑较少用。有泻水利尿,逐痰,杀虫的功效。
中药黑丑,也就是黑色的牵牛花的种子,研成细粉加入鸡蛋清于睡前涂抹在患处,第二天清晨用清水洗去,连续使用一星期,有消除雀斑的功效。也可以用水果李子的种子代替黑牵牛花的种子,效果是一样的。特别注意的是,黑丑是有一定的毒性,千万不要口服。
0
1
文章
Colour_
2017年08月08日

#扶桑花 的养护技巧
(1)土壤:扶桑花对土壤要求不高,除盐碱土外一般均可适应。但以疏松、肥沃、排水良好的微酸性壤土或粘土壤为好。上盆的土壤可用壤土4份、粪干1份配成营养土。
(2)光照:扶桑花如光照不足会使花蕾脱落,花朵缩小,花色暗淡。因此,扶桑花每日要有8小时以上的光照。但是,在盛夏需遮阳,以防止烈日灼射植株。早春培土一次,每季除草、培土一次。每年十月后,盆栽朱槿要移至室温在15~22℃的室内培植,入室后要注意通风和适当光照。
(3)浇水:扶桑花浇水要充足。通常每天浇水一次,以浇透为度。伏天每天早、晚各浇水一次,并需对地面喷水多次,以降温和增加空气的湿度,防止花叶早落。冬季则应减少浇水、停止施肥,使之安全过冬。
(4)施肥:扶桑花对“肥”的需要量较大,圃地育苗或盆植时,每株施猪干粪肥50克,与磷肥、腐熟堆肥适量拌合作为基肥;每月追施0.2%尿素水溶液及磷肥为主的淡薄肥2~3次。如遇多雨季节,可改施复合颗粒肥于根部,每株100克。
(5)换盆及修剪:盆栽用土宜选用疏松、肥沃的沙质壤土,每年早春4月移出室外前,应进行换盆。换盆时要做3件事:一是换上新的培养土;二是剪去部分过密的卷曲的须根;三是施足基肥,盆底略加磷肥。
(6)病虫害:扶桑花病虫害较少,有时因通风、光照差会发生蚜虫及介壳虫。发现后应立即捕杀,或用乐果喷洒杀灭。

扶桑花的注意事项
1、控肥:从10月份开始停止施肥,避免贪青,贪花,不利生理休眠。
2、控水:扶桑花在室内过冬期间,盆土要偏干忌湿,因此要控制浇水,仅使盆土保持略湿即可,一般5~7天浇一次水,水量不宜过多,以防低温高湿引起烂根死亡。
3、控温:扶桑花的适宜休眠温度为5℃~15℃。若高于15℃,会影响扶桑的休眠,而影响花的开放,低于5℃,就会遭受冻害。
(1)土壤:扶桑花对土壤要求不高,除盐碱土外一般均可适应。但以疏松、肥沃、排水良好的微酸性壤土或粘土壤为好。上盆的土壤可用壤土4份、粪干1份配成营养土。
(2)光照:扶桑花如光照不足会使花蕾脱落,花朵缩小,花色暗淡。因此,扶桑花每日要有8小时以上的光照。但是,在盛夏需遮阳,以防止烈日灼射植株。早春培土一次,每季除草、培土一次。每年十月后,盆栽朱槿要移至室温在15~22℃的室内培植,入室后要注意通风和适当光照。
(3)浇水:扶桑花浇水要充足。通常每天浇水一次,以浇透为度。伏天每天早、晚各浇水一次,并需对地面喷水多次,以降温和增加空气的湿度,防止花叶早落。冬季则应减少浇水、停止施肥,使之安全过冬。
(4)施肥:扶桑花对“肥”的需要量较大,圃地育苗或盆植时,每株施猪干粪肥50克,与磷肥、腐熟堆肥适量拌合作为基肥;每月追施0.2%尿素水溶液及磷肥为主的淡薄肥2~3次。如遇多雨季节,可改施复合颗粒肥于根部,每株100克。
(5)换盆及修剪:盆栽用土宜选用疏松、肥沃的沙质壤土,每年早春4月移出室外前,应进行换盆。换盆时要做3件事:一是换上新的培养土;二是剪去部分过密的卷曲的须根;三是施足基肥,盆底略加磷肥。
(6)病虫害:扶桑花病虫害较少,有时因通风、光照差会发生蚜虫及介壳虫。发现后应立即捕杀,或用乐果喷洒杀灭。

扶桑花的注意事项
1、控肥:从10月份开始停止施肥,避免贪青,贪花,不利生理休眠。
2、控水:扶桑花在室内过冬期间,盆土要偏干忌湿,因此要控制浇水,仅使盆土保持略湿即可,一般5~7天浇一次水,水量不宜过多,以防低温高湿引起烂根死亡。
3、控温:扶桑花的适宜休眠温度为5℃~15℃。若高于15℃,会影响扶桑的休眠,而影响花的开放,低于5℃,就会遭受冻害。
0
1
文章
Miss Chen
2017年08月08日


Whether you transplant small 'Black' hens and chicks (Sempervivum 'Black') -- hardy from U.S. Department of Agriculture plant hardiness zones 4 through 9 -- or a larger succulent such as a prickly pear cactus (Opuntia spp.) -- hardy from USDA zones 3b through 11, the keys to success lie in proper soil with good drainage. Therefore, you'll probably spend more time preparing the new growing area than you will transplanting your succulents. Also check each succulent's light requirements before you transplant because a succulent variety may need full sun or shade.
Cactus
credit: fotokate/iStock/Getty Images
Some succulents spread, and their growth habits indicate how much space they need.
Check Drainage
Many types of succulents exist, and what makes a plant a succulent is its ability to draw and store water in its tissues. Succulents also don't tolerate having wet roots, however. So the transplant location you choose for them should have good drainage. Avoid transplanting succulents to low spots.
Check a site's drainage by digging a hole in it when its topsoil is moist. Make the hole 12 inches in diameter and 12 inches deep. Fill the hole with water, and monitor its drainage. If water drains from the hole in fewer than three hours, then the soil has good drainage. If it takes three to 12 hours to drain, then the drainage is OK for most landscaping plants, but you still could improve the drainage. A hole that takes more than 12 hours to drain means the soil has poor drainage that definitely needs to be improved.
Fix Drainage in a Dry Climate
If you live in a dry climate, one way to improve soil drainage is to add a layer of gravel in the bottom of your desired planting area. Dig about 2 feet deep in the entire planting area. Place a 12-inch-thick layer of gravel in the excavated site, and follow it with a few inches of the soil you removed while digging. Over the top of the soil, place 6 to 8 inches of sharp sand. Afterward, the site will offer good drainage for succulents such as prickly pear.
Fix Drainage in a Wet Climate
If you live in a wet climate, create good drainage with an elevated "rock garden." On top of the current soil, set a layer of large, 8- to 12-inch-high rocks. Add coarse sand or pea gravel on the rocks, and then wet the site. Allow it to dry for a few days. Finally, add 3 to 4 inches of scree. A scree suggested by Urban Horticulture Program Assistant John McLaughlin, Ph.D., in an article on the University of Florida IFAS Extension website is a mixture that is 1 part Canadian sphagnum peat, 1 part potting soil, 2 parts course sand and 6 parts bonsai or poultry grit, which is small pebbles of porous granite or other stone. Mix the scree ingredients in a wheelbarrow, and then dump the mixture on top of the sand or pea gravel. Spread the scree evenly across the pile's top. Then cover it with a 1-inch-thick layer of 1/2-inch gravel.

Plant Properly
The temperature at transplanting time should be at least 70 degrees Fahrenheit and not lower than 50 F, especially if you transplant small succulents. Wear a pair of thick, leather work gloves to avoid injuries from succulents' prickly points.
If a succulent you want to transplant is in the ground, then use a trowel or shovel to loosen the soil, sand or gravel several inches from the plant's perimeter, and gently remove the plant from the ground. Lightly brush soil from the roots.
Dig into the new planting site's soil material, making a hole deep and wide enough for the root spread of the succulent you want to put in the hole. Place the root part of the plant in the hole, and allow the fleshy or stem parts of the plant to remain above the soil line. Spread the roots, and cover them with the site's soil material, making the material even with the surrounding ground's surface. Tamp the soil. Allow the plant to dry out and to repair its roots for about one week before watering. Add water once each week thereafter. It's time to water when you stick your finger a few inches into the surrounding soil and find the soil is dry.
1
3
文章
Colour_
2017年08月08日

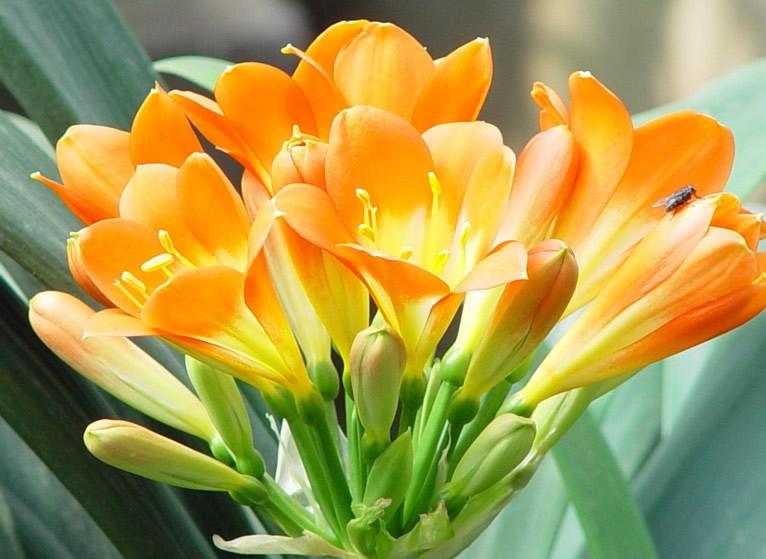
君子兰主要通过种子播种进行繁殖。
#君子兰 的花期是入冬后至次年3-4月份,花后种子成熟也需9-10个月,故君子兰的播种宜在11-12月份。播种前要进行选种,将空瘪发育不良的种子剔除。可用一般花盆播种,下面用粗沙砾或碎石砾铺成2厘米厚的排水层,然后铺一层腐叶土和河沙混合的培养土,厚约4-5厘米,在铺上0.5-1厘米的河沙作播种层。点播时,株距2厘米,然后用沙覆盖。覆土后浸1次水,盖上玻璃盖。播后保持20℃-25℃的气温有利发芽。
从发芽到长出第一片叶需2个月,以后要揭开玻璃盖通风,并逐渐去掉玻璃盖。播后90天便可移栽。移植时,先用竹签或竹筷扎孔,将肉质根插入土中,深度以埋住根茎露出种子为宜,同时注意叶片朝向一致。移后浇1次透水,过数日缓苗后再接受光照。苗期温度控制在15℃-20℃,冬春可见阳光,春、夏季应在散射光下生长,入秋后即可定植栽培。
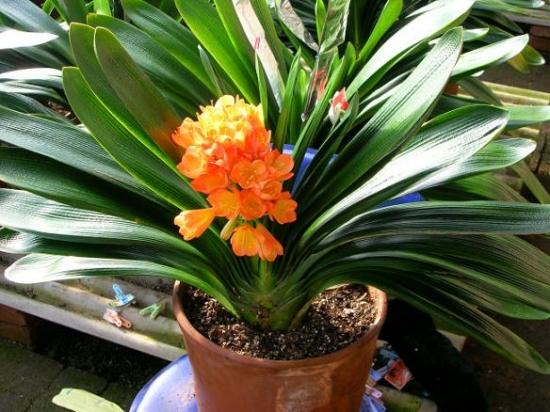
君子兰分株繁殖,需做好以下工作:
①家庭盆栽宜用泥瓦盆,这种盆透气性好,有利于植株生长。
②准备好已消毒过的介质土。如用腐殖土混合细沙的,腐殖土要用高锰酸钾1000-2000倍水溶液喷洒消毒;细河沙也要用开水烫洗消毒,避免幼苗受病菌感染腐烂。
③准备少量木炭粉涂抹伤口,供吸潮防腐之用。
④分株时,将君子兰从盆中磕出来,拍松盆土,理顺根系,找出可以分株的腋芽:如果子株长在母株的外沿,株体较小,可以一手握住鳞茎部分,另一手捏住子株基部,轻轻一掰,就能将子株掰离母株;如果子株粗壮,则用锋利的刀将其切下。然后用于木炭粉涂抹伤口,以吸干流液,防止腐烂。让子株、母株在室内晾干后再种植,种植深度以埋住子株的基部假鳞茎为度,靠植株的部位要使其略高些,并盖上已消毒的沙土。种好后过2天再浇1次透水,2周后待伤口愈合时,再加盖一层培养土。一般需1-2个月才能生出新根,1-2年后便可开花。
0
0
文章
Colour_
2017年08月08日


一、盆栽#风信子
可用腐叶土、园土和沙土各1/3配制培养土,栽植深度以鳞茎的肩部与土面等平为宜。栽后充分浇水,放人冷室内,室温保持在4 ~6℃,促使其发根。待花茎开始生长时须将花盆移到温暖处。
日常养护:风信子喜光照充足和比较湿润的环境,因此,生长期间要放置在阳光充足的地方,同时要经常保持盆土湿润。抽出花葶后每天向叶面上喷水1~2次,以增加空气湿度。风信子正常花期在3―4月间,开花前后各施1~2次腐熟的稀薄液肥。花后施肥有助促进子球生长。6月气温渐热,叶片枯黄,这时应将鳞茎从盆内磕出,略加干燥,放室内通风阴凉处贮藏。
二、地栽风信子
宜选择土质疏松肥沃、排水良好的地方,于9~10月种植。种植前要耕翻土地,并施人大量腐熟有机肥和少量骨粉。花坛栽植时株距约为15厘米,栽后覆土5―8厘米,充分浇水,并盖草帘保墒。冬季不需要防寒保护。一般每隔3―4年挖掘1次分球后再种。在长江流域繁殖主要用分球繁殖法。夏季,风信子植株枯萎进入休眠期,将其从土中挖出,晾干贮藏,到秋季9―10月栽植前,将子球与母球分离,另行栽植即可。
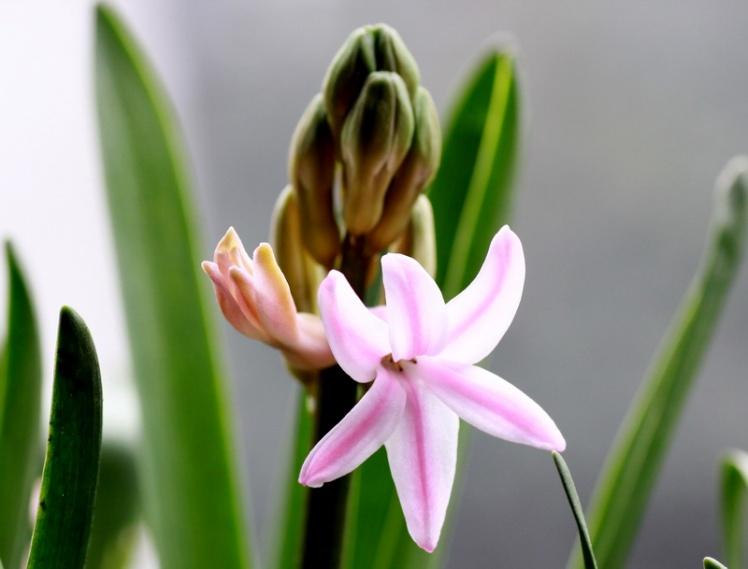
注意事项:
①子球不能在夏季挖出时分离,否则容易腐烂。
②栽培后期要节水节肥,避免鳞茎“裂底”发生腐烂。
③适时采收,早则生长不充实;迟则遇雨季,会使鳞茎不易阴干,影响贮藏。
④除去病球,减少传染。
为促使其母球产生更多的小子球,可于休眠期在母鳞茎底部的鳞茎盘上用小刀划出十字形或米字形伤口,埋入沙中2―3周,待伤口愈合后,再栽人培养土中。夏末,母鳞茎盘四周就会产生许多小鳞茎,待小鳞茎长到1厘米左右时,就可以分开栽培了。

0
0


