文章
Miss Chen
2017年08月08日

Flaunting 1-foot night-blooming flowers, dragon fruit plants (Hylocereus and Selenicereus spp.) more closely resemble the princess in a fairy tale than the monster. The "dragon" in their name actually refers to the dark pink, yellow, or green scales which protect their fruits. With white, pink, red or magenta pulp dotted with black seeds, those fruits ripen one to two months after the plants bloom. Climbing cacti with aerial roots, dragon fruits can live outdoors in U.S. Department of Agriculture plant hardiness zones 9 to 12 and be cultivated as houseplants elsewhere.

Cut and Dried
Dragon fruit plants are usually started from cuttings rather than seeds, since cuttings flower more quickly. Select three or four sections of stem that are 6 to 15 inches long. When severing the sections from the mother plant, cut at a slight slant. Allow the cuttings to lie, uncovered, in a cool, dark place for a week until their cut edges have hardened. Then insert the bases of the cuttings about 2 inches deep into a 1-gallon pot filled with slightly damp cactus soil, packing the soil tightly around them until they stand upright. Keep the pot in a bright spot out of direct sun, misting the cuttings every other day, until new growth indicates that they have rooted. Then move the cuttings into partial sun, shifting them gradually into full sun about four months after their rooting.
Stakeout
Wait until the cuttings are at least four months old before planting them outdoors. Choose a site in full sun near a sturdy support. Commercial growers frequently use posts that are 4 to 6 inches in diameter and about 5 feet high after they have been set in the ground. Plant three or four rooted cuttings around the stake, replacing about one-third of the soil with composted manure and another third with sand. Tie the cuttings to the stake with garden twine, water them well and mulch them with several inches of chopped bark, keeping the mulch at least 8 inches away from their stems. Continue to water the plant as necessary, making sure it gets at least 1/2 to 1 inch of water per week. Rake the mulch back to strew about 4 pounds of composted manure and 1/4 pound of 6-6-6 granular organic fertilizer around the stake in June. Repeat the 1/4-pound fertilizer application once every two months until October.

Go to Pot
To grow a dragon fruit plant indoors, fill a 16- to 18-inch-diameter pot with cactus potting soil, and embed a heavy stake in its center. After planting three or four rooted cuttings around that stake, tie them to it and and water them thoroughly. Place the pot near a sunny window and water it again only when the surface of its soil feels dry to the touch. Fertilize an indoor plant monthly with 10-10-5 liquid plant food in April and May, mixing 1 tablespoon of the plant food per gallon of water. Afterwards, feed it monthly with 0-10-10 liquid plant food from June until October, using the same amount. Don't fertilize the plant at all from November through March.
Train Your Dragon
As the cuttings grow, either indoors or outdoors, prune off all their side-shoots until their stems reach the top of the stake. Then snip off the tips of those stems so that they will branch out, with those branches dangling down from the stake's crown like a head of hair. After a mature plant has finished flowering in the fall, prune out weak or dead growth and the branches that bloomed that year, allowing new ones to dangle down to replace them.

Cut and Dried
Dragon fruit plants are usually started from cuttings rather than seeds, since cuttings flower more quickly. Select three or four sections of stem that are 6 to 15 inches long. When severing the sections from the mother plant, cut at a slight slant. Allow the cuttings to lie, uncovered, in a cool, dark place for a week until their cut edges have hardened. Then insert the bases of the cuttings about 2 inches deep into a 1-gallon pot filled with slightly damp cactus soil, packing the soil tightly around them until they stand upright. Keep the pot in a bright spot out of direct sun, misting the cuttings every other day, until new growth indicates that they have rooted. Then move the cuttings into partial sun, shifting them gradually into full sun about four months after their rooting.
Stakeout
Wait until the cuttings are at least four months old before planting them outdoors. Choose a site in full sun near a sturdy support. Commercial growers frequently use posts that are 4 to 6 inches in diameter and about 5 feet high after they have been set in the ground. Plant three or four rooted cuttings around the stake, replacing about one-third of the soil with composted manure and another third with sand. Tie the cuttings to the stake with garden twine, water them well and mulch them with several inches of chopped bark, keeping the mulch at least 8 inches away from their stems. Continue to water the plant as necessary, making sure it gets at least 1/2 to 1 inch of water per week. Rake the mulch back to strew about 4 pounds of composted manure and 1/4 pound of 6-6-6 granular organic fertilizer around the stake in June. Repeat the 1/4-pound fertilizer application once every two months until October.

Go to Pot
To grow a dragon fruit plant indoors, fill a 16- to 18-inch-diameter pot with cactus potting soil, and embed a heavy stake in its center. After planting three or four rooted cuttings around that stake, tie them to it and and water them thoroughly. Place the pot near a sunny window and water it again only when the surface of its soil feels dry to the touch. Fertilize an indoor plant monthly with 10-10-5 liquid plant food in April and May, mixing 1 tablespoon of the plant food per gallon of water. Afterwards, feed it monthly with 0-10-10 liquid plant food from June until October, using the same amount. Don't fertilize the plant at all from November through March.
Train Your Dragon
As the cuttings grow, either indoors or outdoors, prune off all their side-shoots until their stems reach the top of the stake. Then snip off the tips of those stems so that they will branch out, with those branches dangling down from the stake's crown like a head of hair. After a mature plant has finished flowering in the fall, prune out weak or dead growth and the branches that bloomed that year, allowing new ones to dangle down to replace them.
0
0
文章
Miss Chen
2017年08月08日

Christmas Cacti are notoriously difficult to root. This article might help you in rooting pieces for new plants or just rooting another in the same pot with the parent plant.

Root A Christmas Cactus House Plant
Step 1
Sometimes a large Christmas cactus will start to fall apart. In this case you can take the large parts that have fallen apart from the big plant and root them. You can also try cutting a large part off of a big cactus and rooting it. In any case, you need a big piece of cactus to root a new plant. The picture of the cactus is one that I rooted. It is in the pot with the parent plant. The piece I rooted is about 10" wide and 7" tall. Smaller piece usually don't root.
Step 2
Place the piece of cactus in a really good potting soil for indoor plants. Use new, store bought, potting soil. Place the piece into the pot with the soil and lightly pack the soil around the stem until the piece will stand up on it's own. Always take a cutting that has at least three leaves for the stem. Bury at least one leaf under the soil. The stem needs to be long enough to grow roots from.
Step 3
Keep the soil moist, but not wet. Christmas cactus are succulents and not a true cacti. They grown on the floor of forests and in tree hollows and arms where it is moist. So don't let the soil dry out completely.

Step 4
The cutting will wilt and shrivel and look like it is going to die. This always happens. The cutting might die, but just keep caring for it.
Step 5
When the cutting finally starts to take root, it may have been two months or so. You will notice that the stalk or stem has greened up. The outer leaves will still be shriveled and wilted. Just keep watering the plant. Just leave the wilted leaves alone even though you may want to cut them off. The leaves are alive and as the root system grows they will green up and puff up into healthy leaves.

Root A Christmas Cactus House Plant
Step 1
Sometimes a large Christmas cactus will start to fall apart. In this case you can take the large parts that have fallen apart from the big plant and root them. You can also try cutting a large part off of a big cactus and rooting it. In any case, you need a big piece of cactus to root a new plant. The picture of the cactus is one that I rooted. It is in the pot with the parent plant. The piece I rooted is about 10" wide and 7" tall. Smaller piece usually don't root.
Step 2
Place the piece of cactus in a really good potting soil for indoor plants. Use new, store bought, potting soil. Place the piece into the pot with the soil and lightly pack the soil around the stem until the piece will stand up on it's own. Always take a cutting that has at least three leaves for the stem. Bury at least one leaf under the soil. The stem needs to be long enough to grow roots from.
Step 3
Keep the soil moist, but not wet. Christmas cactus are succulents and not a true cacti. They grown on the floor of forests and in tree hollows and arms where it is moist. So don't let the soil dry out completely.

Step 4
The cutting will wilt and shrivel and look like it is going to die. This always happens. The cutting might die, but just keep caring for it.
Step 5
When the cutting finally starts to take root, it may have been two months or so. You will notice that the stalk or stem has greened up. The outer leaves will still be shriveled and wilted. Just keep watering the plant. Just leave the wilted leaves alone even though you may want to cut them off. The leaves are alive and as the root system grows they will green up and puff up into healthy leaves.
0
0
文章
Colour_
2017年08月08日

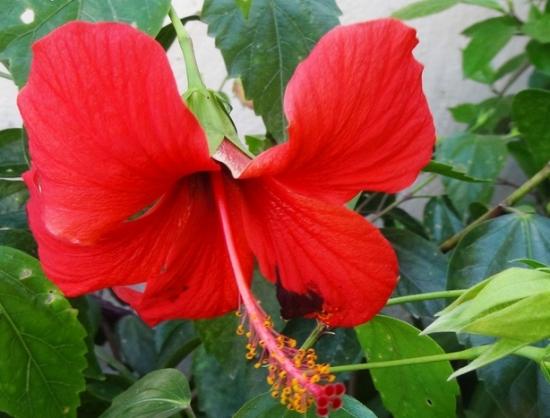
#扶桑 又名朱槿,为常绿灌木,扶桑开出的花优美且艳丽,极具观赏价值,那么扶桑该如何养殖呢?通过下文您就能找到相关信息。
扶桑花的养殖方法
扶桑花一般用扦插法进行繁殖。
1、挑选土地:扶桑花适合种植在温暖湿润的地方, 因此在选地时应当尽量选择土壤肥沃,且排水性能好的土壤,土壤还应呈现弱碱性,更利于扶桑花成长。
2、扦插:在5~6月份选用一年生的枝条,粗细均匀,插穗长度在10厘米左右,将上半部分剔除一般叶片,并插进粗砂之中,然后一次性浇水通透,每株苗之间间距在4厘米左右。同时为了保存空气的温度,可进行大棚处理,即覆盖薄膜。大约在半个月后生根,一个月后即可回盆。室内扦插可用沙土为基质,效果更佳。寒冷季节特别需要注意保暖措施,温度控制在25摄氏度左右,插入盆中后需定时浇水,每天喷水2次,早晚各一次,1个多月便生根,一个月上盆,成活率在60%左右。
3、移苗上盆:待扶桑花生根之后即可上盆,盆土选择为4份沙壤土以及1份粪土,经过中和拌匀后,在底部施加基础肥料,然后将其移栽进去,每天定时浇水1次,并通过一定的遮阴处理,待苗长好后,放在阳光充足的地方,一般来说换盆时间为2到3年,春末及夏初是换盆的最好时段。
注:无论是室外栽培还是室内养护,在扦插初期都要经过遮阴处理,因为这段时间的管理能够保证一定的空气湿度,并能将温度维持在适合扶桑花生长的温度。当然也要保证有一定的光照。每隔半月追肥一次,后期则需要注意通风,施肥不应过勤。值得注意的是,扶桑花管理过程中对温度的管理尤其重要。花期的长短,都与此相关。

3
1
文章
Colour_
2017年08月08日

#扶桑花 的养护技巧
(1)土壤:扶桑花对土壤要求不高,除盐碱土外一般均可适应。但以疏松、肥沃、排水良好的微酸性壤土或粘土壤为好。上盆的土壤可用壤土4份、粪干1份配成营养土。
(2)光照:扶桑花如光照不足会使花蕾脱落,花朵缩小,花色暗淡。因此,扶桑花每日要有8小时以上的光照。但是,在盛夏需遮阳,以防止烈日灼射植株。早春培土一次,每季除草、培土一次。每年十月后,盆栽朱槿要移至室温在15~22℃的室内培植,入室后要注意通风和适当光照。
(3)浇水:扶桑花浇水要充足。通常每天浇水一次,以浇透为度。伏天每天早、晚各浇水一次,并需对地面喷水多次,以降温和增加空气的湿度,防止花叶早落。冬季则应减少浇水、停止施肥,使之安全过冬。
(4)施肥:扶桑花对“肥”的需要量较大,圃地育苗或盆植时,每株施猪干粪肥50克,与磷肥、腐熟堆肥适量拌合作为基肥;每月追施0.2%尿素水溶液及磷肥为主的淡薄肥2~3次。如遇多雨季节,可改施复合颗粒肥于根部,每株100克。
(5)换盆及修剪:盆栽用土宜选用疏松、肥沃的沙质壤土,每年早春4月移出室外前,应进行换盆。换盆时要做3件事:一是换上新的培养土;二是剪去部分过密的卷曲的须根;三是施足基肥,盆底略加磷肥。
(6)病虫害:扶桑花病虫害较少,有时因通风、光照差会发生蚜虫及介壳虫。发现后应立即捕杀,或用乐果喷洒杀灭。

扶桑花的注意事项
1、控肥:从10月份开始停止施肥,避免贪青,贪花,不利生理休眠。
2、控水:扶桑花在室内过冬期间,盆土要偏干忌湿,因此要控制浇水,仅使盆土保持略湿即可,一般5~7天浇一次水,水量不宜过多,以防低温高湿引起烂根死亡。
3、控温:扶桑花的适宜休眠温度为5℃~15℃。若高于15℃,会影响扶桑的休眠,而影响花的开放,低于5℃,就会遭受冻害。
(1)土壤:扶桑花对土壤要求不高,除盐碱土外一般均可适应。但以疏松、肥沃、排水良好的微酸性壤土或粘土壤为好。上盆的土壤可用壤土4份、粪干1份配成营养土。
(2)光照:扶桑花如光照不足会使花蕾脱落,花朵缩小,花色暗淡。因此,扶桑花每日要有8小时以上的光照。但是,在盛夏需遮阳,以防止烈日灼射植株。早春培土一次,每季除草、培土一次。每年十月后,盆栽朱槿要移至室温在15~22℃的室内培植,入室后要注意通风和适当光照。
(3)浇水:扶桑花浇水要充足。通常每天浇水一次,以浇透为度。伏天每天早、晚各浇水一次,并需对地面喷水多次,以降温和增加空气的湿度,防止花叶早落。冬季则应减少浇水、停止施肥,使之安全过冬。
(4)施肥:扶桑花对“肥”的需要量较大,圃地育苗或盆植时,每株施猪干粪肥50克,与磷肥、腐熟堆肥适量拌合作为基肥;每月追施0.2%尿素水溶液及磷肥为主的淡薄肥2~3次。如遇多雨季节,可改施复合颗粒肥于根部,每株100克。
(5)换盆及修剪:盆栽用土宜选用疏松、肥沃的沙质壤土,每年早春4月移出室外前,应进行换盆。换盆时要做3件事:一是换上新的培养土;二是剪去部分过密的卷曲的须根;三是施足基肥,盆底略加磷肥。
(6)病虫害:扶桑花病虫害较少,有时因通风、光照差会发生蚜虫及介壳虫。发现后应立即捕杀,或用乐果喷洒杀灭。

扶桑花的注意事项
1、控肥:从10月份开始停止施肥,避免贪青,贪花,不利生理休眠。
2、控水:扶桑花在室内过冬期间,盆土要偏干忌湿,因此要控制浇水,仅使盆土保持略湿即可,一般5~7天浇一次水,水量不宜过多,以防低温高湿引起烂根死亡。
3、控温:扶桑花的适宜休眠温度为5℃~15℃。若高于15℃,会影响扶桑的休眠,而影响花的开放,低于5℃,就会遭受冻害。
0
1
文章
Miss Chen
2017年08月08日


Cactus plants are adapted to drought and extreme temperatures. One of the adaptations that allows them to survive their native desert conditions is slow growth. Saguaro cacti, for example, grow only 1 inch in the first eight years of life. These massive plants are usually 35 years old before they produce flowers, and at least 75 years old before they produce side arms.
Seed
Growing cactus from seed is an exercise in patience since the seeds may take up to a year to germinate. Once the seeds begin growing, it may be at least two or three years before the plant flowers. Sow the seeds in a sandy potting mix and keep the soil at 70 degrees Fahrenheit. Cover the seed tray with plastic wrap to conserve moisture and warmth. Keep them in the starting tray until the plant stands 2 to 4 inches high, which may take up to two years.
Nursery Plants
Many nurseries and garden centers sell small cacti as houseplants. These plants grow very slowly and can remain in the same pot for two or three years. The plants grow during the spring and summer, followed by a dormant period in the fall and winter.

Care
To encourage reasonable growth, plant your cactus in a shallow pot with a coarse sand and soil mixture or a potting mix made specifically for cacti. Place the cactus outdoors in full sun during the summer, but bring it indoors in the winter. Water it every two weeks or so during hot weather. Provide water in the winter every three to four weeks. Cacti are prone to root rots and fungal diseases in damp conditions. Gradually move the plant each spring and fall to help it acclimate to its new surroundings. Moving it abruptly outdoors after a winter inside may scorch the plant.
Variety
Cacti vary in their growth rate, depending on the species. Try Christmas cactus, golden barrel or fire barrel cactus as houseplants. Other succulent plants that are often classified as a cactus, such as aloe, agave and sedums, may grow more quickly.
2
1
文章
Colour_
2017年08月08日

可根据所喜爱的花色花形进行挑选
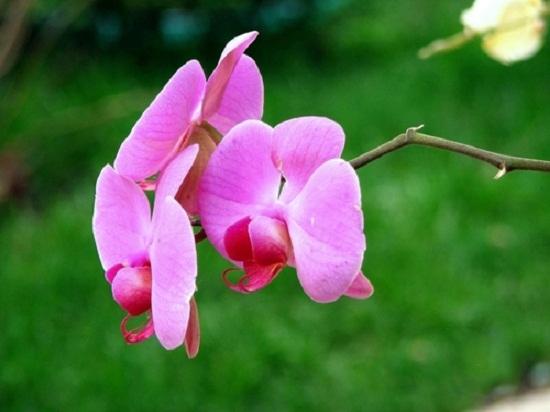
1、植株生长情况。植株生长应健壮、挺拔,叶片肥厚、坚韧,有光泽而无褐、黑斑,无空洞、缺损,否则是感染病虫害而生长不良的,如叶片薄、软、下垂,表明生长不好;叶片卷、萎是受过冻害或根部有病的。
2、根系情况。盆面与盆外都要见到根,且根要粗壮,须根要洁白。如看不到根,说明种植上有问题,会影响植株的生长。
3、开花情况。花梗要挺,其弯曲的弧度要顺其自然,花色要亮丽。
4、株龄情况。要选择第3年开花的大株,这样开花繁而花期长。因为蝴蝶兰开花期的长短与植株开花的年限有关:第1年开花的,花期为3周;第2年开花的,为5~6周;第3年开花可达1~4周。

1、植株生长情况。植株生长应健壮、挺拔,叶片肥厚、坚韧,有光泽而无褐、黑斑,无空洞、缺损,否则是感染病虫害而生长不良的,如叶片薄、软、下垂,表明生长不好;叶片卷、萎是受过冻害或根部有病的。
2、根系情况。盆面与盆外都要见到根,且根要粗壮,须根要洁白。如看不到根,说明种植上有问题,会影响植株的生长。
3、开花情况。花梗要挺,其弯曲的弧度要顺其自然,花色要亮丽。
4、株龄情况。要选择第3年开花的大株,这样开花繁而花期长。因为蝴蝶兰开花期的长短与植株开花的年限有关:第1年开花的,花期为3周;第2年开花的,为5~6周;第3年开花可达1~4周。
0
0
文章
Colour_
2017年08月08日

君子兰开花后的养护技巧

1、施肥
#君子兰 在冬季生长速度最快,需要的营养物质最多,因此,施好冬肥很重要。花盆入室前用骨粉、炒芝麻、熟大豆等或复合肥。每隔15~20天浇施1次,也可用动、植物残体浸泡液浇根。做到肥料腐熟淡施,防止浓肥伤害。
2、浇水
君子兰为肉质根,怕水渍。此外,君子兰叶片有蜡质层,冬季气温低,水分的蒸腾、蒸发量少。因此浇水不宜过多,只需结合施肥浇水,保持盆土湿润即可。切不可大水漫灌,造成烂根死苗。
3、保温
君子兰适宜的生长温度为15℃~25℃,10℃停止生长,0℃受冻害。因此,冬季必须保温防冻。花茎抽出后,维持18℃左右为宜。温度过高,叶片、花苔徒长细瘦,花小质差,花期短,温度太低,花茎矮,容易夹箭早产(开花),影响品质,降低观赏价值。
4、调光
君子兰喜散射光,忌直射强光。冬季室内养护,花盆要放在光照充足的地方。特别是在开花前要有良好的光照,有利花蕾发育壮实。开花后适当降温、避强光,保持通气良好,有利于延长花期。
5、护叶
叶肥花壮,叶绿花艳,叶短、阔、厚、绿、亮、挺是健康君子兰的特点,是促进开花提高观赏价值的基础。维持强健的叶质,除提供合理的肥水外,必须保持叶面清洁,以提高光合效率。
护叶方法:一是定期洗叶:用与室温相同的清水喷洒冲洗或揩抹污染叶片上的尘埃物,保持叶面清洁。二是及时喷洒杀菌剂,防止叶斑病、叶枯病、茎腐病的发生,确保叶片青绿,花朵艳丽。
1
1
文章
Colour_
2017年08月08日

向日葵的种植四季皆可,重要以夏、冬两季为主。个别观赏用的品种特点为植株较矮小,通常不超过半公尺。下面为大家介绍盆栽向日葵的栽种方法。

盆栽向日葵的栽种方法
1、品种选择:
(1)一般盆栽向日葵,选择矮化分枝型的较好,在这么小的空间里长出来的才更好些, 而且还能开好几朵花,观赏期更长些,像我们的欢乐火炮竹、活力、帕蒂小葵就是很好的盆栽品种呢 株高一般盆栽都在20-40cm。
(2)如果株高再高些,不是不可以,只是需要的盆子要更大些,肥水更充足些,就和多大的人吃多大量的饭,是一样的!所以要量力而行,有多大的盆种多大的向日葵哦。
2、花盆大小:花盆的选择,当然就看咱们想种多大的向日葵喽!不管怎么说,即便是最小的向 日葵对花盆也是有要求的,一个巴掌大的花盆总归是种不好向日葵的那么我们的向日葵需要的花盆要选多大的才好些呢?一般情况下,如果您要一个盆里种一株向日葵,那么花盆直径最少也要10cm,高10cm。一个花盆里种的向日葵越多,那么花盆就要选越大的。
3、土壤选择:向日葵耐贫瘠,一般土壤内均能生长。如果有营养土或者培养土是最好的,因为这样的土壤肥力好,透气保水好,向日葵自然就会长得好。
4、播种深度:观赏向日葵的种子比食葵的种子偏小些,比其他的草种子、花卉种子要大些。因而,我们选择的播种深度一般是1-2cm。
5、浇水要求:水分的话,只要保证能顺利出苗,也就是出苗前土壤湿润些。出苗后土壤干了再浇水就可以,大概3、5天浇一次水。可以顺便松下土,促进土壤呼吸,根系会更发达!植株会更健壮!
6、施肥管理:
(1)因为盆栽向日葵,收到容器的限制,土壤的肥力自然比不过大田种植。这就需要在播种前期施底肥,一般的15cm直径的花盆施入大概一汤匙花肥即可。
(2)在向日葵现蕾期,也就是头上出现小花骨朵的时候,再施一次肥。对于肥料选择上,一般的花肥都会有说明氮磷钾的比例和含量,我们最好选择氮含量多些的,长出来的植株更壮些。
(3)如果在第一次施肥后,向日葵的生长状况不是很好的话,说明肥料养分含量少,或者花盆里面的土本身就很贫瘠,那中间可以再施一次肥。
7、阳光温度:向日葵的生长适温为 15-35℃,夏天长的自然更好些。冬天温度低的话可以选择在有暖气的室内阳台上。
9
17
文章
Colour_
2017年08月08日

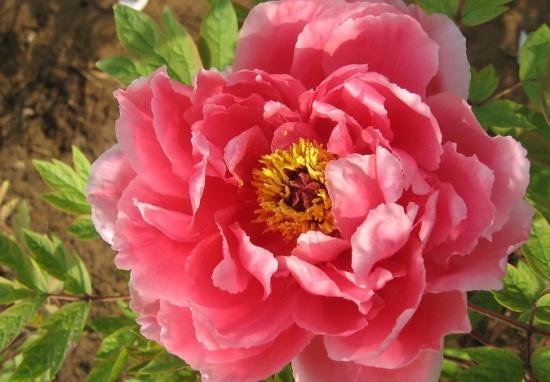
1、净化作用:#牡丹 根深叶茂,有较强的蒸腾、光合能力。用于园林绿化,在空气湿度的调节、净化和保护环境方面有良好的作用。牡丹对光化学烟雾、臭氧敏感,是此类大汽污染的良好监测植物。
2、食用价值:牡丹花不仅是美食,而且是良药,牡丹花有调经活血之功。以牡丹鲜花制作点心,不必添加香精、色素等物质,可以利用牡丹鲜花所含有的天然色泽、自然香味生产出色香味俱全的天然面点产品,牡丹鲜花除作点心外,还可用于生产罐头、煮、酱制肴等,例如制肴,不仅古代已有完善的配方,在当今的中国菜中,不仅日趋风行,而形成为餐桌的一部分了。因此,牡丹鲜花制作点心及其他食品有着广阔的发展前景。
3、开发利用:
(1)牡丹花饮料:是一种纯天然的牡丹花汁饮料,不添加任何色素和防腐剂,以鲜牡丹花发酵液和浸渍液加适量蔗糖,蜂蜜及柠檬酸经特殊工艺制作而成。
(2)牡丹花茶:以牡丹花为原料,开发出的牡丹花茶具有美容、安神、养血、调经、降压之功效,对中老年人特别是妇女保健尤为有益。
(3)牡丹花酒:以牡丹鲜花,多种鲜果为原料,佐以蔗糖、蜂王浆,经多年发酵精制而成,花香浓郁,清醇可口,营养丰富,数酒中珍品,牡丹液可做牡丹鲜花酒,以牡丹鲜花为原料,配以清纯的粮食酒,工艺简单,操作方便,既可喝到花香浓郁的花瓣酒,又可欣赏到艳冠群芳硕大的各色牡丹花瓣。
(4)牡丹酱及糕点:牡丹鲜花中富含高效生物活性物质,加工后可做成牡丹酱食用,还是制作糕点的重要原材料和佐料。采用直接的牡丹鲜花瓣,经清洗,沥干水分水分,揉搓等工序,加糖,发酵后做成牡丹酱,可直接食用。也可做成中秋节常吃的牡丹月饼,牡丹糕点等。
(5)牡丹花粉:牡丹花瓣采收后进行低温烘干,烘干时温度不能超过80%,要均匀过气,烘干后用超微粉碎机粉碎,真空包装后进入市场。可做为食品添加剂,香精等,用于饮料、饼干、糕点、冷冻食品、糖果、调味料、乳制品、罐头、酒等食品中。
4、其他价值:牡丹花可提炼香精、制化妆品。种子可提取油脂,叶加黑矾可作染料,植株还可提取揉质等。

0
0
文章
Colour_
2017年08月08日

#风信子 种球保存方法:
1、把过了花期叶片已经开始烂掉的风信子从水里拿出来(通常为水养),然后用手把叶片拔掉,记得要把叶片最底部也要清除干净,如果用手清除不干净,可以用戒刀适当切一下。
2、把风信子外表腐烂的部分用牙刷刷掉,牙刷刷不掉的,也可以用戒刀适当剥一下,注意,剥掉腐烂,软的的部分就可以了,千万不要剥得太深。
3、把风信子的地步也用牙刷刷干净,然后把根部用剪刀剪干净。然后用清水把风信子的黏液洗干净。
4、把风信子用高锰酸钾溶液(大概一个1g的小颗粒先用一个最大的可乐瓶兑水填满,再从里面的稀释溶液中取一两滴滴入另外一个大可乐瓶中兑水填满,这样制作出来的最稀的高锰酸钾溶液就是我们所需要的)浸泡1个小时左右。
5、最后再用清水把种球清洗干净(虽然无论怎么洗,种球还会是紫黑紫黑的),把风信子放进没盖的盒子里,并且用沙把风信子浅埋住放在阳关下晾干几个小时,最后只要移至通风透气干燥的地方就可以保存了。

风信子种球水培注意事项:
风信子种球保存难免会有霉菌的入侵(事实上,70%左右的球都会有霉斑的存在),建议大家首先对球根消毒杀菌,防止腐烂。
方法:将种球干枯的表皮及老根除去,泡在1000倍多菌灵溶液里半小时左右,进行侵泡消毒。然后捞起来稍微晾干即可种植。


1、把过了花期叶片已经开始烂掉的风信子从水里拿出来(通常为水养),然后用手把叶片拔掉,记得要把叶片最底部也要清除干净,如果用手清除不干净,可以用戒刀适当切一下。
2、把风信子外表腐烂的部分用牙刷刷掉,牙刷刷不掉的,也可以用戒刀适当剥一下,注意,剥掉腐烂,软的的部分就可以了,千万不要剥得太深。
3、把风信子的地步也用牙刷刷干净,然后把根部用剪刀剪干净。然后用清水把风信子的黏液洗干净。
4、把风信子用高锰酸钾溶液(大概一个1g的小颗粒先用一个最大的可乐瓶兑水填满,再从里面的稀释溶液中取一两滴滴入另外一个大可乐瓶中兑水填满,这样制作出来的最稀的高锰酸钾溶液就是我们所需要的)浸泡1个小时左右。
5、最后再用清水把种球清洗干净(虽然无论怎么洗,种球还会是紫黑紫黑的),把风信子放进没盖的盒子里,并且用沙把风信子浅埋住放在阳关下晾干几个小时,最后只要移至通风透气干燥的地方就可以保存了。

风信子种球水培注意事项:
风信子种球保存难免会有霉菌的入侵(事实上,70%左右的球都会有霉斑的存在),建议大家首先对球根消毒杀菌,防止腐烂。
方法:将种球干枯的表皮及老根除去,泡在1000倍多菌灵溶液里半小时左右,进行侵泡消毒。然后捞起来稍微晾干即可种植。


2
3
文章
Colour_
2017年08月08日


种植之前#风信子 发霉花友知道怎么办,但是种上之后风信子发霉了花友就不知道怎么办了。今天就教大家如何防治风信子发霉,遇到发霉后怎么处理。

预防风信子发霉
1、种球本身的受到伤害导致发霉
这就像一个人身上有伤口,那么感染的机会就大了一样,球体表面也应避免磕碰破损,避免过多剥除外层肉质皮(干枯皮问题不大),以免造成新鲜伤口,增加感染机会。
2、根盘的清理
风信子到手后,清理干净枯根,也是预防的手段之一。
3、水培风信子
根盘底部与水面保持1~3公分距离,保持球体干燥。如果土培,避免兜头浇水。
4、泡多菌灵后要彻底阴干
虽然多菌灵可以抑制霉菌细菌等生长,但泡后球体潮湿,也为霉变制造隐患。应在阴凉通风处彻底晾干,一般为一昼夜,再水培较好。
5、不过于温暖
很多朋友说,我平时各种注意,怎么还是烂球、发霉了?我认为这和气温过于温暖有很大关系。这好比夏天的菜隔夜就坏,而冬天放上两天依然不变质。温度高,细菌霉菌繁殖的速度就快,而且风信子本身也适应较为寒冷的环境(开花期也只需15~18度),所以不过于温暖,也是预防的重要一环。
风信子发霉后处理办法
1、把霉变部分去除。
2、用多菌灵浸泡。
3、放在阴凉通风处彻底晾干,一般为一昼夜。
用上面三个步骤处理完成后。重新养殖即可。同时注意水或土都要注意消毒。
0
0
文章
Colour_
2017年08月08日


一、盆栽#风信子
可用腐叶土、园土和沙土各1/3配制培养土,栽植深度以鳞茎的肩部与土面等平为宜。栽后充分浇水,放人冷室内,室温保持在4 ~6℃,促使其发根。待花茎开始生长时须将花盆移到温暖处。
日常养护:风信子喜光照充足和比较湿润的环境,因此,生长期间要放置在阳光充足的地方,同时要经常保持盆土湿润。抽出花葶后每天向叶面上喷水1~2次,以增加空气湿度。风信子正常花期在3―4月间,开花前后各施1~2次腐熟的稀薄液肥。花后施肥有助促进子球生长。6月气温渐热,叶片枯黄,这时应将鳞茎从盆内磕出,略加干燥,放室内通风阴凉处贮藏。
二、地栽风信子
宜选择土质疏松肥沃、排水良好的地方,于9~10月种植。种植前要耕翻土地,并施人大量腐熟有机肥和少量骨粉。花坛栽植时株距约为15厘米,栽后覆土5―8厘米,充分浇水,并盖草帘保墒。冬季不需要防寒保护。一般每隔3―4年挖掘1次分球后再种。在长江流域繁殖主要用分球繁殖法。夏季,风信子植株枯萎进入休眠期,将其从土中挖出,晾干贮藏,到秋季9―10月栽植前,将子球与母球分离,另行栽植即可。
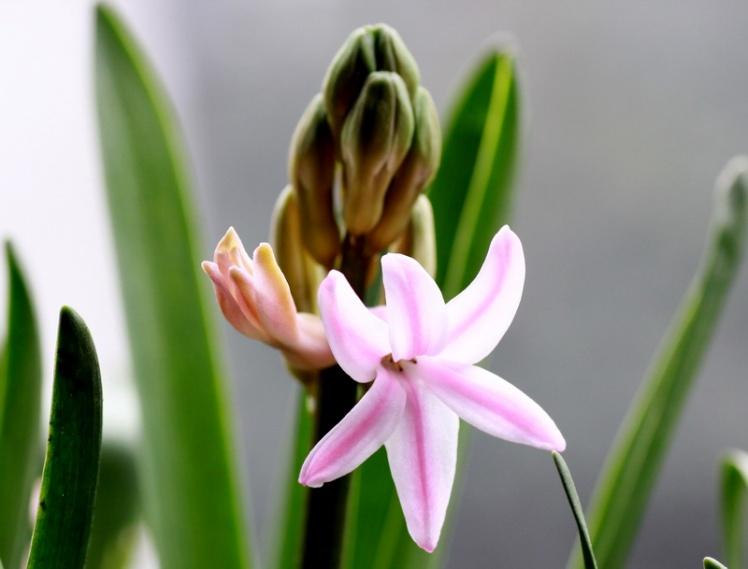
注意事项:
①子球不能在夏季挖出时分离,否则容易腐烂。
②栽培后期要节水节肥,避免鳞茎“裂底”发生腐烂。
③适时采收,早则生长不充实;迟则遇雨季,会使鳞茎不易阴干,影响贮藏。
④除去病球,减少传染。
为促使其母球产生更多的小子球,可于休眠期在母鳞茎底部的鳞茎盘上用小刀划出十字形或米字形伤口,埋入沙中2―3周,待伤口愈合后,再栽人培养土中。夏末,母鳞茎盘四周就会产生许多小鳞茎,待小鳞茎长到1厘米左右时,就可以分开栽培了。

0
0
文章
Colour_
2017年08月08日

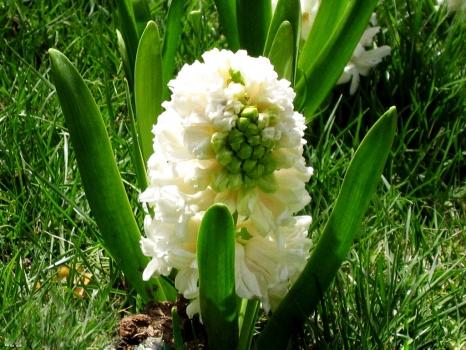
#风信子 叶子为什么发黄?风信子叶子发黄该怎么办?那么让我们来了解风信子叶子为什么发黄和处理小技巧吧!
风信子叶子发黄及处理技巧

(1)水黄:由于长期浇水引起的叶黄,表现在嫩叶阳黄无光泽,老叶则无明显变化,根细小黄绿,新梢萎缩不长。
处理方法:应节制浇水,重者可脱盆,放荫凉处晒干土后再重新上盆。
(2)旱黄:由于缺水或浇水偏少而引起叶片发黄。老叶自下而上枯黄脱落,但新叶一般生长正常。
处理方法:应适当加大浇水量和浇水次数。
(3)肥黄:由于施肥过多或浓度过大,新叶顶尖出现干褐色,老叶尖干焦枯黄脱落,一般叶面虽然肥厚有光泽,但大都凹凸不平。
处理方法:应停止浇肥或用清水淋洗肥份。
(4)缺肥黄:盆花长期只浇水不浇肥,或多年不换盆,根须结成一团,植株得不到肥分,使叶发黄。
处理方法:及时换盆,平时应薄肥勤施。
(5)灼黄:喜阴湿的盆花和观叶植物,如吊兰,万年青,一叶兰,簪竹芋等,如经强烈阳光直,叶片常出现黄尖。
处理方法:应把风信子放置阴凉通风处。
(6)碱黄:喜酸性土的花卉,如杜鹃桅子山茶,桂花白兰等,如盆土或水质偏碱,常引起叶片由绿转黄,甚至脱落。
处理方法:除用酸性营养土载培,可使用矾肥水或0.2%-0.5% 的硫酸亚铁水溶液喷施,既可使叶子由黄变青。
(7)湿热黄:一些不耐高温,高湿的花卉,因夏季炎热,通风暴不良,避阴不当而引起的发黄。如倒挂金钟,杜鹃在闷热潮湿的环境中有此现象。
处理方法:要注意通风和降温,而盆土不能过温。
(8)白化黄:花卉常期光照不足,叶片中的叶绿素减少,使叶片绿色渐渐消失,呈现出白化病。
处理方法:可将植株移到阳光充足的地方,使叶片慢慢变青。
风信子叶子发黄及处理技巧

(1)水黄:由于长期浇水引起的叶黄,表现在嫩叶阳黄无光泽,老叶则无明显变化,根细小黄绿,新梢萎缩不长。
处理方法:应节制浇水,重者可脱盆,放荫凉处晒干土后再重新上盆。
(2)旱黄:由于缺水或浇水偏少而引起叶片发黄。老叶自下而上枯黄脱落,但新叶一般生长正常。
处理方法:应适当加大浇水量和浇水次数。
(3)肥黄:由于施肥过多或浓度过大,新叶顶尖出现干褐色,老叶尖干焦枯黄脱落,一般叶面虽然肥厚有光泽,但大都凹凸不平。
处理方法:应停止浇肥或用清水淋洗肥份。
(4)缺肥黄:盆花长期只浇水不浇肥,或多年不换盆,根须结成一团,植株得不到肥分,使叶发黄。
处理方法:及时换盆,平时应薄肥勤施。
(5)灼黄:喜阴湿的盆花和观叶植物,如吊兰,万年青,一叶兰,簪竹芋等,如经强烈阳光直,叶片常出现黄尖。
处理方法:应把风信子放置阴凉通风处。

(6)碱黄:喜酸性土的花卉,如杜鹃桅子山茶,桂花白兰等,如盆土或水质偏碱,常引起叶片由绿转黄,甚至脱落。
处理方法:除用酸性营养土载培,可使用矾肥水或0.2%-0.5% 的硫酸亚铁水溶液喷施,既可使叶子由黄变青。
(7)湿热黄:一些不耐高温,高湿的花卉,因夏季炎热,通风暴不良,避阴不当而引起的发黄。如倒挂金钟,杜鹃在闷热潮湿的环境中有此现象。
处理方法:要注意通风和降温,而盆土不能过温。
(8)白化黄:花卉常期光照不足,叶片中的叶绿素减少,使叶片绿色渐渐消失,呈现出白化病。
处理方法:可将植株移到阳光充足的地方,使叶片慢慢变青。
0
1


