文章
Dummer. ゛☀
2017年09月14日

Sometimes called jumping plant lice, psyllids feed on a variety of plants including most fruit trees and small fruits as well as tomato and potato. Both adults and nymphs feed by piercing the leaf surface and extracting cell sap. This causes foliage (especially the upper leaves) to turn yellow, curl and eventually die. Honeydew secreted by the psyllids encourages the growth of dark sooty molds. Many species transmit disease-carrying viruses.
Adults (1/10 inch long) are reddish brown in color with transparent wings and strong jumping legs. They are very active and will hop or fly away when disturbed. Nymphs are flat and elliptical in shape, almost scale-like. They are less active than adults and are most numerous on the undersides of leaves. Newly hatched nymphs are yellowish in color but turn green as they mature.
Note: Psyllids are monophagous which means that they are host specific (each species feeds on only one plant type).
Life Cycle
Adults overwinter in crevices on tree trunks. In early spring they mate and females begin depositing orange-yellow eggs in the crevices about the buds, and after the foliage is out, on the leaves. Hatching occurs in 4-15 days. Yellow to green nymphs pass through five in instars in 2-3 weeks before reaching the adult stage. There are one to five generations per year depending on species.
Psyllid Control
To get rid of psyllids spray horticultural oil in early spring to destroy overwintering adults and eggs.
Beneficial insects, such as ladybugs and lacewing, are important natural predators of this pest. For best results, make releases when pest levels are low to medium.
If populations are high, use a least-toxic, short-lived natural pesticide to establish control, then release predatory insects to maintain control.
Diatomaceous earth contains no toxic poisons and works quickly on contact. Dust lightly and evenly over vegetable crops wherever adults are found.
Safer® Insecticidal Soap will work fast on heavy infestations. A short-lived natural pesticide, it works by damaging the outer layer of soft-bodied insect pests, causing dehydration and death within hours. Apply 2.5 oz/ gallon of water when insects are present, repeat every 7-10 day as needed.
Surround WP (kaolin clay) forms a protective barrier film, which acts as a broad spectrum crop protectant for preventing damage from insect pests.
70% Neem Oil is approved for organic use and can be sprayed on vegetables, fruit trees and flowers to kill eggs, larvae and adult insects. Mix 1 oz/ gallon of water and spray all leaf surfaces (including the undersides of leaves) until completely wet.
If pest levels become intolerable, spot treat with insecticides approved for organic use every 5-7 days. Thorough coverage of both upper and lower infested leaves is necessary for effective control.

Adults (1/10 inch long) are reddish brown in color with transparent wings and strong jumping legs. They are very active and will hop or fly away when disturbed. Nymphs are flat and elliptical in shape, almost scale-like. They are less active than adults and are most numerous on the undersides of leaves. Newly hatched nymphs are yellowish in color but turn green as they mature.

Note: Psyllids are monophagous which means that they are host specific (each species feeds on only one plant type).
Life Cycle
Adults overwinter in crevices on tree trunks. In early spring they mate and females begin depositing orange-yellow eggs in the crevices about the buds, and after the foliage is out, on the leaves. Hatching occurs in 4-15 days. Yellow to green nymphs pass through five in instars in 2-3 weeks before reaching the adult stage. There are one to five generations per year depending on species.
Psyllid Control
To get rid of psyllids spray horticultural oil in early spring to destroy overwintering adults and eggs.
Beneficial insects, such as ladybugs and lacewing, are important natural predators of this pest. For best results, make releases when pest levels are low to medium.

If populations are high, use a least-toxic, short-lived natural pesticide to establish control, then release predatory insects to maintain control.
Diatomaceous earth contains no toxic poisons and works quickly on contact. Dust lightly and evenly over vegetable crops wherever adults are found.
Safer® Insecticidal Soap will work fast on heavy infestations. A short-lived natural pesticide, it works by damaging the outer layer of soft-bodied insect pests, causing dehydration and death within hours. Apply 2.5 oz/ gallon of water when insects are present, repeat every 7-10 day as needed.

Surround WP (kaolin clay) forms a protective barrier film, which acts as a broad spectrum crop protectant for preventing damage from insect pests.
70% Neem Oil is approved for organic use and can be sprayed on vegetables, fruit trees and flowers to kill eggs, larvae and adult insects. Mix 1 oz/ gallon of water and spray all leaf surfaces (including the undersides of leaves) until completely wet.
If pest levels become intolerable, spot treat with insecticides approved for organic use every 5-7 days. Thorough coverage of both upper and lower infested leaves is necessary for effective control.
0
0
文章
Dummer. ゛☀
2017年09月14日

Fusarium wilt (foo-zair-ee-um) is caused by the fungus Fusarium oxysporum f.sp. lycopersici. Fusarium wilt is found worldwide and even resistant tomato varieties may be affected. The fungus is soil borne and makes its way into the plant through the roots. Once inside, it clogs and blocks the xylem, the tissue that moves water and some nutrients through the plant, preventing water from traveling up the stem and out into the branches and leaves.
It may not kill your tomato plants, but they won't be very productive.
Species of Fusarium can infect many plants including: potatoes, peppers, eggplants, legumes and bananas.
Symptoms of Verticillium wilt can be very similar to Fusarium wilt.
What Causes Fusarium Wilt?
The Fusarium wilt pathogen is soil borne and can remain in infected soil for years. It can also be carried and transmitted in multiple ways, like:
infected seed
seedlings from infected soil
the bottom of shoes
shovels and equipment used in infected soil
infected soil blown into the garden
Ideal conditions for Fusarium wilt include warm, dry weather and acidic soil pH (5.0 - 5.6)
There are tomato varieties that are resistant to fusarium wilt, but if they are weakened by root-knot nematode, they become more susceptible to it.
Plants infected with Fusarium wilt will be stunted and the earlier they are infected, them more severe the stunting.
Keep reading for more photos and descriptions of Fusarium Wilt symptoms and how to control it.
Symptoms of Fusarium Wilt on Tomatoes
Fusarium wilt can sometimes be confused with other wilts, but here are some symptoms to help you identify it in tomatoes:
Wilting The plants will literally wilt. Often it starts with a single leaf or shoot, near the top of the plant. It will recover at night, when temperatures are cooler, but as it progresses, the entire plant will wilt and not recover. Watering does not make a difference.
Yellowing Lower leaves will turn yellow, often starting on only one side. As with the wilting, the yellowing will gradually move up the plant.
Dry Leaves The wilted leaves will dry out and fall off.
Discolored Stem If you cut open the stem length-wise you will see dark brown streaks.
Management and Control of Fusarium Wilt of Tomatoes
There is no cure for Fusarium and since it persists in the soil for years, it can be very hard to eradicate. Here are some measures to help you control it.
Resistant Varieties - If you've had problems with Fusarium wilt, you would be wise to stick with resistant varieties. Seed packets and many seedlings will be labeled with their resistance to various diseases. You could also consult a seed catalog for choices.
Sterile Potting Soil - If you are starting your own seedlings, begin with a sterile soilless potting mix.
Raise the Soil pH - Apply lime to the soil in your garden, to bring the pH up into the neutral range of about 6.5 - 7.0.
Control Nematodes - Since root-knot nematodes can lessen resistance to Fusarium wilt, don't let nematode populations build up in your soil.
Don't Cultivate - Avoid injuring plants' roots by not using a hoe or cultivator around your tomato plants. Damaged roots are entry points for the pathogen.
Disinfect Tools - Clean all tools that may have come in contact with infected soil and make it a habit to regularly clean and disinfect your garden tools.
Rotate Your Crops - Since the pathogen can persist in the soil for years, you will have to find another area to plant your tomatoes. A 5 to 7 year rotation is recommended, but that does not guarantee the pathogen will be entirely gone.

It may not kill your tomato plants, but they won't be very productive.
Species of Fusarium can infect many plants including: potatoes, peppers, eggplants, legumes and bananas.
Symptoms of Verticillium wilt can be very similar to Fusarium wilt.

What Causes Fusarium Wilt?
The Fusarium wilt pathogen is soil borne and can remain in infected soil for years. It can also be carried and transmitted in multiple ways, like:
infected seed
seedlings from infected soil
the bottom of shoes
shovels and equipment used in infected soil
infected soil blown into the garden
Ideal conditions for Fusarium wilt include warm, dry weather and acidic soil pH (5.0 - 5.6)
There are tomato varieties that are resistant to fusarium wilt, but if they are weakened by root-knot nematode, they become more susceptible to it.
Plants infected with Fusarium wilt will be stunted and the earlier they are infected, them more severe the stunting.
Keep reading for more photos and descriptions of Fusarium Wilt symptoms and how to control it.

Symptoms of Fusarium Wilt on Tomatoes
Fusarium wilt can sometimes be confused with other wilts, but here are some symptoms to help you identify it in tomatoes:
Wilting The plants will literally wilt. Often it starts with a single leaf or shoot, near the top of the plant. It will recover at night, when temperatures are cooler, but as it progresses, the entire plant will wilt and not recover. Watering does not make a difference.
Yellowing Lower leaves will turn yellow, often starting on only one side. As with the wilting, the yellowing will gradually move up the plant.
Dry Leaves The wilted leaves will dry out and fall off.
Discolored Stem If you cut open the stem length-wise you will see dark brown streaks.

Management and Control of Fusarium Wilt of Tomatoes
There is no cure for Fusarium and since it persists in the soil for years, it can be very hard to eradicate. Here are some measures to help you control it.
Resistant Varieties - If you've had problems with Fusarium wilt, you would be wise to stick with resistant varieties. Seed packets and many seedlings will be labeled with their resistance to various diseases. You could also consult a seed catalog for choices.
Sterile Potting Soil - If you are starting your own seedlings, begin with a sterile soilless potting mix.

Raise the Soil pH - Apply lime to the soil in your garden, to bring the pH up into the neutral range of about 6.5 - 7.0.
Control Nematodes - Since root-knot nematodes can lessen resistance to Fusarium wilt, don't let nematode populations build up in your soil.
Don't Cultivate - Avoid injuring plants' roots by not using a hoe or cultivator around your tomato plants. Damaged roots are entry points for the pathogen.

Disinfect Tools - Clean all tools that may have come in contact with infected soil and make it a habit to regularly clean and disinfect your garden tools.
Rotate Your Crops - Since the pathogen can persist in the soil for years, you will have to find another area to plant your tomatoes. A 5 to 7 year rotation is recommended, but that does not guarantee the pathogen will be entirely gone.
0
0
文章
Dummer. ゛☀
2017年09月13日

Identification
The tomato hornworm, Manduca quinquemaculata, is much dreaded by vegetable gardeners, because they can devastate tomatoes and other members of the nightshade ( Solanaceae) family, such as eggplants and peppers. However, the tomato hornworm and tobacco hornworm, Manduca sexta, are often confused with each other. They are very similar in appearance and both attack members of the Solanaceae family.
The tomato hornworm is three to four inches long at full size (likely to be the biggest caterpillar we see in our gardens) and green in color, with white V-shaped marks along its sides. A black "horn" projects from the rear of the caterpillar. Tobacco hornworms, on the other hand, have diagonal white stripes and a red "horn." Both are treated in the same way when they attack your garden.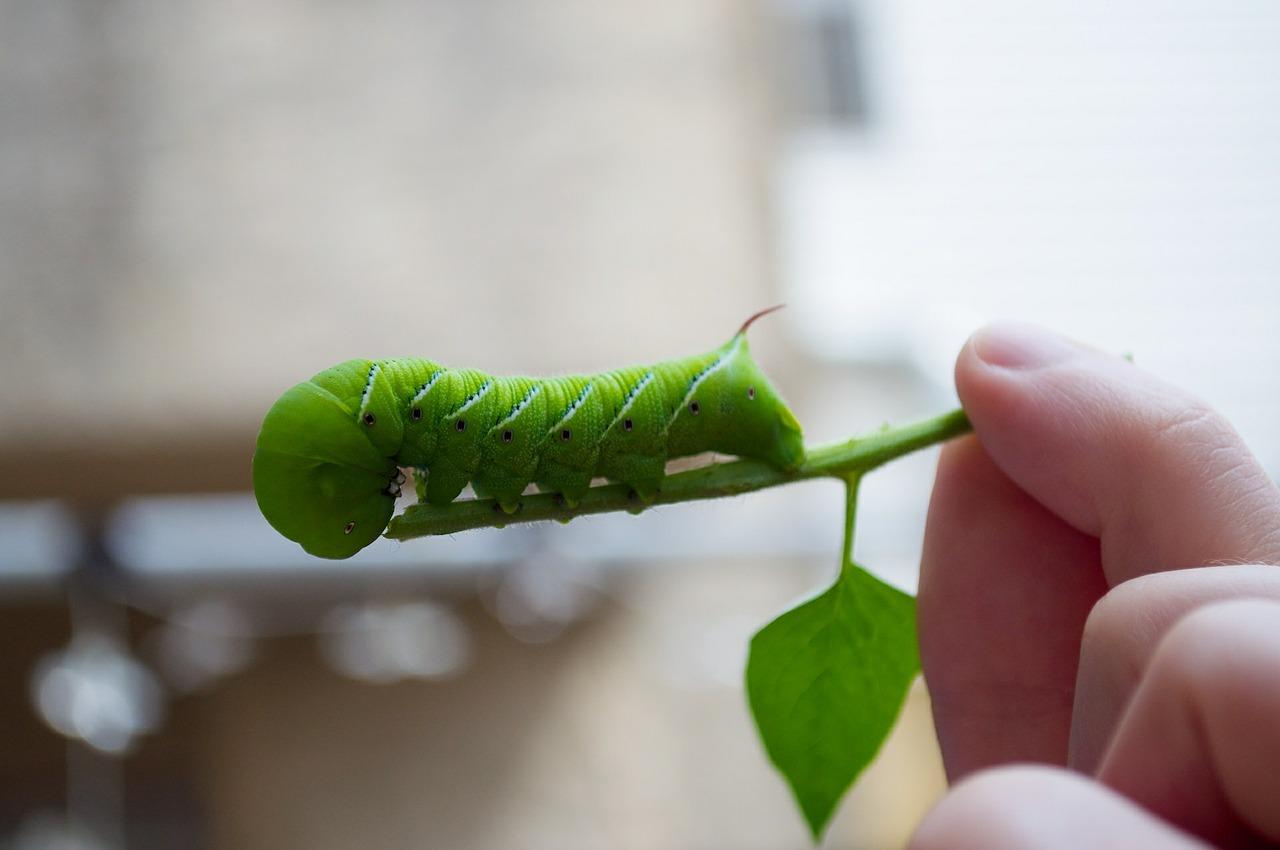
Life Cycle
The tomato hornworm represents the larval stage of the hawk or sphinx moth, also known as hummingbird moths. The moths overwinter in the soil as dark brown pupae, then emerge and mate in late spring. They lay their eggs, which are round and greenish-white, on the undersides of leaves. The eggs hatch in four to five days and the hornworm emerges. It spends the next four weeks growing to full size, after which it will make its way into the soil to pupate.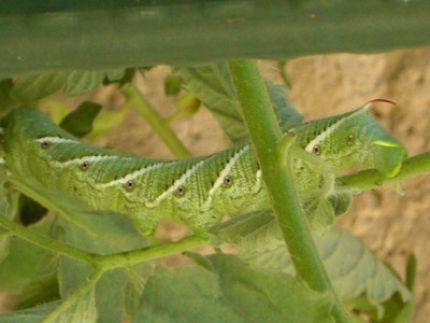
Signs of Tomato Hornworms
Tomato hornworms are voracious pests, munching entire leaves, small stems and even parts of the immature fruit.
While they are most commonly associated with tomatoes, hornworms are also common pests of eggplants, peppers, and potatoes. Most likely, you'll notice the damage before you notice the hornworms because their color helps them blend in so well with the plant foliage. You can also look for their black frass (droppings) on the foliage and around the base of the plant.
Effect on Garden Plants
Undetected, a tomato hornworm can do a fair amount of damage to its host plant. They have hearty appetites and can defoliate a plant in a matter of days. If they are detected and removed early on, the plant will recover just fine.
Organic Control for Tomato Hornworm
Because the hornworm is so large, the easiest and most effective way to get rid of it is to pick it off of plants as soon as you detect it, and either crush it or toss it into a bowl of soapy water. A bad infestation can be treated by applying BT (Bacillus thuringiensis). This is most effective when the larvae are small. If worms are a problem year after year, try rototilling the soil either in late fall or in spring before you plant--this will either bury the pupae or destroy them.
However, if you see a hornworm covered with white egg sacs, leave it be. The egg sacs are those of a parasitic wasp called the Braconid wasp. Let the eggs hatch, and you'll have an army of wasps ready to defend your garden against all types of pests. These wasps are not a threat to humans.
Another organic method for killing tomato hornworms is mix liquid soap and water together and spray it onto the plant foliage, then sprinkle cayenne pepper over the foliage and fruit.
The soap solution will kill the worms, while the Cayenne repels them if the soap washes off. This treatment will need to be repeated after each heavy rain, however.
Chemical Control for Tomato Hornworms
The synthetic chemical Carbaryl will kill tomato hornworms along with many other pests. However, it is highly toxic and is discouraged for use on edibles. Wherever possible, rely on organic methods to control tomato hornworms, as well as other garden pests.
The tomato hornworm, Manduca quinquemaculata, is much dreaded by vegetable gardeners, because they can devastate tomatoes and other members of the nightshade ( Solanaceae) family, such as eggplants and peppers. However, the tomato hornworm and tobacco hornworm, Manduca sexta, are often confused with each other. They are very similar in appearance and both attack members of the Solanaceae family.

The tomato hornworm is three to four inches long at full size (likely to be the biggest caterpillar we see in our gardens) and green in color, with white V-shaped marks along its sides. A black "horn" projects from the rear of the caterpillar. Tobacco hornworms, on the other hand, have diagonal white stripes and a red "horn." Both are treated in the same way when they attack your garden.

Life Cycle
The tomato hornworm represents the larval stage of the hawk or sphinx moth, also known as hummingbird moths. The moths overwinter in the soil as dark brown pupae, then emerge and mate in late spring. They lay their eggs, which are round and greenish-white, on the undersides of leaves. The eggs hatch in four to five days and the hornworm emerges. It spends the next four weeks growing to full size, after which it will make its way into the soil to pupate.

Signs of Tomato Hornworms
Tomato hornworms are voracious pests, munching entire leaves, small stems and even parts of the immature fruit.
While they are most commonly associated with tomatoes, hornworms are also common pests of eggplants, peppers, and potatoes. Most likely, you'll notice the damage before you notice the hornworms because their color helps them blend in so well with the plant foliage. You can also look for their black frass (droppings) on the foliage and around the base of the plant.

Effect on Garden Plants
Undetected, a tomato hornworm can do a fair amount of damage to its host plant. They have hearty appetites and can defoliate a plant in a matter of days. If they are detected and removed early on, the plant will recover just fine.
Organic Control for Tomato Hornworm
Because the hornworm is so large, the easiest and most effective way to get rid of it is to pick it off of plants as soon as you detect it, and either crush it or toss it into a bowl of soapy water. A bad infestation can be treated by applying BT (Bacillus thuringiensis). This is most effective when the larvae are small. If worms are a problem year after year, try rototilling the soil either in late fall or in spring before you plant--this will either bury the pupae or destroy them.

However, if you see a hornworm covered with white egg sacs, leave it be. The egg sacs are those of a parasitic wasp called the Braconid wasp. Let the eggs hatch, and you'll have an army of wasps ready to defend your garden against all types of pests. These wasps are not a threat to humans.
Another organic method for killing tomato hornworms is mix liquid soap and water together and spray it onto the plant foliage, then sprinkle cayenne pepper over the foliage and fruit.
The soap solution will kill the worms, while the Cayenne repels them if the soap washes off. This treatment will need to be repeated after each heavy rain, however.

Chemical Control for Tomato Hornworms
The synthetic chemical Carbaryl will kill tomato hornworms along with many other pests. However, it is highly toxic and is discouraged for use on edibles. Wherever possible, rely on organic methods to control tomato hornworms, as well as other garden pests.
0
0
文章
Dummer. ゛☀
2017年09月13日

This disease produces small, dark irregular spots on tomato and pepper leaves; leaves eventually turn yellow and drop off. This defoliation weakens plants and exposes developing fruits to sunscald. Small, dark, wartlike raised spots with slightly sunken centers may appear on green fruits. Rot organisms are able to enter the fruit at these spots and cause decay. Bacterial spot symptoms are similar to, and often indistinguishable from, bacterial speck.

Very warm, wet weather encourages the development of the disease. The bacteria overwinter in plant residues. This disease is a problem mainly in the East and Midwest.

Prevention and Control
Purchase certified disease-free seeds.
Remove volunteer tomato and pepper plants, which may harbor the bacteria.
Use a three- to four-year crop rotation for susceptible crops.
Space plants well apart and support vines to ensure good air circulation.
Use drip irrigation or soaker hoses instead of overhead watering to keep foliage as dry as possible.
Keep the soil surface covered with mulch to prevent spores from splashing up from the soil surface.
Remove infected plant parts from the garden and destroy them or add them to a hot compost pile.

Very warm, wet weather encourages the development of the disease. The bacteria overwinter in plant residues. This disease is a problem mainly in the East and Midwest.

Prevention and Control
Purchase certified disease-free seeds.
Remove volunteer tomato and pepper plants, which may harbor the bacteria.
Use a three- to four-year crop rotation for susceptible crops.
Space plants well apart and support vines to ensure good air circulation.
Use drip irrigation or soaker hoses instead of overhead watering to keep foliage as dry as possible.
Keep the soil surface covered with mulch to prevent spores from splashing up from the soil surface.
Remove infected plant parts from the garden and destroy them or add them to a hot compost pile.
0
0
文章
Dummer. ゛☀
2017年08月22日

You know it’s summer when fresh, ripe tomato and basil salad graces your dinner table. Basil is one of the warm season herbs that have a distinctive scent and flavor. Harvesting basil seeds from a favorite variety will ensure you get that same taste and cultivar. Saving basil seed is an easy, economical way to grow basil year after year. Read on for some tips on how to harvest basil seeds and ways for saving basil seed.
How to Harvest Basil Seeds
Basil plants are pollinated by small flying insects. The different varieties will cross pollinate, so it is important to isolate a favorite cultivar by at least 150 feet. This will prevent another variety from polluting your strain. The seeds are contained in the spent flower head. Use a fine colander for basil seed collecting, as the black seeds are very tiny. Cut off the brown and spent flower heads and let them dry for a few days in a warm, dry location. Crush the heads over the colander and pick out the old petals and any chaff. Basil seed collecting is that simple. You can also put the dried seed heads into a paper bag and shake it, then crush the bag with a rolling pin, tip the pulverized plant material into a shallow tray and blow out the chaff. You now have home-harvested basil seed which will be of the parent plant’s strain, provided they didn’t cross pollinate.
How Long Do Basil Seeds Keep?
Once you have the seeds, you need to store them properly. But how long do basil seeds keep? If they are properly stored, basil seeds are viable for up to five years. Label and date your seeds and rotate them so the oldest are used up first. Seeds that are completely dry and kept in a dry, dark location should be viable for years after basil seed collecting.
Storing Basil Seed
Place the dried seeds in a plastic bag or glass jar with a sealable lid. Put the bag or jar in the freezer for a couple of days to kill any insect pests that may be still in the plant material. Ensure there is no air in the container and store the seed in a cool, dark place. Seed viability will be affected if the seeds are exposed to more than minimal light. Label and catalogue your varieties and get ready for a bumper crop of basil. Sow the seed in flats in early spring with just a dusting of potting soil over the tiny seeds. Keep moderately moist and transplant after the first two sets of true leaves appear. Harvesting basil seeds is a quick way to preserve the delicate flavors of the herb and ensure there is a plentiful supply of pesto.

How to Harvest Basil Seeds
Basil plants are pollinated by small flying insects. The different varieties will cross pollinate, so it is important to isolate a favorite cultivar by at least 150 feet. This will prevent another variety from polluting your strain. The seeds are contained in the spent flower head. Use a fine colander for basil seed collecting, as the black seeds are very tiny. Cut off the brown and spent flower heads and let them dry for a few days in a warm, dry location. Crush the heads over the colander and pick out the old petals and any chaff. Basil seed collecting is that simple. You can also put the dried seed heads into a paper bag and shake it, then crush the bag with a rolling pin, tip the pulverized plant material into a shallow tray and blow out the chaff. You now have home-harvested basil seed which will be of the parent plant’s strain, provided they didn’t cross pollinate.

How Long Do Basil Seeds Keep?
Once you have the seeds, you need to store them properly. But how long do basil seeds keep? If they are properly stored, basil seeds are viable for up to five years. Label and date your seeds and rotate them so the oldest are used up first. Seeds that are completely dry and kept in a dry, dark location should be viable for years after basil seed collecting.

Storing Basil Seed
Place the dried seeds in a plastic bag or glass jar with a sealable lid. Put the bag or jar in the freezer for a couple of days to kill any insect pests that may be still in the plant material. Ensure there is no air in the container and store the seed in a cool, dark place. Seed viability will be affected if the seeds are exposed to more than minimal light. Label and catalogue your varieties and get ready for a bumper crop of basil. Sow the seed in flats in early spring with just a dusting of potting soil over the tiny seeds. Keep moderately moist and transplant after the first two sets of true leaves appear. Harvesting basil seeds is a quick way to preserve the delicate flavors of the herb and ensure there is a plentiful supply of pesto.
0
1
文章
Dummer. ゛☀
2017年08月08日

Alternaria leaf spot in the garden is a real problem for growers of brassicas, but it also makes life miserable for tomato and potato growers, causing plaque-like spots on leaves and fruits. Treating alternaria can be difficult, so many gardeners do what they can to prevent this fungus from getting a toe-hold in their plots. Let’s learn more on what is alternaria and how to treat this gardener’s nightmare. What is Alternaria? The fungal pathogens in the genus Alternaria can be devastating to plants year after year.
The spores overwinter on old plant debris and attach themselves to seeds, making alternaria leaf spot especially tricky to completely eliminate if you save your own seeds. Garden vegetables are common targets of these wind-blown spores, but alternaria is not discriminatory in the plants it attacks — apples, citrus, ornamentals and weeds have been known to develop leaf spots caused by this fungus. Alternaria symptoms once infection begins include small, dark, circular spots that regularly reach ½ inch in diameter. As they spread, alternaria leaf spots may change in color from black to tan or gray, with a yellow halo around the outside. Because spot development is heavily influenced by the environment, there are frequently noticeable concentric rings that spread from the initial point of infection. Sporulation causes these spots to develop a fuzzy texture. Some plants tolerate alternaria spots better than others, but as these spots increase on tissues, leaves may wilt or drop, leading to sunburned crops or weak plants. Fruits and vegetable surfaces can be infected with alternaria spots as well, the lesions making them unsightly and unmarketable.
Because alternaria can invade tissues invisibly, eating spot-covered produce is not recommended. How to Treat Alternaria Treatment for alternaria requires fungicide to be sprayed directly on infected plants, as well as improvements in sanitation and crop rotation to prevent future outbreaks. Organic gardeners are limited to sprays of captan or copper fungicides, making control much more challenging. Conventional gardeners can use chlorothanil, fludioxinil, imazalil, iprodine, maneb, mancozeb or thiram on plants listed on the label of their chemical of choice, but should still strive for prevention in areas with known alternaria pathogens. Mulch can help to slow the spread of alternaria spores already in the soil when applied immediately after planting. Experiments at the New York State Agricultural Experiment Station showed that mulched kale crops experienced fewer and less severe problems with alternaria leaf spot than the control plants, with straw mulches significantly more successful at suppression than black plastic or biodegradable plastic mulches. The straw-mulched plants also grew much taller than other plants in the experiment.
Crop rotation is vital to preventing alternaria fungal spores from germinating – although the many alternaria fungal diseases look similar, the fungi themselves are often very specialized in the type of plant they will attack; gardens on four year rotations can avoid alternaria building in the soil. Cleaning up fallen leaves and spent plants as soon as possible will also limit the number of spores in the soil. Healthy, well-spaced plants tend to suffer less severe damage from alternaria than their overly-stressed kin.

The spores overwinter on old plant debris and attach themselves to seeds, making alternaria leaf spot especially tricky to completely eliminate if you save your own seeds. Garden vegetables are common targets of these wind-blown spores, but alternaria is not discriminatory in the plants it attacks — apples, citrus, ornamentals and weeds have been known to develop leaf spots caused by this fungus. Alternaria symptoms once infection begins include small, dark, circular spots that regularly reach ½ inch in diameter. As they spread, alternaria leaf spots may change in color from black to tan or gray, with a yellow halo around the outside. Because spot development is heavily influenced by the environment, there are frequently noticeable concentric rings that spread from the initial point of infection. Sporulation causes these spots to develop a fuzzy texture. Some plants tolerate alternaria spots better than others, but as these spots increase on tissues, leaves may wilt or drop, leading to sunburned crops or weak plants. Fruits and vegetable surfaces can be infected with alternaria spots as well, the lesions making them unsightly and unmarketable.

Because alternaria can invade tissues invisibly, eating spot-covered produce is not recommended. How to Treat Alternaria Treatment for alternaria requires fungicide to be sprayed directly on infected plants, as well as improvements in sanitation and crop rotation to prevent future outbreaks. Organic gardeners are limited to sprays of captan or copper fungicides, making control much more challenging. Conventional gardeners can use chlorothanil, fludioxinil, imazalil, iprodine, maneb, mancozeb or thiram on plants listed on the label of their chemical of choice, but should still strive for prevention in areas with known alternaria pathogens. Mulch can help to slow the spread of alternaria spores already in the soil when applied immediately after planting. Experiments at the New York State Agricultural Experiment Station showed that mulched kale crops experienced fewer and less severe problems with alternaria leaf spot than the control plants, with straw mulches significantly more successful at suppression than black plastic or biodegradable plastic mulches. The straw-mulched plants also grew much taller than other plants in the experiment.

Crop rotation is vital to preventing alternaria fungal spores from germinating – although the many alternaria fungal diseases look similar, the fungi themselves are often very specialized in the type of plant they will attack; gardens on four year rotations can avoid alternaria building in the soil. Cleaning up fallen leaves and spent plants as soon as possible will also limit the number of spores in the soil. Healthy, well-spaced plants tend to suffer less severe damage from alternaria than their overly-stressed kin.
2
0
文章
Dummer. ゛☀
2017年08月06日

BOTANICAL NAME: Lycopersicon esculentum
PLANT TYPE: Vegetable
SUN EXPOSURE: Full Sun
SOIL TYPE: Loamy
SOIL PH: Acidic
Enjoy our tomato-growing page covering planting through plant care through harvesting—and even tomato recipes!
America’s favorite vegetable is fairly easy to grow and will produce a bumper crop with proper care. Its uses are numerous, however, tomato plants are susceptible to pests and diseases so proper plant care is important.
PLANTING
If you’re planting seeds (versus purchasing transplants), you’ll want to start your seeds indoors 6 to 8 weeks before the average last spring frost date.
Select a site with full sun and well-drained soil. For northern regions, is is VERY important that your site receives at least 6 hours of sun. For southern regions, light afternoon shade will help tomatoes survive and thrive.
Two weeks before transplanting seedlings outdoors, till soil to about 1 foot and mix in aged manure, compost, or fertilizer.
Harden off transplants for a week before moving outdoors.
Transplant after last spring frost when the soil is warm.
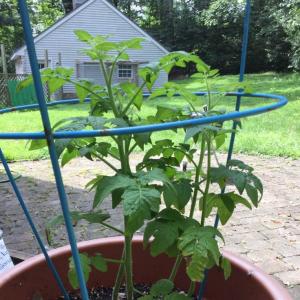
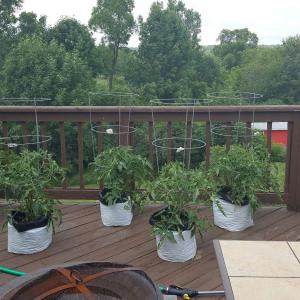
Establish tomato stakes or cages in the soil at the time of planting. Staking keeps developing tomato fruit off the ground, while caging lets the plant hold itself upright. Some sort of support system is recommended, but sprawling can also produce fine crops if you have the space, and if the weather cooperates.
Plant seedlings two feet apart.
Pinch off a few of the lower branches on transplants, and plant the root ball deep enough so that the remaining lowest leaves are just above the surface of the soil.
Water well to reduce shock to the roots.
CARE
Water generously for the first few days.
Water well throughout the growing season, about 2 inches per week during the summer. Keep watering consistent!
Mulch five weeks after transplanting to retain moisture.
To help tomatoes through periods of drought, find some flat rocks and place one next to each plant. The rocks pull water up from under the ground and keep it from evaporating into the atmosphere.
Fertilize two weeks prior to first picking and again two weeks after first picking.
If using stakes, prune plants by pinching off suckers so that only a couple stems are growing per stake.
Practice crop rotation from year to year to prevent diseases that may have overwintered.
PESTS/DISEASES
Aphids
Flea Beetles
Tomato Hornworm
Whiteflies
Blossom-End Rot
Late Blight is a fungal disease that can strike during any part of the growing season. It will cause grey, moldy spots on leaves and fruit which later turn brown. The disease is spread and supported by persistent damp weather. This disease will overwinter, so all infected plants should be destroyed.
Mosaic Virus creates distorted leaves and causes young growth to be narrow and twisted, and the leaves become mottled with yellow. Unfortunately, infected plants should be destroyed (but don’t put them in your compost pile).
Cracking: When fruit growth is too rapid, the skin will crack. This usually occurs in uneven water or uneven moisture due to weather conditions (very rainy periods mixed with dry periods). Keep moisture levels constant with consistent watering and mulching.
Basil repels aphids, whiteflies, tomato hornworms, and mosquitoes from tomatoes.
PLANT TYPE: Vegetable
SUN EXPOSURE: Full Sun
SOIL TYPE: Loamy
SOIL PH: Acidic
Enjoy our tomato-growing page covering planting through plant care through harvesting—and even tomato recipes!
America’s favorite vegetable is fairly easy to grow and will produce a bumper crop with proper care. Its uses are numerous, however, tomato plants are susceptible to pests and diseases so proper plant care is important.

PLANTING
If you’re planting seeds (versus purchasing transplants), you’ll want to start your seeds indoors 6 to 8 weeks before the average last spring frost date.
Select a site with full sun and well-drained soil. For northern regions, is is VERY important that your site receives at least 6 hours of sun. For southern regions, light afternoon shade will help tomatoes survive and thrive.
Two weeks before transplanting seedlings outdoors, till soil to about 1 foot and mix in aged manure, compost, or fertilizer.
Harden off transplants for a week before moving outdoors.
Transplant after last spring frost when the soil is warm.
Establish tomato stakes or cages in the soil at the time of planting. Staking keeps developing tomato fruit off the ground, while caging lets the plant hold itself upright. Some sort of support system is recommended, but sprawling can also produce fine crops if you have the space, and if the weather cooperates.
Plant seedlings two feet apart.
Pinch off a few of the lower branches on transplants, and plant the root ball deep enough so that the remaining lowest leaves are just above the surface of the soil.
Water well to reduce shock to the roots.

CARE
Water generously for the first few days.
Water well throughout the growing season, about 2 inches per week during the summer. Keep watering consistent!
Mulch five weeks after transplanting to retain moisture.
To help tomatoes through periods of drought, find some flat rocks and place one next to each plant. The rocks pull water up from under the ground and keep it from evaporating into the atmosphere.
Fertilize two weeks prior to first picking and again two weeks after first picking.
If using stakes, prune plants by pinching off suckers so that only a couple stems are growing per stake.
Practice crop rotation from year to year to prevent diseases that may have overwintered.

PESTS/DISEASES
Aphids
Flea Beetles
Tomato Hornworm
Whiteflies
Blossom-End Rot
Late Blight is a fungal disease that can strike during any part of the growing season. It will cause grey, moldy spots on leaves and fruit which later turn brown. The disease is spread and supported by persistent damp weather. This disease will overwinter, so all infected plants should be destroyed.
Mosaic Virus creates distorted leaves and causes young growth to be narrow and twisted, and the leaves become mottled with yellow. Unfortunately, infected plants should be destroyed (but don’t put them in your compost pile).
Cracking: When fruit growth is too rapid, the skin will crack. This usually occurs in uneven water or uneven moisture due to weather conditions (very rainy periods mixed with dry periods). Keep moisture levels constant with consistent watering and mulching.
Basil repels aphids, whiteflies, tomato hornworms, and mosquitoes from tomatoes.
3
3


