求助
Trinity Rangel
2017年06月06日

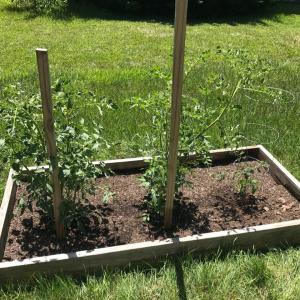
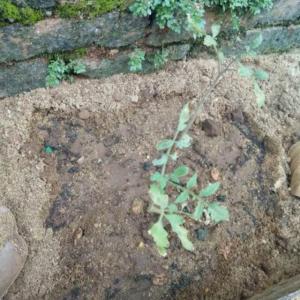
Planted tomato seeds and they sprouted. I have one problem, on the right you can see they look a little droopy. what am I doing wrong?¶(°•°)

0
0
elvenking42:there's a chance they're succumbing to the Damping Off fungus? it's pretty common with seedlings. it's best to make sure they have a decent amount of airflow to prevent it
文章
粉团
2017年05月22日

Do you want to grow the best tomatoes in taste and size? And want to have a bumper harvest? Then put these things in the hole before planting your tomato plant!
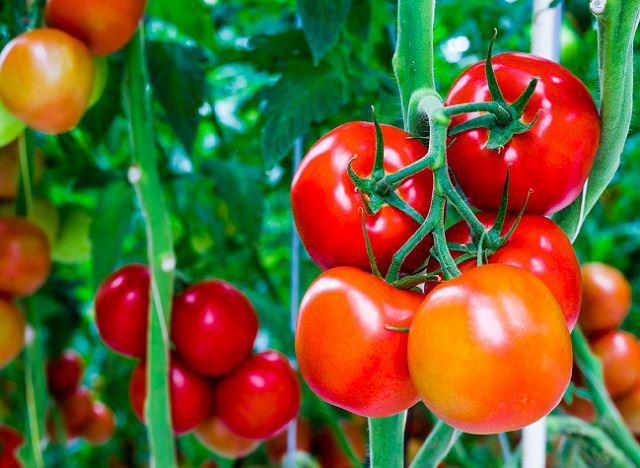
The homegrown TOMATOES are so delicious, and when you pick them fresh and eat, the delightful taste you get is just unmatchable. Better than store bought fruits. The thick, juicy, plump, sweet, a bit acrid and so satiating– the tomatoes are one of the first fruits (vegetable, if you say) everyone wants to grow from the beginning of the gardening season.1. Baking Soda
It works and really a good trick (especially when you’re growing tomatoes in containers) if you want sweeter tomatoes. Simply sprinkle a small amount of baking soda around the base of your tomato plants. The baking soda will be absorbed into the soil and lower the acidity levels, thus, giving you tomatoes that are more sweet than tart.
2. Fish heads
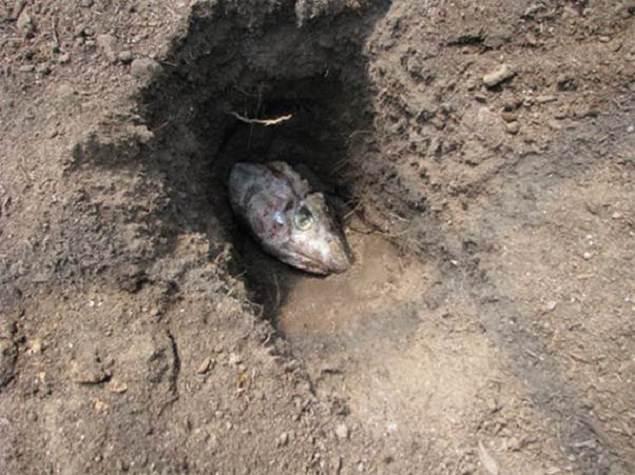
Fish heads have been used as a natural fertilizer in the garden for a long time. Their popularity with tomato planting is not a myth that needs to be busted. It works! Their decay releases nitrogen, potassium, many essential trace elements, calcium and phosphorous. The only problem with burying fish heads is that critters may dig them up. To avoid this, bury deeply, at least a foot. You can drop them into the hole whole or use groundfish scraps which you can mix with water(2 cups) and milk(1 cup) for a supercharge solution. If you want to read more on this, here’s an article in detail!
3. Aspirin
Drop 2-3 aspirin tablets in the hole either whole or ground; this is to boost plant immunity, it also helps to ward off diseases like blight and increases the yield. The salicylic acid, a compound in aspirin is the reason why it works. You can also spray plants with the solution contain this drug. If you want to read more about ASPIRIN uses on tomato plants in detail, visit DailyMail UK.
4. Eggshells
Eggshells boost the calcium content in the soil. And just like us, Calcium is one of the most important components that plant needs for growth. Here’s a very educative article if you like to read, it also helps to prevent blossom end rot. Whether you’re planting tomatoes in the garden bed or containers, you can always put eggshells before planting.
Also Read: Eggshell Uses in the Garden
5. Epsom Salt

Tomatoes suffer from magnesium deficiency that is why it’s a good idea to add 1 or 2 tablespoons of Epsom salt while transplanting the seedling in the bottom of the planting hole (both in containers or garden bed). Cover this with a thin layer of soil; this is to make sure that roots are not directly touching Epsom salt.
Epsom salt must be used when growing tomatoes; it can do miracles. Read why you should use it here!
Also Read: 13 Great Epsom Salt Uses in the Garden
6. Kelp Meal
Kelp meal is rich in micro-nutrients and trace elements. It provides complete nutrient for plants, the addition of kelp gives tomatoes a turbo boosted start. Slow-release kelp fertilizer contains the tomato with sufficient nutrient over a period which prevents the plant from experiencing shock as is with the use of excess fertilizers. One cup-full of kelp meal is adequate for the plant at the time of planting. If you want to read more about kelp fertilizer, click here!
7. Bone Meal
Similar to kelp meal, bone meal is also an addition to the tomato hole during planting. A handful or cup-full of bone meal is essential for a blossoming and quality fruits of the tomato plant since it provides the much-needed phosphorus nutrient which is one of the most vital components for healthy tomato growth.
8. Used coffee grounds

Add well-composted coffee grounds to the planting hole when transplanting tomato seedlings to improve soil composition and provide a source of slow-release nutrients to your plants. It is an excellent source of fertilizer and can be used even as a mulch. We have written a comprehensive guide on coffee grounds uses, take a look!

The homegrown TOMATOES are so delicious, and when you pick them fresh and eat, the delightful taste you get is just unmatchable. Better than store bought fruits. The thick, juicy, plump, sweet, a bit acrid and so satiating– the tomatoes are one of the first fruits (vegetable, if you say) everyone wants to grow from the beginning of the gardening season.1. Baking Soda
It works and really a good trick (especially when you’re growing tomatoes in containers) if you want sweeter tomatoes. Simply sprinkle a small amount of baking soda around the base of your tomato plants. The baking soda will be absorbed into the soil and lower the acidity levels, thus, giving you tomatoes that are more sweet than tart.
2. Fish heads

Fish heads have been used as a natural fertilizer in the garden for a long time. Their popularity with tomato planting is not a myth that needs to be busted. It works! Their decay releases nitrogen, potassium, many essential trace elements, calcium and phosphorous. The only problem with burying fish heads is that critters may dig them up. To avoid this, bury deeply, at least a foot. You can drop them into the hole whole or use groundfish scraps which you can mix with water(2 cups) and milk(1 cup) for a supercharge solution. If you want to read more on this, here’s an article in detail!
3. Aspirin
Drop 2-3 aspirin tablets in the hole either whole or ground; this is to boost plant immunity, it also helps to ward off diseases like blight and increases the yield. The salicylic acid, a compound in aspirin is the reason why it works. You can also spray plants with the solution contain this drug. If you want to read more about ASPIRIN uses on tomato plants in detail, visit DailyMail UK.
4. Eggshells
Eggshells boost the calcium content in the soil. And just like us, Calcium is one of the most important components that plant needs for growth. Here’s a very educative article if you like to read, it also helps to prevent blossom end rot. Whether you’re planting tomatoes in the garden bed or containers, you can always put eggshells before planting.
Also Read: Eggshell Uses in the Garden
5. Epsom Salt

Tomatoes suffer from magnesium deficiency that is why it’s a good idea to add 1 or 2 tablespoons of Epsom salt while transplanting the seedling in the bottom of the planting hole (both in containers or garden bed). Cover this with a thin layer of soil; this is to make sure that roots are not directly touching Epsom salt.
Epsom salt must be used when growing tomatoes; it can do miracles. Read why you should use it here!
Also Read: 13 Great Epsom Salt Uses in the Garden
6. Kelp Meal
Kelp meal is rich in micro-nutrients and trace elements. It provides complete nutrient for plants, the addition of kelp gives tomatoes a turbo boosted start. Slow-release kelp fertilizer contains the tomato with sufficient nutrient over a period which prevents the plant from experiencing shock as is with the use of excess fertilizers. One cup-full of kelp meal is adequate for the plant at the time of planting. If you want to read more about kelp fertilizer, click here!
7. Bone Meal
Similar to kelp meal, bone meal is also an addition to the tomato hole during planting. A handful or cup-full of bone meal is essential for a blossoming and quality fruits of the tomato plant since it provides the much-needed phosphorus nutrient which is one of the most vital components for healthy tomato growth.
8. Used coffee grounds

Add well-composted coffee grounds to the planting hole when transplanting tomato seedlings to improve soil composition and provide a source of slow-release nutrients to your plants. It is an excellent source of fertilizer and can be used even as a mulch. We have written a comprehensive guide on coffee grounds uses, take a look!
0
0
文章
Alicia
2017年05月22日

Learn about the companion plants for tomatoes. Tomato companion plants are those that help it in growing more productively.
The key of getting most productive tomato plants is to plant right companions with it. Read this article to find out which are the best companion plants for tomatoes.

Companion planting is a sustainable way to grow healthy tomatoes without the use of toxic pesticides. Many good companion plant for tomatoes are herbs and flowers like marigold.
Also Read: How to Grow Tomatoes in Hanging Baskets
Tomato Companion Plants: Herbs
Basil and tomatoes in the garden go as well together as they do in the kitchen. Plant two or three basil plants near tomatoes. They not only enhances the flavor of each other and improves growth but also keep the pests away.
Plant garlic between each tomato plant to discourage red spider mites and plant parsley to improve the taste of tomatoes. Chives and mint are pungent herbs that also deter away the pests and are compatible with tomatoes.
Plant borage near tomatoes as it protects tomato plants from tomato hornworm.
Tomato Companion Plants: Vegetables
Tomatoes also do well with beans, peas, peppers, onions and lettuce. Carrots and tomatoes also go well together, although carrots grow little stunned if planted too close to the tomato plants but their flavor will be higher.
Also Read: Carrot Companion Plants
Tomato Companion Plants: Flowers
Flowers planted with tomatoes add variety in the garden. Plant marigolds along with tomatoes – they keep the soil healthy, prevent nematodes and discourage many common garden pests. This bright annual flower also adds color to the garden and attract beneficial insects to your tomato patch.
Calendula also keeps the pests away. As an added bonus, its flowers are edible and added in salads and desserts. Nasturtiums too are good companion plants for tomatoes.
Unsuitable Plants for Tomatoes
While some companion plants improve or do not affect the tomatoes, some plants are best avoided to be planted near them. Generally tomatoes are heavy feeders, they require lots of sun, water and nutrients so you should avoid plants that have higher growing requirements or have pests and diseases like tomatoes. Don’t pare tomatoes with cabbage, broccoli, kohlrabi and other members of brassica genus, as they slow up the growth and development of tomatoes.
Tomatoes and potatoes are also not a good match – both suffer from the same pests and diseases and once it hits one plant, quickly affect the other. Corn is another plant that needs to be avoided as both are vulnerable to a worm that can be transferred between the two plants.
Plants that Do well with Tomatoes
Tomatoes when planted with some plants also help them. A bed of asparagus with a few tomato plants will be more resistant to asparagus beetle. When planted with roses, tomatoes prevent black spot in roses, a fungal disease that attacks the roses.
The key of getting most productive tomato plants is to plant right companions with it. Read this article to find out which are the best companion plants for tomatoes.

Companion planting is a sustainable way to grow healthy tomatoes without the use of toxic pesticides. Many good companion plant for tomatoes are herbs and flowers like marigold.
Also Read: How to Grow Tomatoes in Hanging Baskets
Tomato Companion Plants: Herbs
Basil and tomatoes in the garden go as well together as they do in the kitchen. Plant two or three basil plants near tomatoes. They not only enhances the flavor of each other and improves growth but also keep the pests away.
Plant garlic between each tomato plant to discourage red spider mites and plant parsley to improve the taste of tomatoes. Chives and mint are pungent herbs that also deter away the pests and are compatible with tomatoes.
Plant borage near tomatoes as it protects tomato plants from tomato hornworm.
Tomato Companion Plants: Vegetables
Tomatoes also do well with beans, peas, peppers, onions and lettuce. Carrots and tomatoes also go well together, although carrots grow little stunned if planted too close to the tomato plants but their flavor will be higher.
Also Read: Carrot Companion Plants
Tomato Companion Plants: Flowers
Flowers planted with tomatoes add variety in the garden. Plant marigolds along with tomatoes – they keep the soil healthy, prevent nematodes and discourage many common garden pests. This bright annual flower also adds color to the garden and attract beneficial insects to your tomato patch.
Calendula also keeps the pests away. As an added bonus, its flowers are edible and added in salads and desserts. Nasturtiums too are good companion plants for tomatoes.
Unsuitable Plants for Tomatoes
While some companion plants improve or do not affect the tomatoes, some plants are best avoided to be planted near them. Generally tomatoes are heavy feeders, they require lots of sun, water and nutrients so you should avoid plants that have higher growing requirements or have pests and diseases like tomatoes. Don’t pare tomatoes with cabbage, broccoli, kohlrabi and other members of brassica genus, as they slow up the growth and development of tomatoes.
Tomatoes and potatoes are also not a good match – both suffer from the same pests and diseases and once it hits one plant, quickly affect the other. Corn is another plant that needs to be avoided as both are vulnerable to a worm that can be transferred between the two plants.
Plants that Do well with Tomatoes
Tomatoes when planted with some plants also help them. A bed of asparagus with a few tomato plants will be more resistant to asparagus beetle. When planted with roses, tomatoes prevent black spot in roses, a fungal disease that attacks the roses.
3
3
成长记
Leonardo Gunawan
2017年04月22日

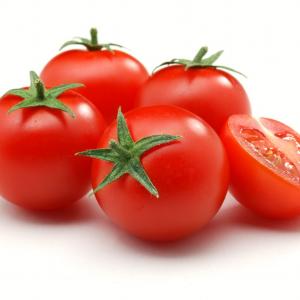
I new added a "tomato" in my "garden"

1
0
Hhhhh:It must become more beautiful
文章
Andrea
2017年02月17日

Tomatoes are without a doubt one of the most popular vegetables in the home garden, and for good reason. Homegrown tomatoes are very nutritious and much more flavorful than those bought from a store. Tomato plants will produce an abundance of fruit for the home gardener if they are properly planted and cared for.
#Tomato require a fairly long growing season, and for this reason the seeds are typically planted indoors about six to eight weeks before they can be planted in the garden. The seeds can be sown 1/4″ deep in small pots or flats in a soil less potting mix or sterilized potting soil. It takes 7-14 days at a temperature of 70-80 degrees Fahrenheit for the seeds to germinate. Keep the soil moist but not soggy. Placing plastic wrap loosely over the pots or flats will help maintain the humidity necessary for germination, but the plastic wrap must be removed once the seedlings sprout.
Bottom heat helps to speed the germination process. Garden centers and catalogs sell heating cables made just for this purpose, but you may also set the pots or flats on top of your water heater to take advantage of its warmth for germination.
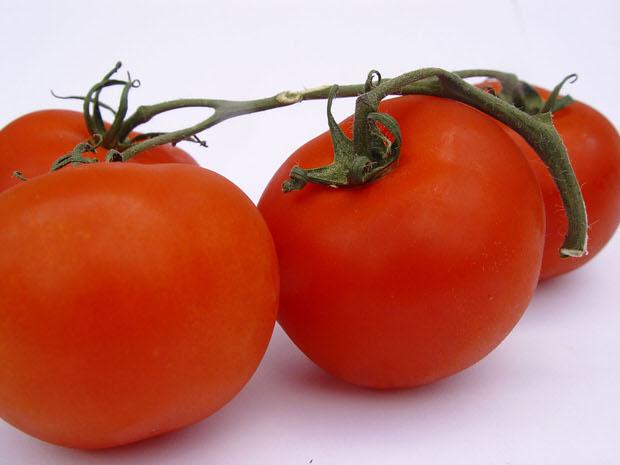
As soon as the seedlings emerge, they should be moved to an area with full light, such as a sunny window or under grow lights. They should have light on them for about 12 hours a day and should be kept at a temperature of 70-80 degrees. Fertilize the seedlings with a water-soluble fertilizer when they’re about 3-4 weeks old, but dilute the fertilizer to about half the strength recommended on the label.
The little tomato plants will be accustomed to fairly steady and warm temperatures indoors, and planting them directly outside could come as quite a shock to them, especially when nighttime temperatures are still cool. About a week before it’s time to plant them in the garden, begin to gradually introduce them to outdoor conditions. This is called hardening off, and it simply involves moving the plants gradually to conditions more like what they’ll experience in the garden.
Start hardening them off by moving the plants to an enclosed porch for a day or two, then to a sunny spot outdoors that is protected from the wind. If the temperature threatens to take a drastic downward dip, bring the plants back indoors until it warms up outside again.
Tomatoes were originally found only in very warm climates. They don’t like to be cold and should not be planted outside until the danger of frost has passed and the soil has warmed up. That’s typically late May or even early June here in northern Ohio.
The sooner tomatoes are planted outside, the sooner they will begin to produce ripe fruit, and there are a few tricks that make it possible to plant tomatoes in the garden a bit earlier.
The garden soil may be warmed up by covering it with clear or white plastic for a few days. The little tomato plants will be much happier with their roots in warm soil. Once the plants are in the garden, the foliage can be protected from a light frost by covering the plants with plastic gallon jugs that have their bottoms removed, or with plastic or fabric sheets placed over the plants. Suspend this over the plants using wire hoops so the plastic or fabric doesn’t touch the foliage.
When you are ready to transplant your tomato seedlings into the garden, be sure to choose a spot for them that gets full sun for at least 8 hours a day. Dig a hole for each plant that is large enough to easily accommodate all of the roots. Before transplanting, water the plants while they are still in the pot. This not only helps prevent transplant shock, but it also makes it easier to slip the plant from the pot.
Tomato plants will grow roots from any part of the stem that is buried beneath the soil, so the plants will benefit from being planted deeply, up to the first set of leaves. If the plants have spent too much time in pots and have become leggy, they may be planted in furrows with their too-long stems laid in the furrow and gently buried with soil. This will help the plants develop a strong root system while preventing the long stem from breaking.
Fill in the planting hole with soil, pressing the soil in firmly to eliminate air pockets. Then give the plants a good drink of water, thoroughly soaking the soil around them.

If you plan on staking or trellising your tomato plants, they can be planted about 2-3 feet apart. Plants that will be allowed to sprawl on the ground will need more room and should be planted 4-6 feet apart.
If the soil is still a bit cool, your white or clear plastic may be placed on the ground beneath the plants to warm the soil. Once warmer temperatures have settled in, this plastic should be removed to avoid burning the foliage with reflective heat.
It is important to keep tomato leaves up off the soil to help prevent soil-borne diseases from attacking the plants. This can easily be done by applying straw mulch around the plants. But straw mulch should only be applied once the soil has warmed up above 70 degrees. If the mulch is laid down while the soil is still cool, it will keep the soil from warming up as it should, your tomato plants will suffer from cold feet and won’t produce as well as they could.
Planting your tomatoes properly is an important step toward a bountiful harvest of sweet, juicy fruit. In another article we’ll discuss how to trellis and prune tomato plants to increase your harvest.
#Tomato require a fairly long growing season, and for this reason the seeds are typically planted indoors about six to eight weeks before they can be planted in the garden. The seeds can be sown 1/4″ deep in small pots or flats in a soil less potting mix or sterilized potting soil. It takes 7-14 days at a temperature of 70-80 degrees Fahrenheit for the seeds to germinate. Keep the soil moist but not soggy. Placing plastic wrap loosely over the pots or flats will help maintain the humidity necessary for germination, but the plastic wrap must be removed once the seedlings sprout.
Bottom heat helps to speed the germination process. Garden centers and catalogs sell heating cables made just for this purpose, but you may also set the pots or flats on top of your water heater to take advantage of its warmth for germination.

As soon as the seedlings emerge, they should be moved to an area with full light, such as a sunny window or under grow lights. They should have light on them for about 12 hours a day and should be kept at a temperature of 70-80 degrees. Fertilize the seedlings with a water-soluble fertilizer when they’re about 3-4 weeks old, but dilute the fertilizer to about half the strength recommended on the label.
The little tomato plants will be accustomed to fairly steady and warm temperatures indoors, and planting them directly outside could come as quite a shock to them, especially when nighttime temperatures are still cool. About a week before it’s time to plant them in the garden, begin to gradually introduce them to outdoor conditions. This is called hardening off, and it simply involves moving the plants gradually to conditions more like what they’ll experience in the garden.
Start hardening them off by moving the plants to an enclosed porch for a day or two, then to a sunny spot outdoors that is protected from the wind. If the temperature threatens to take a drastic downward dip, bring the plants back indoors until it warms up outside again.
Tomatoes were originally found only in very warm climates. They don’t like to be cold and should not be planted outside until the danger of frost has passed and the soil has warmed up. That’s typically late May or even early June here in northern Ohio.

The sooner tomatoes are planted outside, the sooner they will begin to produce ripe fruit, and there are a few tricks that make it possible to plant tomatoes in the garden a bit earlier.
The garden soil may be warmed up by covering it with clear or white plastic for a few days. The little tomato plants will be much happier with their roots in warm soil. Once the plants are in the garden, the foliage can be protected from a light frost by covering the plants with plastic gallon jugs that have their bottoms removed, or with plastic or fabric sheets placed over the plants. Suspend this over the plants using wire hoops so the plastic or fabric doesn’t touch the foliage.
When you are ready to transplant your tomato seedlings into the garden, be sure to choose a spot for them that gets full sun for at least 8 hours a day. Dig a hole for each plant that is large enough to easily accommodate all of the roots. Before transplanting, water the plants while they are still in the pot. This not only helps prevent transplant shock, but it also makes it easier to slip the plant from the pot.
Tomato plants will grow roots from any part of the stem that is buried beneath the soil, so the plants will benefit from being planted deeply, up to the first set of leaves. If the plants have spent too much time in pots and have become leggy, they may be planted in furrows with their too-long stems laid in the furrow and gently buried with soil. This will help the plants develop a strong root system while preventing the long stem from breaking.
Fill in the planting hole with soil, pressing the soil in firmly to eliminate air pockets. Then give the plants a good drink of water, thoroughly soaking the soil around them.

If you plan on staking or trellising your tomato plants, they can be planted about 2-3 feet apart. Plants that will be allowed to sprawl on the ground will need more room and should be planted 4-6 feet apart.
If the soil is still a bit cool, your white or clear plastic may be placed on the ground beneath the plants to warm the soil. Once warmer temperatures have settled in, this plastic should be removed to avoid burning the foliage with reflective heat.
It is important to keep tomato leaves up off the soil to help prevent soil-borne diseases from attacking the plants. This can easily be done by applying straw mulch around the plants. But straw mulch should only be applied once the soil has warmed up above 70 degrees. If the mulch is laid down while the soil is still cool, it will keep the soil from warming up as it should, your tomato plants will suffer from cold feet and won’t produce as well as they could.
Planting your tomatoes properly is an important step toward a bountiful harvest of sweet, juicy fruit. In another article we’ll discuss how to trellis and prune tomato plants to increase your harvest.
0
0
文章
Erin
2016年12月26日

#growing-fruit-tips
DON’TS
1. Don’t water from above. Doing so encourages water born pathogens and spreads disease.
2. Don’t Overcrowd. Tomato seedlings need plenty of room to grow and will be stunted if they are over crowded. The same is true for mature plants. The size of a mature tomato plant is about 3 feet in diameter, so don’t plant young plants a foot apart.
3. Don’t forget tomato cages. While a tall stake will work okay, tomato plants can get very large and will benefit from having a tomato cage around them to keep sprawling stems off the ground.
4. Don’t wait too long to stake. I place my stakes in at the time that I plant the seedlings. I won’t damage the roots if I do this and the stems will be ready to tie up as the plant grows.
5. Don’t forget that critters like tomatoes too! If you have followed my blog, you will know of my exploits with the squirrels. Nothing is worse than seeing a dozen half ripe tomatoes on the ground with a bite out of each one. See my tips for dealing with squirrels. Hint…they don’t like cayenne pepper!
6. Don’t over-fertilize. Doing so will often result in bushy tomato plants with few flowers and flowers are what makes tomatoes later.
7. Don’t go for seedlings with flowers. You may think this will give you a head start on the growing season but the opposite is the case. Go for strong root systems and healthy looking stems. The flowers will come soon enough. (The same goes for flowering plants – why buy those already in flower? Enjoy them in your garden, not at the garden center!)
8. Don’t plant too early. Tomatoes are best if the soil temperature is consistently above 50º F outside. And make sure to measure the temp down a ways into the soil. 6 inches doesn’t sound like a lot, but think of where the roots are!
9. Don’t be impatient. The sweetest tomatoes are those that grow on the vine as long as possible. Don’t be in a hurry to take them off too early. If any fall off the vine, see my tips for ripening green tomatoes.
10. Don’t panic at the end of the season. If you have plants left and a frost is threatening at season end, pull up the whole plant, tomatoes and all and hang upside down in a garage or basement. The fruit will continue to ripen.
11. Don’t store tomatoes in the fridge. Doing so will spoil the taste and take away much of the sweetness that you are looking for. See this tip for sweet tomatoes.
Sun-ripened tomatoes deliver the taste of summer in every bite all summer long. Plant just a few healthy plants and you will ensure the production of buckets of this delicious fruit.
2
0
文章
Erin
2016年12月26日

#growing-fruit-tips
DOS
1.Do provide plenty of sunlight. Tomato plants need sunlight and lots of it. They need about 10 hours of direct sunlight a day during the summer (and 10-14 hours of bright diffused light a day as seedlings.)
2.Do start with healthy soil. A well amended soil is a must. I like to add a scoop of compost to every hole that I dig for any plant, and tomatoes are no exception. Soil that is full of rich compost is the secret weapon to any tomato grower and organic material is the best. There is just on chemical substitute for well good, old fashioned compost.
3.Do plant seedlings deeply. Tomato plants do best with a healthy root system. I like to choose a tall plant and pull of some of the lower leaves and plant it deeply into the hole. Roots will form along the planted stem and this will make for a very healthy plant.<img src="1000062739_24273_1482734228.jpg">
4.Do know your soil type. Tomatoes like soil that will hold water but not make them too soggy. The wrong soil type an cause all sorts of problems from flower drop, blossom end rot and split fruit.
5.Do remove lower leaves. These are the first leaves to grow on your plant and they are the easiest ones to develop fungus and other problems. As they plant grows, they also get the least amount of light ans circulation so they are more vulnerable to disease. Removing them also keeps them out of reach of the water.
6.Do Water Deeply from the roots. Tomato plants love water and they like a deep watering. A soaker hose works best for tomato plants. (affiliate link) Also see my tutorial for a soda bottle drip feeder here.
7.Do stake your plants. Indeterminate tomato plants can grow to 10 feet or more and definitely need some staking. Even determinate plants will get to 3 feet. If you don’t stake, the weight of fruit may break your stems.<img src="1000062740_24273_1482734228.jpg">
8.Do Mulch. While we are on the topic of watering, be sure to add mulch. Bring it to a few inches from the stem, right over a soaker hose. This conserves the water and helps to prevent soil born pathogens from getting on to the leaves.
9.Do pinch suckers. Small suckers will grow at each leaf axil. This can weaken the plant and won’t bear fruit. Pinch these out to encourage great plant growth.<img src="1000062741_24273_1482734229.jpg">
10.Do rotate your crop. If you plant your tomatoes in the same spot each year, you encourage soil borne pests and diseases to take hold. Move the area where you plant to another spot in your garden every three years or so.
11.Do choose a spot with good air circulation. Making sure there is plenty of air around the plants keeps the risk of many diseases at bay.
12.Do watch out for caterpillars. Horn worm caterpillars can devastate a tomato crop. Be on the look out and remove if you find them.
13.Do plant again. If you live in a sunny growing zone, be sure to practice succession planting. Add another crop a few weeks after you plant the first one to ensure luscious tomatoes all summer long.
3
0


