文章
Miss Chen
2022年07月04日

IN THIS ARTICLE
Care
Types
Pruning
Propagating
Growing From Seed
Potting
Overwintering
Pests & Diseases
Bloom
Common Problems
Frequently Asked Questions
Creeping mazus (Mazus reptans) is a fast-spreading, semi-evergreen perennial that works well as a ground cover in USDA zones 5 to 8. In warmer climates, the dense, lush foliage remains green throughout the year, and it features clusters of beautiful little purple-blue flowers that blossom in late spring and summer. The tiny thumbnail-sized flowers form a dense mat and can be mowed in much the same way as turf grass.
Creeping mazus is usually planted from potted nursery starts or from root divisions in the spring. It is a fast-growing plant that will quickly fill in to create a uniform ground cover.
Common Name Creeping mazus
Botanical Name Mazus reptans or Mazus miquelii
Family Mazaceae
Plant Type Herbaceous perennial
Mature Size 2–3 in. tall, 6–12 in. wide
Sun Exposure Full, partial
Soil Type Moist, well drained
Soil pH Acidic to alkaline (5.5–8.0)
Bloom Time Summer
Flower Color White to blue-violet
Hardiness Zones 5–8 (USDA)
Native Area Central Asia (Himalayas)
Creeping Mazus Care
Creeping mazus prefers relatively moist fertile soil in a full-sun location, but it is an adaptable plant that tolerates almost any soil type and will grow adequately in partial shade. In shady conditions, it will grow more slowly with fewer flowers.
Light
Creeping mazus sees rapid growth in full sun or partial shade positions. In very hot regions, a location that is shaded during the peak of the afternoon is best.
Soil
Creeping mazus prefers fertile, moist, loamy soil, but it is a robust species that tolerates a variety of soil types. If the soil is too hard-packed, the delicate rooting system will struggle to become established. It grows equally well in acidic, neutral, and alkaline soils. With soils that are too dry, adding mulch will help with moisture retention.
Water
This plant prefers to remain moist but not constantly wet. Make sure it isn't exposed to over-watering, as standing water will cause root rot. Weekly watering, especially in hot and dry conditions will ensure your creeping mazus continues to flourish. If it stays dry too long, the foliage will begin to wilt and die.
Temperature and Humidity
Creeping mazus copes well across a wide range of temperatures and is reliably hardy in USDA zones 5 to 8. It prefers a warm and moist environment, and in warmer climates it is evergreen. In colder zones, the foliage may turn red and go dormant in the winter months. Hard frost may kill individual plants, though a colony usually fills in again when mild spring weather returns.
Fertilizer
You won't have to worry about feeding creeping mazus if it's planted in a rich and fertile soil. An annual light feeding of a slow-release variety in the spring, however, could promote better growth for plants that are in dry, poor-quality soil.
Types of Creeping Mazus
Mazus reptans has no widely available named cultivars—the species type is the one normally sold in the horticulture trade. However, there is a related species, Mazus miquelli, that is also sometimes known by the common name creeping mazus. However, M. miquelli, a native to Japan and China, is considered an invasive plant in the Northeast U.S., and it is rarely, if ever, deliberately used as a landscape plant.
Pruning
Although pruning is not required, creeping mazus responds well to shearing with a mower when used as a replacement for turf grass in ground-cover situations.
Propagating Creeping Mazus
Creeping mazus spreads naturally as its roaming stems root themselves in soil. It is an easy matter to dig up some of these offshoots and transplant them. Here's how:
In spring after an established plant is actively growing, use a sharp knife or trowel to separate an offshoot stem that has rooted itself and lift it free of the mother plant.
Immediately plant the offshoot in a new garden location and water it well. If planting with the intent of creating a new ground cover, space the plants 8 to 12 inches apart, as they will quickly spread to fill the space.
How to Grow Creeping Mazus From Seed
Creeping mazus spreads so quickly that it's generally planted via nursery seedling flats, with plants spaced 8 to 12 inches apart and then allowed to fill in to create a carpet of greenery. However, if you are covering large areas with creeping mazus, it is possible to plant from bulk seeds sown over the area, much the way lawn seed is sown. However, if you're seeding an area previously covered with grass, make sure to remove as much grass as possible, including the roots. This will give creeping mazus the best chance of thriving, as it can't outcompete the tenacious roots of turfgrasses.
Allow a decent amount of space between sown seeds, too. Remember, this plant has a fast-spreading, close-to-the-surface, sprawling root system. You don't want the area to become overcrowded, as this can impact growth.
Potting and Repotting Creeping Mazus
Although it's not a common way to grow creeping mazus, this plant can be grown in containers filled with standard potting mix. The low-growing trailing habit can make it a good "spiller" plant for the edges of a mixed container garden. A container of any type will do, provided it is well draining.
Overwintering
This plant generally requires no special winter preparation, though gardeners in colder zones may find that a layer of leaf mulch over the plants will prevent winter kill. Any covering should be raked off the plants as soon as the weather warms in the spring.
Common Pests and Plant Diseases
Creeping mazus is not a victim of any common serious pests or diseases, but it can be subject to damage from slugs and snails. These pests are best handled by removing them by hand, or with snail/slug baits placed in the garden.
How to Get Creeping Mazus to Bloom
It's rare for creeping mazus to withhold blooms during its normal flowering period, late spring though mid-summer. If it does not bloom adequately, it may be because it is not getting enough sunlight or water—both of which are necessary for profuse blooming. If both these cultural needs are adequate, then feeding the plant with balanced fertilizer may give the plants a needed nutritional boost.
An old, overgrown patch of creeping mazus may stop blooming because the plants become too crowded. In this case, rejuvenate the colony by digging up the plants, dividing the roots, and replanting the pieces 8 to 12 inches apart. The colony usually responds quickly with vigorous growth and ample flowering.
Common Problems With Creeping Mazus
There are very few cultural problems with creeping mazus if it's grown in its established hardiness range, but occasionally you may notice brown patches appearing in the otherwise uniform carpet of green. In the colder end of the hardiness range, this can be a symptom of winter kill caused by hard frost. Unless the frost is very hard and prolonged, winter kill usually corrects itself in the spring as surrounding plants fill in to replace dead patches.
Brown patches can also be caused by soil that is too dry. Creeping mazus plants like plenty of moisture, and may die back if allowed to become too dry during hot months.
FAQ
How is this plant best used in the landscape?
Creeping mazus is a popular aground cover alternative in locations that are too moist for turfgrass to grow well—such as the banks along streams or water gardens. It also works well to fill in gaps in between flagstones or walls, and it is a favored addition in rock gardens, where it helps reduce weed growth. This species also looks lovely dangling over the edges of hanging baskets or containers.
Is there a similar plant that works well in colder zones?
Scotch moss can be a good alternative to creeping mazus for zones 3 and 4. It is a good plant for moist areas, and it accepts a fair amount of foot traffic without incurring permanent damage.
How do I replace a turf grass lawn with creeping mazus?
Creeping mazus cannot simply be overseeded in a turf grass lawn, as turf grasses are considerably more aggressive and will win the rooting battle. If you do want to replace an area of turf grass, you must first kill off or remove all the grass. Turf grass can be removed with a sharp, flat shovel, but a more effective method is to kill it off with glyphosate herbicide before replanting with creeping mazus.
0
0
文章
Miss Chen
2022年06月21日

IN THIS ARTICLE
Care
Pruning
Propagating
Growing From Seed
Potting and Repotting
Overwintering
Bloom
Common Problems
Frequently Asked Questions
BACK TO TOP
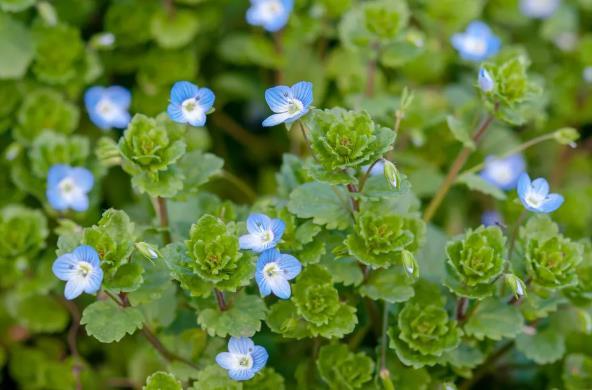
Creeping speedwell is a spreading perennial ground cover plant adorned with dainty flowers. Veronica filiformis is a trailing perennial that only reaches up to 5 inches in height and produces small, singular flowers. The blooms are composed of four rounded petals seen in shades of pink, purple or blue and appear in the spring and summer. The foliage is scallop-shaped and is evergreen in warm areas.
These plants spread quickly, creating mats that can reach up to 30 inches wide. This spreading nature, though good for covering large areas, can spread outside of their intended growing areas. The species is considered an invasive weed in some areas.1
Common Name Creeping Speedwell, Slender Speedwell
Botanical Name Veronica filiformis
Family Plantaginaceae
Plant Type Perennial, groundcover
Mature Size 2-5 in. tall, 20-30 in. wide
Sun Exposure Full, partial
Soil Type Loamy, sandy, clay, moist but well-drained
Soil pH Neutral
Bloom Time Spring, summer
Flower Color Pink, blue, purple
Hardiness Zones 3-9, USA
Native Area Europe, Asia
Creeping Speedwell Care
Creeping speedwell is very easy to care for and is often found growing wild in lawns, fields, or meadows. It is quite hardy and handles mowing and foot traffic well. In fact, cut pieces blown by a mower easily take root, spreading the plant further. These plants make excellent additions to rock gardens or around pathways.
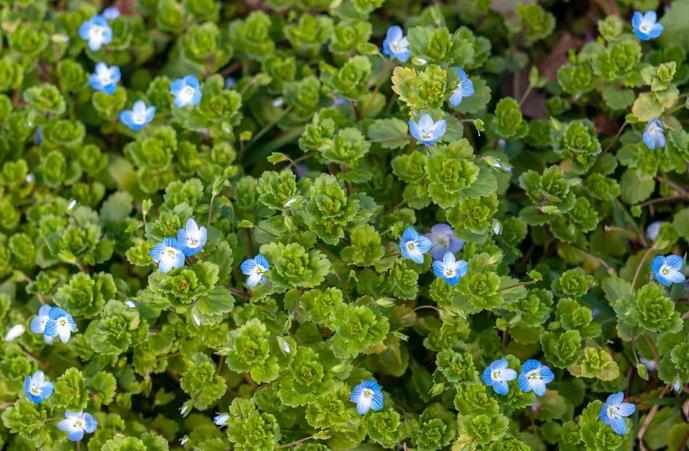
Creeping speedwell are deer and rabbit resistant. They are susceptible to root rot or other fungal problems if the soil is kept too wet.2 Take note that the dense mats created by the plants may harbor ticks and fleas.
Because of its hardy nature and rapid spread, creeping speedwell is considered invasive in some areas. For example, according to the Center for Invasive Species and Ecosystem Health, Veronica filiformis is considered invasive in the state of West Virginia.1 Be sure to do thorough research before planting this species in your area.
Light
Creeping speedwell can be grown in both full sun and shade. However, full sun can be too intense for creeping speedwell when it is grown in warm climates. Plants grown in full shade often do not flower well. For the best growth and bloom, it is ideal to plant creeping speedwell in an area with partial shade, particularly in the afternoon.
Soil
Creeping speedwell is a hardy plant frequently found growing in lawns, fields, and meadows. It prefers loamy, sandy, well-draining, and moist soil, but can also tolerate some clay. These plants grow best in soil with a neutral pH level, though they can tolerate slightly acidic and slightly alkaline soils.
Water
Once established, creeping speedwell is considered drought-tolerant. To avoid problems with soggy soil, only water these plants when the top inch or so of the soil begins to dry out. For young, newly planted speedwells, it is best to water more often until they are established. An inch of water per week is plenty to keep established plants healthy.
Temperature and Humidity
This groundcover plant is adaptable to a wide range of temperature and humidity levels, as long as it is grown within USDA hardiness zones 3 to 9. Keep in mind that the plant will remain evergreen in warm weather climates, but not in places where more seasonal changes in temperature are expected.
Fertilizer
Creeping speedwell is a light feeder and can even be grown in poor soil conditions, so regular fertilizing is not necessary. However, you can work compost or a well-balanced fertilizer into the soil in early spring if you want to ensure the plant receives needed nutrients.
Pruning
Pruning is not necessary, though it may be desired to keep the plant from spreading. Simply trim the plant with garden snips to do this. For large areas of creeping speedwell used as ground cover, a lawnmower is the best way to make quick work of the job. However, if you do not want the pruned pieces to take root, it is best to use a collection bag when mowing these plants.
Stop pruning in late summer, especially for plants grown in areas with cold winters. This allows the plants to create enough mature foliage to be protected through the winter. Pruning too late in the year will result in new growth that is too tender to survive the winter.
Propagating Creeping Speedwell
The spreading nature of creeping speedwell makes these plants easy to propagate. It can be accomplished by means of division, cuttings, or layering.
Division is a great option for plants whose centers begin to look bare or scraggly. To divide the plant, you will need a garden shovel, a hand shovel, a pair of snips, and a pair of gardening gloves. Then follow these instructions:
In early spring, use the garden shovel to gently dig around the plant, loosening the roots. Do this until the plant and its root system can be lifted from the ground.
Gently lift the plant out of the ground.
Using the shovels and the snips, divide the plant into however many sections you wish. Just be sure each section has healthy foliage and roots. Discard any bare areas.
Plant each section in its desired location.
To take cuttings, you will need a sharp pair of snips, moist, well-drained soil, and a small pot. Then follow these instructions:
Using the snips, cut a stem below a leaf node. Trim a section that is around 6 inches long.
Remove the leaves on the lower half of the cutting.
Bury the stripped end into moist soil. Make sure several nodes are buried, as this is where roots will form.
Keep the soil moist, but not soggy. Place the cuttings in bright, indirect light until roots form.
Check for roots by gently tugging on the cutting. If there is resistance, roots have formed. Once this happens, harden the cutting off and move it to its permanent location.
To layer, you will need a pair of garden gloves, a hand shovel, and a pair of snips. Then follow these instructions:
Find a node along the stem where you would like to propagate the plant.
Bury the node in the soil. Wait a few weeks for roots to form.
Check for roots by gently tugging on the buried node. Resistance means that roots have formed. At this point you may leave the node in place or cut the stem connecting it to the rest of the plant and dig up the new root system, planting it where you wish.
How to Grow Creeping Speedwell From Seed
Creeping speedwell can also be grown from seeds, started either indoors and outdoors. For indoor growth, start the seeds eight to 10 weeks before the last frost. You will need small pots, bright, indirect lighting, and a moist, well-draining seed starting mix, such as a peat moss mixture. Then follow these instructions:
Fill the pots with the seed starting mix and dampen the mixture.
Lightly sprinkle the tiny seeds onto the damp mixture and gently press them onto it. Do not bury them as they need light to germinate.
Place the pots in an area that receives bright, indirect light.
Keep the soil consistently moist.
Once the threat of frost is gone, harden off your seedlings. Then plant them into their permanent garden spaces.
To start seeds outdoors, follow these instructions:
Wait until the threat of frost is gone, then clear the area of weeds and work in organic material, such as compost. It is best to choose a spot that is protected from wind, as the seeds are very small and can be blown about.
Lightly sprinkle the seeds across the soil and gently tap them onto the soil to settle them in place. Do not bury them, as they need light to germinate.
Keep the soil moist as the seeds germinate and sprout. Once the plants become larger and more established, slowly reduce watering.
Potting and Repotting Creeping Speedwell
An easy way to contain creeping speedwell is by growing it in a pot. When choosing a container, be sure it has free-flowing drainage holes, as soggy soil can cause fungal problems. Since creeping speedwell will spread and fill the pot, at some point you will need to divide the plant or place it in a larger pot. When this time comes, tip the pot onto its side and tap it on all sides in order to loosen the roots. Slide the plant out when possible and either place it into a larger pot with loamy, well-draining soil, or divide the plant with a shovel or a pair of snips.
Overwintering
When grown in its appropriate growing zones, creeping speedwell does not require extra attention to survive the winter. Just be sure the soil does not get too wet, as this can lead to problems that may kill off the plant. If the winter is especially wet, you may want to cover the plant with plastic to keep some of the water out.
How to Get Creeping Speedwell to Bloom
Creeping speedwells produce small, four-petaled flowers seen in blue, purple, and pink. They often have white centers. Unlike other species of Veronica plants, creeping speedwell produces one flower per stalk as opposed to a spiky raceme covered in flowers. Still, these tiny flowers are attractive to pollinators such as butterflies and bees.
Because of their hardy nature, creeping speedwells do not often need much help to bloom. To encourage blooming, be sure to choose a planting spot that receives a few hours of sunlight each day. An area that receives morning sun and afternoon shade is ideal. Deadheading spent flower blooms will encourage more flowers to form.
Common Problems With Creeping Speedwell
Creeping speedwell is a very hardy plant and does not present many problems. In fact, it is more likely to challenge the gardener with problems of overgrowth. However, even extremely hardy plants may occasionally face problems. The biggest issues for creeping speedwell plants occur when the soil is too wet or too dry, manifesting in the form of wilting, soggy, or yellowing foliage.
Wilting Foliage
This is often seen in hot climates where the soil dries out quickly. If this is the case, try to plant your creeping speedwell in an area that receives afternoon shade. Increase the amount of water and frequency of watering times to ensure the plant receives enough.
Soggy, Wilting, and Yellowing Foliage
This is a sign of too much water and may point to root rot.2 If this is the case, cut back on watering and only water when the first inch or so of the soil is dry. If root rot is suspected, dig up the plant and cut away any infected roots and foliage. Amend the soil with a well-draining material such as sand or compost before replanting.
FAQ
Is creeping speedwell invasive?
Creeping speedwell is considered to be an invasive weed in some areas.1 Even in areas where it is not technically considered invasive, this plant has invasive qualities and can quickly spread outside its intended growing area.
Is creeping speedwell a perennial?
Yes, creeping speedwell is a perennial flowering plant. In areas with warm winters, this ground cover plant is also an evergreen.
How fast does creeping speedwell grow?
This ground cover is a fast grower and a quick spreader. This rapid growth makes containing the plant an important consideration for most gardeners.
Care
Pruning
Propagating
Growing From Seed
Potting and Repotting
Overwintering
Bloom
Common Problems
Frequently Asked Questions
BACK TO TOP
Creeping speedwell is a spreading perennial ground cover plant adorned with dainty flowers. Veronica filiformis is a trailing perennial that only reaches up to 5 inches in height and produces small, singular flowers. The blooms are composed of four rounded petals seen in shades of pink, purple or blue and appear in the spring and summer. The foliage is scallop-shaped and is evergreen in warm areas.
These plants spread quickly, creating mats that can reach up to 30 inches wide. This spreading nature, though good for covering large areas, can spread outside of their intended growing areas. The species is considered an invasive weed in some areas.1
Common Name Creeping Speedwell, Slender Speedwell
Botanical Name Veronica filiformis
Family Plantaginaceae
Plant Type Perennial, groundcover
Mature Size 2-5 in. tall, 20-30 in. wide
Sun Exposure Full, partial
Soil Type Loamy, sandy, clay, moist but well-drained
Soil pH Neutral
Bloom Time Spring, summer
Flower Color Pink, blue, purple
Hardiness Zones 3-9, USA
Native Area Europe, Asia
Creeping Speedwell Care
Creeping speedwell is very easy to care for and is often found growing wild in lawns, fields, or meadows. It is quite hardy and handles mowing and foot traffic well. In fact, cut pieces blown by a mower easily take root, spreading the plant further. These plants make excellent additions to rock gardens or around pathways.

Creeping speedwell are deer and rabbit resistant. They are susceptible to root rot or other fungal problems if the soil is kept too wet.2 Take note that the dense mats created by the plants may harbor ticks and fleas.
Because of its hardy nature and rapid spread, creeping speedwell is considered invasive in some areas. For example, according to the Center for Invasive Species and Ecosystem Health, Veronica filiformis is considered invasive in the state of West Virginia.1 Be sure to do thorough research before planting this species in your area.
Light
Creeping speedwell can be grown in both full sun and shade. However, full sun can be too intense for creeping speedwell when it is grown in warm climates. Plants grown in full shade often do not flower well. For the best growth and bloom, it is ideal to plant creeping speedwell in an area with partial shade, particularly in the afternoon.
Soil
Creeping speedwell is a hardy plant frequently found growing in lawns, fields, and meadows. It prefers loamy, sandy, well-draining, and moist soil, but can also tolerate some clay. These plants grow best in soil with a neutral pH level, though they can tolerate slightly acidic and slightly alkaline soils.
Water
Once established, creeping speedwell is considered drought-tolerant. To avoid problems with soggy soil, only water these plants when the top inch or so of the soil begins to dry out. For young, newly planted speedwells, it is best to water more often until they are established. An inch of water per week is plenty to keep established plants healthy.
Temperature and Humidity
This groundcover plant is adaptable to a wide range of temperature and humidity levels, as long as it is grown within USDA hardiness zones 3 to 9. Keep in mind that the plant will remain evergreen in warm weather climates, but not in places where more seasonal changes in temperature are expected.
Fertilizer
Creeping speedwell is a light feeder and can even be grown in poor soil conditions, so regular fertilizing is not necessary. However, you can work compost or a well-balanced fertilizer into the soil in early spring if you want to ensure the plant receives needed nutrients.
Pruning
Pruning is not necessary, though it may be desired to keep the plant from spreading. Simply trim the plant with garden snips to do this. For large areas of creeping speedwell used as ground cover, a lawnmower is the best way to make quick work of the job. However, if you do not want the pruned pieces to take root, it is best to use a collection bag when mowing these plants.
Stop pruning in late summer, especially for plants grown in areas with cold winters. This allows the plants to create enough mature foliage to be protected through the winter. Pruning too late in the year will result in new growth that is too tender to survive the winter.
Propagating Creeping Speedwell
The spreading nature of creeping speedwell makes these plants easy to propagate. It can be accomplished by means of division, cuttings, or layering.
Division is a great option for plants whose centers begin to look bare or scraggly. To divide the plant, you will need a garden shovel, a hand shovel, a pair of snips, and a pair of gardening gloves. Then follow these instructions:
In early spring, use the garden shovel to gently dig around the plant, loosening the roots. Do this until the plant and its root system can be lifted from the ground.
Gently lift the plant out of the ground.
Using the shovels and the snips, divide the plant into however many sections you wish. Just be sure each section has healthy foliage and roots. Discard any bare areas.
Plant each section in its desired location.
To take cuttings, you will need a sharp pair of snips, moist, well-drained soil, and a small pot. Then follow these instructions:
Using the snips, cut a stem below a leaf node. Trim a section that is around 6 inches long.
Remove the leaves on the lower half of the cutting.
Bury the stripped end into moist soil. Make sure several nodes are buried, as this is where roots will form.
Keep the soil moist, but not soggy. Place the cuttings in bright, indirect light until roots form.
Check for roots by gently tugging on the cutting. If there is resistance, roots have formed. Once this happens, harden the cutting off and move it to its permanent location.
To layer, you will need a pair of garden gloves, a hand shovel, and a pair of snips. Then follow these instructions:
Find a node along the stem where you would like to propagate the plant.
Bury the node in the soil. Wait a few weeks for roots to form.
Check for roots by gently tugging on the buried node. Resistance means that roots have formed. At this point you may leave the node in place or cut the stem connecting it to the rest of the plant and dig up the new root system, planting it where you wish.
How to Grow Creeping Speedwell From Seed
Creeping speedwell can also be grown from seeds, started either indoors and outdoors. For indoor growth, start the seeds eight to 10 weeks before the last frost. You will need small pots, bright, indirect lighting, and a moist, well-draining seed starting mix, such as a peat moss mixture. Then follow these instructions:
Fill the pots with the seed starting mix and dampen the mixture.
Lightly sprinkle the tiny seeds onto the damp mixture and gently press them onto it. Do not bury them as they need light to germinate.
Place the pots in an area that receives bright, indirect light.
Keep the soil consistently moist.
Once the threat of frost is gone, harden off your seedlings. Then plant them into their permanent garden spaces.
To start seeds outdoors, follow these instructions:
Wait until the threat of frost is gone, then clear the area of weeds and work in organic material, such as compost. It is best to choose a spot that is protected from wind, as the seeds are very small and can be blown about.
Lightly sprinkle the seeds across the soil and gently tap them onto the soil to settle them in place. Do not bury them, as they need light to germinate.
Keep the soil moist as the seeds germinate and sprout. Once the plants become larger and more established, slowly reduce watering.
Potting and Repotting Creeping Speedwell
An easy way to contain creeping speedwell is by growing it in a pot. When choosing a container, be sure it has free-flowing drainage holes, as soggy soil can cause fungal problems. Since creeping speedwell will spread and fill the pot, at some point you will need to divide the plant or place it in a larger pot. When this time comes, tip the pot onto its side and tap it on all sides in order to loosen the roots. Slide the plant out when possible and either place it into a larger pot with loamy, well-draining soil, or divide the plant with a shovel or a pair of snips.
Overwintering
When grown in its appropriate growing zones, creeping speedwell does not require extra attention to survive the winter. Just be sure the soil does not get too wet, as this can lead to problems that may kill off the plant. If the winter is especially wet, you may want to cover the plant with plastic to keep some of the water out.
How to Get Creeping Speedwell to Bloom
Creeping speedwells produce small, four-petaled flowers seen in blue, purple, and pink. They often have white centers. Unlike other species of Veronica plants, creeping speedwell produces one flower per stalk as opposed to a spiky raceme covered in flowers. Still, these tiny flowers are attractive to pollinators such as butterflies and bees.
Because of their hardy nature, creeping speedwells do not often need much help to bloom. To encourage blooming, be sure to choose a planting spot that receives a few hours of sunlight each day. An area that receives morning sun and afternoon shade is ideal. Deadheading spent flower blooms will encourage more flowers to form.
Common Problems With Creeping Speedwell
Creeping speedwell is a very hardy plant and does not present many problems. In fact, it is more likely to challenge the gardener with problems of overgrowth. However, even extremely hardy plants may occasionally face problems. The biggest issues for creeping speedwell plants occur when the soil is too wet or too dry, manifesting in the form of wilting, soggy, or yellowing foliage.
Wilting Foliage
This is often seen in hot climates where the soil dries out quickly. If this is the case, try to plant your creeping speedwell in an area that receives afternoon shade. Increase the amount of water and frequency of watering times to ensure the plant receives enough.
Soggy, Wilting, and Yellowing Foliage
This is a sign of too much water and may point to root rot.2 If this is the case, cut back on watering and only water when the first inch or so of the soil is dry. If root rot is suspected, dig up the plant and cut away any infected roots and foliage. Amend the soil with a well-draining material such as sand or compost before replanting.

FAQ
Is creeping speedwell invasive?
Creeping speedwell is considered to be an invasive weed in some areas.1 Even in areas where it is not technically considered invasive, this plant has invasive qualities and can quickly spread outside its intended growing area.
Is creeping speedwell a perennial?
Yes, creeping speedwell is a perennial flowering plant. In areas with warm winters, this ground cover plant is also an evergreen.
How fast does creeping speedwell grow?
This ground cover is a fast grower and a quick spreader. This rapid growth makes containing the plant an important consideration for most gardeners.
0
0
文章
莹723
2021年01月27日

Sowing seed is a simple and inexpensive way of growing new flowers and vegetables for your garden. You can start the growing year much earlier than if sowing outside. When growing salad and vegetable crops, it’s a good idea to sow a small amount of seed every two weeks, to ensure you have a long season of fresh produce to eat throughout summer. This is called ‘successional sowing’.

You don’t need a lot of kit to sow seeds. Many gardeners buy expensive propagators but a seed tray or a few plastic pots, will do the job. If you don’t have plastic pots then try using old yoghurt pots with holes punched in the bottom, or tomato or mushroom punnets instead of a seed tray. Any vessel that can hold compost and allow water to drain freely is suitable.
To maintain an even temperature and keep the soil moist, it’s a good idea to cover the soil with a clear piece of plastic. A bespoke propagator will come with its own clear plastic lid, but you can use cling film, old freezer bags or any clear plastic bag. Use cellotape or an elastic band to fix it to the pot.

Follow our step-by-step guide to sowing seed indoors, below.
You Will Need
• Seeds
• Multi-purpose, peat-free compost
• Seed trays or pots
• Plant labels
• Pencil or waterproof pen
• Watering can with rose attachment
• Polythene bag
• Sheet of glass, or a propagator

Step 1
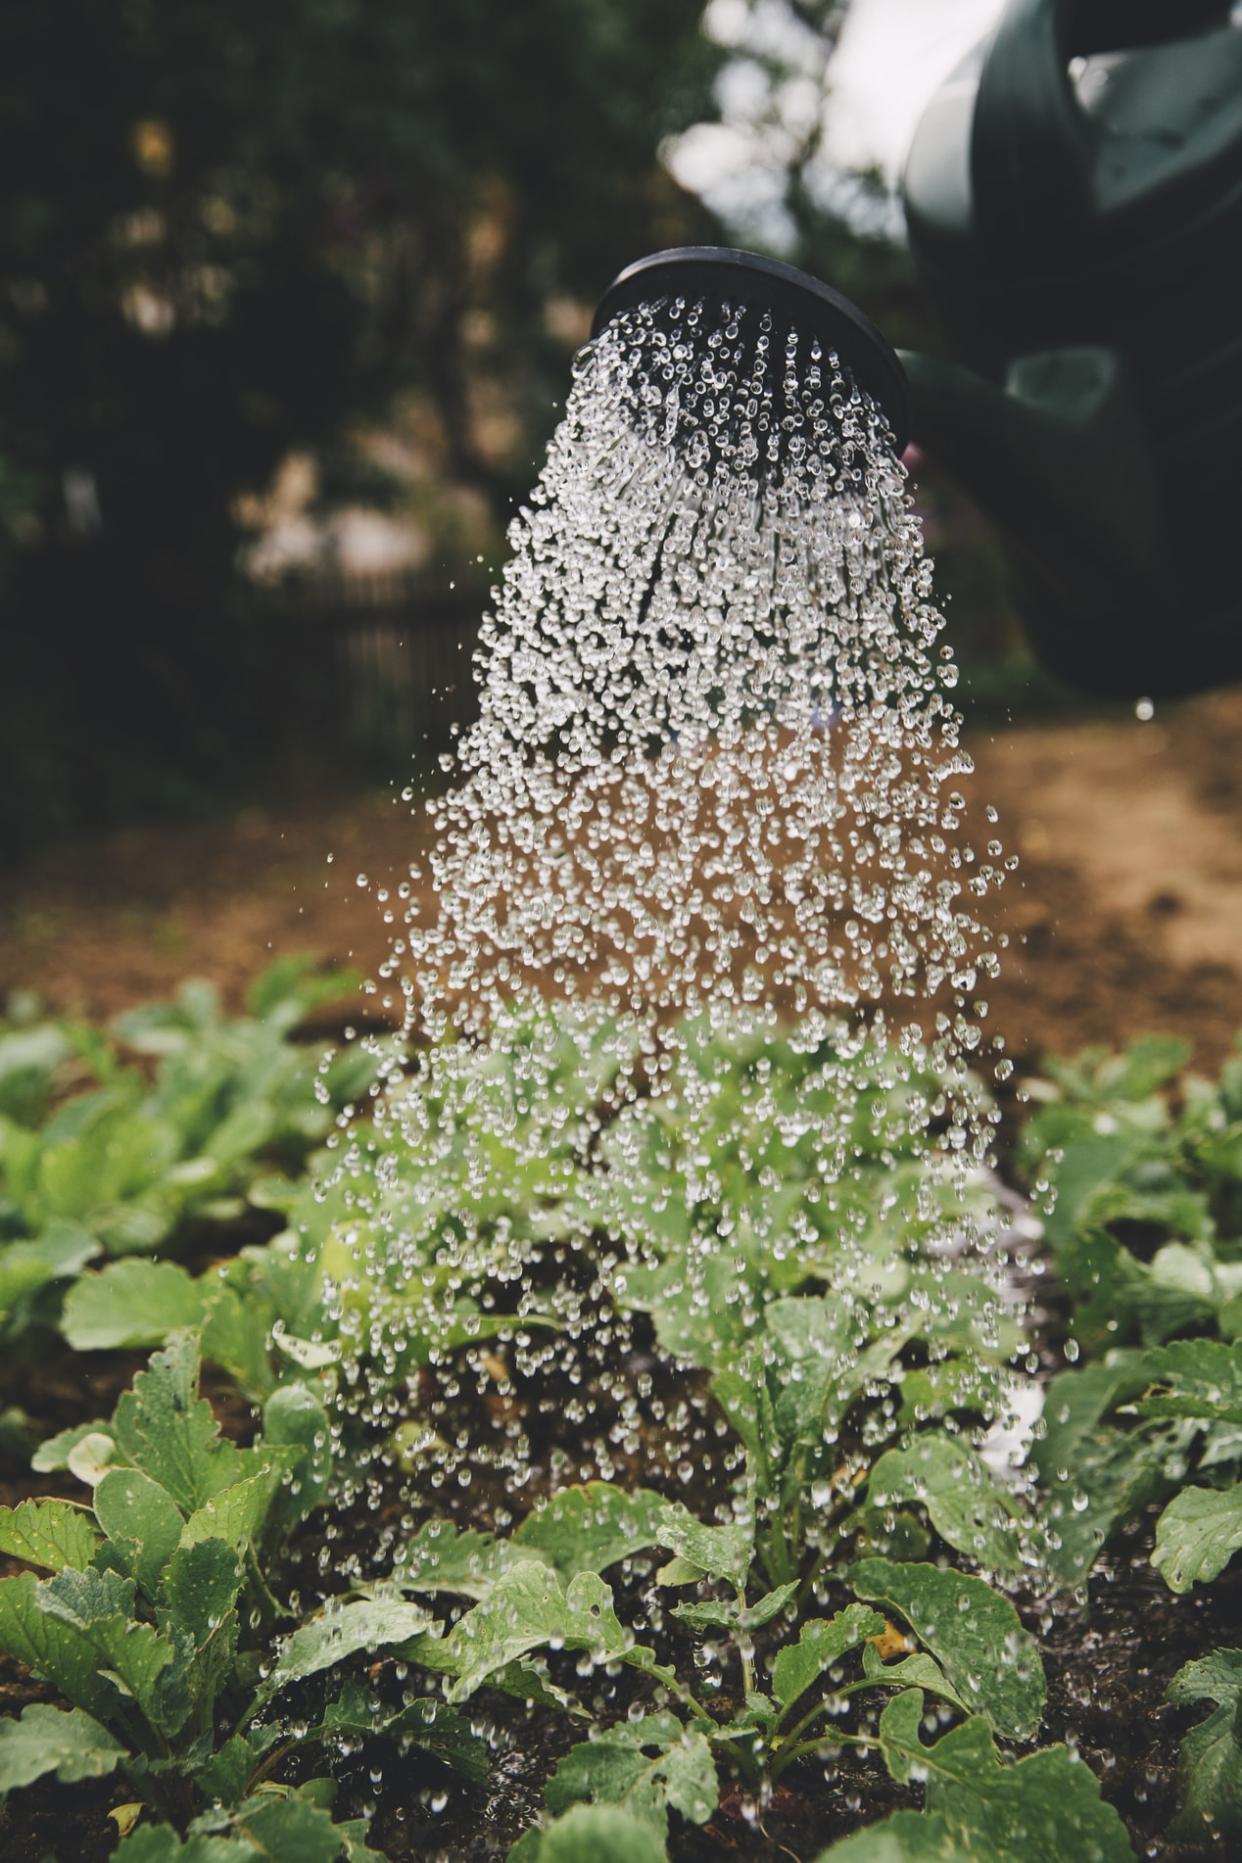
Fill small pots or seed trays with compost. Use a watering can fitted with a fine rose to thoroughly wet the compost, and leave to drain.
Step 2
Sprinkle seeds evenly and thinly over the surface of the compost, leaving approx 2cm – 3cm between each one, if possible. Some seed is very small, making this impossible. Cover seeds with a thin layer of compost, about the same depth as the size of the seed (the smaller the seed, the thinner the layer of compost).
Step 3
Cover the pot with a clear polythene bag or piece of glass or clear plastic, to maintain an even temperature for germination, and keep the compost moist. Place the pot of seeds on a well-lit windowsill or in a heated propagator.

Step 4
Remove the plastic or glass cover as soon as the seeds have germinated and you can see the seedlings growing out of the compost. Grow them on in a warm place indoors – if growing them on a windowsill you may need to move them at night as temperatures can drop dramatically. The young plants will ready to be ‘pricked’ out when the second pair of leaves, known as ‘true’ leaves, emerges.
Step 5
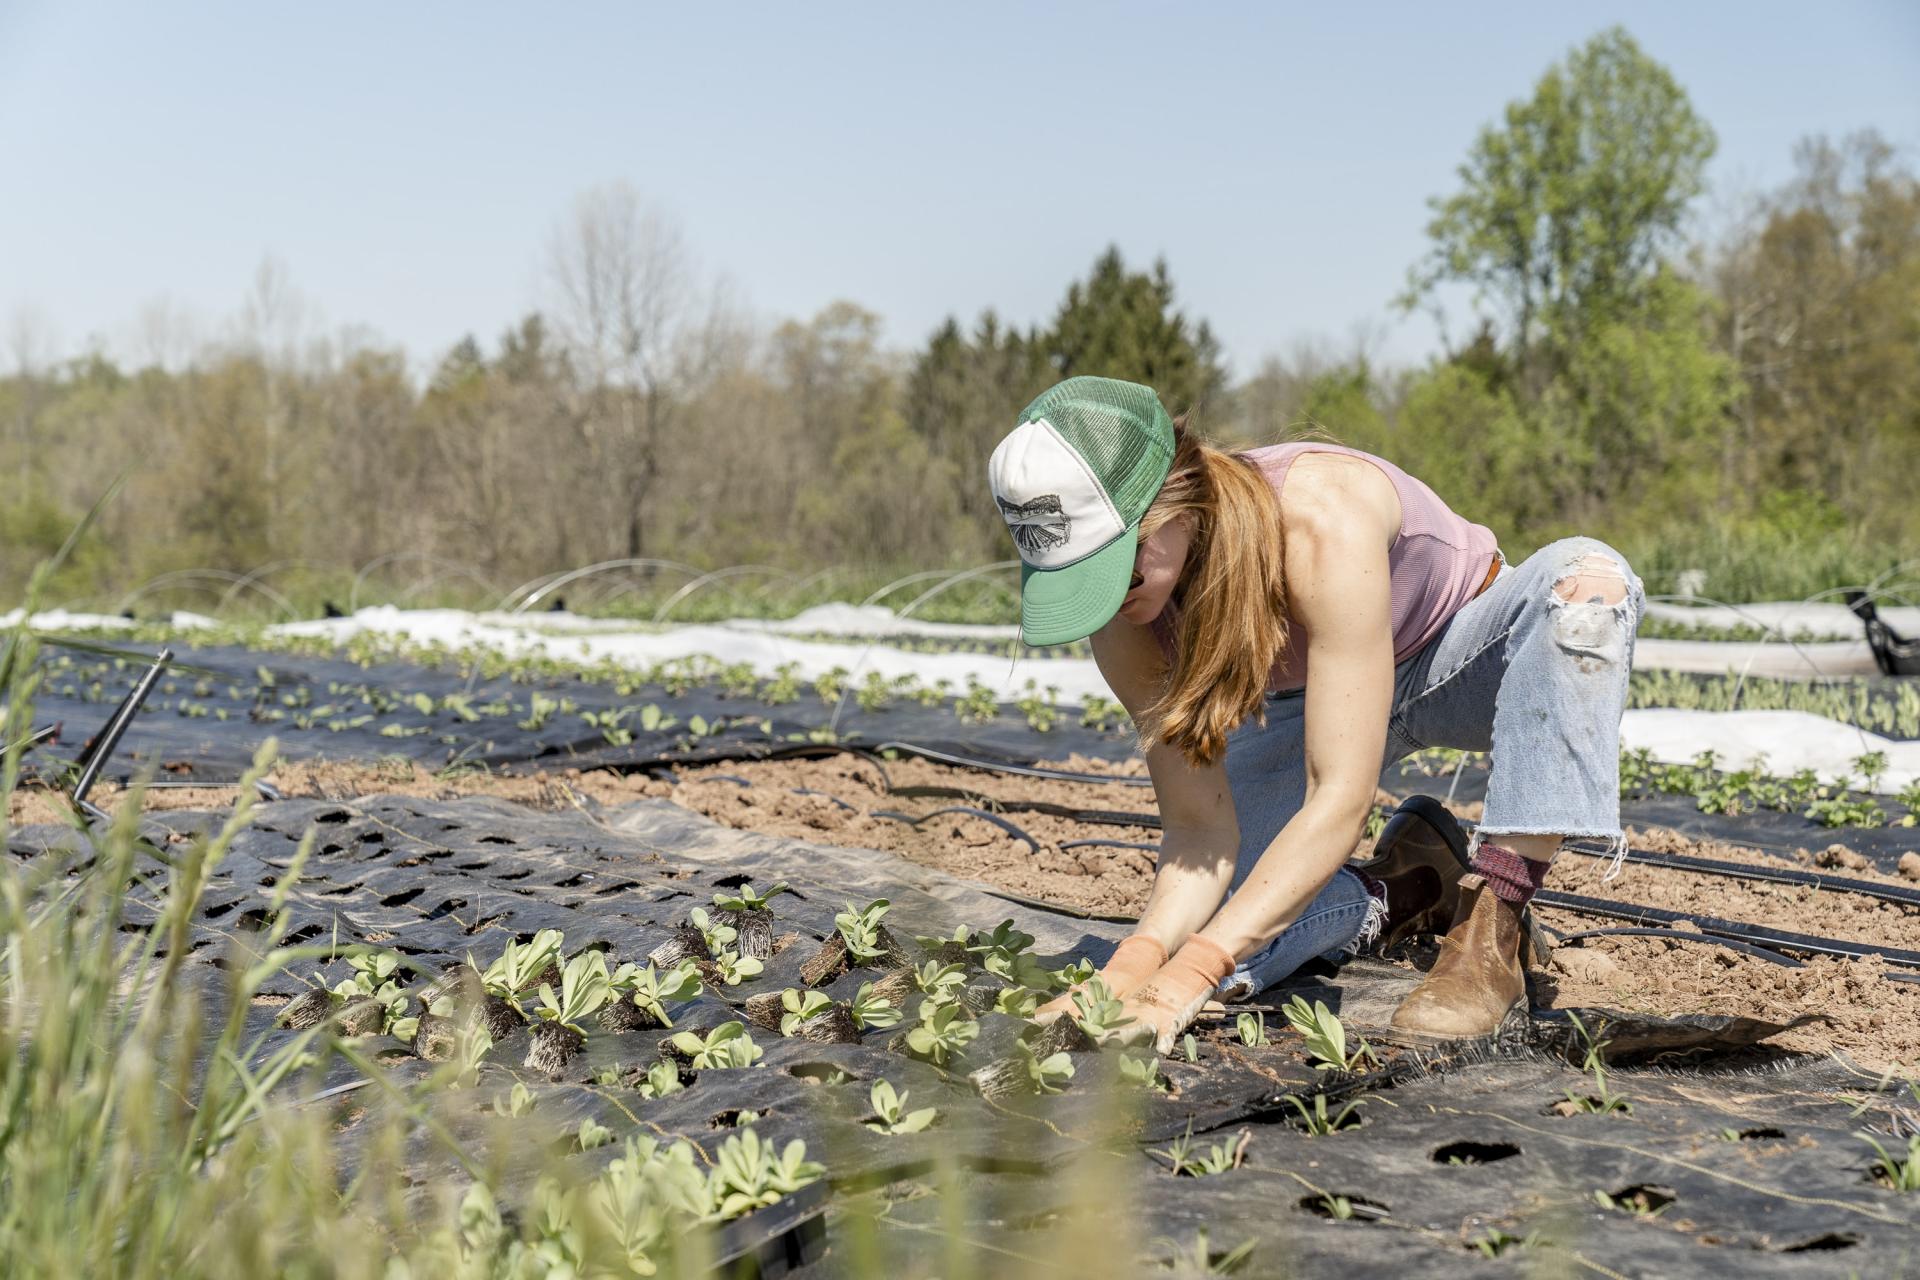
When pricking out seedlings, handle them only by their leaves, not the stem. Fill a seed tray with compost and plant seedlings about 5cm apart, burying the seedling up to the base of the first set of leaves.

Step 6s
After a couple of weeks, the young plants will be large enough to pot individually into 7.5cm pots, or planted outside in well-prepared soil. Handle plants gently, firm compost around them and water well. Don’t allow the soil or compost to dry out.


You don’t need a lot of kit to sow seeds. Many gardeners buy expensive propagators but a seed tray or a few plastic pots, will do the job. If you don’t have plastic pots then try using old yoghurt pots with holes punched in the bottom, or tomato or mushroom punnets instead of a seed tray. Any vessel that can hold compost and allow water to drain freely is suitable.
To maintain an even temperature and keep the soil moist, it’s a good idea to cover the soil with a clear piece of plastic. A bespoke propagator will come with its own clear plastic lid, but you can use cling film, old freezer bags or any clear plastic bag. Use cellotape or an elastic band to fix it to the pot.

Follow our step-by-step guide to sowing seed indoors, below.
You Will Need
• Seeds
• Multi-purpose, peat-free compost
• Seed trays or pots
• Plant labels
• Pencil or waterproof pen
• Watering can with rose attachment
• Polythene bag
• Sheet of glass, or a propagator

Step 1
Fill small pots or seed trays with compost. Use a watering can fitted with a fine rose to thoroughly wet the compost, and leave to drain.
Step 2
Sprinkle seeds evenly and thinly over the surface of the compost, leaving approx 2cm – 3cm between each one, if possible. Some seed is very small, making this impossible. Cover seeds with a thin layer of compost, about the same depth as the size of the seed (the smaller the seed, the thinner the layer of compost).

Step 3
Cover the pot with a clear polythene bag or piece of glass or clear plastic, to maintain an even temperature for germination, and keep the compost moist. Place the pot of seeds on a well-lit windowsill or in a heated propagator.

Step 4
Remove the plastic or glass cover as soon as the seeds have germinated and you can see the seedlings growing out of the compost. Grow them on in a warm place indoors – if growing them on a windowsill you may need to move them at night as temperatures can drop dramatically. The young plants will ready to be ‘pricked’ out when the second pair of leaves, known as ‘true’ leaves, emerges.

Step 5
When pricking out seedlings, handle them only by their leaves, not the stem. Fill a seed tray with compost and plant seedlings about 5cm apart, burying the seedling up to the base of the first set of leaves.

Step 6s
After a couple of weeks, the young plants will be large enough to pot individually into 7.5cm pots, or planted outside in well-prepared soil. Handle plants gently, firm compost around them and water well. Don’t allow the soil or compost to dry out.

0
0
文章
莹723
2021年01月06日

For some plants, including tropical crops like chillies and aubergines, an early start is the best way you’ll get them to produce a worthwhile crop.
However, early seed sowing will require some patience. Low light levels and high temperatures indoors can produce weak seedlings, prone to ‘damping off’. Prevent issues by thoroughly cleaning everything that will come into contact with seeds or seedlings. Use good peat-free seed compost – it’s worth spending a bit more for a good brand.

Discover 10 seeds to sow in January, below.
1.Pelargoniums
Flowers June to October/November.
Sow thinly in small seed trays using seed compost + 10 per cent grit; barely bury the seeds.
Temperature 24°C (75°F); germination takes 3-12 days.

2.Sweet peas
Flowers May/June to August.
Sow seeds 6cm deep in ‘tubes’ or 7cm pots using seed compost + 10 per cent grit.
Temperature 12°C (55°F), unheated greenhouse or cold frame; germination 10-14 days.

3.Dahlias
Flowers July to October/November.
Sow 1-2 seeds in cells or small pots using seed compost + 10 per cent vermiculite.
Temperature 18-21°C (65-70°F), germination takes approximately 5-20 days.

4.Delphinium
Flowers June and July.
Sow delphiniums thinly in trays of seed compost + 10 per cent vermiculite; barely cover with vermicul¬¬ite.
Temperature Keep in fridge for three weeks, then 15-21°C (59-70°F); germination takes 7-28 days.

5.Basil
Harvest May to October.
Sow thinly on the surface of pots or trays of seed compost; cover with vermiculite.
Temperature 15-25°C (59-77°F); germination takes 14-21 days depending on temperature.

6.Begonias, tuberous and bedding types
Flowers July to October/November.
Sow thinly on the surface in trays of seed compost with a thin layer of vermiculite.
Temperature 19-24°C (66-77°F); germination slow, 15-60 days, light essential.

7.Chillies and aubergines
Harvest July to October.
Sow 2-3 seeds thinly per small individual pot using seed compost + 10 per cent silver sand. Cover to own depth with vermiculite.
Temperature 21-27°C (70-80°F); germination 3-10 days.

8.Petunias
Flowers late June to September.
Sow thinly on the surface in small trays of seed compost + 10 per cent vermiculite and lightly dust with vermiculite to barely cover.
Temperature 24-27°C (75-80°F); germination 14 days, light essential.

9.Iceland poppies
Flowers June to October.
Sow 2-3 seeds on the surface of each small individual pot of seed compost + 20 per cent fine grit.
Temperature 12°C (55°F) in a cold frame; germination takes 14-21 days.

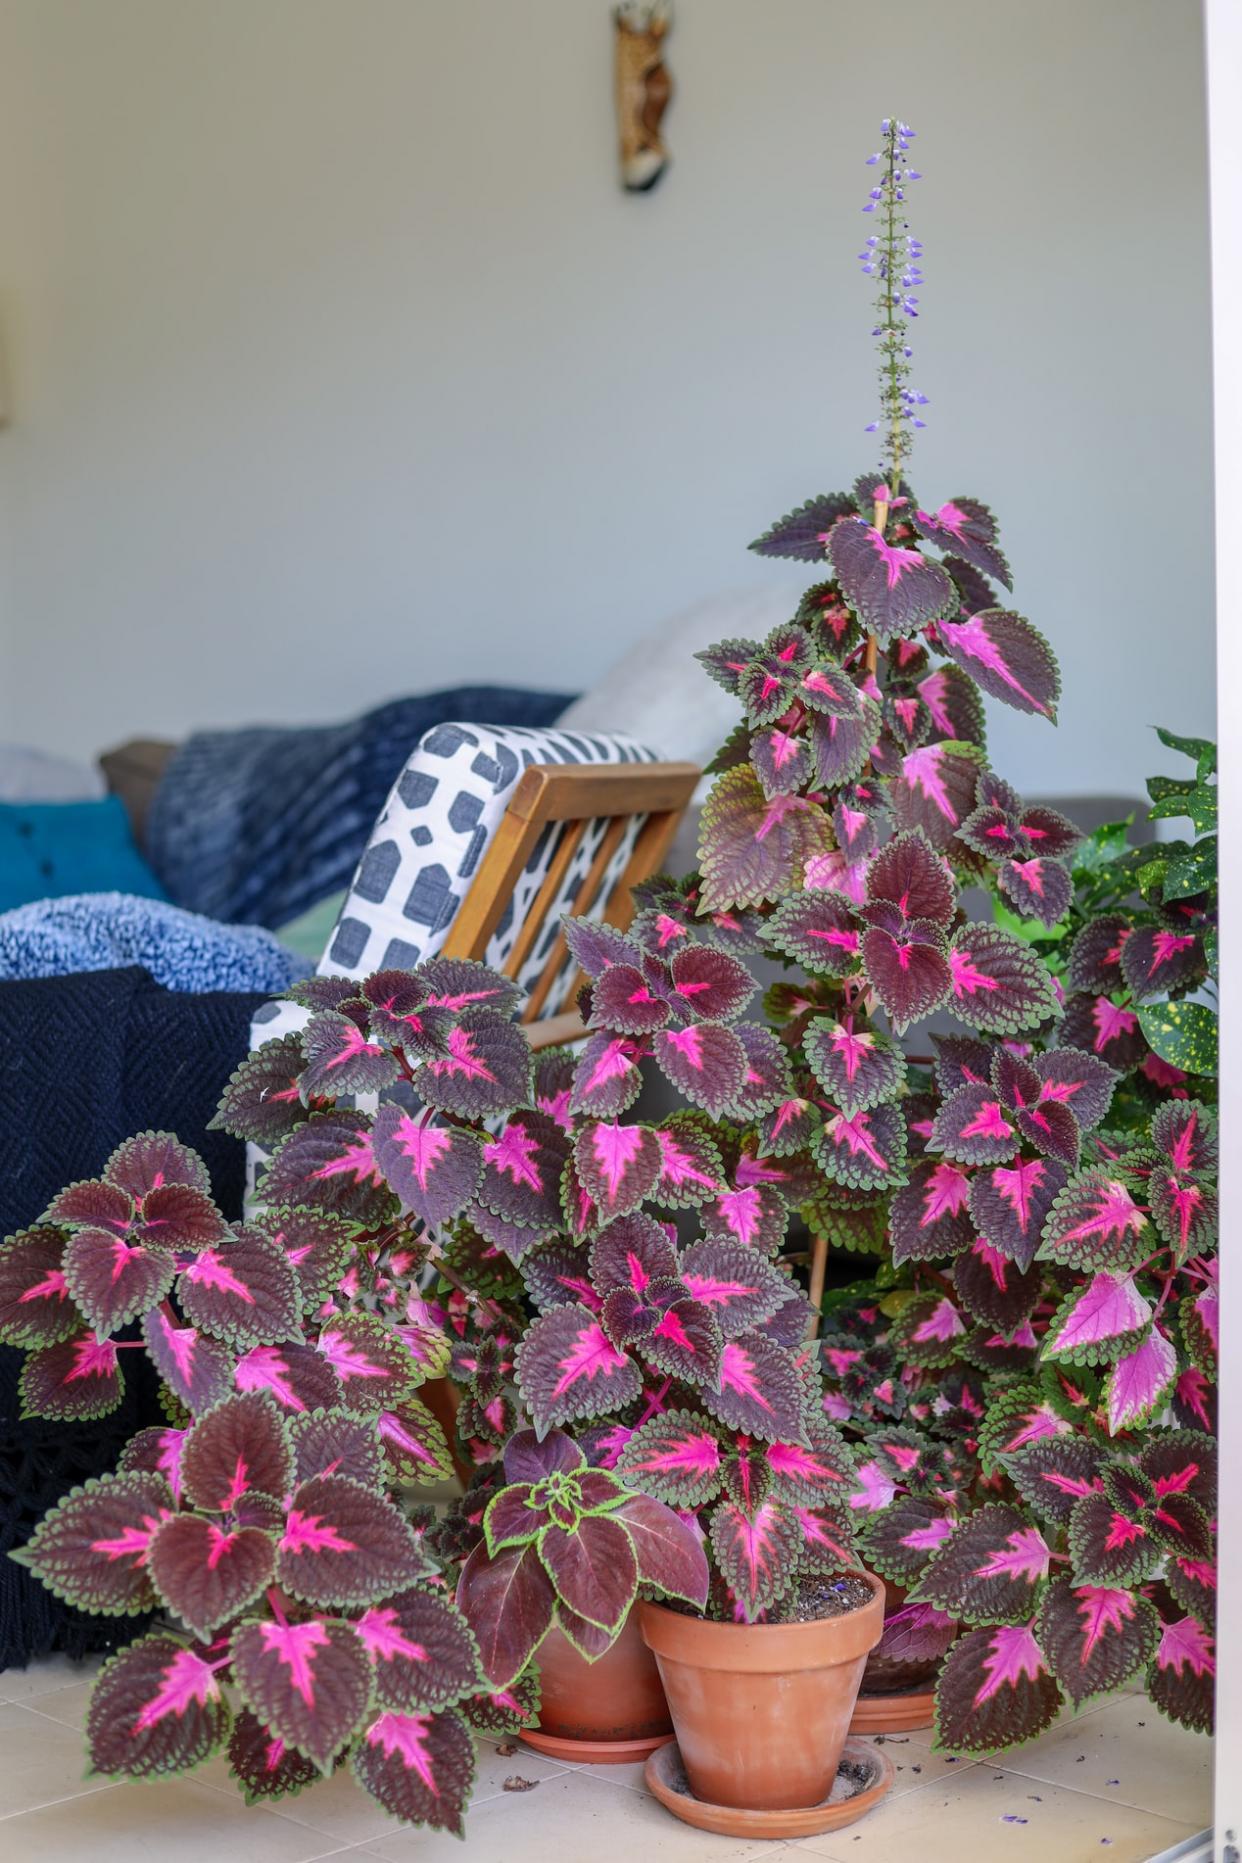
10.Coleus
Foliage display June onwards.
Sow thinly in pots or a tray using seed compost + 10 per cent vermiculite, covering to its own depth.
Temperature 19-24°C (65-75°F); germination 10-20 days depending on temperature.
Early sowing dos and don’ts
• Do clean everything that will come into contact with seeds or seedlings, including pots, dibbers and drip trays
• Do use new compost. It needs to drain freely yet hold just enough moisture – peat-free seed compost is ideal
• Do reserve a bright, warm windowsill for sowing, where the temperature stays fairly steady
• Do sow seeds even more thinly than usual, so that seedlings will have space to grow – overcrowding will encourage damping off
• Do give germinating seeds plenty of air by opening ventilators even if it seems a waste of heat
• Do wipe away condensation in propagators once or twice daily
• Do check seeds and seedlings daily, so that you can take remedial action before problems develop
• Don’t use too much heat – results are a bit slower but there’s less risk of legginess and more damping off

However, early seed sowing will require some patience. Low light levels and high temperatures indoors can produce weak seedlings, prone to ‘damping off’. Prevent issues by thoroughly cleaning everything that will come into contact with seeds or seedlings. Use good peat-free seed compost – it’s worth spending a bit more for a good brand.

Discover 10 seeds to sow in January, below.
1.Pelargoniums
Flowers June to October/November.
Sow thinly in small seed trays using seed compost + 10 per cent grit; barely bury the seeds.
Temperature 24°C (75°F); germination takes 3-12 days.

2.Sweet peas
Flowers May/June to August.
Sow seeds 6cm deep in ‘tubes’ or 7cm pots using seed compost + 10 per cent grit.
Temperature 12°C (55°F), unheated greenhouse or cold frame; germination 10-14 days.

3.Dahlias
Flowers July to October/November.
Sow 1-2 seeds in cells or small pots using seed compost + 10 per cent vermiculite.
Temperature 18-21°C (65-70°F), germination takes approximately 5-20 days.

4.Delphinium
Flowers June and July.
Sow delphiniums thinly in trays of seed compost + 10 per cent vermiculite; barely cover with vermicul¬¬ite.
Temperature Keep in fridge for three weeks, then 15-21°C (59-70°F); germination takes 7-28 days.

5.Basil
Harvest May to October.
Sow thinly on the surface of pots or trays of seed compost; cover with vermiculite.
Temperature 15-25°C (59-77°F); germination takes 14-21 days depending on temperature.

6.Begonias, tuberous and bedding types
Flowers July to October/November.
Sow thinly on the surface in trays of seed compost with a thin layer of vermiculite.
Temperature 19-24°C (66-77°F); germination slow, 15-60 days, light essential.

7.Chillies and aubergines
Harvest July to October.
Sow 2-3 seeds thinly per small individual pot using seed compost + 10 per cent silver sand. Cover to own depth with vermiculite.
Temperature 21-27°C (70-80°F); germination 3-10 days.

8.Petunias
Flowers late June to September.
Sow thinly on the surface in small trays of seed compost + 10 per cent vermiculite and lightly dust with vermiculite to barely cover.
Temperature 24-27°C (75-80°F); germination 14 days, light essential.

9.Iceland poppies
Flowers June to October.
Sow 2-3 seeds on the surface of each small individual pot of seed compost + 20 per cent fine grit.
Temperature 12°C (55°F) in a cold frame; germination takes 14-21 days.

10.Coleus
Foliage display June onwards.
Sow thinly in pots or a tray using seed compost + 10 per cent vermiculite, covering to its own depth.
Temperature 19-24°C (65-75°F); germination 10-20 days depending on temperature.

Early sowing dos and don’ts
• Do clean everything that will come into contact with seeds or seedlings, including pots, dibbers and drip trays
• Do use new compost. It needs to drain freely yet hold just enough moisture – peat-free seed compost is ideal
• Do reserve a bright, warm windowsill for sowing, where the temperature stays fairly steady
• Do sow seeds even more thinly than usual, so that seedlings will have space to grow – overcrowding will encourage damping off
• Do give germinating seeds plenty of air by opening ventilators even if it seems a waste of heat
• Do wipe away condensation in propagators once or twice daily
• Do check seeds and seedlings daily, so that you can take remedial action before problems develop
• Don’t use too much heat – results are a bit slower but there’s less risk of legginess and more damping off

0
0
文章
莹723
2020年10月16日

Sowing cyclamen from seed is very easy, but it’s not a quick job– it can take a year or more before you see beautiful blooms.
To produce indoor cyclamen plants you need to use seeds of tender large-flowered varieties with wonderful colours.
Learn how to sow cyclamen seeds, below.
You Will Need
•Cyclamen seed
•10cm pot
•Seed compost
•Vermiculite
•Sheet of glass
•Black polythene
Step 1
Before sowing, soak the cyclamen seeds in warm water for at least 12 hours, to soften the seed coat, then rinse. Sow seeds into pots of compost, spacing them evenly.

Step 2
Sprinkle a layer of fine vermiculite or compost over the seeds until the surface is covered completely.

Step 3
Water, then cover with a sheet of glass and a layer of black polythene to shut out the light and encourage germination. Keep temperature lower than 16° – 21°.
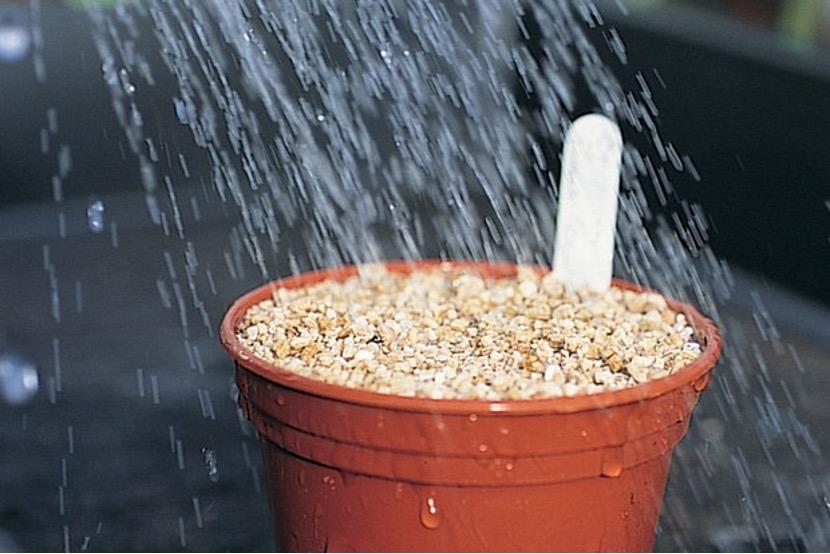
Step 4
Check pot regularly. Germination can take 30 – 60 days, and once the seedlings appear, remove the covering and pop your pot into a bright position.

Step 5
Leaves develop from a tiny tuber, and once two or three leaves have formed the plants can be potted up separately.

Step 6
Plant individually into 7.5cm pots of multi-purpose compost, keeping the tiny tuber level with the surface of the compost.

Step 7
Pot on into larger containers as your plants grow, watering them regularly and feeding them once a week. Most varieties should begin flowering about nine months after sowing. Keep them in a cool spot.

Remove faded flowers or yellowing leaves by twisting stems and giving them a firm tug.
To produce indoor cyclamen plants you need to use seeds of tender large-flowered varieties with wonderful colours.
Learn how to sow cyclamen seeds, below.
You Will Need
•Cyclamen seed
•10cm pot
•Seed compost
•Vermiculite
•Sheet of glass
•Black polythene
Step 1
Before sowing, soak the cyclamen seeds in warm water for at least 12 hours, to soften the seed coat, then rinse. Sow seeds into pots of compost, spacing them evenly.

Step 2
Sprinkle a layer of fine vermiculite or compost over the seeds until the surface is covered completely.

Step 3
Water, then cover with a sheet of glass and a layer of black polythene to shut out the light and encourage germination. Keep temperature lower than 16° – 21°.

Step 4
Check pot regularly. Germination can take 30 – 60 days, and once the seedlings appear, remove the covering and pop your pot into a bright position.

Step 5
Leaves develop from a tiny tuber, and once two or three leaves have formed the plants can be potted up separately.

Step 6
Plant individually into 7.5cm pots of multi-purpose compost, keeping the tiny tuber level with the surface of the compost.

Step 7
Pot on into larger containers as your plants grow, watering them regularly and feeding them once a week. Most varieties should begin flowering about nine months after sowing. Keep them in a cool spot.

Remove faded flowers or yellowing leaves by twisting stems and giving them a firm tug.

0
0
文章
ritau
2020年08月02日

1. Purchase a mint seedling. Mint plants are notoriously difficult to begin from seed. Instead, visit your local nursery (or even sometimes your local grocery store) and purchase a mint seedling. Look for a seeding that is already at least 3–4 inches (7.6–10.2 cm) tall.
-Some varieties of mint include sweet mint, chocolate mint, spearmint, lemon mint, apple mint, and peppermint.
-Spearmint and peppermint are the most common. Spearmint is often used in baking and cooking. Peppermint is used more often for drinks, like mojitos and hot chocolate.
2. Propagate a new mint plant from a cutting. Trim a 4 in (10 cm) sprig from an existing mint plant, about 0.5 inches (1.3 cm) above a junction. Place the trimming in a glass of water, and wait about 1 week. Small white roots should begin appearing under water. Wait another 2-7 days to allow the roots to develop.
-Add water to the glass as necessary.
-Change the water every 4-5 days to keeping your trimming healthy.
3. Use a “runner” from an existing outdoor mint plant. If you have a friend with an existing outdoor mint plant, you may be able to use one of their runners. “Runners” are long stems that grow away from a mint plant. Runners set their own roots in the ground, which means they can be carefully removed and transplanted into a new pot. Look for a runner, and use a trowel to gently remove it from the ground.
4. Find a container with a wide surface. Mint plants needs a lot of width to grow effectively, but they don’t need a great deal of depth. For each mint plant, look for a container at least 8–12 inches (20–30 cm) wide.
-Ceramic planters are porous and lose moisture easily. Your mint might be happier in a plastic container.
-You can repurpose a plastic container by drilling a hole in the bottom for drainage.
5. Fill your container with potting soil. You can pick up some potting soil from a local nursery, home improvement store, or big box store. Mint plants enjoy soil that drains well, so don’t pack the soil too tight.
6. Test your soil for a pH of 6-7.5. Mint plants are not super finicky, so they will accept a relatively wide pH range. Use a test kit to make sure your soil falls within this optimal range.
-To lower the pH of your soil, add some compost, composted manure, or acidic mulch.
-To raise the pH of your soil, add pelletized lime or wood ash.

7. Place your mint seedling in the container. Using a small trowel and/or your fingers, make a small opening in the soil. Carefully place your mint seedling into this opening. Move the soil around your seedling so that the roots are no longer exposed, and your seedling can stand up.
-Indoor mint plants do not require fertilizer or mulch.
8. Water your seedling immediately after planting. Once you've gotten your mint plant in the soil, give your seedling a generous watering. For one mint plant, offer around 6–8 fluid ounces (180–240 ml) of water.
Caring for:
1. Place your mint plant so it receives indirect sunlight. Choose an area that receives morning sun and partial afternoon shade. You want the plant to get some light without drying it out completely. Rotate your plant every 3-4 days. Mint plants will grow in the direction of sunlight, and rotating the plant helps to keep it from growing unevenly.
Some good options include:
-A windowsill that faces north.
-A shelf across the room from a south-facing window.
2. Water your mint frequently. Water your mint at least every 2-3 days, or more if you live in a very dry climate or your mint is getting a lot of direct sunlight. Check the soil with a finger each day to ensure that the soil is moist.
-Add around 1–2 cups (240–470 ml) to your mint plant at each watering.
-Humidity can be important to the growing process, so consider misting your plant with water in between waterings.
3. Use water soluble fertilizer if desired. Mint plants do not often require fertilizer, but it can help improve your plant's growth if used occasionally. The best time to use fertilizer is in the spring when plants first start the new growing season.
-Choose a water soluble, time-release fertilizer.
-Too much fertilizer can alter the taste of your mint.

4. Harvest your mint leaves. Give your new mint plant anywhere from 2-6 weeks to get established. Then begin plucking off leaves as you need them. Avoid harvesting more than ⅓ of the plant at one time, as this can prevent proper regrowth.
-Hang mint stems upside down to dry them.
-Save mint leaves in an airtight container, like a jar or a small plastic bag.
5. Remove any flower buds before they open. Although the flowers that appear at the top of your mint plant are pretty, you’ll need to trim them off as soon as they appear. Use a pair of sharp scissors to clip the flowers off at the stem to prevent fewer, blander mint leaves.
This prevents the plant from “going to seed.” When a mint plant starts producing seeds, it puts less energy toward leaf production.
-Some varieties of mint include sweet mint, chocolate mint, spearmint, lemon mint, apple mint, and peppermint.
-Spearmint and peppermint are the most common. Spearmint is often used in baking and cooking. Peppermint is used more often for drinks, like mojitos and hot chocolate.
2. Propagate a new mint plant from a cutting. Trim a 4 in (10 cm) sprig from an existing mint plant, about 0.5 inches (1.3 cm) above a junction. Place the trimming in a glass of water, and wait about 1 week. Small white roots should begin appearing under water. Wait another 2-7 days to allow the roots to develop.
-Add water to the glass as necessary.
-Change the water every 4-5 days to keeping your trimming healthy.
3. Use a “runner” from an existing outdoor mint plant. If you have a friend with an existing outdoor mint plant, you may be able to use one of their runners. “Runners” are long stems that grow away from a mint plant. Runners set their own roots in the ground, which means they can be carefully removed and transplanted into a new pot. Look for a runner, and use a trowel to gently remove it from the ground.
4. Find a container with a wide surface. Mint plants needs a lot of width to grow effectively, but they don’t need a great deal of depth. For each mint plant, look for a container at least 8–12 inches (20–30 cm) wide.
-Ceramic planters are porous and lose moisture easily. Your mint might be happier in a plastic container.
-You can repurpose a plastic container by drilling a hole in the bottom for drainage.
5. Fill your container with potting soil. You can pick up some potting soil from a local nursery, home improvement store, or big box store. Mint plants enjoy soil that drains well, so don’t pack the soil too tight.
6. Test your soil for a pH of 6-7.5. Mint plants are not super finicky, so they will accept a relatively wide pH range. Use a test kit to make sure your soil falls within this optimal range.
-To lower the pH of your soil, add some compost, composted manure, or acidic mulch.
-To raise the pH of your soil, add pelletized lime or wood ash.

7. Place your mint seedling in the container. Using a small trowel and/or your fingers, make a small opening in the soil. Carefully place your mint seedling into this opening. Move the soil around your seedling so that the roots are no longer exposed, and your seedling can stand up.
-Indoor mint plants do not require fertilizer or mulch.
8. Water your seedling immediately after planting. Once you've gotten your mint plant in the soil, give your seedling a generous watering. For one mint plant, offer around 6–8 fluid ounces (180–240 ml) of water.
Caring for:
1. Place your mint plant so it receives indirect sunlight. Choose an area that receives morning sun and partial afternoon shade. You want the plant to get some light without drying it out completely. Rotate your plant every 3-4 days. Mint plants will grow in the direction of sunlight, and rotating the plant helps to keep it from growing unevenly.
Some good options include:
-A windowsill that faces north.
-A shelf across the room from a south-facing window.
2. Water your mint frequently. Water your mint at least every 2-3 days, or more if you live in a very dry climate or your mint is getting a lot of direct sunlight. Check the soil with a finger each day to ensure that the soil is moist.
-Add around 1–2 cups (240–470 ml) to your mint plant at each watering.
-Humidity can be important to the growing process, so consider misting your plant with water in between waterings.
3. Use water soluble fertilizer if desired. Mint plants do not often require fertilizer, but it can help improve your plant's growth if used occasionally. The best time to use fertilizer is in the spring when plants first start the new growing season.
-Choose a water soluble, time-release fertilizer.
-Too much fertilizer can alter the taste of your mint.

4. Harvest your mint leaves. Give your new mint plant anywhere from 2-6 weeks to get established. Then begin plucking off leaves as you need them. Avoid harvesting more than ⅓ of the plant at one time, as this can prevent proper regrowth.
-Hang mint stems upside down to dry them.
-Save mint leaves in an airtight container, like a jar or a small plastic bag.
5. Remove any flower buds before they open. Although the flowers that appear at the top of your mint plant are pretty, you’ll need to trim them off as soon as they appear. Use a pair of sharp scissors to clip the flowers off at the stem to prevent fewer, blander mint leaves.
This prevents the plant from “going to seed.” When a mint plant starts producing seeds, it puts less energy toward leaf production.
0
0
文章
ritau
2020年06月22日

The pea is most commonly the small spherical seed or the seed-pod of the pod fruit Pisum sativum. Each pod contains several peas, which can be green or yellow. Botanically, pea pods are fruit, since they contain seeds and develop from the ovary of a (pea) flower. The name is also used to describe other edible seeds from the Fabaceae such as the pigeon pea (Cajanus cajan), the cowpea (Vigna unguiculata), and the seeds from several species of Lathyrus.
P. sativum is an annual plant, with a life cycle of one year. It is a cool-season crop grown in many parts of the world; planting can take place from winter to early summer depending on location. The average pea weighs between 0.1 and 0.36 gram. The immature peas (and in snow peas the tender pod as well) are used as a vegetable, fresh, frozen or canned; varieties of the species typically called field peas are grown to produce dry peas like the split pea shelled from a matured pod. These are the basis of pease porridge and pea soup, staples of medieval cuisine; in Europe, consuming fresh immature green peas was an innovation of Early Modern cuisine.

The wild pea is restricted to the Mediterranean basin and the Near East. The earliest archaeological finds of peas date from the late Neolithic era of current Greece, Syria, Turkey and Jordan. In Egypt, early finds date from c. 4800–4400 BC in the Nile delta area, and from c. 3800–3600 BC in Upper Egypt. The pea was also present in Georgia in the 5th millennium BC. Farther east, the finds are younger. Peas were present in Afghanistan c. 2000 BC; in Harappan civilization around modern-day Pakistan and western- and northwestern India in 2250–1750 BC. In the second half of the 2nd millennium BC, this legume crop appears in the Ganges Basin and southern India.
In early times, peas were grown mostly for their dry seeds. From plants growing wild in the Mediterranean basin, constant selection since the Neolithic dawn of agriculture improved their yield. In the early 3rd century BC Theophrastus mentions peas among the legumes that are sown late in the winter because of their tenderness. In the first century AD, Columella mentions them in De re rustica, when Roman legionaries still gathered wild peas from the sandy soils of Numidia and Judea to supplement their rations.
In the Middle Ages, field peas are constantly mentioned, as they were the staple that kept famine at bay, as Charles the Good, count of Flanders, noted explicitly in 1124.
Green "garden" peas, eaten immature and fresh, were an innovative luxury of Early Modern Europe. In England, the distinction between field peas and garden peas dates from the early 17th century: John Gerard and John Parkinson both mention garden peas. Sugar peas, which the French called mange-tout, for they were consumed pods and all, were introduced to France from the market gardens of Holland in the time of Henri IV, through the French ambassador. Green peas were introduced from Genoa to the court of Louis XIV of France in January 1660, with some staged fanfare; a hamper of them were presented before the King, and then were shelled by the Savoyan comte de Soissons, who had married a niece of Cardinal Mazarin; little dishes of peas were then presented to the King, the Queen, Cardinal Mazarin and Monsieur, the king's brother. Immediately established and grown for earliness warmed with manure and protected under glass, they were still a luxurious delicacy in 1696, when Mme de Maintenon and Mme de Sevigné each reported that they were "a fashion, a fury".
Modern split peas, with their indigestible skins rubbed off, are a development of the later 19th century.

Peas are starchy, but high in fiber, protein, vitamin A, vitamin B6, vitamin C, vitamin K, phosphorus, magnesium, copper, iron, zinc and lutein.Dry weight is about one-quarter protein and one-quarter sugar. Pea seed peptide fractions have less ability to scavenge free radicals than glutathione, but greater ability to chelate metals and inhibit linoleic acid oxidation.
P. sativum is an annual plant, with a life cycle of one year. It is a cool-season crop grown in many parts of the world; planting can take place from winter to early summer depending on location. The average pea weighs between 0.1 and 0.36 gram. The immature peas (and in snow peas the tender pod as well) are used as a vegetable, fresh, frozen or canned; varieties of the species typically called field peas are grown to produce dry peas like the split pea shelled from a matured pod. These are the basis of pease porridge and pea soup, staples of medieval cuisine; in Europe, consuming fresh immature green peas was an innovation of Early Modern cuisine.

The wild pea is restricted to the Mediterranean basin and the Near East. The earliest archaeological finds of peas date from the late Neolithic era of current Greece, Syria, Turkey and Jordan. In Egypt, early finds date from c. 4800–4400 BC in the Nile delta area, and from c. 3800–3600 BC in Upper Egypt. The pea was also present in Georgia in the 5th millennium BC. Farther east, the finds are younger. Peas were present in Afghanistan c. 2000 BC; in Harappan civilization around modern-day Pakistan and western- and northwestern India in 2250–1750 BC. In the second half of the 2nd millennium BC, this legume crop appears in the Ganges Basin and southern India.
In early times, peas were grown mostly for their dry seeds. From plants growing wild in the Mediterranean basin, constant selection since the Neolithic dawn of agriculture improved their yield. In the early 3rd century BC Theophrastus mentions peas among the legumes that are sown late in the winter because of their tenderness. In the first century AD, Columella mentions them in De re rustica, when Roman legionaries still gathered wild peas from the sandy soils of Numidia and Judea to supplement their rations.
In the Middle Ages, field peas are constantly mentioned, as they were the staple that kept famine at bay, as Charles the Good, count of Flanders, noted explicitly in 1124.
Green "garden" peas, eaten immature and fresh, were an innovative luxury of Early Modern Europe. In England, the distinction between field peas and garden peas dates from the early 17th century: John Gerard and John Parkinson both mention garden peas. Sugar peas, which the French called mange-tout, for they were consumed pods and all, were introduced to France from the market gardens of Holland in the time of Henri IV, through the French ambassador. Green peas were introduced from Genoa to the court of Louis XIV of France in January 1660, with some staged fanfare; a hamper of them were presented before the King, and then were shelled by the Savoyan comte de Soissons, who had married a niece of Cardinal Mazarin; little dishes of peas were then presented to the King, the Queen, Cardinal Mazarin and Monsieur, the king's brother. Immediately established and grown for earliness warmed with manure and protected under glass, they were still a luxurious delicacy in 1696, when Mme de Maintenon and Mme de Sevigné each reported that they were "a fashion, a fury".
Modern split peas, with their indigestible skins rubbed off, are a development of the later 19th century.

Peas are starchy, but high in fiber, protein, vitamin A, vitamin B6, vitamin C, vitamin K, phosphorus, magnesium, copper, iron, zinc and lutein.Dry weight is about one-quarter protein and one-quarter sugar. Pea seed peptide fractions have less ability to scavenge free radicals than glutathione, but greater ability to chelate metals and inhibit linoleic acid oxidation.
0
0
文章
ritau
2020年02月04日

Hello everybody, welcome back to our channel! Today we are going to give you some tips on how to grow tomatoes.
*Temperature: 24℃-26℃
*Sowing time:July & August
*Adequate illumination
*Drain away water in time
*Disinfect the seed: During disinfection, wrap the seeds with gauze and soak them in 50℃ water for 10 minutes, or soak them in 10% sodium phosphate solution for 20 minutes.Rinse with clean water and soak in 30℃ warm water for 23 hours.Get the dry stuff out.

*Prepare a shelf to prop up the development and stay upright
*If the first flower doesn't bear fruit, the plant won't be able to bear fruit until the leaves are full. A tomato flower has both the stamen and the pistil, and there is no natural pollination medium. To make the fruit fuller,it need our help by gently tapping the flower with a finger or cotton swab.
*Before and after flowering, lateral buds will grow out of the leaf base. The lateral buds below the first tidbits should be removed in time so as not to consume nutrients.
*When the red fruit is fully ripe, cut and harvest from below. The ripe fruit tends to split or fall off, so don't harvest too late.

*Temperature: 24℃-26℃
*Sowing time:July & August
*Adequate illumination
*Drain away water in time
*Disinfect the seed: During disinfection, wrap the seeds with gauze and soak them in 50℃ water for 10 minutes, or soak them in 10% sodium phosphate solution for 20 minutes.Rinse with clean water and soak in 30℃ warm water for 23 hours.Get the dry stuff out.

*Prepare a shelf to prop up the development and stay upright
*If the first flower doesn't bear fruit, the plant won't be able to bear fruit until the leaves are full. A tomato flower has both the stamen and the pistil, and there is no natural pollination medium. To make the fruit fuller,it need our help by gently tapping the flower with a finger or cotton swab.
*Before and after flowering, lateral buds will grow out of the leaf base. The lateral buds below the first tidbits should be removed in time so as not to consume nutrients.
*When the red fruit is fully ripe, cut and harvest from below. The ripe fruit tends to split or fall off, so don't harvest too late.

0
0
成长记
kensong
2019年03月11日

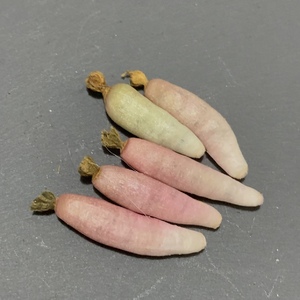
Harvested its seed pods. Will cut open and hopefully find some seeds to plant.

0
0
求助
paddy01
2018年12月17日

what type is this is glit a fruit of a seed


0
0
胡杨:百香果
mailipod5:never see this
文章
Miss Chen
2018年08月20日

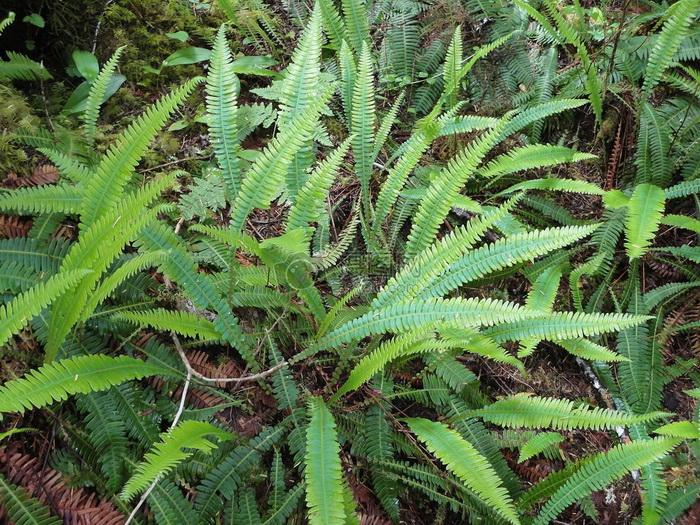
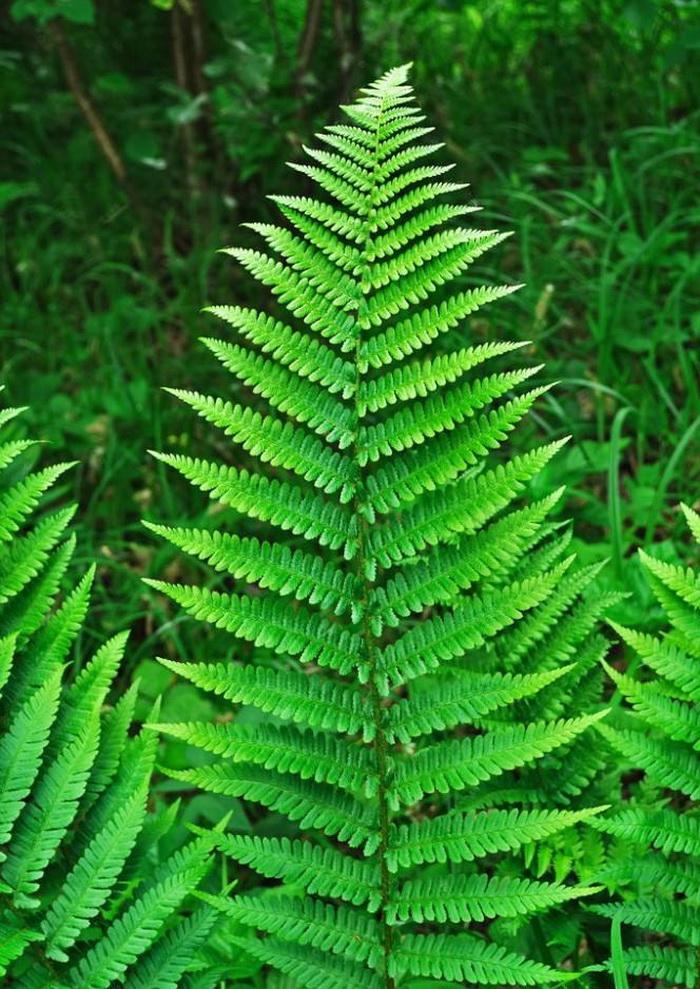
Ferns are one of the oldest forms of plant life. There are over 10,000 known species of fern, some of which are deciduous and some that are evergreen. Fern leaves are called fronds, and they house the reproductive spores that ferns produce instead of seeds. Deciduous ferns lose their leaves in winter and tend to look ratty over the season when some of them die back but don't fall off. Evergreen ferns are vibrant year-round but they can benefit from cleanups to remove damage and dead fronds. Timing is important when pruning ferns so new fiddleheads (immature ferns) are not disturbed and spores are able to disperse.
Timing is Everything
Pruning of ferns needs to occur after the spores on fruiting fronds have matured and released. Trim them when they are dormant, which is during winter. They can also be pruned in very early spring. Many ferns do not object to pruning at any time of the year. The hardy ferns such as sword fern can be pruned once a year if necessary, just about any time, since they are continuously growing.
Evergreen Ferns
As a rule, ferns don't really need pruning. Ferns in nature are generally self-cleaning and will release old fronds as they die. In the garden, occasional removal of dead fronds will improve the appearance of the plant, but it is strictly cosmetic. Where the plants are large and very old, severe pruning can take place to the crown. All the fronds can be removed in late winter or before the first new fiddleheads appear. Prune the stems away from the crown in a circular pattern so you are left with a little dome. This is not only attractive, but it prevents accidental damage to the newest growth which appears at the center of the plant.
Deciduous Ferns
Deciduous ferns don't necessarily drop all their fronds when temperatures plummet. They do experience dieback and many of the fronds will fall off or turn brown. From a cosmetic standpoint, it is best to get these dead fronds out of the plant. You will also increase light and room for new leaflets. Many people prune the deciduous ferns in fall so they are ready for the spring, but the old fronds provide protection for the crown. It is best to leave them, unattractive though they may be, until spring.
Pruning Indoor Ferns
Boston, staghorn and maidenhair are some of the common ferns used as houseplants. These plants do not need pruning but they do need cleaning. The difference is that pruning increases the health of a plant and is done for many reasons, while cleaning is just routine maintenance. As with outdoor ferns you may choose to remove dead fronds. These should be cut with very sharp scissors or pruning shears and taken back 1/4 to 1/2 inch above the crown. The only time you would ever need to prune out all the fronds is when you are faced with a monumental pest problem. In this case, fertilize one week before the big haircut and then remove all the fronds.

Timing is Everything
Pruning of ferns needs to occur after the spores on fruiting fronds have matured and released. Trim them when they are dormant, which is during winter. They can also be pruned in very early spring. Many ferns do not object to pruning at any time of the year. The hardy ferns such as sword fern can be pruned once a year if necessary, just about any time, since they are continuously growing.
Evergreen Ferns
As a rule, ferns don't really need pruning. Ferns in nature are generally self-cleaning and will release old fronds as they die. In the garden, occasional removal of dead fronds will improve the appearance of the plant, but it is strictly cosmetic. Where the plants are large and very old, severe pruning can take place to the crown. All the fronds can be removed in late winter or before the first new fiddleheads appear. Prune the stems away from the crown in a circular pattern so you are left with a little dome. This is not only attractive, but it prevents accidental damage to the newest growth which appears at the center of the plant.
Deciduous Ferns
Deciduous ferns don't necessarily drop all their fronds when temperatures plummet. They do experience dieback and many of the fronds will fall off or turn brown. From a cosmetic standpoint, it is best to get these dead fronds out of the plant. You will also increase light and room for new leaflets. Many people prune the deciduous ferns in fall so they are ready for the spring, but the old fronds provide protection for the crown. It is best to leave them, unattractive though they may be, until spring.

Pruning Indoor Ferns
Boston, staghorn and maidenhair are some of the common ferns used as houseplants. These plants do not need pruning but they do need cleaning. The difference is that pruning increases the health of a plant and is done for many reasons, while cleaning is just routine maintenance. As with outdoor ferns you may choose to remove dead fronds. These should be cut with very sharp scissors or pruning shears and taken back 1/4 to 1/2 inch above the crown. The only time you would ever need to prune out all the fronds is when you are faced with a monumental pest problem. In this case, fertilize one week before the big haircut and then remove all the fronds.
0
0
文章
Miss Chen
2018年08月11日

Black-eyed Susans (Rudbeckia) add a dramatic swash of color to summer garden beds, borders and planters. Most varieties have bright yellow blossoms, but red and purple varieties are also available. The upturned flowers have a central black seed cone that earns the plants their name. Seed production prevents the plants from producing a second set of blooms later in the season. Cutting back the black-eyed Susans can reward you with blooms throughout the growing season.

Step 1
Trim back the flower stems in summer after the blossoms begin to wilt. Cut the stems off ¼ inch above the topmost leaf. Plants that are cut back may flower a second time in the fall.
Step 2
Cut back the the entire black-eyed Susan plant after the first fall frost kills off any remaining flowers. Prune the stems down to just above the top healthy leaves. Cut off any dead or browned leaves.

Step 3
Spread a 2- to 4-inch layer of mulch over the black-eyed Susan bed once the ground begins to freeze, typically after three to four fall frosts have occurred. Mulch protects the crown of the trimmed flowers and helps them survive winter.

Step 1
Trim back the flower stems in summer after the blossoms begin to wilt. Cut the stems off ¼ inch above the topmost leaf. Plants that are cut back may flower a second time in the fall.
Step 2
Cut back the the entire black-eyed Susan plant after the first fall frost kills off any remaining flowers. Prune the stems down to just above the top healthy leaves. Cut off any dead or browned leaves.

Step 3
Spread a 2- to 4-inch layer of mulch over the black-eyed Susan bed once the ground begins to freeze, typically after three to four fall frosts have occurred. Mulch protects the crown of the trimmed flowers and helps them survive winter.
0
0
Michub63
2018年08月08日

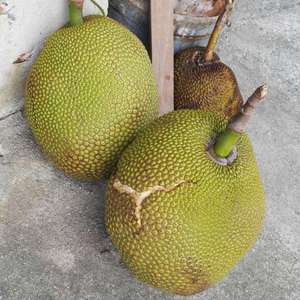
Trying to grow Artocarpus heterophyllus / Jackfruit from seed..

1
0
Michub63:Afterafter 3-4 months
文章
Miss Chen
2018年08月07日

Bamboo plants are woody members of the grass family and consist of vertical, above-ground culms, and underground roots and rhizomes. A successful propagation must recreate all these parts. While reproduction from seed is the easiest way for the species to reproduce, bamboo plants do not produce many viable seeds. Consequently, bamboo is more commonly propagated by vegetative means. There are several types of vegetative propagation, and each have various advantages and drawbacks. Culm cutting, branch cutting, trench layering and marcotting propagation techniques essentially involve cutting a part off a bamboo in order to reroot it.

Culm Cutting
The culm cutting technique is used to successfully propagate most of the economically significant species of bamboo at a much faster rate than seed plantings. Begin by selecting only healthy culms 2 to 3 years in age. Cut the culm at ground level or slightly above the first node. Remove all leaves and small side branches. Use this culm to prepare several cuttings 2 to 3 nodes in length, leaving about 4 inches on each side. Place cuttings in a sandy, starting medium. Bury about 5 inches deep in dirt, totally covering up at least one node. New growth should appear in about 6 weeks.
Branch Cutting
Branch cutting propagation is a process that is very similar to culm cutting, but with branches. It works best with thick-walled bamboo cultivars. Select branches from 1- to 3-year-old culms. With both culm cutting and branch cuttings, rooting hormone applications will help produce better and faster results. Place branches in a growing medium upright or at a 20-degree angle. Special equipment like sand beds and mist chambers are often used to improve sprouting.
Trench Layering
Dig a long trench about 6 inches deep, long enough to accommodate a culm, lying horizontal, approximately 20 nodes long. Select a 2-year-old culm, stripping it of small branches and leaves. Cut through the culm, leaving about two thirds of its diameter. Place it in well-prepared soil, so that buds on the culm are in a lateral position. Shoots should start to appear at each node after about 3 months.

Marcotting
Marcotting is a bamboo propagation technique that is similar to trench layering. However, culms are not cut, but bent to a degree that will allow growers to physically reach plant nodes. In addition, propagation does not take place in the soil; instead it takes place in the air. A mixture of soil and rooting hormones are placed at each node. These materials are wrapped and physically bound to bamboo nodes using coconut fiber. Rooted nodes are later separated from the stem to become independent plants.

Culm Cutting
The culm cutting technique is used to successfully propagate most of the economically significant species of bamboo at a much faster rate than seed plantings. Begin by selecting only healthy culms 2 to 3 years in age. Cut the culm at ground level or slightly above the first node. Remove all leaves and small side branches. Use this culm to prepare several cuttings 2 to 3 nodes in length, leaving about 4 inches on each side. Place cuttings in a sandy, starting medium. Bury about 5 inches deep in dirt, totally covering up at least one node. New growth should appear in about 6 weeks.
Branch Cutting
Branch cutting propagation is a process that is very similar to culm cutting, but with branches. It works best with thick-walled bamboo cultivars. Select branches from 1- to 3-year-old culms. With both culm cutting and branch cuttings, rooting hormone applications will help produce better and faster results. Place branches in a growing medium upright or at a 20-degree angle. Special equipment like sand beds and mist chambers are often used to improve sprouting.
Trench Layering
Dig a long trench about 6 inches deep, long enough to accommodate a culm, lying horizontal, approximately 20 nodes long. Select a 2-year-old culm, stripping it of small branches and leaves. Cut through the culm, leaving about two thirds of its diameter. Place it in well-prepared soil, so that buds on the culm are in a lateral position. Shoots should start to appear at each node after about 3 months.

Marcotting
Marcotting is a bamboo propagation technique that is similar to trench layering. However, culms are not cut, but bent to a degree that will allow growers to physically reach plant nodes. In addition, propagation does not take place in the soil; instead it takes place in the air. A mixture of soil and rooting hormones are placed at each node. These materials are wrapped and physically bound to bamboo nodes using coconut fiber. Rooted nodes are later separated from the stem to become independent plants.
0
0


