文章
Miss Chen
2021年10月25日

Homegrown fruit always beats market fruit for freshness and taste, but not everyone has the space to grow a fruit tree or a melon vine. For that reason, berries are the gateway fruit for many gardeners, and none are easier to grow in the home garden than the blackberry. As native North American fruiting shrubs that can typically be harvested from June to August, blackberries are primed to grow in your yard with little extra maintenance. All you need to grow summer blackberries for your pies, jams, and smoothies is a spot with full sun and a good supply of soil amendments such as compost or leaf mold.
Blackberries are sold as dormant bare roots or as potted plants. They are best planted when the canes are dormant—generally in early spring. If you have the patience to grow blackberries from seed, plant them in the ground in the fall. Planted from seeds, blackberry canes generally will begin producing meaningful quantities of fruit in their second full year of growth.
Botanical Name Rubus Fruticosus
Common Name Blackberry
Plant Type Perennial
Size 3–5 feet
Sun Exposure Full sun
Soil Type Rich, well-drained loam
Soil pH Slightly acidic to neutral (5.5 to 7.0)
Hardiness Zones 5–8
Native Area North America, especially the Pacific Northwest
How to Plant Blackberries
As members of the Rosaceae family, the cultivation of blackberries resembles that of rose bushes. Fortunately, blackberries are closer to wild roses in their ease of care than they are to a hybrid tea rose. Blackberries will tolerate many growing conditions, but the harvest of a struggling blackberry plant will be disappointing compared to the harvest of a pampered plant. Plenty of sunshine, regular irrigation, and rich loamy soil will give plants the energy and nutrients they need to yield sweet, jumbo blackberries.
Plants should be spaced 5 to 6 feet apart; if planting in rows, space the rows 5 to 8 feet apart. If necessary, amend the soil before planting so it is rich, well-drained, and slightly acidic. Blackberries should be planted relatively shallow—about 1 inch deeper than they were growing in the nursery pot.
Trailing varieties of blackberries should have a trellis or other form of support to secure the canes.
Light
Sites with full sun are best for productive blackberry bushes. Some afternoon shade is tolerated, especially in areas with hot summers.
Soil
Careful site selection will ensure a long life for your blackberries, which usually live for about a decade with proper care. The ideal soil is slightly acidic with good drainage; these plants do not do well in clay soil. An elevated site or raised beds will not only help drainage but will also prevent late spring frosts from damaging flower buds. Remove all weeds that might draw nutrients or water away from your blackberries, as their shallow roots are susceptible to this competition.
Keep a good layer of mulch over the root zone at all times. This will feed the plants, conserve water moisture, and keep weeds down.
Water
Blackberries need moderate amounts of water, around 1 inch per week provided either by rainfall or from ground-level irrigation. Blackberries do not fare well in wet soils.
Temperature and Humidity
Blackberries require a period of cold dormancy to germinate, but because of their shallow root systems, they don't do well in areas where temperatures go below zero degrees routinely. Zones 5 to 8 provide the best environment for blackberries. Cold winter temperatures combined with wet spring soils may lead to plant death. The reverse environment of hot, dry winds is also unfavorable for blackberry growing and may result in stunted, seedy fruits.
Fertilizer
Fertilize your blackberries in the spring when plants are emerging from dormancy, using a balanced 10-10-10 formula. Fertilize plants again in the fall with an application of manure and compost, which will also suppress weeds and improve soil tilth.
Blackberry Varieties
Blackberries are usually categorized according to their growth habit:
Erect thorny blackberries grow upright and don't require support for the canes. They have very sharp spines on the canes—sharp enough to tear clothing.
Erect thornless blackberries are similar, but have canes without the prickly thorns. They, too, require no trellis supports.
Trailing thornless blackberries have sprawling canes that require a trellis or system of wires to hold them up above the ground.
'Shawnee' is resistant to cold, and has self-supporting thorny canes. 'Natchez' is thornless and erect, and will form a hedgerow as it spreads by suckers. Semi-erect thornless varieties like 'Chester' and 'Triple Crown' grow as a clump, and benefit from a trellis. Varieties like 'Prime-Ark Traveler' produce fruit on new and old canes throughout the season.
Blackberries vs. Raspberries
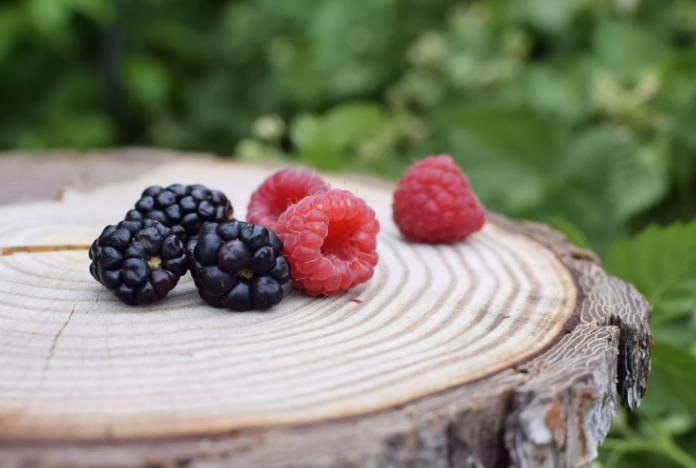
Both blackberries and raspberries belong to the Rubus genus. Blackberry and raspberry plants look very similar—both featuring thorny canes and compound leaves with toothed edges in groups of three or five. One key difference between the fruits of blackberries and raspberries is the way the fruits are formed. The tiny globes of the fruits, called drupelets, are attached to a white core in blackberries. Raspberries, including black raspberries, form drupelets with a hollow core.
Harvesting
Because they are highly perishable, it's important to follow the development of your ripening blackberries carefully. Immature blackberries start out green, then transition to red before maturing to a deep, glossy black. Blackberries do not continue to ripen after harvest, so pick the berries only after they have turned completely black. Berries last about seven days in the refrigerator after harvest.
Pruning
Blackberry roots are perennial but the canes are biennial. This means that second-year canes that have produced their fruit need to be trimmed away after harvesting.
For an established shrub, new canes that haven't yet fruited should be tip-pruned to about 3 feet in summer. This will cause the new canes to branch out, maximizing the fruit produced. Once these canes produce fruit, they should be removed to the ground immediately after the fruit harvest.
In early spring before new growth has started, remove any canes damaged by winter, and thin out the remaining canes to the four or five strongest canes.

Propagating Blackberries
It's easy to propagate blackberry plants from stem cuttings. Cut a 4-inch piece from the end of the stem in late spring when temperatures are mild and rainfall is plenty. Plant it in the soil, and keep it moist. Roots will form in two to four weeks. These newly started plants can be planted in the fall, or you can keep them in a sheltered location and plant them the following spring.
Common Pests and Diseases
Blackberries are prone to anthracnose, stem blight, and crown gall. Prevent disease by purchasing disease-free plant stock from reputable nurseries, and planting your blackberries away from areas with wild brambles, which may carry these diseases.
Insect pests include stink bugs and raspberry crown borers. Keeping your plants healthy and vigorous will make them less attractive to insect attack.
Blackberries are sometimes afflicted by viral diseases. Raspberry bushy dwarf virus and blackberry calico virus both cause bright yellow splotches to appear on leaves. Affected plants will need to be removed and destroyed.
How to Grow Blackberries in Pots
When growing blackberries in containers, choose a compact cultivar like Baby Cakes that does not need pruning. Choose large containers that hold at least five gallons of soil to prevent drying out.
Blackberries are sold as dormant bare roots or as potted plants. They are best planted when the canes are dormant—generally in early spring. If you have the patience to grow blackberries from seed, plant them in the ground in the fall. Planted from seeds, blackberry canes generally will begin producing meaningful quantities of fruit in their second full year of growth.
Botanical Name Rubus Fruticosus
Common Name Blackberry
Plant Type Perennial
Size 3–5 feet
Sun Exposure Full sun
Soil Type Rich, well-drained loam
Soil pH Slightly acidic to neutral (5.5 to 7.0)
Hardiness Zones 5–8
Native Area North America, especially the Pacific Northwest
How to Plant Blackberries
As members of the Rosaceae family, the cultivation of blackberries resembles that of rose bushes. Fortunately, blackberries are closer to wild roses in their ease of care than they are to a hybrid tea rose. Blackberries will tolerate many growing conditions, but the harvest of a struggling blackberry plant will be disappointing compared to the harvest of a pampered plant. Plenty of sunshine, regular irrigation, and rich loamy soil will give plants the energy and nutrients they need to yield sweet, jumbo blackberries.
Plants should be spaced 5 to 6 feet apart; if planting in rows, space the rows 5 to 8 feet apart. If necessary, amend the soil before planting so it is rich, well-drained, and slightly acidic. Blackberries should be planted relatively shallow—about 1 inch deeper than they were growing in the nursery pot.
Trailing varieties of blackberries should have a trellis or other form of support to secure the canes.

Light
Sites with full sun are best for productive blackberry bushes. Some afternoon shade is tolerated, especially in areas with hot summers.
Soil
Careful site selection will ensure a long life for your blackberries, which usually live for about a decade with proper care. The ideal soil is slightly acidic with good drainage; these plants do not do well in clay soil. An elevated site or raised beds will not only help drainage but will also prevent late spring frosts from damaging flower buds. Remove all weeds that might draw nutrients or water away from your blackberries, as their shallow roots are susceptible to this competition.
Keep a good layer of mulch over the root zone at all times. This will feed the plants, conserve water moisture, and keep weeds down.
Water
Blackberries need moderate amounts of water, around 1 inch per week provided either by rainfall or from ground-level irrigation. Blackberries do not fare well in wet soils.
Temperature and Humidity
Blackberries require a period of cold dormancy to germinate, but because of their shallow root systems, they don't do well in areas where temperatures go below zero degrees routinely. Zones 5 to 8 provide the best environment for blackberries. Cold winter temperatures combined with wet spring soils may lead to plant death. The reverse environment of hot, dry winds is also unfavorable for blackberry growing and may result in stunted, seedy fruits.
Fertilizer
Fertilize your blackberries in the spring when plants are emerging from dormancy, using a balanced 10-10-10 formula. Fertilize plants again in the fall with an application of manure and compost, which will also suppress weeds and improve soil tilth.
Blackberry Varieties
Blackberries are usually categorized according to their growth habit:
Erect thorny blackberries grow upright and don't require support for the canes. They have very sharp spines on the canes—sharp enough to tear clothing.
Erect thornless blackberries are similar, but have canes without the prickly thorns. They, too, require no trellis supports.
Trailing thornless blackberries have sprawling canes that require a trellis or system of wires to hold them up above the ground.
'Shawnee' is resistant to cold, and has self-supporting thorny canes. 'Natchez' is thornless and erect, and will form a hedgerow as it spreads by suckers. Semi-erect thornless varieties like 'Chester' and 'Triple Crown' grow as a clump, and benefit from a trellis. Varieties like 'Prime-Ark Traveler' produce fruit on new and old canes throughout the season.
Blackberries vs. Raspberries
Both blackberries and raspberries belong to the Rubus genus. Blackberry and raspberry plants look very similar—both featuring thorny canes and compound leaves with toothed edges in groups of three or five. One key difference between the fruits of blackberries and raspberries is the way the fruits are formed. The tiny globes of the fruits, called drupelets, are attached to a white core in blackberries. Raspberries, including black raspberries, form drupelets with a hollow core.
Harvesting
Because they are highly perishable, it's important to follow the development of your ripening blackberries carefully. Immature blackberries start out green, then transition to red before maturing to a deep, glossy black. Blackberries do not continue to ripen after harvest, so pick the berries only after they have turned completely black. Berries last about seven days in the refrigerator after harvest.
Pruning
Blackberry roots are perennial but the canes are biennial. This means that second-year canes that have produced their fruit need to be trimmed away after harvesting.
For an established shrub, new canes that haven't yet fruited should be tip-pruned to about 3 feet in summer. This will cause the new canes to branch out, maximizing the fruit produced. Once these canes produce fruit, they should be removed to the ground immediately after the fruit harvest.
In early spring before new growth has started, remove any canes damaged by winter, and thin out the remaining canes to the four or five strongest canes.

Propagating Blackberries
It's easy to propagate blackberry plants from stem cuttings. Cut a 4-inch piece from the end of the stem in late spring when temperatures are mild and rainfall is plenty. Plant it in the soil, and keep it moist. Roots will form in two to four weeks. These newly started plants can be planted in the fall, or you can keep them in a sheltered location and plant them the following spring.
Common Pests and Diseases
Blackberries are prone to anthracnose, stem blight, and crown gall. Prevent disease by purchasing disease-free plant stock from reputable nurseries, and planting your blackberries away from areas with wild brambles, which may carry these diseases.
Insect pests include stink bugs and raspberry crown borers. Keeping your plants healthy and vigorous will make them less attractive to insect attack.
Blackberries are sometimes afflicted by viral diseases. Raspberry bushy dwarf virus and blackberry calico virus both cause bright yellow splotches to appear on leaves. Affected plants will need to be removed and destroyed.
How to Grow Blackberries in Pots
When growing blackberries in containers, choose a compact cultivar like Baby Cakes that does not need pruning. Choose large containers that hold at least five gallons of soil to prevent drying out.
0
0
文章
ritau
2020年04月12日

Indoor activity for Quarantine!
1. Know when to transplant.
Aloe plants have relatively short roots and heavy leaves, so they are commonly moved to a heavier pot when they become top-heavy and tip over. If Aloe vera runs out of space for its roots to grow, it may start to produce "pups" that can be moved to their own pot (see the Propagating section). If you are more interested in the adult plant growing than producing new plants, transplant it to a larger pot before the roots begin to circle the walls of its container.
2. Give the plant adequate sunlight and warmth.
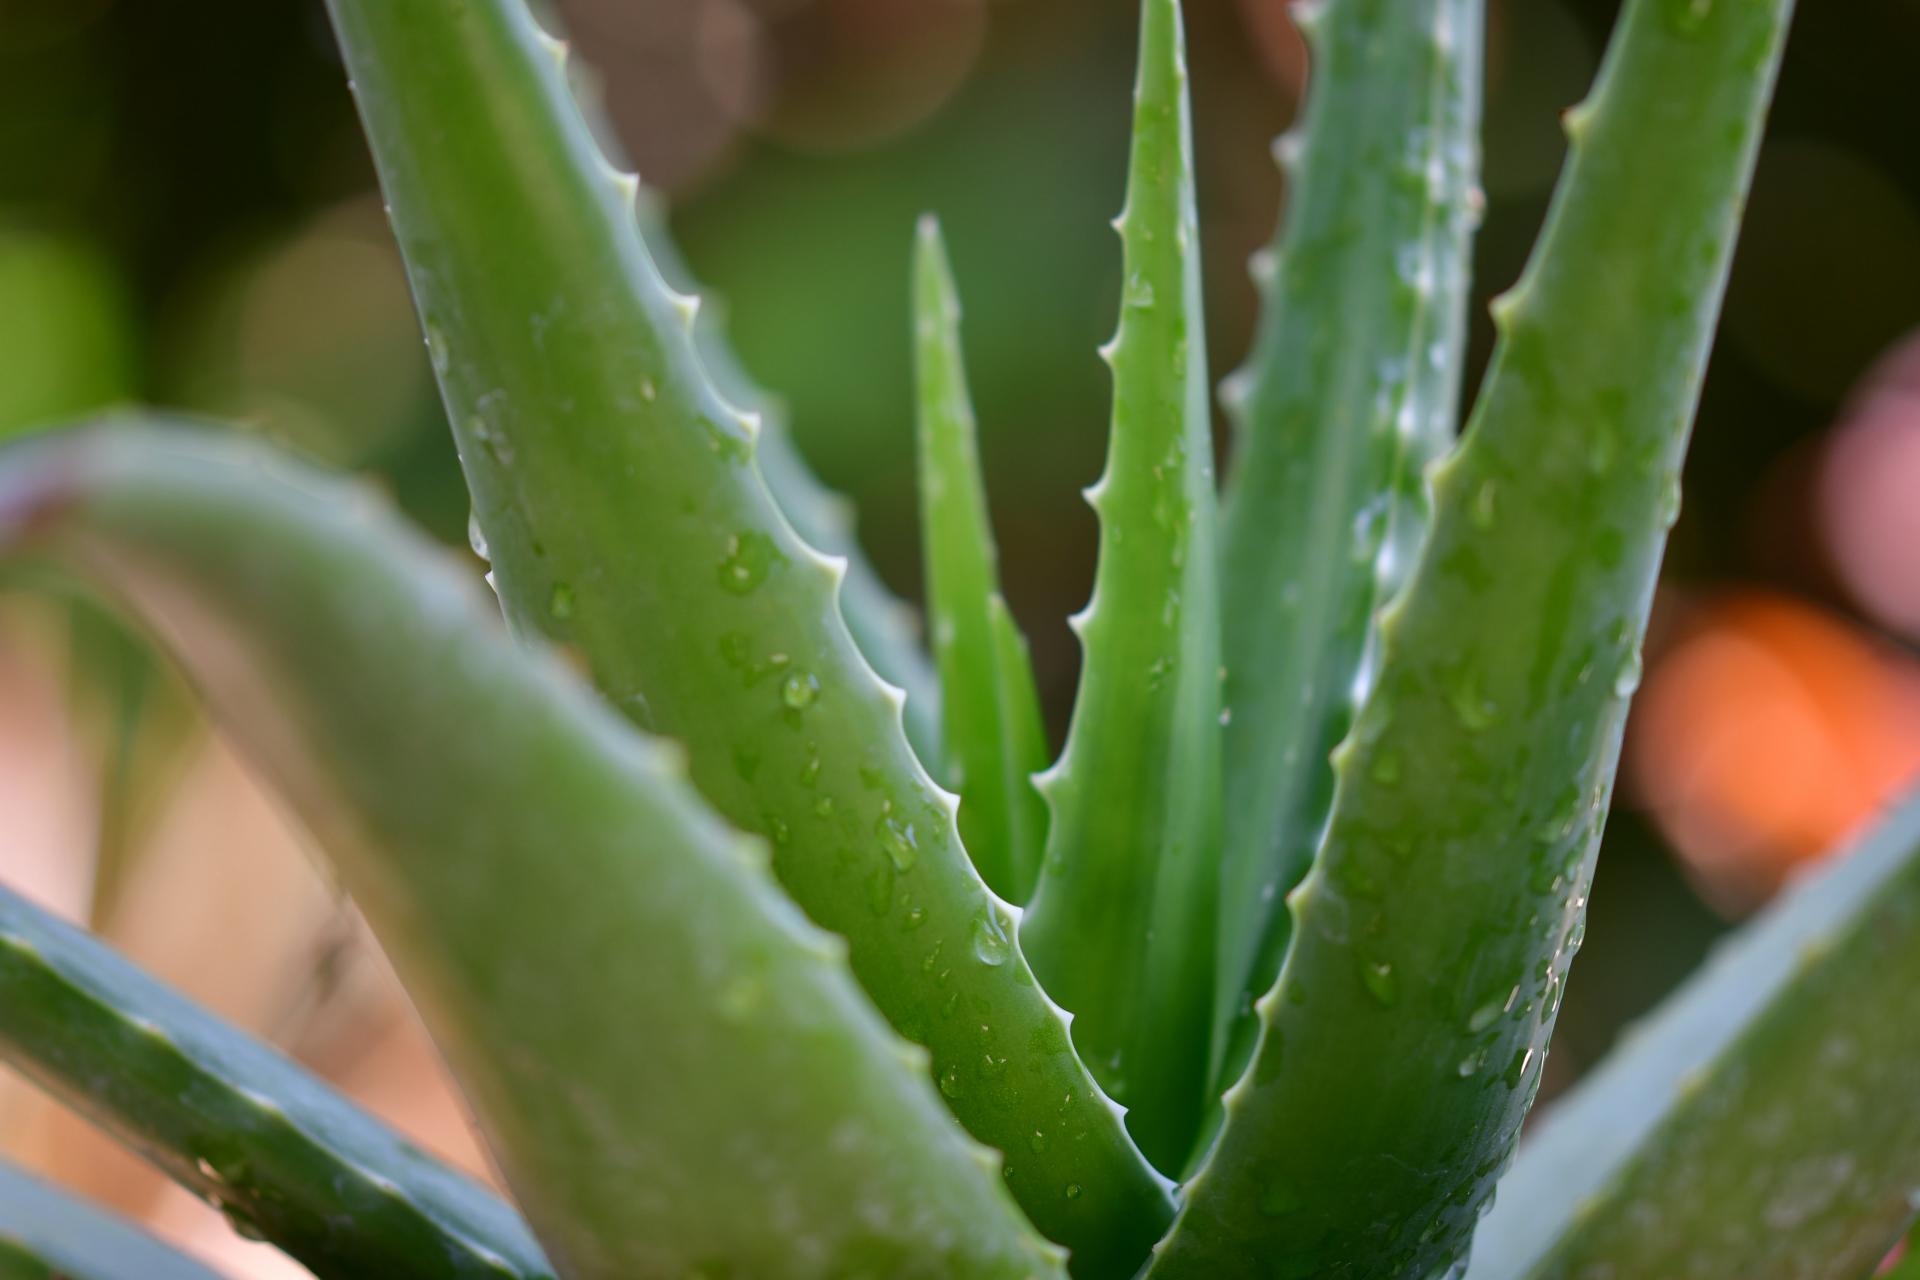
Aloe vera plants prefer 8–10 hours of sunlight a day. While they grow best in warm or hot temperatures, they are capable of surviving cooler seasons in a more dormant state. However, they may suffer harm if exposed to temperatures below 25ºF (-4ºC).
3. Plant the Aloe vera in well draining soil.
Aloe vera plants are adapted for survival in dry conditions, and may rot if planted in soil that collects standing water. Use a cactus potting mix, or create your own mix using equal parts soil, sand, and gravel.
4. Cover the root ball when planting but do not let the leaves touch the soil.
Place the Aloe vera root ball just below the soil surface. If any of the thick, green leaves are partially buried or touch the soil, they may rot.
5. Cover the surface of the soil with gravel or pebbles (optional).
Place a layer of small rocks around the base of the aloe plant to keep the soil in place and reduce evaporation. This is not required for your aloe plant to thrive, so you may leave the soil exposed if you prefer the appearance.
6. Do not water for the first few days after planting.
Before you start watering, give the aloe plant a few days to repair any roots that may have been damaged during planting. Watering damaged roots increases the chance of root rot. Aloe plants store plenty of water in their leaves, and should not be harmed by the lack of water during this time. Give it a light watering the first one or two times you water if you would like to be extra safe.
Enjoy your DIY!
1. Know when to transplant.
Aloe plants have relatively short roots and heavy leaves, so they are commonly moved to a heavier pot when they become top-heavy and tip over. If Aloe vera runs out of space for its roots to grow, it may start to produce "pups" that can be moved to their own pot (see the Propagating section). If you are more interested in the adult plant growing than producing new plants, transplant it to a larger pot before the roots begin to circle the walls of its container.
2. Give the plant adequate sunlight and warmth.
Aloe vera plants prefer 8–10 hours of sunlight a day. While they grow best in warm or hot temperatures, they are capable of surviving cooler seasons in a more dormant state. However, they may suffer harm if exposed to temperatures below 25ºF (-4ºC).

3. Plant the Aloe vera in well draining soil.
Aloe vera plants are adapted for survival in dry conditions, and may rot if planted in soil that collects standing water. Use a cactus potting mix, or create your own mix using equal parts soil, sand, and gravel.
4. Cover the root ball when planting but do not let the leaves touch the soil.
Place the Aloe vera root ball just below the soil surface. If any of the thick, green leaves are partially buried or touch the soil, they may rot.
5. Cover the surface of the soil with gravel or pebbles (optional).
Place a layer of small rocks around the base of the aloe plant to keep the soil in place and reduce evaporation. This is not required for your aloe plant to thrive, so you may leave the soil exposed if you prefer the appearance.
6. Do not water for the first few days after planting.
Before you start watering, give the aloe plant a few days to repair any roots that may have been damaged during planting. Watering damaged roots increases the chance of root rot. Aloe plants store plenty of water in their leaves, and should not be harmed by the lack of water during this time. Give it a light watering the first one or two times you water if you would like to be extra safe.

Enjoy your DIY!
0
0
文章
ritau
2020年03月01日

Companion planting in gardening and agriculture is the planting of different crops in proximity for any of a number of different reasons, including pest control, pollination, providing habitat for beneficial insects, maximizing use of space, and to otherwise increase crop productivity. Companion planting is a form of polyculture.
Companion planting is used by farmers and gardeners in both industrialized and developing countries for many reasons. Many of the modern principles of companion planting were present many centuries ago in cottage gardens in England and forest gardens in Asia, and thousands of years ago in Mesoamerica.
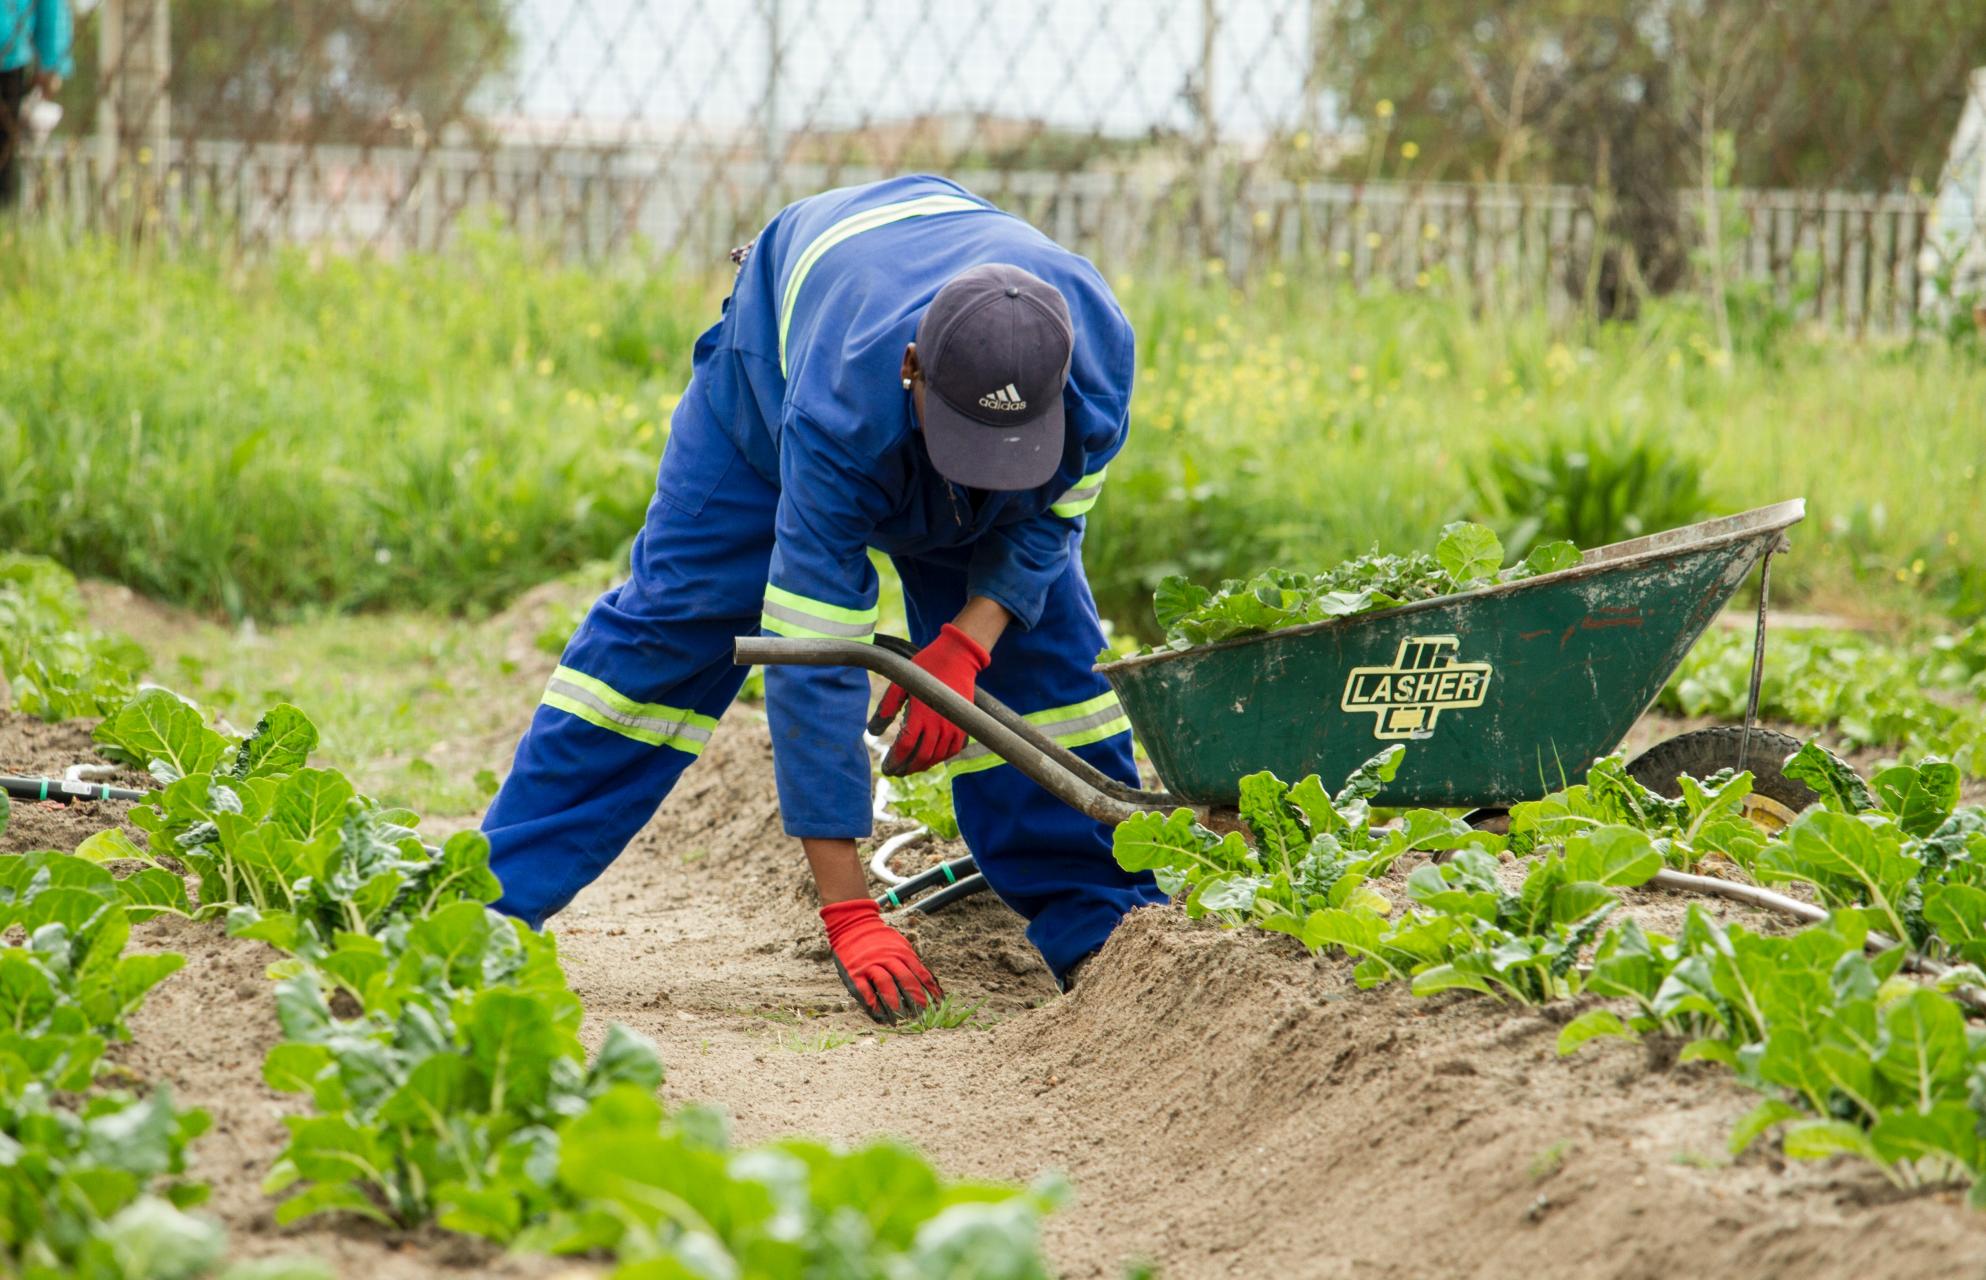
Companion planting can operate through a variety of mechanisms, which may sometimes be combined.
*Provision of nutrients
Legumes such as clover provide nitrogen compounds to other plants such as grasses by fixing nitrogen from the air with symbiotic bacteria in their root nodules.
Dandelions have long taproots that bring nutrients from deep within the soil to near the surface, benefitting neighboring plants that are shallower-rooted.
*Trap cropping
Further information: Trap crop
Trap cropping uses alternative plants to attract pests away from a main crop. For example, nasturtium (Tropaeolum majus) is a food plant of some caterpillars which feed primarily on members of the cabbage family (brassicas); some gardeners claim that planting them around brassicas protects the food crops from damage, as eggs of the pests are preferentially laid on the nasturtium. However, while many trap crops have successfully diverted pests off of focal crops in small scale greenhouse, garden and field experiments, only a small portion of these plants have been shown to reduce pest damage at larger commercial scales.
*Host-finding disruption
Recent studies on host-plant finding have shown that flying pests are far less successful if their host-plants are surrounded by any other plant or even "decoy-plants" made of green plastic, cardboard, or any other green material.
The host-plant finding process occurs in phases:
— The first phase is stimulation by odours characteristic to the host-plant. This induces the insect to try to land on the plant it seeks. But insects avoid landing on brown (bare) soil. So if only the host-plant is present, the insects will quasi-systematically find it by simply landing on the only green thing around. This is called (from the point of view of the insect) "appropriate landing". When it does an "inappropriate landing", it flies off to any other nearby patch of green. It eventually leaves the area if there are too many 'inappropriate' landings.
— The second phase of host-plant finding is for the insect to make short flights from leaf to leaf to assess the plant's overall suitability. The number of leaf-to-leaf flights varies according to the insect species and to the host-plant stimulus received from each leaf. The insect must accumulate sufficient stimuli from the host-plant to lay eggs; so it must make a certain number of consecutive 'appropriate' landings. Hence if it makes an 'inappropriate landing', the assessment of that plant is negative, and the insect must start the process anew.
Thus it was shown that clover used as a ground cover had the same disruptive effect on eight pest species from four different insect orders. An experiment showed that 36% of cabbage root flies laid eggs beside cabbages growing in bare soil (which resulted in no crop), compared to only 7% beside cabbages growing in clover (which allowed a good crop). Simple decoys made of green cardboard also disrupted appropriate landings just as well as did the live ground cover.
*Pest suppression
Some companion plants help prevent pest insects or pathogenic fungi from damaging the crop, through chemical means. For example, the smell of the foliage of marigolds is claimed to deter aphids from feeding on neighbouring plants.
*Predator recruitment
Companion plants that produce copious nectar or pollen in a vegetable garden (insectary plants) may help encourage higher populations of beneficial insects that control pests, as some beneficial predatory insects only consume pests in their larval form and are nectar or pollen feeders in their adult form. For instance, marigolds with simple flowers attract nectar-feeding adult hoverflies, the larvae of which are predators of aphids.

*Protective shelter
Shade-grown coffee plantation in Costa Rica. The red trees in the background provide shade; those in the foreground have been pruned to allow full exposure to the sun.
Some crops are grown under the protective shelter of different kinds of plant, whether as wind breaks or for shade. For example, shade-grown coffee, especially Coffea arabica, has traditionally been grown in light shade created by scattered trees with a thin canopy, allowing light through to the coffee bushes but protecting them from overheating. Suitable Asian trees include Erythrina subumbrans (tton tong or dadap), Gliricidia sepium (khae falang), Cassia siamea (khi lek), Melia azedarach (khao dao sang), and Paulownia tomentosa, a useful timber tree.
Companion planting is used by farmers and gardeners in both industrialized and developing countries for many reasons. Many of the modern principles of companion planting were present many centuries ago in cottage gardens in England and forest gardens in Asia, and thousands of years ago in Mesoamerica.

Companion planting can operate through a variety of mechanisms, which may sometimes be combined.
*Provision of nutrients
Legumes such as clover provide nitrogen compounds to other plants such as grasses by fixing nitrogen from the air with symbiotic bacteria in their root nodules.
Dandelions have long taproots that bring nutrients from deep within the soil to near the surface, benefitting neighboring plants that are shallower-rooted.
*Trap cropping
Further information: Trap crop
Trap cropping uses alternative plants to attract pests away from a main crop. For example, nasturtium (Tropaeolum majus) is a food plant of some caterpillars which feed primarily on members of the cabbage family (brassicas); some gardeners claim that planting them around brassicas protects the food crops from damage, as eggs of the pests are preferentially laid on the nasturtium. However, while many trap crops have successfully diverted pests off of focal crops in small scale greenhouse, garden and field experiments, only a small portion of these plants have been shown to reduce pest damage at larger commercial scales.

*Host-finding disruption
Recent studies on host-plant finding have shown that flying pests are far less successful if their host-plants are surrounded by any other plant or even "decoy-plants" made of green plastic, cardboard, or any other green material.
The host-plant finding process occurs in phases:
— The first phase is stimulation by odours characteristic to the host-plant. This induces the insect to try to land on the plant it seeks. But insects avoid landing on brown (bare) soil. So if only the host-plant is present, the insects will quasi-systematically find it by simply landing on the only green thing around. This is called (from the point of view of the insect) "appropriate landing". When it does an "inappropriate landing", it flies off to any other nearby patch of green. It eventually leaves the area if there are too many 'inappropriate' landings.
— The second phase of host-plant finding is for the insect to make short flights from leaf to leaf to assess the plant's overall suitability. The number of leaf-to-leaf flights varies according to the insect species and to the host-plant stimulus received from each leaf. The insect must accumulate sufficient stimuli from the host-plant to lay eggs; so it must make a certain number of consecutive 'appropriate' landings. Hence if it makes an 'inappropriate landing', the assessment of that plant is negative, and the insect must start the process anew.
Thus it was shown that clover used as a ground cover had the same disruptive effect on eight pest species from four different insect orders. An experiment showed that 36% of cabbage root flies laid eggs beside cabbages growing in bare soil (which resulted in no crop), compared to only 7% beside cabbages growing in clover (which allowed a good crop). Simple decoys made of green cardboard also disrupted appropriate landings just as well as did the live ground cover.
*Pest suppression
Some companion plants help prevent pest insects or pathogenic fungi from damaging the crop, through chemical means. For example, the smell of the foliage of marigolds is claimed to deter aphids from feeding on neighbouring plants.
*Predator recruitment
Companion plants that produce copious nectar or pollen in a vegetable garden (insectary plants) may help encourage higher populations of beneficial insects that control pests, as some beneficial predatory insects only consume pests in their larval form and are nectar or pollen feeders in their adult form. For instance, marigolds with simple flowers attract nectar-feeding adult hoverflies, the larvae of which are predators of aphids.

*Protective shelter
Shade-grown coffee plantation in Costa Rica. The red trees in the background provide shade; those in the foreground have been pruned to allow full exposure to the sun.
Some crops are grown under the protective shelter of different kinds of plant, whether as wind breaks or for shade. For example, shade-grown coffee, especially Coffea arabica, has traditionally been grown in light shade created by scattered trees with a thin canopy, allowing light through to the coffee bushes but protecting them from overheating. Suitable Asian trees include Erythrina subumbrans (tton tong or dadap), Gliricidia sepium (khae falang), Cassia siamea (khi lek), Melia azedarach (khao dao sang), and Paulownia tomentosa, a useful timber tree.
0
0
文章
A🎌王木木💮
2019年11月18日

After entering the winter,the outside world is getting more and more depressed.If you’re a florist,you can raise some flowers and plants at home,let the space that belongs to you be full of spring.What flowers and plants are suitable for raising in winter?Today we introduce hyacinth.
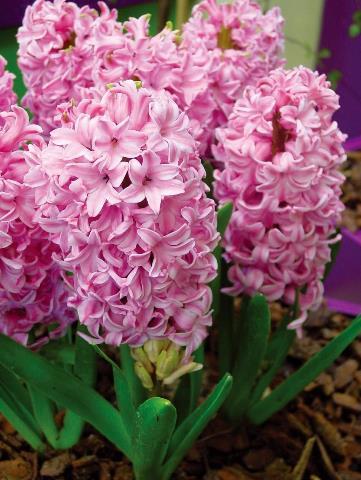
Other common names:hyacinth 'Woodstock'
Family:Asparagaceae
Genus:Hyacinthus are bulbous perennial with glossy, broadly strap-shaped leaves and fragrant, bell-shaped flowers with recurved petals, borne in loose or dense racemes in spring
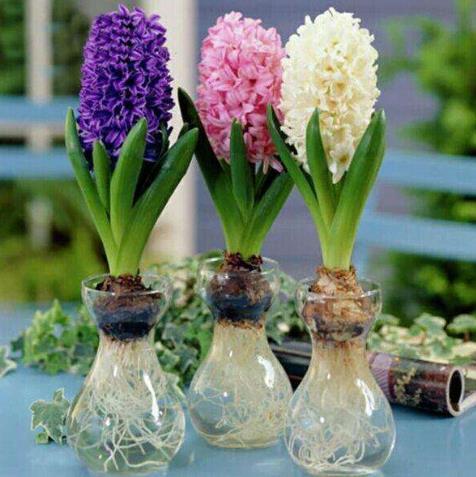
Details:'Woodstock' is a perennial bulb, growing to 30cm tall, with rich green, glossy, upright foliage and spikes of plum-purple, scented flowers on black-purple stems in mid-spring
How to grow
Cultivation Plant 10cm deep in autumn in any moderately fertile, humus-rich, well-drained soil. Protect container-grown bulbs from excessive winter wet. See hyacinth cultivation
Propagation Propagate by removing offsets when dormant in summer
Suggested planting locations and garden types Flower borders and beds City & Courtyard Gardens Cottage & Informal Garden Mediterranean Climate Plants Patio & Container Plants

How to care
Pruning No pruning required
Pests Can be damaged by slugs
Diseases Generally disease free

Other common names:hyacinth 'Woodstock'
Family:Asparagaceae
Genus:Hyacinthus are bulbous perennial with glossy, broadly strap-shaped leaves and fragrant, bell-shaped flowers with recurved petals, borne in loose or dense racemes in spring
Details:'Woodstock' is a perennial bulb, growing to 30cm tall, with rich green, glossy, upright foliage and spikes of plum-purple, scented flowers on black-purple stems in mid-spring

How to grow
Cultivation Plant 10cm deep in autumn in any moderately fertile, humus-rich, well-drained soil. Protect container-grown bulbs from excessive winter wet. See hyacinth cultivation
Propagation Propagate by removing offsets when dormant in summer
Suggested planting locations and garden types Flower borders and beds City & Courtyard Gardens Cottage & Informal Garden Mediterranean Climate Plants Patio & Container Plants

How to care
Pruning No pruning required
Pests Can be damaged by slugs
Diseases Generally disease free
0
0
成长记
Ichigobaibee
2019年03月16日

These three are still in the same pot but I had to move the other one due to space problems.




1
0
文章
Andy
2018年12月26日

Facebook Pinterest Twitter Google+ LinkedIn StumbleUponCreate an Indoor Garden Under Stairs. This can be a unique place to introduce some greenery to your home.
The empty space under the stairs can be useful. You can store things there, this is the most common use. However, there are many other under stair ideas you can opt for, depending upon the type of space you’ve there. A mini library with bookshelves or a reading nook or a home office, if it’s big enough.
A dog house or playhouse for your kids can be an interesting idea too. And, if your kitchen doesn’t offer a lot of cabinet space and it’s near to that under the stair place, make a kitchen pantry. The Kitchn.com has a remarkable post on it, check it out here. You can make a wine cellar as well by taking inspiration from this post.
If the idea of making a wet bar to entertain your guest interest you–must try that. Besides all these under stair ideas, you can make a closet to store your clothes. A small bathroom, a mudroom can also fit well there. There are plenty of projects with tutorials available on the web to teach you how to do this.
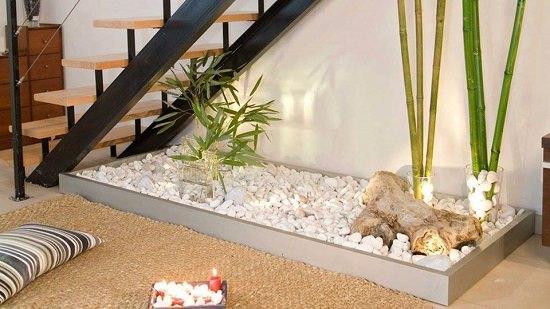
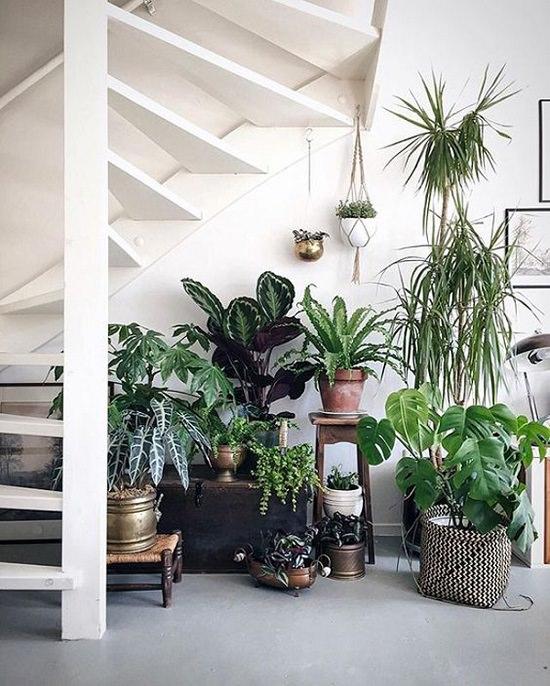
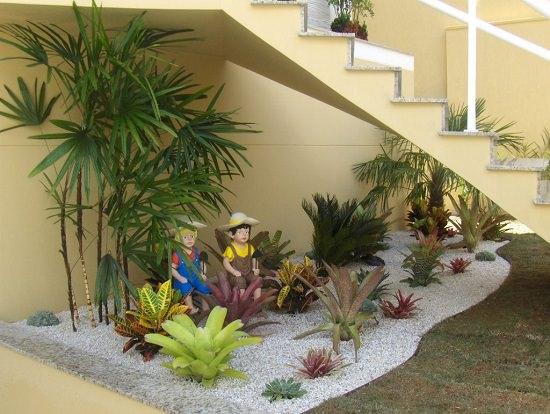
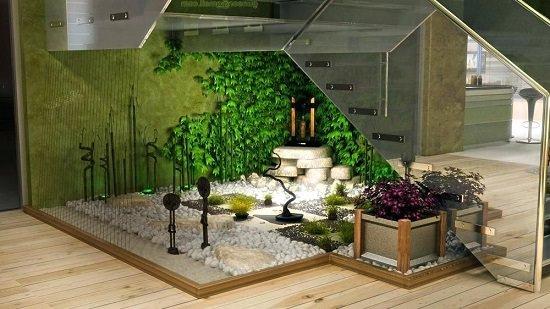
The unique and nowadays popular use is indoor garden under stairs. If your space receives some bright indirect light there, or by using artificial lights you can do this. If both are not possible, you can create greenery by fake plants. Below are the 14 Garden Under the Stairs Ideas you can consider:
1.


2.


3.

4.


5.

6.


Also Read: Most Important Indoor Gardening Tips
7.


8.

9.


10.


11.


12.

13.

14.


15.


The empty space under the stairs can be useful. You can store things there, this is the most common use. However, there are many other under stair ideas you can opt for, depending upon the type of space you’ve there. A mini library with bookshelves or a reading nook or a home office, if it’s big enough.
A dog house or playhouse for your kids can be an interesting idea too. And, if your kitchen doesn’t offer a lot of cabinet space and it’s near to that under the stair place, make a kitchen pantry. The Kitchn.com has a remarkable post on it, check it out here. You can make a wine cellar as well by taking inspiration from this post.
If the idea of making a wet bar to entertain your guest interest you–must try that. Besides all these under stair ideas, you can make a closet to store your clothes. A small bathroom, a mudroom can also fit well there. There are plenty of projects with tutorials available on the web to teach you how to do this.
The unique and nowadays popular use is indoor garden under stairs. If your space receives some bright indirect light there, or by using artificial lights you can do this. If both are not possible, you can create greenery by fake plants. Below are the 14 Garden Under the Stairs Ideas you can consider:
1.


2.


3.


4.


5.


6.


Also Read: Most Important Indoor Gardening Tips
7.


8.


9.


10.


11.


12.


13.


14.


15.


0
2
文章
Andy
2018年12月26日

Tangy and sour, lemon adds flavor to every cuisine. Learn how to grow a lemon tree in a pot. Growing lemon tree is easy if you follow the requirements given below.

Image credit: the tree center
You want to grow lemons but stop because you run out of space or you don’t grow it because you live in a colder region. If this is your plight then growing a lemon tree in a pot is a smart idea. Plant it on a patio, terrace or in indoors, and you will be bestowed by its scented flowers and soft yellow citrus fruits. You can grow it in balcony too, Meyer lemon variety is perfect for kitchen and balcony gardens, especially for non-tropical zones.
Lemon Tree Varieties
Growing lemon tree from seed is a bad idea because it can take up to 4 years to produce fruits. Instead, ask in local nurseries for dwarf varieties that can do well in containers. Varieties that are most suitable for containers are Improved Meyer, Lisbon Lemon, and Dwarf Eureka. However, a lemon tree doesn’t grow too big, which means you can grow almost any variety in the pot.
*Buy a healthy lemon plant that is at least 3 years old, so that you don’t have to wait for it to start blooming and fruiting.
How to Grow a Lemon Tree in Pot
Choose a pot that is 25% bigger than the root ball of the plant. A clay pot is ideal because unlike plastic it is porous and evaporates water from sides, this helps the lemon tree to grow well as it dislikes being waterlogged. The quality and type of potting soil is an essential factor as well. For growing high yielding plants, use well draining organic potting mix.
*If you’re growing a lemon tree in a balcony or any other small space, take care of its spikes, keep the plant in a corner.
Requirements for Growing Lemon Tree in a Pot
Repot your lemon tree in every couple of years or so at the beginning of spring (in warm climates, winter is the best season). Your pot size should be according to the scale of your tree. Avoid too large or small planters, keep in mind to use a container that is one size bigger than your previously used pot.
*pH level of soil should be around 5.5 to 7 as this plant prefers slightly acidic soil to neutral soil.
Sunlight
All plants in the citrus family love full sun, around 7 to 8 hours of sunlight is essential. If growing lemon tree indoors, use grow lights to provide adequate lighting inside.
Also Read: Growing Pomegranates in Containers
Watering
The lemon tree requires consistent watering to produce healthy fruits. Giving it too much or too little water can lead to blossom and fruit drop and sometimes plant may die too. Check top 2-inch layer of soil for dryness before watering. On windy and hot days, it requires more frequent watering and slightly moist soil.
Humidity
If you are growing a lemon tree indoors, it requires a certain humidity level to thrive, 50% is ideal. You can maintain humidity by placing it on a pebble tray or using a humidifier.
Lemon Tree Care
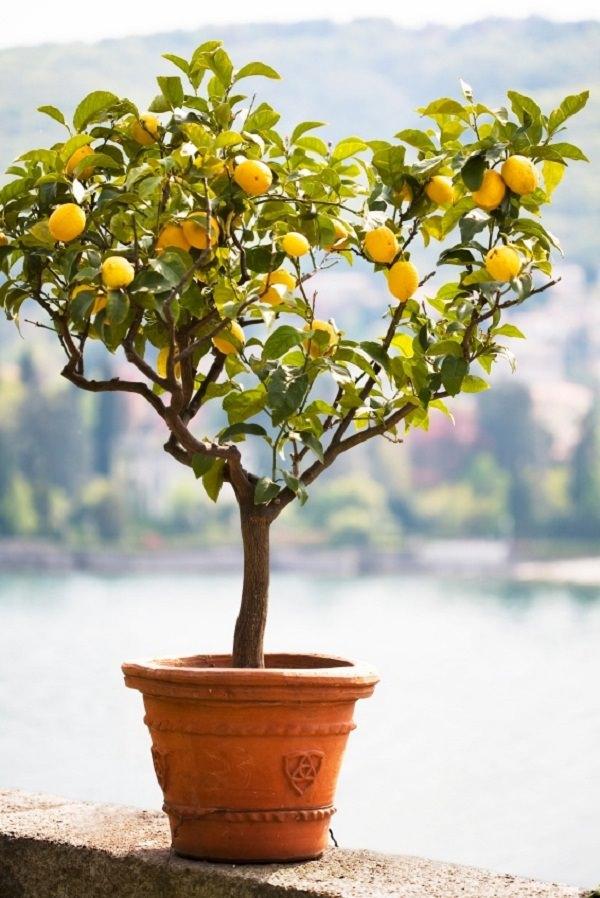

If you’re growing a lemon tree in a pot in USDA Zones 8b to 11, you don’t need to care for cold that much, but below these zones, special care is needed in harsh winters. Temperature below 30°F (-1 C) is life-threatening for the lemon tree, except ‘Meyer’ lemon variety that can tolerate some cold till 24°F (-4 C).
Freezing temperatures succumb these plants to death. Optimum temperature is around 50°F to 82°F (10°C to 28°C). To overwinter it, keep your potted plant indoors or in a greenhouse when the temperature falls below 35°F (2°C).
Pruning and Pinching Lemon Tree
Pinching encourages bushier growth, pinch growing tip when a branch is about 5 inches long. Pruning of lemon tree is best carried out when new growth starts (February – March). Be careful before pruning it, only prune diseased or dead branches because lemon stores excess food in its leaves and too much pruning can result in poor fruit crop. Also, keep looking for suckers and prune them immediately if found one.
Fertilizer for Growing Lemon Tree in a Pot
All plants of citrus family are heavy feeders, and lemon tree too requires fertilizer to produce juicy fruits, lush foliage, and fragrant blooms. Use special purpose citrus fertilizers for every citrus species plant, if unavailable use slow release fertilizer of NPK 12-6-6.
Look for a fertilizer that contains micronutrients, especially iron, manganese, and zinc. To give boost feed to your lemon tree apply a water-soluble fertilizer once in a month in growing season. Occasionally, side dress your plant with compost or well-rotted manure.
Pests and Diseases for Lemon Tree in Pot
Pests like mealy bugs, spider mites, aphids, and scales occasionally attract toward it. To get rid of them organically read this article.
Harvesting
Harvesting time depends on the type of variety you are growing and your weather conditions. The citrus fruits stop ripening once they are off the tree. To determine if the fruit is ripened, see if the fruit is heavy, soft and yellow.
Also Read: Growing Cucumbers on a Trellis
Additional Tips for Growing Lemon Tree in PotKeep your lemon tree in a less windy spot as it dislikes strong winds.If moving indoors for winter or outside for summer, acclimatize it to avoid shock.You can also do grafting to get two or more varieties from the single tree.


Image credit: the tree center
You want to grow lemons but stop because you run out of space or you don’t grow it because you live in a colder region. If this is your plight then growing a lemon tree in a pot is a smart idea. Plant it on a patio, terrace or in indoors, and you will be bestowed by its scented flowers and soft yellow citrus fruits. You can grow it in balcony too, Meyer lemon variety is perfect for kitchen and balcony gardens, especially for non-tropical zones.
Lemon Tree Varieties
Growing lemon tree from seed is a bad idea because it can take up to 4 years to produce fruits. Instead, ask in local nurseries for dwarf varieties that can do well in containers. Varieties that are most suitable for containers are Improved Meyer, Lisbon Lemon, and Dwarf Eureka. However, a lemon tree doesn’t grow too big, which means you can grow almost any variety in the pot.
*Buy a healthy lemon plant that is at least 3 years old, so that you don’t have to wait for it to start blooming and fruiting.
How to Grow a Lemon Tree in Pot
Choose a pot that is 25% bigger than the root ball of the plant. A clay pot is ideal because unlike plastic it is porous and evaporates water from sides, this helps the lemon tree to grow well as it dislikes being waterlogged. The quality and type of potting soil is an essential factor as well. For growing high yielding plants, use well draining organic potting mix.
*If you’re growing a lemon tree in a balcony or any other small space, take care of its spikes, keep the plant in a corner.
Requirements for Growing Lemon Tree in a Pot
Repot your lemon tree in every couple of years or so at the beginning of spring (in warm climates, winter is the best season). Your pot size should be according to the scale of your tree. Avoid too large or small planters, keep in mind to use a container that is one size bigger than your previously used pot.
*pH level of soil should be around 5.5 to 7 as this plant prefers slightly acidic soil to neutral soil.
Sunlight
All plants in the citrus family love full sun, around 7 to 8 hours of sunlight is essential. If growing lemon tree indoors, use grow lights to provide adequate lighting inside.
Also Read: Growing Pomegranates in Containers
Watering
The lemon tree requires consistent watering to produce healthy fruits. Giving it too much or too little water can lead to blossom and fruit drop and sometimes plant may die too. Check top 2-inch layer of soil for dryness before watering. On windy and hot days, it requires more frequent watering and slightly moist soil.
Humidity
If you are growing a lemon tree indoors, it requires a certain humidity level to thrive, 50% is ideal. You can maintain humidity by placing it on a pebble tray or using a humidifier.
Lemon Tree Care


If you’re growing a lemon tree in a pot in USDA Zones 8b to 11, you don’t need to care for cold that much, but below these zones, special care is needed in harsh winters. Temperature below 30°F (-1 C) is life-threatening for the lemon tree, except ‘Meyer’ lemon variety that can tolerate some cold till 24°F (-4 C).
Freezing temperatures succumb these plants to death. Optimum temperature is around 50°F to 82°F (10°C to 28°C). To overwinter it, keep your potted plant indoors or in a greenhouse when the temperature falls below 35°F (2°C).
Pruning and Pinching Lemon Tree
Pinching encourages bushier growth, pinch growing tip when a branch is about 5 inches long. Pruning of lemon tree is best carried out when new growth starts (February – March). Be careful before pruning it, only prune diseased or dead branches because lemon stores excess food in its leaves and too much pruning can result in poor fruit crop. Also, keep looking for suckers and prune them immediately if found one.
Fertilizer for Growing Lemon Tree in a Pot
All plants of citrus family are heavy feeders, and lemon tree too requires fertilizer to produce juicy fruits, lush foliage, and fragrant blooms. Use special purpose citrus fertilizers for every citrus species plant, if unavailable use slow release fertilizer of NPK 12-6-6.
Look for a fertilizer that contains micronutrients, especially iron, manganese, and zinc. To give boost feed to your lemon tree apply a water-soluble fertilizer once in a month in growing season. Occasionally, side dress your plant with compost or well-rotted manure.
Pests and Diseases for Lemon Tree in Pot
Pests like mealy bugs, spider mites, aphids, and scales occasionally attract toward it. To get rid of them organically read this article.
Harvesting
Harvesting time depends on the type of variety you are growing and your weather conditions. The citrus fruits stop ripening once they are off the tree. To determine if the fruit is ripened, see if the fruit is heavy, soft and yellow.
Also Read: Growing Cucumbers on a Trellis
Additional Tips for Growing Lemon Tree in PotKeep your lemon tree in a less windy spot as it dislikes strong winds.If moving indoors for winter or outside for summer, acclimatize it to avoid shock.You can also do grafting to get two or more varieties from the single tree.
0
0
kensong
2018年11月06日

Never realised I've various types of Kalanchoes that were not repotted yet. So, makes sense to put them together. Space is premium.
Kalanchoe Humilis, Laxiflora and Fedtschenkoi Variegata.


Kalanchoe Humilis, Laxiflora and Fedtschenkoi Variegata.


1
0
kensong
2018年09月24日

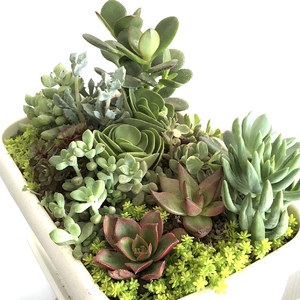
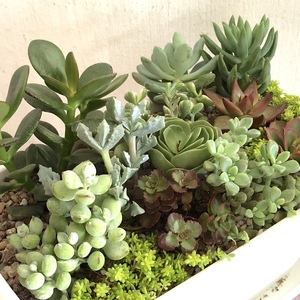
Did a combination pot of my loose individual succulents. Its surprising how much space you save when doing such arrangements.


2
0
文章
Miss Chen
2018年08月22日

Though each daylily (Hemerocallis spp.) flower only lasts a day, you can have blooms all summer long if you plant the right type. Reblooming or everblooming varieties are repeat bloomers with little or no space of time between the flushes of bloom, so the plants stay in bloom from early summer to the beginning of fall.

Stella Daylilies
One the best known reblooming daylilies that provides color from late spring through fall is "Stella de Oro" (Hemerocallis x "Stella de Oro"). This variety produces 2-3/4 inch yellow-gold blooms and is hardy in U.S. Department of Agriculture plant hardiness zones 4 through 11. The "Blackeyed Stella" (Hemerocallis "Blackeyed Stella") variety is similar, but its blooms feature a dark red eye. This cultivar is hardy in USDA zones 3 through 10.
Returns Varieties
The variety "Happy Returns" (Hemerocallis "Happy Returns") is a descendent of the "Stella de Oro." This everblooming daylily, which produces lemon-yellow flowers that reach 3 inches wide, is hardy in USDA zones 3 through 9. Other varieties in the "Returns" series, by the same hybridizer, provide more colors of everblooming daylilies. "Dynamite Returns" features ruffled red flowers, "Rosy Returns" reveals pink petals and "'When My Sweetheart Returns" produces pink and cream blooms.
More Summer Bloomers
Many other everblooming and reblooming day lilies exist. "Fairy Tale Pink" daylily (Hemerocallis x "Fairy Tale Pink") produces pale apricot-colored flowers, and "Little Grapette" dwarf daylily (Hemerocallis x "Little Grapette") blooms dark purple. Both varieties rebloom throughout the summer and are hardy in USDA zones 4 through 11. Some daylilies with double flowers also reliably rebloom, like "Night Embers" (Hemerocallis x "Night Embers"). This variety blooms dark red from early summer until frost and is hardy in USDA zones 5 through 9.
Extending Bloom Time
Deadhead daylilies regularly to encourage more flowers. Remove spent blooms every day, and cut the flowering stem back to the ground after all blooms disappear. Because daylilies have thick stems, the best way to deadhead them without breaking off any surrounding blooms is to use sharp scissors or pruners. Disinfect cutting tools before use by soaking them in a mixture of 1 part bleach to 3 parts water, then rising in clean water.
Dividing plants every three to five years also encourages prolific flowering. Early spring or right after flowering are the best times to divide, but it can be done throughout the growing season. To divide plants, lift the entire clump with a gardening fork and use the fork or your hands to divide it into sections. Daylily clumps contain individual plants with a fan-shaped group of leaves attached to roots. When you divide, leave at least four fans in each division. Re-plant the new clumps at the same level they were originally growing, and water thoroughly.
0
0
文章
Miss Chen
2018年07月23日

Historically, potatoes have only been grown on farms and in vegetable gardens with lots of space. However, even those people in the smallest of urban lots can grow healthy and tasty potatoes with the garbage bag method.

Step 1
Chit your potatoes, which means preparing them for planting. You can use potatoes from your pantry, even if they have already sprouted. Cut potatoes into at least two pieces, making sure that there is at least two eyes in each piece. A potato eye is an indentation or spot where a growing sprout will form. Leave potato pieces out to dry on a paper towel for at least 24 hours.
Step 2
Prepare your soil mixture. The soil mixture must be light and airy to allow potato roots and shoots to form and grow easily. Mix potting soil with peat moss, vermiculite or chopped dead leaves, or a mixture of all of them. Fill a garbage bag 4 inches full of the soil mixture. Roll the edges of the garbage bag down to within 2 inches of the top of the soil layer. Punch holes into the garbage bag below the soil level to allow drainage.
Step 3
Plant your potatoes. Plant five potato chits per garbage bag, one in the center and four in a circle near the outside edge of the garbage bag. Plant potato chits deep enough to just be barely covered with soil. Water thoroughly.
Step 4
Maintain your potatoes. First, the potato chits will grow roots. This is a time when there will be little visible activity. Then the chits will send up sprouts. When the sprouts get 4 inches high, add soil mixture to the garbage bag until the shoot is almost completely covered again. Roll out the edges of the garbage bag to keep up with the soil being added. Water thoroughly. Continue to add soil mixture as the shoot grows to encourage it to continue to grow upwards. Water the bags regularly so that the soil does not dry out. When the shoots have reached the top of the garbage bag, stop adding soil and allow them to bloom and mature.

Step 5
Harvest your potatoes. When the potato plant has withered and the leaves have turned brown, it's time to harvest the potatoes. Dump out or cut open the garbage bag and pull the potatoes off of the underground shoots. Brush off as much dirt as possible but do not wash. Allow skins to firm up in open air out of sunlight for at least two days. Wash potatoes only when ready to use to prolong the storage life.

Step 1
Chit your potatoes, which means preparing them for planting. You can use potatoes from your pantry, even if they have already sprouted. Cut potatoes into at least two pieces, making sure that there is at least two eyes in each piece. A potato eye is an indentation or spot where a growing sprout will form. Leave potato pieces out to dry on a paper towel for at least 24 hours.
Step 2
Prepare your soil mixture. The soil mixture must be light and airy to allow potato roots and shoots to form and grow easily. Mix potting soil with peat moss, vermiculite or chopped dead leaves, or a mixture of all of them. Fill a garbage bag 4 inches full of the soil mixture. Roll the edges of the garbage bag down to within 2 inches of the top of the soil layer. Punch holes into the garbage bag below the soil level to allow drainage.
Step 3
Plant your potatoes. Plant five potato chits per garbage bag, one in the center and four in a circle near the outside edge of the garbage bag. Plant potato chits deep enough to just be barely covered with soil. Water thoroughly.
Step 4
Maintain your potatoes. First, the potato chits will grow roots. This is a time when there will be little visible activity. Then the chits will send up sprouts. When the sprouts get 4 inches high, add soil mixture to the garbage bag until the shoot is almost completely covered again. Roll out the edges of the garbage bag to keep up with the soil being added. Water thoroughly. Continue to add soil mixture as the shoot grows to encourage it to continue to grow upwards. Water the bags regularly so that the soil does not dry out. When the shoots have reached the top of the garbage bag, stop adding soil and allow them to bloom and mature.

Step 5
Harvest your potatoes. When the potato plant has withered and the leaves have turned brown, it's time to harvest the potatoes. Dump out or cut open the garbage bag and pull the potatoes off of the underground shoots. Brush off as much dirt as possible but do not wash. Allow skins to firm up in open air out of sunlight for at least two days. Wash potatoes only when ready to use to prolong the storage life.
3
0
文章
Miss Chen
2018年07月22日

Vine-variety cucumbers, Cucumis sativus, require a lot of space to produce a healthy, continuous crop throughout the season. Using tomato cages to train cucumbers for vertical growth gives the plants lots of breathing room, aids in the formation of perfectly straight fruits and helps keep pests and soil-borne diseases at bay. When garden space is at a premium, training cucumbers vertically can also free up a great deal of garden real estate.
Play in the Dirt

Cucumbers favor well-draining, slightly acidic soil with a pH level of 5.8 to 6.5. Have the soil tested to determine its exact pH level and follow the the testing laboratory's recommendations regarding the application of amendments to correct the soil's pH. Incorporate 1 to 2 inches of organic compost and sand into the soil to create a nutrient-rich base for the new plants. The Clemson Cooperative Extension recommends adding a pre-planting application of a 5-10-10 fertilizer if soil has not been tested.
Feel the Heat

Cucumbers are tender annual vegetables that refuse to germinate in cold soil and thrive in temperatures ranging from 75 to 85 degrees Fahrenheit. For best results, start cucumber seeds directly outdoors after all chance of frost has passed and the soil reaches 70 degrees Fahrenheit at a depth of at least 1 inch.
Early to Rise

For an early harvest, start cucumber seeds indoors two to four weeks before the last expected frost date. Sow two to three seeds in peat pots or pellets and thin to one seedling in each pot after sprouting. Transplant the seedlings to the outdoor planting site when all chance of frost has passed, soil temperature measures 70 degrees Fahrenheit, and the seedlings have developed three to four sets of true leaves. Plant established seedlings at least 10 to 12 inches apart beneath tomato cages.
Containing the Cucumbers

Choose sturdily constructed tomato cages, at least 3 to 4 feet tall, that won't be easily rattled by a stiff breeze or the weight of the developing cucumbers. Insert the cages into the soil directly above the planting location and then sow 1 to 2 cucumber seeds inside each cage, at a depth of 1/2 to 1 inch, spaced approximately 4 to 6 inches apart. Once the vines begin to grow, nudge them toward the sides of the cages where their grabby tendrils can attach to the cage wires as they begin growing in an upright fashion. As the vines lengthen, they can be secured to the cages with loosely tied twine until they reach the top of the cage and start to hang down.
Water, Water, Everywhere

Cucumbers require consistent moisture during the growing season and especially when the blooms appear and fruits begin to set. When cucumbers are water-stressed, fruits can become misshapen and develop an unpleasant bitter flavor. Water cucumbers at least once per week, making sure to moisten the soil to a depth of at least 6 inches. If the soil is sandy, additional watering will be required to keep the soil adequately hydrated. To help with moisture retention throughout the season, add a 1- to 2-inch layer of organic mulch over the planting location.
It's Dinner Time
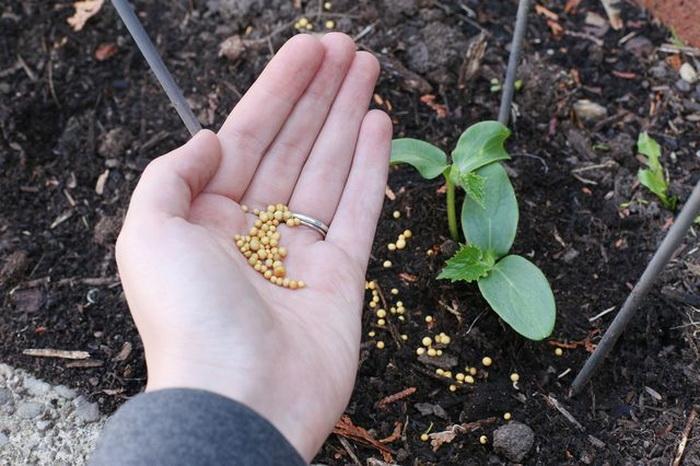
Cucumbers, which are moderate feeders, need a dose of nitrogen fertilizer when the plants start to vine and about a week after blooms first appear. The University of Minnesota recommends adding 1/2 cup of a 46-0-0 fertilizer for every 25 feet of planting space. Apply the fertilizer along the side of the row and approximately 4 to 6 inches from each plant. Additional feedings may not be necessary if the soil is enriched with organic compost.
Play in the Dirt

Cucumbers favor well-draining, slightly acidic soil with a pH level of 5.8 to 6.5. Have the soil tested to determine its exact pH level and follow the the testing laboratory's recommendations regarding the application of amendments to correct the soil's pH. Incorporate 1 to 2 inches of organic compost and sand into the soil to create a nutrient-rich base for the new plants. The Clemson Cooperative Extension recommends adding a pre-planting application of a 5-10-10 fertilizer if soil has not been tested.
Feel the Heat

Cucumbers are tender annual vegetables that refuse to germinate in cold soil and thrive in temperatures ranging from 75 to 85 degrees Fahrenheit. For best results, start cucumber seeds directly outdoors after all chance of frost has passed and the soil reaches 70 degrees Fahrenheit at a depth of at least 1 inch.
Early to Rise

For an early harvest, start cucumber seeds indoors two to four weeks before the last expected frost date. Sow two to three seeds in peat pots or pellets and thin to one seedling in each pot after sprouting. Transplant the seedlings to the outdoor planting site when all chance of frost has passed, soil temperature measures 70 degrees Fahrenheit, and the seedlings have developed three to four sets of true leaves. Plant established seedlings at least 10 to 12 inches apart beneath tomato cages.
Containing the Cucumbers

Choose sturdily constructed tomato cages, at least 3 to 4 feet tall, that won't be easily rattled by a stiff breeze or the weight of the developing cucumbers. Insert the cages into the soil directly above the planting location and then sow 1 to 2 cucumber seeds inside each cage, at a depth of 1/2 to 1 inch, spaced approximately 4 to 6 inches apart. Once the vines begin to grow, nudge them toward the sides of the cages where their grabby tendrils can attach to the cage wires as they begin growing in an upright fashion. As the vines lengthen, they can be secured to the cages with loosely tied twine until they reach the top of the cage and start to hang down.
Water, Water, Everywhere

Cucumbers require consistent moisture during the growing season and especially when the blooms appear and fruits begin to set. When cucumbers are water-stressed, fruits can become misshapen and develop an unpleasant bitter flavor. Water cucumbers at least once per week, making sure to moisten the soil to a depth of at least 6 inches. If the soil is sandy, additional watering will be required to keep the soil adequately hydrated. To help with moisture retention throughout the season, add a 1- to 2-inch layer of organic mulch over the planting location.
It's Dinner Time

Cucumbers, which are moderate feeders, need a dose of nitrogen fertilizer when the plants start to vine and about a week after blooms first appear. The University of Minnesota recommends adding 1/2 cup of a 46-0-0 fertilizer for every 25 feet of planting space. Apply the fertilizer along the side of the row and approximately 4 to 6 inches from each plant. Additional feedings may not be necessary if the soil is enriched with organic compost.
1
0
文章
Miss Chen
2018年07月22日

Pumpkins take up a large space in the home garden. To grow them successfully, you need to know how to prepare the soil, when to start the seeds, how far apart to space them and when to harvest the pumpkins.

Step 1
Check the back of the seed packet for the number of days until maturity. If you are growing pumpkins for Halloween, add a week or two and then count backwards to arrive at the best planting date. It will most likely be in late spring or early summer. Pumpkin seedlings do not tolerate frost, but the pumpkins will rot before Halloween if you plant them too soon in a warm climate.
Step 2
Prepare the soil for the pumpkin bed in an area that receives sun. Because pumpkins are heavy feeders, dig a hole 2 feet across and 1 foot deep. Fill it with a mix of compost and soil to which you've added a handful of slow-release fertilizer. Form a mound over the hole about 4 inches high in the center.
Step 3
Make additional mounds. Space them 10 feet apart. Pumpkins like to sprawl and require plenty of room.
Step 4
Sow six seeds in a circle in each mound. Push them about one inch deep into the soil and spaced four to six inches apart. After the seeds sprout, remove all but the strongest two seedlings. If you don't, you'll have all foliage and no pumpkins.

Step 5
Weed the bed regularly. Pumpkins can tolerate short periods of hot, dry weather, but if you have extended periods of heat, water them. As the pumpkins grow, slip a shingle or tile under each one to lift it slightly from the soil. This foils some insects and improves the appearance of the pumpkin on that side.
Step 6
Harvest all the pumpkins when they turn orange and before a heavy frost hits. To harvest pumpkins, cut the stem about three inches from the pumpkin. Pumpkins broken from their stems do not keep well.

Step 1
Check the back of the seed packet for the number of days until maturity. If you are growing pumpkins for Halloween, add a week or two and then count backwards to arrive at the best planting date. It will most likely be in late spring or early summer. Pumpkin seedlings do not tolerate frost, but the pumpkins will rot before Halloween if you plant them too soon in a warm climate.
Step 2
Prepare the soil for the pumpkin bed in an area that receives sun. Because pumpkins are heavy feeders, dig a hole 2 feet across and 1 foot deep. Fill it with a mix of compost and soil to which you've added a handful of slow-release fertilizer. Form a mound over the hole about 4 inches high in the center.
Step 3
Make additional mounds. Space them 10 feet apart. Pumpkins like to sprawl and require plenty of room.
Step 4
Sow six seeds in a circle in each mound. Push them about one inch deep into the soil and spaced four to six inches apart. After the seeds sprout, remove all but the strongest two seedlings. If you don't, you'll have all foliage and no pumpkins.

Step 5
Weed the bed regularly. Pumpkins can tolerate short periods of hot, dry weather, but if you have extended periods of heat, water them. As the pumpkins grow, slip a shingle or tile under each one to lift it slightly from the soil. This foils some insects and improves the appearance of the pumpkin on that side.
Step 6
Harvest all the pumpkins when they turn orange and before a heavy frost hits. To harvest pumpkins, cut the stem about three inches from the pumpkin. Pumpkins broken from their stems do not keep well.
1
0
文章
Miss Chen
2018年07月20日

Zucchini is a garden crop that grows easily and abundantly for most gardeners. Growing zucchini on a garden trellis is an effective way of growing more in a small space because less ground space is used. It also is easier to watch for disease and pests, because the vines are up off the ground. In addition, harvesting zucchini growing on trellises is simple because the zucchinis are readily found growing along the sides. Learn how easy it is to grow zucchini on a trellis.

Step 1
To grow your zucchini plants, choose a location that is on the northern side of your growing area. This will prevent the trellis from shading any of your other plants.
Step 2
Pound the side trellis posts at least 2 feet into the ground to make sure the trellis will withstand the weight of the zucchini plants and blowing wind.
Step 3
Plant the zucchini seeds at the base of the trellis approximately 1/2 inch under the soil. Space the seeds so there are two seeds about every 3 feet along the base of the trellis.
Step 4
Keep the zucchini seeds evenly moist while they are germinating.

Step 5
Watch the seedlings as they sprout and grow taller. As soon as they start touching the wire mesh of the trellis, begin encouraging them to grow in, out and around the wire mesh of the trellis. You can lightly tie the stalks to the wire mesh to train them, but this should not be necessary. The vines will naturally want to grow up the trellis.
Step 6
Monitor the plant as it begins to flower and zucchinis begin to grow. Keep the plants well watered.
Step 7
For best flavor, pick zucchinis before they grow to be 8 inches long. Zucchinis that grow on a trellis tend to be prolific, and you will need to monitor them daily to make sure they do not grow too large.

Step 1
To grow your zucchini plants, choose a location that is on the northern side of your growing area. This will prevent the trellis from shading any of your other plants.
Step 2
Pound the side trellis posts at least 2 feet into the ground to make sure the trellis will withstand the weight of the zucchini plants and blowing wind.
Step 3
Plant the zucchini seeds at the base of the trellis approximately 1/2 inch under the soil. Space the seeds so there are two seeds about every 3 feet along the base of the trellis.
Step 4
Keep the zucchini seeds evenly moist while they are germinating.

Step 5
Watch the seedlings as they sprout and grow taller. As soon as they start touching the wire mesh of the trellis, begin encouraging them to grow in, out and around the wire mesh of the trellis. You can lightly tie the stalks to the wire mesh to train them, but this should not be necessary. The vines will naturally want to grow up the trellis.
Step 6
Monitor the plant as it begins to flower and zucchinis begin to grow. Keep the plants well watered.
Step 7
For best flavor, pick zucchinis before they grow to be 8 inches long. Zucchinis that grow on a trellis tend to be prolific, and you will need to monitor them daily to make sure they do not grow too large.
0
0
文章
Miss Chen
2018年07月19日

Vining cucumbers (Cucumis sativus) are annual plants, and they grow well vertically on a trellis, poles and other upright supports. Growing cucumbers vertically saves space, reduces leaf diseases and pest attack, and provides the heavier harvests than if the plants are grown along the ground. Another benefit of growing cucumbers vertically is that Asian and oriental varieties produce long, straight fruit.
Growing Spots
Fertile, organically rich, freely draining soil and at least six hours of direct sun every day provide the best growing conditions for cucumbers. The soil pH should be around 7.0, which is neutral, and its temperature should be at least 65 degrees Fahrenheit for healthy growth. Cucumbers grow best in warm conditions.

Space cucumbers 8 to 15 inches apart or 10 inches apart if you're growing cucumbers up a trellis.
Supports for Cucumbers
Supports for cucumbers should be at least 6 feet tall. Cucumbers grow up to 6 feet tall and wide, and often grow 3 to 5 feet long before setting fruit. Set up the supports before planting cucumbers to avoid disturbing the plants' roots. Trellis provides a sturdy support, or you can grow cucumbers up bamboo poles or from hanging baskets.
Push three 8-foot bamboo poles 1 foot into the soil 1 foot apart in a triangle. Tie the top ends together with twine to make a pyramidal shape, and plant one cucumber at the base of each pole.
Another option is to grow cucumbers in hanging baskets, allowing the plants to trail. 'Pot Luck' is a cucumber variety that grows well in hanging baskets. Grow one cucumber in each basket.
Water Needs
Cucumbers are thirsty plants that need frequent watering to grow and fruit well. The soil around their roots should be evenly moist, not dry and crumbly or wet and soggy. Wilting leaves are a sign of under- or overwatered cucumbers.
Water cucumbers when the soil is dry to a depth of 1/2 inch. Apply enough water to moisten the soil to the depth of the root balls. In hot, dry weather, cucumbers may need water every day.

Fertilizer for Cucumbers
Fertilizing cucumbers twice during the growing season provides the best results. Sprinkle 1 cup of 10-10-10 or 10-20-10 fertilizer along each 10 feet of row, or 2 tablespoons around each plant, at planting, and apply 1/2 cup or 1 tablespoon of the same fertilizer when the cucumbers are 10 to 12 inches tall. . Gently rake the fertilizer into the soil surface and water it into the soil.
Training and Pinching
Cucumbers sometimes need help to grow up their support, and pinching to control their size when they grow too tall. When cucumber shoots stray from the trellis or other support, tie them to the support with pieces of soft twine.
If cucumbers grow too tall for their support, pinch off the shoot tips. Stopping upward growth in this way encourages sideways growth and more fruits.
Cucumber Varieties
Most vining cucumbers grow well vertically in small spaces. "Japanese Climbing" produces fruit 7 to 9 inches long and up to 3 inches in diameter, and "Marketmore 76" is a high-yielding variety with fruit 8 to 9 inches long and 2 to 2 1/2 inches in diameter. "Stallion White Cucumber" is named for its white or pale green fruit, which grow 6 to 8 inches long. Another variety to consider is "Yamamoto Extra Long" for the novelty of its 24-inch-long fruit.
Growing Spots
Fertile, organically rich, freely draining soil and at least six hours of direct sun every day provide the best growing conditions for cucumbers. The soil pH should be around 7.0, which is neutral, and its temperature should be at least 65 degrees Fahrenheit for healthy growth. Cucumbers grow best in warm conditions.

Space cucumbers 8 to 15 inches apart or 10 inches apart if you're growing cucumbers up a trellis.
Supports for Cucumbers
Supports for cucumbers should be at least 6 feet tall. Cucumbers grow up to 6 feet tall and wide, and often grow 3 to 5 feet long before setting fruit. Set up the supports before planting cucumbers to avoid disturbing the plants' roots. Trellis provides a sturdy support, or you can grow cucumbers up bamboo poles or from hanging baskets.
Push three 8-foot bamboo poles 1 foot into the soil 1 foot apart in a triangle. Tie the top ends together with twine to make a pyramidal shape, and plant one cucumber at the base of each pole.
Another option is to grow cucumbers in hanging baskets, allowing the plants to trail. 'Pot Luck' is a cucumber variety that grows well in hanging baskets. Grow one cucumber in each basket.
Water Needs
Cucumbers are thirsty plants that need frequent watering to grow and fruit well. The soil around their roots should be evenly moist, not dry and crumbly or wet and soggy. Wilting leaves are a sign of under- or overwatered cucumbers.
Water cucumbers when the soil is dry to a depth of 1/2 inch. Apply enough water to moisten the soil to the depth of the root balls. In hot, dry weather, cucumbers may need water every day.

Fertilizer for Cucumbers
Fertilizing cucumbers twice during the growing season provides the best results. Sprinkle 1 cup of 10-10-10 or 10-20-10 fertilizer along each 10 feet of row, or 2 tablespoons around each plant, at planting, and apply 1/2 cup or 1 tablespoon of the same fertilizer when the cucumbers are 10 to 12 inches tall. . Gently rake the fertilizer into the soil surface and water it into the soil.
Training and Pinching
Cucumbers sometimes need help to grow up their support, and pinching to control their size when they grow too tall. When cucumber shoots stray from the trellis or other support, tie them to the support with pieces of soft twine.
If cucumbers grow too tall for their support, pinch off the shoot tips. Stopping upward growth in this way encourages sideways growth and more fruits.
Cucumber Varieties
Most vining cucumbers grow well vertically in small spaces. "Japanese Climbing" produces fruit 7 to 9 inches long and up to 3 inches in diameter, and "Marketmore 76" is a high-yielding variety with fruit 8 to 9 inches long and 2 to 2 1/2 inches in diameter. "Stallion White Cucumber" is named for its white or pale green fruit, which grow 6 to 8 inches long. Another variety to consider is "Yamamoto Extra Long" for the novelty of its 24-inch-long fruit.
1
0


