文章
Gina
2017年03月15日


Few things bring more life to our home’s interiors than plants, and using tropical plants indoors creates your own little paradise. For us gardeners, it’s an opportunity to grow plants we might otherwise not be able to grow in our regions. Tropical plants are pretty easy to grow indoors, and just require attention to a few details to make sure they do well. Here are some popular tropical plants to grow indoors, and the little tricks to make sure you are successful with them. Remember if you have kids or pets to always check with your poison control to see if the plants you wish to use in your home are toxic.
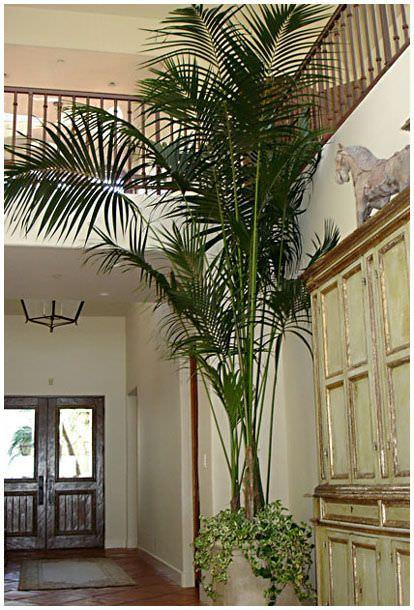
Palms
There are many types of palms available as house plants, but most of them require the same basic care.
1. Palms generally like warm air. Keep palms away from cold drafts, air vents, or open doors.
2. Palms like to be moist, but most don’t like to sit in water. Make sure that you have a good drainage pan under your palm, and empty any excess about a half hour after watering. If you notice brown tips to the fronds, improve your drainage. Some palms like to be sprayed with a mister for humidity, and others, especially fan palms, prefer drier conditions. Check your specific type of palm.
3. Don’t overwater. This kills more palms than any other thing. Water when the soil is dry a half inch down.
4. Light, light, light! While palms will tolerate some low light, it’s not ideal and it will not help them grow into a healthy looking plant. Give them the brightest light you can provide. Palms with tender, transparent fronds will appreciate being shielded from direct sun.
Kentia Palm

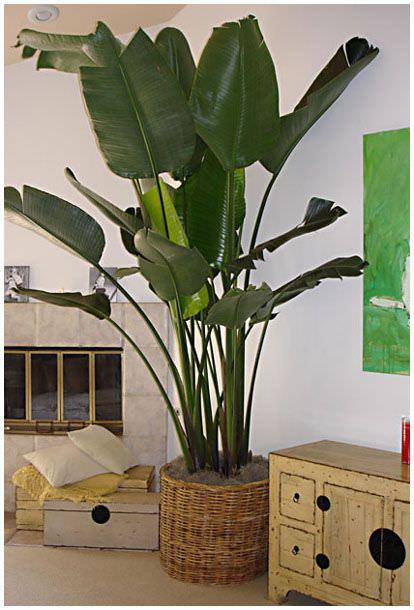
Bird of Paradise
Birds of Paradise (Giant or White) may be the most dramatic tropical plant you can grow indoors! Luckily, given the right conditions, they aren’t hard to grow. Here are the basics…
1. Light, light, light! Are you sensing a theme here? Bright light is the secret to this beautiful plant doing well.
2. Space. Repot every year and make sure they have growing room, because they grow quickly. The variety grown as a house plant can easily reach a height of 6 to 7 feet. After about 4 or 5 years, a Bird of Paradise (Strelitzia) may flower on rare occasions. The Strelizia Nicolai or White Bird of Paradise will produce a blue/white flower. Flower production is much more frequent when a Bird of Paradise is used as an outdoor plant.
3. Water. Keep this plant moist, as it does not like to dry out.
4. Fertilize regularly.
5. Don’t chill it out. This plant does not like to get below 60 degrees, and prefers it warm.
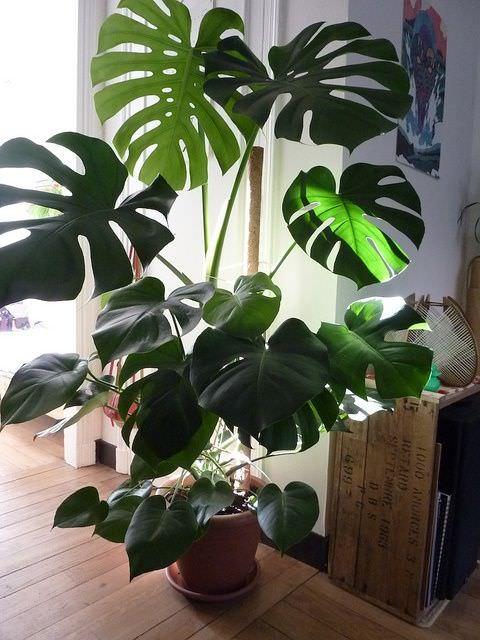
Philodendron (Split Leaf)
Another tropical and lush plant that can be grown indoors, the split leaf Philodendron can grow to a large plant both in height and circumference. Here’s how to grow it to it’s best.
1. Place in warm room without drafts, 5-10 feet away from a bright window. Trun a quarter turn every 4 or 5 days to keep the plant growing evenly.
2. Water when the soil is dry 1-2 inches below the surface. Water less often in winter, but never let it dry out to the point of wilting. Do not let it sit in water.
3. Mist with water every couple of days. Philodendron like high humidity.
4. Clean the leaves when necessary with a cloth dipped in warm water. Check for mites and flies often, and spray with an indoor spray if necessary.
5. Transplant every other year into a slightly larger pot.
For those of you with a larger bathroom and a nice bright window, you have the perfect place for tropical plants to thrive!

Tropical plants add a sense of luxury and drama to any home.

It’s not difficult to grow tropical plants indoors, and worth the little bit of extra effort for what they offer.
2
1
文章
Gina
2017年03月15日

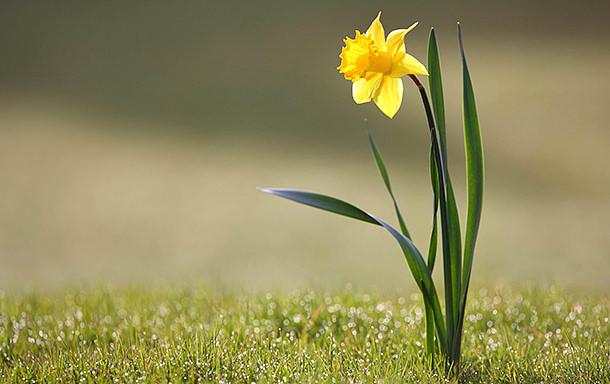
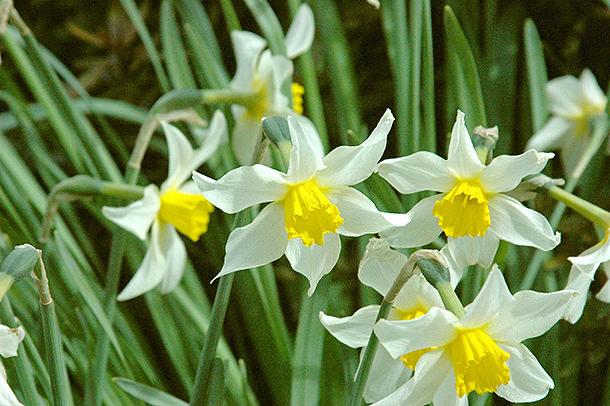
Just when you thought the snow would never melt, or the winds would never stop, daffodils brighten your garden with a burst of color in spring. Super easy to grow in most zones, daffodils are great cut flowers, can be used in both formal and informal gardens, can be grown in containers, and can even be forced to bloom out of season! There are many more varieties than just the time honored sunny yellow, and single and double foliage. There are even miniature daffodils, perfect for making a statement in a small garden, planting in a casual lawn of grass, or using in containers. If you know how to dig a hole and be patient, you can grow daffodils.
Daffodils must be planted in the fall to bloom in the spring with just a few easy care requirements.
How to Plant and Grow Daffodils
Choosing Bulbs and Varieties
Choose healthy bulbs by looking for bulbs that are papery, not shriveled. Full, heavy bulbs that don’t have gashes or cuts are a good sign of bulb health. Don’t buy any bulb with mold or fungus.
Most varieties will bloom wherever there is a winter frost, as they need a period of cold dormancy to force blooming. There are varieties that grow in the south in zone 9, check with your local nursery for best suggestions for your area. According to ‘Southern Living’, these types are perfect for Southern gardens. ‘Avalon’, ‘Carlton’, ‘February Gold’, ‘Geranium’, ‘Hawera’, ‘Ice Follies’, ‘Jack Snipe’, ‘Jetfire’, ‘Minnow’, Narcissus odorus, ‘Quail’, ‘Saint Keverne’, ‘Salome’, ‘Tête-à-tête’, ‘Thalia’, and ‘Trevithian’.
Varieties run from two foot tall sunny yellow traditional daffodils, to tiny little minis, to white doubles with a pure pink throat. There are pale yellows, coral throated beauties, and even a pure pink variety! Check out our favs at the end of the post to help you choose. Remember, choose for your space. Don’t expect a dozen minis to make a big impact on an acre lot.
Planting
Daffodil bulbs are planted in the fall, before the ground freezes. It’s best to plant them as soon as you can get your hands on them to give them time to set out roots.
Choose a light soil, they hate heavy clay. (Don’t we all?)
Plant 3 times deeper than their height. So if your bulb is 2 inches tall, you need to plant them 6 inches deep. 3-6 inches apart, depending on size, larger bulbs farther apart.
Choose a full to part sun position. Pink and red varieties have better color with afternoon shade, but all prefer 6 hours of sun a day for best flowering.

Seasonal Care
Fall
Plant bulbs and water well. Water occasionally if the fall is dry. Add a bulb fertilizer at time of planting and each fall after that to help the plant store energy for blooms. Bone meal is a good organic food for bulbs, especially in the planting hole.
Spring
Water the bulbs if it has been dry, and a half strength liquid fertilizer at this time can boost bloom.
Summer
Do not cut back withering foliage until it has totally died back, like most bulbs. They need every last bit of the green energy to store away enough for next seasons blooms. Most gardeners plant perennials or annuals near the bulbs so that as they grow in the spring, they cover much of the aging foliage. Cut back foliage to the ground when it it totally browned.
Winter
Daffodils are very hardy and do not require being dug up for winter. You may mulch to prevent them from being displaced by the heaving ground at hard freezes. Remember to remove the mulch in spring.
Tips and Cautions
Daffodils are poisonous if eaten, so do not plant where young children or pets can access them.
The flowers will tend to face the sun, so make sure you keep that in mind when choosing your site. You don’t want all those gorgeous blooms with their backs to you all day!
Daffodils can be lifted and divided with a sharp spade in early fall as they multiply, and then replanted for a larger display next year. Most can be divided every 3-4 years.
Daffodils are deer resistant.
Our Favorites
Our selections here are from ‘Brecks‘, as they are our favorite online bulb supplier. Nope, they did not sponsor this post, we just love ’em!
‘Carlton‘
A traditional yellow, medium sized bulb, these thrive just about anywhere, and naturalize beautifully! And they have a vanilla scent!

‘Mount Hood‘
A tried and true pure white variety. Large blooms great for cutting.
‘Cotinga‘
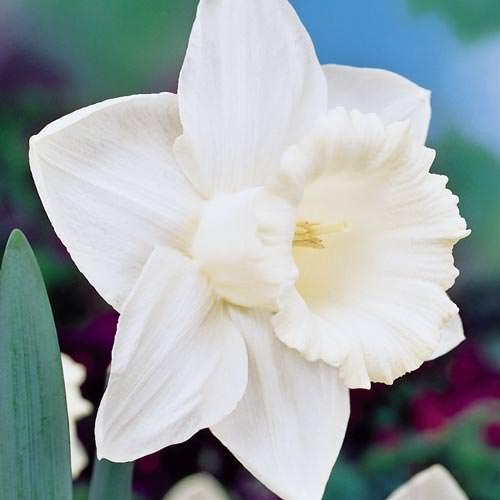
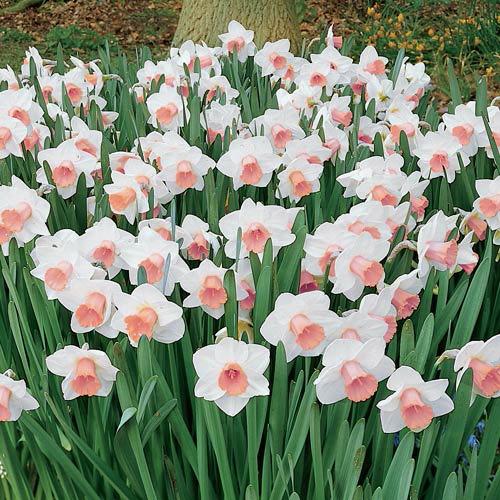
We love pink daffodils, and Cotinga has white petals with a pink throat. This is a smaller one, less than 12 inches high, but the long throat and delicate translucence to the petals make this an elegant choice.

‘Riot‘
Need a little more color from your Daffys? Try Riot for its red cups against white petals. Medium sized at 16 inches and very weather resistant, these are a great choice for grabbing attention for your garden!

‘Dick Wilden‘ aka ‘Golden Beauty’
This stunning double yellow daffodil is a focal plant, to be sure. Medium height, easy to grow. Gorgeous in a vase!

‘Bravoure‘
One of the most awarded daffodils, Bravoure is a great blend between a traditional happy yellow, tempered with a true pure white, and long elegant cups. Medium sized.
‘Petit Four‘
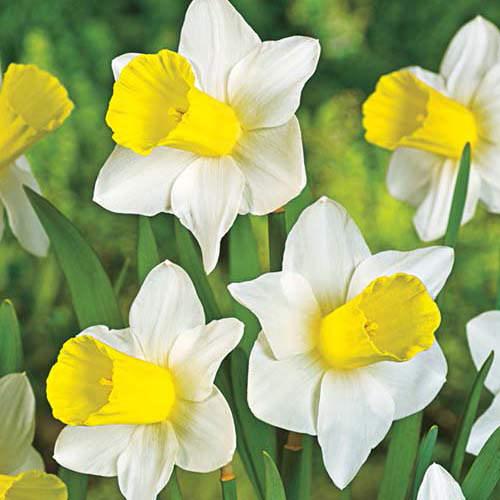
Tall, fragrant, beautiful.

‘Tête-à-Tête’
This is the double version of the iconic Tête-à-Tête mini daffodil, and we love this! Perfect for pots at only 8 inches high, this is a lot of bloom packed into a tiny plant! The original Tête-à-Tête is not double, but just as sweet!
‘Salome‘
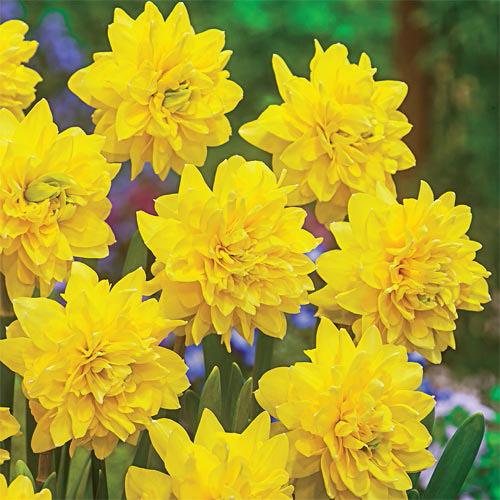
Our last choice is Salome for it’s apricot throats and pure white petals… These are medium plants that look amazing en masse. And they are fragrant!
2
2
文章
Colorful
2017年03月15日
Growing garlic indoors is not difficult and you’ll be able to get the supply of fresh green stalks, flowers, and even the garlic bulbs. Learn more!
If you have ever wondered about how to grow garlic indoors then the good news is that it is going to be considerably easier than you were perhaps aware. This is something that you will be able to achieve even with next to no previous gardening experience.
What You Need and Getting Started

When to Plant Garlic Indoors
Usually, the fall is the right planting season, outdoors in our gardens it’s the time when we plant garlic. However, when growing indoors, you can try to plant garlic anytime in the year.
Choosing a Container and Spacing
Look for a pot around 8-10 inches deep, minimum and if you are planning on growing more than one bulb at a time then the pot has to be big enough to maintain a four-inch gap between each clove. Also, make sure that the pot has drainage holes in the bottom. If you’re growing garlic for its GREENS– you can grow them more closely.
You can try growing garlic indoors from the grocery store garlic but they are treated with chemicals so for the best result buy from local farmers, order them online or check out your local gardening store for the organic garlic bulbs. Also, remember that you don’t need to remove the paper like husk from cloves.Planting and Getting them Growing
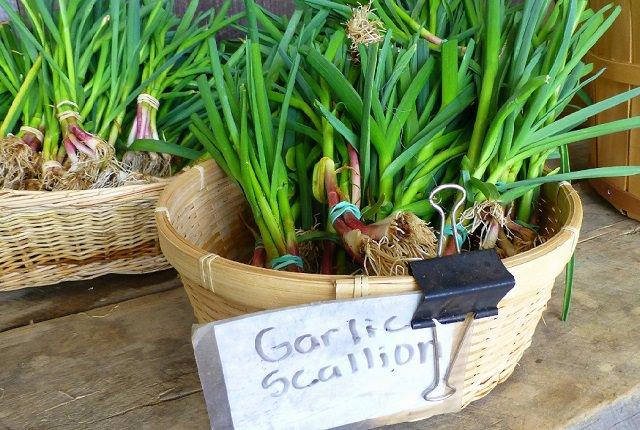
The next step is to fill the pot with the organic soil mixture. You then need to remove the individual cloves from the garlic bulbs and make sure that the flat end is going to be pointing down in the soil as that is where the roots come from.
At the time of filling the soil, you can also mix time-based granular fertilizer such as 10-10-10.
When planting them, you need to push the cloves down at least 2-3 inches deep into the soil. There should also be roughly 1 inch of soil between the top of the clove and the top layer of the soil.
Placement and Caring for the Bulbs
Soil
It is important that you use the right soil that is well-draining, and permeable. Soil-less potting medium is best, you can also make one for yourself instead of buying– Mix peat or cocopeat (coconut fiber), compost or manure, and either perlite or vermiculite (if you don’t have both, use sand) in equal parts.
Location
Once you have planted the bulbs decide where you should place the pot. If there is a room in your home with a South or West facing window where it can receive at least six hours of direct sunlight per day, consider that. You can also purchase indoor grow lights to make life easier and they can certainly be rather effective.
Watering
Outdoors, garlic prefers evenly moist soil, however, since you’re growing garlic indoors you may need to careful. Watering must be done according to the indoor growing conditions. Like, how much sunlight and warmth your potted garlic plants are receiving. Regular watering to keep the soil slightly moist is preferable.
Fertilizer
Garlic needs a good amount of fertilizer to grow well, indoors is no different. Fertilize the garlic plant twice a month with organic general purpose fertilizer during the warm growing season. You can also use kelp meal or fish fertilizer to ensure your garlic plant has enough nutrients for optimum growth.
HarvestingPicking Garlic Greens
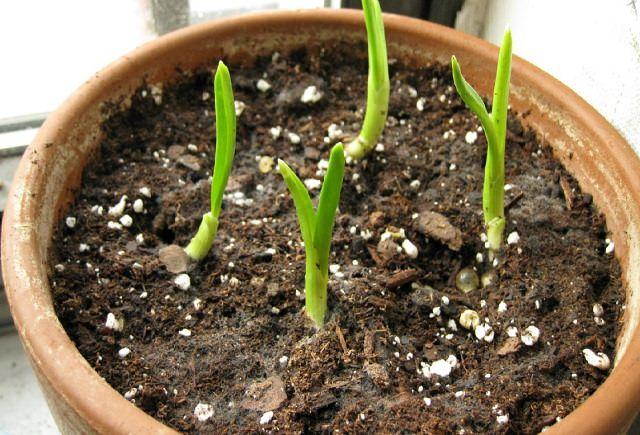
With the right soil, sunlight and proper watering, in a week or so you’ll be able to see the fresh new garlic shoots coming out. You can start picking the greens once they are at least 4-6 inches tall, which will happen in a few more weeks (depending on the weather). Leave an inch of growth on each clove to let your garlic plants regrow again.
Harvesting Bulbs
If you’re growing garlic indoors for garlic bulbs, note that it’ll be ready in around eight to ten months and you will know this when you see the leaves starting to turn brown. At this point, you need to remove them from the soil and allow them to dry for a week. By this time, they will be ready to include in your cooking or, of course, you could use some of them to then grow your next batch of garlic.
If you have ever wondered about how to grow garlic indoors then the good news is that it is going to be considerably easier than you were perhaps aware. This is something that you will be able to achieve even with next to no previous gardening experience.
What You Need and Getting Started

When to Plant Garlic Indoors
Usually, the fall is the right planting season, outdoors in our gardens it’s the time when we plant garlic. However, when growing indoors, you can try to plant garlic anytime in the year.
Choosing a Container and Spacing
Look for a pot around 8-10 inches deep, minimum and if you are planning on growing more than one bulb at a time then the pot has to be big enough to maintain a four-inch gap between each clove. Also, make sure that the pot has drainage holes in the bottom. If you’re growing garlic for its GREENS– you can grow them more closely.
You can try growing garlic indoors from the grocery store garlic but they are treated with chemicals so for the best result buy from local farmers, order them online or check out your local gardening store for the organic garlic bulbs. Also, remember that you don’t need to remove the paper like husk from cloves.Planting and Getting them Growing

The next step is to fill the pot with the organic soil mixture. You then need to remove the individual cloves from the garlic bulbs and make sure that the flat end is going to be pointing down in the soil as that is where the roots come from.
At the time of filling the soil, you can also mix time-based granular fertilizer such as 10-10-10.
When planting them, you need to push the cloves down at least 2-3 inches deep into the soil. There should also be roughly 1 inch of soil between the top of the clove and the top layer of the soil.
Placement and Caring for the Bulbs

Soil
It is important that you use the right soil that is well-draining, and permeable. Soil-less potting medium is best, you can also make one for yourself instead of buying– Mix peat or cocopeat (coconut fiber), compost or manure, and either perlite or vermiculite (if you don’t have both, use sand) in equal parts.
Location
Once you have planted the bulbs decide where you should place the pot. If there is a room in your home with a South or West facing window where it can receive at least six hours of direct sunlight per day, consider that. You can also purchase indoor grow lights to make life easier and they can certainly be rather effective.
Watering
Outdoors, garlic prefers evenly moist soil, however, since you’re growing garlic indoors you may need to careful. Watering must be done according to the indoor growing conditions. Like, how much sunlight and warmth your potted garlic plants are receiving. Regular watering to keep the soil slightly moist is preferable.
Fertilizer
Garlic needs a good amount of fertilizer to grow well, indoors is no different. Fertilize the garlic plant twice a month with organic general purpose fertilizer during the warm growing season. You can also use kelp meal or fish fertilizer to ensure your garlic plant has enough nutrients for optimum growth.
HarvestingPicking Garlic Greens
With the right soil, sunlight and proper watering, in a week or so you’ll be able to see the fresh new garlic shoots coming out. You can start picking the greens once they are at least 4-6 inches tall, which will happen in a few more weeks (depending on the weather). Leave an inch of growth on each clove to let your garlic plants regrow again.
Harvesting Bulbs
If you’re growing garlic indoors for garlic bulbs, note that it’ll be ready in around eight to ten months and you will know this when you see the leaves starting to turn brown. At this point, you need to remove them from the soil and allow them to dry for a week. By this time, they will be ready to include in your cooking or, of course, you could use some of them to then grow your next batch of garlic.
2
2
文章
扭扭
2017年03月14日

These ‘Vertical Balcony Garden Ideas’ will inspire you to generate space and how to make balcony vertical garden.
You have a small balcony or a terrace and you want to grow a garden there? Well, if you arrange everything neatly and use every inch of your space then you will be able to do this really. One thing you need to remember is balcony gardening is not about putting some pots and grow plants. It is about how aptly you manage space. Using vertical space is part of it.
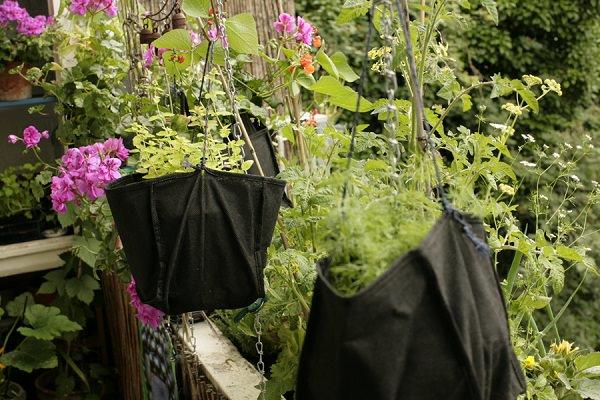
1.These two grow bags are strong enough to bear the weight of herbs growing in the containers kept inside them, this is a good idea if you don’t have hanging baskets.
2.These clay pots are arranged one above each other using threaded steel and fasteners.

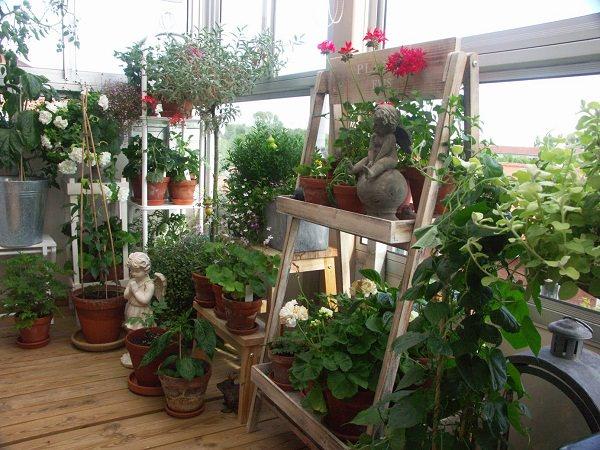
3.Use racks to keep pots, this way you can use lot of vertical space of your balcony.
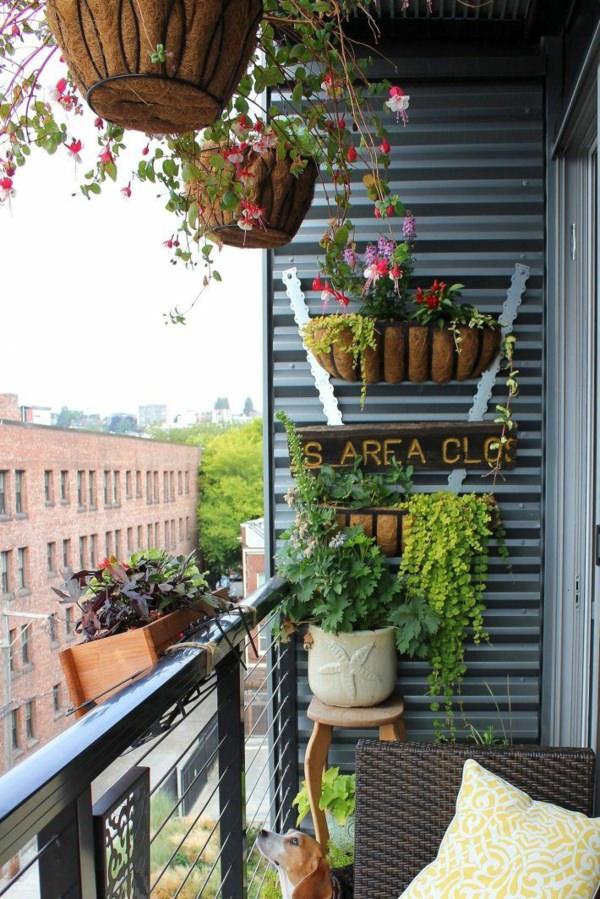
4.Fuchsia growing on a hanging basket is looking beautiful and a wooden planter is tied on railing is a smart way to use outside space.
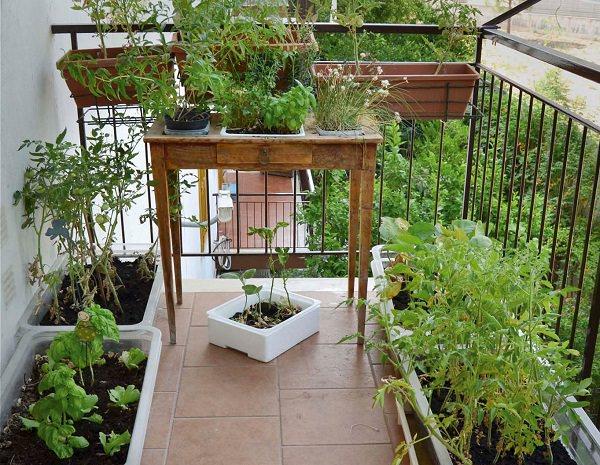
5. Table garden is used to grow plants, two main benefit of table garden is that if you have a back problem then you don’t need to get down and up. Besides this, it saves space on the floor.
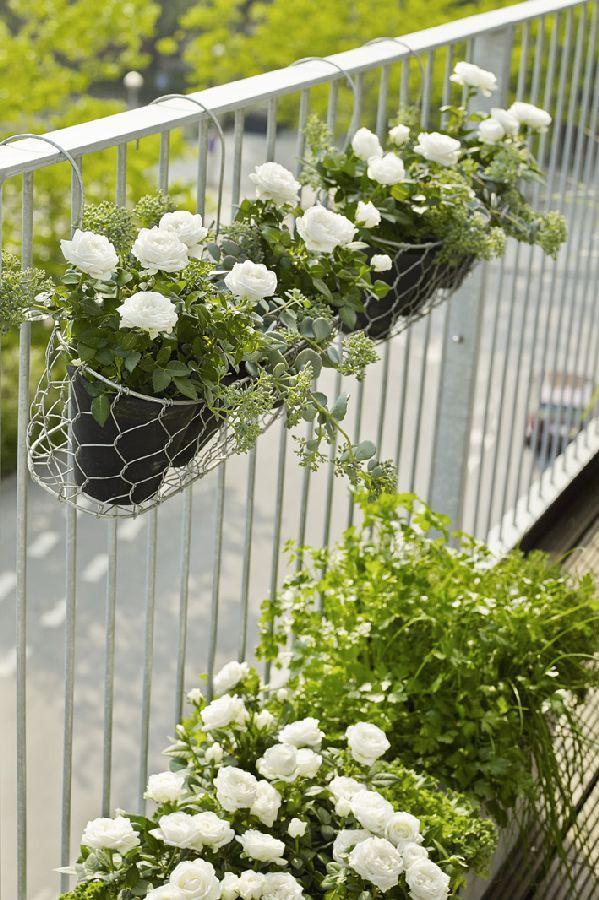
6.Hang lot of planters on the railings of your balcony garden, this is an apt way to generate lot of space.
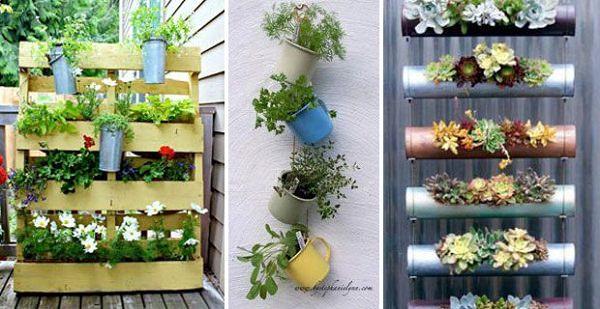
7.Wooden pallets can be used to do multiple things. You can hang pots on them and grow plants in its narrow space. Read more on DIY pallets ideas. You can also arrange pots one above each other as you see in the picture. Use PVC pipes to grow plants, this is called gutter gardening. Here’s one tutorial on how to grow strawberries in gutters.
8.And here comes a burning one. If you have ammo cans use your creativity to make them vertical planter. Before trying this, make sure to clean up the canes properly.

9.OK! It’s a bit cheeky idea, herbs growing inside the gloves. If you have some odd ideas, try them.

10.Use plant walls if you want to optimize space of your balcony or terrace. You’ll be stunned after you install one, these plant walls are useful innovation for small gardens.
11.This is one cheap solution you should look at. Planters are hanged on this wooden bracket mounted on the wall.

12.Grow herbs and green leafy vegetables on these gutters, this is a modern way to create lot of space.
You have a small balcony or a terrace and you want to grow a garden there? Well, if you arrange everything neatly and use every inch of your space then you will be able to do this really. One thing you need to remember is balcony gardening is not about putting some pots and grow plants. It is about how aptly you manage space. Using vertical space is part of it.
1.These two grow bags are strong enough to bear the weight of herbs growing in the containers kept inside them, this is a good idea if you don’t have hanging baskets.

2.These clay pots are arranged one above each other using threaded steel and fasteners.

3.Use racks to keep pots, this way you can use lot of vertical space of your balcony.

4.Fuchsia growing on a hanging basket is looking beautiful and a wooden planter is tied on railing is a smart way to use outside space.

5. Table garden is used to grow plants, two main benefit of table garden is that if you have a back problem then you don’t need to get down and up. Besides this, it saves space on the floor.

6.Hang lot of planters on the railings of your balcony garden, this is an apt way to generate lot of space.

7.Wooden pallets can be used to do multiple things. You can hang pots on them and grow plants in its narrow space. Read more on DIY pallets ideas. You can also arrange pots one above each other as you see in the picture. Use PVC pipes to grow plants, this is called gutter gardening. Here’s one tutorial on how to grow strawberries in gutters.

8.And here comes a burning one. If you have ammo cans use your creativity to make them vertical planter. Before trying this, make sure to clean up the canes properly.

9.OK! It’s a bit cheeky idea, herbs growing inside the gloves. If you have some odd ideas, try them.

10.Use plant walls if you want to optimize space of your balcony or terrace. You’ll be stunned after you install one, these plant walls are useful innovation for small gardens.
11.This is one cheap solution you should look at. Planters are hanged on this wooden bracket mounted on the wall.

12.Grow herbs and green leafy vegetables on these gutters, this is a modern way to create lot of space.

1
0
成长记
Hong Lam
2017年03月14日

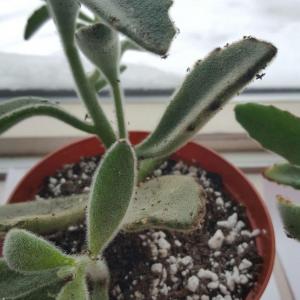
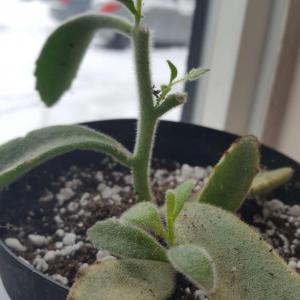
These guys are so fuzzy! I bought one pot of the guys, but they seemed so crowded that I decided to repot them into three little pots for more space. They seem highly damaged, but hopefully with some care they'll grow nice and big!


1
0
文章
Mirella
2017年03月13日

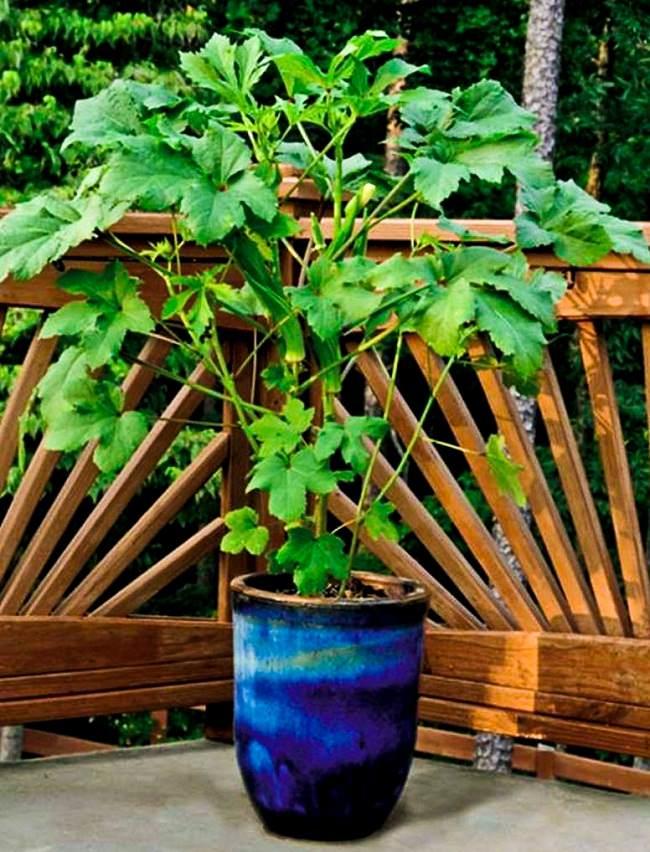
Learn how to grow okra in containers in this article. Growing okra in pots doesn’t require a lot of space and it is easy too if you complete all of the planting requirements.
Okra, which is also called lady’s finger is a warm season tropical vegetable that is also grown for ornamental purposes. Its delicate foliage and showy blooms that look like hibiscus (don’t forget okra belongs to the same hibiscus family) look amazing.
Very low in calories (25 to 40 kcal per 100g), okra is a vegetable rich in vitamins A, C and P, calcium and many minerals.
Choosing a pot
Choose a pot of whatever material you like. Pot should be at least 3 gallons in size. Ideally, a 5-gallon pot that is 10-12 inches deep and similar in diameter would be perfect for one okra plant if you have got a larger pot you can grow a few plants in it. Best to choose a black colored pot as okra loves heat.
Planting Okra Seeds
The first step for growing okra is to get the seeds. Ask for the dwarf okra variety that will not grow above 5 feet tall. However, you can grow any okra variety in a pot, but it is best if you choose the dwarf one. If you live in a climate with short summers, search for varieties that mature fast.
The best planting time is when the temperature starts to stay above 55-60 F (13-16 C) and all the dangers of frost are passed. Growing okra is possible year round if you live in USDA Zones 9-11 or any other subtropical or tropical region on our earth.
Due to its taproot, okra doesn’t transplant well that’s why you’ll have to directly plant the seeds in the container or a biodegradable pot. Sow 2-3 okra seeds 1/2 to 1 inch deep in each pot. Water with a sprayer and keep the seeds in a bright, warm place, the substrate should remain moist until seeds germinate. The germination takes 5 to 10 days after sowing. The more warmth, the faster the germination.
Requirements for Growing Okra in PotsPosition
Pick a spot that receives full sun (at least 5-6 hours of sunlight is essential). Like tomatoes and peppers, okra requires plenty of sunlight to produce well.
Soil
The soil you use must be loamy and crumbly; it must be well draining too. Opt for a soilless potting mix that is rich in organic matter. You can also add a lot of compost or aged manure to provide the constant supply of nutrients to your okra plant.
Watering
Okra requires slightly moist soil. Water regularly to keep the soil uniformly moist and particularly more from the beginning of the flowering period and until the end of production.
Temperature
The cultivation of okra plant is extremely easy but requires a lot of heat. The plant can grow above 50 F (10 C), but to flower and to bear fruit abundantly the temperature must be around 75 to 95 F (23-35 C) ideally. The plant can tolerate higher temperatures well but fails to grow when the temperature starts to touch lower levels.
Okra Plant Care
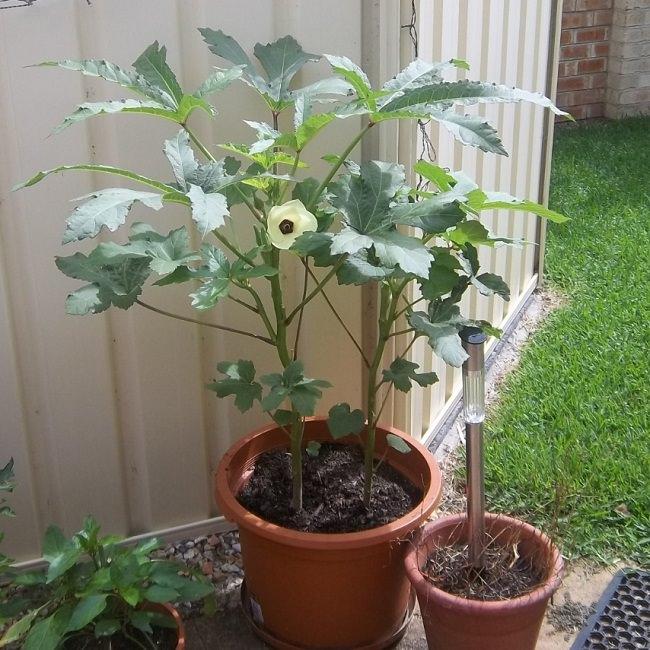
Fertilization
Mix manure in soil to provide nutrients to the plant, you can also side dress the plant with it. Also, at the time of planting, you can add balanced fertilizer if you want. Once the plant has reached the height of 6 inches, apply a dose of balanced fertilizer again. Keep in mind that if the soil is nitrogen rich, it may promote vegetative growth at the expense of fruiting so maintain the balance. Later on, feed the plant with low in nitrogen fertilizer such as NPK 5-10-15 or 6-12-12.
Pollination
Okra is self-pollinating so you don’t need to care about pollination.
Pinching and Topping
As you’re growing okra in containers, dwarf varieties we consider, the plant will not exceed the height of 5 feet. In that case, you don’t need to care about pinching or topping.
Pests and Diseases
Okra is susceptible to fusarium wilt and nematode attack as well as aphids and whiteflies in pests. Mealybugs also affect the plant’s growth. However, these pests do more damage on plants grown in large quantities. As you’re growing okra in pots, you can easily control them.
Harvesting
Okra requires frequent harvesting. It blooms about two months from planting, and the fruits appear 5-7 days after flowering. The fruits/pods are harvested when they are still tender. Otherwise, they become fibrous and too hard to be eaten. Ideally, the picking length is between 3 to 5 inches.
How to see if okras are not too late to be picked?
Bend the tip of any fruit and if it breaks easily this means that they are still tender and crispy and good to harvest.
Okra, which is also called lady’s finger is a warm season tropical vegetable that is also grown for ornamental purposes. Its delicate foliage and showy blooms that look like hibiscus (don’t forget okra belongs to the same hibiscus family) look amazing.
Very low in calories (25 to 40 kcal per 100g), okra is a vegetable rich in vitamins A, C and P, calcium and many minerals.

Choosing a pot
Choose a pot of whatever material you like. Pot should be at least 3 gallons in size. Ideally, a 5-gallon pot that is 10-12 inches deep and similar in diameter would be perfect for one okra plant if you have got a larger pot you can grow a few plants in it. Best to choose a black colored pot as okra loves heat.
Planting Okra Seeds
The first step for growing okra is to get the seeds. Ask for the dwarf okra variety that will not grow above 5 feet tall. However, you can grow any okra variety in a pot, but it is best if you choose the dwarf one. If you live in a climate with short summers, search for varieties that mature fast.
The best planting time is when the temperature starts to stay above 55-60 F (13-16 C) and all the dangers of frost are passed. Growing okra is possible year round if you live in USDA Zones 9-11 or any other subtropical or tropical region on our earth.
Due to its taproot, okra doesn’t transplant well that’s why you’ll have to directly plant the seeds in the container or a biodegradable pot. Sow 2-3 okra seeds 1/2 to 1 inch deep in each pot. Water with a sprayer and keep the seeds in a bright, warm place, the substrate should remain moist until seeds germinate. The germination takes 5 to 10 days after sowing. The more warmth, the faster the germination.
Requirements for Growing Okra in PotsPosition
Pick a spot that receives full sun (at least 5-6 hours of sunlight is essential). Like tomatoes and peppers, okra requires plenty of sunlight to produce well.
Soil
The soil you use must be loamy and crumbly; it must be well draining too. Opt for a soilless potting mix that is rich in organic matter. You can also add a lot of compost or aged manure to provide the constant supply of nutrients to your okra plant.
Watering
Okra requires slightly moist soil. Water regularly to keep the soil uniformly moist and particularly more from the beginning of the flowering period and until the end of production.
Temperature
The cultivation of okra plant is extremely easy but requires a lot of heat. The plant can grow above 50 F (10 C), but to flower and to bear fruit abundantly the temperature must be around 75 to 95 F (23-35 C) ideally. The plant can tolerate higher temperatures well but fails to grow when the temperature starts to touch lower levels.
Okra Plant Care

Fertilization
Mix manure in soil to provide nutrients to the plant, you can also side dress the plant with it. Also, at the time of planting, you can add balanced fertilizer if you want. Once the plant has reached the height of 6 inches, apply a dose of balanced fertilizer again. Keep in mind that if the soil is nitrogen rich, it may promote vegetative growth at the expense of fruiting so maintain the balance. Later on, feed the plant with low in nitrogen fertilizer such as NPK 5-10-15 or 6-12-12.
Pollination
Okra is self-pollinating so you don’t need to care about pollination.
Pinching and Topping
As you’re growing okra in containers, dwarf varieties we consider, the plant will not exceed the height of 5 feet. In that case, you don’t need to care about pinching or topping.
Pests and Diseases
Okra is susceptible to fusarium wilt and nematode attack as well as aphids and whiteflies in pests. Mealybugs also affect the plant’s growth. However, these pests do more damage on plants grown in large quantities. As you’re growing okra in pots, you can easily control them.
Harvesting
Okra requires frequent harvesting. It blooms about two months from planting, and the fruits appear 5-7 days after flowering. The fruits/pods are harvested when they are still tender. Otherwise, they become fibrous and too hard to be eaten. Ideally, the picking length is between 3 to 5 inches.
How to see if okras are not too late to be picked?
Bend the tip of any fruit and if it breaks easily this means that they are still tender and crispy and good to harvest.
1
0
文章
Andy
2017年03月13日

Learn how to grow licorice (Mulethi) in this article if you love to grow medicinal herbs. Growing licorice and licorice plant care is easy.

The licorice (Glycyrrhiza glabra), which means sweet root in Greek is actually a legume. It is native to the Mediterranean and parts of the South-West Asia and particularly to the Indian subcontinent, where it is called ‘Mulethi’ It is a perennial herb that grows to over a meter and a half tall. It is cultivated for its roots, the plant has an extensive root system. Roots grow 3 to 4 feet (1 – 1.2 m) deep and can extend to 25 feet (10 m) in a deep, permeable soil. Growing licorice in container is also possible.
Licorice Uses
Roots of this shrub are the part that usually consumed. Licorice roots, besides having a sweet anise like flavor are also beneficial to health with medicinal properties, such as anti-inflammatory and expectorant effect. It is used in traditional Chinese, Ayurvedic and greek medicines too.
Learn more about Licorice uses
USDA Zones— 6 – 11
Difficulty— Easy
Other Names— Acide Glycyrrhizique, Acide Glycyrrhizinique, Alcacuz, Alcazuz, Bois Doux, Bois Sucré, Can Cao, Chinese Licorice, Deglycyrrhized Licorice, Gan Cao, Gan Zao, Glabra, Glycyrrhiza, Glycyrrhiza glabra, Glycyrrhiza glabra typica, Glycyrrhiza glabra violacea, Glycyrrhiza glabra glandulifera, Glycyrrhiza Radix, Glycyrrhiza uralensis, Glycyrrhizae, Glycyrrhizic Acid, Glycyrrhizinic Acid, Isoflavone, Jethi-Madh, Kanzo, Lakritze, Licorice Root, Liquiritiae Radix, Liquirizia, Mulathi, Mulethi, Orozuz, Phytoestrogen, Phyto-œstrogène, Racine de Réglisse, Racine Douce, Radix Glycyrrhizae, Régalissse, Regaliz, Reglisse, Réglisse, Réglisse Déglycyrrhisée, Réglisse Espagnole, Réglisse Russe, Regliz, Russian Licorice, Spanish Licorice, Subholz, Sussholz, Sweet Root, Yashtimadhu, Yashti-Madhu, Yashti-Madhuka, Zhi Gan Cao, liquorice.
How to Grow LicoricePropagation
Propagating licorice is easy. It can be propagated from cuttings, division or seeds.
Growing Licorice from seeds
Soak the seeds for at least 24 hours in lukewarm water and then sow seeds in seed starting mix, which you can make yourself from these seed mix recipes. Sow the seeds at a depth of 1/2 inch. Cover the seeds with soil and keep it evenly moist until the seeds germinate. Germination occurs within two weeks. Optimum germination ranges around 68 F (20 C). Leave space of 2 feet between each plant.
Growing Licorice from Divison
Divide the licorice plant in spring or fall. Every division must have about one growth bud. If are dividing the plant in the fall (autumn), divisions must be replanted immediately or you can also store them in clamps for spring planting.
Planting
Licorice should be planted in the spring or summer. In warm subtropical or tropical climate growing licorice is possible year around except peak summer.
How to Grow Licorice on the Ground
Plant licorice on the ground in any land loosened deep, well-draining soil, devoid of stones.
Dig a pit that is 60 cm wide and 50 cm deep and then backfill it with the soil. If the soil is clay rich lighten it by adding compost and sand.
How to Grow Licorice in Pot
Choose a large pot (at least 20 cm) of a light color so that the temperature does not rise too much for the roots. Make a mixture of 1 parts sand 1 part compost and 1 part loam. In colder zones keep the pot indoors during winter.
Requirements for Growing Licorice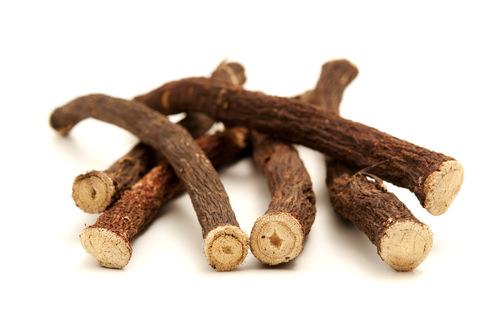
Position
This shrub needs to be in a location that is sunny to grow properly but if you’re growing licorice in tropics, plant it in on a location that receives shade in the afternoon.
Soil
A soil that is light and rich in humus facilitates the harvesting of the roots and maintains moisture. It prefers slightly sandy soil that is well draining but retains moisture with neutral to slightly alkaline pH levels.
Watering
Growing licorice requires regular and abundant watering during the growing period. Regular and deep watering is required to keep the soil slightly moist all the time. In winter, watering should be reduced.
Licorice Plant Care
Licorice plant care is simple, you just need to be careful about a few basic needs. This herbaceous perennial is mildly frost tolerant can bear temperature down to 5 F (-15 C)
Mulching
Mulch is required to retain the moisture in the soil.
Fertilizer
Licorice doesn’t need fertilizer. Although, if the soil is poor, mix compost at the time of planting or mulch around the base of plant with compost.
Temperature
It prefers average temperature around 60 – 85 F (15 to 30 C). Frost, high winds or too warm temperature can damage the plant.
Pests and Diseases
It usually remains pests and diseases free. Spider mites may invade the foliage, particularly in dry summers. Spraying the foliage with water helps to prevent them. Powdery mildew, slugs, and caterpillars can be a problem too.
Harvesting Licorice
Licorice roots are ready for harvest after two years of planting. Harvest the plant in fall. Extract the horizontal roots with a sharp spade and replant the plant so that it will regrow again. Preserve the main roots so as not to damage the plant.
Storage
Once dried, the licorice roots can be kept for several months.
Companion Plants for Licorice
Good companions — Marjoram, rosemary, and marigold.

The licorice (Glycyrrhiza glabra), which means sweet root in Greek is actually a legume. It is native to the Mediterranean and parts of the South-West Asia and particularly to the Indian subcontinent, where it is called ‘Mulethi’ It is a perennial herb that grows to over a meter and a half tall. It is cultivated for its roots, the plant has an extensive root system. Roots grow 3 to 4 feet (1 – 1.2 m) deep and can extend to 25 feet (10 m) in a deep, permeable soil. Growing licorice in container is also possible.
Licorice Uses
Roots of this shrub are the part that usually consumed. Licorice roots, besides having a sweet anise like flavor are also beneficial to health with medicinal properties, such as anti-inflammatory and expectorant effect. It is used in traditional Chinese, Ayurvedic and greek medicines too.
Learn more about Licorice uses
USDA Zones— 6 – 11
Difficulty— Easy
Other Names— Acide Glycyrrhizique, Acide Glycyrrhizinique, Alcacuz, Alcazuz, Bois Doux, Bois Sucré, Can Cao, Chinese Licorice, Deglycyrrhized Licorice, Gan Cao, Gan Zao, Glabra, Glycyrrhiza, Glycyrrhiza glabra, Glycyrrhiza glabra typica, Glycyrrhiza glabra violacea, Glycyrrhiza glabra glandulifera, Glycyrrhiza Radix, Glycyrrhiza uralensis, Glycyrrhizae, Glycyrrhizic Acid, Glycyrrhizinic Acid, Isoflavone, Jethi-Madh, Kanzo, Lakritze, Licorice Root, Liquiritiae Radix, Liquirizia, Mulathi, Mulethi, Orozuz, Phytoestrogen, Phyto-œstrogène, Racine de Réglisse, Racine Douce, Radix Glycyrrhizae, Régalissse, Regaliz, Reglisse, Réglisse, Réglisse Déglycyrrhisée, Réglisse Espagnole, Réglisse Russe, Regliz, Russian Licorice, Spanish Licorice, Subholz, Sussholz, Sweet Root, Yashtimadhu, Yashti-Madhu, Yashti-Madhuka, Zhi Gan Cao, liquorice.
How to Grow LicoricePropagation
Propagating licorice is easy. It can be propagated from cuttings, division or seeds.
Growing Licorice from seeds
Soak the seeds for at least 24 hours in lukewarm water and then sow seeds in seed starting mix, which you can make yourself from these seed mix recipes. Sow the seeds at a depth of 1/2 inch. Cover the seeds with soil and keep it evenly moist until the seeds germinate. Germination occurs within two weeks. Optimum germination ranges around 68 F (20 C). Leave space of 2 feet between each plant.
Growing Licorice from Divison
Divide the licorice plant in spring or fall. Every division must have about one growth bud. If are dividing the plant in the fall (autumn), divisions must be replanted immediately or you can also store them in clamps for spring planting.
Planting
Licorice should be planted in the spring or summer. In warm subtropical or tropical climate growing licorice is possible year around except peak summer.
How to Grow Licorice on the Ground
Plant licorice on the ground in any land loosened deep, well-draining soil, devoid of stones.
Dig a pit that is 60 cm wide and 50 cm deep and then backfill it with the soil. If the soil is clay rich lighten it by adding compost and sand.
How to Grow Licorice in Pot
Choose a large pot (at least 20 cm) of a light color so that the temperature does not rise too much for the roots. Make a mixture of 1 parts sand 1 part compost and 1 part loam. In colder zones keep the pot indoors during winter.
Requirements for Growing Licorice

Position
This shrub needs to be in a location that is sunny to grow properly but if you’re growing licorice in tropics, plant it in on a location that receives shade in the afternoon.
Soil
A soil that is light and rich in humus facilitates the harvesting of the roots and maintains moisture. It prefers slightly sandy soil that is well draining but retains moisture with neutral to slightly alkaline pH levels.
Watering
Growing licorice requires regular and abundant watering during the growing period. Regular and deep watering is required to keep the soil slightly moist all the time. In winter, watering should be reduced.
Licorice Plant Care
Licorice plant care is simple, you just need to be careful about a few basic needs. This herbaceous perennial is mildly frost tolerant can bear temperature down to 5 F (-15 C)
Mulching
Mulch is required to retain the moisture in the soil.
Fertilizer
Licorice doesn’t need fertilizer. Although, if the soil is poor, mix compost at the time of planting or mulch around the base of plant with compost.
Temperature
It prefers average temperature around 60 – 85 F (15 to 30 C). Frost, high winds or too warm temperature can damage the plant.
Pests and Diseases
It usually remains pests and diseases free. Spider mites may invade the foliage, particularly in dry summers. Spraying the foliage with water helps to prevent them. Powdery mildew, slugs, and caterpillars can be a problem too.
Harvesting Licorice
Licorice roots are ready for harvest after two years of planting. Harvest the plant in fall. Extract the horizontal roots with a sharp spade and replant the plant so that it will regrow again. Preserve the main roots so as not to damage the plant.
Storage
Once dried, the licorice roots can be kept for several months.
Companion Plants for Licorice
Good companions — Marjoram, rosemary, and marigold.
0
0
文章
Abigal
2017年03月13日

Growing vines and other vertical elements in a garden adds height, interest, expands useful space, and sometimes even acts as a privacy screen! It’s pretty impossibly to grow most vines, however, without the proper support. You can build DIY garden trellises for any garden from anything from inexpensive lumber to recycled and repurpose materials. Check out these DIY garden trellis tutorials and find one that’s right for the style, feel, and needs in your garden!
Our first project, above, is a freestanding DIY trellis from Lowes, with complete step by step instructions.
Next we have a $6 DIY Trellis from Two Zero One… Love this cost saving project!

We found this great project on Flickr…there is no tutorial, but it’s a pretty basic idea…using the narrow strips of wood gives it a more modern feel.

Sybil Alfano created this great DIY trellis out of an old coat rack… Love this idea! Great instructions.

Find out how to make a basic wood trellis from Remove and Replace…

This is a great idea for inspiration… Using a recycled old mattress base as a trellis! Great idea!
Flea Market Gardening showcases this old ladder trellis… another amazing repurposed idea!

Renee Garner stapled chicken wire to an old window frame for her trellis… So cute!

Another idea from Ecosalon…

And another DIY trellis idea!
Using the side of an old crib as a trellis…

Finally, if your style is a little more modern, Modern in MN has a short tutorial on creating this Kee Klamp Trellis.

0
1
文章
Abigal
2017年03月13日

If you love chocolates grow chocolate scented flowers, check out this list of plants and flowers to get an idea.
If you love chocolate, chocolate scented flowers and plants are must have in your garden. Several plants and flowers that smell like chocolate or with their chocolate brown color can be a good addition to your chocolate garden. Plant these perennials/annuals in the garden or in containers on your patio, balcony or rooftop garden where you can enjoy the fragrance of chocolate issued by the pleasant wind.
1. Chocolate Daisy

It is also known as the chocolate flower (Berlandiera lyrata) due to its delicious chocolate like smell. It is a yellow-flowering perennial nectar plant that not only smells good to humans, but is also an allurement for bees, bumblebees, and butterflies.
2. Chocolate Cosmos

Chocolate cosmos adorn itself with amazing deep brown or chocolate colored flowers that emit a smell of rich chocolate. This perennial grows up to 30 inches tall in the full sun to partial shade position. It enjoys a rich, moist soil and is hardy warm temperates and subtropical climates under USDA zones 8 to 10. You can expect a chocolate scent to be the strongest in the early evening after a warm summer day. It is a drought-tolerant plant and easy to grow.
3. Black Salsify

As garden a plant, the Black salsify (Scorzonera hispanica) is too little known since most appreciate only the edible lower part of the plant, namely the root. Its dandelion-like large yellow blooms emanate a soft delicate odor reminiscent of chocolate. The fragrance is most intense in morning hours and from afternoon it subsides.
4. Carolina Allspice (Sweetshrub)

Carolina allspice is a shrub that doesn’t exceed the height of 2-3 m, you can also grow it in containers. This amazing plant is not only useful for its fragrant flowers that smell like chocolate but also for foliage that emit a cinnamon-like odor. It also produces an edible and delicious spice. Just snip off its twigs and allow them to dry out in the sun, then smash up the bark and use it like cinnamon.
5. Chocolate Mint

Grow chocolate mint in a container or on the ground to add a hint of minty chocolate odor to your garden and food. This perennial grows well in USDA zones 3 to 9b. Plant in partial sun but beware when you plant it directly on the ground as it can be invasive.
6. Chocolate Orchid

Sharry baby orchid is a sweet chocolate scented orchid. It is one plant that can bring the chocolate smell in your room. Place this plant in a well-lit spot away from intense direct sunlight that is high in humidity. Grow it indoors, on an east-facing window where it would receive soft morning sun would be perfect. Also, place the plant in a tray on pebbles filled with water to increase the humidity.
7. Chocolate Vine (Akebia Quinata)

This vigorous perennial vine is famous for its chocolate scented flowers. Its fruits are edible too. You can also grow it in pots. Its unusual flowers look amazing and blooms prolifically in full sun to partial shade.
If you love chocolate, chocolate scented flowers and plants are must have in your garden. Several plants and flowers that smell like chocolate or with their chocolate brown color can be a good addition to your chocolate garden. Plant these perennials/annuals in the garden or in containers on your patio, balcony or rooftop garden where you can enjoy the fragrance of chocolate issued by the pleasant wind.
1. Chocolate Daisy

It is also known as the chocolate flower (Berlandiera lyrata) due to its delicious chocolate like smell. It is a yellow-flowering perennial nectar plant that not only smells good to humans, but is also an allurement for bees, bumblebees, and butterflies.
2. Chocolate Cosmos

Chocolate cosmos adorn itself with amazing deep brown or chocolate colored flowers that emit a smell of rich chocolate. This perennial grows up to 30 inches tall in the full sun to partial shade position. It enjoys a rich, moist soil and is hardy warm temperates and subtropical climates under USDA zones 8 to 10. You can expect a chocolate scent to be the strongest in the early evening after a warm summer day. It is a drought-tolerant plant and easy to grow.
3. Black Salsify

As garden a plant, the Black salsify (Scorzonera hispanica) is too little known since most appreciate only the edible lower part of the plant, namely the root. Its dandelion-like large yellow blooms emanate a soft delicate odor reminiscent of chocolate. The fragrance is most intense in morning hours and from afternoon it subsides.
4. Carolina Allspice (Sweetshrub)

Carolina allspice is a shrub that doesn’t exceed the height of 2-3 m, you can also grow it in containers. This amazing plant is not only useful for its fragrant flowers that smell like chocolate but also for foliage that emit a cinnamon-like odor. It also produces an edible and delicious spice. Just snip off its twigs and allow them to dry out in the sun, then smash up the bark and use it like cinnamon.
5. Chocolate Mint

Grow chocolate mint in a container or on the ground to add a hint of minty chocolate odor to your garden and food. This perennial grows well in USDA zones 3 to 9b. Plant in partial sun but beware when you plant it directly on the ground as it can be invasive.
6. Chocolate Orchid

Sharry baby orchid is a sweet chocolate scented orchid. It is one plant that can bring the chocolate smell in your room. Place this plant in a well-lit spot away from intense direct sunlight that is high in humidity. Grow it indoors, on an east-facing window where it would receive soft morning sun would be perfect. Also, place the plant in a tray on pebbles filled with water to increase the humidity.
7. Chocolate Vine (Akebia Quinata)

This vigorous perennial vine is famous for its chocolate scented flowers. Its fruits are edible too. You can also grow it in pots. Its unusual flowers look amazing and blooms prolifically in full sun to partial shade.
0
1
文章
Andrea
2017年03月13日

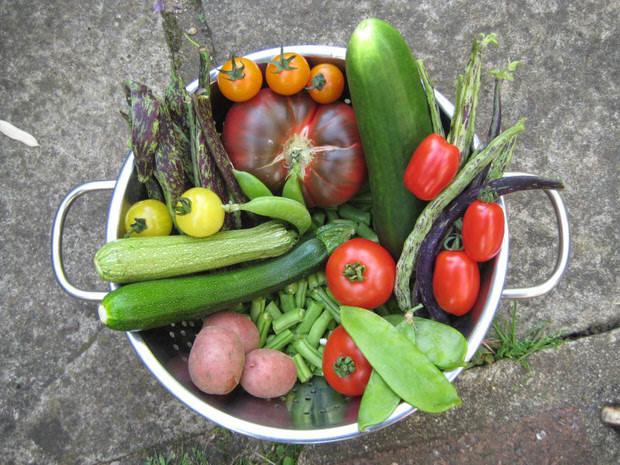
It’s that time of year again! Late summer and early fall is prime time for fresh vegetables in the garden. If you were lucky enough to grow some of the good stuff in your little spot this year, here are some easy tips to help you harvest your late summer vegetables at the right time for the best flavor, nutrition and texture.
Beans
Beans are a crop that should be harvested every other day as they continue to produce new beans. Pick when the beans are just under the maximum size for their type, and always pick late in the day, never in the morning. Picking beans when there is dew still present encourages mildew diseases.
Corn
Corn is ready when the silks start to turn brown but aren’t dried up yet. Kernels should be filled with a milky white juice if you cut one open. Corn starts to lose it’s sweetness as soon as it’s picked, so try to pick right before cooking.

Cucumbers
Harvest cucumbers as soon as they are the mature size for their type. If you allow them to grow large, they will become bitter. Harvest often to stimulate the plant to produce more, at least every couple of days.

Eggplant
Eggplant should be harvested when grown to mature size, and are smooth and shiny. If the seeds inside are dark, they were harvested late.
Herbs
Cut back most herbs often to keep them from blooming, and dry any herbs you cannot use right away. You can also freeze herbs as well. Follow this tutorial for instructions.
Melons
Cantaloupes: Pick when they are heavy and tan-colored with a slight yellowish cast. When ripe, a cantaloupe’s netting becomes harder and raised, and a crack forms around the stem where it touches the fruit. The melons should slip easily off the vines with a quick pull, but should not have already fallen off. The fruits get slightly softer at the bottom end and they smell fragrant.
Watermelons develop a dull green cast and have a light patch at the bottom that changes from green to light yellow when mature. Also, the leaf on the tendril nearest the fruit turns brown and withers. The skin should be hard–difficult to pierce with a fingernail. Some people say they can knock on a melon to detect a perfect hollow tone.
Pumpkins and Winter Squash
When the shell has developed it’s color and the rind cannot be pierced with a fingernail, they are ready. Cut 2-3 inch stem and allow to ripen in the field for 10 days. Store in a cool place.

Summer Squash
Summer squash is another one that most gardeners let grow too large…bigger is not always better! Larger fruits get seedy and watery, so pick when about 6 inches long. Round varieties can be picked at 3-4 inches.
Peppers
Peppers taste best when allowed to fully color before picking.
Tomatoes
Tomatoes are best when fully ripened to a deep color in the sun, but you can pick them early if you are having issues with cracking or cold nights. Do not ripen in the frig, on a counter is best.
Learning to harvest your vegetables at the right time helps them have better flavor and greater levels of nutrients. And let’s face it, it gives us bragging rights around the neighborhood as well!
1
0
文章
Abigal
2017年03月13日

Learn how to grow cloves in this clove cultivation guide. Growing cloves is somewhat similar to that of the other spices. The scent and flavor of cloves is intense and spicy with a hot note.
USDA Zones— 9b – 12
Difficulty— Moderate to Hard
Family: Myrtaceae
Other Names— Syzygium aromaticum (Scientific name), Bourgeon Floral de Clou de Girofle, Bouton Floral de Clou de Girofle, Caryophylli Flos, Caryophyllum, Caryophyllus aromaticus, Clavo de Olor, Clous de Girolfe, Clove Flower, Clove Flowerbud, Clove Leaf, Clove Oil, Clove Stem, Cloves, Cloves Bud, Ding Xiang, Eugenia aromatica, Eugenia caryophyllata, Eugenia caryophyllus, Feuille de Clou de Girofle, Fleur de Clou de Girofle, Flores Caryophylli, Flores Caryophyllum, Gewurznelken Nagelein, Girofle, Giroflier, Huile de Clou de Girofle, Kreteks, Laung, Lavang, Lavanga, Oil of Clove, Syzygium aromaticum, Tige de Clou de Girofle.

It is an evergreen tree and on favorable climates, it grows up to more than 8 meters high, while the cultivated varieties are of a smaller height of around 5 meters.
Clove tree trunk has smooth bark with grayish yellow aromatic foliage. It is a slow growing but a long-lived tree and can exceed 100 years of age easily.
How to Grow ClovesClove Cultivation
Growing cloves require humid tropical or subtropical climate. Constant temperature above 50 F (10 C) is essential, the optimum temperature for growing clove tree is around 70 – 85 F (20 – 30 C). You can not grow it outdoors in temperate zones. However, growing clove tree in a pot is possible if proper care is done in winters.
Propagation
Growing cloves from seeds and cuttings is possible. For seed propagation, buy seeds that are recently harvested and not dried out completely since completely dried out seeds are not viable and do not germinate.
Plant seeds as soon as you get them. The seeds don’t need to be covered with soil and should be placed on top of the soil. You can cover the pot or seed tray with the plastic sheet to increase the humidity.
Requirements for Growing Cloves

Position
For healthy and strong growth, it needs a tropical climate. The Clove prefers a semi-shaded exposure similar to black pepper. It can not withstand winter temperatures below 32 F (0 C). So do not plant it outside in an area with cold and harsh winters. However, it can tolerate occasional frosts.
Soil
Soil should be rich and loamy with good drainage and lot of organic matter.
Water
Clove tree grows in wet tropics. It requires regular watering especially when the plant is young (first 3-4 years). Overwatering must be avoided.
Fertilizer
Apply 50 kg aged manure or compost and bone meal or fish meal 2-4 kg per year. Usually, the organic fertilizer is applied in the beginning of rainy season in the regions where clove is cultivated. Once the plant starts to grow, apply 40-gram urea, 110-gram superphosphate, and 80-gram MOP, instead of MOP you can also apply potassium sulfate. The dosage must be increased and for the tree that is mature and older than 15 years apply 600 gm urea,1560 gm superphosphate and 1250 gm MOP per year.The fertilizer must be applied in equal split doses in shallow trenches dug around the plant after the end of summer.
Pests and Diseases
In diseases, it suffers from seedling wilt, leaf rot, leaf spot and bud shedding. Stem borer, scales, and mealybugs are the pests that attack it.
Harvesting
The cloves you use as a spice is actually the result of the harvest of dried unopened flower buds. A Clove tree starts to flower after 6 years of its planting if grown in favorable conditions. However, it takes at least 15 – 20 years reach the full bearing stage.
Because opened flowers are not valued as a spice the unopened buds are picked before they turn pink and when they are rounded and plump. At that time, they are less than 2 cm long. Harvesting must be done carefully without damaging the branches.
The buds once picked are dried in the sun or in the hot air chambers until they have lost two-thirds of their original weight and the color of the bud stem has darkened to dark brown and rest of the bud in slight brown color.
Properties and Benefits of ClovesClove is used in the ancient Chinese medicines and in traditional Ayurvedic medicines for its antiseptic and anti-fermentation properties.Clove is used as a disinfectant in the oral cavity and teeth. The action of clove covers micro-organisms, including viruses, bacteria and fungi. It also has analgesic or anesthetic properties.Additionally, it treats digestive disorders such as diarrhea, abdominal pain of spastic origin, bloating and dyspepsia. Since it is an antiseptic, it can also be used in a sore throat.Other Clove Uses
USDA Zones— 9b – 12
Difficulty— Moderate to Hard
Family: Myrtaceae
Other Names— Syzygium aromaticum (Scientific name), Bourgeon Floral de Clou de Girofle, Bouton Floral de Clou de Girofle, Caryophylli Flos, Caryophyllum, Caryophyllus aromaticus, Clavo de Olor, Clous de Girolfe, Clove Flower, Clove Flowerbud, Clove Leaf, Clove Oil, Clove Stem, Cloves, Cloves Bud, Ding Xiang, Eugenia aromatica, Eugenia caryophyllata, Eugenia caryophyllus, Feuille de Clou de Girofle, Fleur de Clou de Girofle, Flores Caryophylli, Flores Caryophyllum, Gewurznelken Nagelein, Girofle, Giroflier, Huile de Clou de Girofle, Kreteks, Laung, Lavang, Lavanga, Oil of Clove, Syzygium aromaticum, Tige de Clou de Girofle.

It is an evergreen tree and on favorable climates, it grows up to more than 8 meters high, while the cultivated varieties are of a smaller height of around 5 meters.
Clove tree trunk has smooth bark with grayish yellow aromatic foliage. It is a slow growing but a long-lived tree and can exceed 100 years of age easily.
How to Grow ClovesClove Cultivation
Growing cloves require humid tropical or subtropical climate. Constant temperature above 50 F (10 C) is essential, the optimum temperature for growing clove tree is around 70 – 85 F (20 – 30 C). You can not grow it outdoors in temperate zones. However, growing clove tree in a pot is possible if proper care is done in winters.
Propagation
Growing cloves from seeds and cuttings is possible. For seed propagation, buy seeds that are recently harvested and not dried out completely since completely dried out seeds are not viable and do not germinate.
Plant seeds as soon as you get them. The seeds don’t need to be covered with soil and should be placed on top of the soil. You can cover the pot or seed tray with the plastic sheet to increase the humidity.
Requirements for Growing Cloves

Position
For healthy and strong growth, it needs a tropical climate. The Clove prefers a semi-shaded exposure similar to black pepper. It can not withstand winter temperatures below 32 F (0 C). So do not plant it outside in an area with cold and harsh winters. However, it can tolerate occasional frosts.
Soil
Soil should be rich and loamy with good drainage and lot of organic matter.
Water
Clove tree grows in wet tropics. It requires regular watering especially when the plant is young (first 3-4 years). Overwatering must be avoided.
Fertilizer
Apply 50 kg aged manure or compost and bone meal or fish meal 2-4 kg per year. Usually, the organic fertilizer is applied in the beginning of rainy season in the regions where clove is cultivated. Once the plant starts to grow, apply 40-gram urea, 110-gram superphosphate, and 80-gram MOP, instead of MOP you can also apply potassium sulfate. The dosage must be increased and for the tree that is mature and older than 15 years apply 600 gm urea,1560 gm superphosphate and 1250 gm MOP per year.The fertilizer must be applied in equal split doses in shallow trenches dug around the plant after the end of summer.
Pests and Diseases
In diseases, it suffers from seedling wilt, leaf rot, leaf spot and bud shedding. Stem borer, scales, and mealybugs are the pests that attack it.
Harvesting
The cloves you use as a spice is actually the result of the harvest of dried unopened flower buds. A Clove tree starts to flower after 6 years of its planting if grown in favorable conditions. However, it takes at least 15 – 20 years reach the full bearing stage.
Because opened flowers are not valued as a spice the unopened buds are picked before they turn pink and when they are rounded and plump. At that time, they are less than 2 cm long. Harvesting must be done carefully without damaging the branches.
The buds once picked are dried in the sun or in the hot air chambers until they have lost two-thirds of their original weight and the color of the bud stem has darkened to dark brown and rest of the bud in slight brown color.
Properties and Benefits of ClovesClove is used in the ancient Chinese medicines and in traditional Ayurvedic medicines for its antiseptic and anti-fermentation properties.Clove is used as a disinfectant in the oral cavity and teeth. The action of clove covers micro-organisms, including viruses, bacteria and fungi. It also has analgesic or anesthetic properties.Additionally, it treats digestive disorders such as diarrhea, abdominal pain of spastic origin, bloating and dyspepsia. Since it is an antiseptic, it can also be used in a sore throat.Other Clove Uses
1
0
rebeccamee
2017年03月11日

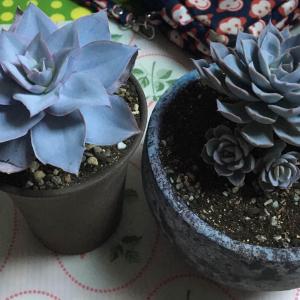
My favotire succulents. Hope they grow well and strong.

5
0
rebeccamee:Thank you
lrgarden:Beautiful
文章
Andy
2017年02月24日

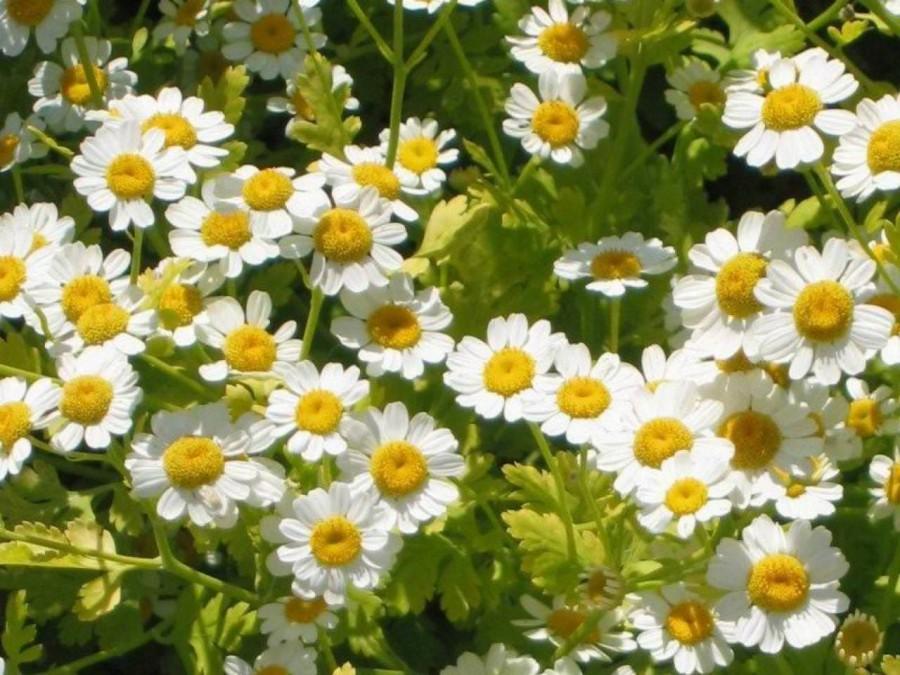
Learn how to #grow feverfew. Growing feverfew plant is relatively easy. It is a useful medicinal herb, plus it embellishes itself with beautiful yellow-white #flowers .
Difficulty — Easy
Other Names — Featherfew, Fever few, Febrifuge #plant , Featherfoil, Mid-summer daisy and wild chamomile .
Feverfew (Tanacetum parthenium) belong to the Asteraceae family (family of chrysanthemums). This plant is also called “false chamomile”. It is native to the Eastern Mediterranean. From there it was brought to Central and Western Europe a long time ago, where it was grown in gardens as a medicinal and ornamental plant.
In temperate areas, the feverfew is a short living perennial. Where the winters are harder, growing feverfew is possible as an annual plant. It is a low maintenance plant that loves to grow in typically variety of soil types and therefore frequently occurs as a garden weed.
Feverfew Uses
Feverfew is used to treat a wide range of health problems, such as fever, cold, rheumatism and cramps. It is also widely used to treat migraines. The flowers, stems and leaves are harvested for medicinal purposes. Parthenolide, a sesquiterpene lactone is considered the main biological active ingredient found in feverfew.
How to Grow FeverfewPropagation and Planting Feverfew
It can be propagated by seeds, cuttings and division.
To propagate it from seeds, since they are somewhat rare if you don’t find them locally, buy online. Sow them indoors in early spring in a seed tray using well draining starting mix. Scatter the seeds over the surface of soil and lightly tamp them. Cover the tray with plastic sheet or put in a plastic bag and keep that in a bright spot.
If you want to sow seeds directly on the ground wait until the temperature warms up around 60 F (15 C) and last frost date passes away in the spring. Keep the soil evenly moist until the germination. Germination occurs within one or two weeks after seed sowing.
To know more about feverfew propagation, read this article.
Requirements for Growing FeverfewLocation
Often this herb settles down by itself in the garden and is regarded by many gardeners wrongly as a weed. Ideal location to grow feverfew is full to partially sunny spot. Growing feverfew in pots, railing planters and window boxes is possible too, you can easily cultivate it on your balcony garden, just be careful not to keep it on windy spot.
Watering
Feverfew plants prefer soil which never dry out completely. Regular watering is important but overwatering can lead it to death, care in watering is required in cold weather conditions, in winter.
Soil
This undemanding plant grows in all soil types except heavy clay rich soil. Best to plant it in nutrient-rich, well drained and loose soil.
Feverfew Plant CareFertilizer
Growing feverfew doesn’t require fertilizer, if soil is rich in organic matter. However, you can apply a fertilizer you use for other flowers monthly.
Overwinter
Feverfew plants are grown as perennial and annual. Annual varieties die off in the winter and then germinate again in the spring. Feverfews are sensitive to extreme cold and need special care in winter time.
Mulching
Do protect mulching to protect the plant from severe cold in winters. Mulching also helps in summers in conserving moisture.
Pruning
Deadhead the faded flowers and slightly prune off the plant after the first flowering. Pruning stimulates the growth of new flowers. Prune long, leggy and diseased
branches with discolored leaves. You can prune off the plant up to about one-third of its size.
Pests and diseases
While growing feverfew plants, gardeners sometimes face problems due to wrong planting site and permanent waterlogging in soil. In pests and diseases, care feverfew plant from slugs, powdery mildew, spider mites and aphids. To prevent the pests, colonize geraniums, garlics or cress as companion plants.
Harvesting
1
0
文章
小马奥
2017年02月22日

Not only the #vegetables but #fruits can be grown in pots too. Here are 14 best fruits to #grow in pots.
Buy a disease free potted plant from a reputed nursery or online and start in a small to medium sized pot (3-5 gallons) and then repot the plant gradually into the bigger ones. A 20-25 gallon size pot is an ideal one for a fruit tree in the container.
Best Fruits To Grow In Pots1. Lemon

USDA Zones— 8-11, *can be grown in cooler zones with care in winter
Lemon trees have adapted themselves for container gardening. However, it is a tropical fruit but gardeners in cool temperate regions are also successfully growing this tangy and sour fruit in containers. Almost all the varieties are suitable but there are some that grows best in specific conditions. Read the information given in this article to grow your own lemon tree.
2. Strawberries

Strawberries are without a doubt one of the best fruits to grow in pots. The best about growing strawberries in containers is they are easy to grow, don’t require large pots or space and you can grow on your small urban balcony. You can also try to grow strawberries in tropics in winters. Check out our guide on growing strawberries here.
3. Apple

Dwarf apple trees are very suitable for growing in pots, you can even keep on a balcony or small terrace. When growing an apple tree in such a small space it would be better if you choose a self-fertile variety so that you don’t need to grow more than one plant. All the other requirements for growing apple tree in a pot is available here.
4. Pomegranate

*can be grown in cooler zones with care in winter
Pomegranate is one of the juiciest and healthiest fruits and perhaps the easiest to grow in pots because it has shallow root system when compared to other large fruit trees. If you’ve grown citrus in pot, growing pomegranates in containers can not be difficult for you too. Moreover, pomegranate is more cold hardy and easy to grow. Learn how to grow it in pot in this article.
5. Fig

0
As figs are most suitable for warm temperate regions (USDA Zones 8-10) it is best to grow a fig tree in a pot if you live in a climate where winters are harsh or you don’t have enough space. Choose an appropriate variety to grow in a pot and provide plenty of sun to your plant. Regular pruning and fertilization are necessary.
6. Nectarines and Peaches

Both the nectarines and peaches are available in dwarf varieties. Most of these dwarf varieties don’t exceed the height of 6-8 feet and are self-fertile. Some dwarf peach varieties are “Golden Gem”, “El Dorado”, “Garden Gold” and “Southern Sweet”. Dwarf nectarine varieties you can grow in pots are “Nectarcrest”, “Fantasia”.
7. Cherry

Bush cherry cultivars are suitable for container gardening. Cherries prefer a mild climate and a little water as it dislikes wet feet. However, drought and high temperatures could damage the plant as well, but it survives well in the cold. The cherry tree favors a soil that is well drained and composed of plenty of organic matter.
8. Guava

*can be grown in cooler zones with care in winter
Guava tree will delight you with its sweetly scented flowers, delicious fruits, and beautiful tropical appearance. Guava loves the sunny and warm exposure. It is a tropical plant but very much adaptable to temperate climates with moderate winter. Learn how you can grow guava tree in pot here.
9. Watermelon
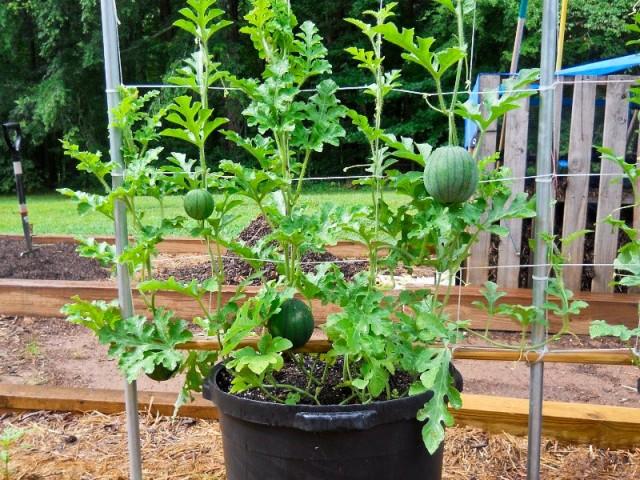
Watermelons are easy to grow in pots, all they need is a good support and well-drained potting soil. Growing watermelon is similar to cucumbers, you can find out all the information in our article.
10. Banana

Growing banana in a pot is easy and its lush green appearance can give any place a tropical look and feel. Banana trees grow in tropical and subtropical parts of the world and therefore they love full sun, heat and humidity. However, there are cultivars available that are mildly cold hardy and suitable for warm temperate zones. Find out how to grow it in a pot here.
11. Pineapple

Pineapple plants are small and compact and never grow more than 3-6 feet tall. Also, the plant has shallow roots when compared to other fruit bearing plants or trees that’s why it is possible to grow them in pots. However, pineapples require consistently warm and humid climate to thrive but you can also grow them as a houseplant in temperates, providing several hours of direct sunlight daily.
12. Raspberries

Raspberries are bit tricky and unruly to grow in containers but still everbearing varieties like “Heritage”, “Raspberry Shortcake” and “Fall Gold” are a good choice. All these varieties are self-fertile and easy to grow in pots. Here’s a useful article on growing raspberry in containers.
13. Blueberries

Growing blueberries in pots is a good idea if the soil in your garden is not acidic. Providing a potting mix for Azaleas and camellias or other acid loving plants and a large pot is essential so that your blueberry plant will grow easily and provide fruit for years.
14. Oranges and Citruses

All the oranges and citruses can be grown in pots as they are rather large shrubs or small trees. If you live in a climate where winters are mild these fruits are really easy to grow, however, you can still grow an orange tree in a cold climate with care in winter. In pots, you can grow calamondin, buddha’s hand citron, clementines orange etc.
Buy a disease free potted plant from a reputed nursery or online and start in a small to medium sized pot (3-5 gallons) and then repot the plant gradually into the bigger ones. A 20-25 gallon size pot is an ideal one for a fruit tree in the container.
Best Fruits To Grow In Pots1. Lemon

USDA Zones— 8-11, *can be grown in cooler zones with care in winter
Lemon trees have adapted themselves for container gardening. However, it is a tropical fruit but gardeners in cool temperate regions are also successfully growing this tangy and sour fruit in containers. Almost all the varieties are suitable but there are some that grows best in specific conditions. Read the information given in this article to grow your own lemon tree.
2. Strawberries

Strawberries are without a doubt one of the best fruits to grow in pots. The best about growing strawberries in containers is they are easy to grow, don’t require large pots or space and you can grow on your small urban balcony. You can also try to grow strawberries in tropics in winters. Check out our guide on growing strawberries here.
3. Apple

Dwarf apple trees are very suitable for growing in pots, you can even keep on a balcony or small terrace. When growing an apple tree in such a small space it would be better if you choose a self-fertile variety so that you don’t need to grow more than one plant. All the other requirements for growing apple tree in a pot is available here.
4. Pomegranate

*can be grown in cooler zones with care in winter
Pomegranate is one of the juiciest and healthiest fruits and perhaps the easiest to grow in pots because it has shallow root system when compared to other large fruit trees. If you’ve grown citrus in pot, growing pomegranates in containers can not be difficult for you too. Moreover, pomegranate is more cold hardy and easy to grow. Learn how to grow it in pot in this article.
5. Fig

0
As figs are most suitable for warm temperate regions (USDA Zones 8-10) it is best to grow a fig tree in a pot if you live in a climate where winters are harsh or you don’t have enough space. Choose an appropriate variety to grow in a pot and provide plenty of sun to your plant. Regular pruning and fertilization are necessary.
6. Nectarines and Peaches

Both the nectarines and peaches are available in dwarf varieties. Most of these dwarf varieties don’t exceed the height of 6-8 feet and are self-fertile. Some dwarf peach varieties are “Golden Gem”, “El Dorado”, “Garden Gold” and “Southern Sweet”. Dwarf nectarine varieties you can grow in pots are “Nectarcrest”, “Fantasia”.
7. Cherry

Bush cherry cultivars are suitable for container gardening. Cherries prefer a mild climate and a little water as it dislikes wet feet. However, drought and high temperatures could damage the plant as well, but it survives well in the cold. The cherry tree favors a soil that is well drained and composed of plenty of organic matter.
8. Guava

*can be grown in cooler zones with care in winter
Guava tree will delight you with its sweetly scented flowers, delicious fruits, and beautiful tropical appearance. Guava loves the sunny and warm exposure. It is a tropical plant but very much adaptable to temperate climates with moderate winter. Learn how you can grow guava tree in pot here.
9. Watermelon

Watermelons are easy to grow in pots, all they need is a good support and well-drained potting soil. Growing watermelon is similar to cucumbers, you can find out all the information in our article.
10. Banana

Growing banana in a pot is easy and its lush green appearance can give any place a tropical look and feel. Banana trees grow in tropical and subtropical parts of the world and therefore they love full sun, heat and humidity. However, there are cultivars available that are mildly cold hardy and suitable for warm temperate zones. Find out how to grow it in a pot here.
11. Pineapple

Pineapple plants are small and compact and never grow more than 3-6 feet tall. Also, the plant has shallow roots when compared to other fruit bearing plants or trees that’s why it is possible to grow them in pots. However, pineapples require consistently warm and humid climate to thrive but you can also grow them as a houseplant in temperates, providing several hours of direct sunlight daily.
12. Raspberries

Raspberries are bit tricky and unruly to grow in containers but still everbearing varieties like “Heritage”, “Raspberry Shortcake” and “Fall Gold” are a good choice. All these varieties are self-fertile and easy to grow in pots. Here’s a useful article on growing raspberry in containers.
13. Blueberries

Growing blueberries in pots is a good idea if the soil in your garden is not acidic. Providing a potting mix for Azaleas and camellias or other acid loving plants and a large pot is essential so that your blueberry plant will grow easily and provide fruit for years.
14. Oranges and Citruses

All the oranges and citruses can be grown in pots as they are rather large shrubs or small trees. If you live in a climate where winters are mild these fruits are really easy to grow, however, you can still grow an orange tree in a cold climate with care in winter. In pots, you can grow calamondin, buddha’s hand citron, clementines orange etc.
0
0
文章
Hande Salcan
2017年02月22日

Seed catalogs are out, (check our post on our seed catalog recommendations) and soon dedicated gardeners will be choosing what #plants to #grow this year from seed. We have some choices that make the experience a lot easier, with less frustration than you may have experienced if you have tried to grow plants from seed before. Choosing plants to grow from seed can be hit and miss, especially for the novice. Some plants are extremely difficult even under professional growing standards. However, luckily, there are many great #garden plants that are easy to start from seed, either indoors, or outside after the last frost. I am sticking to flowering plants for this one, as vegetables are a whole new subject…but just for the record, except for tomatoes, most common veggies are easy to grow from seed!

Annuals to Start from Seed
I am starting with the category of annuals. Annuals are plants that flower or fruit and then die in one season. They can be some of the easier plants to grow from seed. Many of them can be planted directly in the ground after the last hard frost, and don’t need an indoor seed starting set up. (Which really isn’t that hard, but does take some room. See our post on indoor seed starting.) You can find out the last frost date for your area by going to the National Climatic Data Center. Remember, these are just averages, watch your local conditions and forecasts. Here are our top annuals to grow from seed… all of these can be directly planted in the garden after frost, unless otherwise noted. However, for earlier blooms and fruit, you can start them indoors ahead of time. Sometimes I start them just a week or two early to give them a head-start, but I don’t have to create a lighting set up, and it takes up all that room for only a short time.
Cosmos – Tall flowering plant, with large daisy like blooms that go all summer. Great for cutting, don’t like to be transplanted so better direct sown. Full sun to partial shade. These look best used in broad swaths of color. They reseed readily, which I love. Purples, pinks and whites. Not very drought resistant, but not water greedy either. Do well in poor soil. Basically, you could toss out a handful of these, water in and wait! That easy!

Nasturtium – Great for spilling over containers. Yellow, orange and creams in a flowering plant, that is edible as well! Prefers some afternoon shade in hot climates. Some people like to soak the seed in water overnight, then direct plant in the ground, cover with a light layer of soil and water. Some great new varieties avaiable!

Sunflowers – I don’t even have to tell you how to plant a sunflower, but did you know that there are many, many different varieties? Dwarf or tall, bushy shrub like plants, or the more traditional stalk. Colors from bright yellow, to wine, to white. Large heads to dozens of tiny flowers. Pull out one of the garden seed catalogs we recommended, they all have great choices!

Annual Fountain Grass (Pennisetum) – Grow an ornamental grass to update your garden! This one has narrow leaves and grows about three feet tall and two wide. It may reseed. Sun.

California Poppy – Another one that is as easy as tossing onto some soil and watering in! Although I grew up in California and have fond memories of the bright orange blooms and ferny foliage along roadsides and highways early every summer, you might want to grow my favorite, California Poppy Rose. Pink in color, almost as easy to grow as the orange. Sun, drought resistant. Perfect for a cottage style garden.

Finally, who could leave out the old fashioned, but well loved Zinnia. Great for cutting, easy to grow from seed, pretty in the garden. Make sure you don’t water in the evening, as they can be prone to mildew. Keep cutting them and you will keep getting blooms! My fav is Zinnia Envy, a green variety that looks fantastic in any floral arrangement, and freshens the garden. Looks great with white.

Perennials to Start from Seed
Perennials are flowers that bloom and grow each season, only to go dormant in the winter and come back each spring. These usually bloom a little less than average the first year grown from seed. You can get a jump on the bloom by starting them indoors 6-8 weeks before the last frost. However, these picks can be direct sown outdoors as well, and enjoyed season after season. Have patience with them ,while they will reward you with blooms the first year, it will be year two and three that they fully come into their own. This can be the most economical way to start a garden, so have fun with this!
Yarrow – Easy to grow from seed, yarrow gives you broad heads of blooms all summer long. Yellow, pinks and red varieties are available. Drought resistant. Ferny foliage looks great in the garden. Cut back after flowering to encourage re-bloom. Make great dried flowers.

Coneflower – Coneflower has become the trend plant the last few years with dozens of new varieties appearing on the pages of the catalogs. Originally a wildflower of the prairie states, it is tough, disease resistant, easy to grow and gives you some gorgeous flowers heads, many of unusual shape to add to your garden form. My fav? Last year we grew Pow Wow Wildberry…love it!

Coreopsis – More daisy like flowers, but on compact plants… and they bloom their heads off! work great in containers as well. Yellows, pinks and bi-colored, great in a hot border.

Pinks (Dianthus) – Pinks are charming, low growing cottage style flowers, that blanket the ground with pink, red or white blooms. Easy to grow from seed, some varieties bloom all summer, others give you one spectacular bloom in late spring. Some are fragrant, and all are beautiful! Tough little plant, likes some afternoon shade and even watering.

Shasta Daisy – Big, gorgeous white flowers all summer. Can be direct sown outdoors after frost, but they need light to germinate, so just press into soil and water, don’t cover. Old fashioned favorite that is practically care free. Cut flowers back when they get ragged to keep it blooming all summer.

Those are our top picks for best plant to start from seed, so this year, get a plan going! And plant those seeds!

Annuals to Start from Seed
I am starting with the category of annuals. Annuals are plants that flower or fruit and then die in one season. They can be some of the easier plants to grow from seed. Many of them can be planted directly in the ground after the last hard frost, and don’t need an indoor seed starting set up. (Which really isn’t that hard, but does take some room. See our post on indoor seed starting.) You can find out the last frost date for your area by going to the National Climatic Data Center. Remember, these are just averages, watch your local conditions and forecasts. Here are our top annuals to grow from seed… all of these can be directly planted in the garden after frost, unless otherwise noted. However, for earlier blooms and fruit, you can start them indoors ahead of time. Sometimes I start them just a week or two early to give them a head-start, but I don’t have to create a lighting set up, and it takes up all that room for only a short time.
Cosmos – Tall flowering plant, with large daisy like blooms that go all summer. Great for cutting, don’t like to be transplanted so better direct sown. Full sun to partial shade. These look best used in broad swaths of color. They reseed readily, which I love. Purples, pinks and whites. Not very drought resistant, but not water greedy either. Do well in poor soil. Basically, you could toss out a handful of these, water in and wait! That easy!

Nasturtium – Great for spilling over containers. Yellow, orange and creams in a flowering plant, that is edible as well! Prefers some afternoon shade in hot climates. Some people like to soak the seed in water overnight, then direct plant in the ground, cover with a light layer of soil and water. Some great new varieties avaiable!

Sunflowers – I don’t even have to tell you how to plant a sunflower, but did you know that there are many, many different varieties? Dwarf or tall, bushy shrub like plants, or the more traditional stalk. Colors from bright yellow, to wine, to white. Large heads to dozens of tiny flowers. Pull out one of the garden seed catalogs we recommended, they all have great choices!

Annual Fountain Grass (Pennisetum) – Grow an ornamental grass to update your garden! This one has narrow leaves and grows about three feet tall and two wide. It may reseed. Sun.

California Poppy – Another one that is as easy as tossing onto some soil and watering in! Although I grew up in California and have fond memories of the bright orange blooms and ferny foliage along roadsides and highways early every summer, you might want to grow my favorite, California Poppy Rose. Pink in color, almost as easy to grow as the orange. Sun, drought resistant. Perfect for a cottage style garden.

Finally, who could leave out the old fashioned, but well loved Zinnia. Great for cutting, easy to grow from seed, pretty in the garden. Make sure you don’t water in the evening, as they can be prone to mildew. Keep cutting them and you will keep getting blooms! My fav is Zinnia Envy, a green variety that looks fantastic in any floral arrangement, and freshens the garden. Looks great with white.

Perennials to Start from Seed
Perennials are flowers that bloom and grow each season, only to go dormant in the winter and come back each spring. These usually bloom a little less than average the first year grown from seed. You can get a jump on the bloom by starting them indoors 6-8 weeks before the last frost. However, these picks can be direct sown outdoors as well, and enjoyed season after season. Have patience with them ,while they will reward you with blooms the first year, it will be year two and three that they fully come into their own. This can be the most economical way to start a garden, so have fun with this!
Yarrow – Easy to grow from seed, yarrow gives you broad heads of blooms all summer long. Yellow, pinks and red varieties are available. Drought resistant. Ferny foliage looks great in the garden. Cut back after flowering to encourage re-bloom. Make great dried flowers.

Coneflower – Coneflower has become the trend plant the last few years with dozens of new varieties appearing on the pages of the catalogs. Originally a wildflower of the prairie states, it is tough, disease resistant, easy to grow and gives you some gorgeous flowers heads, many of unusual shape to add to your garden form. My fav? Last year we grew Pow Wow Wildberry…love it!

Coreopsis – More daisy like flowers, but on compact plants… and they bloom their heads off! work great in containers as well. Yellows, pinks and bi-colored, great in a hot border.

Pinks (Dianthus) – Pinks are charming, low growing cottage style flowers, that blanket the ground with pink, red or white blooms. Easy to grow from seed, some varieties bloom all summer, others give you one spectacular bloom in late spring. Some are fragrant, and all are beautiful! Tough little plant, likes some afternoon shade and even watering.

Shasta Daisy – Big, gorgeous white flowers all summer. Can be direct sown outdoors after frost, but they need light to germinate, so just press into soil and water, don’t cover. Old fashioned favorite that is practically care free. Cut flowers back when they get ragged to keep it blooming all summer.

Those are our top picks for best plant to start from seed, so this year, get a plan going! And plant those seeds!
3
1


