文章
Abigal
2017年05月22日

Learn How to Grow Cardamom, one of the most expensive spices in the world. Growing cardamom is moderately difficult but you can learn how to do it by reading this article.
Cardamom is one of the world’s most expensive spices after saffron and vanilla. It has a sweet, burning taste and a very distinctive spicy odor.
Cardamom because of its variety of uses gained a reputation as the queen of spices (king, however, is black pepper).
USDA Zones — 10 – 12
Difficulty — Moderate to Hard
Other Names — Amomum cardamomum, Bai Dou Kou, Black Cardamom, Cardamome, Cardamomo, Cardomom, Cardomomi Fructus, Ela, Elettaria cardamomum, Green Cardamom, Huile Essentielle de Cardamome, Indian Cardamom, Lesser Cardamom, Kardamom, chhoti elachi, lachie, illaichi and elam.
Cardamom Types
Commonly, you can find two types of cardamom: Green (originating in India and Sri Lanka) and black (in Nepal and Himalayan states of India).
Characteristics
Cardamom (Elettaria cardammommum) is a perennial plant. It has rigid and erect aromatic leaves, which forms the aerial part of the plant’s stems. These stems are between 2 to 4 meters high and forms a canopy of leaves around the plant.
Tiny cardamom flowers are beautiful and are usually white in color with a yellow or red strips over them.
Cardamom fruits are called capsules. Inside the fruits there are seeds of the plant, which are actually used as spice.
PropagationFrom seeds
You can propagate cardamom from seeds. You can try seeds you get from glossary store but those seeds are generally treated and not fresh. For best results buy seeds from seed store or online.
Read this to learn how to grow cardamom plant from seed.
From Rhizomes
The easiest way to propagate cardamom is from division. For this, cut the rhizome with a sharp knife and carefully separate it from the plant.
Replant it under the similar conditions. Beware that this techinique will also transmit cardamom mosaic virus from mother plant to new plant, if it is infected.
Growing Conditions
Growing Cardamom is difficult, it requires specific growing conditions: Tropical, hot and humid climates are suitable for its growth. It grows in humid or very humid subtropical forests. Where temperature ranges mostly between 18 to 35 C. Humidity level for growing cardamom is usually near 75%.
Requirements for Growing Cardamom (Elaichi)
Position
Plant cardamom in a location with partial shade or filtered sun light, away from full direct sun as it grows up to 2 – 4 m in height under the canopy of much higher trees.
Soil
Sandy, loamy soil that is rich in organic matter and manure is optimal. It requires slightly acidic to neutral pH level around 6 – 6.8. It can also tolerate acidic soils down to 5.5 – 6.
Key to growing cardamom is right substrate, which should be well-drained in a way that water should drain out easily, but soil must remain moist constantly. By moist it doesn’t mean damp or waterlogged soil, the clay texture of soil is also not recommended as it kills the plant.
Watering
Cardamom grows in rainforest, these areas mostly receives rainfall 200 days annually. So it is essential to keep the soil constantly moist, don’t let the soil to dry out ever. In summer or when the plant is setting fruits, increase watering.
Fertilizer
Supply organic fertilizer that is high in phosphorous and apply it twice a month during the growing season. Also apply 5 kg aged manure or compost per clump annually. Application of neem cake is also recommended.
Harvesting and storage
Cardamom starts to bear fruit from the third year after planting.
Fruit harvesting must be done manually. You can start collecting fruits when they begin to green, dry and easy to break.
After harvesting, dry the pods for 6 – 7 days and store them in an airtight container in a cool, dry place, away from direct sunlight to be preserved for long time.
Pests and diseases
It is generally not attacked by pests. However, some of the pests and diseases that attacks it are:
Cardamom mosaic virus: It is the most serious disease of cardamom. It is a viral disease transmitted by aphids. To prevent this disease keep your plant healthy and never let aphids infect it.
Rhizomes rot: Its symptoms includes chlorosis of leaves, lower leaves become yellowish, premature fruit drop and decay of the rhizomes also happens. It can be caused by high planting density that prevents aeration or by water logged soil.
Other pests and diseases that might infect or attack it are cardamom thrips, capsule rot and nematodes.
Problems
If the leaf tips turn brown, you either have underwatered it or humidity is low, to increase the humidity level spray the foliage. If overwatered, the roots begins to rot and plant starts to wilt.
Brown spots can occur on leaves if plant is grown under too much sun.
Yellowing leaves are usually a sign of too little fertilization or deficiency of iron.
Also read: How to Identify Plant Problems from Leaves.
Uses
True cardamom or green cardamom belongs to the genus Elettaria but there is also a plant from the genus Amomum costatum known as Nepal cardamom or black cardamom. Both of these cardamoms have distinctive uses: Green cardamom is more intense and superior and can be used in many dishes, whereas black cardamom is long and thick and is not used in sweet dishes and desserts.
Cardamom is one of the world’s most expensive spices after saffron and vanilla. It has a sweet, burning taste and a very distinctive spicy odor.
Cardamom because of its variety of uses gained a reputation as the queen of spices (king, however, is black pepper).
USDA Zones — 10 – 12
Difficulty — Moderate to Hard
Other Names — Amomum cardamomum, Bai Dou Kou, Black Cardamom, Cardamome, Cardamomo, Cardomom, Cardomomi Fructus, Ela, Elettaria cardamomum, Green Cardamom, Huile Essentielle de Cardamome, Indian Cardamom, Lesser Cardamom, Kardamom, chhoti elachi, lachie, illaichi and elam.
Cardamom Types
Commonly, you can find two types of cardamom: Green (originating in India and Sri Lanka) and black (in Nepal and Himalayan states of India).
Characteristics

Cardamom (Elettaria cardammommum) is a perennial plant. It has rigid and erect aromatic leaves, which forms the aerial part of the plant’s stems. These stems are between 2 to 4 meters high and forms a canopy of leaves around the plant.
Tiny cardamom flowers are beautiful and are usually white in color with a yellow or red strips over them.
Cardamom fruits are called capsules. Inside the fruits there are seeds of the plant, which are actually used as spice.
PropagationFrom seeds
You can propagate cardamom from seeds. You can try seeds you get from glossary store but those seeds are generally treated and not fresh. For best results buy seeds from seed store or online.
Read this to learn how to grow cardamom plant from seed.
From Rhizomes
The easiest way to propagate cardamom is from division. For this, cut the rhizome with a sharp knife and carefully separate it from the plant.
Replant it under the similar conditions. Beware that this techinique will also transmit cardamom mosaic virus from mother plant to new plant, if it is infected.
Growing Conditions
Growing Cardamom is difficult, it requires specific growing conditions: Tropical, hot and humid climates are suitable for its growth. It grows in humid or very humid subtropical forests. Where temperature ranges mostly between 18 to 35 C. Humidity level for growing cardamom is usually near 75%.
Requirements for Growing Cardamom (Elaichi)

Position
Plant cardamom in a location with partial shade or filtered sun light, away from full direct sun as it grows up to 2 – 4 m in height under the canopy of much higher trees.
Soil
Sandy, loamy soil that is rich in organic matter and manure is optimal. It requires slightly acidic to neutral pH level around 6 – 6.8. It can also tolerate acidic soils down to 5.5 – 6.
Key to growing cardamom is right substrate, which should be well-drained in a way that water should drain out easily, but soil must remain moist constantly. By moist it doesn’t mean damp or waterlogged soil, the clay texture of soil is also not recommended as it kills the plant.
Watering
Cardamom grows in rainforest, these areas mostly receives rainfall 200 days annually. So it is essential to keep the soil constantly moist, don’t let the soil to dry out ever. In summer or when the plant is setting fruits, increase watering.
Fertilizer
Supply organic fertilizer that is high in phosphorous and apply it twice a month during the growing season. Also apply 5 kg aged manure or compost per clump annually. Application of neem cake is also recommended.
Harvesting and storage
Cardamom starts to bear fruit from the third year after planting.
Fruit harvesting must be done manually. You can start collecting fruits when they begin to green, dry and easy to break.
After harvesting, dry the pods for 6 – 7 days and store them in an airtight container in a cool, dry place, away from direct sunlight to be preserved for long time.
Pests and diseases
It is generally not attacked by pests. However, some of the pests and diseases that attacks it are:
Cardamom mosaic virus: It is the most serious disease of cardamom. It is a viral disease transmitted by aphids. To prevent this disease keep your plant healthy and never let aphids infect it.
Rhizomes rot: Its symptoms includes chlorosis of leaves, lower leaves become yellowish, premature fruit drop and decay of the rhizomes also happens. It can be caused by high planting density that prevents aeration or by water logged soil.
Other pests and diseases that might infect or attack it are cardamom thrips, capsule rot and nematodes.
Problems
If the leaf tips turn brown, you either have underwatered it or humidity is low, to increase the humidity level spray the foliage. If overwatered, the roots begins to rot and plant starts to wilt.
Brown spots can occur on leaves if plant is grown under too much sun.
Yellowing leaves are usually a sign of too little fertilization or deficiency of iron.
Also read: How to Identify Plant Problems from Leaves.
Uses
True cardamom or green cardamom belongs to the genus Elettaria but there is also a plant from the genus Amomum costatum known as Nepal cardamom or black cardamom. Both of these cardamoms have distinctive uses: Green cardamom is more intense and superior and can be used in many dishes, whereas black cardamom is long and thick and is not used in sweet dishes and desserts.
0
0
文章
Abigal
2017年05月22日

If you’re searching for the best flowers for full sun then see our list of heat tolerant flowers.
All these flowers can bear the tropical heat and thrive in full sun. You can also grow them in containers. Check out!
Heat Tolerant Flowers1. Pentas

Beautiful pentas flowers attract pollinators like bees, hummingbirds, and sunbirds due to the nectar. Pentas is a tough heat tolerant plant that you can grow in containers. This tropical flower can be grown in USDA Zones 9-11 as perennial, below these zones grow it as an annual.
2. Lantana

Lantana is a common tropical flower that blooms year-round in bright colors like red, yellow, orange, white or pink. It thrives in neglect and heat, it is kind of an afternoon sun plant, the more sun the better. Growing lantana is only possible as an annual plant in mild climates. Learn more about lantana here.
3. Plumbago

Plumbago is a beautiful vine-like African native shrub that thrives in minimal care in subtropical or tropical heat. Its sky blue flowers appear almost year long in right climate. For growing plumbago outside you have to live in USDA Zone 9-11, in cooler zones you’ll need to protect it in winters.
4. Moonflower

The spectacular display of large and fragrant pure white flowers that resembles morning glory and open in the evening. You can grow this vine in a large container. It flowers year-round in subtropics but if you live in a temperate region, grow it as annual. Moonflower plant can reach the height of 6-15 feet in a single season and blooms from summer to fall.
5. Hibiscus

Hibiscus is one the most popular flowering shrubs due to some reasons: It is low maintenance, can be grown in pots easily, available in myriads of colors and for both temperate and tropical climates. Tropical hibiscus can easily handle the temperature above 100 F or more.
Also Read: 44 Best Shrubs for Containers
6. Portulaca (Moss Rose)

Amazing needle-like foliage and bright and colorful small flowers, the portulacas worth a place in your container garden, in hanging baskets or window boxes whether you live in tropics or in temperates. They are one of the toughest plants that never mind the rising tropical heat and drought. Portulacas are annuals everywhere except tropical zones.
7. Gaillardia (Blanket Flower)

Also known as blanket flower, gaillardia is a heat resistant and drought tolerant plant belongs to the sunflower family. The blooms look so attractive and become excellent cut flowers. Grow blanket flower in full sun and provide afternoon shade in summer in peak tropical summer to save it.
8. Calliandra (Powder Puff)

Basically, a small tree that is famous for its puffy flowers that attract wildlife, you can also grow calliandra in a large pot, especially in the colder zones, below 9 to overwinter it indoors as this magnificent plant can’t survive harsh winters.
9. Verbena

There are more than 250 species of verbenas that can be grown in a variety of climates between USDA Zones 4-11. Almost all varieties require sun to thrive and bloom prolifically. Grow verbenas in well-drained soil and provide moderate but regular watering when the soil is dry.
10. Thunbergia Erecta (King’s Mantle)

Also called bush clock vine, thunbergia erecta is a shrub that is native to Africa. If grown in a subtropical or tropical climate (USDA Zone 9-11) this plant never fails from flowering. A year round prolific bloomer thunbergia erecta comes in shades of violet, purple and yellow.
11. Mandevilla

Grow Mandevilla as annual in cooler climates, it is a fast growing heat resistant tropical climber that blooms heavily, flowers are pink, white or red in color and give a tropical look to any garden.
12. Bottlebrush

With its brush like puffy flowers that appear throughout the year, bottlebrush is without a doubt one of the best large flowering shrubs. Bottlebrush can be trained in large containers, although it requires space. If grown in a cooler zone, bring the bottle brush plant indoors before the first frost to overwinter it.
Continue to next page–
All these flowers can bear the tropical heat and thrive in full sun. You can also grow them in containers. Check out!
Heat Tolerant Flowers1. Pentas

Beautiful pentas flowers attract pollinators like bees, hummingbirds, and sunbirds due to the nectar. Pentas is a tough heat tolerant plant that you can grow in containers. This tropical flower can be grown in USDA Zones 9-11 as perennial, below these zones grow it as an annual.
2. Lantana

Lantana is a common tropical flower that blooms year-round in bright colors like red, yellow, orange, white or pink. It thrives in neglect and heat, it is kind of an afternoon sun plant, the more sun the better. Growing lantana is only possible as an annual plant in mild climates. Learn more about lantana here.
3. Plumbago

Plumbago is a beautiful vine-like African native shrub that thrives in minimal care in subtropical or tropical heat. Its sky blue flowers appear almost year long in right climate. For growing plumbago outside you have to live in USDA Zone 9-11, in cooler zones you’ll need to protect it in winters.
4. Moonflower

The spectacular display of large and fragrant pure white flowers that resembles morning glory and open in the evening. You can grow this vine in a large container. It flowers year-round in subtropics but if you live in a temperate region, grow it as annual. Moonflower plant can reach the height of 6-15 feet in a single season and blooms from summer to fall.
5. Hibiscus

Hibiscus is one the most popular flowering shrubs due to some reasons: It is low maintenance, can be grown in pots easily, available in myriads of colors and for both temperate and tropical climates. Tropical hibiscus can easily handle the temperature above 100 F or more.
Also Read: 44 Best Shrubs for Containers
6. Portulaca (Moss Rose)

Amazing needle-like foliage and bright and colorful small flowers, the portulacas worth a place in your container garden, in hanging baskets or window boxes whether you live in tropics or in temperates. They are one of the toughest plants that never mind the rising tropical heat and drought. Portulacas are annuals everywhere except tropical zones.
7. Gaillardia (Blanket Flower)

Also known as blanket flower, gaillardia is a heat resistant and drought tolerant plant belongs to the sunflower family. The blooms look so attractive and become excellent cut flowers. Grow blanket flower in full sun and provide afternoon shade in summer in peak tropical summer to save it.
8. Calliandra (Powder Puff)

Basically, a small tree that is famous for its puffy flowers that attract wildlife, you can also grow calliandra in a large pot, especially in the colder zones, below 9 to overwinter it indoors as this magnificent plant can’t survive harsh winters.
9. Verbena

There are more than 250 species of verbenas that can be grown in a variety of climates between USDA Zones 4-11. Almost all varieties require sun to thrive and bloom prolifically. Grow verbenas in well-drained soil and provide moderate but regular watering when the soil is dry.
10. Thunbergia Erecta (King’s Mantle)

Also called bush clock vine, thunbergia erecta is a shrub that is native to Africa. If grown in a subtropical or tropical climate (USDA Zone 9-11) this plant never fails from flowering. A year round prolific bloomer thunbergia erecta comes in shades of violet, purple and yellow.
11. Mandevilla

Grow Mandevilla as annual in cooler climates, it is a fast growing heat resistant tropical climber that blooms heavily, flowers are pink, white or red in color and give a tropical look to any garden.
12. Bottlebrush

With its brush like puffy flowers that appear throughout the year, bottlebrush is without a doubt one of the best large flowering shrubs. Bottlebrush can be trained in large containers, although it requires space. If grown in a cooler zone, bring the bottle brush plant indoors before the first frost to overwinter it.
Continue to next page–
0
0
文章
Abigal
2017年05月22日

Learn how to grow gaura in your garden. Gaura plant care and growing is easy. This drought tolerant shrub thrives in well-drained soil and loves to bath in the day long sun.
The gaura is a beautiful perennial plant that is easy to grow and with minimal care, it offers a long blooming period and colorful flowers that attract butterflies.
Gaura Plant Care

USDA Zones— 5 – 10
Difficulty— Easy
Other Names— Wandflower, Butterfly gaura, Whirling butterfly, Siskiyou pink
The genus “Gaura” consists of about 20 species of plants. It is native to North America. Its fine erected foliage and irregularly shaped flowers make it attractive. You can vary the uses according to the species, low growing varieties (not more than 24 inches) are placed in borders or in rock gardens while the large shrub-like varieties are perfect for growing in the cluster behind low growing plants in flower beds.
Two Popular VarietiesGaura Biennis (Biennial Gaura): A tall variety that can grow 3-6 feet high. The foliage is red when matured, it has hairy flowering stems and light pink or white colored flowers that turn into coral red in late summer and fall.Gaura Lindheimeri (White Gaura): A Texas native, tolerant to drought. It grows up to 5 feet tall, flowers appears from summer to fall.How to Grow GauraPropagation
Gaura can be propagated from seeds.The seeds are available in local garden shops or can be bought online. Propagation by cuttings should be done in spring and late summer or by division in the fall.
Planting Gaura
Prepare the planting site by performing a deep plowing. Remove stones, debris, and weeds. This plant doesn’t transplant well, that’s why it is better to sow the seeds directly at the planting site, once all the dangers of frost are eliminated and the weather warms up.
If you are planting a potted gaura plant, make sure to make a planting hole in soil– twice wide and of the same depth as it was planted in the previous pot. Place the plant in the hole and fill that with well-drained soil. If the soil is very heavy or poor prepare it by adding compost or well-rotted manure and coarse sand in smaller proportion.
How to Grow Gaura in Pots
Growing gaura in pots is possible. Choose the pot that is 12 inches deep and 10 inches wide to provide a sufficient space to the plant. Keep the pot in sunny spot and water it only when the top surface of soil dries out.
Requirements for Growing Gaura

Position
Planting position must be sunny, for prolific blooms exposure to at least 6 hours of sunlight is ideal. If the location is windy provide support to plants.
Soil
Gaura grows well in light and sandy soil. Due to its taproot, the soil must be deep and also little fertile. Water logging soil that is clay rich and cloaks the drainage hinders the development and must be avoided.
Watering
Growing gaura is easy. As it adapts well to the drought-like conditions due to the long taproot it has, infrequent and economical watering is recommended. Water it deeply but only when the top two inch of soil seems dry.
Spacing
The planting distance for low growing varieties is around 12 inches. For more shrub like large varieties, space the plants 15 inches apart from each other.
Gaura Plant CareFertilizer
Gaura doesn’t require additional fertilizer to bloom. It thrives in poor soil. Application of manure or compost during planting is sufficient. Even adding too much natural fertilizer can cause the plant to grow limply.
Deadheading and Pruning
Remove spent flower spikes as soon as they fade, cut the entire stalk to promote more blooms. Once the blooming period ends in late summer, trim the shrub slightly (3″) to refresh it. The plant will start to flower again in fall with more vigor.
Overwintering
Gaura plant care is if you live in the warmer region. During the winter, let the faded stems on site, they provide protection against the cold. It is also recommended to mulch around the roots to insulate them, especially if you live below USDA Zone 8.
Diseases and Pests
The gaura is a beautiful perennial plant that is easy to grow and with minimal care, it offers a long blooming period and colorful flowers that attract butterflies.
Gaura Plant Care

USDA Zones— 5 – 10
Difficulty— Easy
Other Names— Wandflower, Butterfly gaura, Whirling butterfly, Siskiyou pink
The genus “Gaura” consists of about 20 species of plants. It is native to North America. Its fine erected foliage and irregularly shaped flowers make it attractive. You can vary the uses according to the species, low growing varieties (not more than 24 inches) are placed in borders or in rock gardens while the large shrub-like varieties are perfect for growing in the cluster behind low growing plants in flower beds.
Two Popular VarietiesGaura Biennis (Biennial Gaura): A tall variety that can grow 3-6 feet high. The foliage is red when matured, it has hairy flowering stems and light pink or white colored flowers that turn into coral red in late summer and fall.Gaura Lindheimeri (White Gaura): A Texas native, tolerant to drought. It grows up to 5 feet tall, flowers appears from summer to fall.How to Grow GauraPropagation
Gaura can be propagated from seeds.The seeds are available in local garden shops or can be bought online. Propagation by cuttings should be done in spring and late summer or by division in the fall.
Planting Gaura
Prepare the planting site by performing a deep plowing. Remove stones, debris, and weeds. This plant doesn’t transplant well, that’s why it is better to sow the seeds directly at the planting site, once all the dangers of frost are eliminated and the weather warms up.
If you are planting a potted gaura plant, make sure to make a planting hole in soil– twice wide and of the same depth as it was planted in the previous pot. Place the plant in the hole and fill that with well-drained soil. If the soil is very heavy or poor prepare it by adding compost or well-rotted manure and coarse sand in smaller proportion.
How to Grow Gaura in Pots
Growing gaura in pots is possible. Choose the pot that is 12 inches deep and 10 inches wide to provide a sufficient space to the plant. Keep the pot in sunny spot and water it only when the top surface of soil dries out.
Requirements for Growing Gaura

Position
Planting position must be sunny, for prolific blooms exposure to at least 6 hours of sunlight is ideal. If the location is windy provide support to plants.
Soil
Gaura grows well in light and sandy soil. Due to its taproot, the soil must be deep and also little fertile. Water logging soil that is clay rich and cloaks the drainage hinders the development and must be avoided.
Watering
Growing gaura is easy. As it adapts well to the drought-like conditions due to the long taproot it has, infrequent and economical watering is recommended. Water it deeply but only when the top two inch of soil seems dry.
Spacing
The planting distance for low growing varieties is around 12 inches. For more shrub like large varieties, space the plants 15 inches apart from each other.
Gaura Plant CareFertilizer
Gaura doesn’t require additional fertilizer to bloom. It thrives in poor soil. Application of manure or compost during planting is sufficient. Even adding too much natural fertilizer can cause the plant to grow limply.
Deadheading and Pruning
Remove spent flower spikes as soon as they fade, cut the entire stalk to promote more blooms. Once the blooming period ends in late summer, trim the shrub slightly (3″) to refresh it. The plant will start to flower again in fall with more vigor.
Overwintering
Gaura plant care is if you live in the warmer region. During the winter, let the faded stems on site, they provide protection against the cold. It is also recommended to mulch around the roots to insulate them, especially if you live below USDA Zone 8.
Diseases and Pests
1
0
文章
Micky
2017年05月22日

Learn how to grow datura. Growing datura is easy and this medicinal herb doesn’t require any special care or attention.
Flowering: Summer to late fall
Flower color: White, pink, yellow, purple
Exposure: Full Sun
Soil pH: Neutral
Height: 30 cm to 1.5 m
Plant type: Flower, Medicinal Herb
Type of foliage: deciduous
USDA Hardiness Zones: 9 – 11
Propagation Method: Seed sowing, cuttings
Toxicity: All parts of the plant are toxic, its ingestion leads to a delirium or hallucinatory feeling for several hours
Species and Varieties: The genus includes about twenty species. Datura stramonium, the Jimsonweed is often considered a weed and is one of the most poisonous plants in Solanaceae family.
Other Names— Jimson weed, Devil’s snare, thornapple, moon flower, hell’s bells, devil’s trumpet, devil’s weed, tolguacha, Jamestown weed, stinkweed, locoweed, pricklyburr, and devil’s cucumber
The plant is recognizable by its large leaves of 20 cm, dark green with jagged edges. It has a bushier growth and the plant usually grow 60 cm high but it can grow up to nearly 1.5 m. The flowers are bright colored and appear in late summer. Followed by fruits that come in the size of a small apricot, covered with long needle like thorns.
Growing Datura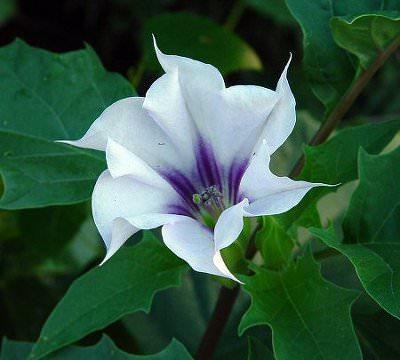
Growing datura is extremely easy. Just plant it in full sun in well-drained soil.
Soil
Humus-rich, well drained and calcareous soil is required for growing datura. However, it tolerates a variety of soil types.
Watering
Water your datura up regularly when it is establishing. Once matured, it doesn’t require watering as it seeks water deeply into the soil with the help of its long taproot.
Invasiveness
This plant is considered a weed. It can easily become invasive if grown in favorable conditions.
Pests and Diseases
The plant doesn’t bother by pests and diseases much. Still, spider mites, whiteflies, and mealybugs may attack it.
Uses and Effects
Datura stramonium contains powerful alkaloids. The plant if ingested can cause hallucinations, tachycardia, muscle weakness, and amnesia.

Flowering: Summer to late fall
Flower color: White, pink, yellow, purple
Exposure: Full Sun
Soil pH: Neutral
Height: 30 cm to 1.5 m
Plant type: Flower, Medicinal Herb
Type of foliage: deciduous
USDA Hardiness Zones: 9 – 11
Propagation Method: Seed sowing, cuttings
Toxicity: All parts of the plant are toxic, its ingestion leads to a delirium or hallucinatory feeling for several hours
Species and Varieties: The genus includes about twenty species. Datura stramonium, the Jimsonweed is often considered a weed and is one of the most poisonous plants in Solanaceae family.
Other Names— Jimson weed, Devil’s snare, thornapple, moon flower, hell’s bells, devil’s trumpet, devil’s weed, tolguacha, Jamestown weed, stinkweed, locoweed, pricklyburr, and devil’s cucumber
The plant is recognizable by its large leaves of 20 cm, dark green with jagged edges. It has a bushier growth and the plant usually grow 60 cm high but it can grow up to nearly 1.5 m. The flowers are bright colored and appear in late summer. Followed by fruits that come in the size of a small apricot, covered with long needle like thorns.
Growing Datura

Growing datura is extremely easy. Just plant it in full sun in well-drained soil.
Soil
Humus-rich, well drained and calcareous soil is required for growing datura. However, it tolerates a variety of soil types.
Watering
Water your datura up regularly when it is establishing. Once matured, it doesn’t require watering as it seeks water deeply into the soil with the help of its long taproot.
Invasiveness
This plant is considered a weed. It can easily become invasive if grown in favorable conditions.
Pests and Diseases
The plant doesn’t bother by pests and diseases much. Still, spider mites, whiteflies, and mealybugs may attack it.
Uses and Effects
Datura stramonium contains powerful alkaloids. The plant if ingested can cause hallucinations, tachycardia, muscle weakness, and amnesia.
1
1
文章
Micky
2017年05月22日

Learn how to grow timothy hay, growing timothy hay is easy but requires a few basic conditions which you can read below.
USDA Zones — 3-9
Difficulty — Easy
Other names — Herd grass, Herd’s grass, Meadow cat’s-tail, Phleum pratense, Timothy, Timothy grass, Meadow cat’s-tail and common cat’s tail.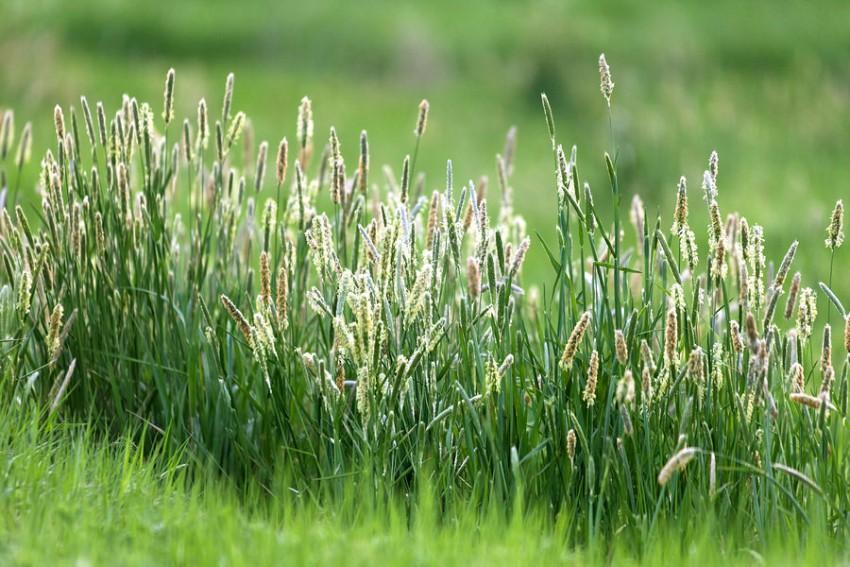
Timothy (Phleum pratense) is a perennial grass that grows of itself in some places, especially in the north, in the east and on the mountains. The leaves of timothy grass are quite pale green. Young leaves are rolled into the sleeve and then they grow in spirals. The base of the plant is often bulged and bulbous.
Timothy grass is generally used as hay to feed horses and that’s why is it also called Timothy hay. Apart from being used as hay it also produces a durable and attractive lawn. Growing timothy hay is relatively an easier task.
How to Grow Timothy HayPropagation and Planting Timothy GrassPrepare a place to sow seeds. Remove all weeds from the planting site with a hoe.Sprinkle the seeds on the planting site. The seeds must cover about one half of the total surface area of the soil.Rake to incorporate the planting site of the seeds in the soil. Sow the seeds no more than 1/2 inches deep.Slowly moisten the soil and keep it moist until the seeds germinate.For growing timothy hay, sow seeds in spring or late summer, you can also plant seeds in early fall.Requirements for Growing Timothy HayLocation
Timothy hay growing should be done on a flat area that receives partial shade. This cool season grass is undemanding and doesn’t require any special care.
Soil
Timothy grass grows well in both sandy or clay rich soil. It tolerates the wet conditions and thrives in slightly dry state for a short time too.
Watering
Keep the soil moist all the time. For growing timothy hay, regular watering is required as the plant has shallow roots that are not able to provide water under the surface of the soil, so even a short drought period can be detrimental for plant.
Timothy Hay Care
The timothy hay field should not be trampled on during drought periods because the grass has very shallow and fine roots that are sensitive at these times.
Fertilizer
Feed it with fertilizer rich in nitrogen in spring and again after harvesting. If you’re growing timothy hay with legumes, skip the nitrogen fertilizer. For accuracy in fertilization soil testing is recommended.
Harvesting
USDA Zones — 3-9
Difficulty — Easy
Other names — Herd grass, Herd’s grass, Meadow cat’s-tail, Phleum pratense, Timothy, Timothy grass, Meadow cat’s-tail and common cat’s tail.

Timothy (Phleum pratense) is a perennial grass that grows of itself in some places, especially in the north, in the east and on the mountains. The leaves of timothy grass are quite pale green. Young leaves are rolled into the sleeve and then they grow in spirals. The base of the plant is often bulged and bulbous.
Timothy grass is generally used as hay to feed horses and that’s why is it also called Timothy hay. Apart from being used as hay it also produces a durable and attractive lawn. Growing timothy hay is relatively an easier task.
How to Grow Timothy HayPropagation and Planting Timothy GrassPrepare a place to sow seeds. Remove all weeds from the planting site with a hoe.Sprinkle the seeds on the planting site. The seeds must cover about one half of the total surface area of the soil.Rake to incorporate the planting site of the seeds in the soil. Sow the seeds no more than 1/2 inches deep.Slowly moisten the soil and keep it moist until the seeds germinate.For growing timothy hay, sow seeds in spring or late summer, you can also plant seeds in early fall.Requirements for Growing Timothy HayLocation
Timothy hay growing should be done on a flat area that receives partial shade. This cool season grass is undemanding and doesn’t require any special care.
Soil
Timothy grass grows well in both sandy or clay rich soil. It tolerates the wet conditions and thrives in slightly dry state for a short time too.
Watering
Keep the soil moist all the time. For growing timothy hay, regular watering is required as the plant has shallow roots that are not able to provide water under the surface of the soil, so even a short drought period can be detrimental for plant.
Timothy Hay Care
The timothy hay field should not be trampled on during drought periods because the grass has very shallow and fine roots that are sensitive at these times.
Fertilizer
Feed it with fertilizer rich in nitrogen in spring and again after harvesting. If you’re growing timothy hay with legumes, skip the nitrogen fertilizer. For accuracy in fertilization soil testing is recommended.
Harvesting
0
0
文章
Micky
2017年05月22日

Gigantic, exotic and gargantuan, baobab tree is special. Learn how to grow a baobab tree as growing baobab tree is not that difficult if you understand the basics. You can also make a baobab bonsai, it looks superb.What is a Baobab Tree?
Baobab is a low maintenance tree and regarded as world’s largest succulent. It can also be grown in pot, baobab bonsai is famous and is particularly well suited for beginners and if you have a large backyard, you can grow it outside. The baobab tree flourishes on poor soils, tolerates heat and has the ability to store large amounts of water, to survive in drought.
USDA Zones: 10 – 12, can be grown in other zones in pots with care in winter
Difficulty: Moderate
Other Names: Adansonia (scientific name), boab, boaboa, tabaldi, bottle tree, upside-down tree, and monkey bread tree.
Height: up to 30 meters
Bloom Color: White
Propagation
Even gardeners without green fingers can make it with a little patience, to multiply the baobab tree. This is done in two ways:
Growing Baobab from Seed
Before sowing, the Baobab seeds needs soaking at room temperature. For this, soak the seeds for one day in warm water. After that, scarify the baobab seeds on sandpaper to expose their inner white layer.
Dry seeds indoors for a day before planting. The germination rate of baobab seeds is low, so sow 3 times more seeds than required.
Sow baobab seeds 1 to 2 inch deep and keep the soil temperature above at least 15 degrees Celsius. It is important to keep soil evenly moist, but not kept wet.
Once the roots are formed, baobab can be planted into individual pots or on the grounds. The pot you use should have a minimum diameter of seven centimeters.
The germination of baobab seeds is sporadic, their germination can take anywhere from a week to a month. The cultivation of baobab from seed requires some patience. Because in some cases, the germination can take several months.
Propagation from cuttings
Baobab tree can also be grown from cutting. For this, take cutting in spring from the tree. The cuttings should have at least three leaves.
After taking a cutting, let it dry for a few days to reduce the chances of fungal attacks and stem rot. After that, plant the cutting in soil mixture of sand and peat.
RequirementsLocation and Soil
Growing baobab tree requires at least 6 hours of direct sunlight, it appreciates as much sun as given. If baobab receives too little daylight, it grows slowly and spindly and leaves turns yellow.
In order to create the optimum soil conditions for the baobab, soil must have good drainage and should be sandy. To make baobab soil at home, mix 3 parts of compost, 2 parts of sand in 1 part soil.
However, best to buy premixed cactus soil. This allows better aeration of the soil and prevents the roots rot.
Watering and fertilizing
Watering requirement of baobab is moderate to low as it is native to arid areas of Africa and it should be done carefully. If you’re growing baobab in container, choose one with good drainage holes, so that the excess water can seep out from bottom.
Overwatering should be avoided. Before watering the plant again, always check if the soil is dry. If it is moist, do not water. As baobab is very tolerant to droughts, do not water if unsure.
Mature baobab tree on ground does not need any fertilizer. Fertilize young and potted plant with liquid succulent fertilizer that is high in potassium and low in nitrogen every month.
Baobab Care
Taking care of a baobab is simple. The sturdy exotic plant loves warm, sunny and bright location. Larger specimens survive longer drying sessions. Seedlings, on other hand need more water and should be kept moderately moist. Baobab tree if grown successfully, rewards you not only with its ornamental thick trunk and rich green leaves, but also with large white flowers and edible fruits.
Overwintering Baobab
Knowing how to grow a baobab tree is not as difficult as overwintering it especially if you’re living in extremely cold climate. You’ll need to do a lot of care to overwinter it.
Place it indoors, in a bright and warm position near a windowsill. Try to keep temperature around 10 C, lower than this will stunt baobab.
In winter, baobab tree drops its leaves and goes to dormancy. During this time water sparingly, watering in winter can cause root rot.
Also stop to fertilize. In the spring, place it back at its usual location. Resume watering when buds begin to swell.
Repotting
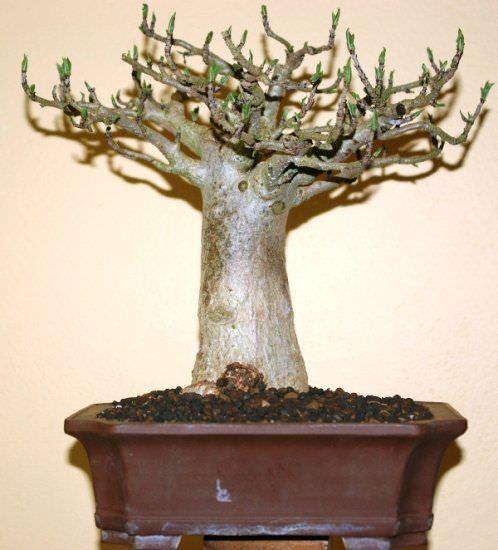
If you are growing baobab trees in pot, repotting is necessary. The growth of baobab roots is very strong. Therefore, the tree requires enough space to unfold. Repot baobab when plants seems root bound, roots starts to appear on upper surface.
Pruning
The baobab tree can be pruned throughout the year except winter. It’s easy, simply remove the shoots, which are located under the main crown. If possible, make a cut near bud. So a new bud of the branch will be ensured.
In order to cut individual branches summer is the ideal time
Diseases, pests and other problems
Some common pests that attracts on baobab tree are mealybugs, spider mites and fungus gnats.
Baobab Tree Facts and Adaptations
It has strong branches, impressive trunk and fleshy leaves.
Baobab tree forms large white flowers after a few years of growing, it also produces fruits that taste well and provide energy.
Fruits are rich in calcium and slightly acidic.
Baobab tree is drought tolerant and has the ability to store large amounts of water in its trunk and roots.
It is forgiving, robust and low-maintenance plant.
Baobab is a low maintenance tree and regarded as world’s largest succulent. It can also be grown in pot, baobab bonsai is famous and is particularly well suited for beginners and if you have a large backyard, you can grow it outside. The baobab tree flourishes on poor soils, tolerates heat and has the ability to store large amounts of water, to survive in drought.

USDA Zones: 10 – 12, can be grown in other zones in pots with care in winter
Difficulty: Moderate
Other Names: Adansonia (scientific name), boab, boaboa, tabaldi, bottle tree, upside-down tree, and monkey bread tree.
Height: up to 30 meters
Bloom Color: White
Propagation
Even gardeners without green fingers can make it with a little patience, to multiply the baobab tree. This is done in two ways:
Growing Baobab from Seed
Before sowing, the Baobab seeds needs soaking at room temperature. For this, soak the seeds for one day in warm water. After that, scarify the baobab seeds on sandpaper to expose their inner white layer.
Dry seeds indoors for a day before planting. The germination rate of baobab seeds is low, so sow 3 times more seeds than required.
Sow baobab seeds 1 to 2 inch deep and keep the soil temperature above at least 15 degrees Celsius. It is important to keep soil evenly moist, but not kept wet.
Once the roots are formed, baobab can be planted into individual pots or on the grounds. The pot you use should have a minimum diameter of seven centimeters.
The germination of baobab seeds is sporadic, their germination can take anywhere from a week to a month. The cultivation of baobab from seed requires some patience. Because in some cases, the germination can take several months.
Propagation from cuttings
Baobab tree can also be grown from cutting. For this, take cutting in spring from the tree. The cuttings should have at least three leaves.
After taking a cutting, let it dry for a few days to reduce the chances of fungal attacks and stem rot. After that, plant the cutting in soil mixture of sand and peat.
RequirementsLocation and Soil
Growing baobab tree requires at least 6 hours of direct sunlight, it appreciates as much sun as given. If baobab receives too little daylight, it grows slowly and spindly and leaves turns yellow.
In order to create the optimum soil conditions for the baobab, soil must have good drainage and should be sandy. To make baobab soil at home, mix 3 parts of compost, 2 parts of sand in 1 part soil.
However, best to buy premixed cactus soil. This allows better aeration of the soil and prevents the roots rot.
Watering and fertilizing
Watering requirement of baobab is moderate to low as it is native to arid areas of Africa and it should be done carefully. If you’re growing baobab in container, choose one with good drainage holes, so that the excess water can seep out from bottom.
Overwatering should be avoided. Before watering the plant again, always check if the soil is dry. If it is moist, do not water. As baobab is very tolerant to droughts, do not water if unsure.
Mature baobab tree on ground does not need any fertilizer. Fertilize young and potted plant with liquid succulent fertilizer that is high in potassium and low in nitrogen every month.
Baobab Care
Taking care of a baobab is simple. The sturdy exotic plant loves warm, sunny and bright location. Larger specimens survive longer drying sessions. Seedlings, on other hand need more water and should be kept moderately moist. Baobab tree if grown successfully, rewards you not only with its ornamental thick trunk and rich green leaves, but also with large white flowers and edible fruits.
Overwintering Baobab
Knowing how to grow a baobab tree is not as difficult as overwintering it especially if you’re living in extremely cold climate. You’ll need to do a lot of care to overwinter it.
Place it indoors, in a bright and warm position near a windowsill. Try to keep temperature around 10 C, lower than this will stunt baobab.
In winter, baobab tree drops its leaves and goes to dormancy. During this time water sparingly, watering in winter can cause root rot.
Also stop to fertilize. In the spring, place it back at its usual location. Resume watering when buds begin to swell.
Repotting

If you are growing baobab trees in pot, repotting is necessary. The growth of baobab roots is very strong. Therefore, the tree requires enough space to unfold. Repot baobab when plants seems root bound, roots starts to appear on upper surface.
Pruning
The baobab tree can be pruned throughout the year except winter. It’s easy, simply remove the shoots, which are located under the main crown. If possible, make a cut near bud. So a new bud of the branch will be ensured.
In order to cut individual branches summer is the ideal time
Diseases, pests and other problems
Some common pests that attracts on baobab tree are mealybugs, spider mites and fungus gnats.
Baobab Tree Facts and Adaptations
It has strong branches, impressive trunk and fleshy leaves.
Baobab tree forms large white flowers after a few years of growing, it also produces fruits that taste well and provide energy.
Fruits are rich in calcium and slightly acidic.
Baobab tree is drought tolerant and has the ability to store large amounts of water in its trunk and roots.
It is forgiving, robust and low-maintenance plant.
0
0
文章
Micky
2017年05月22日

Learn how to grow carob tree. Growing carob tree is easy, it’s also grown as ornamental plant in the gardens.
Growing Carob is durable evergreen tree native to the Mediterranean. It has bright, green beautiful foliage, cluster of small flowers and edible pods that are used as cocoa powder substitute.
Carob pods contain about 8% protein, vitamins A and B and about one-third of calories than chocolate.
USDA Zones — 9-11
Propagation Method — Seeds
Difficulty — Easy
Soil pH — 6 – 8
Carob Tree Growing Conditions
Carob tree grows about 10 meter tall (exceptionally 15 m). It is a dioecious tree, which means each tree bears male or female flowers. Carob tree can bear up to 20 F temperature.
Carob tree has a thick and twisted trunk with a rough and brown bark. Its leaves are oval, dark green and shiny that are 12 to 30 centimeters long. Its foliage provides a welcome shade in hot countries. They form a very effective curtain against noise too.
Growing Carob from Seeds
The fresh carob tree seeds germinates quickly and easily. If you don’t find fresh seeds you can grow it from dry seeds which is scarified and soaked in water until they double in size. They can be planted in spring or fall.
Requirements for Growing Carob TreeSoil
The carob tree is a tree that grows in many soil types including hillsides with deep sandy soil or loam, even arid. It does not tolerate acidic or wet soils but requires good drainage.
Sun
Carob tree needs full sun and a position sheltered from wind.
Watering
It is resistant to drought. However, watering must be provided during dry seasons, especially if the tree is grown for its fruit.
Carob Tree Care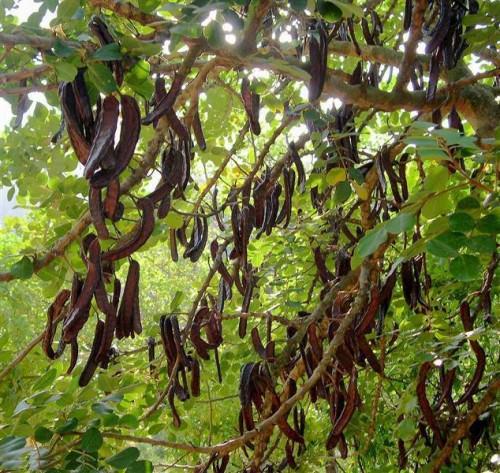
Once fully developed carob tree can withstand temperatures up to -7 ° C, but frost during flowering period can reduce or sometimes prevent fruiting. The tree is ideally grown in regions with a Mediterranean climate.
Fertilizer
Fertilizer is often unnecessary for carob trees. However, a 8-3-9 fertilizer can be applied occasionally to give plant a boost.
Pruning
Growing Carob is durable evergreen tree native to the Mediterranean. It has bright, green beautiful foliage, cluster of small flowers and edible pods that are used as cocoa powder substitute.
Carob pods contain about 8% protein, vitamins A and B and about one-third of calories than chocolate.

USDA Zones — 9-11
Propagation Method — Seeds
Difficulty — Easy
Soil pH — 6 – 8
Carob Tree Growing Conditions
Carob tree grows about 10 meter tall (exceptionally 15 m). It is a dioecious tree, which means each tree bears male or female flowers. Carob tree can bear up to 20 F temperature.
Carob tree has a thick and twisted trunk with a rough and brown bark. Its leaves are oval, dark green and shiny that are 12 to 30 centimeters long. Its foliage provides a welcome shade in hot countries. They form a very effective curtain against noise too.
Growing Carob from Seeds
The fresh carob tree seeds germinates quickly and easily. If you don’t find fresh seeds you can grow it from dry seeds which is scarified and soaked in water until they double in size. They can be planted in spring or fall.
Requirements for Growing Carob TreeSoil
The carob tree is a tree that grows in many soil types including hillsides with deep sandy soil or loam, even arid. It does not tolerate acidic or wet soils but requires good drainage.
Sun
Carob tree needs full sun and a position sheltered from wind.
Watering
It is resistant to drought. However, watering must be provided during dry seasons, especially if the tree is grown for its fruit.
Carob Tree Care

Once fully developed carob tree can withstand temperatures up to -7 ° C, but frost during flowering period can reduce or sometimes prevent fruiting. The tree is ideally grown in regions with a Mediterranean climate.
Fertilizer
Fertilizer is often unnecessary for carob trees. However, a 8-3-9 fertilizer can be applied occasionally to give plant a boost.
Pruning
0
0
文章
Micky
2017年05月22日

Want to grow a cashew tree in your garden? But for growing cashew nuts tree you’ll need to acquire some basic growing and planting information that is given below in this article.
Cashew nuts growing is easy, but it requires a more specific environment and growing conditions. If you can provide that environment then you can grow your cashew tree and enjoy the nuts and fresh fruits that are called cashew apple, throughout the year.

USDA Zones — 10 – 11
Difficulty — Moderate
Soil pH — Slightly acidic to neutral
Other names — Maranon, Noix d’anacarde, Caju, Kaju, Mundiri, Kazu, Pajuil, anacardio, Paringi mavu, 槚如树
Cashew Nuts Growing Information
Cashew or Anacardium occidentale originates from the Caribbean Island and the North East of Brazil. But today it is grown in several other tropical parts of the world. Mostly in Africa, India and Southeast Asia for cashew nuts.
It is also called as cashew apple tree; it is part of the Anacardiaceae family, the same family that belongs to pistachio and mango.
Cashew tree can grow up to 6 – 12 m (20 – 40 f) high. Its evergreen leaves are oval, leathery and dark green. They have a prominent midrib.
The flowers, white and pink are gathered in inflorescence at the tips of young shoots. They are smaller in size but very fragrant.
As for the fruits of this tree, do not be fooled by appearances. The cashew apple is oval-shaped, like bell pepper: yellow, orange or red in color is a false fruit (it is also edible). The real fruit, more discreet is a nut attached to the end of the fake fruit. It is that which contains the edible kernel, which we called cashew.
How to Grow Cashew Tree from Seed
Cashew tree can be grown from seeds, air layering, and grafting. To propagate it from seeds, you will need a matured unshelled nut (seed). These seeds are viable up to 4 months.
If you have collected the fresh seed from the tree, dry it in the sun for 3 days and soak in water overnight before sowing.
Sow the seeds in good quality seed starting mix; the seeds will germinate anywhere from 4 days to 3 weeks.
Requirements for Growing Cashew Nuts TreeSun
Cashew tree needs at least 6 hours of direct sun, it grows slowly and doesn’t fruit if grown in the shade.
Soil
Cashew prefers poor sandy and laterite soil with the pH level around 5 – 6.5. Never grow cashew tree in a clay-rich soil. It is heavy and encourages waterlogging, and in the case of growing cashew tree, the soil you use should be well drained in a way that water will flow smoothly.
Water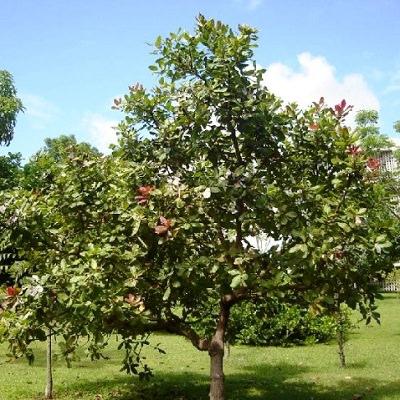
Cashew trees are moderately drought tolerant once established, but they produce more fruits if watered regularly. During the summer, water weekly or twice and deeply. Reduce or withhold watering during winter. Overwatering can harm or even kill your cashew tree, so water only if soil is dry and let the soil to dry out between spells of watering.
Fertilizer
Cashew tree needs regular application of fertilizer to grow vigorously and produce fruits. Use slow release fertilizer with N-P-K 8 – 3 – 9 according to the product instructions given on the packet, around the base of the tree every two months during growing season. Also apply compost or farm manure once in a year, around 30 pounds (15 kg) on the surface of the soil to a mature tree.
Cashew Nuts Growing CarePruning
Prune cashew trees regularly to remove weak, dead and entangled branches and branches that are infested with diseases or pests. Also, cut overcrowded branches to promote vigorous growth.
Mulching
Do mulching around your cashew tree with organic matters to prevent weeds and to conserve moisture.
Pests and Diseases
The cashew tree is generally pest free if it is in good health. Major pests that attack it are tea mosquito, stem and root borer, leaf Miner and blossom Webber.
Harvesting and Cashew Nut Processing
Harvest when cashew apples turn pink or red and cashew nut shell are gray. After harvesting, separate the cashew apple from the nut.
Cashew apple can be eaten raw or make juice of it. Unshelled cashew nut can be stored up to 2 years.
Do not attempt to break the shell before roasting; cashew shell contains very caustic oil which can burn skin.
When processing cashew nut at home must wear gloves and safety glasses and take special care. To learn more on how to process cashew– read this.
Also Read: How to Grow Mango Tree
Cashew Nuts Growing TipsSow fresh cashew seeds for germination, as they germinate easily.A tree grown from seeds take 3 to 5 years to produce its first fruits. Our recommendation is to buy a potted plant from a nursery, this way you’ll not have to wait that long.Choose a location that is well protected from the wind.Cashew grows better when the temperature remains around 80 degrees Fahrenheit (25 C) although it can withstand temperatures as low as 50 degrees Fahrenheit (10 C) and as high as 105 Fahrenheit (40.5 C) without any problem.Keep the area around the base of your cashew tree free from weeds, small shrubs, vines, and debris.Watch for sick or dead branches, prune them if necessary.Benefits of Cashew Nuts
One of the most delicious and healthiest nuts cashews are an amazing source of nutrients, and not only the cashew nuts but its fruit cashew apple is nutritious too. It is a rich source of vitamin C, five times more than an orange. It also contains higher amounts of calcium, iron and vitamin B1, which is more than most of the fruits. To know more about the benefits of cashew nuts read this article.
Also Read: How to Grow Mamoncillo
Cashew nuts growing is easy, but it requires a more specific environment and growing conditions. If you can provide that environment then you can grow your cashew tree and enjoy the nuts and fresh fruits that are called cashew apple, throughout the year.

USDA Zones — 10 – 11
Difficulty — Moderate
Soil pH — Slightly acidic to neutral
Other names — Maranon, Noix d’anacarde, Caju, Kaju, Mundiri, Kazu, Pajuil, anacardio, Paringi mavu, 槚如树
Cashew Nuts Growing Information
Cashew or Anacardium occidentale originates from the Caribbean Island and the North East of Brazil. But today it is grown in several other tropical parts of the world. Mostly in Africa, India and Southeast Asia for cashew nuts.
It is also called as cashew apple tree; it is part of the Anacardiaceae family, the same family that belongs to pistachio and mango.
Cashew tree can grow up to 6 – 12 m (20 – 40 f) high. Its evergreen leaves are oval, leathery and dark green. They have a prominent midrib.
The flowers, white and pink are gathered in inflorescence at the tips of young shoots. They are smaller in size but very fragrant.
As for the fruits of this tree, do not be fooled by appearances. The cashew apple is oval-shaped, like bell pepper: yellow, orange or red in color is a false fruit (it is also edible). The real fruit, more discreet is a nut attached to the end of the fake fruit. It is that which contains the edible kernel, which we called cashew.
How to Grow Cashew Tree from Seed
Cashew tree can be grown from seeds, air layering, and grafting. To propagate it from seeds, you will need a matured unshelled nut (seed). These seeds are viable up to 4 months.
If you have collected the fresh seed from the tree, dry it in the sun for 3 days and soak in water overnight before sowing.
Sow the seeds in good quality seed starting mix; the seeds will germinate anywhere from 4 days to 3 weeks.
Requirements for Growing Cashew Nuts TreeSun
Cashew tree needs at least 6 hours of direct sun, it grows slowly and doesn’t fruit if grown in the shade.
Soil
Cashew prefers poor sandy and laterite soil with the pH level around 5 – 6.5. Never grow cashew tree in a clay-rich soil. It is heavy and encourages waterlogging, and in the case of growing cashew tree, the soil you use should be well drained in a way that water will flow smoothly.
Water

Cashew trees are moderately drought tolerant once established, but they produce more fruits if watered regularly. During the summer, water weekly or twice and deeply. Reduce or withhold watering during winter. Overwatering can harm or even kill your cashew tree, so water only if soil is dry and let the soil to dry out between spells of watering.
Fertilizer
Cashew tree needs regular application of fertilizer to grow vigorously and produce fruits. Use slow release fertilizer with N-P-K 8 – 3 – 9 according to the product instructions given on the packet, around the base of the tree every two months during growing season. Also apply compost or farm manure once in a year, around 30 pounds (15 kg) on the surface of the soil to a mature tree.
Cashew Nuts Growing CarePruning
Prune cashew trees regularly to remove weak, dead and entangled branches and branches that are infested with diseases or pests. Also, cut overcrowded branches to promote vigorous growth.
Mulching
Do mulching around your cashew tree with organic matters to prevent weeds and to conserve moisture.
Pests and Diseases
The cashew tree is generally pest free if it is in good health. Major pests that attack it are tea mosquito, stem and root borer, leaf Miner and blossom Webber.
Harvesting and Cashew Nut Processing
Harvest when cashew apples turn pink or red and cashew nut shell are gray. After harvesting, separate the cashew apple from the nut.
Cashew apple can be eaten raw or make juice of it. Unshelled cashew nut can be stored up to 2 years.
Do not attempt to break the shell before roasting; cashew shell contains very caustic oil which can burn skin.
When processing cashew nut at home must wear gloves and safety glasses and take special care. To learn more on how to process cashew– read this.
Also Read: How to Grow Mango Tree
Cashew Nuts Growing TipsSow fresh cashew seeds for germination, as they germinate easily.A tree grown from seeds take 3 to 5 years to produce its first fruits. Our recommendation is to buy a potted plant from a nursery, this way you’ll not have to wait that long.Choose a location that is well protected from the wind.Cashew grows better when the temperature remains around 80 degrees Fahrenheit (25 C) although it can withstand temperatures as low as 50 degrees Fahrenheit (10 C) and as high as 105 Fahrenheit (40.5 C) without any problem.Keep the area around the base of your cashew tree free from weeds, small shrubs, vines, and debris.Watch for sick or dead branches, prune them if necessary.Benefits of Cashew Nuts
One of the most delicious and healthiest nuts cashews are an amazing source of nutrients, and not only the cashew nuts but its fruit cashew apple is nutritious too. It is a rich source of vitamin C, five times more than an orange. It also contains higher amounts of calcium, iron and vitamin B1, which is more than most of the fruits. To know more about the benefits of cashew nuts read this article.
Also Read: How to Grow Mamoncillo
1
0
文章
Andy
2017年05月22日

Learn how to grow tulsi plant, its care and growing requirements are simple and easy.
Tulsi or holy basil is an incredible herb revered in Indian mythology in Hinduism for its medicinal and spiritual characteristics.
Tulsi, a medicinal herb is native to India, its spicy and refreshing fragrance and tiny colorful flowers makes this a useful houseplant. Tulsi grows as a perennial plant in areas with mild winter and as an annual in cold and temperate climates.
USDA Zones — 10-11, can be grown in the cooler zones as annual
Tulsi or holy basil is an incredible herb revered in Indian mythology in Hinduism for its medicinal and spiritual characteristics.

Tulsi, a medicinal herb is native to India, its spicy and refreshing fragrance and tiny colorful flowers makes this a useful houseplant. Tulsi grows as a perennial plant in areas with mild winter and as an annual in cold and temperate climates.
USDA Zones — 10-11, can be grown in the cooler zones as annual
0
0
文章
Abigal
2017年05月21日

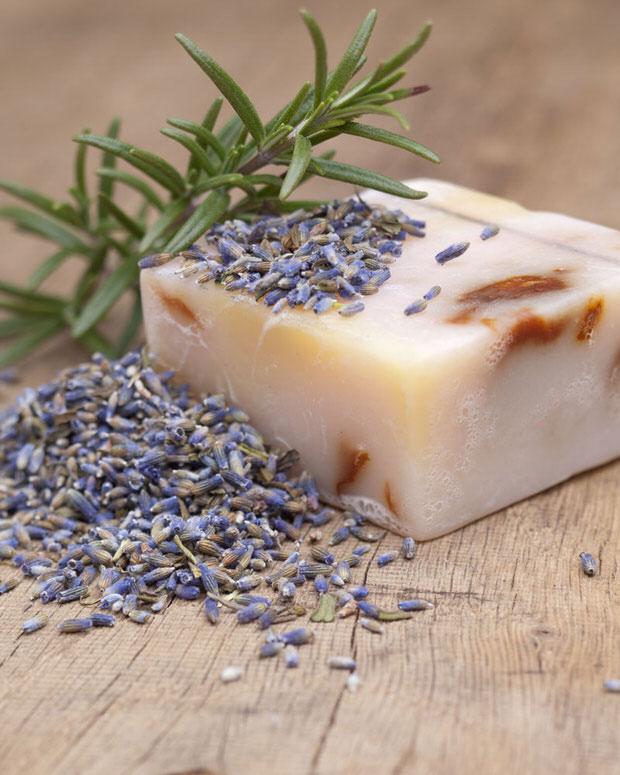
If you grow herbs in your garden, chances are there comes a time every year when you realize you have tons of herbs. Don’t just let them die back with the end of the season and end up in the compost pile! Herbs were meant to be used and useful, and if you know what to do with them, they can have great uses in the kitchen, bath, or even as great gifts! (People pay good money for these specialty herb gifts, and you have the most important ingredients right in your own garden!) These clever projects made using herbs will show you how you can use all those sprigs of rosemary and bunches of basil! Our feature project above, is from “Mother Earth Living’. Find out how to make homemade soap with herbs, including this amazing Lavender Rosemary Soap! And so pretty! Wrap it in some lavender colored tissue paper and tie with a raffia string for a quick gift.
Learn how to infuse olive oil with herbs, from ‘The Kitchn’. Use this in your own cooking, or make them for gifts from the garden. There are pretty much endless combinations you can create with this, great on salads or used to saute. Mmmmm!

Also from ‘The Kitchn’, make herbal infused honey and use it for everything under the sun, from sweetening tea with a gourmet touch, to a soothing syrup for a cough.

Tanya from ‘Lovely Greens’ shows us how to make natural rose and lavender oatmeal bath bombs. These are so pretty! And they look like so much fun to make! I can see these in a pretty glass container sitting on the counter.

Want to know how to make basil salt? Of course you do! Learn how at ‘The Rising Spoon’. Use it as a finishing salt when you really want to impress, or you just want to treat yourself!

More salt! Love this DIY Rosemary salt, Lemon Verbena salt and Sriracha salt. (My youngest son would LOVE that last one!) Great tutorial on how to customize your gourmet salt from ‘Sidewalk Shoes’.

This lavender chamomile bath soak recipe by ‘A Delightful Home’ is just what I need at the end of a long week. What an amazing way to treat yourself.

Make these herbal sleep and dream pillows with these instructions from ‘Mountain Rose Herbs’. It is proven that aromatherapy can help you fall asleep, and stay asleep!

Save your herbs to last into winter by making these DIY Rosemary and Lavender candles for your home, from ‘Live Simply’. Check out her post, she has other great ideas for herbs as well!

These DIY natural room scents are gorgeous and useful! Oh, and they look like so much fun to put together. Did I mention easy too? From ‘The Yummy Life’.

This DIY sage infused cleaner from ‘Melodrama’ uses the medicinal properties from sage, and the antiseptic properties of white vinegar to make a wonderful homemade cleaner that has no artificial chemicals.

Lastly, from ‘Brides‘, freeze fresh herb sprigs in ice cube trays! Can you imagine serving fresh mint ice cubes in your lemonade? Yum!

0
0
文章
Abigal
2017年05月15日


Greenhouses can extend your #growing season, allow you to propagate plants from your yard, and the yard of #fellow gardeners, and let you grow tender or delicate plants you might not otherwise be able to grow. I’ve seen lettuce and spinach grow in a greenhouse when there was a foot of snow on the ground. An old gardening friend of mine would use her #greenhouse to pot up all her volunteer seedlings from her yard, grow them in four inch pots in the greenhouse, then have a plant sale to raise money for her charity. Any way you look at it, if you’re a serious gardener, you would love to get your hands on a greenhouse. So how do we solve problems at TGG? We #DIY it! We found you some great DIY greenhouse projects and plans that range from a temporary row solution, all the way to a full size backyard greenhouse! Before you pick out a project, read over our “getting started” tips to help you choose, site and start your DIY greenhouse. Our feature project, above, is a mini window greenhouse by Crafts Ala Mode.
Getting Started with Your Greenhouse
Position your greenhouse running lengthwise east to west. This will give it the longest stretch of daylight each day.
Make sure your greenhouse will get at least 6 hours of sun in the winter.
Remember, if you plan on having electricity in your greenhouse, site it close enough to your source.
Try to position it away from kids play areas.
Make sure your greenhouse has a working thermometer. You will need to pay attention to temperature unless your system has automatic venting. In the winter, the minimum inside temp should remain between 45-60 degrees for active growing. A sunny winter day can quickly heat up the interior of a greenhouse, even if its freezing outside. Be sure to open vents and allow cool air to enter when the temps rise too much.
‘Design Dreams by Anne’ created this DIY baby greenhouse from old storm windows. This may be one of my favorite projects! It may not be air tight for all you who are looking for that, but I think it would do a very charming job for the most of us. Did I mention it’s charming?

Want to save the earth? Ana White has free plans on how to make a plastic bottle greenhouse! What a great idea and re-use of materials!

Here’s another soda bottle greenhouse for inspiration, photo by John Rutherford.

Need a quick and inexpensive idea for protecting plants already in the ground? 2-Liter soda bottles and some ingenuity.

Need a portable seed starting greenhouse/ cold-frame? Find out how to make this greenhouse at Instructables from Brian Perry.

Ok, let’s get serious. Ana White made her own DIY barn style greenhouse from her plans, and it is incredible! All her DIY plans are amazing, but with all the step by step photos, I really feel like I could make this!

Find our how to build a $50 greenhouse! Yes, this hoop house was built by Door Garden, and was profiled in Birds and Blooms magazine. Lot’s of good information here, and step by step photos.
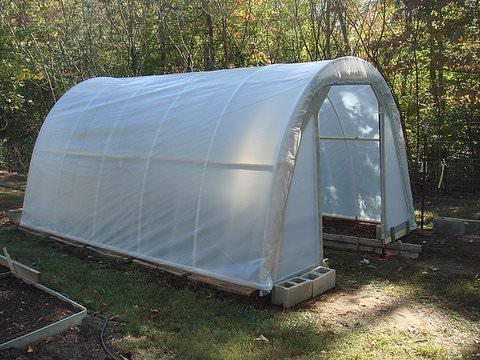
How to make a greenhouse from a pallet, by Anthony Win on Instructables.

Find an easy tutorial for this homemade greenhouse at ThinMac. It looks like it would fit well in a small yard, too!

No, this isn’t 1982. This geodome greenhouse is perfect for areas with high winds and heavy snows. Northern Homestead made this easy for the rest of us, because they did all the hard work. They even included a link to an online calculator to help figure out the mathematics of the dome!

Finally, Fabulously Frugal made this greenhouse for less than $100! Great instructions…actually, theirs came out to $67!

2
1
文章
Andrea
2017年03月27日


Plant potatoes in your home garden and grow one of the most popular vegetables eaten today. Each American eats about 30 pounds of potatoes a year.
To begin growing potatoes, buy certified seed potatoes at nurseries or garden centers. The ones in supermarkets have usually been treated with growth retardants.
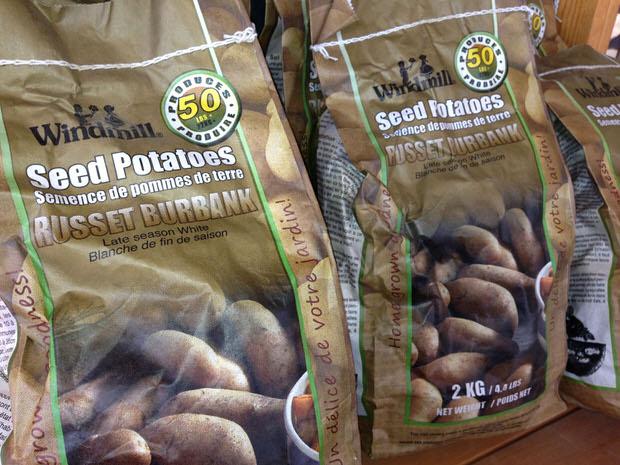

Ten to 14 days before planting, place seed potatoes in a warm area so they begin sprouting. Then, a day or two before planting, use a sharp knife to cut the sprouts, or eyes, into pieces. Each piece should contain 2 or 3 eyes. The bigger the piece, the more food the young potato plant will have to start growing.
About a week or two before the last frost date in your area you can plant the potatoes. Select a site that receives full sun.
Dig up the soil so that it’s loose and drains moisture well. Make rows about two and a half to three feet apart. Plant the potato pieces every 15 inches with the cut side down.
Potatoes are susceptible to frost so if they should be growing when frost conditions are imminent cover then with straw or a blanket or other light covering.
As the plants grow, mound additional soil around the plants every week or two. Continue to add soil or mulch or black plastic around the plants throughout the growing season. The potatoes should not be exposed to sunlight or they will obtain a green coloring which is toxic.
Water well throughout the summer. The most critical time is when the plants are flowering and for a short time afterward as that is the time when they are producing the young potatoes. Water in the morning so that the plants dry before nightfall. Potatoes are very susceptible to fungal diseases.
Fertilize every two to four weeks with a good root crop fertilizer.
Potatoes don’t have many pests but the most common one is the potato beetle which can be controlled with vigilance.
When foliage turns yellow and dies back, discontinue watering. The young potatoes will now mature. Harvest follows in about two weeks. But harvesting can occur at any stage of growth for small baby potatoes.
For winter storage let the potatoes dry either outside or in a dry, cool area for a few days.
1
0
成长记
riverrun
2017年03月23日

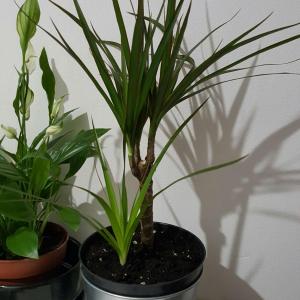
I want Wiz to grow tall! I cut one of the four branches and put it next to his bro in a bigger pot

2
0
成长记
riverrun
2017年03月19日

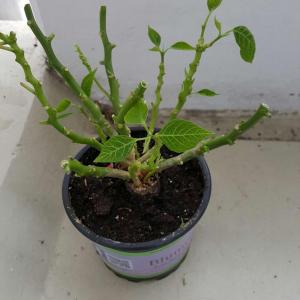
As sad as it might look, all the flowers need to be cut from this one after it blossomed, otherwise it dies. But it will grow bigger and thicker every time this is done 🍃

0
0
fyfywong:Oh, that's a brave move! They will become vivid again next winter ❄️🌺 (Blessing)


