文章
Joss
2017年02月22日

Alliums are one of the best and easiest bulbs to #grow in the gardening world, but often overlooked. Gorgeous, show stopping blooms, easy growing requirements, and amazing architectural shape make these perfect for any gardener, beginner or seasoned veteran. The large round or oval #flowers are borne on single stalks that tower over the garden from 1-4 feet, usually in mid spring to early summer, but there are varieties that bloom even in the fall. Flowers can be tiny little globes, or large 6 inch giants. One of the best traits of the allium over other spring and summer bulbs is that most animals will avoid eating them. Apparently, people aren’t the only ones who want to avoid onion breath! That’s right, alliums are simply ornamental, or flowering onions. Don’t let images of big smelly onions growing in your garden dissuade you, these plants are nothing of the sort, with a gorgeous, sweet scent. Beautiful as cut flowers as well, they come in whites, blues, purples, pinks and even yellow. Your tulips and daffodils may still get top billing in the spring, but make sure you tuck some alliums into your flower beds as well. Here is how to grow those amazing alliums! Photo below by ‘Dutch Flower Bulbs‘.

Photo below by ‘Fine Gardening‘. Allium “Jeannine”.
How To Grow Alliums
Buy allium bulbs from a good nursery or online resource. You want healthy bulbs with no cuts or soft spots. Research varieties to include several varieties of different bloom times to keep the show going!
Most varieties are hardy zones 3-9.
Like most bulbs, these look best planted in groups.
Plant the bulbs in the fall, before the ground freezes. Plant them to a depth of 3 times their diameter in a sunny or mostly sunny position. Generally, 6-8 inches.
Fertilize at planting and yearly in spring with bone meal or a bulb food.
Water well, then leave till they burst out in flower in spring and summer! After flowering, allium foliage will wither, brown, and go dormant.
Plant them under, behind, and around other perennial plants whose growing foliage will cover the allium foliage later in the summer when it browns.
Do not cut back the browning allium leaves until fall, that is how they store energy for flowers the next season. (This is why planting foliage plants around them is important.)
Photo below by ‘Gardener’s Supply‘.
Our Favorite Allium Varieties
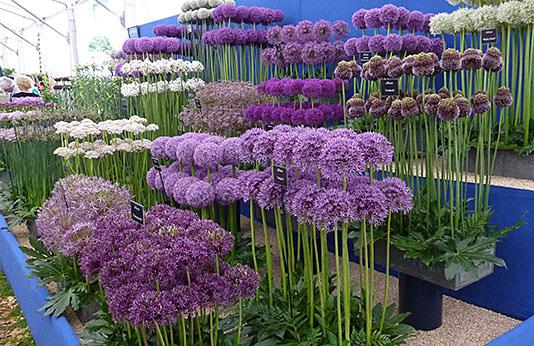
Gladiator – A giant variety. 3-4 feet tall, this showstopper blooms with 6 inch flowers in May-June. It prefers sun but will tolerate partial shade, and has a sweet scent. From ‘Eden Brothers‘. If you are looking to make a statement in your garden, this is it.

Globe Master – This one is the biggest giant we know of, with blooms topping out at a foot across! 36-40 inches high, it’s a gorgeous pick for any spring to early summer garden. Blooms are slightly more blue than Gladiator. From ‘American Meadows‘.

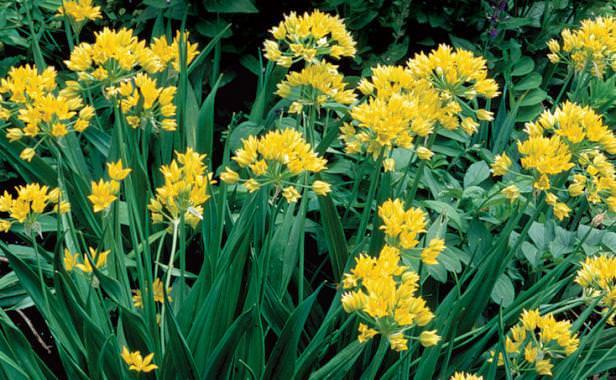
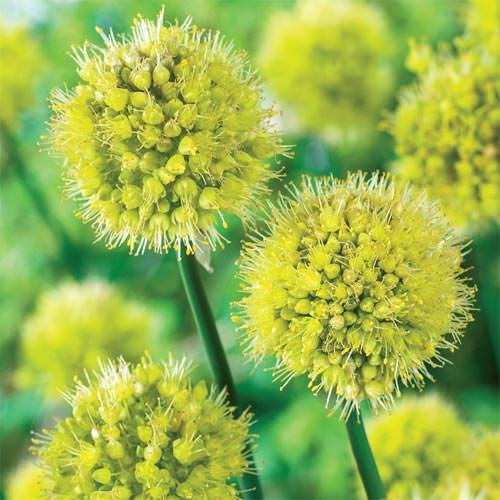
Allium obliquum – This unusual shade of yellow in a small flowered allium is a perfect selection for a naturalized planting. Growing to just 24 inches high, it’s fragrant and blooms late spring to early summer. From ‘Dutch Bulbs‘.
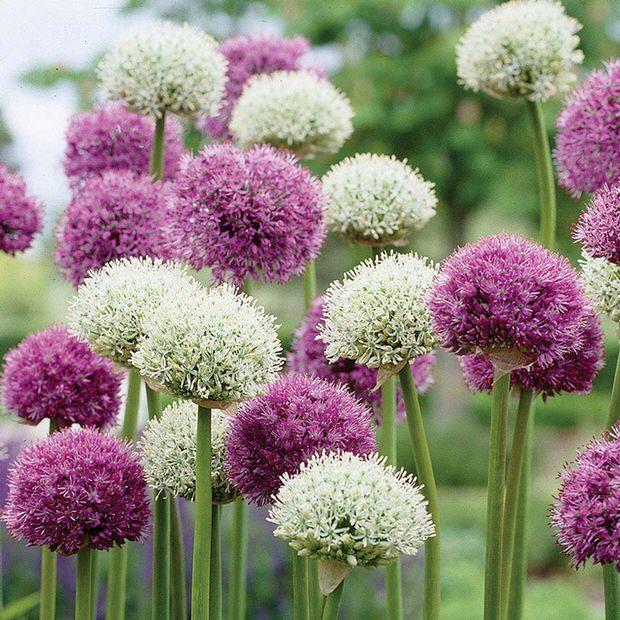
Mount Everest / Purple Sensation – Long the standard for garden alliums , “Purple Sensation” has 4-5 inch globes and grows to 24-30 inches high. It’s white partner here is “Mount Everest”, perfect in combination because they grow to similar sizes and have similar late spring – early summer bloom times. From ‘Longfield Gardens‘.
Twinkling Stars – This giant pink variety has 5-6 inch blooms and 3 1/2 – 4 foot stems, making it perfect for the back of the border. Blooms in May – June. From ‘Breck’s Bulbs‘.
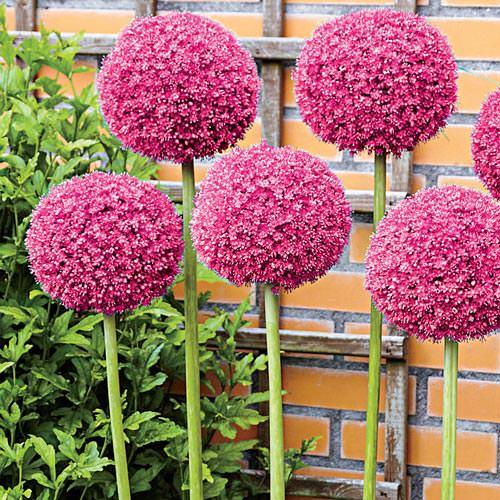
Pink Jewel – A later blooming allium, starting in June into July. This light pink selection grows to 24 inches high, and has 3 inch blooms. From ‘White Flower Farm‘.
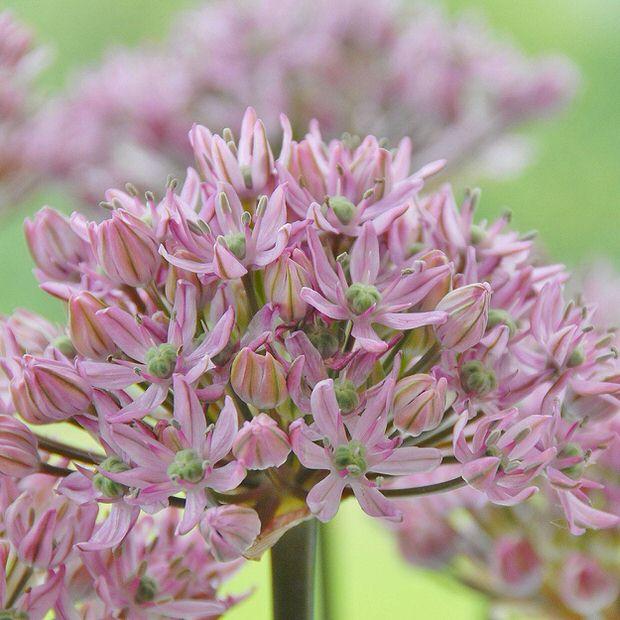
Drumstick Allium – Our last selection is the drumstick allium, an oval shaped reddish bloom that grows to 24 inches high. This allium can actually be grown down to zone 2! Blooms early spring to early summer. Another variety great for naturalizing. From ‘American Meadows‘. So which is your favorite?
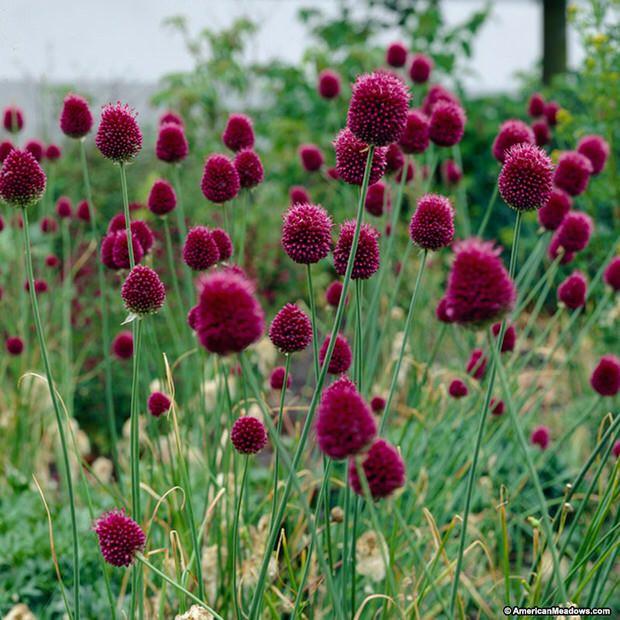

Photo below by ‘Fine Gardening‘. Allium “Jeannine”.

How To Grow Alliums
Buy allium bulbs from a good nursery or online resource. You want healthy bulbs with no cuts or soft spots. Research varieties to include several varieties of different bloom times to keep the show going!
Most varieties are hardy zones 3-9.
Like most bulbs, these look best planted in groups.
Plant the bulbs in the fall, before the ground freezes. Plant them to a depth of 3 times their diameter in a sunny or mostly sunny position. Generally, 6-8 inches.
Fertilize at planting and yearly in spring with bone meal or a bulb food.
Water well, then leave till they burst out in flower in spring and summer! After flowering, allium foliage will wither, brown, and go dormant.
Plant them under, behind, and around other perennial plants whose growing foliage will cover the allium foliage later in the summer when it browns.
Do not cut back the browning allium leaves until fall, that is how they store energy for flowers the next season. (This is why planting foliage plants around them is important.)
Photo below by ‘Gardener’s Supply‘.

Our Favorite Allium Varieties
Gladiator – A giant variety. 3-4 feet tall, this showstopper blooms with 6 inch flowers in May-June. It prefers sun but will tolerate partial shade, and has a sweet scent. From ‘Eden Brothers‘. If you are looking to make a statement in your garden, this is it.

Globe Master – This one is the biggest giant we know of, with blooms topping out at a foot across! 36-40 inches high, it’s a gorgeous pick for any spring to early summer garden. Blooms are slightly more blue than Gladiator. From ‘American Meadows‘.

Allium obliquum – This unusual shade of yellow in a small flowered allium is a perfect selection for a naturalized planting. Growing to just 24 inches high, it’s fragrant and blooms late spring to early summer. From ‘Dutch Bulbs‘.

Mount Everest / Purple Sensation – Long the standard for garden alliums , “Purple Sensation” has 4-5 inch globes and grows to 24-30 inches high. It’s white partner here is “Mount Everest”, perfect in combination because they grow to similar sizes and have similar late spring – early summer bloom times. From ‘Longfield Gardens‘.

Twinkling Stars – This giant pink variety has 5-6 inch blooms and 3 1/2 – 4 foot stems, making it perfect for the back of the border. Blooms in May – June. From ‘Breck’s Bulbs‘.

Pink Jewel – A later blooming allium, starting in June into July. This light pink selection grows to 24 inches high, and has 3 inch blooms. From ‘White Flower Farm‘.

Drumstick Allium – Our last selection is the drumstick allium, an oval shaped reddish bloom that grows to 24 inches high. This allium can actually be grown down to zone 2! Blooms early spring to early summer. Another variety great for naturalizing. From ‘American Meadows‘. So which is your favorite?

0
1
文章
Joss
2017年02月22日

I think I hear over and over, that #Peonies are one of the most favorited #flowers around. What’s not to love? Perfect colors, a romantic cupped shape, some are even fragrant! They are not that difficult to grow, but they do have some requirements that make them a little more high maintenance than, say, petunias. But they are worth it. Amazing in the garden, and as cut flowers, here’s how to grow Perfect Peonies! (and some of our fav’s to grow!)

There are both herbaceous peonies, and tree peonies. Herbaceous are the bush kind that are the most common, and easier to grow.
Peonies live for up to 50 years, so think of them as a long term investment in your garden.
They like full sun, thrive in zones 3-8, grow 3-4 feet and bloom in May and June, depending on the variety.
If you buy peony crowns in the fall, it’s a lot like choosing healthy bulbs. Choose a crown with at least three good bugs, then plant them facing up no more than 2 inches below the soil. Number one way to keep your peony from blooming? Plant it too deep.

Peonies like deep, fertile soil. Basically, that means before you plant your peony, dig deep, add lot’s of organic matter, and make really sure you’ve picked the right spot. They do NOT like to be transplanted. They make their home a forever home, so keep that in mind.
Peony do not have strong stems, so they tend to flop over, especially when in flower. The best way to deal with this is to create a “cage” of support just as the peony is peeking out of the ground in spring. That way, the plant grows into it’s support, gradually covers it, and never misses a beat!
At the end of the season after the plant has died back with the frost, cut back and discard the old foliage. Do not add it to your compost pile, to prevent disease.
That’s it! Love ’em and they might outlive their owners! And in the meantime, provide you with spring flowers that are beloved by both gardeners and non gardeners alike.

Here is a taste of Peony varieties that should be easily available and are good choices for any garden!
Sarah Bernhardt is one of the most planted peonies of all time, and is an old fashioned variety from the early 1900’s. It grows to 36 inches and blooms in June, and has a light fragrance.

Festiva Maxima is another old variety that is still extremely popular, and my fav white variety. Pure white and flecked with red, growing to 36 inches.

Raspberry Sundae is a two tone variety with a round cupped form.

Bartzella blooms mid season, and has a rare yellow peony flower.
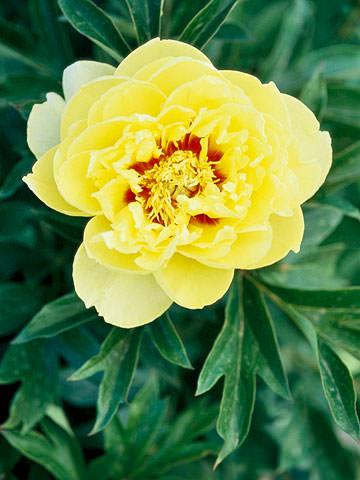
Gay Paree is another bi-color peony with strong seems and a mid season bloom.

Big Ben is a good choice for peony virgins, because of the natural vigor of the plant. Oh, and it’s fragrant!

America is our choice for a red blooming peony. It blooms early and has a nice, strong habit.

Finally, want to be more inspired?


There are both herbaceous peonies, and tree peonies. Herbaceous are the bush kind that are the most common, and easier to grow.
Peonies live for up to 50 years, so think of them as a long term investment in your garden.
They like full sun, thrive in zones 3-8, grow 3-4 feet and bloom in May and June, depending on the variety.
If you buy peony crowns in the fall, it’s a lot like choosing healthy bulbs. Choose a crown with at least three good bugs, then plant them facing up no more than 2 inches below the soil. Number one way to keep your peony from blooming? Plant it too deep.

Peonies like deep, fertile soil. Basically, that means before you plant your peony, dig deep, add lot’s of organic matter, and make really sure you’ve picked the right spot. They do NOT like to be transplanted. They make their home a forever home, so keep that in mind.
Peony do not have strong stems, so they tend to flop over, especially when in flower. The best way to deal with this is to create a “cage” of support just as the peony is peeking out of the ground in spring. That way, the plant grows into it’s support, gradually covers it, and never misses a beat!
At the end of the season after the plant has died back with the frost, cut back and discard the old foliage. Do not add it to your compost pile, to prevent disease.
That’s it! Love ’em and they might outlive their owners! And in the meantime, provide you with spring flowers that are beloved by both gardeners and non gardeners alike.

Here is a taste of Peony varieties that should be easily available and are good choices for any garden!
Sarah Bernhardt is one of the most planted peonies of all time, and is an old fashioned variety from the early 1900’s. It grows to 36 inches and blooms in June, and has a light fragrance.

Festiva Maxima is another old variety that is still extremely popular, and my fav white variety. Pure white and flecked with red, growing to 36 inches.

Raspberry Sundae is a two tone variety with a round cupped form.

Bartzella blooms mid season, and has a rare yellow peony flower.

Gay Paree is another bi-color peony with strong seems and a mid season bloom.

Big Ben is a good choice for peony virgins, because of the natural vigor of the plant. Oh, and it’s fragrant!

America is our choice for a red blooming peony. It blooms early and has a nice, strong habit.

Finally, want to be more inspired?

0
0
文章
Lisa
2017年02月20日

There are literally hundreds of types of #roses that you can grow in your garden. With such a selection to choose from, it can be extremely difficult to choose the rose that’s right for you. To make this task a bit easier, We’ve outlined a few important factors you should consider, and explained some of the different types of roses to aid in your search.

Tips on Choosing Roses
1. Color may seem trivial at first glance, but it’s usually an important factor to those that want to grow roses. Usually it is simply a matter of personal preference, but you may want to try creating a complimentary color palette for your rose garden.
2. The final growth height of a rose should be considered as it would be unattractive to grow roses that are higher than the area of the garden that it grows in. Some roses can grow to be as high as 20 feet.
3. If you live in an area that is prone to cold winters, you would certainly want a rose that could survive during the off season.
4. If certain fragrances invoke an allergic reaction, you’ll want to plant roses that have a softer fragrance than the others.
5. It’s smart gardening to learn what the advantages and disadvantages would be if you were to choose certain roses over others.
6. You will want to consider the size of your garden space, so that you can ensure proper exposure to the air and other elements as well.
7. If you are hoping to make your roses into bouquets, you will want to know if they can be cut. Hybrid teas can. Some roses will fall apart at the petals if they are cut.
8. You should also consider what other types of flowers or plants you intend on adding to the rose’s environment. You want to add plants and flowers that will not create a damaging environment to your rose’s ecosystem.

Some Common Types of Roses
After you get a sense of the type of roses that you would like to plant, you’ll naturally want to know which types of roses best fit with your planting ideas. There are too many varieties of roses to list here, but this list covers some of the most popular. You should consult your nearest garden center for advice on whether your choice is fitting to your garden’s abilities.
Landscape roses – Landscape roses are great for the novice gardener. They are disease resistant, and require a little bit less maintenance. Hybrid teas are not good for the novice.
Climbing Roses – These roses are different from the regular roses that are planted as they are trained to grow upward like vines. Most people like to use these for trellises, or buildings. Some of them are hybrid teas, wichuraine, and large flowered climbers. They are a beautiful addition to the look of one’s house.
Shrub Roses – Shrub roses like the beautiful rugosa are both long blooming, and disease resistant. These are also great for the novice planter. They are gorgeous even when they are not in bloom because the foliage is so pretty.

Old Garden Roses – These roses are not very good for those with severe allergies to strong fragrances because they have a strong fragrant odor. However, they are disease resistant and continue to bloom for months at a time.
The Modern Rose – These are very special roses because they are the result of cross breeding the hybrid tea with the polyanthus. They are also referred to as Floribunda. They are a beautiful combination of the best those two flowers have to offer. They are long blooming, fragrant, and they are great for cutting.
Miniature Roses – Miniature roses are exactly what they sound like. They have all of the fragrance and beauty of a regular rose, but they have smaller blooms. These particular roses are great for indoor planting.
While note all inclusive, this article should be a great help in getting you started on the way to having your very own, gorgeous rose garden.

Tips on Choosing Roses
1. Color may seem trivial at first glance, but it’s usually an important factor to those that want to grow roses. Usually it is simply a matter of personal preference, but you may want to try creating a complimentary color palette for your rose garden.
2. The final growth height of a rose should be considered as it would be unattractive to grow roses that are higher than the area of the garden that it grows in. Some roses can grow to be as high as 20 feet.
3. If you live in an area that is prone to cold winters, you would certainly want a rose that could survive during the off season.
4. If certain fragrances invoke an allergic reaction, you’ll want to plant roses that have a softer fragrance than the others.
5. It’s smart gardening to learn what the advantages and disadvantages would be if you were to choose certain roses over others.
6. You will want to consider the size of your garden space, so that you can ensure proper exposure to the air and other elements as well.
7. If you are hoping to make your roses into bouquets, you will want to know if they can be cut. Hybrid teas can. Some roses will fall apart at the petals if they are cut.
8. You should also consider what other types of flowers or plants you intend on adding to the rose’s environment. You want to add plants and flowers that will not create a damaging environment to your rose’s ecosystem.

Some Common Types of Roses
After you get a sense of the type of roses that you would like to plant, you’ll naturally want to know which types of roses best fit with your planting ideas. There are too many varieties of roses to list here, but this list covers some of the most popular. You should consult your nearest garden center for advice on whether your choice is fitting to your garden’s abilities.
Landscape roses – Landscape roses are great for the novice gardener. They are disease resistant, and require a little bit less maintenance. Hybrid teas are not good for the novice.
Climbing Roses – These roses are different from the regular roses that are planted as they are trained to grow upward like vines. Most people like to use these for trellises, or buildings. Some of them are hybrid teas, wichuraine, and large flowered climbers. They are a beautiful addition to the look of one’s house.
Shrub Roses – Shrub roses like the beautiful rugosa are both long blooming, and disease resistant. These are also great for the novice planter. They are gorgeous even when they are not in bloom because the foliage is so pretty.

Old Garden Roses – These roses are not very good for those with severe allergies to strong fragrances because they have a strong fragrant odor. However, they are disease resistant and continue to bloom for months at a time.
The Modern Rose – These are very special roses because they are the result of cross breeding the hybrid tea with the polyanthus. They are also referred to as Floribunda. They are a beautiful combination of the best those two flowers have to offer. They are long blooming, fragrant, and they are great for cutting.
Miniature Roses – Miniature roses are exactly what they sound like. They have all of the fragrance and beauty of a regular rose, but they have smaller blooms. These particular roses are great for indoor planting.
While note all inclusive, this article should be a great help in getting you started on the way to having your very own, gorgeous rose garden.
0
0
文章
Joss
2017年02月20日

Lavender blooms in many parts of the world , and there are few #flowers that are more cherished for romance, scent and form. What most gardeners don’t realize is that lavender is easy to grow and maintain, and can make a splash in your flower beds, add an old world touch to your flower gardens, or can have an entire garden design based around it, whether your style is modern, or old world. You can use the flowers for craft projects, aromatherapy, or even a relaxing tea! You don’t have to have a generous field of lavender in Provence to enjoy and appreciate all it can do for your garden. The featured photo above is from a recent trip to Vashon Island, WA. Simply gorgeous! Here are seven easy tips for growing lavender in any garden space!

1. Lavender needs one thing to grow well…good drainage. This is all fine and good if you have a naturally sandy or gravelly soil in your yard, but pretty problematic if your entire garden is pure clay! The solution? You can either grow your lavender in raised beds with good soil, or you can use containers. Regular planting mix is fine, just make sure there are plenty of drainage holes. If your lavender is yellowing, first thing to check is drainage.
2. Lavender is drought tolerant once established, but they do bloom better if they are watered as soon as the soil becomes dry one inch down.
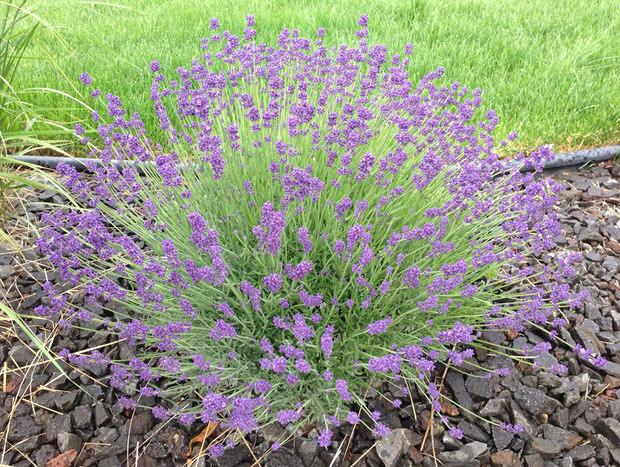
3. Lavender are short lived plants by nature. If they are happy in their spot, they will last a bit longer, but even under the best conditions, three years is not unusual for a plant to start dying out in the center. Here’s the up side of that. Lavender volunteers show up each year in droves, so there are always new plants ready to take over the ones that have passed their prime!
4. Lavender does not need much in the way of fertilizer, making them great low maintenance plants. Give them a dose of liquid fertilizer in the spring, then leave them alone, Too much fertilizer will produce plants that are large and spindly, with fewer flowers.

5. Early each spring, make sure you cut your lavender back, and don’t be a baby about it! Cut back most lavender to one third their height to rejuvenate the plant, and make sure your plant is flowering at it’s best.
6. Lavender blooms in early to mid summer, but may be convinced to re-bloom in later summer or fall. After the first flush of bloom has been harvested or died back, use scissors or shear to give the plant a light hair cut. Give it a dose of half strength liquid fertilizer, and leave it be. Chances are you will see more lavender later in the season!
7. To harvest lavender flowers, it’s best to cut them in bunches with long stems. Choosing to cut them in early morning maximizes the oils in the flowers, which gives them the best scent. You can use them fresh in vases with other cut flowers, or easily dry bunches by tying the ends together and hanging them upside down in a protected place. Dried lavender retains much of its scent and can be used in drawers, crafts or as decorative additions to wreaths or flower arrangements.
Note: Lavender is thought to help induce sleep and relaxation, either made into a tea, or tucked into pillow cases. You can even throw a sachet of lavender through the dryer with your sheets and towels for a natural scent to your laundry!
How to Make Lavender Dryer Sachets
Lavender is easy to grow, easy to find at most nurseries, and can be found in purples, blues, roses and whites. You can choose from hardy English lavender, larger French lavender that is the form you see in photos of the French countryside, or special Spanish lavender. Keep in mind that Spanish lavender, with its flower heads that remind me of butterflies, are great in containers, but are less hardy than its cousins.

Spanish Lavender
Grow lavender. Even if the only use you ever find for it is picking flowers and foliage as you pass by, and taking the time to smell that wonderful scent, fresh from your own garden.

1. Lavender needs one thing to grow well…good drainage. This is all fine and good if you have a naturally sandy or gravelly soil in your yard, but pretty problematic if your entire garden is pure clay! The solution? You can either grow your lavender in raised beds with good soil, or you can use containers. Regular planting mix is fine, just make sure there are plenty of drainage holes. If your lavender is yellowing, first thing to check is drainage.
2. Lavender is drought tolerant once established, but they do bloom better if they are watered as soon as the soil becomes dry one inch down.

3. Lavender are short lived plants by nature. If they are happy in their spot, they will last a bit longer, but even under the best conditions, three years is not unusual for a plant to start dying out in the center. Here’s the up side of that. Lavender volunteers show up each year in droves, so there are always new plants ready to take over the ones that have passed their prime!
4. Lavender does not need much in the way of fertilizer, making them great low maintenance plants. Give them a dose of liquid fertilizer in the spring, then leave them alone, Too much fertilizer will produce plants that are large and spindly, with fewer flowers.

5. Early each spring, make sure you cut your lavender back, and don’t be a baby about it! Cut back most lavender to one third their height to rejuvenate the plant, and make sure your plant is flowering at it’s best.
6. Lavender blooms in early to mid summer, but may be convinced to re-bloom in later summer or fall. After the first flush of bloom has been harvested or died back, use scissors or shear to give the plant a light hair cut. Give it a dose of half strength liquid fertilizer, and leave it be. Chances are you will see more lavender later in the season!
7. To harvest lavender flowers, it’s best to cut them in bunches with long stems. Choosing to cut them in early morning maximizes the oils in the flowers, which gives them the best scent. You can use them fresh in vases with other cut flowers, or easily dry bunches by tying the ends together and hanging them upside down in a protected place. Dried lavender retains much of its scent and can be used in drawers, crafts or as decorative additions to wreaths or flower arrangements.
Note: Lavender is thought to help induce sleep and relaxation, either made into a tea, or tucked into pillow cases. You can even throw a sachet of lavender through the dryer with your sheets and towels for a natural scent to your laundry!
How to Make Lavender Dryer Sachets
Lavender is easy to grow, easy to find at most nurseries, and can be found in purples, blues, roses and whites. You can choose from hardy English lavender, larger French lavender that is the form you see in photos of the French countryside, or special Spanish lavender. Keep in mind that Spanish lavender, with its flower heads that remind me of butterflies, are great in containers, but are less hardy than its cousins.

Spanish Lavender
Grow lavender. Even if the only use you ever find for it is picking flowers and foliage as you pass by, and taking the time to smell that wonderful scent, fresh from your own garden.
2
2
文章
Joss
2017年02月18日


If you are gardening on a budget, have we got the plant for you! How can a plant choice help you spend less and garden more? Well if you grow Butterfly Bush, (Buddleia) its easy… here’s why.
Butterfly Bush is one of the easiest shrubs to grow. It is low maintenance, requiring little in the way of fertilizer, and is resistant to pests and disease. So you spend less on upkeep. Say that about a rose bush! The gray green leaves are the perfect backdrop for any garden, and they have a fine texture and arching shape that many gardens lack.
It grows fast. And we mean FAST.
Butterfly Bush will fill a corner, create a hedge or become the background of a large planting bed in one season. It grows 5-10 feet high and as wide, so it can make fast impact on your yard for little cash. Don’t bother with the $40 ten gallon size from the nursery. Buy them in four inch pots for $3, wait one season and have full size bushes!
It attracts, of all things, butterflies!
And occasionally hummingbirds, and the finches love to hang out there too. Forget a butterfly feeder, plant this shrub.
It has beautiful flowers perfect for cutting, and lots of them all summer long.
Butterfly Bush produces panicles of pretty flowers that range from a few inches to over a foot long depending on variety. The most common colors are pink and purple, but there are also blue, white and a yellow variety. The yellow happens to be fragrant as well, although the flower panicles are smaller. These all make great cut flowers on long stems, and bloom from June to September.
Drought Resistant means it saves water (and money!) too!

Butterfly Bush Growing Basics
Butterfly Bush will grow in poor soil, although prefers a mid range loam. Do not fertilize much as that will produce too much green growth, and make it lanky with few flowers.
Give them room…ten feet across is not uncommon.
Water well the first year to develop a good root system, and they are moderately drought resistant after that.
Cut back to 12-18 inches from the ground in early spring. That may sound severe, but this will create a more dense uniform plant with larger flowers. Trust us, it will rebound to its large size by June. This is the secret to attractive shrubs that make your garden look like a prize winning spot!
Don’t be in a hurry in the spring to see new growth, as Butterfly Bush is a late sleeper. It will put out new leaves a little later than a lot of other shrubs, so be patient, it catches up fast.
They do well down to Zone 5, and can be semi evergreen in areas that do not freeze. They are deciduous in colder areas, but since you cut it back to the ground in early spring anyway, it doesn’t matter.
Be aware, some varieties can be invasive. If you have that problem in your area, look for “sterile” varieties that do not self seed.
Our Fav Varieties!
Tried and True, “Pink Delight” is still the industry standard, with uniform growth and large, deep pink flowers. Other pink varieties we love” “Miss Molly” and “Royal Red”.
If you love fragrance, try “Honeycomb”. Yellow flowers and a delicious scent.
A dwarf variety that is suitable for large containers is “Blue Chip” This is also a sterile variety.
“Purple Emperor” is a fantastic deep purple with long panicles of flowers, and for a sparkling white variety, try “White Ball” or “White Profusion”
There are dozens of varieties from local and online nurseries, even selections with variegated foliage!
If you garden on a budget, Butterfly Bush is a proven winner that will quickly establish an attractive, full garden for little money, and basic upkeep. Already have it growing in your garden? Whats your experience with it?
3
0
文章
Martha
2017年02月17日

Learn how to grow #peanuts in this article. Growing Peanuts in containers is fun as well as easy to do and somewhat similar to #potatoes .
Difficulty— Easy
Other Names— Arachis hypogaea (Scientific Name), Groundnut
Soil pH— 6 – 6.5
Peanut (Arachis hypogaea) is an annual plant belonging to the Fabaceae family, a legume. It is a hardy plant that requires minimal attention. Peanut, which is also called groundnut contains many trace elements like copper, zinc, manganese and vitamin B and is very nutritious.
How to Grow Peanuts in ContainersPropagation and Planting Peanuts in containers
Fill the seed tray or container with potting soil or potting mix. Sow seeds at the depth of 3 cm. Cover them up with a thin layer of soil. Also note that peanut seeds you obtain for sowing must remain in their shell and you should open them just before planting.
For proper germination and maximum yield, temperature must be above 70 F (21 ° C), 80 F is optimum. After a week or two, the seeds will germinate.
Let the seedlings grow a bit and replant them in individual pots.

If you’re growing peanuts in cooler zone you should remember that peanuts require at least 100 frost free days to mature. You’ll need to start the seeds indoors, earlier, at least 30 days before the final frost date in the spring.
Choosing Containers
Peanut develops its pod from 5 to 10 cm under the ground. So select pot at least 30 cm deep and 40 – 50 cm. wide (1 feet deep and 1 – 2 feet wide). Make sure the pots have sufficient drainage holes. You can grow 2 – 3 plants in such a pot.
Requirements for Growing Peanuts in ContainersPosition
Peanut is a tropical plant, it loves to grow in slightly humid and warm conditions. When growing peanuts in containers place them in the sunniest but less windy spot of your balcony or terrace. The plant does not survive below 32 F (0 ° C). It flowers and fruits at a temperature between 70 – 95 F (20 to 35 ° C).
Soil
For growing peanuts in containers fertile and light soil is required, which is neutral in pH and well-drained. Best to buy a good quality organic potting mix or make your own.
Watering
When growing peanuts in pots, keep the soil slightly moist. During early growth and flowering period, increase watering. However, the plant tolerates short dry periods.

Peanut Plant CareEarthing up
The base of the peanut plant should be covered with soil to increase production. Once the plant reaches 10 inches of height earthen up the soil around the base, as is the case of potatoes, so as to favor the development of the pods.
Fertilizer
Initially it will not need any type of fertilization, but when you see the first yellow flowers forming, it is then useful to help the plant with the organic fertilizer that is rich in phosphorus and potassium as peanuts are legumes and form their own nitrogen you don’t need to fertilize them with additional nitrogen fertilizer.
Pests and Diseases
The most common diseases in addition to molds and fungi are leaf spots. In pests it is attacked by aphids, potato leafhopper and spider mites.
Harvesting PeanutsWhen and How to Harvest Peanuts?
Difficulty— Easy
Other Names— Arachis hypogaea (Scientific Name), Groundnut
Soil pH— 6 – 6.5
Peanut (Arachis hypogaea) is an annual plant belonging to the Fabaceae family, a legume. It is a hardy plant that requires minimal attention. Peanut, which is also called groundnut contains many trace elements like copper, zinc, manganese and vitamin B and is very nutritious.
How to Grow Peanuts in ContainersPropagation and Planting Peanuts in containers
Fill the seed tray or container with potting soil or potting mix. Sow seeds at the depth of 3 cm. Cover them up with a thin layer of soil. Also note that peanut seeds you obtain for sowing must remain in their shell and you should open them just before planting.
For proper germination and maximum yield, temperature must be above 70 F (21 ° C), 80 F is optimum. After a week or two, the seeds will germinate.
Let the seedlings grow a bit and replant them in individual pots.

If you’re growing peanuts in cooler zone you should remember that peanuts require at least 100 frost free days to mature. You’ll need to start the seeds indoors, earlier, at least 30 days before the final frost date in the spring.
Choosing Containers
Peanut develops its pod from 5 to 10 cm under the ground. So select pot at least 30 cm deep and 40 – 50 cm. wide (1 feet deep and 1 – 2 feet wide). Make sure the pots have sufficient drainage holes. You can grow 2 – 3 plants in such a pot.
Requirements for Growing Peanuts in ContainersPosition
Peanut is a tropical plant, it loves to grow in slightly humid and warm conditions. When growing peanuts in containers place them in the sunniest but less windy spot of your balcony or terrace. The plant does not survive below 32 F (0 ° C). It flowers and fruits at a temperature between 70 – 95 F (20 to 35 ° C).
Soil
For growing peanuts in containers fertile and light soil is required, which is neutral in pH and well-drained. Best to buy a good quality organic potting mix or make your own.
Watering
When growing peanuts in pots, keep the soil slightly moist. During early growth and flowering period, increase watering. However, the plant tolerates short dry periods.

Peanut Plant CareEarthing up
The base of the peanut plant should be covered with soil to increase production. Once the plant reaches 10 inches of height earthen up the soil around the base, as is the case of potatoes, so as to favor the development of the pods.
Fertilizer
Initially it will not need any type of fertilization, but when you see the first yellow flowers forming, it is then useful to help the plant with the organic fertilizer that is rich in phosphorus and potassium as peanuts are legumes and form their own nitrogen you don’t need to fertilize them with additional nitrogen fertilizer.
Pests and Diseases
The most common diseases in addition to molds and fungi are leaf spots. In pests it is attacked by aphids, potato leafhopper and spider mites.
Harvesting PeanutsWhen and How to Harvest Peanuts?
0
1
文章
Micky
2017年02月16日

Learn how to grow bamboo from cuttings, growing bamboo from cuttings is possible if you grow it in warm temperature.
Bamboo is actually a grass, but its wood is strong enough to be used in flooring and furniture. In the garden bamboo is usually grown for its ornamental aspect or as a privacy tree as it grows quickly and mostly in clumps that can be so dense that you can not walk through them.

How to Grow Bamboo from Cuttings in WaterTo grow bamboo from cuttings in water, cut several 10 inches long cuttings from new growth that has at least two nodes and two internodes. Cut it in a slight 45 degree angle with a sharp knife.Dip the ends of cutting in melted wax. Place the cutting in water and leave it on a well lit location for several weeks.Change the water every other day as standing water will quickly run out of oxygen.Move the cutting in a pot as soon as it has 2 inches long roots. Fill the pot with potting mix or a mixture of 1 part loam to 1 part sand to improve drainage. Make a hole in soil and plant the cutting to 1 inch depth into the soil.For support tie it to a stick with string. This will stabilize the bamboo cutting until it establishes.Growing Bamboo from RhizomesTake bamboo rhizomes and cut them into portions leaving two or three growth buds on each with a gardening knife. Don’t use rhizomes with a dark and patched appearance as they will not grow well.Lay the bamboo rhizomes horizontally on pots with the buds facing up. Spread a 3 inch layer of soil over them and water thoroughly until the soil looks deeply moist.Place the container in a warm spot under light shade.

Keep the soil slightly moist consistently. Remember not to overwater the rhizome cuttings otherwise they will rot.Rhizomes will take four to six weeks to grow, you can plant them outside once nighttime temperature start to stay around 55 F.How to Grow Bamboo from Culm CuttingsCut a few cuttings from three or four years old bamboo plant in various sections with a hacksaw. Each section must contain at least one node and one internode. Remove the existing leaves in between.Fill a pot with potting mix or a mixture of equal parts of coarse sand and loam.Seal the first ridges of bamboo cuttings with wax to save them from rotting or drying. Melt the wax and simply dip it in about 1/8 inch.Pour 2 tablespoons of rooting hormone in a plastic bag and immerse the bamboo cuttings in it. Shake off the excess rooting hormone and make several holes in soil and plant cuttings in it.Cover the cuttings with clear plastic bag and set the pot in a warm area, out of direct sunlight. Water them to keep the soil moist.When you see new shoots, it means cuttings are forming roots. Continue to grow the bamboo plants in containers or plant outside when whether warms up.
Bamboo is actually a grass, but its wood is strong enough to be used in flooring and furniture. In the garden bamboo is usually grown for its ornamental aspect or as a privacy tree as it grows quickly and mostly in clumps that can be so dense that you can not walk through them.

How to Grow Bamboo from Cuttings in WaterTo grow bamboo from cuttings in water, cut several 10 inches long cuttings from new growth that has at least two nodes and two internodes. Cut it in a slight 45 degree angle with a sharp knife.Dip the ends of cutting in melted wax. Place the cutting in water and leave it on a well lit location for several weeks.Change the water every other day as standing water will quickly run out of oxygen.Move the cutting in a pot as soon as it has 2 inches long roots. Fill the pot with potting mix or a mixture of 1 part loam to 1 part sand to improve drainage. Make a hole in soil and plant the cutting to 1 inch depth into the soil.For support tie it to a stick with string. This will stabilize the bamboo cutting until it establishes.Growing Bamboo from RhizomesTake bamboo rhizomes and cut them into portions leaving two or three growth buds on each with a gardening knife. Don’t use rhizomes with a dark and patched appearance as they will not grow well.Lay the bamboo rhizomes horizontally on pots with the buds facing up. Spread a 3 inch layer of soil over them and water thoroughly until the soil looks deeply moist.Place the container in a warm spot under light shade.

Keep the soil slightly moist consistently. Remember not to overwater the rhizome cuttings otherwise they will rot.Rhizomes will take four to six weeks to grow, you can plant them outside once nighttime temperature start to stay around 55 F.How to Grow Bamboo from Culm CuttingsCut a few cuttings from three or four years old bamboo plant in various sections with a hacksaw. Each section must contain at least one node and one internode. Remove the existing leaves in between.Fill a pot with potting mix or a mixture of equal parts of coarse sand and loam.Seal the first ridges of bamboo cuttings with wax to save them from rotting or drying. Melt the wax and simply dip it in about 1/8 inch.Pour 2 tablespoons of rooting hormone in a plastic bag and immerse the bamboo cuttings in it. Shake off the excess rooting hormone and make several holes in soil and plant cuttings in it.Cover the cuttings with clear plastic bag and set the pot in a warm area, out of direct sunlight. Water them to keep the soil moist.When you see new shoots, it means cuttings are forming roots. Continue to grow the bamboo plants in containers or plant outside when whether warms up.
0
0
文章
Andy
2017年02月16日

Learn how to grow bay leaf laurel, it is a Mediterranean herb famous for its culinary uses. Growing bay leaf laurel requires a basic knowledge of its requirements and growing conditions.
Among the best known and most used herbs, one is bay. It has diverse uses, from simple ornamental plant in a garden to a culinary herb on a small balcony kitchen garden. Leaves of this small tree are aromatic and emit intense scent that complements most of the Mediterranean cuisines.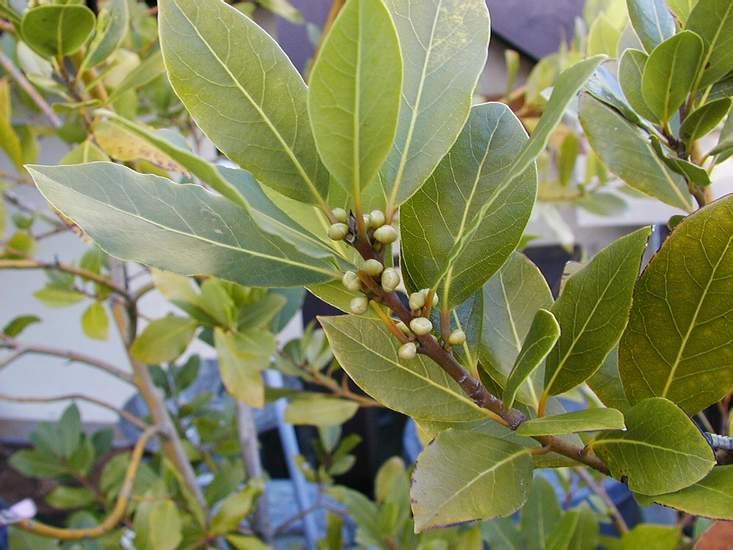
Among the best known and most used herbs, one is bay. It has diverse uses, from simple ornamental plant in a garden to a culinary herb on a small balcony kitchen garden. Leaves of this small tree are aromatic and emit intense scent that complements most of the Mediterranean cuisines.

0
0
文章
Andy
2017年02月15日

Starting an indoor herb garden? Find out 11 best herbs to grow indoors. These are easiest to grow and require less care.
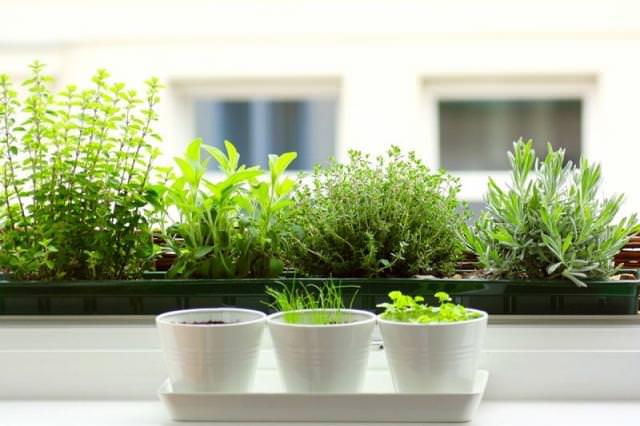
Best Herbs to Grow Indoors in Less Sun
1. Lemongrass
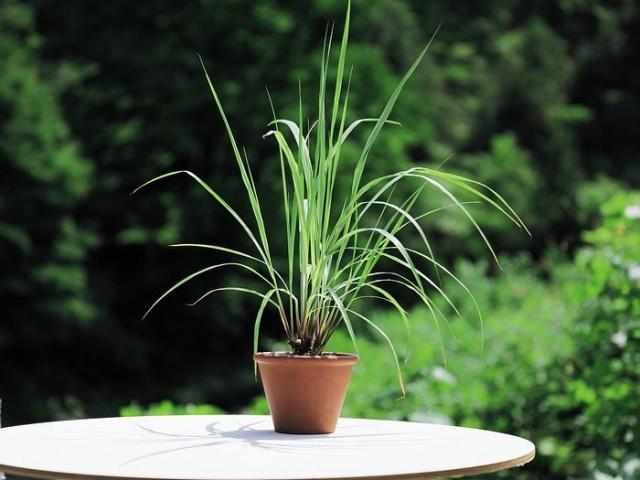
This herb grows wild in tropics and becomes easiest indoor herb, you can also grow it in temperate climates. It requires slightly moist soil and partial sun, and it can even adjust itself in a small container.
2. Mint
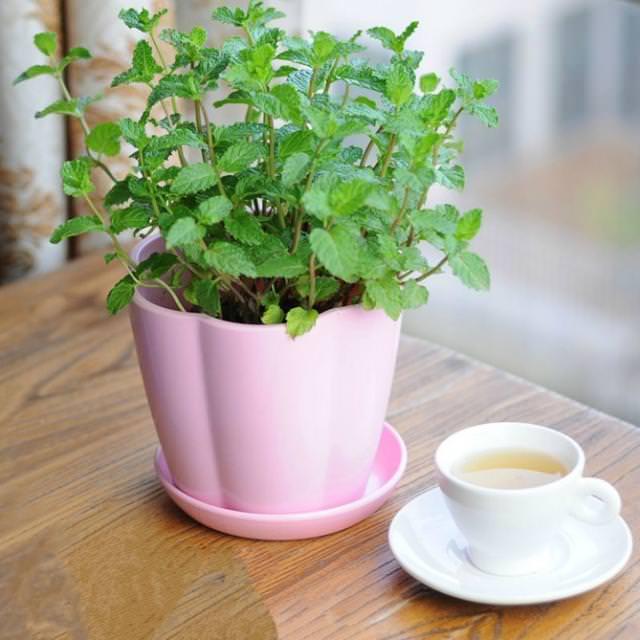
In the garden, mint becomes very invasive and grows like a weed. It doesn’t require plenty of sun too. You can even keep your potted mint plant in a spot that receives bright indirect sun.
3. Parsley

Germinate parsley from seeds, seedlings may sprout up late, sometimes in a month. But once grown, parsley requires minimal attention. Grow it in a medium-large pot and keep that in a spot that receives part sun. In a moderate room temperature, you can grow it year round. Just propagate new plants time to time from cuttings and it will last forever in your indoor herb garden.
4. Chives

Herbs that require less sunlight and moist soil in order to thrive are most suitable for growing indoors. Chives doesn’t require a sunny spot. Just place the pot near a bright window facing east. You can multiply chives from an already established plant by division.
5. Garden Cress
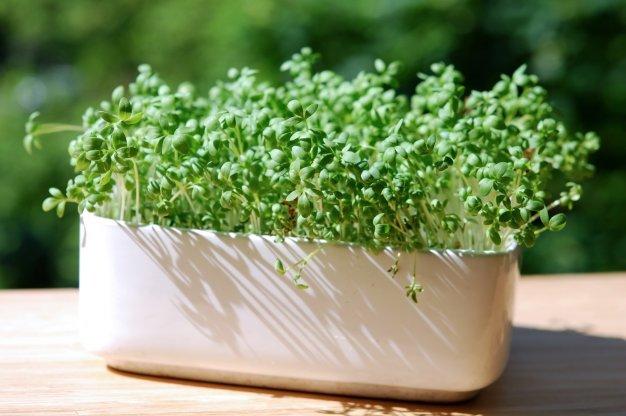
You can grow this cool season annual indoors easily. Plant seeds in a shallow but wide containers and keep the pot on a windowsill that receives partial sun. Soil should be moist, for regular harvest of cress micro greens, plant seeds in interval of every two weeks. You can cut and harvest the garden cress 3-4 times. If there is no sun, you can grow it under fluorescent lamps and T5 fluorescent plant lights.
6. Catnip
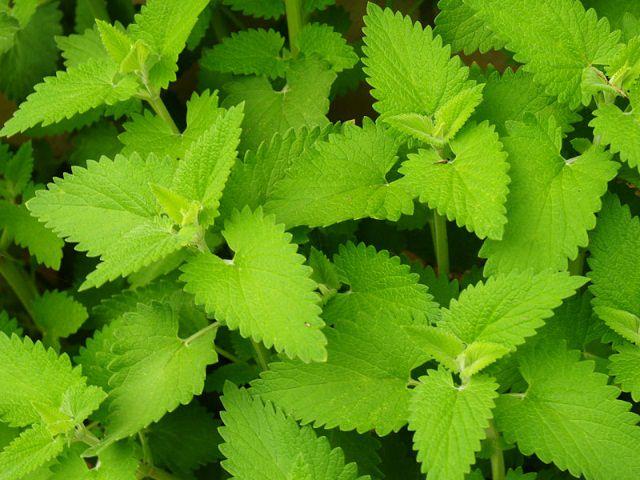
Growing catnip indoors is hard if you have cats. Apart from that, it is one of the easiest herbs. Once you germinate seeds, you can grow it forever from cuttings. Place the pot on a sunny windowsill and keep it well watered.
7. Lemon Balm

Lemon balm grows year round in warmer zones. Some gardeners even consider it a weed. Growing lemon balm indoors is super easy if you can provide it an exposure to 4 hours of sunlight daily. When growing indoors, water the plant only when top soil is dry.
8. Chervil
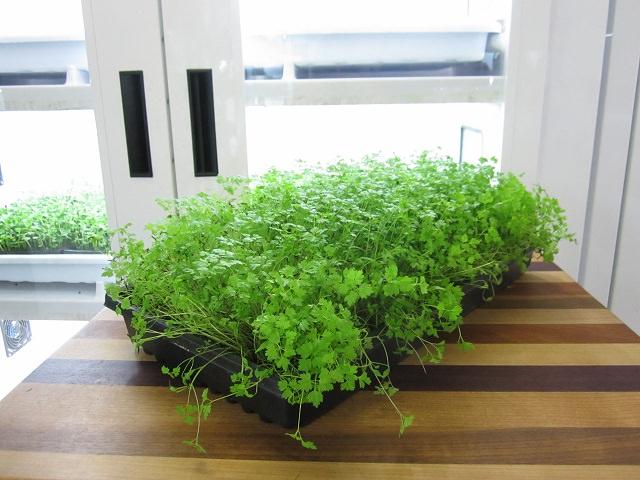
Chervil is one of the herbs you can grow indoors smoothly. A room temperature around 60-70 F is optimum for it. It can also adapt to low light conditions.
Best Herbs to Grow Indoors in More Sun9. Dill
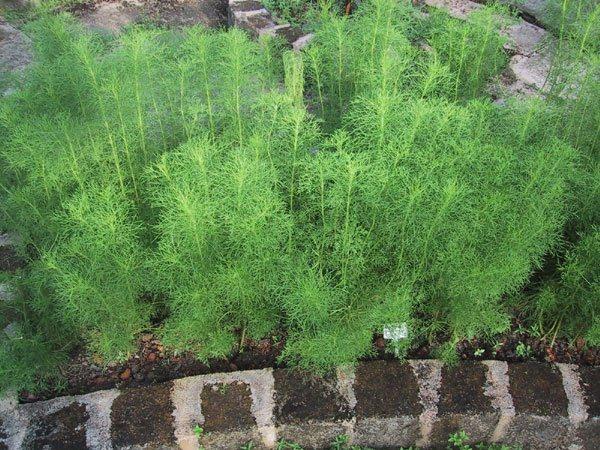
The secret of growing dill successfully in a container is to grow it in a deep one. A minimum 10 inches deep container is required. For growing dill indoors keep it in a spot that receives at least 5 hours of sunlight daily, provide good air circulation and water it only when top 1 inch surface of potting soil seems dry.
9. Cilantro

Image Credit: Gardening Know How
Cilantro is extremely easy to germinate but hard to maintain in containers. The trick is to grow cilantro in a deep container. It bolts quickly so it is better to plant seeds time to time. Keep cilantro in the south or west facing window.
10. Sage
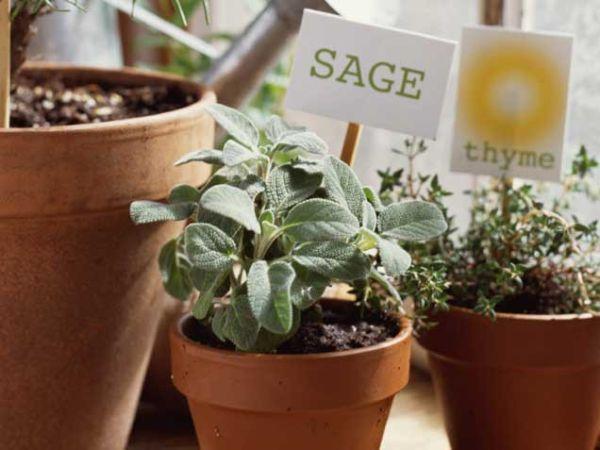
Grow sage indoors only if you have a South or West facing window that receives plenty of sun. This perennial herb takes a lot of time to get established when grown from seeds so it is better to take a tip cutting and propagate it.
11. Thyme
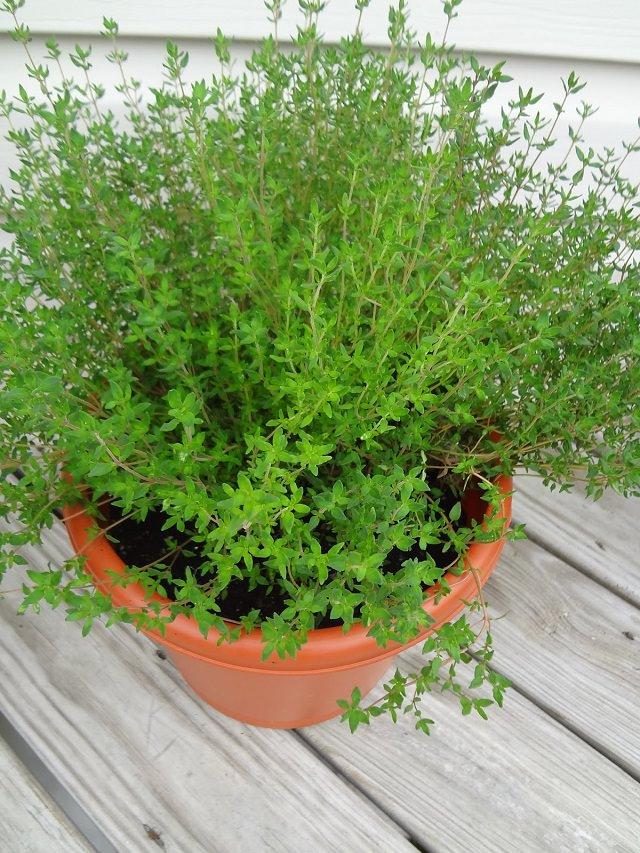
Thyme can adjust itself to partial sun and if you can provide 5 hours of sunlight daily, growing thyme indoors is possible.
A few more herbs you can grow indoors on a sunny windowsillOreganoRosemaryTarragonBasil

Best Herbs to Grow Indoors in Less Sun
1. Lemongrass

This herb grows wild in tropics and becomes easiest indoor herb, you can also grow it in temperate climates. It requires slightly moist soil and partial sun, and it can even adjust itself in a small container.
2. Mint

In the garden, mint becomes very invasive and grows like a weed. It doesn’t require plenty of sun too. You can even keep your potted mint plant in a spot that receives bright indirect sun.
3. Parsley

Germinate parsley from seeds, seedlings may sprout up late, sometimes in a month. But once grown, parsley requires minimal attention. Grow it in a medium-large pot and keep that in a spot that receives part sun. In a moderate room temperature, you can grow it year round. Just propagate new plants time to time from cuttings and it will last forever in your indoor herb garden.
4. Chives

Herbs that require less sunlight and moist soil in order to thrive are most suitable for growing indoors. Chives doesn’t require a sunny spot. Just place the pot near a bright window facing east. You can multiply chives from an already established plant by division.
5. Garden Cress

You can grow this cool season annual indoors easily. Plant seeds in a shallow but wide containers and keep the pot on a windowsill that receives partial sun. Soil should be moist, for regular harvest of cress micro greens, plant seeds in interval of every two weeks. You can cut and harvest the garden cress 3-4 times. If there is no sun, you can grow it under fluorescent lamps and T5 fluorescent plant lights.
6. Catnip

Growing catnip indoors is hard if you have cats. Apart from that, it is one of the easiest herbs. Once you germinate seeds, you can grow it forever from cuttings. Place the pot on a sunny windowsill and keep it well watered.
7. Lemon Balm

Lemon balm grows year round in warmer zones. Some gardeners even consider it a weed. Growing lemon balm indoors is super easy if you can provide it an exposure to 4 hours of sunlight daily. When growing indoors, water the plant only when top soil is dry.
8. Chervil

Chervil is one of the herbs you can grow indoors smoothly. A room temperature around 60-70 F is optimum for it. It can also adapt to low light conditions.
Best Herbs to Grow Indoors in More Sun9. Dill

The secret of growing dill successfully in a container is to grow it in a deep one. A minimum 10 inches deep container is required. For growing dill indoors keep it in a spot that receives at least 5 hours of sunlight daily, provide good air circulation and water it only when top 1 inch surface of potting soil seems dry.
9. Cilantro

Image Credit: Gardening Know How
Cilantro is extremely easy to germinate but hard to maintain in containers. The trick is to grow cilantro in a deep container. It bolts quickly so it is better to plant seeds time to time. Keep cilantro in the south or west facing window.
10. Sage

Grow sage indoors only if you have a South or West facing window that receives plenty of sun. This perennial herb takes a lot of time to get established when grown from seeds so it is better to take a tip cutting and propagate it.
11. Thyme

Thyme can adjust itself to partial sun and if you can provide 5 hours of sunlight daily, growing thyme indoors is possible.
A few more herbs you can grow indoors on a sunny windowsillOreganoRosemaryTarragonBasil
4
1
文章
Andy
2017年02月15日

If you’re new to gardening and planning to grow herbs then check out these 13 easy to grow herbs. All of them are low maintenance.
Also Read: How to Make Spiral Herb Garden
Easy to Grow Herbs for a Herb Garden
1. Parsley

Parsley is a biennial herbaceous plant, although it can also be grown as an annual. It is propagated from seeds easily, place it in a sunny or shady it doesn’t mind, parsley is not picky about soil type too. However, choose soil that is not too compact. It is one of the most easy to grow herbs for containers.
2. Mint

Mint is a very aromatic, perennial herb that can be grown in pots or in garden soil.
It needs plenty of water and supply of mineral fertilizers or natural organic fertilizers to spread heavily. It grows better in partial shade. You can easily get new plants from its cuttings or by dividing the root ball.
3. Rosemary

Use it fresh or dried, rosemary is a boon to have in a kitchen garden. Growing rosemary from seeds is slightly difficult as it takes time, quicker way is to buy a potted rosemary plant and multiply it from cuttings.
4. Lavender

You can grow lavender in a variety of climates. Suitable for cool temperate or Mediterranean climates you can also grow this most beautiful herb in subtropical regions.
If you want to multiply it, do it by cuttings of 10 cm. in size in summer.
Also Read: How to Grow Lavender in Tropics
5. Thyme

An easy to grow and less demanding herb, it adapts to all types of soils and is highly resistant to drought. You only need to provide it the sun. After four or five years this low growing plant loses some of its perfume and you may need to replace the old plants. *Grow it as annual in tropics.
6. Chamomile

It likes full sun, with well-drained and permeable soil. It is resistant to drought and once bloomed in the spring, you should cut it to regain its strength. If you collect the flowers, you must do this in its fullness, dry flowers in shade to avoid the exposure to direct sunlight to avoid spoilage.
7. Sage

One of the toughest herbs that prefer full sun situations, especially if you live in a cool climate, always plant sage in a warm place. Sage can be grown in a variety of soil types, well draining and permeable soil with little organic matter is recommended. In subtropical or tropical climatic zones, grow sage in a slightly clayey soil in pots and provide shade in the afternoon. *Overwatering must be avoided.
8. Oregano

This pungent herb is most favorite of many. It is known for centuries throughout the Mediterranean and West Asia, where it grows freely. Growing oregano is not difficult, grow it from seeds, cuttings or buy a few potted plants for your garden in the spring. To ensure the quality, remove 3-4 years old plant and grow new ones.
9. Lemon Verbena

Being a subtropical herb lemon verbena needs a warm environment to thrive. Grow the plant in direct sun. In cooler zones, growing lemon verbena in pots is a better idea to protect it from frost.
10. Rue

Basically, an ornamental medicinal herb but it is also used in recipes though sparingly. It is not much popular but growing this pungent herb is a great way to repel insects from your garden. It grows in USDA Zones 4-9 and requires the sun or partial shade and protection from the wind. It prefers poor and calcareous soils.
11. Basil

Basil must be planted in full sun (6 hours minimum) in a well-drained and moist soil. Pick leaves to encourage the growth and when the plant is young pick the tips for thick bushier shape.
12. Curry Tree

Grow the pungent curry tree plant if you want to enjoy more flavor in your South East Asian delicacies and Indian curries. However, the curry tree does not tolerate frost but it is exceptionally a low maintenance, drought resistant tropical herb. You can grow it in a pot and protect it in winters, it’s easy.
Also Read: How to Grow Curry Tree
13. Bay Leaf Tree

One more small to medium sized tree in our list that is easy to grow. Grow bay leaf tree to add flavor to your soups and stews. This plant may not be hardy to cooler zones below 8 and requires protection in winter. The best way to overwinter this Mediterranean herb is to keep it indoors.
Learn how to grow laurel bay leaf tree
Also Read: How to Make Spiral Herb Garden
Easy to Grow Herbs for a Herb Garden
1. Parsley

Parsley is a biennial herbaceous plant, although it can also be grown as an annual. It is propagated from seeds easily, place it in a sunny or shady it doesn’t mind, parsley is not picky about soil type too. However, choose soil that is not too compact. It is one of the most easy to grow herbs for containers.
2. Mint

Mint is a very aromatic, perennial herb that can be grown in pots or in garden soil.
It needs plenty of water and supply of mineral fertilizers or natural organic fertilizers to spread heavily. It grows better in partial shade. You can easily get new plants from its cuttings or by dividing the root ball.
3. Rosemary

Use it fresh or dried, rosemary is a boon to have in a kitchen garden. Growing rosemary from seeds is slightly difficult as it takes time, quicker way is to buy a potted rosemary plant and multiply it from cuttings.
4. Lavender

You can grow lavender in a variety of climates. Suitable for cool temperate or Mediterranean climates you can also grow this most beautiful herb in subtropical regions.
If you want to multiply it, do it by cuttings of 10 cm. in size in summer.
Also Read: How to Grow Lavender in Tropics
5. Thyme

An easy to grow and less demanding herb, it adapts to all types of soils and is highly resistant to drought. You only need to provide it the sun. After four or five years this low growing plant loses some of its perfume and you may need to replace the old plants. *Grow it as annual in tropics.
6. Chamomile

It likes full sun, with well-drained and permeable soil. It is resistant to drought and once bloomed in the spring, you should cut it to regain its strength. If you collect the flowers, you must do this in its fullness, dry flowers in shade to avoid the exposure to direct sunlight to avoid spoilage.
7. Sage

One of the toughest herbs that prefer full sun situations, especially if you live in a cool climate, always plant sage in a warm place. Sage can be grown in a variety of soil types, well draining and permeable soil with little organic matter is recommended. In subtropical or tropical climatic zones, grow sage in a slightly clayey soil in pots and provide shade in the afternoon. *Overwatering must be avoided.
8. Oregano

This pungent herb is most favorite of many. It is known for centuries throughout the Mediterranean and West Asia, where it grows freely. Growing oregano is not difficult, grow it from seeds, cuttings or buy a few potted plants for your garden in the spring. To ensure the quality, remove 3-4 years old plant and grow new ones.
9. Lemon Verbena

Being a subtropical herb lemon verbena needs a warm environment to thrive. Grow the plant in direct sun. In cooler zones, growing lemon verbena in pots is a better idea to protect it from frost.
10. Rue

Basically, an ornamental medicinal herb but it is also used in recipes though sparingly. It is not much popular but growing this pungent herb is a great way to repel insects from your garden. It grows in USDA Zones 4-9 and requires the sun or partial shade and protection from the wind. It prefers poor and calcareous soils.
11. Basil

Basil must be planted in full sun (6 hours minimum) in a well-drained and moist soil. Pick leaves to encourage the growth and when the plant is young pick the tips for thick bushier shape.
12. Curry Tree

Grow the pungent curry tree plant if you want to enjoy more flavor in your South East Asian delicacies and Indian curries. However, the curry tree does not tolerate frost but it is exceptionally a low maintenance, drought resistant tropical herb. You can grow it in a pot and protect it in winters, it’s easy.
Also Read: How to Grow Curry Tree
13. Bay Leaf Tree

One more small to medium sized tree in our list that is easy to grow. Grow bay leaf tree to add flavor to your soups and stews. This plant may not be hardy to cooler zones below 8 and requires protection in winter. The best way to overwinter this Mediterranean herb is to keep it indoors.
Learn how to grow laurel bay leaf tree
2
1
文章
Andy
2017年02月15日

Turmeric is a superfood and has many medicinal benefits. Growing turmeric in pots is not so difficult if you follow this how-to guide.

USDA Zones— 7b – 11, below these zones grow it from spring to fall
Difficulty— Easy to Moderate
Other Names— Curcuma, Curcuma aromatica, Curcuma domestica, Curcumae longa, Curcumae Longae Rhizoma, Curcumin, Curcumine, Curcuminoid, Curcuminoïde, Curcuminoïdes, Curcuminoids, Halada, Haldi, Haridra, Indian Saffron, Nisha, Pian Jiang Huang, Racine de Curcuma, Radix Curcumae, Rajani, Rhizoma Cucurmae Longae, Safran Bourbon, Safran de Batallita, Safran des Indes, Turmeric Root, Yu Jin.
Soil pH— Slightly acidic to slightly alkaline soil
Turmeric (Curcuma longa) is obtained from the underground tubers or rhizomes. Originated in India, it is now cultivated throughout the tropical Asia and in smaller extent in other subtropical and tropical parts of the world.
Turmeric plants look good too, you can grow them outdoors to get a tropical look in your garden.

Where to Find the Rhizome or Turmeric Plant
As you may already know, turmeric grows from the rhizomes like ginger. The easiest way to find them is to search for fresh turmeric rhizome in organic food stores. Also, try searching for it in the local garden center or seed store. Alternatively, you can find a turmeric plant or rhizome online.
Choosing a Pot
For growing turmeric in pots, choose a large pot as this amazing herb can easily exceed the height of 1 m. Pot should be at least 12 inches deep and 12-18 inches wide so that the plant can spread its tubers freely. Plant 1 or 2 rhizomes in such a pot.
Planting Turmeric
The best season to plant turmeric is spring or summer when the temperature starts to stay above 54 F (12 C), but if you are living in tropics, it can be planted throughout the year.
After you have got the rhizome follow the steps below for planting:
Break large rhizome into small pieces, each one should have at least two or three buds.Fill a pot with rich organic soil that is moist and well-drained.Place it about 2 inches (5 cm) below the soil surface, with the buds facing up.Water the pot thoroughly.Requirements for Growing Turmeric in Containers

Growing turmeric is similar to ginger, it requires warm and humid climate to thrive. If you live in a cool temperate climate or if you’re short of space and want to grow your own turmeric rhizomes then learn how to grow turmeric in pots.
Position
The position must be sheltered from the wind. In tropics, the plant is grown in dappled shade and does not like all day long intense direct sun, considering this keep the turmeric plant in partial sun in the warmer zones (USDA Zone 9 and above). However, in temperate climates, provide it full sun for optimum growth, some shade in the afternoon would be okay.
Soil
Plant turmeric in a light and loamy soil that is rich in organic matters. Use well-drained soil otherwise the plant will suffer.
Water
Watering requirements are similar to ginger. Keep the soil moist throughout the growing season from spring to fall and do not hesitate to mist the foliage in dry weather to increase the humidity level around the plant.
If growing turmeric in a warmer region, keep watering the plant to maintain moist soil in winters too.
Temperature
The ideal temperature range for growing turmeric is between 68-95 F (20-35 C). When the temperature drop below 50 F (10 C) the plant suffers.
Turmeric Plant Care
Overwintering
Since you are growing turmeric in a pot, move the plant inside even in low-light conditions. Because you have to only overwinter the roots. It is important that when you grow turmeric indoors maintain a constant ambient temperature of approximately 64 F (18 C).
Overwintering turmeric on ground
If you’re growing turmeric in true tropical climate then you don’t need to care about winter. But in warm temperate zones (below USDA Zones 9b and down to 7) to overwinter your turmeric plants, reduce watering around the end of fall and when the leaves begin to wilt and turn yellow due to temperature drop cut the plant back to the ground so that it can hibernate. It will perk up again in the spring.
If you want to grow turmeric in cooler areas (below zone 7) then you have to dig up the rhizomes to save them from freezing. For this, dig up the rhizomes and rinse off excess soil from them, snap off rotting pieces. Air dry them and store in a cool and dry place until spring.
Fertilizer
Fertilize turmeric every month with an all-purpose liquid fertilizer during the growing season. Application of manure or compost also helps.
Pruning
The turmeric plant should not be pruned. It is sufficient if you remove dried leaves time to time.
Pests and Diseases
Turmeric plant is not prone to any serious disease or pests. However, red spider mites and scales can become a problem. In diseases, it only suffers from rhizome rot and leaf spot. Rot appears when the plant is grown in waterlogged soil. Therefore, it is important to grow turmeric in well-drained soil.
Harvesting
Turmeric plant takes 8 to 10 months to mature. Harvesting is done once the leaves become yellow and stems start to dry. Harvesting turmeric is not difficult, simply dig up the plant entirely, including the roots.
Cut the required amount and then replant the remaining part again to get a new plant growing.
After you cut the rhizome, follow the steps below to process it:
Boil the rhizomes.Carefully remove the skin from rhizomes.Place the bare rhizomes in a tray.Dry them by exposing to sunlight.
When the rhizomes are dry, grind them and store your homemade organic fresh turmeric powder in an air tight container.
Turmeric Uses and Benefits
Turmeric powder has many medicinal properties that have long been known in the India and China. Turmeric is termed as ‘Super Food‘ probably the most powerful natural anti-inflammatory and antioxidant. It is used as an anti-depressant and plays a protective role against Alzheimer’s disease and against different types of cancers. Turmeric powder is the most prominent ingredient in almost all kind of curry recipes, a pinch of it is used to provide pretty orange color. Its leaves are also useful. Young shoots and flowers are used in Thai cuisines while the leaves are used to flavor the fish in Indonesia.
One thing you did not know and surprise you is the addition of pepper in a diet as it contains piperine helps in the absorption of turmeric. Especially the black pepper, it can tenfold the benefits of this superfood.

USDA Zones— 7b – 11, below these zones grow it from spring to fall
Difficulty— Easy to Moderate
Other Names— Curcuma, Curcuma aromatica, Curcuma domestica, Curcumae longa, Curcumae Longae Rhizoma, Curcumin, Curcumine, Curcuminoid, Curcuminoïde, Curcuminoïdes, Curcuminoids, Halada, Haldi, Haridra, Indian Saffron, Nisha, Pian Jiang Huang, Racine de Curcuma, Radix Curcumae, Rajani, Rhizoma Cucurmae Longae, Safran Bourbon, Safran de Batallita, Safran des Indes, Turmeric Root, Yu Jin.
Soil pH— Slightly acidic to slightly alkaline soil
Turmeric (Curcuma longa) is obtained from the underground tubers or rhizomes. Originated in India, it is now cultivated throughout the tropical Asia and in smaller extent in other subtropical and tropical parts of the world.
Turmeric plants look good too, you can grow them outdoors to get a tropical look in your garden.

Where to Find the Rhizome or Turmeric Plant
As you may already know, turmeric grows from the rhizomes like ginger. The easiest way to find them is to search for fresh turmeric rhizome in organic food stores. Also, try searching for it in the local garden center or seed store. Alternatively, you can find a turmeric plant or rhizome online.
Choosing a Pot
For growing turmeric in pots, choose a large pot as this amazing herb can easily exceed the height of 1 m. Pot should be at least 12 inches deep and 12-18 inches wide so that the plant can spread its tubers freely. Plant 1 or 2 rhizomes in such a pot.
Planting Turmeric
The best season to plant turmeric is spring or summer when the temperature starts to stay above 54 F (12 C), but if you are living in tropics, it can be planted throughout the year.
After you have got the rhizome follow the steps below for planting:
Break large rhizome into small pieces, each one should have at least two or three buds.Fill a pot with rich organic soil that is moist and well-drained.Place it about 2 inches (5 cm) below the soil surface, with the buds facing up.Water the pot thoroughly.Requirements for Growing Turmeric in Containers

Growing turmeric is similar to ginger, it requires warm and humid climate to thrive. If you live in a cool temperate climate or if you’re short of space and want to grow your own turmeric rhizomes then learn how to grow turmeric in pots.
Position
The position must be sheltered from the wind. In tropics, the plant is grown in dappled shade and does not like all day long intense direct sun, considering this keep the turmeric plant in partial sun in the warmer zones (USDA Zone 9 and above). However, in temperate climates, provide it full sun for optimum growth, some shade in the afternoon would be okay.
Soil
Plant turmeric in a light and loamy soil that is rich in organic matters. Use well-drained soil otherwise the plant will suffer.
Water
Watering requirements are similar to ginger. Keep the soil moist throughout the growing season from spring to fall and do not hesitate to mist the foliage in dry weather to increase the humidity level around the plant.
If growing turmeric in a warmer region, keep watering the plant to maintain moist soil in winters too.
Temperature
The ideal temperature range for growing turmeric is between 68-95 F (20-35 C). When the temperature drop below 50 F (10 C) the plant suffers.
Turmeric Plant Care

Overwintering
Since you are growing turmeric in a pot, move the plant inside even in low-light conditions. Because you have to only overwinter the roots. It is important that when you grow turmeric indoors maintain a constant ambient temperature of approximately 64 F (18 C).
Overwintering turmeric on ground
If you’re growing turmeric in true tropical climate then you don’t need to care about winter. But in warm temperate zones (below USDA Zones 9b and down to 7) to overwinter your turmeric plants, reduce watering around the end of fall and when the leaves begin to wilt and turn yellow due to temperature drop cut the plant back to the ground so that it can hibernate. It will perk up again in the spring.
If you want to grow turmeric in cooler areas (below zone 7) then you have to dig up the rhizomes to save them from freezing. For this, dig up the rhizomes and rinse off excess soil from them, snap off rotting pieces. Air dry them and store in a cool and dry place until spring.
Fertilizer
Fertilize turmeric every month with an all-purpose liquid fertilizer during the growing season. Application of manure or compost also helps.
Pruning
The turmeric plant should not be pruned. It is sufficient if you remove dried leaves time to time.
Pests and Diseases
Turmeric plant is not prone to any serious disease or pests. However, red spider mites and scales can become a problem. In diseases, it only suffers from rhizome rot and leaf spot. Rot appears when the plant is grown in waterlogged soil. Therefore, it is important to grow turmeric in well-drained soil.
Harvesting
Turmeric plant takes 8 to 10 months to mature. Harvesting is done once the leaves become yellow and stems start to dry. Harvesting turmeric is not difficult, simply dig up the plant entirely, including the roots.
Cut the required amount and then replant the remaining part again to get a new plant growing.
After you cut the rhizome, follow the steps below to process it:
Boil the rhizomes.Carefully remove the skin from rhizomes.Place the bare rhizomes in a tray.Dry them by exposing to sunlight.
When the rhizomes are dry, grind them and store your homemade organic fresh turmeric powder in an air tight container.
Turmeric Uses and Benefits
Turmeric powder has many medicinal properties that have long been known in the India and China. Turmeric is termed as ‘Super Food‘ probably the most powerful natural anti-inflammatory and antioxidant. It is used as an anti-depressant and plays a protective role against Alzheimer’s disease and against different types of cancers. Turmeric powder is the most prominent ingredient in almost all kind of curry recipes, a pinch of it is used to provide pretty orange color. Its leaves are also useful. Young shoots and flowers are used in Thai cuisines while the leaves are used to flavor the fish in Indonesia.
One thing you did not know and surprise you is the addition of pepper in a diet as it contains piperine helps in the absorption of turmeric. Especially the black pepper, it can tenfold the benefits of this superfood.
4
1
文章
Andy
2017年02月15日

Learn how to grow cilantro in a pot. Growing cilantro in containers is not difficult all you need is to follow a few tips and fulfill a few growing requirements.

Cilantro is a highly aromatic herb that is used to enhance the flavor of many South-East Asian and Mexican cuisines and as a dressing to improve the appearance of meal served. Most of the people tend to think that cilantro is one of the most difficult herbs to grow but that’s not true. However, it is little but easy to grow if you follow the way of growing cilantro.
Choosing A Pot
Mostly people choose too shallow pots for growing cilantro but that’s a mistake. Similar to dill, cilantro needs a pot that is deep and wide. For growing cilantro in a pot, choose one that is 18 inches wide and at least 10-12 inches deep, this would be a perfect size.
Best Cilantro Planting Time
Start cilantro once all the dangers of frost are passed. You can grow cilantro successively from spring to fall. In warm temperates and much hotter regions (USDA Zone 8 and above) you can grow cilantro in winters too. Cilantro can tolerate light frost easily. Below the zone 8, in much cooler regions, you can grow cilantro in cold frames and overwinter it.
In warm tropical climate (USDA Zone 10-11), cilantro grows best in fall and winter. However, it can be grown year round in such climate as in many tropical countries fresh cilantro leaves are available all year but you’ll need to cope with the bolting problem. You may need to harvest quickly and provide shade in spring and summer.
Growing Cilantro From Seeds
It is better if you sow the seeds directly in a pot in which you like to grow the plants later as cilantro has long taproot and it doesn’t transplant well, especially when the plant grows up slightly. Sow seeds 1/4 inches deep. Keep the soil moist until the seedlings germinate. If you have grown them in the seed tray, once the plants have formed 2-3 leaves, plant them to their final location in a pot.
If you’re planting grocery store seeds, gently crush the seed husk before sowing. As cilantro seeds are enclosed in a husk that you’ll need to crush to improve the germination rate.Requirements For Growing Cilantro In Pot

Location
It is a plant that grows best in the sun. But be careful, too much heat will make it go to seed quickly. In summer (or in warm climates) place it in a position that receives shade in the afternoon.
Watering
Cilantro likes evenly moist soil. When watering, make sure you never wet the foliage as cilantro is really susceptible to powdery mildew.
Soil
Neutral soil that is very rich in organic matter and crumbly in texture helps this plant to grow. Also, the addition of aged manure or compost provide a good steady supply of nitrogen and other trace elements, thus promotes the vegetative growth.
Spacing
You can grow cilantro plants thickly but for optimum growth space the plants 4 inches apart.
Cilantro Plant Care
Fertilizer
Feed the cilantro bimonthly with any half strength nitrogen-rich fertilizer to promote the foliage growth. You don’t need to fertilize your cilantro plants much if you side dress them with compost or manure. Also, the application of fish emulsion is recommended.
Deadheading
Inspect your cilantro plants every day to see if the flowers are appearing, deadhead them regularly to promote the production of leaves. However, you can leave them if you want your plants to seed.
Problem With Coriander/Cilantro:
The recurring problem with cilantro is bolting.
The plant eventually goes to seed but a lot earlier in hot weather. Flowers start to appear quickly, then giving way to seed and after seeding the plant dies.
The best solution for this problem is to sow seeds successively, plant seeds every other week to get a regular harvest. Also, once the plant starts to bolt pinch the top of it to slow down the process.
Pests And Diseases
In pests, look out for aphids. Mildew is the most common disease that kills this herb, more consistently occurs in humid warm weather.
To prevent powdery mildew, keep a good distance between the plants, provide good air circulation and avoid overhead watering, wetting the leaves also promote the growth of many other fungal infections.
Harvesting
You can start to harvest young cilantro leaves too early, about 3-4 weeks after sowing seeds. Leaves can be picked from the plant when they have reached 3-6 inches in length.
If you want to harvest the entire plant you should wait at least 45-70 days. Cutting the entire plant at soil level or 2 inches above the crown.

Cilantro is a highly aromatic herb that is used to enhance the flavor of many South-East Asian and Mexican cuisines and as a dressing to improve the appearance of meal served. Most of the people tend to think that cilantro is one of the most difficult herbs to grow but that’s not true. However, it is little but easy to grow if you follow the way of growing cilantro.
Choosing A Pot
Mostly people choose too shallow pots for growing cilantro but that’s a mistake. Similar to dill, cilantro needs a pot that is deep and wide. For growing cilantro in a pot, choose one that is 18 inches wide and at least 10-12 inches deep, this would be a perfect size.
Best Cilantro Planting Time
Start cilantro once all the dangers of frost are passed. You can grow cilantro successively from spring to fall. In warm temperates and much hotter regions (USDA Zone 8 and above) you can grow cilantro in winters too. Cilantro can tolerate light frost easily. Below the zone 8, in much cooler regions, you can grow cilantro in cold frames and overwinter it.
In warm tropical climate (USDA Zone 10-11), cilantro grows best in fall and winter. However, it can be grown year round in such climate as in many tropical countries fresh cilantro leaves are available all year but you’ll need to cope with the bolting problem. You may need to harvest quickly and provide shade in spring and summer.
Growing Cilantro From Seeds
It is better if you sow the seeds directly in a pot in which you like to grow the plants later as cilantro has long taproot and it doesn’t transplant well, especially when the plant grows up slightly. Sow seeds 1/4 inches deep. Keep the soil moist until the seedlings germinate. If you have grown them in the seed tray, once the plants have formed 2-3 leaves, plant them to their final location in a pot.
If you’re planting grocery store seeds, gently crush the seed husk before sowing. As cilantro seeds are enclosed in a husk that you’ll need to crush to improve the germination rate.Requirements For Growing Cilantro In Pot

Location
It is a plant that grows best in the sun. But be careful, too much heat will make it go to seed quickly. In summer (or in warm climates) place it in a position that receives shade in the afternoon.
Watering
Cilantro likes evenly moist soil. When watering, make sure you never wet the foliage as cilantro is really susceptible to powdery mildew.
Soil
Neutral soil that is very rich in organic matter and crumbly in texture helps this plant to grow. Also, the addition of aged manure or compost provide a good steady supply of nitrogen and other trace elements, thus promotes the vegetative growth.
Spacing
You can grow cilantro plants thickly but for optimum growth space the plants 4 inches apart.
Cilantro Plant Care

Fertilizer
Feed the cilantro bimonthly with any half strength nitrogen-rich fertilizer to promote the foliage growth. You don’t need to fertilize your cilantro plants much if you side dress them with compost or manure. Also, the application of fish emulsion is recommended.
Deadheading
Inspect your cilantro plants every day to see if the flowers are appearing, deadhead them regularly to promote the production of leaves. However, you can leave them if you want your plants to seed.
Problem With Coriander/Cilantro:
The recurring problem with cilantro is bolting.
The plant eventually goes to seed but a lot earlier in hot weather. Flowers start to appear quickly, then giving way to seed and after seeding the plant dies.
The best solution for this problem is to sow seeds successively, plant seeds every other week to get a regular harvest. Also, once the plant starts to bolt pinch the top of it to slow down the process.
Pests And Diseases
In pests, look out for aphids. Mildew is the most common disease that kills this herb, more consistently occurs in humid warm weather.
To prevent powdery mildew, keep a good distance between the plants, provide good air circulation and avoid overhead watering, wetting the leaves also promote the growth of many other fungal infections.
Harvesting
You can start to harvest young cilantro leaves too early, about 3-4 weeks after sowing seeds. Leaves can be picked from the plant when they have reached 3-6 inches in length.
If you want to harvest the entire plant you should wait at least 45-70 days. Cutting the entire plant at soil level or 2 inches above the crown.
2
1
文章
Andy
2017年02月15日

Want to grow an Indoor Herb Garden? Learn everything you need to know in these 7 INFOGRAPHICS that’ll teach you everything about growing herbs indoors.
Growing an indoor herb garden is the best way to grow your own herbs if you don’t have space outdoors.
1. Growing Herbs From Seeds

Starting herb seeds successfully either indoor or outdoor requires a number of things including ample light, quality growing medium, moisture, the right temperature, air circulation, and the MOST important thing– lots of patience. Save and use the infographic given above to learn how to start herb seeds.
2. Herb Planting Tips

Use this infographic to learn about a few basic herb planting tips.
3. How To Grow Your Own Indoor Herb Garden

Source: Chadwicks
If you live in an apartment the best way to always have fresh herbs is to make your very own indoor herb garden or if you have a balcony you can create a Balcony Herb Garden. Also, Chadwicks have put together this perfect infographic to help you successfully grow your own indoor herb garden.
4. Light Requirements Of Indoor Herbs

Source: The Growers Exchange
Check out this comprehensive infographic on light requirements of indoor herbs. This infographic will help you ensure that your indoor herbs are receiving proper amount of light so that you’ll get bountiful and flavourful harvest.
5. Easiest Herbs To Grow Indoors

Source: Desima
If you are just beginning with indoor herb gardening it is worth to grow easiest herbs first to ensure successful harvest. This great infographic will help you in choosing the easiest herbs to grow.
6. Guide To Flavoring With Herbs

Source: Cooksmarts
This infographic is about storing and using herbs in cooking. To help you get cooking with herbs and learn how to keep them fresh, take help of this infographic. It will tell you all about herbs and their flavors, when to use fresh herbs and dried herbs and how to properly store them so that they’ll last longer.
7. How To Create A Windowsill Herb Garden

Source: TheTruthAboutCancer
This inforgraphic is about the herbs you can grow on the windowsill, to learn more you can read our guide on Windowsill Herb Gardening.
Growing an indoor herb garden is the best way to grow your own herbs if you don’t have space outdoors.
1. Growing Herbs From Seeds

Starting herb seeds successfully either indoor or outdoor requires a number of things including ample light, quality growing medium, moisture, the right temperature, air circulation, and the MOST important thing– lots of patience. Save and use the infographic given above to learn how to start herb seeds.
2. Herb Planting Tips

Use this infographic to learn about a few basic herb planting tips.
3. How To Grow Your Own Indoor Herb Garden

Source: Chadwicks
If you live in an apartment the best way to always have fresh herbs is to make your very own indoor herb garden or if you have a balcony you can create a Balcony Herb Garden. Also, Chadwicks have put together this perfect infographic to help you successfully grow your own indoor herb garden.
4. Light Requirements Of Indoor Herbs

Source: The Growers Exchange
Check out this comprehensive infographic on light requirements of indoor herbs. This infographic will help you ensure that your indoor herbs are receiving proper amount of light so that you’ll get bountiful and flavourful harvest.
5. Easiest Herbs To Grow Indoors

Source: Desima
If you are just beginning with indoor herb gardening it is worth to grow easiest herbs first to ensure successful harvest. This great infographic will help you in choosing the easiest herbs to grow.
6. Guide To Flavoring With Herbs

Source: Cooksmarts
This infographic is about storing and using herbs in cooking. To help you get cooking with herbs and learn how to keep them fresh, take help of this infographic. It will tell you all about herbs and their flavors, when to use fresh herbs and dried herbs and how to properly store them so that they’ll last longer.
7. How To Create A Windowsill Herb Garden

Source: TheTruthAboutCancer
This inforgraphic is about the herbs you can grow on the windowsill, to learn more you can read our guide on Windowsill Herb Gardening.
2
1
文章
Andy
2017年01月01日

Temperature:
Temperature: Best kept at 68°F (20°C), although fluctuations from 60-70°F (15-21°C) are tolerated. The plant can be kept at 55-59°F (13-15°C) will grow slowly and allow rest. Plant death can occur at below 50°F (10°C).
Light:
During the late fall and all winter long these plants like full, direct sunlight. At any other time of the year, the plants should be grown in partial sun conditions. Too much light during non-flowering times will cause the plant to turn yellow and fail to produce buds in the coming year.
Watering:
Although a cactus, this is a tropical plant. The top inch of soil should be kept moist to the touch at all times. Never allow the soil to become water-logged, or permit water to stand in the pot tray.
Soil:
The Christmas Cactus likes being grown in pots. It demands an easily drained growth medium. Suggested is a mixture of 60% potting soil with a pH balanced formula and either 40% bark or 40% perlite.
Fertilizer:
They likewise require a high dose of magnesium in the soil for proper growth, which is achieved through a mixture of 1 teaspoon Epsom salts to 1 gallon of water. This must be delivered to the plant on a monthly basis from early spring through early fall, and should be given two weeks after a regular fertilizer treatment for best results.
Humidity:
Normal room humidity is suggested for this plant. Mist leaves frequently.
Re-Potting: This is best performed in the late spring season. Place the cactus with plenty of room in the container. Re-potting is required every three years to provide additional growth room, although they do prefer being partially pot-bound.
Temperature: Best kept at 68°F (20°C), although fluctuations from 60-70°F (15-21°C) are tolerated. The plant can be kept at 55-59°F (13-15°C) will grow slowly and allow rest. Plant death can occur at below 50°F (10°C).
Light:
During the late fall and all winter long these plants like full, direct sunlight. At any other time of the year, the plants should be grown in partial sun conditions. Too much light during non-flowering times will cause the plant to turn yellow and fail to produce buds in the coming year.

Watering:
Although a cactus, this is a tropical plant. The top inch of soil should be kept moist to the touch at all times. Never allow the soil to become water-logged, or permit water to stand in the pot tray.
Soil:
The Christmas Cactus likes being grown in pots. It demands an easily drained growth medium. Suggested is a mixture of 60% potting soil with a pH balanced formula and either 40% bark or 40% perlite.

Fertilizer:
They likewise require a high dose of magnesium in the soil for proper growth, which is achieved through a mixture of 1 teaspoon Epsom salts to 1 gallon of water. This must be delivered to the plant on a monthly basis from early spring through early fall, and should be given two weeks after a regular fertilizer treatment for best results.
Humidity:
Normal room humidity is suggested for this plant. Mist leaves frequently.
Re-Potting: This is best performed in the late spring season. Place the cactus with plenty of room in the container. Re-potting is required every three years to provide additional growth room, although they do prefer being partially pot-bound.

3
1
文章
stone
2016年12月28日
#lithops #living-stone #succulent Living Stones (Lithops) are unusual succulents that have evolved to resemble the pebbles and rocks that litter their native habitats through southern Africa. These very small plants hug the ground and grow extremely slowly. It can take years for a plant to eventually fill its pots with new leaves. Structurally, Lithops are comprised of two fused leaves above ground that connect to an underground stem with a long root.
The leaves are extremely thick and the degree of fusion depends on the species. Some species appear to be a single leaf, with hardly any evidence of the leaf fusion, while others are deeply lobed to the level of the soil. These plants are great collectibles, but require a careful hand with the water. Too much water and the leaves will burst or the plant will die from beneath. If you provide them with good conditions, they will flower in mid-to late summer with white and yellow daisy-like flowers that emerge from between the leaves.
Growing Conditions
Light: Lithops thrive in full sunlight, so provide as much light as possible. Weak light will cause elongated leaves and washed out patterns on the leaves.
Water: Lithops have a definite annual cycle that should be carefully followed. In the summer, as the plants are dormant, it is okay to lightly water them if the leaves shrivel. In general, plants should not be watered during their summer dormancy or during the winter.
Temperature: Warm in summer (household temperatures are fine) and colder in winter months (down to 55˚F/13˚C at night).
Soil: Use a cactus mix or very fast-draining potting soil mixed with sand.
Fertilizer: Fertilizer is not necessary.
Propagation
Most Lithops species can be propagated from seeds. Seedlings typically take two to three years to reach maturity and begin flowering.
Repotting
Lithops are very slow growing, small plants, which makes them ideal as houseplants (once you get the hang of their watering schedule). Older plants form attractive clumps of “pebbles” in their pots, which are highly prized. In general, plants should only be repotted if there are cultural problems (soggy soil) or the plant has outgrown its dish container, which will only happen every several years。
Grower’s Tips
Lithops develop a new set of leaves every year, with new leaves emerging in the fall and growing through the winter and into the summer. In late summer, the plant will go dormant and water should be severely restricted to prevent bursting leaves. The flowers appear near the end of summer or fall, first showing up as a small bud forcing its way between the leaves and growth will begin again. It’s safe to water during this period. Heading into the winter, the leaves will still be growing, but you should stop watering, even as the older leaves shrivel up and encase the new growth. In the spring, it’s safe to begin lightly watering again as the plant begins to grow again, heading toward their summer dormancy period and the emergence of new leaves in the fall.

The leaves are extremely thick and the degree of fusion depends on the species. Some species appear to be a single leaf, with hardly any evidence of the leaf fusion, while others are deeply lobed to the level of the soil. These plants are great collectibles, but require a careful hand with the water. Too much water and the leaves will burst or the plant will die from beneath. If you provide them with good conditions, they will flower in mid-to late summer with white and yellow daisy-like flowers that emerge from between the leaves.

Growing Conditions
Light: Lithops thrive in full sunlight, so provide as much light as possible. Weak light will cause elongated leaves and washed out patterns on the leaves.
Water: Lithops have a definite annual cycle that should be carefully followed. In the summer, as the plants are dormant, it is okay to lightly water them if the leaves shrivel. In general, plants should not be watered during their summer dormancy or during the winter.
Temperature: Warm in summer (household temperatures are fine) and colder in winter months (down to 55˚F/13˚C at night).
Soil: Use a cactus mix or very fast-draining potting soil mixed with sand.
Fertilizer: Fertilizer is not necessary.

Propagation
Most Lithops species can be propagated from seeds. Seedlings typically take two to three years to reach maturity and begin flowering.
Repotting
Lithops are very slow growing, small plants, which makes them ideal as houseplants (once you get the hang of their watering schedule). Older plants form attractive clumps of “pebbles” in their pots, which are highly prized. In general, plants should only be repotted if there are cultural problems (soggy soil) or the plant has outgrown its dish container, which will only happen every several years。

Grower’s Tips
Lithops develop a new set of leaves every year, with new leaves emerging in the fall and growing through the winter and into the summer. In late summer, the plant will go dormant and water should be severely restricted to prevent bursting leaves. The flowers appear near the end of summer or fall, first showing up as a small bud forcing its way between the leaves and growth will begin again. It’s safe to water during this period. Heading into the winter, the leaves will still be growing, but you should stop watering, even as the older leaves shrivel up and encase the new growth. In the spring, it’s safe to begin lightly watering again as the plant begins to grow again, heading toward their summer dormancy period and the emergence of new leaves in the fall.
4
3
rebeccamee:Not so familiar with this plant but they look cute, will give it a thought to grow them if I have more room to keep all my succulents


