文章
Miss Chen
2017年11月17日

Tomatoes are thriving, vining plants when it's warm and sunny outside. In the spring, when it's still a bit cool, they require some protection. Spring is, however, the best time for planting tomatoes, as it gives the plants a long growing season for their fruit harvest.

Planting
University of Missouri Extension suggests setting tomatoes out in the home garden as early as possible in the spring, to give the plants time to grow and fruit before fall comes. The Extension suggests planting as soon as the last frost is gone, when soil warms enough for easy working.
Day
The Tomato Gardening Guru website advises that cool, cloudy days are best for transplanting tomatoes into the home garden. Gardeners should plant in the morning, to keep tomatoes from drying or suffering during the process.

Preparation
Any planting should start with adequate preparation, to keep the transplant process quick and easy. Tomatoes require a site that gets full sun all day and quick drainage. Gardeners should mix a combination of half quick-draining soil and half organic compost, with an addition of starter fertilizer, into the soil a day or two before the transplant.

Planting
University of Missouri Extension suggests setting tomatoes out in the home garden as early as possible in the spring, to give the plants time to grow and fruit before fall comes. The Extension suggests planting as soon as the last frost is gone, when soil warms enough for easy working.
Day
The Tomato Gardening Guru website advises that cool, cloudy days are best for transplanting tomatoes into the home garden. Gardeners should plant in the morning, to keep tomatoes from drying or suffering during the process.

Preparation
Any planting should start with adequate preparation, to keep the transplant process quick and easy. Tomatoes require a site that gets full sun all day and quick drainage. Gardeners should mix a combination of half quick-draining soil and half organic compost, with an addition of starter fertilizer, into the soil a day or two before the transplant.
1
0
文章
Miss Chen
2017年11月16日

Rats are a common pest outside homes and in gardens. They eat almost any food, including tomato fruit right off the plants. You can recognize the damage from rats by their tracks and droppings around the plants. To eliminate a rat infestation in your tomato garden, set up traps and lay down repellents that will keep the rats away.

Step 1
Remove any other food sources that may be tempting the rats to your tomatoes. This may include dog food bowls or a compost pile nearby.
Step 2
Pour three to five moth balls into a small cloth bag. Drive a stake into the ground next to your tomato plants and tie the bag to the top of the stake by the string closures. Moth balls are a natural rat repellent, but they dissolve in the rain so you will have to replace the balls after each rainfall. Be sure moth ball soaked rainwater cannot drain onto the tomatoes.

Step 3
Purchase fox urine pellets from a local hunting store and spread them on the ground around the tomatoes and around the perimeter of the garden, according to the instructions on the package. Replace the pellets after each heavy rainfall.
Step 4
Set out rat traps throughout the tomato garden and along the edges of the garden. For bait, smear peanut butter on the trigger. Check the traps daily. If a rat does trigger the trap, wear protective gloves and dispose of the body in a trash bag.

Step 1
Remove any other food sources that may be tempting the rats to your tomatoes. This may include dog food bowls or a compost pile nearby.
Step 2
Pour three to five moth balls into a small cloth bag. Drive a stake into the ground next to your tomato plants and tie the bag to the top of the stake by the string closures. Moth balls are a natural rat repellent, but they dissolve in the rain so you will have to replace the balls after each rainfall. Be sure moth ball soaked rainwater cannot drain onto the tomatoes.

Step 3
Purchase fox urine pellets from a local hunting store and spread them on the ground around the tomatoes and around the perimeter of the garden, according to the instructions on the package. Replace the pellets after each heavy rainfall.
Step 4
Set out rat traps throughout the tomato garden and along the edges of the garden. For bait, smear peanut butter on the trigger. Check the traps daily. If a rat does trigger the trap, wear protective gloves and dispose of the body in a trash bag.
0
0
成长记
Ueca
2017年11月09日

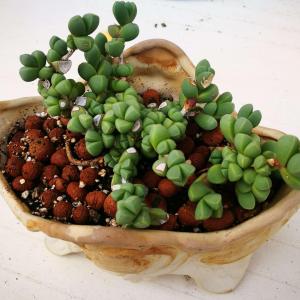
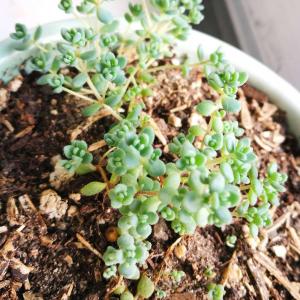
These are growing like crazy, but it's getting too cold to put them outside every day.

1
0
成长记
Lucky Coyote
2017年11月02日

They quite literally exploded overnight after they were accidentally left outside last night


1
0
求助
CMO111101
2017年11月02日

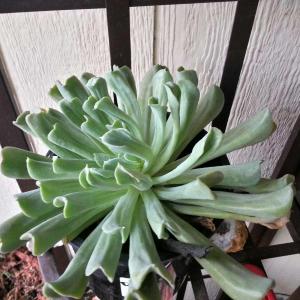
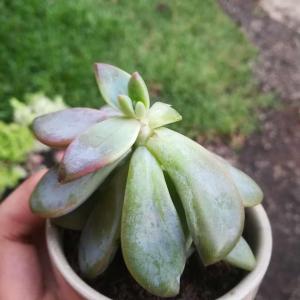
Hi! I have my new plant. I just found this outside, abandoned. It's a little weak and some leaves are missing. I have many questions.
a. What succulent is this?
b. Leaves are a little weak and might fall off. Will these leaves stick back if I take care of the plant?
c. A leaf has been cut off. Will it grow back?
I want this plant to have the perfect shape again. Please help me out. Thank you!
a. What succulent is this?
b. Leaves are a little weak and might fall off. Will these leaves stick back if I take care of the plant?
c. A leaf has been cut off. Will it grow back?
I want this plant to have the perfect shape again. Please help me out. Thank you!

1
0
Edgar Enrique Solis de la Rosa:these plants love the sun, the substrate must be very drained and water once a week
meriunkat:Also when they received to much sunlight without training it to withstand the leaves will slouch
meriunkat:Usually if leaves are dry the plant is not getting enough water, if the leaves are mushy it is being overwatered which as a result could rot and die
meriunkat:However first decide whether the leaves are dry or mushy above all, this will help you decide weather it needs more water or less
meriunkat:New leaves grow from the top of the stem, a fallen leaf can be used to propagate, sometimes new leaves will grow from the bottom part of stem as a new plant
显示更多
Dunia Carrillo
2017年10月16日

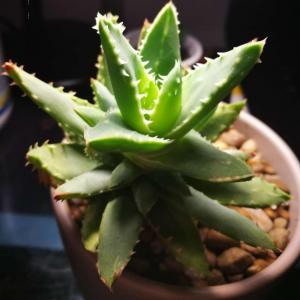
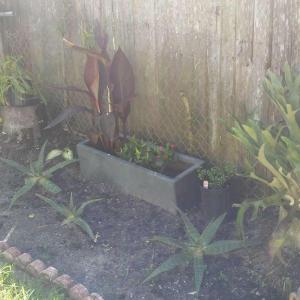
So bright outside. A little piece of my evolving garden 🌞

1
0
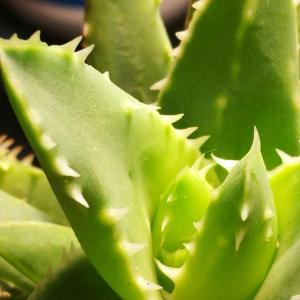
Dunia Carrillo:My aloe are getting so big 😀
文章
Dummer. ゛☀
2017年09月28日

Narcissus are the classic spring-flowering bulb. For many people, appearance of these delicate flowers outside signals the end of winter and the beginning of spring. Indoor gardeners can enjoy Narcissus too. They are generally less than a foot (30 cm) in height and bought already in bloom in decorative pots. Like other spring-flowering bulbs, Narcissus can be forced to bloom, but will require a chilling period of about 12 weeks.
Growing Conditions
Light: For established plants, place them in bright light as on a east or south windowsill. Bulbs that have not sprouted should be kept away from direct sunlight until new growth emerges and the plants are established.
Water: Many people start Narcissus from bulbs. If you’re doing this, plant the bulbs in moist potting media with the pointed end facing up. Keep the soil continuously moist, but not soaking. They can also be grown directly in stones or gravel by suspending or anchoring the bulbs in the substrate and adding just enough water to reach the base of the bulb. In all cases, it’s crucial to avoid letting the body of the bulb become saturated or sit in water–it will quickly rot. New growth should emerge within a few days to a few weeks after planting, depending on the temperature. The bloom should follow in 4-6 weeks.
Temperature: Cooler (around 65ºF/18ºC).
Soil: Bulbs can be planted in regular potting soil or in pebbles or clay. The key is to keep the balance of moisture right: they should have constant moisture, but never be soaked.
Fertilizer: During growing period, use weak liquid fertilizer weekly. Young plants shouldn’t require fertilizer as they will draw all their nutrition from the bulb itself.
Propagation
Like other bulbs, Narcissus multiply by putting out new bulbs and forming a clump. However, as with other indoor bulbs, most people discard the plant after bloom or transplant it outside. Offsets aren’t as vigorous as their parents and old bulbs will never bloom again indoors.
Repotting
Usually not necessary, as the most common indoor Narcissus (Paperwhite) are sold in decorative pots or as planting kits that are designed to be discarded after the 3-week bloom is over. If you do want to save the bulbs, treat like other bulbs: after the bloom is over and the plant has died back, dig up the bulb, dry and clean it, and store in a paper bag or container in a cool, dark place until the next spring.
Grower’s Tips
The Paperwhite Narcissus are frequently sold as blooming kits. These are a great way to get started with bulbs. They don’t require a chilling period and bloom readily with a pot of tall, fragrant flowers. The plants may need staking to remain upright as indoor plants frequently become top heavy in small containers and want to tip over. You can prop them up with bamboo stakes.

Growing Conditions
Light: For established plants, place them in bright light as on a east or south windowsill. Bulbs that have not sprouted should be kept away from direct sunlight until new growth emerges and the plants are established.
Water: Many people start Narcissus from bulbs. If you’re doing this, plant the bulbs in moist potting media with the pointed end facing up. Keep the soil continuously moist, but not soaking. They can also be grown directly in stones or gravel by suspending or anchoring the bulbs in the substrate and adding just enough water to reach the base of the bulb. In all cases, it’s crucial to avoid letting the body of the bulb become saturated or sit in water–it will quickly rot. New growth should emerge within a few days to a few weeks after planting, depending on the temperature. The bloom should follow in 4-6 weeks.

Temperature: Cooler (around 65ºF/18ºC).
Soil: Bulbs can be planted in regular potting soil or in pebbles or clay. The key is to keep the balance of moisture right: they should have constant moisture, but never be soaked.
Fertilizer: During growing period, use weak liquid fertilizer weekly. Young plants shouldn’t require fertilizer as they will draw all their nutrition from the bulb itself.

Propagation
Like other bulbs, Narcissus multiply by putting out new bulbs and forming a clump. However, as with other indoor bulbs, most people discard the plant after bloom or transplant it outside. Offsets aren’t as vigorous as their parents and old bulbs will never bloom again indoors.
Repotting
Usually not necessary, as the most common indoor Narcissus (Paperwhite) are sold in decorative pots or as planting kits that are designed to be discarded after the 3-week bloom is over. If you do want to save the bulbs, treat like other bulbs: after the bloom is over and the plant has died back, dig up the bulb, dry and clean it, and store in a paper bag or container in a cool, dark place until the next spring.

Grower’s Tips
The Paperwhite Narcissus are frequently sold as blooming kits. These are a great way to get started with bulbs. They don’t require a chilling period and bloom readily with a pot of tall, fragrant flowers. The plants may need staking to remain upright as indoor plants frequently become top heavy in small containers and want to tip over. You can prop them up with bamboo stakes.
0
0
文章
Dummer. ゛☀
2017年08月30日

Ovoid to nearly heart shaped, covered in knobby gray/blue/green hues that look almost like scales on the outside and inside, sections of glistening, creamy-white flesh with a shockingly pleasant aroma. What are we talking about? Sugar apples. What exactly is sugar apple fruit and can you grow sugar apples in the garden? Read on to find out about growing sugar apple trees, sugar apple uses and other information.
What is Sugar Apple Fruit?
Sugar apples (Annona squamosa) are the fruit of one of the most commonly grown Annona trees. Depending upon where you find them, they go by a plethora of names, amongst them include sweetsop, custard apple and the apropos scaly custard apple.
The sugar apple tree varies in height from 10-20 feet with an open habit of irregular, zigzagging twigs. Foliage is alternate, dull green on top and pale green on the underside. Crushed leaves have an aromatic scent, as do the fragrant flowers which may be single or in clusters of 2-4. They are yellow-green with a pale yellow interior borne off of long drooping stalks. Fruit of sugar apple trees is as about 2 ½ to 4 inches long. Each fruit segment typically contains a ½-inch long black to dark brown seed, of which there may be up to 40 per sugar apple. Most sugar apples have green skins, but a dark red variety is attaining some popularity. Fruit ripens 3-4 months after flowering in the spring.
Sugar Apple Information
No one is exactly sure where sugar apples hail from, but they are commonly cultivated in tropical South America, southern Mexico, the West Indies, Bahamas and Bermuda. Cultivation is most extensive in India and is wildly popular in the interior of Brazil. It can be found growing wild in Jamaica, Puerto Rico, Barbados and in the drier regions of North Queensland, Australia. It’s likely that Spanish explorers brought seeds from the New World to the Philippines, while the Portuguese are thought to have brought the seeds to southern India prior to 1590. In Florida, a “seedless” variety, ‘Seedless Cuban,’ was introduced for cultivation in 1955. It does have vestigial seeds and has a less developed flavor than other cultivars, grown primarily as a novelty.
Sugar Apple Uses
The fruit of the sugar apple tree is eaten out of hand, separating the fleshy segments from the outer peel and spitting the seeds out. In some countries, the pulp is pressed to eliminate the seeds and then added to ice cream or combined with milk for a refreshing beverage. Sugar apples are never used cooked. The seeds of the sugar apple are poisonous, as are the leaves and bark. In fact, powdered seeds or dried fruit has been used as a fish poison and insecticide in India. A seed paste has also been used pasted on the scalp to rid people of lice. The oil derived from the seeds has also been used as a pesticide. Conversely, the oil from sugar apple’s leaves has a history of use in perfumes. In India, the crushed leaves are snorted to treat hysteria and fainting spells and topically applied to wounds. A leaf decoction is used throughout tropical America to treat a multitude of symptoms, as too is the fruit.
Can You Grow Sugar Apple Trees?
Sugar apples need a tropical to near tropical climate (73-94 degrees F. or 22-34 C.) and are unsuited to most areas of the United States with the exception of some areas of Florida, although they are cold tolerant to 27 degrees F. (-2 C.). They thrive in dry areas except during pollination where high atmospheric humidity seems to be an important factor. So can you grow a sugar apple tree? If you are within that climactic range, then yes. Also, sugar apple trees do well in containers in greenhouses. The trees do well in a variety of soils, provided they have good drainage. When growing sugar apple trees, propagation is generally from seeds that may take 30 days or longer to germinate. To hasten germination, scarify the seeds or soak them for 3 days prior to planting.
If you live in a tropical zone and wish to plant your sugar apples in the soil, plant them in full sun and 15-20 feet away from other trees or buildings. Feed young trees every 4-6 weeks during the growing season with a complete fertilizer. Apply a 2- to 4-inch layer of mulch around the tree to within 6 inches of the trunk to retain moisture and regulate soil temperature.

What is Sugar Apple Fruit?
Sugar apples (Annona squamosa) are the fruit of one of the most commonly grown Annona trees. Depending upon where you find them, they go by a plethora of names, amongst them include sweetsop, custard apple and the apropos scaly custard apple.
The sugar apple tree varies in height from 10-20 feet with an open habit of irregular, zigzagging twigs. Foliage is alternate, dull green on top and pale green on the underside. Crushed leaves have an aromatic scent, as do the fragrant flowers which may be single or in clusters of 2-4. They are yellow-green with a pale yellow interior borne off of long drooping stalks. Fruit of sugar apple trees is as about 2 ½ to 4 inches long. Each fruit segment typically contains a ½-inch long black to dark brown seed, of which there may be up to 40 per sugar apple. Most sugar apples have green skins, but a dark red variety is attaining some popularity. Fruit ripens 3-4 months after flowering in the spring.

Sugar Apple Information
No one is exactly sure where sugar apples hail from, but they are commonly cultivated in tropical South America, southern Mexico, the West Indies, Bahamas and Bermuda. Cultivation is most extensive in India and is wildly popular in the interior of Brazil. It can be found growing wild in Jamaica, Puerto Rico, Barbados and in the drier regions of North Queensland, Australia. It’s likely that Spanish explorers brought seeds from the New World to the Philippines, while the Portuguese are thought to have brought the seeds to southern India prior to 1590. In Florida, a “seedless” variety, ‘Seedless Cuban,’ was introduced for cultivation in 1955. It does have vestigial seeds and has a less developed flavor than other cultivars, grown primarily as a novelty.

Sugar Apple Uses
The fruit of the sugar apple tree is eaten out of hand, separating the fleshy segments from the outer peel and spitting the seeds out. In some countries, the pulp is pressed to eliminate the seeds and then added to ice cream or combined with milk for a refreshing beverage. Sugar apples are never used cooked. The seeds of the sugar apple are poisonous, as are the leaves and bark. In fact, powdered seeds or dried fruit has been used as a fish poison and insecticide in India. A seed paste has also been used pasted on the scalp to rid people of lice. The oil derived from the seeds has also been used as a pesticide. Conversely, the oil from sugar apple’s leaves has a history of use in perfumes. In India, the crushed leaves are snorted to treat hysteria and fainting spells and topically applied to wounds. A leaf decoction is used throughout tropical America to treat a multitude of symptoms, as too is the fruit.

Can You Grow Sugar Apple Trees?
Sugar apples need a tropical to near tropical climate (73-94 degrees F. or 22-34 C.) and are unsuited to most areas of the United States with the exception of some areas of Florida, although they are cold tolerant to 27 degrees F. (-2 C.). They thrive in dry areas except during pollination where high atmospheric humidity seems to be an important factor. So can you grow a sugar apple tree? If you are within that climactic range, then yes. Also, sugar apple trees do well in containers in greenhouses. The trees do well in a variety of soils, provided they have good drainage. When growing sugar apple trees, propagation is generally from seeds that may take 30 days or longer to germinate. To hasten germination, scarify the seeds or soak them for 3 days prior to planting.

If you live in a tropical zone and wish to plant your sugar apples in the soil, plant them in full sun and 15-20 feet away from other trees or buildings. Feed young trees every 4-6 weeks during the growing season with a complete fertilizer. Apply a 2- to 4-inch layer of mulch around the tree to within 6 inches of the trunk to retain moisture and regulate soil temperature.
0
0
文章
Dummer. ゛☀
2017年08月26日

Leaves of chocolate mint plants add versatility to drinks, desserts and garnishes for a variety of dishes you prepare in the kitchen. Growing chocolate mint, both indoors and outside, is an easy way to always have a fresh supply of the chocolate herb plant. Chocolate mint plants (Mentha x piperita ‘Chocolate’) are attractive, fragrant and easy to grow. As with most square-stemmed members of the mint family, growing chocolate mint can take over the area in which it is planted in the ground, readily and quickly. When learning how to care for chocolate mint, know that it must be contained in some way to avoid the rapid spread of the chocolate herb plant. Horror stories of the escape of uncontained chocolate mint are shared by gardeners who planted it directly in the ground, only for it to take over the bed or spread to a neighbor’s property where it must then be removed.
How to Grow and Harvest Chocolate Mint
Growing chocolate mint in containers is easy. Regular pinching and division keeps chocolate mint healthy, full and under control. Mature brownish red stems and attractive serrated leaves become full after pinching out the tips. Use the leaves in your dishes and drinks. Longer stems of the chocolate herb plant can be clipped for rooting more plants. Learning how to grow and harvest chocolate mint provides a regular supply of the fragrant leaves, which may be used fresh or dried for later use. Growing chocolate mint outside in pots that can be placed in full to partial sun is easy. Once you have a cutting rooted, you likely won’t need to get another plant. Yearly division of the contents of the pot results in an abundance of plants for you or to share with friends and family so that everyone has a container of the useful chocolate herb plant.
If you want to grow the chocolate herb plant in a garden with other herbs, plant the entire container and sink it into the ground. Don’t remove the bottom of the pot. Roots of the growing chocolate mint plant may escape through drainage holes, but you can remove the container once in awhile and clip off any roots that grow from drainage holes. You can also include it in a chocolate themed garden with other chocolate plants. Learning how to care for chocolate mint is simple too. Water and fertilize occasionally and grow in full sun for maximum flavor. Harvest throughout the growing season, unless you want the plant to display its attractive pink flowers in late spring to midsummer. If so, clip after flowering. Root new cuttings in late summer to bring inside for the winter.

How to Grow and Harvest Chocolate Mint
Growing chocolate mint in containers is easy. Regular pinching and division keeps chocolate mint healthy, full and under control. Mature brownish red stems and attractive serrated leaves become full after pinching out the tips. Use the leaves in your dishes and drinks. Longer stems of the chocolate herb plant can be clipped for rooting more plants. Learning how to grow and harvest chocolate mint provides a regular supply of the fragrant leaves, which may be used fresh or dried for later use. Growing chocolate mint outside in pots that can be placed in full to partial sun is easy. Once you have a cutting rooted, you likely won’t need to get another plant. Yearly division of the contents of the pot results in an abundance of plants for you or to share with friends and family so that everyone has a container of the useful chocolate herb plant.

If you want to grow the chocolate herb plant in a garden with other herbs, plant the entire container and sink it into the ground. Don’t remove the bottom of the pot. Roots of the growing chocolate mint plant may escape through drainage holes, but you can remove the container once in awhile and clip off any roots that grow from drainage holes. You can also include it in a chocolate themed garden with other chocolate plants. Learning how to care for chocolate mint is simple too. Water and fertilize occasionally and grow in full sun for maximum flavor. Harvest throughout the growing season, unless you want the plant to display its attractive pink flowers in late spring to midsummer. If so, clip after flowering. Root new cuttings in late summer to bring inside for the winter.

0
0
文章
Dummer. ゛☀
2017年08月24日

Can rosemary survive outside over winter? The answer depends on your growing zone, as rosemary plants are unlikely to survive temperatures below 10 to 20 F. (-7 to -12 C.). If you live in USDA plant hardiness zones 7 or below, rosemary will only survive if you bring it indoors before the arrival of freezing temperatures. On the other hand, if your growing zone is at least zone 8, you can grow rosemary outdoors year round with protection during the chilly months. However, there are exceptions, as a few newer rosemary cultivars have been bred to survive temperatures as low as USDA zone 6 with ample winter protection. Ask your local garden center about ‘Arp,’ ‘Athens Blue Spire’ and ‘Madeline Hill.’ Read on to learn about protecting rosemary plants in winter.
How to Protect Rosemary in Winter
Here are some tips for winterizing rosemary plants:
Plant rosemary in a sunny, sheltered location where the plant is protected from harsh winter winds. A warm spot near your house is your best bet. Prune the plant to about 3 inches after the first frost, then bury the plant entirely with soil or compost. Pile 4 to 6 inches of mulch such as pine needles, straw, finely chopped mulch or chopped leaves over the plant. (Be sure to remove about half of the mulch in spring.) Unfortunately, there is no guarantee that your rosemary plant will survive a cold winter, even with protection. However, you can add a bit of extra protection by covering the plant with a frost blanket during cold snaps. Some gardeners surround rosemary plants with cinderblocks before adding mulch. The blocks provide extra insulation and also help hold the mulch in place.

0
0
文章
Dummer. ゛☀
2017年08月20日

Succulent garden design is appropriate for warm, temperate and even cold season locations. In cold climates, it is not always possible to have a succulent garden outside, but you can grow them indoors in containers. Learn a little about how to plan an outdoor succulent garden and bring some fun shapes and textures to your landscape.

Succulent Garden Design
Succulents are generally drought tolerant plants that have thick leaves where they store moisture. Although succulent plants are very tolerant of dry conditions, they do need water, especially during the growing season.
Succulent garden design should consider the location, soil type, configuration, moisture level, and the types of plants. Some succulents are more drought tolerant than others. Do a little research on the wide variety of succulent shapes and sizes before starting a succulent garden outside. For instance, cacti are succulents and hold water in their stems and pads. Other types of succulents are not spiny but have swollen leaves with a myriad of growth habits. There are spreading or drooping types, such as burro’s tail; spiky, wide plants like agave; or tall, columned varieties such as old man’s cactus. Plan the design with enough space for the plants to fill in as they grow.

Succulent Outdoor Plants
Growing a succulent garden outside starts with plant choices. If you are a novice, begin with plants that are easy and foolproof. Sedum and sempervivum are easy to grow and adaptable to bright, sunny locations or even slightly dappled areas. Whatever types of plants you choose, succulents need well-drained soil. They can thrive in cracks and crevasses, rockeries and sandy or gritty soils. Succulents in cool season areas will do best in containers that are brought indoors for the winter. Try some kalanchoe, aloe, echeveria and aeonium. Have fun with the unique sizes, shapes and textures of these plants. Use succulent outdoor plants as part of a xeriscape area of the garden, to conserve water and provide interest and color.

How to Plan an Outdoor Succulent Garden
When you’ve chosen your plants and are ready for planting, you will need to know how to plan an outdoor succulent garden. Choose a sunny location and plot the space you want to fill. Check the soil conditions and drainage by digging a hole at least 1 foot deep and filling it with water. If the water drains within a half hour, the soil is sufficiently porous. If not, simply mix in 3 inches of sand or other gritty material to increase the texture and drainage. Use taller specimens at the center of the area and spreading species at the edges or dotted among the larger plants as ground cover. Top the area with a layer of pebbles or small rocks to act as mulch. This will help prevent weeds and conserves moisture while allowing evaporation of excess water.

Care of Succulent Garden Plants
Succulent plants tolerate periods of dryness, but should receive regular water during the growing season. When soil is dry a couple of inches down, water deeply and then let the soil dry out again between waterings. The most common problem with succulents is rot. Keeping the stems out of the soil and providing drying periods between irrigation will help prevent this. Also, water from the base of the plant to keep leaves dry. Watch for insect pests and combat them with sprays of water and horticultural soap spray. Remove dead stems and offsets during the care of succulent garden plants. Offsets are easy to start as a completely new plant. Put them in a well-drained potting mix and care for them until roots are full and healthy, then plant them in a new area of the garden.

Succulent Garden Design
Succulents are generally drought tolerant plants that have thick leaves where they store moisture. Although succulent plants are very tolerant of dry conditions, they do need water, especially during the growing season.
Succulent garden design should consider the location, soil type, configuration, moisture level, and the types of plants. Some succulents are more drought tolerant than others. Do a little research on the wide variety of succulent shapes and sizes before starting a succulent garden outside. For instance, cacti are succulents and hold water in their stems and pads. Other types of succulents are not spiny but have swollen leaves with a myriad of growth habits. There are spreading or drooping types, such as burro’s tail; spiky, wide plants like agave; or tall, columned varieties such as old man’s cactus. Plan the design with enough space for the plants to fill in as they grow.

Succulent Outdoor Plants
Growing a succulent garden outside starts with plant choices. If you are a novice, begin with plants that are easy and foolproof. Sedum and sempervivum are easy to grow and adaptable to bright, sunny locations or even slightly dappled areas. Whatever types of plants you choose, succulents need well-drained soil. They can thrive in cracks and crevasses, rockeries and sandy or gritty soils. Succulents in cool season areas will do best in containers that are brought indoors for the winter. Try some kalanchoe, aloe, echeveria and aeonium. Have fun with the unique sizes, shapes and textures of these plants. Use succulent outdoor plants as part of a xeriscape area of the garden, to conserve water and provide interest and color.

How to Plan an Outdoor Succulent Garden
When you’ve chosen your plants and are ready for planting, you will need to know how to plan an outdoor succulent garden. Choose a sunny location and plot the space you want to fill. Check the soil conditions and drainage by digging a hole at least 1 foot deep and filling it with water. If the water drains within a half hour, the soil is sufficiently porous. If not, simply mix in 3 inches of sand or other gritty material to increase the texture and drainage. Use taller specimens at the center of the area and spreading species at the edges or dotted among the larger plants as ground cover. Top the area with a layer of pebbles or small rocks to act as mulch. This will help prevent weeds and conserves moisture while allowing evaporation of excess water.

Care of Succulent Garden Plants
Succulent plants tolerate periods of dryness, but should receive regular water during the growing season. When soil is dry a couple of inches down, water deeply and then let the soil dry out again between waterings. The most common problem with succulents is rot. Keeping the stems out of the soil and providing drying periods between irrigation will help prevent this. Also, water from the base of the plant to keep leaves dry. Watch for insect pests and combat them with sprays of water and horticultural soap spray. Remove dead stems and offsets during the care of succulent garden plants. Offsets are easy to start as a completely new plant. Put them in a well-drained potting mix and care for them until roots are full and healthy, then plant them in a new area of the garden.
1
0


