tinkerguia
2017年07月01日

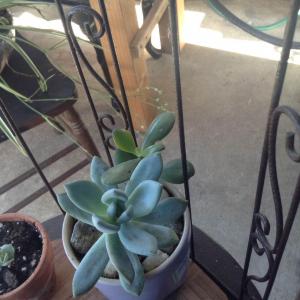
i had to bring them in or else they might die from too much heat outside. few of my "surviving" baby succulents.


1
0
成长记
Ueca
2017年06月24日

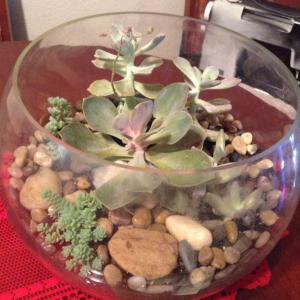
We moved the big one into a new pot and put it outside. It doesn't seem to mind the rain and sun here in Canada.


1
0
文章
Colorful
2017年05月23日

Growing cat grass indoors will keep your cats busy and entertain them. This way they don’t need to go outside for grazing, where the grass may be treated with pesticides and fertilizer!
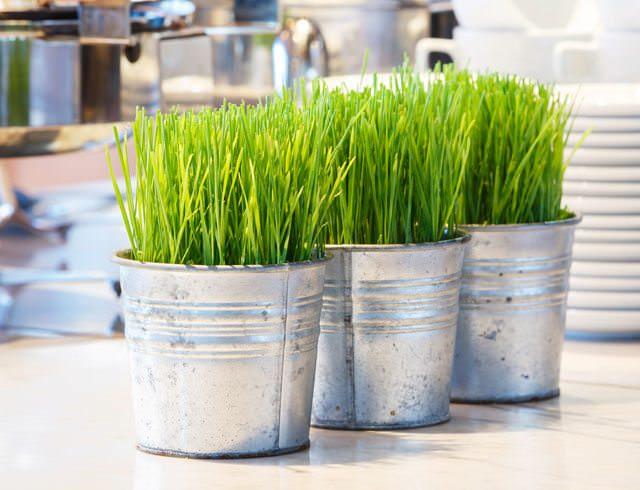
Growing cat grass indoors will keep your cats from going outside to look for grass to satisfy their craving. The grass grown outside may have been treated with pesticides that can be toxic to your feline friend.What is Cat Grass
Cat grass is something cats love to gnaw on; it’s healthy too. Usually, grown from a mix of seeds of wheat, oat, barley or rye. Growing cat grass indoors is also possible.
Oat Grass
Oats grass is mildly sweet, healthy and tastes better than wheat grass or any other cat grass. It requires direct sunlight to grow well.
Wheat Grass
Wheatgrass contains minerals, vitamins, and amino acids. It’s not only beneficial for your cat but also helps human living a healthy life if added in the diet.
Rye Grass
Rye grass has smaller blades compared to the other types of cat grass. Perfect for creating a grass tray that the cat can lounge on.
Barley Grass
This grass provides vital minerals, enzymes, vitamins, and amino acids and the nutrients that are readily absorbed into the bloodstream.
Also Read: How to Start an Indoor Cat Garden
Requirements for Growing Cat Grass Indoors
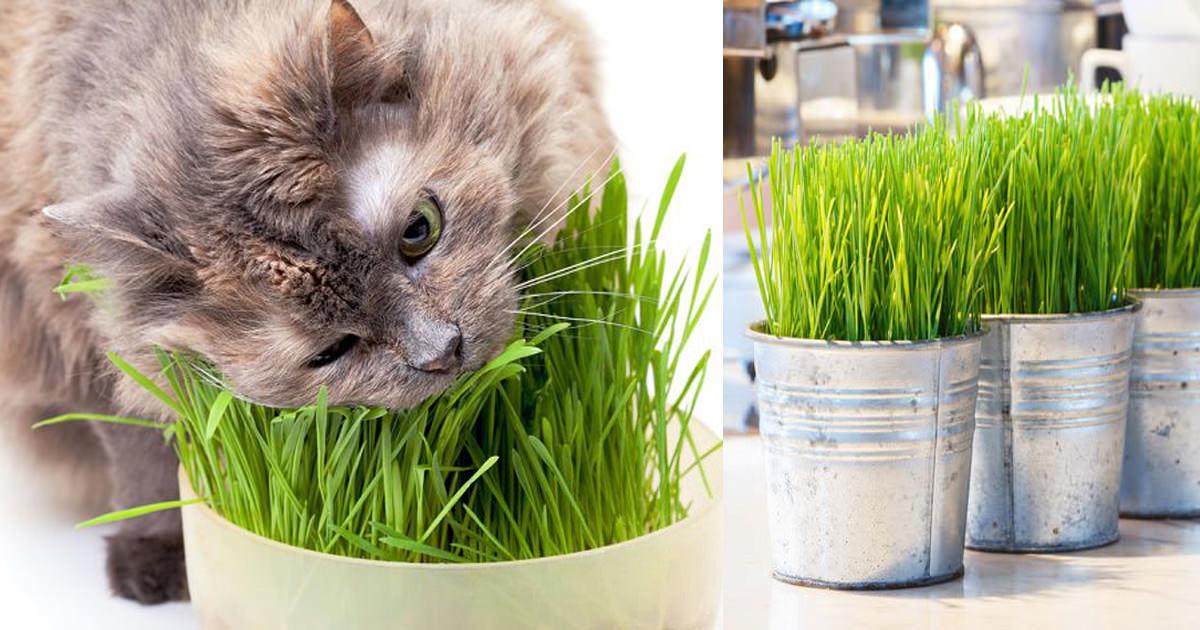
To grow, all you need is a right container (window box is good), plastic wrap, sterilized organic soil, cat grass seeds and water. It is important to use organic soil to provide your cat with healthy grass and safe soil to dig into. Fertilizer is not required since the grass will grow and dies in a few weeks itself.
Planting
To grow the cat grass indoors, fill the pot with soil just about 2 inches from the top then scatter some seeds on top of the soil and put a thin layer of soil over it to about ¼ inch.
Germination and Growing Cat Grass
Take a sprayer or using hands spill the water to make the soil moist, remember to do this gently or else the seeds will be dispersed. Once the soil is evenly moist, cover the container with a plastic wrap, allow some perforations for air flow. Set the container aside in a cool and dark place to help the seeds germinate
In two to three days you’ll be able to see the tiny sprouts emerging, while ensuring the soil is moist, remove the plastic wrap carefully and start to keep the pot in the desired spot. Usually, in a place where your germinating sprouts can receive some sun and indirect light, a windowsill is perfect for this. Continue to wait until about ten to twelve days, when the grass start to grow above 4 to 6 inches high, reduce it to this height. If you let it rise higher than this, your cat may pick up all the plants, wreak havoc and destroy her cat grass garden.
Growing cat grass indoors is a fantastic job aimed at making your cat happy and healthy. Here’re a few more tips to help you in that!Before sprouting, keep the seeds evenly moist but don’t soak them. After sprouting, reduce watering to keep the soil slightly moist only.Keeping it in a naturally well-lit place will make it grow well with regular watering. You can also use grow lights.Don’t overwater!As soon as the grass begins to turn color or wilt, renew the planting again.

Growing cat grass indoors will keep your cats from going outside to look for grass to satisfy their craving. The grass grown outside may have been treated with pesticides that can be toxic to your feline friend.What is Cat Grass
Cat grass is something cats love to gnaw on; it’s healthy too. Usually, grown from a mix of seeds of wheat, oat, barley or rye. Growing cat grass indoors is also possible.
Oat Grass
Oats grass is mildly sweet, healthy and tastes better than wheat grass or any other cat grass. It requires direct sunlight to grow well.
Wheat Grass
Wheatgrass contains minerals, vitamins, and amino acids. It’s not only beneficial for your cat but also helps human living a healthy life if added in the diet.
Rye Grass
Rye grass has smaller blades compared to the other types of cat grass. Perfect for creating a grass tray that the cat can lounge on.
Barley Grass
This grass provides vital minerals, enzymes, vitamins, and amino acids and the nutrients that are readily absorbed into the bloodstream.
Also Read: How to Start an Indoor Cat Garden
Requirements for Growing Cat Grass Indoors

To grow, all you need is a right container (window box is good), plastic wrap, sterilized organic soil, cat grass seeds and water. It is important to use organic soil to provide your cat with healthy grass and safe soil to dig into. Fertilizer is not required since the grass will grow and dies in a few weeks itself.
Planting
To grow the cat grass indoors, fill the pot with soil just about 2 inches from the top then scatter some seeds on top of the soil and put a thin layer of soil over it to about ¼ inch.
Germination and Growing Cat Grass
Take a sprayer or using hands spill the water to make the soil moist, remember to do this gently or else the seeds will be dispersed. Once the soil is evenly moist, cover the container with a plastic wrap, allow some perforations for air flow. Set the container aside in a cool and dark place to help the seeds germinate
In two to three days you’ll be able to see the tiny sprouts emerging, while ensuring the soil is moist, remove the plastic wrap carefully and start to keep the pot in the desired spot. Usually, in a place where your germinating sprouts can receive some sun and indirect light, a windowsill is perfect for this. Continue to wait until about ten to twelve days, when the grass start to grow above 4 to 6 inches high, reduce it to this height. If you let it rise higher than this, your cat may pick up all the plants, wreak havoc and destroy her cat grass garden.
Growing cat grass indoors is a fantastic job aimed at making your cat happy and healthy. Here’re a few more tips to help you in that!Before sprouting, keep the seeds evenly moist but don’t soak them. After sprouting, reduce watering to keep the soil slightly moist only.Keeping it in a naturally well-lit place will make it grow well with regular watering. You can also use grow lights.Don’t overwater!As soon as the grass begins to turn color or wilt, renew the planting again.
6
4
文章
Micky
2017年05月23日

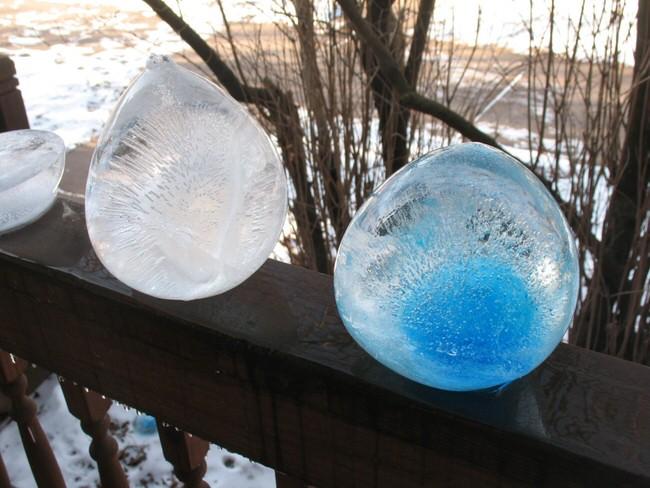
During the winter, you may think there is not much to be done outside. But I love the outdoors the whole year, and I think there is always a way to find happiness in the garden! So take advantage of those frigid outdoor temps, don some good gloves and a scarf, and head out to the garden to create these 7 crafty outdoor projects with ice! Our feature project, above, is from Kate at ‘Faceless 39’. She shows us how to make decorative ice gems for your garden with step by step photos… This is an easy project that’s lots of fun!

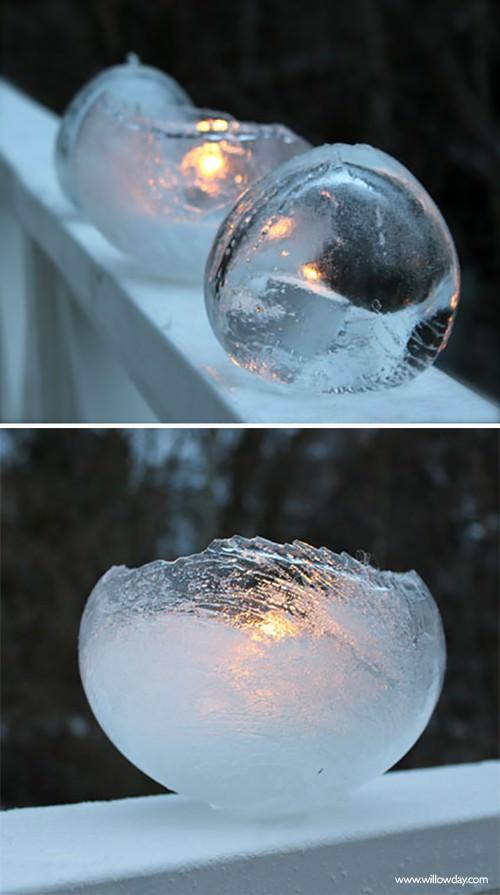
Learn to make ice lanterns, from ‘Willowday’! I love how the candle glows against the melting ice… these would be amazing along a walkway for a holiday party!
I have never seen a craft quite like these winter ice sun catchers from Tracy on ‘Hubpages’. Easy to follow tutorial, these are so cool! What if you just used all blues, to create a look of glowing ice?

hese DIY ice luminaries from Gabrielle at ‘Design Mom’ are the perfect way to light up a porch or add splash to a garden to be viewed from indoors, perhaps during a holiday get together? If it’s not quite cold enough to freeze them hard outdoors, and you are just using them for an event, you can freeze them on a cookie sheet in your freezer, then place outside just before use.

From ‘Queen Vanna Creations’, these ice balloons use food coloring to get that bright color. Fun!

Want to make an ice project that looks like you suddenly have the ability to craft your own giant snowflakes? Make lace and ice, with the help of ‘Resurrection Fern’. Easy and so pretty!

Lastly, if you want to make those great ice globes, and you want to do it the easy way… check out these ice globe luminary kits by ‘Gardeners Supply‘. For the amount of fun you get from them, they aren’t real expensive.


0
0
文章
Abigal
2017年05月22日


I don’t know about you, but given the choice, I would rather eat outside in my garden. It doesn’t matter if it’s a quiet breakfast with just me and the songbirds, or a big family get together, outside is better. But, I kinda hate my table. It’s glass, it’s not my style, and it doesn’t mesh with the outdoors well at all. So we found these DIY outdoor dining tables so that we can all find a way to eat al fresco just a little bit more, and still have a styling’ backyard. Sound good? Thought so! Let’s get to it so you can pick one and get started!
Our feature project above, is from Christine at ‘Pinspiration Mommy’. She built this DIY large outdoor dining table herself for her 40th B’day! Ok, I like this girl. Great tutorial and plans for this table.
Melissa (and her husband Randy!) at ‘The Happier Homemaker’ has this tutorial for their DIY Pottery Barn inspired dining table that only cost them $60 in lumber! Check out the post, her husband used simple plans from ‘Ana White’, another tutorial, and his own great ideas to come up with this. Amazing DIY!

Ashley at ‘Cherished Bliss’ not only has a great tutorial and photos for her DIY outdoor table, she has free plans you can download too! We love the X-frame base of this table.

This simple outdoor dining table was made with plans from ‘Ana White’ and submitted by one of her readers… This looks like an expensive teak table we saw at Room & Board last season.
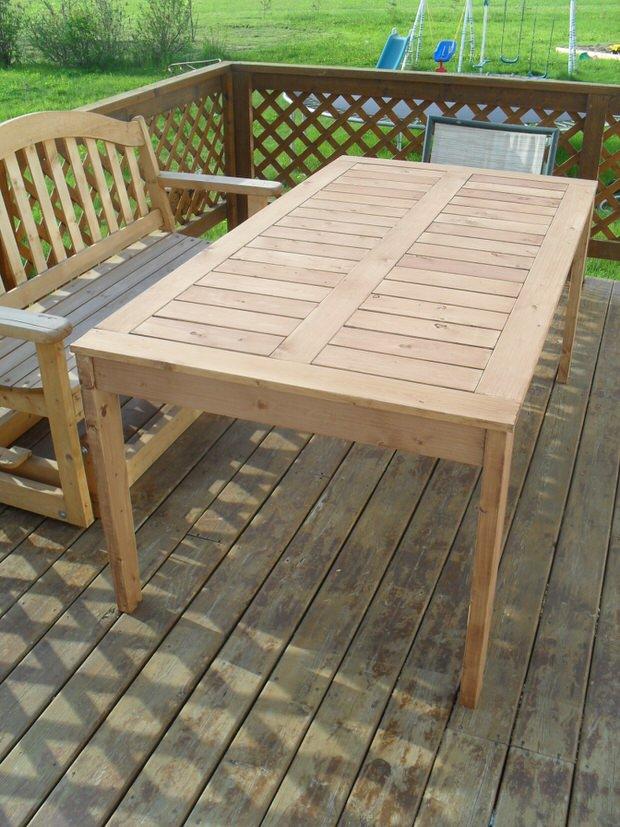
Rebekah at ‘Charming Imperfections’ made this DIY pallet farmhouse table for her patio, and has step by step instructions for you, along with a couple of graphics that explain the process well. (And make it look simple!)

From Danielle (and Luke!) at ‘Finding Silver Pennies’, learn how to build an outdoor dining set. Lot’s of good directions here, and this set looks high end. Love it!

Make this DIY outdoor dining table from wood pallets with ‘A Mitten Full of Savings’. Oh, did we mention? Less than $100!

If you have a smaller patio, or just prefer a round table, make this octagonal picnic table with these free plans from ‘Bobs Plans’.

We LOVE this DIY concrete dining table we found on ‘Houzz’, but it didn’t come with a tutorial… So we went and found one for you! This tutorial from ‘DIY Pete‘ is almost identical.

Ok, last one for you is just inspirational, ’cause it is so cool, we couldn’t leave it out! How amazing is this? From ‘Erin Martin Design‘. Wow!

1
0
文章
Abigal
2017年05月21日


There is never enough storage outside on the deck, porch or patio. I’m always having to run to the garage to look for a yard game, candles, small garden tools or a couple of outdoor pillows for that afternoon book. While we’re busy complaining, there are also never enough places to read that book! So whether you have a small garden space, or just want to maximize your organization, we found some solutions to both problems! These DIY outdoor storage benches are a great idea for adding additional seating and always making sure that bocce ball set is just within reach. Our feature project above, is from the very talented Kim at ‘Sand and Sisal’. Her DIY outdoor storage box and bench is even on caster wheels for easy relocating. She has plenty of step by step photos on how she did it.
Kim at ‘The Kim Six Fix’ designed this X leg bench with crate storage, and shares her tutorial on how she did it for around $40!

I like this bench with hidden storage project from ‘This Old House’ because it has a back rest. Sometimes that’s all I need after working in the garden, is a spot I can lean back and relax.

This outdoor storage bench from Ana White was designed after a West Elm line… and it looks like it! Her complete plans and tutorial are all free, so give this one a try!

From ‘Home Depot’, this DIY outdoor corner bench with storage is from Caitlin at ‘Desert Domicile’… I love her backyard! It feels like an expensive resort. The tutorial has lot’s of instruction and step by step photos. This is one of those projects that could transform a garden space.

From ‘Canadian Home Workshop’, this stylish water storage bench was meant for holding everything from dock supplies to pool toys!

This DIY outdoor storage box by ‘Build Basic’ has some real style factor to it… all you have to do is turn the slats to get a coastal louvered look!

This storage seat box from ‘Better Homes Australia’ has a cool modern look , and is portable with industrial wheels. Good photos take you through it.

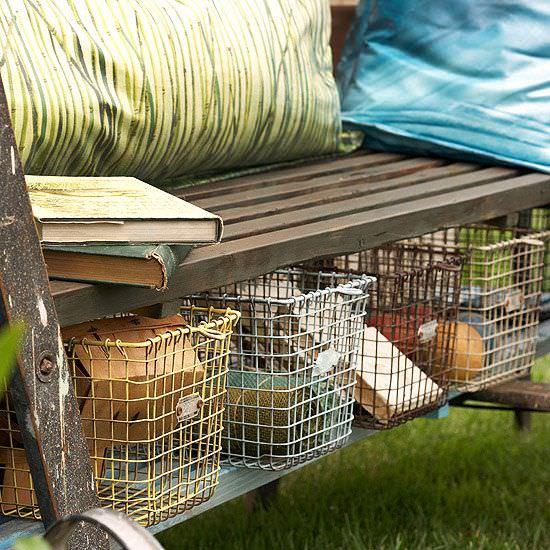
Now that you have some great skills from these tutorials, how about a couple to inspire you to do it your own way? From ‘BHG‘, these vintage locker bins make great DIY outdoor storage!
Last, from ‘Twig Decor’, they used an old door and headboard to repurpose into an outdoor bench with storage. Ok, could this have looked any more amazing? I would love to see it still as a headboard too!

0
0
文章
Abigal
2017年05月16日


Much as many of us would like to live on a secluded lot, miles from the nearest neighbor, not many of us are that lucky! Enjoying time in our #garden can mean the need for some privacy from the #outside world. It is our respite, our seclusion. If you like to lounge on your porch, deck or patio, without prying eyes, read on. We have DIY patio privacy screens and solutions for you!
From ‘Design, Dining and Diapers’, her #DIY garden slat wall is an easy #project . Lots of instructions and photos as she completes it, step by step. This is one of those projects any of you can do, and it looks amazing!

We LOVE ‘Tater Tots and Jello’! (Have you seen her kitchen makeover?) Jen created this DIY privacy screen for a Lowe’s challenge, and this turned out so awesome! Made from old closet doors…yes, really. You gotta jump on over!

From Melissa at ‘Polka Dot Chair’, these outdoor hanging drapes were made from chain link fence posts. Good photos on how she did it. Great idea for privacy with some “pretty” attached!

From ‘DIY Network’, this privacy screen is meant to hide a hot tub, but you could use it for any privacy issue. One of the perks is that it’s movable, so if one day you need to shade your afternoon tea, and the next you need to block out nosy neighbor kids… it does it all!

‘Organized Chaos’ created this DIY privacy screen from lattice, but I like their twist… it’s a hanging screen! Gives it a touch of elegance. Lots of photos, and before and after pictures.

This painted privacy screen from Home Depot was made with drop cloths. I like the idea of adding the color and the DIY touch.

Create a Cabana with drop cloths, with the full tutorial by ‘Fancy Frugal Life’… This looks so pretty, you have to click through to all her photos.

This last ones my favorite! Lowes has a tutorial for their patio hideaway screen made with lumber and aluminum flashing. This looks so unique and upscale. I’d love to try it with a dark stain…

1
1


