文章
Dummer. ゛☀
2017年10月02日

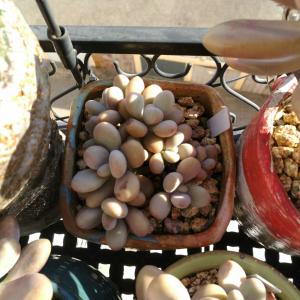
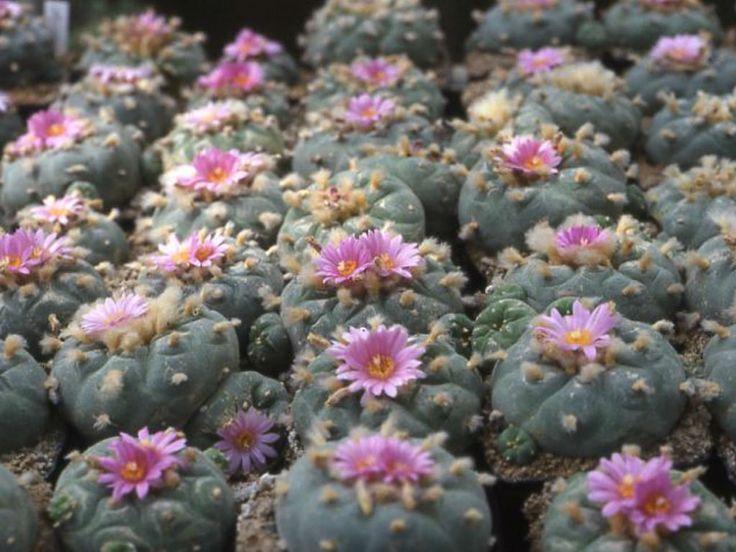
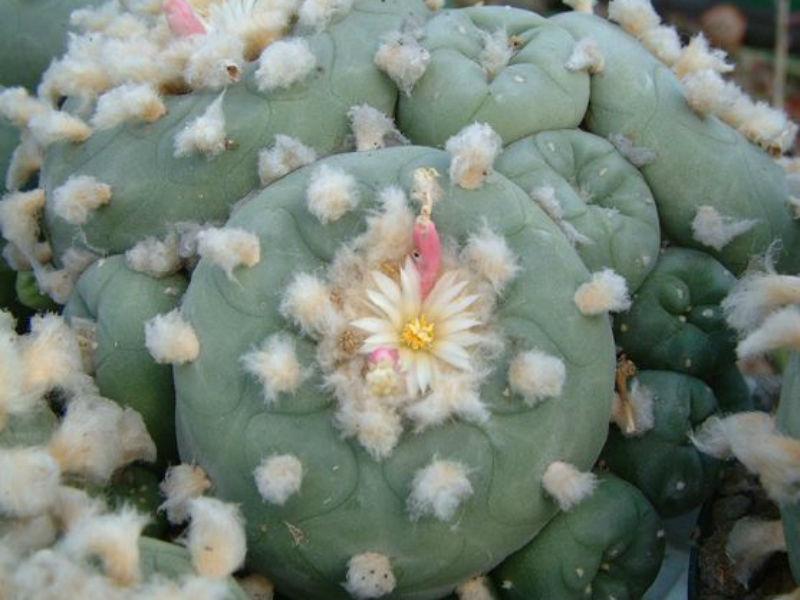
False Peyote (Ariocarpus fissuratus) is a small cactus that grows only a few centimeters in height and about 4-6 inches in diameter. Its nodes end in pointed triangles, giving the cactus a star-like appearance. The flowers are pink-violet in color. These little cacti are often mistaken for rocks in the stony desert in which they grow and are therefore difficult to find. Ariocarpus fissuratus is found only in New Mexico, northern Mexico and southwest Texas.
Traditional Uses
Ariocarpus fissuratus is usually referred to as false or dangerous Peyote, and has been known in the Americas since pre-Columbian times. This cactus was very possibly used as a Peyote substitute when Peyote was unavailable. The Huichol strongly warn against consuming Ariocarpus fissuratus, and associate it with dark sorcery. They believe that those individuals who do not properly purify themselves at the start of the Peyote hunt pilgrimage by admitting all of their sexual encounters outside of marriage may mistake Ariocarpus fissuratus for real Peyote, the consumption of which will result in a deliriant-hallucinogenic state. The Tarahumara, meanwhile, consider they to be even more powerful than Peyote.
Medicinal Uses
Ariocarpus fissuratus, and the related Ariocarpus retusus may have been used to treat malaria by some peoples in Mexico. The related Ariocarpus kotschoubeyanus is used as an external medicine to treat wounds. Certain reports of the consumption of Ariocarpus fissuratus also mention that it has strong narcotic pain-killing properties.

Traditional Uses
Ariocarpus fissuratus is usually referred to as false or dangerous Peyote, and has been known in the Americas since pre-Columbian times. This cactus was very possibly used as a Peyote substitute when Peyote was unavailable. The Huichol strongly warn against consuming Ariocarpus fissuratus, and associate it with dark sorcery. They believe that those individuals who do not properly purify themselves at the start of the Peyote hunt pilgrimage by admitting all of their sexual encounters outside of marriage may mistake Ariocarpus fissuratus for real Peyote, the consumption of which will result in a deliriant-hallucinogenic state. The Tarahumara, meanwhile, consider they to be even more powerful than Peyote.

Medicinal Uses
Ariocarpus fissuratus, and the related Ariocarpus retusus may have been used to treat malaria by some peoples in Mexico. The related Ariocarpus kotschoubeyanus is used as an external medicine to treat wounds. Certain reports of the consumption of Ariocarpus fissuratus also mention that it has strong narcotic pain-killing properties.
0
1
文章
Miss Chen
2017年10月01日

La Acacia Bola es un árbol que pertenece a la familia Leguminosas, género Robinia, especie pseudoacacia, variedad Umbraculifera.
Sus principales características son:
Altura: de 4 a 6 metros.
Diámetro: de 3 a 5 metros.
Crecimiento: rápido.
Suelo: se adapta a todos los tipos.
Temperatura: resiste bien el frío.
Transplante: muy buena tolerancia.
Uso: ornamental.
Origen: Estados Unidos.
La Acacia Bola es un pequeño árbol de follaje caduco, copa compacta y globosa.
Las hojas son de color verde claro y las ramas no presentan espinas. Su principal atractivo radica en la copa redondeada y el follaje denso.
Éste árbol rústico crece en todo tipo de suelos, auqnue prefiere los bien drenados, y presenta una buena tolerancia al frío.
La Acacia Bola se cultiva como ornamental. Crece por injertos sobre pie franco o por estacas.
Suele utilizarse en el arbolado de calles y jardines pequeños.


0
1
文章
Miss Chen
2017年10月01日

Este arbusto, que en realidad es un árbol, no es un laurel (Laurus nobilis) sino como su nombre científico indica, Prunus laurocerasus, una rosácea. Es originario de Asia Menor y en condiciones ideales puede llegar a alcanzar los 6 metros de altura. Se usa en las zonas templadas de Europa como planta ornamental, para setos sobre todo. Su follaje es espeso, perenne y de color verde intenso.
El laurel cerezo o lauroceraso florece a finales de la primavera con unas flores pequeñas arracimadas en las axilas de las hojas. En otoño maduran sus frutos, unas drupas de color púrpura o marrón parecidas a las cerezas y agrupadas en racimo. Aunque la planta es tóxica, los frutos son comestibles a excepción de la semilla que también es venenosa. En homeopatía se usa su tintura como calmante del sistema nervioso.

Se cultiva en primavera o en otoño y admite todo tipo de suelo, siempre que no sea demasiado calizo. Ha de plantarse en un lugar donde reciba sol directo o a la sombra si no es muy pronunciada. Hay que regarlo según sus necesidades durante los primeros años de su plantación. Una vez instalado su mantenimiento se reduce a una poda intensa en primavera y otra en otoño, si hacemos podas ligeras corremos el riesgo de que con el tiempo el centro del arbusto pierda follaje.

Al final del verano le brotan esquejes del tronco que se pueden aprovechar para la reproducción. Elegiremos los más robustos y sanos y los cortaremos por debajo de una hoja y con una longitud de 15 o 20 cm. Quitaremos las hojas del extremo inferior y plantaremos en un recipiente que contenga una mezcla de substrato y arena. Mantendremos en lugar protegido, pero con mucho sol, hasta la primavera siguiente.
El laurel cerezo o lauroceraso florece a finales de la primavera con unas flores pequeñas arracimadas en las axilas de las hojas. En otoño maduran sus frutos, unas drupas de color púrpura o marrón parecidas a las cerezas y agrupadas en racimo. Aunque la planta es tóxica, los frutos son comestibles a excepción de la semilla que también es venenosa. En homeopatía se usa su tintura como calmante del sistema nervioso.

Se cultiva en primavera o en otoño y admite todo tipo de suelo, siempre que no sea demasiado calizo. Ha de plantarse en un lugar donde reciba sol directo o a la sombra si no es muy pronunciada. Hay que regarlo según sus necesidades durante los primeros años de su plantación. Una vez instalado su mantenimiento se reduce a una poda intensa en primavera y otra en otoño, si hacemos podas ligeras corremos el riesgo de que con el tiempo el centro del arbusto pierda follaje.

Al final del verano le brotan esquejes del tronco que se pueden aprovechar para la reproducción. Elegiremos los más robustos y sanos y los cortaremos por debajo de una hoja y con una longitud de 15 o 20 cm. Quitaremos las hojas del extremo inferior y plantaremos en un recipiente que contenga una mezcla de substrato y arena. Mantendremos en lugar protegido, pero con mucho sol, hasta la primavera siguiente.
0
0
文章
Dummer. ゛☀
2017年10月01日

False Peyote (Ariocarpus fissuratus) is a small cactus that grows only a few centimeters in height and about 4-6 inches in diameter. Its nodes end in pointed triangles, giving the cactus a star-like appearance. The flowers are pink-violet in color. These little cacti are often mistaken for rocks in the stony desert in which they grow and are therefore difficult to find. Ariocarpus fissuratus is found only in New Mexico, northern Mexico and southwest Texas.
Traditional Uses
Ariocarpus fissuratus is usually referred to as false or dangerous Peyote, and has been known in the Americas since pre-Columbian times. This cactus was very possibly used as a Peyote substitute when Peyote was unavailable. The Huichol strongly warn against consuming Ariocarpus fissuratus, and associate it with dark sorcery. They believe that those individuals who do not properly purify themselves at the start of the Peyote hunt pilgrimage by admitting all of their sexual encounters outside of marriage may mistake Ariocarpus fissuratus for real Peyote, the consumption of which will result in a deliriant-hallucinogenic state. The Tarahumara, meanwhile, consider they to be even more powerful than Peyote.
Medicinal Uses
Ariocarpus fissuratus, and the related Ariocarpus retusus may have been used to treat malaria by some peoples in Mexico. The related Ariocarpus kotschoubeyanus is used as an external medicine to treat wounds. Certain reports of the consumption of Ariocarpus fissuratus also mention that it has strong narcotic pain-killing properties.

Traditional Uses
Ariocarpus fissuratus is usually referred to as false or dangerous Peyote, and has been known in the Americas since pre-Columbian times. This cactus was very possibly used as a Peyote substitute when Peyote was unavailable. The Huichol strongly warn against consuming Ariocarpus fissuratus, and associate it with dark sorcery. They believe that those individuals who do not properly purify themselves at the start of the Peyote hunt pilgrimage by admitting all of their sexual encounters outside of marriage may mistake Ariocarpus fissuratus for real Peyote, the consumption of which will result in a deliriant-hallucinogenic state. The Tarahumara, meanwhile, consider they to be even more powerful than Peyote.

Medicinal Uses
Ariocarpus fissuratus, and the related Ariocarpus retusus may have been used to treat malaria by some peoples in Mexico. The related Ariocarpus kotschoubeyanus is used as an external medicine to treat wounds. Certain reports of the consumption of Ariocarpus fissuratus also mention that it has strong narcotic pain-killing properties.

0
0
文章
Dummer. ゛☀
2017年09月27日

There are over 400 species of tropical Passion Flowers (the genus Passiflora) with sizes ranging from 0.5 inch to 6 inches (1.3 to 15 cm) across. They are found naturally from South America through Mexico. Early missionaries to these regions used the distinctly colored patterns of the flowers parts to teach about the passion’of Christ; hence the name.
Growing Conditions and General Care
Their vibrant colors and heady fragrance make the Passion Flower a welcome addition to any garden. Unfortunately, because of its origins, most species of Passion Flower plant can’t overwinter in many gardens in the United States, although there are a few that will survive up to USDA plant hardiness zone 5. Most varieties will grow in Zones 7-10.
Because they are vines, the best place for growing Passion Flower is along a trellis or fence. The tops will be killed off during winter, but if you mulch deeply, your Passion Flower plant will return with new shoots in the spring. Since growing Passion Flowers can reach 20 feet (6 m) in a single season, this die back will help keep the vine under control.
Tropical Passion Flowers need full sun and well drained soil. Two applications of a well-balanced fertilizer per year, once in early spring and one in midsummer is all the Passion Flower care you’ll need.
If you live in an area where winters are too harsh for tender Passion Flower care, don’t despair. Growing Passion Flowers indoors is as easy as finding a big pot and a window with bright light. Plant your vine in a rich commercial indoor potting soil and keep it uniformly moist, not wet.
Move your plant outdoors after all danger of frost is past and let your vine run wild. Come fall, cut back the growth to a reasonable height and bring it back indoors. Knowing how to grow Passion Flower is all it takes to bring a little of the tropics to your patio or porch.

Growing Conditions and General Care
Their vibrant colors and heady fragrance make the Passion Flower a welcome addition to any garden. Unfortunately, because of its origins, most species of Passion Flower plant can’t overwinter in many gardens in the United States, although there are a few that will survive up to USDA plant hardiness zone 5. Most varieties will grow in Zones 7-10.

Because they are vines, the best place for growing Passion Flower is along a trellis or fence. The tops will be killed off during winter, but if you mulch deeply, your Passion Flower plant will return with new shoots in the spring. Since growing Passion Flowers can reach 20 feet (6 m) in a single season, this die back will help keep the vine under control.
Tropical Passion Flowers need full sun and well drained soil. Two applications of a well-balanced fertilizer per year, once in early spring and one in midsummer is all the Passion Flower care you’ll need.

If you live in an area where winters are too harsh for tender Passion Flower care, don’t despair. Growing Passion Flowers indoors is as easy as finding a big pot and a window with bright light. Plant your vine in a rich commercial indoor potting soil and keep it uniformly moist, not wet.

Move your plant outdoors after all danger of frost is past and let your vine run wild. Come fall, cut back the growth to a reasonable height and bring it back indoors. Knowing how to grow Passion Flower is all it takes to bring a little of the tropics to your patio or porch.
0
0
文章
玲儿
2017年09月25日

カマッシアの基本情報
学名:Camassia leichtlinii
科名 / 属名:ヒアシンス科 / カマッシア属
特徴
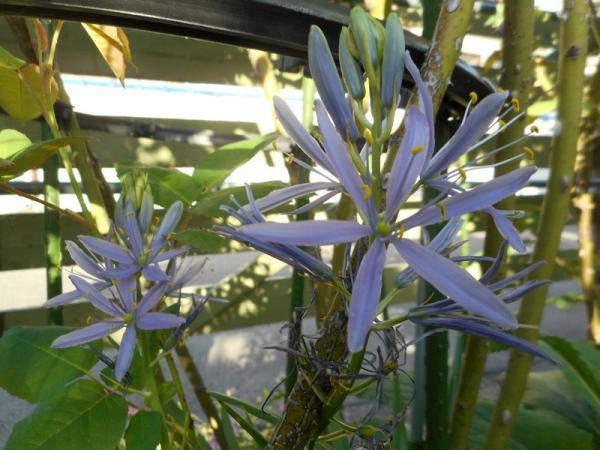
カマッシアは花弁数6枚の星形の花を咲かせる、高性の球根植物。北アメリカ原産です。花色は青、紫、白など。半八重咲き品種もあります。強健で育てやすく、宿根草としても扱われています。長く伸びた花茎に30~50個ほどの蕾をつけ、下から順に数個ずつ咲いていきます。
近縁種のC・クアマッシュは草丈20~30㎝の小型種で、本種と同じように栽培できます。
※科名:ユリ科で分類される場合もあります。
育て方のポイント
栽培のポイント
10月から11月に植えつけ、日当たりのよい場所で育てます。葉が黄変する6月ごろに掘り上げて、乾燥貯蔵しましょう。場所を選ばずに庭で植えっぱなしにできます。庭植えで順調に生育している間は植え替えなくても開花します。分球やこぼれダネでふえます。
学名:Camassia leichtlinii
科名 / 属名:ヒアシンス科 / カマッシア属
特徴
カマッシアは花弁数6枚の星形の花を咲かせる、高性の球根植物。北アメリカ原産です。花色は青、紫、白など。半八重咲き品種もあります。強健で育てやすく、宿根草としても扱われています。長く伸びた花茎に30~50個ほどの蕾をつけ、下から順に数個ずつ咲いていきます。
近縁種のC・クアマッシュは草丈20~30㎝の小型種で、本種と同じように栽培できます。
※科名:ユリ科で分類される場合もあります。

育て方のポイント
栽培のポイント
10月から11月に植えつけ、日当たりのよい場所で育てます。葉が黄変する6月ごろに掘り上げて、乾燥貯蔵しましょう。場所を選ばずに庭で植えっぱなしにできます。庭植えで順調に生育している間は植え替えなくても開花します。分球やこぼれダネでふえます。
0
0
文章
Dummer. ゛☀
2017年09月24日

LIGHT: Abutilons bloom freely provided they receive 6-8 hours of direct sun. A south-facing window is usually ideal.
TEMPERATURE: Day and night temperatures above 65°F are fine year round. Avoid putting plants in the path of cold drafts.
WATERING: Water when the top ½ inch of the potting mix is dry to the touch.
FERTILIZER: Feed every 2 weeks with a balanced, water-soluble fertilizer (such as 20-20-20) mixed at ½ strength. A fertilizer designed to promote blossoms (formula 10-30-20) may be used instead..

CONTINUING CARE: Abutilons are vigorous growers. To keep your plant compact and bushy, prune back long stems with pruning shears, cutting just beyond the point where a leaf joins a stem. Prune just enough to give a pleasing overall shape; if you remove too much growth, you may prevent the plant from setting flower buds. Repot your plant into a slightly larger pot in spring.
PROBLEM: If pests appear, flush plant with water to wash them off; if they persist, spray with insecticidal soap.
Growing Standards: A standard is a woody plant trained to a long, single stem. The stem is crowned with a round head of foliage and flowers. This arrangement is beautiful but also unnatural, requiring a bit of effort on the part of the gardener to prevent gravity and the unrepressed inclinations of the plant from undoing the horticulturist's handiwork.

Staking a Standard: To keep your standard standing, put it out of reach of strong winds and support it with a stake that has a diameter at least as large as the stem's and long enough that when plunged into the pot or the ground it just reaches inside the head. Fasten the standard to the stake at several points with garden twine or green plastic tie tape looped in a figure-eight around stem and stake. Check the ties periodically during the growing season and loosen them if they constrict the outward growth of the stem.
Pruning, fertilizing, and repotting: Maintain the shape of the head with selective pinching of the new shoots (overzealous pinching will prevent the formation of flower buds). Pinch each shoot between thumb and forefinger or cut with pruning shears. Do not shear the plant as though it were a hedge. Fertilize standards grown in pots as you would other pot-grown plants. If you find that a standard in a container dries out quickly after watering, the plant probably needs a larger pot. Lift it from its current pot, make four deep vertical cuts in the root ball, and place it in a new pot that is 2in wider and taller than the old one, filling in around the root ball with fresh potting mix. Water thoroughly after repotting.

Overwintering a standard: Most standards require special care to overwinter. In cold winter climates, bring standards of Abutilon, Anisodontea, Fuchsia, Heliotrope, Lantana, and Rosemary indoors before frost and place them in an east- or west-facing window in a cool room. Water just enough to keep plants from drying out completely, and do not fertilize while plants are in this not-quite-dormant period. Set back outdoors in spring when nighttime temperatures remain consistently above 55°F.to bloom too early.
TEMPERATURE: Day and night temperatures above 65°F are fine year round. Avoid putting plants in the path of cold drafts.
WATERING: Water when the top ½ inch of the potting mix is dry to the touch.
FERTILIZER: Feed every 2 weeks with a balanced, water-soluble fertilizer (such as 20-20-20) mixed at ½ strength. A fertilizer designed to promote blossoms (formula 10-30-20) may be used instead..

CONTINUING CARE: Abutilons are vigorous growers. To keep your plant compact and bushy, prune back long stems with pruning shears, cutting just beyond the point where a leaf joins a stem. Prune just enough to give a pleasing overall shape; if you remove too much growth, you may prevent the plant from setting flower buds. Repot your plant into a slightly larger pot in spring.
PROBLEM: If pests appear, flush plant with water to wash them off; if they persist, spray with insecticidal soap.
Growing Standards: A standard is a woody plant trained to a long, single stem. The stem is crowned with a round head of foliage and flowers. This arrangement is beautiful but also unnatural, requiring a bit of effort on the part of the gardener to prevent gravity and the unrepressed inclinations of the plant from undoing the horticulturist's handiwork.

Staking a Standard: To keep your standard standing, put it out of reach of strong winds and support it with a stake that has a diameter at least as large as the stem's and long enough that when plunged into the pot or the ground it just reaches inside the head. Fasten the standard to the stake at several points with garden twine or green plastic tie tape looped in a figure-eight around stem and stake. Check the ties periodically during the growing season and loosen them if they constrict the outward growth of the stem.
Pruning, fertilizing, and repotting: Maintain the shape of the head with selective pinching of the new shoots (overzealous pinching will prevent the formation of flower buds). Pinch each shoot between thumb and forefinger or cut with pruning shears. Do not shear the plant as though it were a hedge. Fertilize standards grown in pots as you would other pot-grown plants. If you find that a standard in a container dries out quickly after watering, the plant probably needs a larger pot. Lift it from its current pot, make four deep vertical cuts in the root ball, and place it in a new pot that is 2in wider and taller than the old one, filling in around the root ball with fresh potting mix. Water thoroughly after repotting.

Overwintering a standard: Most standards require special care to overwinter. In cold winter climates, bring standards of Abutilon, Anisodontea, Fuchsia, Heliotrope, Lantana, and Rosemary indoors before frost and place them in an east- or west-facing window in a cool room. Water just enough to keep plants from drying out completely, and do not fertilize while plants are in this not-quite-dormant period. Set back outdoors in spring when nighttime temperatures remain consistently above 55°F.to bloom too early.
0
0
文章
玲儿
2017年09月24日

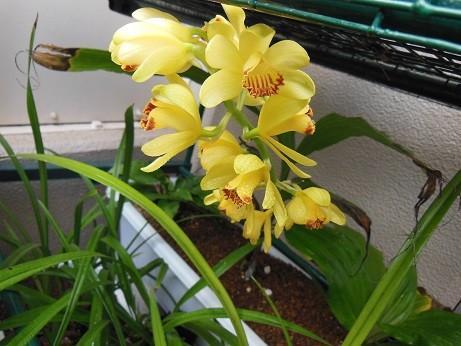
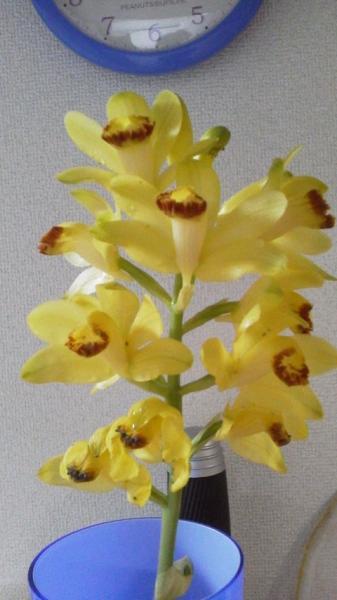
エビネ(夏咲き)の育て方・栽培方法
育て方のポイント
栽培環境・日当たり・置き場
風が強く当たらない日陰で育てます。6月から9月は70%、それ以外の季節は50%の遮光をします。空中湿度は年間を通して60~70%にします。冬は室内か温室に取り込み、最低温度10℃強、理想的には15℃強を保ちます。
水やり
鉢土の表面が乾いたら十分に与えます。冬も意外に乾きやすく、注意が必要です。
芽が出て葉が成長しきるまでの間は、上から水をかけてはいけません。芽に水がたまって軟腐病になるおそれがあります。
肥料
芽が出てきたら9月まで月1回、油かすと骨粉を等量配合した肥料の親指大のものを、5号鉢なら4つ、月ごとに位置を変えて鉢縁に埋め込みます。同時に週1回、観葉植物用の液体肥料を3000~4000倍に薄めて施します。葉の成長が終わったら、液体肥料はリン酸とカリウムのみのものに切り替えて、4000倍に薄めて週に1回施します。
病気と害虫
病気:ウイルス病、軟腐病
ウイルス病は、エビネ栽培で最も恐ろしい病気です。治療不能であるため、発病した株と用土は処分し、その周辺の株も隔離します。予防するには、ウイルスを媒介するアブラムシなどを防除します。作業でハサミを使うときは、1株ごとに刃を火であぶってウイルスの伝染を防ぎます。
軟腐病は、新芽が腐って抜けたり、倒れて枯れたりする病気で、「すっぽ抜け」とも呼ばれます。腐った部分は悪臭がします。

害虫:アブラムシ、ハダニ、カイガラムシ、ケムシ類、ナメクジ
アブラムシは主に5月から8月に、ハダニやカイガラムシは夏に多く発生します。ナメクジは新芽や蕾、花を食害します。葉を食害するケムシが5月から7月に発生することもあります。
用土(鉢植え)
ヤシ殻チップの中粒と大粒を等量で混ぜたものか、ヤシ殻チップ5、硬質鹿沼土小粒3、軽石小粒2の割合で配合したものを使います。ヤシ殻チップは軽く水を含ませてから混ぜ合わせましょう。
植えつけ、 植え替え
植え替えは2~3年に1回、新芽発生直後か開花直後に行います。新芽発生直後の場合は、新芽を傷めないように注意して扱います。鉢は5号以上の駄温鉢やプラスチック鉢など、乾きにくいものを使います。植えつけの際に、新芽のあるほうを広く開けて、偽鱗茎が成長するスペースを確保します。
ふやし方
株分け:大きい株は分けることができます。新芽と3~5個分の偽鱗茎をつけて1株とします。
バックバルブ吹き:葉のついていない古い偽鱗茎を1~2個ずつに分け、水ゴケで植えつけます。3~6か月で新しい芽が出て、小苗となります。
タネまき:秋にとりまきができますが、自然に実ったタネからは親株以上の花を期待できません。苗床は、親と同じ用土に段ボールを混ぜたものか、ツルランや交配種を根を広げて植えた大きい平鉢を使います。
主な作業
花がら摘み:花が半ば以上終わったら、株の根元をしっかりと押さえ、花茎をしっかりと握って、ねじるように回して上に引っ張ります。
育て方のポイント
栽培環境・日当たり・置き場
風が強く当たらない日陰で育てます。6月から9月は70%、それ以外の季節は50%の遮光をします。空中湿度は年間を通して60~70%にします。冬は室内か温室に取り込み、最低温度10℃強、理想的には15℃強を保ちます。
水やり
鉢土の表面が乾いたら十分に与えます。冬も意外に乾きやすく、注意が必要です。
芽が出て葉が成長しきるまでの間は、上から水をかけてはいけません。芽に水がたまって軟腐病になるおそれがあります。

肥料
芽が出てきたら9月まで月1回、油かすと骨粉を等量配合した肥料の親指大のものを、5号鉢なら4つ、月ごとに位置を変えて鉢縁に埋め込みます。同時に週1回、観葉植物用の液体肥料を3000~4000倍に薄めて施します。葉の成長が終わったら、液体肥料はリン酸とカリウムのみのものに切り替えて、4000倍に薄めて週に1回施します。
病気と害虫
病気:ウイルス病、軟腐病
ウイルス病は、エビネ栽培で最も恐ろしい病気です。治療不能であるため、発病した株と用土は処分し、その周辺の株も隔離します。予防するには、ウイルスを媒介するアブラムシなどを防除します。作業でハサミを使うときは、1株ごとに刃を火であぶってウイルスの伝染を防ぎます。
軟腐病は、新芽が腐って抜けたり、倒れて枯れたりする病気で、「すっぽ抜け」とも呼ばれます。腐った部分は悪臭がします。

害虫:アブラムシ、ハダニ、カイガラムシ、ケムシ類、ナメクジ
アブラムシは主に5月から8月に、ハダニやカイガラムシは夏に多く発生します。ナメクジは新芽や蕾、花を食害します。葉を食害するケムシが5月から7月に発生することもあります。
用土(鉢植え)
ヤシ殻チップの中粒と大粒を等量で混ぜたものか、ヤシ殻チップ5、硬質鹿沼土小粒3、軽石小粒2の割合で配合したものを使います。ヤシ殻チップは軽く水を含ませてから混ぜ合わせましょう。
植えつけ、 植え替え
植え替えは2~3年に1回、新芽発生直後か開花直後に行います。新芽発生直後の場合は、新芽を傷めないように注意して扱います。鉢は5号以上の駄温鉢やプラスチック鉢など、乾きにくいものを使います。植えつけの際に、新芽のあるほうを広く開けて、偽鱗茎が成長するスペースを確保します。

ふやし方
株分け:大きい株は分けることができます。新芽と3~5個分の偽鱗茎をつけて1株とします。
バックバルブ吹き:葉のついていない古い偽鱗茎を1~2個ずつに分け、水ゴケで植えつけます。3~6か月で新しい芽が出て、小苗となります。
タネまき:秋にとりまきができますが、自然に実ったタネからは親株以上の花を期待できません。苗床は、親と同じ用土に段ボールを混ぜたものか、ツルランや交配種を根を広げて植えた大きい平鉢を使います。
主な作業
花がら摘み:花が半ば以上終わったら、株の根元をしっかりと押さえ、花茎をしっかりと握って、ねじるように回して上に引っ張ります。
0
0
文章
Dummer. ゛☀
2017年09月23日

The Prickly Pear Cactus (Opuntia sp.) thrives in hot, dry desert areas, growing 3 to 20 feet (0.9 to 6 m) tall, depending on the variety and growing conditions. It spreads to cover 3 to 15 feet (0.9 to 4.5 m). The leaves and fruit are edible once the spines are removed. Leaf pads are eaten as a vegetable. Fruit are eaten raw and used to make juice, jelly and candy.
Prickly Pear Cactus is hardy in U.S. Department of Agriculture hardiness zones 3b through 11. Once established, Prickly Pear Cactus are easy to care for and tolerate drought for two or three weeks.
Fill small pots or a seed tray with cactus soil. Break up any lumps in soil. Water the soil thoroughly and allow to drain.
Sow the seeds in the late spring when night temperatures consistently reach above 45 degrees Fahrenheit (7 degrees Celsius). Rub the Prickly Pear Cactus seeds against a piece of sandpaper to scratch the seed coat. Scratched seeds germinate faster and more reliably than untreated seeds.
Plant one seed per pot or plant seeds 1 inch (2.5 cm) apart in seed trays. Press the seed into the soil and cover with a fine layer of soil, barely 1/8 inch (3 mm) thick.
Mist the soil surface with a fine spray of water. Cover the tray with the plastic lid or put individual pots in plastic bags. Cut a small hole in the plastic to create a vent.
Place the pots or tray in a sunny window or under artificial lights. Check the soil daily for moisture and temperature. Ideal soil and air temperatures for prickly pear cactus is 70 degrees Fahrenheit (21 degrees Celsius). If heat builds up under the plastic, move the container or open the vent further to release excess heat. Water the soil as needed with a fine mist, keeping the soil moist but not wet.
Inspect the seedlings daily. Cactus that turn yellow need more light. Brown or red cactus are receiving too much light.
Transplant the seedlings into larger pots or outside once the roots are well-developed. Place the transplants in full sun spaced 24 to 36 inches (60 to 90 cm) apart. Keep the soil moist for the first two weeks or until the plant has adjusted to its new location. Increase the time between watering once the cactus are established, allowing the soil to dry out slightly.
Fertilize with a balanced fertilizer such as 10-10-10 to encourage pad growth. If you prefer to encourage flowers and fruit, use a low-nitrogen fertilizer such as 0-10-10.
Tips
Harvest Prickly Pear Cactus seeds from the ripe fruit of a Prickly Pear Cactus. Wash the seeds to remove all pulp, and dry them on a paper towel in a warm place for a week or two until completely dry. Store seeds in an air-tight container in a cool, dark place until ready to plant the following spring.
Warning
Prickly Pear Cactus earn their name. Wear gloves and handle the plants carefully, the spines are sharp and cause painful irritation.

Prickly Pear Cactus is hardy in U.S. Department of Agriculture hardiness zones 3b through 11. Once established, Prickly Pear Cactus are easy to care for and tolerate drought for two or three weeks.

Fill small pots or a seed tray with cactus soil. Break up any lumps in soil. Water the soil thoroughly and allow to drain.
Sow the seeds in the late spring when night temperatures consistently reach above 45 degrees Fahrenheit (7 degrees Celsius). Rub the Prickly Pear Cactus seeds against a piece of sandpaper to scratch the seed coat. Scratched seeds germinate faster and more reliably than untreated seeds.

Plant one seed per pot or plant seeds 1 inch (2.5 cm) apart in seed trays. Press the seed into the soil and cover with a fine layer of soil, barely 1/8 inch (3 mm) thick.
Mist the soil surface with a fine spray of water. Cover the tray with the plastic lid or put individual pots in plastic bags. Cut a small hole in the plastic to create a vent.

Place the pots or tray in a sunny window or under artificial lights. Check the soil daily for moisture and temperature. Ideal soil and air temperatures for prickly pear cactus is 70 degrees Fahrenheit (21 degrees Celsius). If heat builds up under the plastic, move the container or open the vent further to release excess heat. Water the soil as needed with a fine mist, keeping the soil moist but not wet.

Inspect the seedlings daily. Cactus that turn yellow need more light. Brown or red cactus are receiving too much light.
Transplant the seedlings into larger pots or outside once the roots are well-developed. Place the transplants in full sun spaced 24 to 36 inches (60 to 90 cm) apart. Keep the soil moist for the first two weeks or until the plant has adjusted to its new location. Increase the time between watering once the cactus are established, allowing the soil to dry out slightly.

Fertilize with a balanced fertilizer such as 10-10-10 to encourage pad growth. If you prefer to encourage flowers and fruit, use a low-nitrogen fertilizer such as 0-10-10.
Tips
Harvest Prickly Pear Cactus seeds from the ripe fruit of a Prickly Pear Cactus. Wash the seeds to remove all pulp, and dry them on a paper towel in a warm place for a week or two until completely dry. Store seeds in an air-tight container in a cool, dark place until ready to plant the following spring.

Warning
Prickly Pear Cactus earn their name. Wear gloves and handle the plants carefully, the spines are sharp and cause painful irritation.
0
0
文章
权问薇
2017年09月22日


扦插分类:
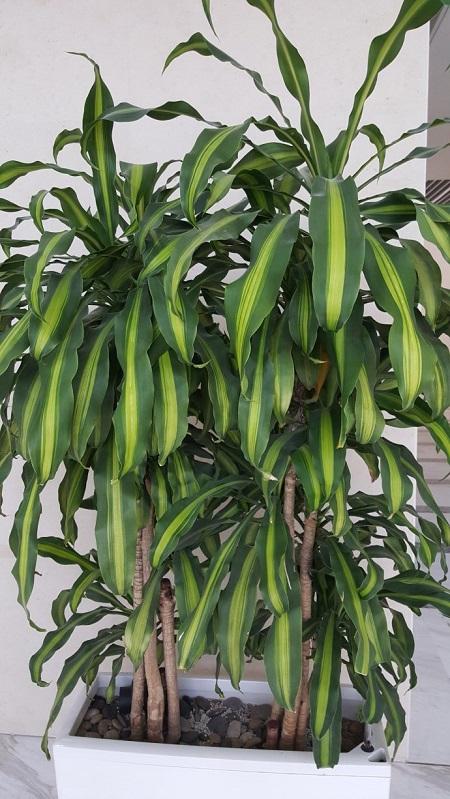
#巴西木 的繁殖方法最常见的就是扦插方法,扦插方法也分两种:柱状扦插与细枝扦插。
扦插方法:
柱状扦插方法:
选用直径为6厘米至10厘米的树干进行扦插,10厘米以上也可以,但要保持树干的新鲜,数皮的颜色以浅黄色为宜;土壤约30厘米深即可;在扦插前要对基质进行消毒;树干插入土壤的深度约为10厘米至25厘米之间,这个可以根据树干的牢固性来调节;若扦插的树干高度达到1米以上时,为了扦插的牢固,可以用其它主式为其固定。扦插时要保持土壤的潮湿度与温雅,同时也要避开午间前后的阳光;扦插后要及时浇水,约一个月左右就可以看见新芽生出;在新芽长至5厘米至10厘米高,就可定植了。
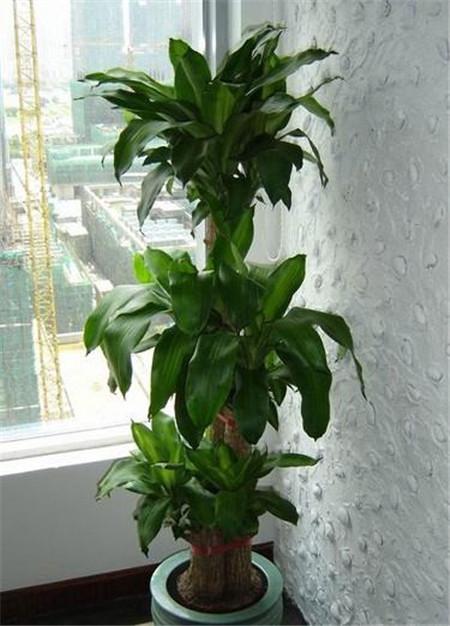
细枝扦插方法:
此方法可以与植物的修剪相结合,修剪下来的枝条即可扦插,在植物生长至一定的高度时,就要将高处的部分枝条剪下用来扦插。扦插前先把枝条修剪成合适的长度,在进行扦插;扦插前同样要对各种土壤容器工具进行消毒,避免造成枝条受病害。扦插时可以选择横插与直插,在25度至30度的温度中,大约一个月左右就可以生长新的根系。
1
2
文章
Miss Chen
2017年09月22日

El granado es un arbusto o árbol pequeño que alcanza como mucho unos 6 metros de altura, aunque por lo general se queda en 2 metros más o menos. Su fruto, la granada, es una rica fruta, sabrosa, dulce y con grandes propiedades para la salud. Veamos pues los pasos y conocimientos que precisamos para el cultivo del granado en maceta.
Es una planta resistente y fácil de cultivar incluso en maceta. El suelo debe ser margoso, que es el compuesto por arcilla, limo y arena, y rico en humus. Hay variedades de granados enanos que nos darán muy buen resultado para el cultivo en maceta. La variedad ‘Nana’ es de las más interesantes, crece de forma compacta y tiene una densa floración. La variedad ‘Provence’ es muy parecida pero tolera mejor el frío, hasta -15ºC. También existen variedades ornamentales que no producen fruto como la ‘Flore Pleno’ y la ‘Madame Legrelle’ pero tienen fantásticas floraciones, en rojo la primera y en un rico tono salmón la segunda.

La localización para el granado debe ser la más soleada de que dispongamos en nuestro espacio de cultivo. Cuando las temperaturas bajen mucho, si vivimos en lugares de inviernos muy fríos, debemos resguardarlo en el interior de la casa. Si lo ponemos cerca de una ventana se encontrará a sus anchas. Sobre todo en las épocas de crecimiento hemos de regar con frecuencia y abundantemente, el suelo no debe secarse del todo entre riegos. En invierno reduciremos notablemente el aporte hídrico.

La poda es indispensable para darle a nuestro granado la forma deseada, el mejor momento es cuando haya pasado el riesgo de heladas. Hemos de podar las ramas débiles y las secas, así como las que hayan crecido demasiado, aumentando así la cantidad de flor que producirá el arbusto. El granado es bastante resistente a las plagas, hay que vigilar la mosca de la fruta que suele atacarlo fácilmente. Un problema muy común es el agrietado de la fruta, se produce por fluctuaciones importantes en el grado de humedad del suelo durante la fructificación.
Es una planta resistente y fácil de cultivar incluso en maceta. El suelo debe ser margoso, que es el compuesto por arcilla, limo y arena, y rico en humus. Hay variedades de granados enanos que nos darán muy buen resultado para el cultivo en maceta. La variedad ‘Nana’ es de las más interesantes, crece de forma compacta y tiene una densa floración. La variedad ‘Provence’ es muy parecida pero tolera mejor el frío, hasta -15ºC. También existen variedades ornamentales que no producen fruto como la ‘Flore Pleno’ y la ‘Madame Legrelle’ pero tienen fantásticas floraciones, en rojo la primera y en un rico tono salmón la segunda.

La localización para el granado debe ser la más soleada de que dispongamos en nuestro espacio de cultivo. Cuando las temperaturas bajen mucho, si vivimos en lugares de inviernos muy fríos, debemos resguardarlo en el interior de la casa. Si lo ponemos cerca de una ventana se encontrará a sus anchas. Sobre todo en las épocas de crecimiento hemos de regar con frecuencia y abundantemente, el suelo no debe secarse del todo entre riegos. En invierno reduciremos notablemente el aporte hídrico.

La poda es indispensable para darle a nuestro granado la forma deseada, el mejor momento es cuando haya pasado el riesgo de heladas. Hemos de podar las ramas débiles y las secas, así como las que hayan crecido demasiado, aumentando así la cantidad de flor que producirá el arbusto. El granado es bastante resistente a las plagas, hay que vigilar la mosca de la fruta que suele atacarlo fácilmente. Un problema muy común es el agrietado de la fruta, se produce por fluctuaciones importantes en el grado de humedad del suelo durante la fructificación.
0
0
文章
玲儿
2017年09月21日

センペルビウム(センペルビブム)の育て方・栽培方法
育て方のポイント
栽培環境・日当たり・置き場
春秋生育型の多肉植物として栽培します。3月から6月ごろの春から初夏までと、9月から11月の秋に生育期し、その間の暑い夏期と寒い冬期には休眠します。
全般に耐寒性は強く、強い霜に当たっても傷むことはありません。その一方高温多湿には弱いため、梅雨から夏にかけては雨の当たらない、風通しのよい半日陰になる場所で夏越しをさせます。
真夏以外の時期は戸外の日当たりのよい場所で管理し、雨に当ててもかまいません。晩秋に気温が下がってくると紅葉し始め、冬を越して春に暖かくなってくると紅葉色がさめ、生育期の美しい発色を見せてくれます。
庭植えにする場合は水はけがよく、夏場に半日陰になる場所がよいでしょう。

水やり
春と秋の生育期には用土の表面が乾いたらたっぷりと与えます。梅雨明けから夏の休眠期に用土が湿りすぎていると根腐れを起こすことがあるので水やりは控え、雨も当てないようにします。冬の休眠期は戸外で雨ざらしになってもかまいません。
肥料
春と秋の生育期には緩効性化成肥料か液体肥料を少量施します。

病気と害虫
病気:問題となる病気は特にありません。
害虫:カイガラムシ、アブラムシ、ネジラミ
茎や葉にカイガラムシやアブラムシ、根にネジラミ(サボテンネコナカイガラムシ)が発生することがあります。
用土(鉢植え)
水はけのよい用土を用います。鹿沼土小粒2、赤玉土小粒2、ピートモス2、川砂2、くん炭2などの配合土がよいでしょう。
植えつけ、 植え替え
植え替えは2~3年に1回行います。生育期ならいつでもできますが、生育期の直前か初期が適期です。このときに群生している株は株分け、茎が伸びてしまった株は剪定やさし木をしてもよいでしょう。

ふやし方
株分け、さし芽、タネまきでふやします。適期はいずれも3月から5月、9月から10月です。
株分け:群生している株は、植え替え時に株分けをしてもよいでしょう。
さし芽:伸びてしまったランナーの先の子株を剪定し、切った芽でさし木ができます。
タネまき:原種は、タネをまいてふやすこともできます。

主な作業
花茎の整理:春ごろから不定期に花茎を伸ばしますが、花を咲かせたロゼットは枯れてしまいます。花茎を早めに整理して、子株の生育を促しましょう。
育て方のポイント
栽培環境・日当たり・置き場
春秋生育型の多肉植物として栽培します。3月から6月ごろの春から初夏までと、9月から11月の秋に生育期し、その間の暑い夏期と寒い冬期には休眠します。
全般に耐寒性は強く、強い霜に当たっても傷むことはありません。その一方高温多湿には弱いため、梅雨から夏にかけては雨の当たらない、風通しのよい半日陰になる場所で夏越しをさせます。
真夏以外の時期は戸外の日当たりのよい場所で管理し、雨に当ててもかまいません。晩秋に気温が下がってくると紅葉し始め、冬を越して春に暖かくなってくると紅葉色がさめ、生育期の美しい発色を見せてくれます。
庭植えにする場合は水はけがよく、夏場に半日陰になる場所がよいでしょう。

水やり
春と秋の生育期には用土の表面が乾いたらたっぷりと与えます。梅雨明けから夏の休眠期に用土が湿りすぎていると根腐れを起こすことがあるので水やりは控え、雨も当てないようにします。冬の休眠期は戸外で雨ざらしになってもかまいません。
肥料
春と秋の生育期には緩効性化成肥料か液体肥料を少量施します。

病気と害虫
病気:問題となる病気は特にありません。
害虫:カイガラムシ、アブラムシ、ネジラミ
茎や葉にカイガラムシやアブラムシ、根にネジラミ(サボテンネコナカイガラムシ)が発生することがあります。
用土(鉢植え)
水はけのよい用土を用います。鹿沼土小粒2、赤玉土小粒2、ピートモス2、川砂2、くん炭2などの配合土がよいでしょう。
植えつけ、 植え替え
植え替えは2~3年に1回行います。生育期ならいつでもできますが、生育期の直前か初期が適期です。このときに群生している株は株分け、茎が伸びてしまった株は剪定やさし木をしてもよいでしょう。

ふやし方
株分け、さし芽、タネまきでふやします。適期はいずれも3月から5月、9月から10月です。
株分け:群生している株は、植え替え時に株分けをしてもよいでしょう。
さし芽:伸びてしまったランナーの先の子株を剪定し、切った芽でさし木ができます。
タネまき:原種は、タネをまいてふやすこともできます。

主な作業
花茎の整理:春ごろから不定期に花茎を伸ばしますが、花を咲かせたロゼットは枯れてしまいます。花茎を早めに整理して、子株の生育を促しましょう。
0
0


