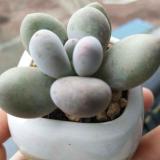
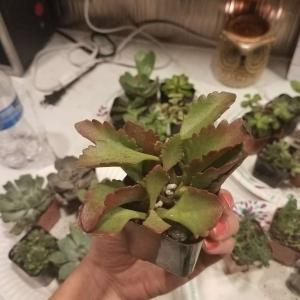
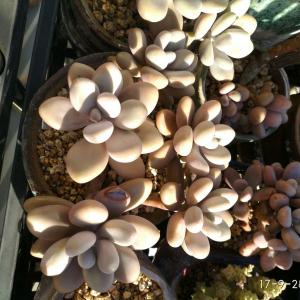
成长记
嘟嘟噜嘟嘟(o^㉨^o)♪
2017年11月04日

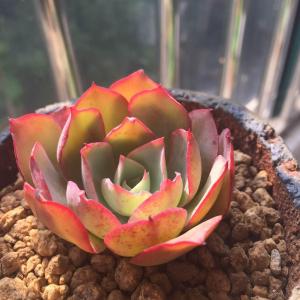
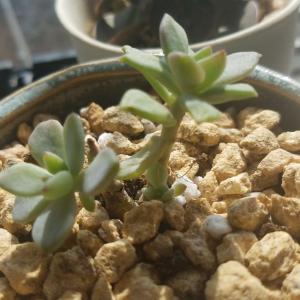
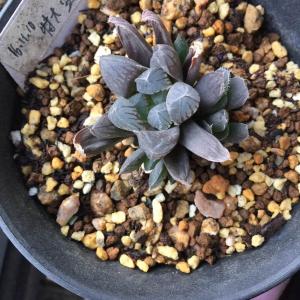
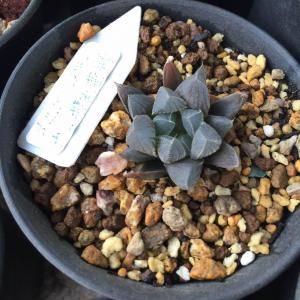
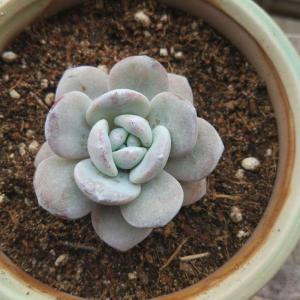
作为一个刚入坑的萌新特喜欢雪莲,11月1号刚入的一株,希望可以养好,满足我的一个心愿(◦˙▽˙◦)

1
0
Harley Quinn:加油呦
文章
Miss Chen
2017年11月02日

Pruning strawberries (Fragaria x ananassa) encourages them to grow strongly and produce plenty of fruit. Strawberries are hardy in U.S. Department of Agriculture plant hardiness zones 2 through 11. June-bearing or short-day strawberries fruit in spring and early summer; ever-bearing varieties produce strawberries through the growing season; day-neutral plants usually fruit three months after planting. Before and after pruning strawberries, wipe your pruning shear blades with rubbing alcohol to help prevent the spread of pests and diseases.

First-Year Plants
Pruning flowers on strawberries in their first year increases fruit production later. June-bearing, ever-bearing and day-neutral strawberries that have their first flowers pruned also grow more vigorously than unpruned plants.
Prune all the flowering stalks on June-bearing strawberries in the first growing season. Prune the stalks at their bases where they join the rest of the plant. Prune the first flush of flowers that appear on ever-bearing strawberries after planting. If your ever-bearing plants are growing strongly, you can allow the second flush of flowers to develop into fruits. Prune flowers on day-neutral varieties for six weeks after planting.
Matted Rows
Selective pruning of strawberry runners helps produce matted rows of plants. Runners are shoots that grow out from plants and develop roots, which grow into new plants. Matted rows of strawberries are wide rows that cover bare soil and suppress weeds.

To create matted rows of June-bearing or ever-bearing strawberries, plant new plants 12 to 18 inches apart in rows 3 to 4 feet apart. When runners appear, encourage six from each plant to form roots. Weigh them down, evenly spaced around the plants, with small stones or U-shaped pieces of wire at their nodes, which are bumps on the stems. Prune all other runners that appear at their bases where they join the rest of the plant.
Grow day-neutral strawberries 9 inches apart in rows 3 to 4 feet apart. Prune all runners on day-neutral plants in the first year, and allow them to form matted rows in the second and third year.
Ribbon Rows
Ribbon rows are rows of single strawberries. Growing strawberries in ribbon rows allows air to circulate and reduces the risk of pests and diseases.
To grow June-bearing, ever-bearing and day-neutral strawberries in ribbon rows, space the plants 4 to 9 inches apart in rows 2 to 3 feet apart. Prune all the runners that appear through the life of the plants. To help prevent problems with weeds, spread a 2-inch layer of sawdust or a 4-inch layer of clean straw between the strawberry plants.
Gray Mold
Strawberries suffer from a fungal disease called gray mold, but pruning helps reduce the disease's spread. Gray mold often affects strawberries in damp weather and in sites with poor air circulation. Blossoms and fruit slowly turn moldy, and finally a dusty, gray mold covers whole fruits.
Prune infected blossoms and fruit, and dead leaves, on June-bearing, ever-bearing and day-neutral strawberries. Pick healthy fruit at least every other day, and immediately refrigerate it. Water in the morning at the plant bases to help prevent gray mold.

First-Year Plants
Pruning flowers on strawberries in their first year increases fruit production later. June-bearing, ever-bearing and day-neutral strawberries that have their first flowers pruned also grow more vigorously than unpruned plants.
Prune all the flowering stalks on June-bearing strawberries in the first growing season. Prune the stalks at their bases where they join the rest of the plant. Prune the first flush of flowers that appear on ever-bearing strawberries after planting. If your ever-bearing plants are growing strongly, you can allow the second flush of flowers to develop into fruits. Prune flowers on day-neutral varieties for six weeks after planting.
Matted Rows
Selective pruning of strawberry runners helps produce matted rows of plants. Runners are shoots that grow out from plants and develop roots, which grow into new plants. Matted rows of strawberries are wide rows that cover bare soil and suppress weeds.

To create matted rows of June-bearing or ever-bearing strawberries, plant new plants 12 to 18 inches apart in rows 3 to 4 feet apart. When runners appear, encourage six from each plant to form roots. Weigh them down, evenly spaced around the plants, with small stones or U-shaped pieces of wire at their nodes, which are bumps on the stems. Prune all other runners that appear at their bases where they join the rest of the plant.
Grow day-neutral strawberries 9 inches apart in rows 3 to 4 feet apart. Prune all runners on day-neutral plants in the first year, and allow them to form matted rows in the second and third year.
Ribbon Rows
Ribbon rows are rows of single strawberries. Growing strawberries in ribbon rows allows air to circulate and reduces the risk of pests and diseases.
To grow June-bearing, ever-bearing and day-neutral strawberries in ribbon rows, space the plants 4 to 9 inches apart in rows 2 to 3 feet apart. Prune all the runners that appear through the life of the plants. To help prevent problems with weeds, spread a 2-inch layer of sawdust or a 4-inch layer of clean straw between the strawberry plants.
Gray Mold
Strawberries suffer from a fungal disease called gray mold, but pruning helps reduce the disease's spread. Gray mold often affects strawberries in damp weather and in sites with poor air circulation. Blossoms and fruit slowly turn moldy, and finally a dusty, gray mold covers whole fruits.
Prune infected blossoms and fruit, and dead leaves, on June-bearing, ever-bearing and day-neutral strawberries. Pick healthy fruit at least every other day, and immediately refrigerate it. Water in the morning at the plant bases to help prevent gray mold.
1
0
文章
Dummer. ゛☀
2017年09月28日

Kohleria plants originated in Mexico and South America. They produce tubular and often speckled flowers in a variety of colors, and their foliage can be decorative as well. Although hardy in U.S. Department of Agriculture plant hardiness zones 10 and 11, they are easily damaged by excess water, so they are usually grown as houseplants. Their culture is similar to that of African Violets, but the height of Kohlerias varies from 6 inches (15 cm) up to 4 feet (1.2 m).
Growing Conditions
Light: Kohleria needs plenty of bright light to bloom. Keep out of direct sunlight.
Water: Spring through fall, water thoroughly and allow the top 2 inches (5 cm) to dry out between waterings. In winter, water just enough to prevent leaves from wilting. Rhizomes store water so it’s more tolerant of dry soil than wet.
Humidity: Kohleria prefers relative humidity above 50%, but will tolerate lower levels. Use a room humidifier or a humidity tray to maintain moist air. Don’t mist this plant because the hairy leaves will trap moisture, which will cause spots and possibly botrytis.
Temperature: Average room temperatures 65 to 75°F (18 to 24°C). Don’t expose your plant to temps below 60°F (16°C).
Soil: Peat moss-based potting mix with perlite added for good drainage. African Violet potting mix is ideal.
Fertilizer: Feed every 2 weeks spring and summer with a high-phosphorus liquid fertilizer (such as 10-30-10) diluted by half.
General Care
Put your Kohleria where it’ll get plenty of light, but out of direct sun. Filtered light from a south- or west-facing window will give it the light it needs.
Keep the soil evenly moist during the growing season, but take care not to overwater. Dry soil will cause the plant to go dormant. Soggy soil will quickly cause the rhizomes to rot.
You can expect dozens of blooms on plants in spring and summer. You’ll get the most blooms by providing plenty of bright, indirect light.
This one likes to be slightly pot-bound, and blooms best this way. Repot in spring when it has outgrown its pot. Always use a container with drainage holes to prevent soggy soil.
Propagation
Divide rhizomes in spring and pot separately. Or take 4-inch (10 cm) leaf tip cuttings with at least 1 pair of leaves attached and root in moist potting mix. Cover the whole thing with plastic or a glass cloche to hold in moisture. Cuttings root easily in about 4 to 6 weeks.

Growing Conditions
Light: Kohleria needs plenty of bright light to bloom. Keep out of direct sunlight.
Water: Spring through fall, water thoroughly and allow the top 2 inches (5 cm) to dry out between waterings. In winter, water just enough to prevent leaves from wilting. Rhizomes store water so it’s more tolerant of dry soil than wet.

Humidity: Kohleria prefers relative humidity above 50%, but will tolerate lower levels. Use a room humidifier or a humidity tray to maintain moist air. Don’t mist this plant because the hairy leaves will trap moisture, which will cause spots and possibly botrytis.
Temperature: Average room temperatures 65 to 75°F (18 to 24°C). Don’t expose your plant to temps below 60°F (16°C).
Soil: Peat moss-based potting mix with perlite added for good drainage. African Violet potting mix is ideal.
Fertilizer: Feed every 2 weeks spring and summer with a high-phosphorus liquid fertilizer (such as 10-30-10) diluted by half.

General Care
Put your Kohleria where it’ll get plenty of light, but out of direct sun. Filtered light from a south- or west-facing window will give it the light it needs.
Keep the soil evenly moist during the growing season, but take care not to overwater. Dry soil will cause the plant to go dormant. Soggy soil will quickly cause the rhizomes to rot.

You can expect dozens of blooms on plants in spring and summer. You’ll get the most blooms by providing plenty of bright, indirect light.
This one likes to be slightly pot-bound, and blooms best this way. Repot in spring when it has outgrown its pot. Always use a container with drainage holes to prevent soggy soil.

Propagation
Divide rhizomes in spring and pot separately. Or take 4-inch (10 cm) leaf tip cuttings with at least 1 pair of leaves attached and root in moist potting mix. Cover the whole thing with plastic or a glass cloche to hold in moisture. Cuttings root easily in about 4 to 6 weeks.
1
1
文章
Dummer. ゛☀
2017年09月27日

Gloriosa Lilies (the genus Gloriosa), also known as Flame Lilies and Glory Lilies, thrive in fertile, well-drained soil in full to partial sun. Hardy in USDA plant hardiness zones 10 and 11, they can be overwintered successfully in zone 9 with winter mulch. In cooler areas, Gloriosa Lilies can be grown successfully during the summer and lifted and stored for the winter.
These exotic-looking lilies produce an abundance of yellow and red flowers with petals that curl backward to resemble a flash of brilliant flames. They can reach heights of 8 feet (2.4 m) and require a trellis or wall to climb. Although climbing lilies do not produce tendrils, the specialized leaves of the Gloriosa Lily cling to the trellis or other plant material, to pull the vine upward.
Growing Conditions
Select a location that receives six to eight hours of direct sunlight a day. In southern climates, a location that allows the vines to grow in full sun while the roots of the plant remain shaded is the best location for growing a Gloriosa Lily plant. Some protection from afternoon sun may be needed as well.
Prepare the soil by tilling to a depth of 8 inches (20 cm) and amending with generous amounts of organic matter such as peat moss, compost or well-rotted manure. Organic matter improves both drainage and aeration and provides a slow-release fertilizer to your Gloriosa Lilies.
Erect a 6-to 8-foot (1.8 to 2.4 m) trellis for your Gloriosa Lilies prior to planting. Check that it is secure and will not topple under the weight of the growing Gloriosa Lilies.
The ideal time for Gloriosa Lily planting is in the spring after the soil has warmed and all danger of frost has passed. Plant the Gloriosa Lily tubers approximately 3 to 4 inches (7.5 to 10 cm) from the trellis. Dig a hole to the depth of 2 to 4 inches (5 to 10 cm) and lay the tuber on its side in the hole.
Space the tubers 6 to 8 inches (15 to 20 cm) apart to allow room for the mature plants to grow. Cover the tubers and gently firm the soil down to remove air pockets and secure the tubers.
General Care
Water the newly planted tuber to saturate the soil to a depth of 2 to 3 inches (5 to 7.5 cm) to give your Gloriosa Lily a good start. Keep the soil evenly moist until shoots appear in two to three weeks. Reduce water to once or twice a week or whenever the soil feels dry an inch below the surface. Gloriosa Lilies typically require an inch of rain and week and need supplemental watering during dry periods.
Train the vines to climb the trellis by tying them to the trellis with soft plant ties, if necessary. Although Gloriosa Lilies cling to the trellis once established, they may need some help from you to get them started.
Fertilize Gloriosa Lilies every two weeks with water-soluble fertilizer designed for flowering plants. This provides the nutrients needed to promote healthy blooming.
Cut the vines back in the fall after they are killed by the frost. Tubers can be lifted and stored in moist peat moss in a cool, dark place for the winter and replanted in the spring.

These exotic-looking lilies produce an abundance of yellow and red flowers with petals that curl backward to resemble a flash of brilliant flames. They can reach heights of 8 feet (2.4 m) and require a trellis or wall to climb. Although climbing lilies do not produce tendrils, the specialized leaves of the Gloriosa Lily cling to the trellis or other plant material, to pull the vine upward.

Growing Conditions
Select a location that receives six to eight hours of direct sunlight a day. In southern climates, a location that allows the vines to grow in full sun while the roots of the plant remain shaded is the best location for growing a Gloriosa Lily plant. Some protection from afternoon sun may be needed as well.
Prepare the soil by tilling to a depth of 8 inches (20 cm) and amending with generous amounts of organic matter such as peat moss, compost or well-rotted manure. Organic matter improves both drainage and aeration and provides a slow-release fertilizer to your Gloriosa Lilies.
Erect a 6-to 8-foot (1.8 to 2.4 m) trellis for your Gloriosa Lilies prior to planting. Check that it is secure and will not topple under the weight of the growing Gloriosa Lilies.

The ideal time for Gloriosa Lily planting is in the spring after the soil has warmed and all danger of frost has passed. Plant the Gloriosa Lily tubers approximately 3 to 4 inches (7.5 to 10 cm) from the trellis. Dig a hole to the depth of 2 to 4 inches (5 to 10 cm) and lay the tuber on its side in the hole.
Space the tubers 6 to 8 inches (15 to 20 cm) apart to allow room for the mature plants to grow. Cover the tubers and gently firm the soil down to remove air pockets and secure the tubers.

General Care
Water the newly planted tuber to saturate the soil to a depth of 2 to 3 inches (5 to 7.5 cm) to give your Gloriosa Lily a good start. Keep the soil evenly moist until shoots appear in two to three weeks. Reduce water to once or twice a week or whenever the soil feels dry an inch below the surface. Gloriosa Lilies typically require an inch of rain and week and need supplemental watering during dry periods.
Train the vines to climb the trellis by tying them to the trellis with soft plant ties, if necessary. Although Gloriosa Lilies cling to the trellis once established, they may need some help from you to get them started.

Fertilize Gloriosa Lilies every two weeks with water-soluble fertilizer designed for flowering plants. This provides the nutrients needed to promote healthy blooming.
Cut the vines back in the fall after they are killed by the frost. Tubers can be lifted and stored in moist peat moss in a cool, dark place for the winter and replanted in the spring.
0
0
文章
Dummer. ゛☀
2017年09月27日

Tulips (genus Tulipa) and Daffodils (genus Narcissus) are often the first flowers of spring. Tulips are available for U.S. Department of Agriculture plant hardiness zones 3 through 9, while daffodils grow in USDA zones 3 through 11. Most daffodils feature bright yellow tubular flowers, while tulips come in a rainbow of colors. Mixing the two bulbs in a single bed creates a colorful spring display and can increase the flowering period if you mix early-flowering daffodils with midseason or late-blooming tulips. Both flowers grow best with full, all-day sunlight and have similar care needs, making them amiable companions.
1. Spread a 2-inch (5 cm) thick layer of compost and 1 pound (450 g) of 10-10-10 fertilizer over every 50 square feet (4.6 square meters) of garden bed in the fall. Dig the compost and fertilizer into the top 6 inches (15 cm) of soil with a shovel.
2. Arrange the tulip and daffodil bulbs on the soil surface. Generally, cluster 5 to 7 bulbs together, spacing the bulbs 4 to 6 inches (10 to 15 cm) apart within the cluster but setting clusters 12 inches (30 cm) apart. Alternate the bulbs in the cluster between tulips and daffodils so that each cluster contains both flowers for an informal look. For a more formal look, alternate clusters only containing daffodils with clusters only containing tulips.
3. Dig a planting hole for each bulb using a trowel. Make the hole deep enough that the flat bottom of the bulb is at a depth equal to about three times the bulb’s width. Set the bulbs in their holes, and fill the holes in with soil.
4. Water the bulb bed immediately after planting to help settle the soil. The tulips daffodils require no further care until growth begins in spring.
5. Resume watering when the bulbs send up shoots in spring. Provide about 1 inch (2.5 cm) of water weekly, or enough to moisten the top 6 inches (15 cm) of soil, if spring rain doesn’t keep the soil moist.
6. Sprinkle 1 pound (450 g) of 10-10-10 fertilizer over every 50 square feet (4.6 square meters) of bed, applying the fertilizer to the soil between bulb clusters, after shoots appear. Water the fertilizer into the soil so that the roots can access the nutrients.
7. Cut off the flowers as soon as they begin to wilt. Depending on the variety, daffodils may bloom earlier than tulips, so removing the old daffodils prevents them from detracting from the tulips’ beauty. Cut back the foliage after it dies back naturally, usually about six weeks after flowering.
Tips
Most tulip and daffodil bulbs require no further maintenance after they go dormant in summer as long as winters drop below 45°F (7°C) for at least 8 weeks. If a cold-enough winter isn’t expected, dig up the bulbs after the foliage dies and store them between 40 and 45 °F (4.5 and 7 °C) to provide this cold treatment. Replant the bulbs in late winter for spring flowering.
You can apply a 2- to 3-inch (5 to 7.5 cm) layer of mulch to prevent weeds from invading the dormant bulb bed, if desired.

1. Spread a 2-inch (5 cm) thick layer of compost and 1 pound (450 g) of 10-10-10 fertilizer over every 50 square feet (4.6 square meters) of garden bed in the fall. Dig the compost and fertilizer into the top 6 inches (15 cm) of soil with a shovel.
2. Arrange the tulip and daffodil bulbs on the soil surface. Generally, cluster 5 to 7 bulbs together, spacing the bulbs 4 to 6 inches (10 to 15 cm) apart within the cluster but setting clusters 12 inches (30 cm) apart. Alternate the bulbs in the cluster between tulips and daffodils so that each cluster contains both flowers for an informal look. For a more formal look, alternate clusters only containing daffodils with clusters only containing tulips.

3. Dig a planting hole for each bulb using a trowel. Make the hole deep enough that the flat bottom of the bulb is at a depth equal to about three times the bulb’s width. Set the bulbs in their holes, and fill the holes in with soil.
4. Water the bulb bed immediately after planting to help settle the soil. The tulips daffodils require no further care until growth begins in spring.
5. Resume watering when the bulbs send up shoots in spring. Provide about 1 inch (2.5 cm) of water weekly, or enough to moisten the top 6 inches (15 cm) of soil, if spring rain doesn’t keep the soil moist.

6. Sprinkle 1 pound (450 g) of 10-10-10 fertilizer over every 50 square feet (4.6 square meters) of bed, applying the fertilizer to the soil between bulb clusters, after shoots appear. Water the fertilizer into the soil so that the roots can access the nutrients.
7. Cut off the flowers as soon as they begin to wilt. Depending on the variety, daffodils may bloom earlier than tulips, so removing the old daffodils prevents them from detracting from the tulips’ beauty. Cut back the foliage after it dies back naturally, usually about six weeks after flowering.

Tips
Most tulip and daffodil bulbs require no further maintenance after they go dormant in summer as long as winters drop below 45°F (7°C) for at least 8 weeks. If a cold-enough winter isn’t expected, dig up the bulbs after the foliage dies and store them between 40 and 45 °F (4.5 and 7 °C) to provide this cold treatment. Replant the bulbs in late winter for spring flowering.

You can apply a 2- to 3-inch (5 to 7.5 cm) layer of mulch to prevent weeds from invading the dormant bulb bed, if desired.
0
0
文章
玲儿
2017年09月24日

デンドロビウム・ノビル系の育て方・栽培方法
育て方のポイント
栽培環境・日当たり・置き場
3月下旬から11月上旬までは戸外で管理し、冬の間は室内の日当たりのよい窓辺に置きます。
1年を通し十分日光に当てることが大切で、特に長い時間日に当てるようにするとよく開花します。5月初めから9月初めまでは弱めの遮光をして葉焼けを防止します。庭木の下などはやや暗すぎる場合が多いので注意が必要です。また、できるだけ株どうしの間隔をあけ、風通しがよくなるようにします。
水やり
もともと樹木に着生するランですから、根がびっしょりとぬれたままになるのは嫌います。水をたっぷりと与えたあとは、植え込み材料がやや乾いてくるまで次の水やりは行いません。初夏から9月ごろまでは生育が旺盛になるので、この期間のみ、ややぬれていてもたっぷりと水を与えます。10月からは乾かし気味にし、ややバルブがやせてくる程度の水やりとします。その後節々から花芽が見え始めたら水をやや多めにして、開花まで同様の水やりをします。

肥料
ノビル系は肥料を施す期間が限られているため、長期間にわたり肥料効果がある緩効性化成肥料は避けます。4月から7月末まで月1回固形の油かす系肥料を施し、さらに週に1回液体肥料も施します。8月以降も株は成長を続けますが、肥料は施しません。
病気と害虫
病気:葉に黒い斑点
夏にバルブが大きく育ち、みずみずしい葉がつくころから秋にかけ、葉に黒い斑点が出ることがありますが、生育に大きな影響はありません。
害虫:ナメクジ
新芽や花芽はナメクジの食害を受けやすいため、春の新芽の時期と冬から春の花芽の時期は特に注意します。
用土(鉢植え)
水ゴケと素焼き鉢の組み合わせか、細かめの洋ラン用バークとプラスチック鉢との組み合わせで植え込みます。
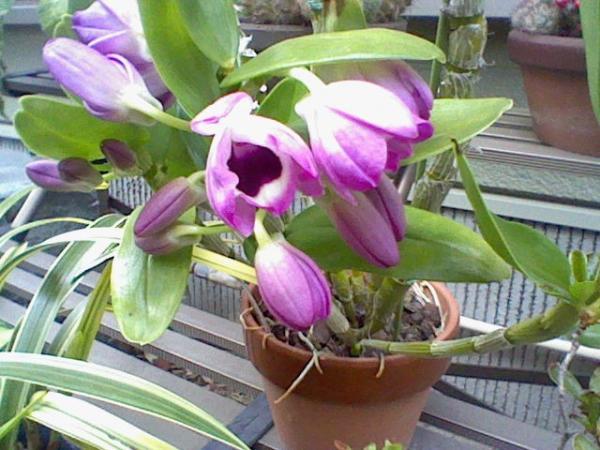
植えつけ、 植え替え
植え替えは2年に1回程度、春の花後に行うのが標準。春遅くに開花した場合は、早めに花を切って植え替えを行います。
ふやし方
バルブの上部に高芽を比較的多く出します。高芽が小さなバルブになり、根を伸ばしたころを見計らって指で摘み取り、水ゴケで小さな鉢に植えつけます。また、株が大きくなった場合はバルブを4本程度ずつつけて株分けも可能です。

主な作業
花がら摘み:節々に咲く花は1輪ずつしぼんでくるので、しぼんできた花から順次指で摘み取る。半分以上の花が終わってきたら、節から伸びる短い花茎をハサミで切り取る。バルブを根元から切らないように注意しましょう。バルブを切ってしまうとその後生育しなくなってしまいます。
支柱立て:秋、バルブがほぼ伸びたころに、支柱を立て株の姿を整えておきます。ただし、小型の品種はバルブがしっかりと立ち支柱が不要のものも多くなっています。
育て方のポイント
栽培環境・日当たり・置き場
3月下旬から11月上旬までは戸外で管理し、冬の間は室内の日当たりのよい窓辺に置きます。
1年を通し十分日光に当てることが大切で、特に長い時間日に当てるようにするとよく開花します。5月初めから9月初めまでは弱めの遮光をして葉焼けを防止します。庭木の下などはやや暗すぎる場合が多いので注意が必要です。また、できるだけ株どうしの間隔をあけ、風通しがよくなるようにします。
水やり
もともと樹木に着生するランですから、根がびっしょりとぬれたままになるのは嫌います。水をたっぷりと与えたあとは、植え込み材料がやや乾いてくるまで次の水やりは行いません。初夏から9月ごろまでは生育が旺盛になるので、この期間のみ、ややぬれていてもたっぷりと水を与えます。10月からは乾かし気味にし、ややバルブがやせてくる程度の水やりとします。その後節々から花芽が見え始めたら水をやや多めにして、開花まで同様の水やりをします。

肥料
ノビル系は肥料を施す期間が限られているため、長期間にわたり肥料効果がある緩効性化成肥料は避けます。4月から7月末まで月1回固形の油かす系肥料を施し、さらに週に1回液体肥料も施します。8月以降も株は成長を続けますが、肥料は施しません。
病気と害虫
病気:葉に黒い斑点
夏にバルブが大きく育ち、みずみずしい葉がつくころから秋にかけ、葉に黒い斑点が出ることがありますが、生育に大きな影響はありません。
害虫:ナメクジ
新芽や花芽はナメクジの食害を受けやすいため、春の新芽の時期と冬から春の花芽の時期は特に注意します。
用土(鉢植え)
水ゴケと素焼き鉢の組み合わせか、細かめの洋ラン用バークとプラスチック鉢との組み合わせで植え込みます。

植えつけ、 植え替え
植え替えは2年に1回程度、春の花後に行うのが標準。春遅くに開花した場合は、早めに花を切って植え替えを行います。
ふやし方
バルブの上部に高芽を比較的多く出します。高芽が小さなバルブになり、根を伸ばしたころを見計らって指で摘み取り、水ゴケで小さな鉢に植えつけます。また、株が大きくなった場合はバルブを4本程度ずつつけて株分けも可能です。

主な作業
花がら摘み:節々に咲く花は1輪ずつしぼんでくるので、しぼんできた花から順次指で摘み取る。半分以上の花が終わってきたら、節から伸びる短い花茎をハサミで切り取る。バルブを根元から切らないように注意しましょう。バルブを切ってしまうとその後生育しなくなってしまいます。
支柱立て:秋、バルブがほぼ伸びたころに、支柱を立て株の姿を整えておきます。ただし、小型の品種はバルブがしっかりと立ち支柱が不要のものも多くなっています。
0
0


