文章
Dummer. ゛☀
2017年08月10日

An unforgettable sight when exiting the airplane terminal at Cabo San Lucas are the huge brightly colored croton plants that line the edges of the buildings. These popular tropical plants are hardy to United States Department of Agriculture zones 9 to 11. For many of us, that leaves our experience with the plant simply as a houseplant. However, croton in the garden can be enjoyed during the summer and sometimes into the early fall. You just need to learn some rules about how to grow a croton outdoors.
Croton in the Garden
Crotons are thought to be native to Malaysia, India and some of the South Pacific Islands. There are many species and cultivars, but the plants are most known for their easy maintenance and colorful foliage, often with interesting variegation or speckling. Can you grow a croton outdoors? It depends where your zone is located and what your average low temperatures are per year. Croton is very frost tender and will not survive freezing temperatures. Southern gardeners in frost free zones should have no problem growing croton plants outside. Anyone who lives where there are temperatures that near freezing or 32 degrees Fahrenheit (0 Celsius), even temperatures that hover in the 40’s (4 C.) can be damaging. That is why some gardeners choose to grow croton in containers on casters. That way, even the slightest threat of cold temps and the plant can be moved to a sheltered location. Care of outdoor croton may also include covering the plant if it is in the ground. The thing to remember is that these are tropical plants and are not suited for freezing temperatures which can kill the foliage and even the roots. Since croton hardiness is limited to freezing and even slightly above, northern gardeners should not attempt to grow the plant outdoors except in the warmest days of summer. Position the plant so it receives plenty of bright but indirect light to keep the foliage colors bright. Also, place the plant where it will not experience cold northern winds. Use well-draining potting soil and a container large enough to encompass the root ball with a little bit of growing room. Croton does not like to be transplanted, which should only be done every 3 to 5 years or as needed.
Care of Outdoor Croton Plants
Plants grown outdoors in appropriate zones will need slightly more water than those inside. This is because sunlight evaporates moisture and wind has a tendency to dry out soil quickly. Watch for pests and disease and handle immediately. When larger plants in the ground are in danger of a cold snap, cover them with a burlap sack or old blanket. To prevent breaking limbs, push in some stakes around the plant to handle the weight of the covering.
Mulch around plants with at least two inches (5 cm.) of organic material. This will help protect roots from cold, prevent competitive weeds and slowly feed the plant as the material breaks down. Where freezes are early and severe, grow plants in containers and move them in as soon as fall starts to arrive. This should save the plant and you can care for it indoors until the first warm rays of spring when it can go back outside after all danger of frost has passed.

Croton in the Garden
Crotons are thought to be native to Malaysia, India and some of the South Pacific Islands. There are many species and cultivars, but the plants are most known for their easy maintenance and colorful foliage, often with interesting variegation or speckling. Can you grow a croton outdoors? It depends where your zone is located and what your average low temperatures are per year. Croton is very frost tender and will not survive freezing temperatures. Southern gardeners in frost free zones should have no problem growing croton plants outside. Anyone who lives where there are temperatures that near freezing or 32 degrees Fahrenheit (0 Celsius), even temperatures that hover in the 40’s (4 C.) can be damaging. That is why some gardeners choose to grow croton in containers on casters. That way, even the slightest threat of cold temps and the plant can be moved to a sheltered location. Care of outdoor croton may also include covering the plant if it is in the ground. The thing to remember is that these are tropical plants and are not suited for freezing temperatures which can kill the foliage and even the roots. Since croton hardiness is limited to freezing and even slightly above, northern gardeners should not attempt to grow the plant outdoors except in the warmest days of summer. Position the plant so it receives plenty of bright but indirect light to keep the foliage colors bright. Also, place the plant where it will not experience cold northern winds. Use well-draining potting soil and a container large enough to encompass the root ball with a little bit of growing room. Croton does not like to be transplanted, which should only be done every 3 to 5 years or as needed.

Care of Outdoor Croton Plants
Plants grown outdoors in appropriate zones will need slightly more water than those inside. This is because sunlight evaporates moisture and wind has a tendency to dry out soil quickly. Watch for pests and disease and handle immediately. When larger plants in the ground are in danger of a cold snap, cover them with a burlap sack or old blanket. To prevent breaking limbs, push in some stakes around the plant to handle the weight of the covering.

Mulch around plants with at least two inches (5 cm.) of organic material. This will help protect roots from cold, prevent competitive weeds and slowly feed the plant as the material breaks down. Where freezes are early and severe, grow plants in containers and move them in as soon as fall starts to arrive. This should save the plant and you can care for it indoors until the first warm rays of spring when it can go back outside after all danger of frost has passed.
0
1
文章
Dummer. ゛☀
2017年08月10日

The garden croton (Codiaeum variegatum) is a small shrub with big tropical-looking leaves. Crotons can grow outdoors in gardening zones 9 to 11, and some varieties also make great houseplants, though demanding ones. Their striking red, orange and yellow-striped leaves make the extra work worthwhile. Some varieties even have purple or white stripes and patches on the dark green leaves. But sometimes the bright colors on a croton fade, leaving them with ordinary-looking green leaves. It can be disappointing to notice a croton losing color because those vibrant leaves are this plant’s best feature.
Why is My Croton Losing its Color?
Color loss of croton is common in winter and in low light conditions. Croton plants are native to the tropics, growing wild in Indonesia and Malaysia, and they do best in full sun or bright indoor light. Most often, croton plants with faded leaves are simply not receiving enough light. Conversely, some colors may fade if crotons are exposed to excessive direct light. Each variety has its own light preferences, so check whether the variety you have does best in full sun or partial sun.
What to Do When Croton Leaves are Fading
If a croton’s colors fade in low light levels, you need to increase the amount of light it is receiving. Bring the croton outdoors during the warm part of the year to give it more light. Be sure to harden off the plant, bringing it outdoors for a few hours at a time and placing it in a shady spot at first, to allow the plant to adjust to the brighter light, wind, and less stable temperatures of the outdoors. Crotons are not cold hardy and shouldn’t be exposed to temperatures below 30 degrees F. (-1 degree C.). Bring your croton back indoors before the first frost in fall. If a croton develops fading leaves when it is exposed to excessively bright light, try moving it into the shade or farther away from the window. To keep your croton healthy during the winter when it has to be indoors, place it near the sunniest window in the house, within 3 to 5 feet (.91 to 1.52 m.) of the glass, or provide a grow light. Legginess is another sign that the plant is not getting enough light. To ward off other problems that could cause weak coloration in crotons, provide a balanced slow-release fertilizer two to three times a year, but avoid over fertilizing, especially during the winter when growth is slower. Keep soil evenly moist, but avoid waterlogged or poorly drained soil, which may cause leaves to turn yellow. Crotons should be misted to keep them healthy indoors, since they prefer more humidity than most houses provide.

Why is My Croton Losing its Color?
Color loss of croton is common in winter and in low light conditions. Croton plants are native to the tropics, growing wild in Indonesia and Malaysia, and they do best in full sun or bright indoor light. Most often, croton plants with faded leaves are simply not receiving enough light. Conversely, some colors may fade if crotons are exposed to excessive direct light. Each variety has its own light preferences, so check whether the variety you have does best in full sun or partial sun.

What to Do When Croton Leaves are Fading
If a croton’s colors fade in low light levels, you need to increase the amount of light it is receiving. Bring the croton outdoors during the warm part of the year to give it more light. Be sure to harden off the plant, bringing it outdoors for a few hours at a time and placing it in a shady spot at first, to allow the plant to adjust to the brighter light, wind, and less stable temperatures of the outdoors. Crotons are not cold hardy and shouldn’t be exposed to temperatures below 30 degrees F. (-1 degree C.). Bring your croton back indoors before the first frost in fall. If a croton develops fading leaves when it is exposed to excessively bright light, try moving it into the shade or farther away from the window. To keep your croton healthy during the winter when it has to be indoors, place it near the sunniest window in the house, within 3 to 5 feet (.91 to 1.52 m.) of the glass, or provide a grow light. Legginess is another sign that the plant is not getting enough light. To ward off other problems that could cause weak coloration in crotons, provide a balanced slow-release fertilizer two to three times a year, but avoid over fertilizing, especially during the winter when growth is slower. Keep soil evenly moist, but avoid waterlogged or poorly drained soil, which may cause leaves to turn yellow. Crotons should be misted to keep them healthy indoors, since they prefer more humidity than most houses provide.

0
0
文章
Dummer. ゛☀
2017年08月10日

Boston ferns are fabulously popular houseplants. Hardy in USDA zones 9-11, they are kept indoors in pots in most regions. Capable of growing 3 feet (0.9 m) high and 4 feet (1.2 m) wide, Boston ferns can brighten any room with their lush green foliage. That’s why it can be so disheartening to see your vibrant green fern fronds turning black or brown. Keep reading to learn what causes a Boston fern with black fronds, and what to do about it.
Boston Fern Fronds Turning Black Isn’t Always Bad
There is one case in which a Boston fern with black fronds is perfectly natural, and it’s good to be able to spot it. You may see small black spots on the undersides of your fern’s leaves, lined up in regular rows. These spots are spores, and they’re the fern’s way of reproducing. Eventually, the spores will drop to the soil below and grow into reproductive structures. If you see these spots, don’t take any action! It’s a sign that your fern is healthy. Your fern will also experience some natural browning as it ages. As new growth emerges, the oldest leaves at the bottom of the fern will wither and turn brown to black to make way for new growth. This is totally normal. Cut away the discolored leaves to keep the plant looking fresh.
When Boston Fern Fronds Turning Black is Not Good
Boston fern fronds turning brown or black may also signal trouble, however. If your fern’s leaves are suffering from brown or black spots or strips, there may be nematodes in the soil. Add lots of compost to the soil – this will encourage the growth of beneficial fungi that should destroy the nematodes. If the infestation is bad, remove any infected plants. Small, but spreading, soft brown to black spots with an unpleasant odor are most likely a sign of bacterial soft rot. Destroy any infected plants.
Small, but spreading, soft brown to black spots with an unpleasant odor are most likely a sign of bacterial soft rot. Destroy any infected plants. Leaf tip burn manifests as browning and withering tips on fronds and leaves. Destroy any infected plants. Rhizoctonia Blight appears as irregular brownish-black spots that start near the crown of the fern but spread very rapidly. Spray with fungicide.

Boston Fern Fronds Turning Black Isn’t Always Bad
There is one case in which a Boston fern with black fronds is perfectly natural, and it’s good to be able to spot it. You may see small black spots on the undersides of your fern’s leaves, lined up in regular rows. These spots are spores, and they’re the fern’s way of reproducing. Eventually, the spores will drop to the soil below and grow into reproductive structures. If you see these spots, don’t take any action! It’s a sign that your fern is healthy. Your fern will also experience some natural browning as it ages. As new growth emerges, the oldest leaves at the bottom of the fern will wither and turn brown to black to make way for new growth. This is totally normal. Cut away the discolored leaves to keep the plant looking fresh.

When Boston Fern Fronds Turning Black is Not Good
Boston fern fronds turning brown or black may also signal trouble, however. If your fern’s leaves are suffering from brown or black spots or strips, there may be nematodes in the soil. Add lots of compost to the soil – this will encourage the growth of beneficial fungi that should destroy the nematodes. If the infestation is bad, remove any infected plants. Small, but spreading, soft brown to black spots with an unpleasant odor are most likely a sign of bacterial soft rot. Destroy any infected plants.

Small, but spreading, soft brown to black spots with an unpleasant odor are most likely a sign of bacterial soft rot. Destroy any infected plants. Leaf tip burn manifests as browning and withering tips on fronds and leaves. Destroy any infected plants. Rhizoctonia Blight appears as irregular brownish-black spots that start near the crown of the fern but spread very rapidly. Spray with fungicide.
0
0
文章
Dummer. ゛☀
2017年08月10日

Alocasia, also called elephant’s ear, is a prolific and striking plant hardy in USDA zones 8b through 11. It requires very little maintenance once it gets going, and it can grow to impressive size, making it ideal for an attention grabbing spot in the garden or a pot. But how do you go about propagating alocasia plants? Keep reading to learn more about alocasia propagation methods and how to propagate alocasia. 
How to Propagate Alocasia Plants
Alocasia grows from rhizomes in the ground, and the best method of alocasia plant propagation involves splitting up these rhizomes. Propagation of alocasia should be done in spring or early summer, when the plant is just coming out of dormancy from the winter. With a shovel, carefully dig around the plant and lift it out of the ground. Dig at least 12 inches around the plant to avoid damaging the roots or the rhizomes themselves. Gently lift the plant out of the soil – there should be many long tubers just underneath the ground (those growing in containers can be gently pushed from the plant). Brush the soil away and carefully divide the tubers – each of these will grow into a new plant of its own.
Tips on Alocasia Plant Propagation The next step in alocasia plant propagation is to plant the rhizomes in a new spot. Choose somewhere that has rich, damp, loamy soil and receives partial shade. Don’t plant them any closer than 36 inches away from each other.
Dig a hole just deep enough that the tuber can be placed in it at the depth it was before. Give the new plant plenty of water, and before long you should start seeing new growth. If you’re propagating alocasia plants in containers, make sure to keep them somewhere warm and humid and to give them plenty of water.

How to Propagate Alocasia Plants
Alocasia grows from rhizomes in the ground, and the best method of alocasia plant propagation involves splitting up these rhizomes. Propagation of alocasia should be done in spring or early summer, when the plant is just coming out of dormancy from the winter. With a shovel, carefully dig around the plant and lift it out of the ground. Dig at least 12 inches around the plant to avoid damaging the roots or the rhizomes themselves. Gently lift the plant out of the soil – there should be many long tubers just underneath the ground (those growing in containers can be gently pushed from the plant). Brush the soil away and carefully divide the tubers – each of these will grow into a new plant of its own.

Tips on Alocasia Plant Propagation The next step in alocasia plant propagation is to plant the rhizomes in a new spot. Choose somewhere that has rich, damp, loamy soil and receives partial shade. Don’t plant them any closer than 36 inches away from each other.

Dig a hole just deep enough that the tuber can be placed in it at the depth it was before. Give the new plant plenty of water, and before long you should start seeing new growth. If you’re propagating alocasia plants in containers, make sure to keep them somewhere warm and humid and to give them plenty of water.
0
0
文章
Colour_
2017年08月09日

怎样使#酒瓶兰 安全越冬
①创造一个阳光充足、空气流通、水分充足、养料均匀的良性生态环境。提高抗寒能力。
a.在4~11月生长期内,花盆的位置和朝向要纹丝不动,相邻的花木也不轻易迁移,保证植株占有一块固定的领地。
b.观察盆土的干湿、叶色的深浅,适时适量地浇水施肥,既不积水,也不失水;肥料成分要搭配好,不施生肥和浓肥。
c.注意虫情,做到每月喷1次乐果或敌杀死,每年喷1~2次百菌清。
②加强保温措施。1~2月移入不加温的玻璃温室后,要注意:
a.置于室内阳光充足处,使植株在晴日能整天晒到太阳。
b.防止冷空气侵入室内,,维持室温在3以上。遇到天气骤变,温度过低,应及时采取临时增温措施。
c.1~3月控水从严,每月只需浇1次与室温相同的透水。
d.坚持清明后出室。若在北方居室越冬,则花盆位置既要选择向阳处,又要远离暖气片。若在南方居室内越冬,有空调者应避开空调直接作用区,无空调者,最好将盆株置于自制简易保温箱内。
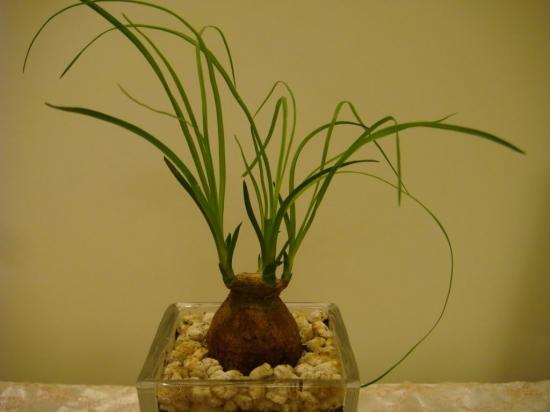
拓展:酒瓶兰的树型奇特有趣,习性强健,能耐干旱与低温;株高达2—3米,细长的绿叶在茎的前端向四方扩展。其最大的特征是:茎基肥大如酒瓶,老株的茎基直径可达1米以上,肥大的茎基可储存水分,耐干旱力特别强。要养好酒瓶兰,应掌握以下要点:
①日照与温度。日照必须充足,耐寒性较其他观叶类植株优秀,但冬季必须移到室内,温度保持在10℃以上。
②浇水。浇水以少量为宜,但不能断水由于植株生长的速度很快,所以在夏季和气候干燥的地方,每天需要浇1次以上的水,浇水时特别注意不可过度潮湿,避免根部腐烂。
③培养土。像仙人掌类植物一样,宜种植在排水良好的培养土中。以沙质壤土为主,加入20%—30%的腐叶土。
④肥料。夏季生长期间,需施2次腐熟的豆饼水或油粕。
⑤移植、繁殖。酒瓶兰生长缓慢,不易结实,必须每隔2—3年移植1次。一般采用播种法繁殖,将种子放置在有肥沃沙质壤土的浅盆中。
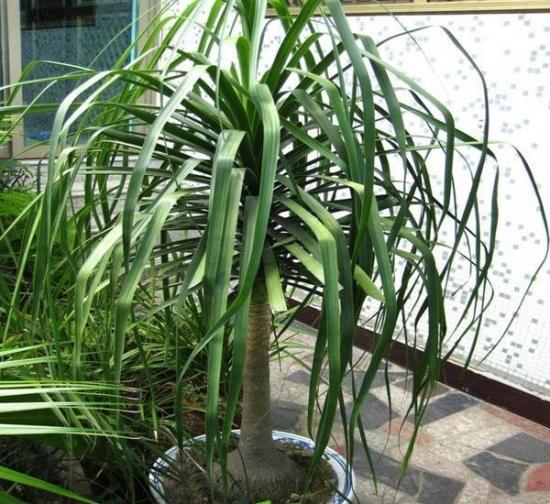
①创造一个阳光充足、空气流通、水分充足、养料均匀的良性生态环境。提高抗寒能力。
a.在4~11月生长期内,花盆的位置和朝向要纹丝不动,相邻的花木也不轻易迁移,保证植株占有一块固定的领地。
b.观察盆土的干湿、叶色的深浅,适时适量地浇水施肥,既不积水,也不失水;肥料成分要搭配好,不施生肥和浓肥。
c.注意虫情,做到每月喷1次乐果或敌杀死,每年喷1~2次百菌清。
②加强保温措施。1~2月移入不加温的玻璃温室后,要注意:
a.置于室内阳光充足处,使植株在晴日能整天晒到太阳。
b.防止冷空气侵入室内,,维持室温在3以上。遇到天气骤变,温度过低,应及时采取临时增温措施。
c.1~3月控水从严,每月只需浇1次与室温相同的透水。
d.坚持清明后出室。若在北方居室越冬,则花盆位置既要选择向阳处,又要远离暖气片。若在南方居室内越冬,有空调者应避开空调直接作用区,无空调者,最好将盆株置于自制简易保温箱内。

拓展:酒瓶兰的树型奇特有趣,习性强健,能耐干旱与低温;株高达2—3米,细长的绿叶在茎的前端向四方扩展。其最大的特征是:茎基肥大如酒瓶,老株的茎基直径可达1米以上,肥大的茎基可储存水分,耐干旱力特别强。要养好酒瓶兰,应掌握以下要点:
①日照与温度。日照必须充足,耐寒性较其他观叶类植株优秀,但冬季必须移到室内,温度保持在10℃以上。
②浇水。浇水以少量为宜,但不能断水由于植株生长的速度很快,所以在夏季和气候干燥的地方,每天需要浇1次以上的水,浇水时特别注意不可过度潮湿,避免根部腐烂。
③培养土。像仙人掌类植物一样,宜种植在排水良好的培养土中。以沙质壤土为主,加入20%—30%的腐叶土。
④肥料。夏季生长期间,需施2次腐熟的豆饼水或油粕。
⑤移植、繁殖。酒瓶兰生长缓慢,不易结实,必须每隔2—3年移植1次。一般采用播种法繁殖,将种子放置在有肥沃沙质壤土的浅盆中。

0
0
文章
Miss Chen
2017年08月08日

When you transplant a spiny cactus such as Easter lily cactus (Echinopsis oxygona), hardy to U.S. Department of Agriculture plant hardiness zones 8 through 11, safety is a consideration. For small cactuses, the best handling tool is a pair of kitchen tongs. Leather gloves give some protection, but spines easily penetrate cloth gloves. Because cactuses have succulent stems and roots, they need different transplanting methods from those used for leafy plants.

Digging Garden Cactus
Transplant garden cactuses during warm months rather than in winter. Wear leather gloves. First, mark the cactus' south side with a small paint spot. Dig around the plant about 6 inches out from the stem. With the shovel under the cactus, sever the bottom roots. Gently lever the cactus loose. For cylindrically shaped cactuses such as golden barrel (Echinocactus grusonii), hardy in USDA zones 8 through 11, put a loop of rope or hose around the stem for a handle. For columnar cactuses, use a strip of blanket or burlap for broader support so the stems don't break. Lift the cactus from the hole.
Moving and Transplanting Cactus
Remove the soil from the roots. Trim away damaged roots with pruning shears dipped in rubbing alcohol to sterilize them. The roots need to heal, so put the cactus on its side in the shade for a few days. Dig a hole in the plant's new location slightly larger than the existing roots. Place the cactus in the hole, putting the marked side to the south. Gently work fill dirt around the roots to replant it. Keep the soil level the same. Water the cactus thoroughly. For columnar cactuses such as Mexican fence post (Stenocereus marginatus), hardy in USDA zones 9b through 11, stake the plant if it is more than 5 feet tall until it has rooted back in.

Unpotting Cactuses
When the roots come through the drainage holes or the cactus stem fills the pot, transplant it. In northern areas, transplant in the spring. For the arid Southwest, transplant in spring, summer or early fall. The new pot should be about 2 inches larger than the old one. Handle the cactus with kitchen tongs. If the roots won't slide out of the pot, lay the potted cactus on its side on a hard surface and tap the pot. Rotate it a quarter turn and tap again, repeating until the cactus is loose. After unpotting the cactus, remove the old soil. Trim the roots with pruning shears dipped in rubbing alcohol.
Repotting Container Plants
Center the cactus in the new pot, keeping it at the same soil level. Add cactus potting mix, occasionally shaking the pot to settle the soil. Don't water it for a few days so the roots can heal. Then water the pot thoroughly until water comes out the drainage holes. These directions apply to cactuses in arid regions. Tropical soft-stemmed cactuses such as Christmas cactus (Schlumbergera truncata), hardy in USDA zones 10 through 12, bloom best when potbound. Repot them approximately every three years right after they flower in late winter, using a mixture of 1 part perlite, 1 part potting mix and 2 parts peat moss.

Digging Garden Cactus
Transplant garden cactuses during warm months rather than in winter. Wear leather gloves. First, mark the cactus' south side with a small paint spot. Dig around the plant about 6 inches out from the stem. With the shovel under the cactus, sever the bottom roots. Gently lever the cactus loose. For cylindrically shaped cactuses such as golden barrel (Echinocactus grusonii), hardy in USDA zones 8 through 11, put a loop of rope or hose around the stem for a handle. For columnar cactuses, use a strip of blanket or burlap for broader support so the stems don't break. Lift the cactus from the hole.
Moving and Transplanting Cactus
Remove the soil from the roots. Trim away damaged roots with pruning shears dipped in rubbing alcohol to sterilize them. The roots need to heal, so put the cactus on its side in the shade for a few days. Dig a hole in the plant's new location slightly larger than the existing roots. Place the cactus in the hole, putting the marked side to the south. Gently work fill dirt around the roots to replant it. Keep the soil level the same. Water the cactus thoroughly. For columnar cactuses such as Mexican fence post (Stenocereus marginatus), hardy in USDA zones 9b through 11, stake the plant if it is more than 5 feet tall until it has rooted back in.

Unpotting Cactuses
When the roots come through the drainage holes or the cactus stem fills the pot, transplant it. In northern areas, transplant in the spring. For the arid Southwest, transplant in spring, summer or early fall. The new pot should be about 2 inches larger than the old one. Handle the cactus with kitchen tongs. If the roots won't slide out of the pot, lay the potted cactus on its side on a hard surface and tap the pot. Rotate it a quarter turn and tap again, repeating until the cactus is loose. After unpotting the cactus, remove the old soil. Trim the roots with pruning shears dipped in rubbing alcohol.
Repotting Container Plants
Center the cactus in the new pot, keeping it at the same soil level. Add cactus potting mix, occasionally shaking the pot to settle the soil. Don't water it for a few days so the roots can heal. Then water the pot thoroughly until water comes out the drainage holes. These directions apply to cactuses in arid regions. Tropical soft-stemmed cactuses such as Christmas cactus (Schlumbergera truncata), hardy in USDA zones 10 through 12, bloom best when potbound. Repot them approximately every three years right after they flower in late winter, using a mixture of 1 part perlite, 1 part potting mix and 2 parts peat moss.
1
0
文章
Miss Chen
2017年08月08日

Agave plants (Agave spp.) thrive in desert gardens and in sandy soils with little moisture. They grow in U.S. Department of Agriculture plant hardiness zones 9 through 11, depending on the variety. Although agaves die after flowering, they have a long flowering cycle and can live for eight to 60 years. These desert succulents transplant well and tolerate disturbance, so you can move the plants to a new area at any time during the spring and summer growing season.

Safety First
Most agave varieties have sharp spines along the edges of the leaves. The sap is also a common skin irritant and can cause allergic reactions. Before handling the agave, protect your skin and eyes. Heavy leather gloves, long sleeves and long pants provide skin protection. Wear eye protection so sap doesn't get into your eyes. Protecting the plant is also necessary. Disinfect any knives, shears or spade blades you will use to prune and cut through the plant to minimize bacterial soft rot and other disease problems. Wiping them with a cloth soaked in isopropyl alcohol kills any disease pathogens or pests.
Plant Preparation
Small plants, called pups or offsets, often grow up around the base of the main mother plant. Each of these pups grows into a new agave if you separate it from the mother. Cut these off just below the soil surface with a knife or the edge of the spade. Removing the outer leaves of a large agave plant lessens the weight during transplanting and results in a healthier looking plant. Peel the outer ragged leaves off the plant and dispose of them, leaving only the intact, healthy looking rosette of leaves in the center. Tie a string loosely around a remaining leaf on the west side of the agave to mark it, but avoid tying it too tightly and cutting into the leaf.

Digging Right
A shovel lifts the entire plant and keeps you well away from the spiny foliage. Insert the shovel blade into the soil around the outer perimeter of the root zone, working around the plant until the soil is loosened. Slide the shovel under the root system and pry the agave out of the ground. Some roots will break, but this doesn't cause any long-lasting harm. After lifting the agave, dust any exposed wounds with sulfur powder to ward off infection. The wounds on any removed pups also benefit from a sulfur dusting before you replant them.
Transplanting Success
A site with sandy, fast-draining soil that receives all-day sunlight provides the best location for an agave or agave pup. Transplant at the same depth the agave was growing at previously and set it so the string-marked side is facing west. Planting agave so it faces the same direction prevents the side used to shade from sun damage. Spacing requirements vary depending on the agave variety, so leave enough room between plants so they can reach their full size without crowding. If you can't transplant right away, set the agave in a shaded location for two or three days and let any wounds dry over. After planting, cover the agave with a shade cloth to protect it from the direct sunlight as the roots establish in the new site, but remove the cloth as soon as new growth becomes apparent. Watering isn't usually necessary, but you can water just enough so the soil is barely moistened if the soil is completely dry and the plant has resumed growth.

Safety First
Most agave varieties have sharp spines along the edges of the leaves. The sap is also a common skin irritant and can cause allergic reactions. Before handling the agave, protect your skin and eyes. Heavy leather gloves, long sleeves and long pants provide skin protection. Wear eye protection so sap doesn't get into your eyes. Protecting the plant is also necessary. Disinfect any knives, shears or spade blades you will use to prune and cut through the plant to minimize bacterial soft rot and other disease problems. Wiping them with a cloth soaked in isopropyl alcohol kills any disease pathogens or pests.
Plant Preparation
Small plants, called pups or offsets, often grow up around the base of the main mother plant. Each of these pups grows into a new agave if you separate it from the mother. Cut these off just below the soil surface with a knife or the edge of the spade. Removing the outer leaves of a large agave plant lessens the weight during transplanting and results in a healthier looking plant. Peel the outer ragged leaves off the plant and dispose of them, leaving only the intact, healthy looking rosette of leaves in the center. Tie a string loosely around a remaining leaf on the west side of the agave to mark it, but avoid tying it too tightly and cutting into the leaf.

Digging Right
A shovel lifts the entire plant and keeps you well away from the spiny foliage. Insert the shovel blade into the soil around the outer perimeter of the root zone, working around the plant until the soil is loosened. Slide the shovel under the root system and pry the agave out of the ground. Some roots will break, but this doesn't cause any long-lasting harm. After lifting the agave, dust any exposed wounds with sulfur powder to ward off infection. The wounds on any removed pups also benefit from a sulfur dusting before you replant them.
Transplanting Success
A site with sandy, fast-draining soil that receives all-day sunlight provides the best location for an agave or agave pup. Transplant at the same depth the agave was growing at previously and set it so the string-marked side is facing west. Planting agave so it faces the same direction prevents the side used to shade from sun damage. Spacing requirements vary depending on the agave variety, so leave enough room between plants so they can reach their full size without crowding. If you can't transplant right away, set the agave in a shaded location for two or three days and let any wounds dry over. After planting, cover the agave with a shade cloth to protect it from the direct sunlight as the roots establish in the new site, but remove the cloth as soon as new growth becomes apparent. Watering isn't usually necessary, but you can water just enough so the soil is barely moistened if the soil is completely dry and the plant has resumed growth.
0
0
文章
Miss Chen
2017年08月08日

The spineless tropical cactus night-blooming cereus (Epiphyllum oxypetalum) produces spiderlike fragrant flowers that open in the evening. It grows in U.S. Department of Agriculture plant hardiness zones 10 through 11 and it doesn't tolerate any frost, but it grows well as a houseplant or as a potted outdoor plant that's overwintered indoors in colder climates. Night-blooming cereus requires only basic care and it is a relatively low-maintenance plant, whether grown outdoors or inside.


Step 1
Set potted night-blooming cereus plants in an area that receives all-day, filtered sunlight, bright but indirect sunlight, or morning sun and afternoon shade. Place the plants outdoors if temperatures are above 50 degrees Fahrenheit at night. In warm, frost-free climates, grow the cactus in a well-drained, slightly sandy garden bed that receives some shade.

Step 2
Water the night-blooming cereus when the soil surface looks dry, but before the soil dries out completely. Sprinkle the water on the soil, keeping the cactus leaves dry, until excess water drains from the bottom of the pot or until the top 6 inches of soil feel moist in a garden bed. Water regularly from spring through early fall. Garden-grown and fully mature potted plants don't require winter watering. Water young pot-grown plants only when the soil dries in completely in winter. Properly watered cactus plants rarely suffer from stem rot or fungal problems.

Step 3
Mix 1/4 teaspoon of a balanced, water-soluble fertilizer, such as a 15-15-15 blend, or of a bloom-inducing fertilizer, such as a 7-9-5 blend, with 1 gallon of water. Water the night-blooming cereus with the fertilizer solution once weekly during the active spring and summer growing season. Check the label because rates vary among brands and use one-fourth of the recommended concentration.

Step 4
Cut back any overgrown or damaged leaf stems after the cactus finishes flowering. Wipe a sharp knife with a rag soaked in rubbing alcohol to disinfect it before making a cut. Cut through leaf stems cleanly, cutting them back to the desired height but removing no more than one-third of their length.

Step 5
Bring potted plants indoors before the temperature drops below 40 F in fall or early winter. Temperatures below 35 F can kill the plant. Place the pot near a sunny window and water sparingly when the the soil dries completely. Move the pot back outdoors in spring after frost danger has passed.

Step 6
Inspect the leaves for white cottony masses that can indicate a mealybug infestation, the primary pest of night-blooming cereus. Remove the mealybugs by hand or dip a cotton swab in rubbing alcohol and dab it onto the bugs to kill them. Monitor the plant daily and remove or kill any new mealybugs until the pests are gone.


Step 1
Set potted night-blooming cereus plants in an area that receives all-day, filtered sunlight, bright but indirect sunlight, or morning sun and afternoon shade. Place the plants outdoors if temperatures are above 50 degrees Fahrenheit at night. In warm, frost-free climates, grow the cactus in a well-drained, slightly sandy garden bed that receives some shade.

Step 2
Water the night-blooming cereus when the soil surface looks dry, but before the soil dries out completely. Sprinkle the water on the soil, keeping the cactus leaves dry, until excess water drains from the bottom of the pot or until the top 6 inches of soil feel moist in a garden bed. Water regularly from spring through early fall. Garden-grown and fully mature potted plants don't require winter watering. Water young pot-grown plants only when the soil dries in completely in winter. Properly watered cactus plants rarely suffer from stem rot or fungal problems.

Step 3
Mix 1/4 teaspoon of a balanced, water-soluble fertilizer, such as a 15-15-15 blend, or of a bloom-inducing fertilizer, such as a 7-9-5 blend, with 1 gallon of water. Water the night-blooming cereus with the fertilizer solution once weekly during the active spring and summer growing season. Check the label because rates vary among brands and use one-fourth of the recommended concentration.

Step 4
Cut back any overgrown or damaged leaf stems after the cactus finishes flowering. Wipe a sharp knife with a rag soaked in rubbing alcohol to disinfect it before making a cut. Cut through leaf stems cleanly, cutting them back to the desired height but removing no more than one-third of their length.

Step 5
Bring potted plants indoors before the temperature drops below 40 F in fall or early winter. Temperatures below 35 F can kill the plant. Place the pot near a sunny window and water sparingly when the the soil dries completely. Move the pot back outdoors in spring after frost danger has passed.

Step 6
Inspect the leaves for white cottony masses that can indicate a mealybug infestation, the primary pest of night-blooming cereus. Remove the mealybugs by hand or dip a cotton swab in rubbing alcohol and dab it onto the bugs to kill them. Monitor the plant daily and remove or kill any new mealybugs until the pests are gone.
0
0
文章
Colour_
2017年08月08日

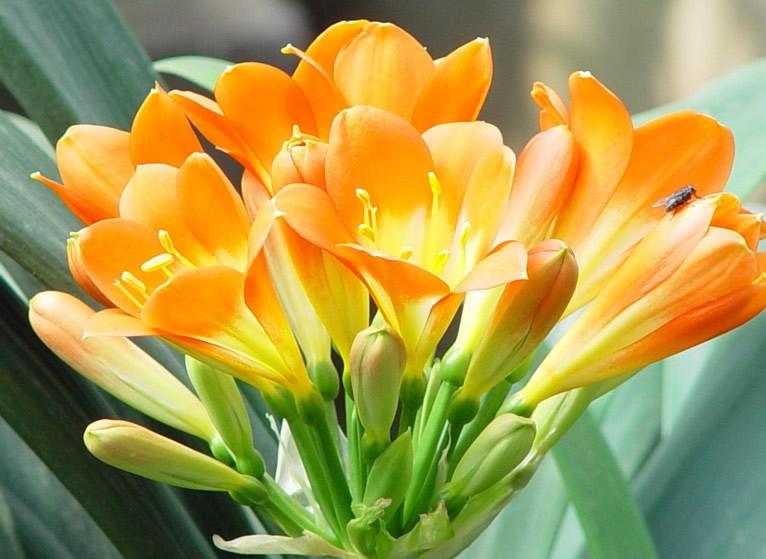
君子兰主要通过种子播种进行繁殖。
#君子兰 的花期是入冬后至次年3-4月份,花后种子成熟也需9-10个月,故君子兰的播种宜在11-12月份。播种前要进行选种,将空瘪发育不良的种子剔除。可用一般花盆播种,下面用粗沙砾或碎石砾铺成2厘米厚的排水层,然后铺一层腐叶土和河沙混合的培养土,厚约4-5厘米,在铺上0.5-1厘米的河沙作播种层。点播时,株距2厘米,然后用沙覆盖。覆土后浸1次水,盖上玻璃盖。播后保持20℃-25℃的气温有利发芽。
从发芽到长出第一片叶需2个月,以后要揭开玻璃盖通风,并逐渐去掉玻璃盖。播后90天便可移栽。移植时,先用竹签或竹筷扎孔,将肉质根插入土中,深度以埋住根茎露出种子为宜,同时注意叶片朝向一致。移后浇1次透水,过数日缓苗后再接受光照。苗期温度控制在15℃-20℃,冬春可见阳光,春、夏季应在散射光下生长,入秋后即可定植栽培。
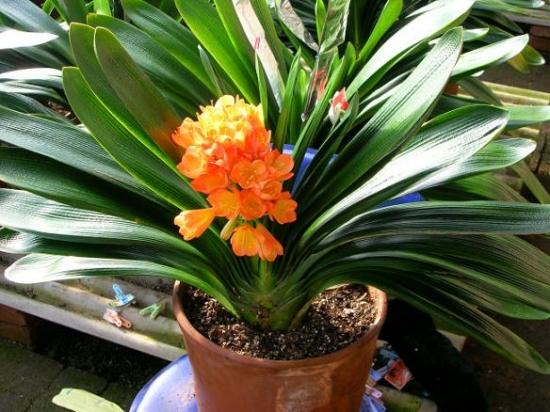
君子兰分株繁殖,需做好以下工作:
①家庭盆栽宜用泥瓦盆,这种盆透气性好,有利于植株生长。
②准备好已消毒过的介质土。如用腐殖土混合细沙的,腐殖土要用高锰酸钾1000-2000倍水溶液喷洒消毒;细河沙也要用开水烫洗消毒,避免幼苗受病菌感染腐烂。
③准备少量木炭粉涂抹伤口,供吸潮防腐之用。
④分株时,将君子兰从盆中磕出来,拍松盆土,理顺根系,找出可以分株的腋芽:如果子株长在母株的外沿,株体较小,可以一手握住鳞茎部分,另一手捏住子株基部,轻轻一掰,就能将子株掰离母株;如果子株粗壮,则用锋利的刀将其切下。然后用于木炭粉涂抹伤口,以吸干流液,防止腐烂。让子株、母株在室内晾干后再种植,种植深度以埋住子株的基部假鳞茎为度,靠植株的部位要使其略高些,并盖上已消毒的沙土。种好后过2天再浇1次透水,2周后待伤口愈合时,再加盖一层培养土。一般需1-2个月才能生出新根,1-2年后便可开花。
0
0
文章
Miss Chen
2017年08月05日


Rosales antiguos, Rosas viejas, Rosal antiguo
Patio - Rosas tipo Patio
Arbustos remontantes. Altura: 35-60 cm y anchura igual: 30-60 cm.
Producen ramilletes compuestos en general por 3-11 flores simples a dobles, que florecen en verano-otoño.
Son muy adecuados para bancales, borduras, setos y también para su cultivo en jardineras.


0
0
文章
Miss Chen
2017年08月05日


Description: This herbaceous perennial plant forms a rosette of spreading to ascending basal leaves. The basal leaves are up to 12" long and 4" across, although they are usually less than two-thirds of the maximum size; they are simple-pinnate with 5-11 pairs of sessile opposite leaflets and a sessile terminal leaflet. The petioles of basal leaves are relatively stout and more or less long-hairy, especially toward their bases; they are light green, whitish yellow, or red. The leaflets become gradually larger toward the tips of the compound leaves; they are up to 2" long and ¾" across. The leaflets are elliptic-oblong or oblanceolate-oblong in shape and coarsely serrated along their margins; the teeth of the margins have narrow bristly tips. The upper leaflet surface is yellowish green to dark green, glabrous to sparsely hairy, and more or less shiny. The lower leaflet surface is white-canescent from dense minute hairs, and some longer white hairs may be present. Interspersed between these leaflets, there are often much smaller secondary leaflets with similar characteristics.
The rachises of the compound leaves are similar to their petioles, except there are grooved above and tend to be less hairy. From the center of the rosette of basal leaves, one or more widely spreading stolons are produced that are 1-3' long. At intervals along these stolons, there are leafy-bracted nodes about 4-6" apart. The stolons are red, terete, and glabrous to sparsely long-hairy. The leafy bracts of the nodes are simple-pinnate; they resemble the basal leaves, except they are much smaller in size (up to 4" long and 1" across). When the nodes have contact with moist ground, they are able to develop new roots, from which new rosettes of basal leaves can develop. Solitary flowers are produced from the nodes of the stolons on long naked pedicels (floral stalks) about 2-6" long. These ascending to erect pedicels are light green to red, terete, and nearly glabrous to long-hairy. Each flower spans about ¾" across, consisting of 5 spreading yellow petals, 5 light green sepals, a ring of 20-25 yellow stamens, and a central head of 20-100+ yellow pistils. The petals are obovate or broadly elliptic in shape, while the hairy sepals are ovate, and often cuspidate (abruptly tapering into narrow pointed tips).
Directly underneath the sepals, there are 5 floral bractlets; these bractlets are similar to the sepals, except they are usually lanceolate and sometimes sparingly toothed. Both the sepals and bractlets are joined together at the base, and they are both shorter than the petals. The blooming period occurs during the summer and early autumn for 2-3 months. Flowering is more abundant during periods of active growth. Cross-pollination of the flowers is required for the production of fertile seeds. The seedheads are cupped along their sides by the persistent sepals and floral bractlets. Individual seeds are 2–2.5 mm. long, compressed-ovoid in shape, and grooved along the upper surface. Because the outer seed coat is somewhat corky from enclosed air pores, the seeds are able to float on water; they can also be blown about by the wind. The primary root system consists of a taproot that often branches. This plant forms clonal colonies by means of its stolons.
Cultivation: The preference is full sun, wet to mesic conditions, and calcareous soil containing gravel or sand. This plant doesn't tolerate much competition from taller vegetation.
Range & Habitat: The native Silverweed is uncommon in NE Illinois, while in the rest of the state it is absent (see Distribution Map). Silverweed has a wide distribution in boreal areas of North America, and it also occurs in Eurasia. Habitats include sand prairies, moist sand flats (pannes), borders of interdunal swales, low areas along sandy ponds, small sand dunes, middle to upper beach areas, and gravelly or sandy areas along mowed paths. In Illinois, this plant occurs primarily along Lake Michigan. It is usually found in high quality habitats where there is some natural disturbance from water or wind, although it can also colonize open degraded areas that are moist, sandy, or gravelly. This is one of the pioneer plant species that helps to stabilize the sand in wetlands, low dunes, and beach areas.
Faunal Associations: The flowers are usually cross-pollinated by various bees and flies, including bumblebees, cuckoo bees (Stelis spp.), Andrenid bees, and Syrphid flies (Miyanishi et al., 1991; Krombein et al., 1979; Discover Life, 2015). Both nectar and pollen are available as floral rewards. A small number of insects have been reported to feed on the foliage, sap, or roots of Silverweed in North America. These species include a flea beetle (Altica browni) and several aphids (Chaetosiphon fragaefolii, Macrosiphum potentillae, and Rhopalosiphoninus latisiphon); see Clark et al, (2004) and Blackman & Eastop (2013). Foliage and flowers of Silverweed are occasionally browsed by White-tailed Deer and other hoofed mammalian herbivores, although they are not eaten by the granivorous American Bison. By surviving the passage through their digestive tracts, the seeds of this plant may be spread to new locations by these mammals.
Photographic Location: A moist gravelly area along a path and a low area along a sandy pond at Illinois Beach State Park in NE Illinois.
Comments: A scientific synonym of Silverweed is Potentilla anserina. The description of this plant refers to the typical subspecies, Argentina anserina anserina. This is the only subspecies that occurs in Illinois. Other subspecies have been described that vary in such characteristics as the hairiness of the foliage, the general size of individual plants, the presence or absence of an upper groove on the seeds, the relative size of the sepals versus the floral bractlets, and other characteristics. It is relatively easy to distinguish Silverweed from similar species (mainly Potentilla spp.). Compared to these other species, Silverweed can be distinguished by the greater number of leaflets per compound leaf, brilliant white undersides on its leaflets, sharp bristly teeth along the margins of its leaflets, and conspicuous red stolons.

0
0


