成长记
Avacha
2018年01月16日

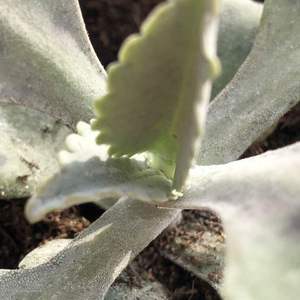
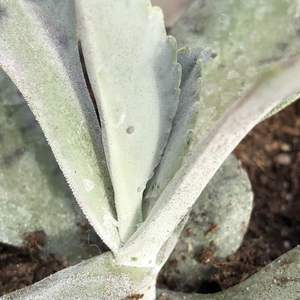
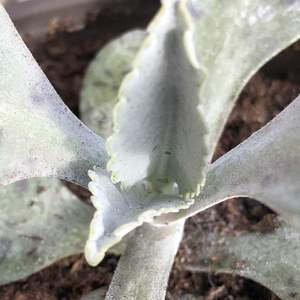
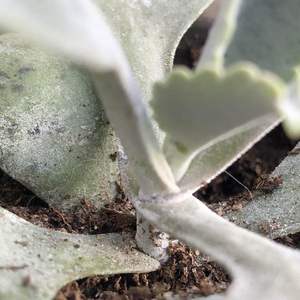
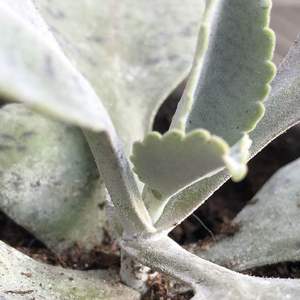
Found outgrowths on some segments of the plant today. They look like black spots, surrounded by white circles. I suppose that’s some kind of fungus, though if so - then why some of the spots are convex?🤨 Anyhow, the plant has become smaller after the removal of the affected segments 😐 #fungus #disease #pruning


0
0
文章
Miss Chen
2018年01月02日

Dahlia (Dahlia spp.) is not above getting infected with fungus. Specifically, dahlia leaves may become mottled with mold for two reasons: Botrytis cinerea or powdery mildew. Knowing the type of fungus the dahlia is infected with is the first step in curing it. After identifying the type of fungus, use a combination of good care and the right remedy to restore your dahlia to full health.

Identifying the Mold
Botrytis cinerea, commonly called gray mold, is aptly named for the woolly, gray mold spores that spread atop masses of brown, water-soaked spots. The dahlia's petals are more likely to be covered by gray mold than leaves, but leaves may be infected if they are injured, dead or growing directly from a food base such as a fallen petal. If the leaves are covered in a dry, white mold, chances are they are infected with powdery mildew, not gray mold. Powdery mildew grows on older leaves and stems, and may cause the leaves to become discolored and die. Unlike gray mold, it does not need moisture to germinate, and it does not cause brown, water-soaked spots.
Removing Plant Debris
Reducing the amount of decaying plant matter the fungus has access to will help prevent and control gray mold and powdery mildew. Tend to the dahlia plants when they're dry because it helps prevent fungal spores from spreading. Destroy any plant debris -- including faded flowers and dead leaves -- infected with any fungus, and discard them in a paper bag to be thrown out with the trash. For plants infected with gray mold, you may have to clip off entire plants at the base. Clipping off entire plants is not necessary for powdery mildew, but infected leaves should be clipped off.

Reducing Moisture
Gray mold spores need free moisture to germinate and infect, and while it is not needed for powdery mildew to survive, it still helps promote its rapid growth. Lowering the amount of moisture may help halt or dramatically slow down the growth of the fungi. To reduce moisture, avoid getting the dahlia plant leaves wet when you water, and water the plant early in the day so it will be dry by the evening. Dahlias only need a deep soaking about once a week, or twice a week if they are not mulched.
Fungicides
If applied when symptoms first arise, fungicides may help prevent gray mold and powdery mildew from spreading. Chlorothalonil is a fungicide that is effective against gray mold and powdery mildew. Mixing and application instructions vary depending on the brand of chlorothalonil. For example, when using 29.6 percent chlorothalonil, mix 2 teaspoons in 1 gallon of water in a garden sprayer, and coat the dahlia with it in a fine mist every seven to 14 days, until the weather is no longer favorable for the fungus. Wear protective eyewear, gloves, pants and a long-sleeved shirt while handling the fungicide, and be careful not to inhale the mist. Keep children and pets out of the area until the spray has dried.

Identifying the Mold
Botrytis cinerea, commonly called gray mold, is aptly named for the woolly, gray mold spores that spread atop masses of brown, water-soaked spots. The dahlia's petals are more likely to be covered by gray mold than leaves, but leaves may be infected if they are injured, dead or growing directly from a food base such as a fallen petal. If the leaves are covered in a dry, white mold, chances are they are infected with powdery mildew, not gray mold. Powdery mildew grows on older leaves and stems, and may cause the leaves to become discolored and die. Unlike gray mold, it does not need moisture to germinate, and it does not cause brown, water-soaked spots.
Removing Plant Debris
Reducing the amount of decaying plant matter the fungus has access to will help prevent and control gray mold and powdery mildew. Tend to the dahlia plants when they're dry because it helps prevent fungal spores from spreading. Destroy any plant debris -- including faded flowers and dead leaves -- infected with any fungus, and discard them in a paper bag to be thrown out with the trash. For plants infected with gray mold, you may have to clip off entire plants at the base. Clipping off entire plants is not necessary for powdery mildew, but infected leaves should be clipped off.

Reducing Moisture
Gray mold spores need free moisture to germinate and infect, and while it is not needed for powdery mildew to survive, it still helps promote its rapid growth. Lowering the amount of moisture may help halt or dramatically slow down the growth of the fungi. To reduce moisture, avoid getting the dahlia plant leaves wet when you water, and water the plant early in the day so it will be dry by the evening. Dahlias only need a deep soaking about once a week, or twice a week if they are not mulched.
Fungicides
If applied when symptoms first arise, fungicides may help prevent gray mold and powdery mildew from spreading. Chlorothalonil is a fungicide that is effective against gray mold and powdery mildew. Mixing and application instructions vary depending on the brand of chlorothalonil. For example, when using 29.6 percent chlorothalonil, mix 2 teaspoons in 1 gallon of water in a garden sprayer, and coat the dahlia with it in a fine mist every seven to 14 days, until the weather is no longer favorable for the fungus. Wear protective eyewear, gloves, pants and a long-sleeved shirt while handling the fungicide, and be careful not to inhale the mist. Keep children and pets out of the area until the spray has dried.
0
0
文章
Miss Chen
2017年12月10日

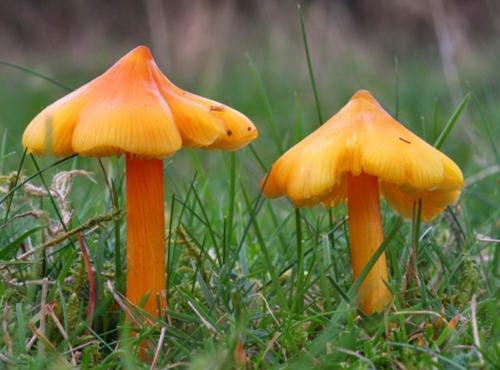
Mushroom hunters forge through damp wooded areas searching for the prized edible mushroom. They must be skilled in the identification process, because some mushrooms are deadly. There are over 3,000 species of mushroom throughout the world. It is a fungus, and unlike other plants, has no chlorophyll to help it manufacture food. The cap of the mushroom--the part we typically eat--is actually the fruiting part of the mushroom, and is vital to its reproduction process. The cap will last only a few days, but during that time it will create millions of spores. Spores are single cells, each capable of developing into a mushroom.
Cells Produce Spores
The cells that produce spores on the fruiting body are either asci or basidia. With asci cells, spores are produced internally, and in the basidia they are produced externally. Spores are released when either the tip of the asci breaks off or the spores break off from the basidia. After the spores are released, they are carried by the wind, and it is possible for them to land far from the parent mushroom. After the spores are released, the cap or fruiting part of the mushroom dies.
Asci and Basidia Cells
The asci cells are located on the internal surface of the cup fungi. When the asci breaks open, the spores are released. Gilled mushrooms, boletes and puffballs all have basidia cells. In the gilled mushrooms, they are located on the bottom of the cap, from which the spores are dropped. In the boletes, they are located in tubes contained in the flesh of the mushroom cap, with pores that release the spores. In the puffball, they are located in the body of the cap, and the spores release when the shell of the cap breaks open.

The Cycle Continues
For a spore to survive and grow into a new mushroom, it must land in an environment that is appropriate for mushroom cultivation. The soil should be damp and moist. Mushrooms thrive in areas that are grassy and wooded. After landing in such an environment, the spore will grow hair-like filaments that are called hypha. From the hyphae, the mushroom's mycelium will grow. This is the part of the mushroom that grows below the soil. From the mycelium a stalk or stem will grow, and atop the stem will grow the fruiting cap. When the hypha of one spore meets with the hypha from another spore, a mating or germination process begins that results in the production of more spores.

Cells Produce Spores
The cells that produce spores on the fruiting body are either asci or basidia. With asci cells, spores are produced internally, and in the basidia they are produced externally. Spores are released when either the tip of the asci breaks off or the spores break off from the basidia. After the spores are released, they are carried by the wind, and it is possible for them to land far from the parent mushroom. After the spores are released, the cap or fruiting part of the mushroom dies.
Asci and Basidia Cells
The asci cells are located on the internal surface of the cup fungi. When the asci breaks open, the spores are released. Gilled mushrooms, boletes and puffballs all have basidia cells. In the gilled mushrooms, they are located on the bottom of the cap, from which the spores are dropped. In the boletes, they are located in tubes contained in the flesh of the mushroom cap, with pores that release the spores. In the puffball, they are located in the body of the cap, and the spores release when the shell of the cap breaks open.

The Cycle Continues
For a spore to survive and grow into a new mushroom, it must land in an environment that is appropriate for mushroom cultivation. The soil should be damp and moist. Mushrooms thrive in areas that are grassy and wooded. After landing in such an environment, the spore will grow hair-like filaments that are called hypha. From the hyphae, the mushroom's mycelium will grow. This is the part of the mushroom that grows below the soil. From the mycelium a stalk or stem will grow, and atop the stem will grow the fruiting cap. When the hypha of one spore meets with the hypha from another spore, a mating or germination process begins that results in the production of more spores.
0
0
文章
Miss Chen
2017年12月09日

A mushroom is a fleshy, spore-bearing fungus. The term is applied to stemmed varieties like the commonly cultivated white button mushroom found in grocery stores. Other types of mushrooms grow without stems or even in a wooden, leathery pattern on trees and logs. Since some mushrooms can make you violently ill when ingested, or prove fatal, those interested in using them in cooking are advised to be able to make proper field identification. When in doubt, throw it out! Learn to identify edible mushrooms.

Morels
One of the tastiest mushrooms in North America is the morel. The three main varieties grow for a few weeks a year, in the spring, just after the first flowers bloom. Morels are identified by pits or cavities that cover the entire cap at the top of the stem. There are also spring mushrooms that exhibit a brainy, spongy cap. These are called false morels and should never be eaten since they can cause illness and death.
Golden Chanterelles
Some say this distinctive bright-yellow mushroom smells like apricot and tastes like a flower. It is found in the wilds from Alaska to Florida. Look for this mushroom to bloom at the end of winter. The cap of the golden chanterelle will be orange to yellow in color, smooth, hairless, and wavy at the edges when mature. There are two types of similar mushrooms that might fool you (and make you sick), so find a pictorial field guide to make sure you have the right one before eating it.
Black Trumpets
This summer mushroom is easy to find and identify. Look beneath oak trees primarily, but it doesn't grow on wood. If you find one, chances are there will be many more nearby. The cap spreads outward from the stem and is hollow inside, so identifying it is like looking down into a trumpet. The coloring runs the gamut from salmon to gray to black. Black trumpets work well powdered and used as flavoring.
Porcini
Referred to simply as "the king" in the United States, this mushroom can grow up to ten inches across its red-tinged dome cap, the underneath of which is spongy with no obvious gill structure. The prime harvesting season is late summer through early fall. Expect to find one by itself or in groups. The stalk is thick and white or yellowish in color. French and Italian recipes make widespread use of dried porcini.

Hen-of-the-woods
Towards the end of the mushrooming season, lucky hunters might stumble across a 40- or 50-pound fruiting hen-of-the-woods beneath an oak tree. The hen is identified by leaf-like fronds growing in overlapping patterns in a bushy structure, sort of like the tail feathers of a chicken. The fronds may be darker at the edges and the sprouting surface can be several feet across. Harvest the mushroom, chop it into whatever size pieces you like to cook with, and freeze the rest in a freezer bag for later use.

Morels
One of the tastiest mushrooms in North America is the morel. The three main varieties grow for a few weeks a year, in the spring, just after the first flowers bloom. Morels are identified by pits or cavities that cover the entire cap at the top of the stem. There are also spring mushrooms that exhibit a brainy, spongy cap. These are called false morels and should never be eaten since they can cause illness and death.
Golden Chanterelles
Some say this distinctive bright-yellow mushroom smells like apricot and tastes like a flower. It is found in the wilds from Alaska to Florida. Look for this mushroom to bloom at the end of winter. The cap of the golden chanterelle will be orange to yellow in color, smooth, hairless, and wavy at the edges when mature. There are two types of similar mushrooms that might fool you (and make you sick), so find a pictorial field guide to make sure you have the right one before eating it.
Black Trumpets
This summer mushroom is easy to find and identify. Look beneath oak trees primarily, but it doesn't grow on wood. If you find one, chances are there will be many more nearby. The cap spreads outward from the stem and is hollow inside, so identifying it is like looking down into a trumpet. The coloring runs the gamut from salmon to gray to black. Black trumpets work well powdered and used as flavoring.
Porcini
Referred to simply as "the king" in the United States, this mushroom can grow up to ten inches across its red-tinged dome cap, the underneath of which is spongy with no obvious gill structure. The prime harvesting season is late summer through early fall. Expect to find one by itself or in groups. The stalk is thick and white or yellowish in color. French and Italian recipes make widespread use of dried porcini.

Hen-of-the-woods
Towards the end of the mushrooming season, lucky hunters might stumble across a 40- or 50-pound fruiting hen-of-the-woods beneath an oak tree. The hen is identified by leaf-like fronds growing in overlapping patterns in a bushy structure, sort of like the tail feathers of a chicken. The fronds may be darker at the edges and the sprouting surface can be several feet across. Harvest the mushroom, chop it into whatever size pieces you like to cook with, and freeze the rest in a freezer bag for later use.
0
0
文章
Miss Chen
2017年12月09日

Growing mushrooms at home allows you to save money and enjoy delicious varieties of mushrooms each day with every meal. Because mushrooms do not contain the green chlorophyll that's found within other types of plants, this fungus relies on drawing all nourishment from the soil and water. To grow mushrooms, start by harvesting mushroom spores from dried mushrooms. Carefully monitor the mushrooms until they are fully developed and ready for consumption.

Collecting Spores
Step 1
Cut the stems off several fresh mushrooms and lay each mushroom on a piece of laminated card-stock paper. If possible, lay each mushroom cap with gills facing down, against the laminated paper.
Step 2
Place plastic bowls over each mushroom cap. Turn a dehumidifier on near the covered mushroom caps. The tiny gap between the card and the bowl allows the dehydrator to dry the mushroom caps, but prevents the mushroom spores from escaping.
Step 3
Allow the mushroom caps to sit under the plastic bowls overnight with the dehumidifier running. The next day, remove the plastic bowls and reserve the dried mushrooms for cooking, but notice the powdery white or black film on the laminated paper piece. This dusty substance is thousands of mushroom spores that have dropped straight down from the mushroom gills.
Planting and Growing Mushrooms
Step 1
Cut straw into sections between 3 and 6 inches long. Place the straw in a container and sterilize the straw by pouring boiling water over it to kill any unwanted bacteria.

Step 2
Pour the hot water off the straw and allow the straw to cool down to room temperature. While it cools, mix the mushroom spores from the laminated paper with the damp grains.
Step 3
Place the spore and damp grain mixture over a 1 to 2-inch layer of straw inside a plastic container.
Step 4
Monitor the grown as the mushroom spores and grain develop into a spore colony that creates a root structure for the mushroom network. The roots, called mycelium, develop into white and lacy filaments.
Step 5
Sterilize a collection of peat moss using the same method described in steps 1 and 2. Place the drained peat moss over the mushroom root structure and allow the mushrooms to grow up and through the peat moss over a period of days or weeks.

Collecting Spores
Step 1
Cut the stems off several fresh mushrooms and lay each mushroom on a piece of laminated card-stock paper. If possible, lay each mushroom cap with gills facing down, against the laminated paper.
Step 2
Place plastic bowls over each mushroom cap. Turn a dehumidifier on near the covered mushroom caps. The tiny gap between the card and the bowl allows the dehydrator to dry the mushroom caps, but prevents the mushroom spores from escaping.
Step 3
Allow the mushroom caps to sit under the plastic bowls overnight with the dehumidifier running. The next day, remove the plastic bowls and reserve the dried mushrooms for cooking, but notice the powdery white or black film on the laminated paper piece. This dusty substance is thousands of mushroom spores that have dropped straight down from the mushroom gills.
Planting and Growing Mushrooms
Step 1
Cut straw into sections between 3 and 6 inches long. Place the straw in a container and sterilize the straw by pouring boiling water over it to kill any unwanted bacteria.

Step 2
Pour the hot water off the straw and allow the straw to cool down to room temperature. While it cools, mix the mushroom spores from the laminated paper with the damp grains.
Step 3
Place the spore and damp grain mixture over a 1 to 2-inch layer of straw inside a plastic container.
Step 4
Monitor the grown as the mushroom spores and grain develop into a spore colony that creates a root structure for the mushroom network. The roots, called mycelium, develop into white and lacy filaments.
Step 5
Sterilize a collection of peat moss using the same method described in steps 1 and 2. Place the drained peat moss over the mushroom root structure and allow the mushrooms to grow up and through the peat moss over a period of days or weeks.
0
0
文章
Miss Chen
2017年12月05日

Mushrooms are the product or fruit of fungus-infested soil and can produce rather quickly taking over a lawn. The fungus feeds off decaying substances in the soil, such as old rotting mulch, dying tree stumps and animal feces. Removal of lawn mushrooms can be difficult, once the fungus has infested a large portion of the yard. Chemical products are one way to rid the yard of the mushrooms and fungus, but are more likely to work once the matter the fungus is feeding on is removed.

Fertilizer
Fertilizers containing nitrogen not only stimulate lawn growth, but can also rid the lawn of mushrooms. Nitrogen rich soil provides the perfect base for a fast growing lawn, but also increases organic waste and matter decomposition times. Nitrogen also speeds up the growth and breakdown of the mushroom systems, lessening the lifespan of the fungus.
Fungicides
Fungicides, available in both powder and liquid form, are chemical compounds used in the removal of different types of fungi. Depending on the type of fungicide used, the chemical may either slow the growth of the fungus, keeping new growth from being reproduced or kill the fungus, causing both the fruit and root system to die. Fungicides must be used with care, especially when used in gardens or on lawns where pets and children walk or play.
Lime
Lime, used by gardeners to prevent pests from eating plants and raise the soils acidity levels in gardens and lawns, can also help slow the growth of mushrooms. Lime raises the PH level of the soil. While grass and some flowering plants thrive in a higher PH level soil, mushrooms prefer lower PH levels and will not grow well or produce fruit in acidic soils. While lime will not actually kill the mushrooms, it can work to slow and eliminate the fungus when used in conjunction with other lawn chemicals.

Considerations
While chemical products can slow the growth of fungi and even, at times, eliminate it from a lawn, fungus growth is a sign of a rich soil environment and fruit may reappear if soil conditions remain fertile. Removal of animal feces and other decaying matter, such as rotting tree stumps, can help eliminate the growth of fungi. Lawns mowed on a regular basis may also help slow the spread of growing fungi fruit. Homeowners should also not use fungus infested lawn clippings in compost, as the fungus can easily spread to any area where the compost is used.

Fertilizer
Fertilizers containing nitrogen not only stimulate lawn growth, but can also rid the lawn of mushrooms. Nitrogen rich soil provides the perfect base for a fast growing lawn, but also increases organic waste and matter decomposition times. Nitrogen also speeds up the growth and breakdown of the mushroom systems, lessening the lifespan of the fungus.
Fungicides
Fungicides, available in both powder and liquid form, are chemical compounds used in the removal of different types of fungi. Depending on the type of fungicide used, the chemical may either slow the growth of the fungus, keeping new growth from being reproduced or kill the fungus, causing both the fruit and root system to die. Fungicides must be used with care, especially when used in gardens or on lawns where pets and children walk or play.
Lime
Lime, used by gardeners to prevent pests from eating plants and raise the soils acidity levels in gardens and lawns, can also help slow the growth of mushrooms. Lime raises the PH level of the soil. While grass and some flowering plants thrive in a higher PH level soil, mushrooms prefer lower PH levels and will not grow well or produce fruit in acidic soils. While lime will not actually kill the mushrooms, it can work to slow and eliminate the fungus when used in conjunction with other lawn chemicals.

Considerations
While chemical products can slow the growth of fungi and even, at times, eliminate it from a lawn, fungus growth is a sign of a rich soil environment and fruit may reappear if soil conditions remain fertile. Removal of animal feces and other decaying matter, such as rotting tree stumps, can help eliminate the growth of fungi. Lawns mowed on a regular basis may also help slow the spread of growing fungi fruit. Homeowners should also not use fungus infested lawn clippings in compost, as the fungus can easily spread to any area where the compost is used.
0
0
文章
Miss Chen
2017年12月04日

In general, fungi have a very short life span, though it differs greatly from species to species. Some types may live as short as a day, while others survive anywhere between a week and a month. The life cycle of a fungus begins as a spore and lasts until germination.

Spore Development
Fungi begin their life as spores that are released from a fully grown fungi. After they are released, the cells of the spore divide and spread into hyphae. When hyphae formed from spores released by two different fungi meet, they may fuse together to create a single cell with two nuclei.
Mushroom
Once the two-nucleus cells, also called dikaryons, have matured, they develop into a fruiting body known as a mushroom. The nuclei of the cells in the mushroom will undergo further divisions and eventually form haploid cells--cells with a single set of chromosomes--that then divide through meiosis and create spores.

Death
Once a fungus has completed creating spores through meiosis, it effectively dies. The spores spread and the remaining stalk and hyphae do not got through another fruiting process. The remnants of the fungus then decompose in the soil.

Spore Development
Fungi begin their life as spores that are released from a fully grown fungi. After they are released, the cells of the spore divide and spread into hyphae. When hyphae formed from spores released by two different fungi meet, they may fuse together to create a single cell with two nuclei.
Mushroom
Once the two-nucleus cells, also called dikaryons, have matured, they develop into a fruiting body known as a mushroom. The nuclei of the cells in the mushroom will undergo further divisions and eventually form haploid cells--cells with a single set of chromosomes--that then divide through meiosis and create spores.

Death
Once a fungus has completed creating spores through meiosis, it effectively dies. The spores spread and the remaining stalk and hyphae do not got through another fruiting process. The remnants of the fungus then decompose in the soil.
0
0
文章
Miss Chen
2017年12月04日

Prized for its taste and texture, the morel mushroom grows wild in many areas of the United States. This quality fungus emerges naturally in the springtime along sections of decomposing trees and rich, loamy patches of soil. Until recently, this type of mushroom defied attempts to cultivate it in a garden environment, making it necessary to search through the woods to find wild specimens. Propagating morel mushrooms with purchased spawn provides an interesting activity that provides an edible produce. The process of growing this type of mushroom requires careful preparation and patience.

Step 1
Prepare the site for your morel mushroom garden. Select a shady spot that measures approximately four feet by four feet. Choose a location that does not receive animal or foot traffic. Remove all existing vegetation and debris. Turn the top three to four inches of soil to loosen the surface. Spread equal amounts of sand, gypsum and peat moss over the surface of your soil, creating a layer about an inch thick. Work these into your loosened topsoil to create a rich, sandy medium.
Step 2
Scatter a fine layer of wood ashes over the prepared soil. Morel mushrooms grow naturally in forested areas after fires, thriving on nutrients in the ashes.
Step 3
Plant your morel spawn into your prepared soil by mixing and spreading the substance according to the package instructions. Sprinkle small pieces of hardwood chips and bark over your planted mushroom bed. In their native habitat, morel mushrooms grow among elms, ashes and apple trees, so try to use those types of hardwood. Keep the area slightly moist.

Step 4
Mark and protect your mushroom garden by placing gardening stakes along the outside edges of your site. Pound the stakes about halfway into the soil and tie strings or ribbons around the stakes to avoid accidentally walking over the area. Your planted spawn may take a few years to begin producing morel mushrooms.

Step 1
Prepare the site for your morel mushroom garden. Select a shady spot that measures approximately four feet by four feet. Choose a location that does not receive animal or foot traffic. Remove all existing vegetation and debris. Turn the top three to four inches of soil to loosen the surface. Spread equal amounts of sand, gypsum and peat moss over the surface of your soil, creating a layer about an inch thick. Work these into your loosened topsoil to create a rich, sandy medium.
Step 2
Scatter a fine layer of wood ashes over the prepared soil. Morel mushrooms grow naturally in forested areas after fires, thriving on nutrients in the ashes.
Step 3
Plant your morel spawn into your prepared soil by mixing and spreading the substance according to the package instructions. Sprinkle small pieces of hardwood chips and bark over your planted mushroom bed. In their native habitat, morel mushrooms grow among elms, ashes and apple trees, so try to use those types of hardwood. Keep the area slightly moist.

Step 4
Mark and protect your mushroom garden by placing gardening stakes along the outside edges of your site. Pound the stakes about halfway into the soil and tie strings or ribbons around the stakes to avoid accidentally walking over the area. Your planted spawn may take a few years to begin producing morel mushrooms.
0
0
文章
Miss Chen
2017年12月03日

Extravagant, rare and revered by culinary aficionados throughout the world, truffles are a pungent fungus that grows around the roots of hazelnut and other types of trees. Truffle varieties include white truffles and black truffles. To grow white truffles, you must purchase inoculated trees from a truffle farmer or a garden supplier that deals in fungi. White truffles are challenging to start, but when they become successfully established, you will reap the rewards of this delicacy for years to come. The primary climates where truffles can grow in the United States are the temperate regions of Washington, Oregon and Northern California.

Step 1
Choose a plot. Inoculated trees need be planted at least 4 feet from other plants and at least 20 feet from other trees. If you are planting several trees, plant rows spaced 12 feet apart with trees spaced 5 to 7 feet apart.
Step 2
Test the soil. Test kits are available from garden suppliers. Truffles need an alkaline soil with a pH between 7.5 and 7.9.
Step 3
Till the soil deeply. Use a rake for small plots and a rototiller for large plots. Add a 3-inch layer of compost. If your test results were below the requisite pH, add 8 oz. of hydrated lime per yard for each number the pH needs to be raised. Till the soil again to mix in the compost and lime.
Step 4
Plant sapling trees in early spring, while they are still dormant. Dig holes large enough to accommodate the roots, using a shovel. Remove the trees from their pots and insert them into the holes. Backfill the remaining space with soil and water thoroughly.

Step 5
Water your trees regularly to keep the soil moist. Do not add any fertilizer, compost or other soil additives for at least one year. Truffles will not begin growing for at least five years, perhaps longer. You may see bulges in the ground when truffles begin to grow. Pigs and trained dogs can also find truffles.
Step 6
Weed the plot regularly.
Step 7
Harvest truffles by carefully digging around them with a rigid stick.

Step 1
Choose a plot. Inoculated trees need be planted at least 4 feet from other plants and at least 20 feet from other trees. If you are planting several trees, plant rows spaced 12 feet apart with trees spaced 5 to 7 feet apart.
Step 2
Test the soil. Test kits are available from garden suppliers. Truffles need an alkaline soil with a pH between 7.5 and 7.9.
Step 3
Till the soil deeply. Use a rake for small plots and a rototiller for large plots. Add a 3-inch layer of compost. If your test results were below the requisite pH, add 8 oz. of hydrated lime per yard for each number the pH needs to be raised. Till the soil again to mix in the compost and lime.
Step 4
Plant sapling trees in early spring, while they are still dormant. Dig holes large enough to accommodate the roots, using a shovel. Remove the trees from their pots and insert them into the holes. Backfill the remaining space with soil and water thoroughly.

Step 5
Water your trees regularly to keep the soil moist. Do not add any fertilizer, compost or other soil additives for at least one year. Truffles will not begin growing for at least five years, perhaps longer. You may see bulges in the ground when truffles begin to grow. Pigs and trained dogs can also find truffles.
Step 6
Weed the plot regularly.
Step 7
Harvest truffles by carefully digging around them with a rigid stick.
0
0
文章
Miss Chen
2017年12月02日

The forests of North America are full of delicious fungi growing on the sides of trees. They can be boiled or stir fried and go well with Western and Asian cooking. However, look-a-likes exist that closely resemble edible fungus, yet are poisonous. It is critical for fungus collectors to know which kinds of fungus are safe to eat and which to avoid.

Oyster Mushroom
During spring, summer, fall and even during warm winter periods, the oyster mushroom grows in large clumps on the sides of trees. The mushroom is around 2 to 8 inches wide and is white, tan or off-white-colored. It has white gills under its wide cap that run down a short stem to the bark of the tree. This mushroom has a few look-a-likes, but they are not poisonous, only unpleasant. Check the reference below for a sample picture of the fungus.
Sulfur Shelf
The sulfur shelf fungus is easy to spot by its bright orange top and sulfur-yellow pores under the cap. Some are peach or salmon colored instead of bright orange. This fungus is also known as chicken mushroom and chicken of the woods. The caps range in size from 2 to 12 inches wide. The reference below contains reference pictures of this fungus. The fungus grows from summer to fall on living and dead trees. There are no close look-a-likes for this fungus. However, be careful as this mushroom can cause a mild allergic reaction in some people in the form of swollen lips. This mushroom has the texture and taste of chicken when cooked.

Wood Ear Fungus
This is a famous edible fungus that also goes by the names of cloud ear mushroom and ear of Judas mushroom. The wood ear fungus is pale off-white color or black and jelly-like in texture. It grows on the sides of trees. and can be dehydrated and re-hydrated for cooking. This fungus is often an ingredient in Chinese and other Asian dishes. Photos appear in the reference for wood ear.

Oyster Mushroom
During spring, summer, fall and even during warm winter periods, the oyster mushroom grows in large clumps on the sides of trees. The mushroom is around 2 to 8 inches wide and is white, tan or off-white-colored. It has white gills under its wide cap that run down a short stem to the bark of the tree. This mushroom has a few look-a-likes, but they are not poisonous, only unpleasant. Check the reference below for a sample picture of the fungus.
Sulfur Shelf
The sulfur shelf fungus is easy to spot by its bright orange top and sulfur-yellow pores under the cap. Some are peach or salmon colored instead of bright orange. This fungus is also known as chicken mushroom and chicken of the woods. The caps range in size from 2 to 12 inches wide. The reference below contains reference pictures of this fungus. The fungus grows from summer to fall on living and dead trees. There are no close look-a-likes for this fungus. However, be careful as this mushroom can cause a mild allergic reaction in some people in the form of swollen lips. This mushroom has the texture and taste of chicken when cooked.

Wood Ear Fungus
This is a famous edible fungus that also goes by the names of cloud ear mushroom and ear of Judas mushroom. The wood ear fungus is pale off-white color or black and jelly-like in texture. It grows on the sides of trees. and can be dehydrated and re-hydrated for cooking. This fungus is often an ingredient in Chinese and other Asian dishes. Photos appear in the reference for wood ear.
0
0
文章
Miss Chen
2017年12月02日

Mushroom growing is a unique type of gardening. Mushrooms are really the fruit of a fungus that is grown from spores, or "mycelium," a mat of developing spores. Mycelium is also called mushroom "spawn." Ordinary soil does not provide the right kind of nutrients for growing mushrooms. Instead, other materials such as straw, sawdust, wood chips and compost are used as growing medium, called a "substrate." Different types of mushrooms require different kinds of substrate.
Wood Chips
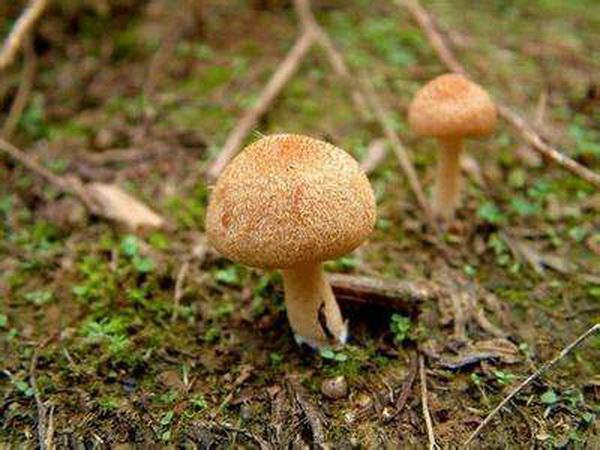
According to the University of California at Davis, wood chips can be used as the soil medium for those mushrooms that grow well on wood substrates. Mushrooms that grow in woody materials include oyster, shiitake, reishi, maitake and lion's mane mushrooms. You can purchase pre-sterilized wood chips ready for culturing the mushroom spawn.
Compost
Compost is a substrate that requires the most time to prepare, but it makes an effective soil-substitute for growing mushrooms. Compost is a mixture of yard waste, like leaves, grass clippings, weeds and branches, with kitchen waste like coffee grounds, vegetable scraps, eggshells and shells. This matter is kept moist and warm until it deteriorates into a rich, loamy soil-like material. You can make your own compost in a small enclosure in your yard in two to four months, according to the Pennsylvania Department of Environmental Protection. White button mushrooms prefer compost as substrate.
Straw
Straw can also be use as the substrate soil-substitute for growing mushrooms. According to Shroomery, cut wheat or barley straw into 2 to 4 inch pieces and pasteurized by putting it into 150-degree F water for 1 hour, then removed and allowed to drain. It is then cooled to room temperature. It is then placed in a bag with the mushroom mycelium, punctured several times and allowed to grow. Once the mycelium spreads on the surface, the bag is opened and the mushrooms are exposed to the air.
Horse Manure
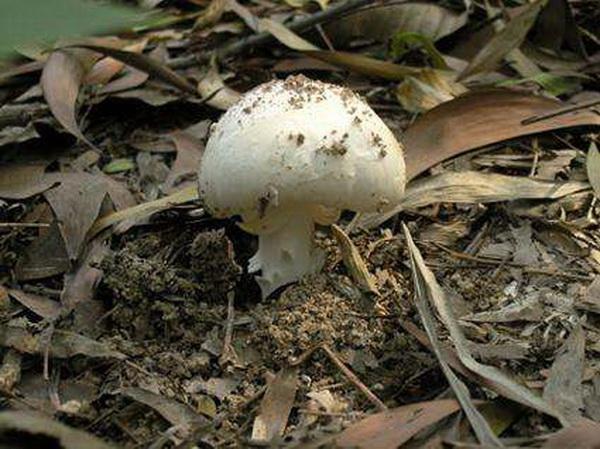
Horse manure grows mushrooms easily if composted well and mixed with straw. You can then place the mushroom spawn on the surface of the manure compost and rub it into the surface. A bit of lime will help the mushrooms grow. Do not water the manure compost for four weeks, as there is sufficient moisture in the compost, according to CountryFarm Lifestyle. You can purchase sterilized and composted horse manure for your mushroom substrate.
Potting Soil
You can also use ordinary potting soil to grow mushrooms, but you must add additional organic material for the mushroom spawn to eat. Coffee beans, cut in half and soaked in water for five minutes, then placed on the soil gives the potting soil more structure and nutrients for growing mushrooms. Adding vermiculite will give the soil additional body to hold the spawn.

Wood Chips
According to the University of California at Davis, wood chips can be used as the soil medium for those mushrooms that grow well on wood substrates. Mushrooms that grow in woody materials include oyster, shiitake, reishi, maitake and lion's mane mushrooms. You can purchase pre-sterilized wood chips ready for culturing the mushroom spawn.
Compost
Compost is a substrate that requires the most time to prepare, but it makes an effective soil-substitute for growing mushrooms. Compost is a mixture of yard waste, like leaves, grass clippings, weeds and branches, with kitchen waste like coffee grounds, vegetable scraps, eggshells and shells. This matter is kept moist and warm until it deteriorates into a rich, loamy soil-like material. You can make your own compost in a small enclosure in your yard in two to four months, according to the Pennsylvania Department of Environmental Protection. White button mushrooms prefer compost as substrate.
Straw
Straw can also be use as the substrate soil-substitute for growing mushrooms. According to Shroomery, cut wheat or barley straw into 2 to 4 inch pieces and pasteurized by putting it into 150-degree F water for 1 hour, then removed and allowed to drain. It is then cooled to room temperature. It is then placed in a bag with the mushroom mycelium, punctured several times and allowed to grow. Once the mycelium spreads on the surface, the bag is opened and the mushrooms are exposed to the air.

Horse Manure
Horse manure grows mushrooms easily if composted well and mixed with straw. You can then place the mushroom spawn on the surface of the manure compost and rub it into the surface. A bit of lime will help the mushrooms grow. Do not water the manure compost for four weeks, as there is sufficient moisture in the compost, according to CountryFarm Lifestyle. You can purchase sterilized and composted horse manure for your mushroom substrate.
Potting Soil
You can also use ordinary potting soil to grow mushrooms, but you must add additional organic material for the mushroom spawn to eat. Coffee beans, cut in half and soaked in water for five minutes, then placed on the soil gives the potting soil more structure and nutrients for growing mushrooms. Adding vermiculite will give the soil additional body to hold the spawn.
0
0
文章
Miss Chen
2017年12月01日

Cow fields, meadows and pastures are often home to significant numbers of mushrooms, both poisonous and edible. These open areas are full of decaying plant matter and animal manure, and provide a welcome habitat for fungus. However, toxic mushrooms can look very similar and grow very close to edible specimens. Knowing how to identify the most common field mushrooms can help mushroom hunters improve their chances of picking only safe specimens.

Agarics
Meadows produce a number of large, white mushrooms that are close relatives of the common button mushroom seen in supermarkets. Agarics found in cattle fields and pastures include Agaricus campestris (meadow mushroom), Agaricus andrewii (false meadow mushroom), Agraicus bisporus (button mushroom) and Agaricus arvensus (horse mushroom). These mushrooms are all large, white, and have purple to brown gills with a sweet, mild flavor and a dark brown spore print.
Amanitas
Amanita mushrooms look significantly like agarics and often grow in very similar habitats; however, these large white toadstools are toxic. They include Amanita phalloides (death cap), Amanita virosa (destroying angel) and Amanita bisporogera, as well as several other less-common white mushrooms. They are distinguishable from the agarics by their white or yellowish gills and white spore prints. Consumption of Amanita mushrooms can cause gastrointestinal problems including nausea and vomiting, and can even lead to death.
Psilocybins
Sometimes called "magic mushrooms," these poisonous fungi contain psychoactive compounds that can cause hallucinations. Several psilocybin mushrooms grow in pastures, including Psilocybe baseocystis (potent psilocybe), Psilocybe caerulipes (blue-foot psilocybe) and Psilocybe cubensis (common large psilocybe). These mushrooms appear as small brown toadstools, often in clusters or "fairy rings." Many species bruise or age to a bluish color. These mushrooms are sometimes picked for use as drugs, but their sale and use are illegal in the United States.
Puffballs
Puffballs are roughly globe-shaped fungi commonly found on lawns, infields and in lightly wooded areas. The most readily identifiable is Langermannia gigantea (giant puffball), an edible variety that can grow as large as a soccer ball. This mushroom is a smooth, white ball or ovoid with a leathery skin and a clear white interior. Purple-spored and skull-shaped puffballs are also edible, but some smaller species, such as Scleroderma citrinum (pigskin poison puffball) are toxic. Young Amanita species like the destroying angel may also be mistaken for puffball mushrooms.
0
0
文章
Miss Chen
2017年11月29日

Known by the more lyrical name Matsutake, pine mushrooms are a prized fungus with a high market price tag. They are collected in season and can command as much as $100 per pound. The North American mushrooms are large white fungus while the ones from Japan are a dark, rich-brown color. The pine mushroom is harvested in fall from under Lodgepole or Jack pine trees nestled amongst pine needles and moss. The mushroom is purportedly very difficult to grow, but you can find spore on some specialty mycelium sites. Easy to recognize by its fruity, spicy, pungent smell, this mushroom is well worth a little effort to grow.

Step 1
Find a Lodgepole or Jack pine that is middle aged. It will be around 30 to 50 feet tall and the roots will be mature enough to support the mycorrhizal relationship it has with pine mushroom spores. Pine mushrooms only grow in British Columbia (Canada), Washington, Oregon and Idaho under Lodgepole pines. They grow under Jack pines in the northeast.
Step 2
Look at the base of the tree for natural pine compost. The process to make it would take years to duplicate in the home, because it takes 10 years for a pine needle to decompose. It is more reliable to use the nature-produced product. The compost has leaves and other organic matter in addition to pine needles and is the preferred breeding site for pine mushrooms.
Step 3
Prepare the substrate by mixing 2 2/3 cups of brown rice flour and 8 cups vermiculite in a large bowl. Moisten them with 2 2/3 cups of water and then fill the jars. Put the seals on and close the lids. Place the jars in the large canning pot with enough water to come halfway up the side of the jars. Boil for 30 minutes. Allow the jars to cool.
Step 4
Inoculate the substrate you just made. Wipe the lids of the jars with alcohol and also the ice pick. Use the ice pick to poke a hole in the lid. Inject 1/4 cc of spore into the substrate. Cover the hole with tape. Put the jars in a dark place that is 85 degrees Fahrenheit, for 10 to 20 days.

Step 5
Use the pitchfork to turn over the compost at the base of the tree. Reserve a small amount to cover the spawn. Sprinkle the pine mushroom or Matsutake spawn in the substrate over the disturbed compost in late summer. Cover lightly with the disturbed compost. Pine mushrooms are nearly impossible to cultivate but using the natural growing conditions may enhance your chances.
Step 6
Visit the site regularly to make certain there is some moisture in the substrate which you can feel as coolness on your fingers. If the substrate is dry, it will not fruit, so check daily if there is no rain. Pine mushrooms are ready for harvest in mid to late fall.

Step 1
Find a Lodgepole or Jack pine that is middle aged. It will be around 30 to 50 feet tall and the roots will be mature enough to support the mycorrhizal relationship it has with pine mushroom spores. Pine mushrooms only grow in British Columbia (Canada), Washington, Oregon and Idaho under Lodgepole pines. They grow under Jack pines in the northeast.
Step 2
Look at the base of the tree for natural pine compost. The process to make it would take years to duplicate in the home, because it takes 10 years for a pine needle to decompose. It is more reliable to use the nature-produced product. The compost has leaves and other organic matter in addition to pine needles and is the preferred breeding site for pine mushrooms.
Step 3
Prepare the substrate by mixing 2 2/3 cups of brown rice flour and 8 cups vermiculite in a large bowl. Moisten them with 2 2/3 cups of water and then fill the jars. Put the seals on and close the lids. Place the jars in the large canning pot with enough water to come halfway up the side of the jars. Boil for 30 minutes. Allow the jars to cool.
Step 4
Inoculate the substrate you just made. Wipe the lids of the jars with alcohol and also the ice pick. Use the ice pick to poke a hole in the lid. Inject 1/4 cc of spore into the substrate. Cover the hole with tape. Put the jars in a dark place that is 85 degrees Fahrenheit, for 10 to 20 days.

Step 5
Use the pitchfork to turn over the compost at the base of the tree. Reserve a small amount to cover the spawn. Sprinkle the pine mushroom or Matsutake spawn in the substrate over the disturbed compost in late summer. Cover lightly with the disturbed compost. Pine mushrooms are nearly impossible to cultivate but using the natural growing conditions may enhance your chances.
Step 6
Visit the site regularly to make certain there is some moisture in the substrate which you can feel as coolness on your fingers. If the substrate is dry, it will not fruit, so check daily if there is no rain. Pine mushrooms are ready for harvest in mid to late fall.
1
1
文章
Miss Chen
2017年11月28日

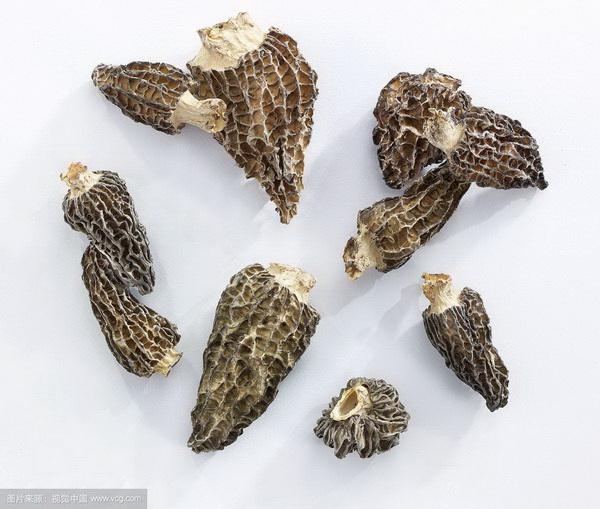
Mushrooms are the product or fruit of fungus-infested soil and can produce rather quickly taking over a lawn. The fungus feeds off decaying substances in the soil, such as old rotting mulch, dying tree stumps and animal feces. Removal of lawn mushrooms can be difficult, once the fungus has infested a large portion of the yard. Chemical products are one way to rid the yard of the mushrooms and fungus, but are more likely to work once the matter the fungus is feeding on is removed.
Fertilizer
Fertilizers containing nitrogen not only stimulate lawn growth, but can also rid the lawn of mushrooms. Nitrogen rich soil provides the perfect base for a fast growing lawn, but also increases organic waste and matter decomposition times. Nitrogen also speeds up the growth and breakdown of the mushroom systems, lessening the lifespan of the fungus.
Fungicides
Fungicides, available in both powder and liquid form, are chemical compounds used in the removal of different types of fungi. Depending on the type of fungicide used, the chemical may either slow the growth of the fungus, keeping new growth from being reproduced or kill the fungus, causing both the fruit and root system to die. Fungicides must be used with care, especially when used in gardens or on lawns where pets and children walk or play.
Lime
Lime, used by gardeners to prevent pests from eating plants and raise the soils acidity levels in gardens and lawns, can also help slow the growth of mushrooms. Lime raises the PH level of the soil. While grass and some flowering plants thrive in a higher PH level soil, mushrooms prefer lower PH levels and will not grow well or produce fruit in acidic soils. While lime will not actually kill the mushrooms, it can work to slow and eliminate the fungus when used in conjunction with other lawn chemicals.
Considerations
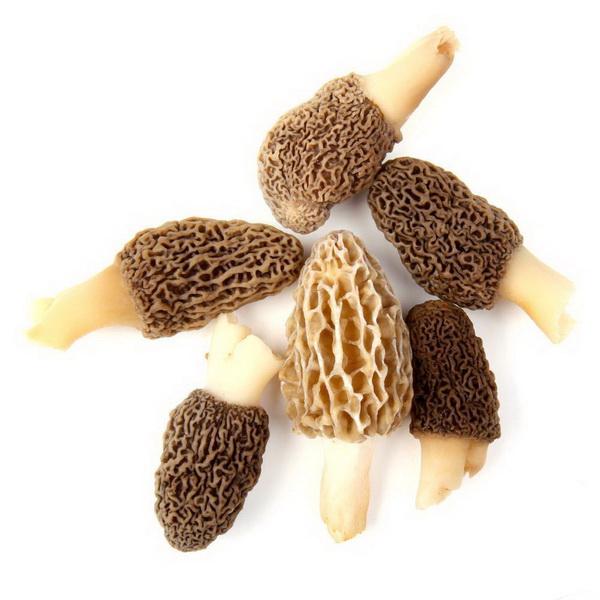
While chemical products can slow the growth of fungi and even, at times, eliminate it from a lawn, fungus growth is a sign of a rich soil environment and fruit may reappear if soil conditions remain fertile. Removal of animal feces and other decaying matter, such as rotting tree stumps, can help eliminate the growth of fungi. Lawns mowed on a regular basis may also help slow the spread of growing fungi fruit. Homeowners should also not use fungus infested lawn clippings in compost, as the fungus can easily spread to any area where the compost is used.

Fertilizer
Fertilizers containing nitrogen not only stimulate lawn growth, but can also rid the lawn of mushrooms. Nitrogen rich soil provides the perfect base for a fast growing lawn, but also increases organic waste and matter decomposition times. Nitrogen also speeds up the growth and breakdown of the mushroom systems, lessening the lifespan of the fungus.
Fungicides
Fungicides, available in both powder and liquid form, are chemical compounds used in the removal of different types of fungi. Depending on the type of fungicide used, the chemical may either slow the growth of the fungus, keeping new growth from being reproduced or kill the fungus, causing both the fruit and root system to die. Fungicides must be used with care, especially when used in gardens or on lawns where pets and children walk or play.
Lime
Lime, used by gardeners to prevent pests from eating plants and raise the soils acidity levels in gardens and lawns, can also help slow the growth of mushrooms. Lime raises the PH level of the soil. While grass and some flowering plants thrive in a higher PH level soil, mushrooms prefer lower PH levels and will not grow well or produce fruit in acidic soils. While lime will not actually kill the mushrooms, it can work to slow and eliminate the fungus when used in conjunction with other lawn chemicals.

Considerations
While chemical products can slow the growth of fungi and even, at times, eliminate it from a lawn, fungus growth is a sign of a rich soil environment and fruit may reappear if soil conditions remain fertile. Removal of animal feces and other decaying matter, such as rotting tree stumps, can help eliminate the growth of fungi. Lawns mowed on a regular basis may also help slow the spread of growing fungi fruit. Homeowners should also not use fungus infested lawn clippings in compost, as the fungus can easily spread to any area where the compost is used.
0
0


