文章
Miss Chen
2022年07月04日

IN THIS ARTICLE
Care
Types
Pruning
Propagating
Growing From Seed
Potting
Overwintering
Pests & Diseases
Bloom
Common Problems
Frequently Asked Questions
Creeping mazus (Mazus reptans) is a fast-spreading, semi-evergreen perennial that works well as a ground cover in USDA zones 5 to 8. In warmer climates, the dense, lush foliage remains green throughout the year, and it features clusters of beautiful little purple-blue flowers that blossom in late spring and summer. The tiny thumbnail-sized flowers form a dense mat and can be mowed in much the same way as turf grass.
Creeping mazus is usually planted from potted nursery starts or from root divisions in the spring. It is a fast-growing plant that will quickly fill in to create a uniform ground cover.
Common Name Creeping mazus
Botanical Name Mazus reptans or Mazus miquelii
Family Mazaceae
Plant Type Herbaceous perennial
Mature Size 2–3 in. tall, 6–12 in. wide
Sun Exposure Full, partial
Soil Type Moist, well drained
Soil pH Acidic to alkaline (5.5–8.0)
Bloom Time Summer
Flower Color White to blue-violet
Hardiness Zones 5–8 (USDA)
Native Area Central Asia (Himalayas)
Creeping Mazus Care
Creeping mazus prefers relatively moist fertile soil in a full-sun location, but it is an adaptable plant that tolerates almost any soil type and will grow adequately in partial shade. In shady conditions, it will grow more slowly with fewer flowers.
Light
Creeping mazus sees rapid growth in full sun or partial shade positions. In very hot regions, a location that is shaded during the peak of the afternoon is best.
Soil
Creeping mazus prefers fertile, moist, loamy soil, but it is a robust species that tolerates a variety of soil types. If the soil is too hard-packed, the delicate rooting system will struggle to become established. It grows equally well in acidic, neutral, and alkaline soils. With soils that are too dry, adding mulch will help with moisture retention.
Water
This plant prefers to remain moist but not constantly wet. Make sure it isn't exposed to over-watering, as standing water will cause root rot. Weekly watering, especially in hot and dry conditions will ensure your creeping mazus continues to flourish. If it stays dry too long, the foliage will begin to wilt and die.
Temperature and Humidity
Creeping mazus copes well across a wide range of temperatures and is reliably hardy in USDA zones 5 to 8. It prefers a warm and moist environment, and in warmer climates it is evergreen. In colder zones, the foliage may turn red and go dormant in the winter months. Hard frost may kill individual plants, though a colony usually fills in again when mild spring weather returns.
Fertilizer
You won't have to worry about feeding creeping mazus if it's planted in a rich and fertile soil. An annual light feeding of a slow-release variety in the spring, however, could promote better growth for plants that are in dry, poor-quality soil.
Types of Creeping Mazus
Mazus reptans has no widely available named cultivars—the species type is the one normally sold in the horticulture trade. However, there is a related species, Mazus miquelli, that is also sometimes known by the common name creeping mazus. However, M. miquelli, a native to Japan and China, is considered an invasive plant in the Northeast U.S., and it is rarely, if ever, deliberately used as a landscape plant.
Pruning
Although pruning is not required, creeping mazus responds well to shearing with a mower when used as a replacement for turf grass in ground-cover situations.
Propagating Creeping Mazus
Creeping mazus spreads naturally as its roaming stems root themselves in soil. It is an easy matter to dig up some of these offshoots and transplant them. Here's how:
In spring after an established plant is actively growing, use a sharp knife or trowel to separate an offshoot stem that has rooted itself and lift it free of the mother plant.
Immediately plant the offshoot in a new garden location and water it well. If planting with the intent of creating a new ground cover, space the plants 8 to 12 inches apart, as they will quickly spread to fill the space.
How to Grow Creeping Mazus From Seed
Creeping mazus spreads so quickly that it's generally planted via nursery seedling flats, with plants spaced 8 to 12 inches apart and then allowed to fill in to create a carpet of greenery. However, if you are covering large areas with creeping mazus, it is possible to plant from bulk seeds sown over the area, much the way lawn seed is sown. However, if you're seeding an area previously covered with grass, make sure to remove as much grass as possible, including the roots. This will give creeping mazus the best chance of thriving, as it can't outcompete the tenacious roots of turfgrasses.
Allow a decent amount of space between sown seeds, too. Remember, this plant has a fast-spreading, close-to-the-surface, sprawling root system. You don't want the area to become overcrowded, as this can impact growth.
Potting and Repotting Creeping Mazus
Although it's not a common way to grow creeping mazus, this plant can be grown in containers filled with standard potting mix. The low-growing trailing habit can make it a good "spiller" plant for the edges of a mixed container garden. A container of any type will do, provided it is well draining.
Overwintering
This plant generally requires no special winter preparation, though gardeners in colder zones may find that a layer of leaf mulch over the plants will prevent winter kill. Any covering should be raked off the plants as soon as the weather warms in the spring.
Common Pests and Plant Diseases
Creeping mazus is not a victim of any common serious pests or diseases, but it can be subject to damage from slugs and snails. These pests are best handled by removing them by hand, or with snail/slug baits placed in the garden.
How to Get Creeping Mazus to Bloom
It's rare for creeping mazus to withhold blooms during its normal flowering period, late spring though mid-summer. If it does not bloom adequately, it may be because it is not getting enough sunlight or water—both of which are necessary for profuse blooming. If both these cultural needs are adequate, then feeding the plant with balanced fertilizer may give the plants a needed nutritional boost.
An old, overgrown patch of creeping mazus may stop blooming because the plants become too crowded. In this case, rejuvenate the colony by digging up the plants, dividing the roots, and replanting the pieces 8 to 12 inches apart. The colony usually responds quickly with vigorous growth and ample flowering.
Common Problems With Creeping Mazus
There are very few cultural problems with creeping mazus if it's grown in its established hardiness range, but occasionally you may notice brown patches appearing in the otherwise uniform carpet of green. In the colder end of the hardiness range, this can be a symptom of winter kill caused by hard frost. Unless the frost is very hard and prolonged, winter kill usually corrects itself in the spring as surrounding plants fill in to replace dead patches.
Brown patches can also be caused by soil that is too dry. Creeping mazus plants like plenty of moisture, and may die back if allowed to become too dry during hot months.
FAQ
How is this plant best used in the landscape?
Creeping mazus is a popular aground cover alternative in locations that are too moist for turfgrass to grow well—such as the banks along streams or water gardens. It also works well to fill in gaps in between flagstones or walls, and it is a favored addition in rock gardens, where it helps reduce weed growth. This species also looks lovely dangling over the edges of hanging baskets or containers.
Is there a similar plant that works well in colder zones?
Scotch moss can be a good alternative to creeping mazus for zones 3 and 4. It is a good plant for moist areas, and it accepts a fair amount of foot traffic without incurring permanent damage.
How do I replace a turf grass lawn with creeping mazus?
Creeping mazus cannot simply be overseeded in a turf grass lawn, as turf grasses are considerably more aggressive and will win the rooting battle. If you do want to replace an area of turf grass, you must first kill off or remove all the grass. Turf grass can be removed with a sharp, flat shovel, but a more effective method is to kill it off with glyphosate herbicide before replanting with creeping mazus.
0
0
文章
Miss Chen
2022年06月21日

IN THIS ARTICLE
Care
Pruning
Propagating
Growing From Seed
Potting and Repotting
Overwintering
Bloom
Common Problems
Frequently Asked Questions
BACK TO TOP
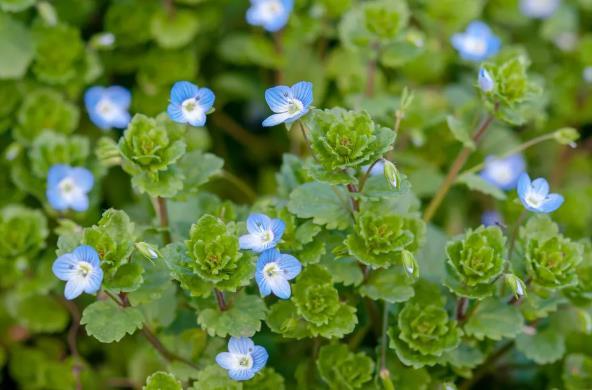
Creeping speedwell is a spreading perennial ground cover plant adorned with dainty flowers. Veronica filiformis is a trailing perennial that only reaches up to 5 inches in height and produces small, singular flowers. The blooms are composed of four rounded petals seen in shades of pink, purple or blue and appear in the spring and summer. The foliage is scallop-shaped and is evergreen in warm areas.
These plants spread quickly, creating mats that can reach up to 30 inches wide. This spreading nature, though good for covering large areas, can spread outside of their intended growing areas. The species is considered an invasive weed in some areas.1
Common Name Creeping Speedwell, Slender Speedwell
Botanical Name Veronica filiformis
Family Plantaginaceae
Plant Type Perennial, groundcover
Mature Size 2-5 in. tall, 20-30 in. wide
Sun Exposure Full, partial
Soil Type Loamy, sandy, clay, moist but well-drained
Soil pH Neutral
Bloom Time Spring, summer
Flower Color Pink, blue, purple
Hardiness Zones 3-9, USA
Native Area Europe, Asia
Creeping Speedwell Care
Creeping speedwell is very easy to care for and is often found growing wild in lawns, fields, or meadows. It is quite hardy and handles mowing and foot traffic well. In fact, cut pieces blown by a mower easily take root, spreading the plant further. These plants make excellent additions to rock gardens or around pathways.
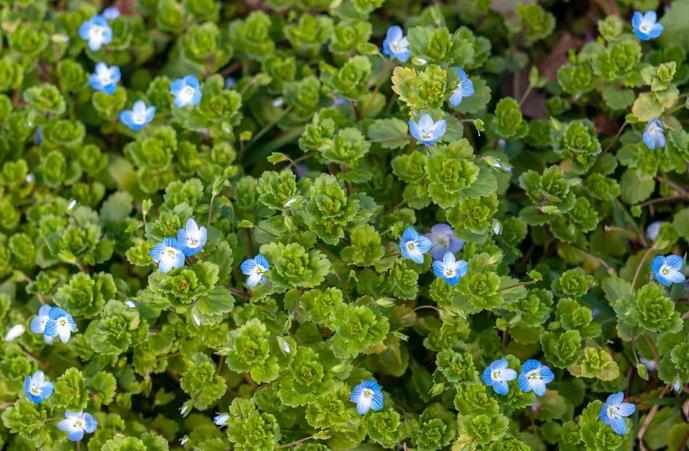
Creeping speedwell are deer and rabbit resistant. They are susceptible to root rot or other fungal problems if the soil is kept too wet.2 Take note that the dense mats created by the plants may harbor ticks and fleas.
Because of its hardy nature and rapid spread, creeping speedwell is considered invasive in some areas. For example, according to the Center for Invasive Species and Ecosystem Health, Veronica filiformis is considered invasive in the state of West Virginia.1 Be sure to do thorough research before planting this species in your area.
Light
Creeping speedwell can be grown in both full sun and shade. However, full sun can be too intense for creeping speedwell when it is grown in warm climates. Plants grown in full shade often do not flower well. For the best growth and bloom, it is ideal to plant creeping speedwell in an area with partial shade, particularly in the afternoon.
Soil
Creeping speedwell is a hardy plant frequently found growing in lawns, fields, and meadows. It prefers loamy, sandy, well-draining, and moist soil, but can also tolerate some clay. These plants grow best in soil with a neutral pH level, though they can tolerate slightly acidic and slightly alkaline soils.
Water
Once established, creeping speedwell is considered drought-tolerant. To avoid problems with soggy soil, only water these plants when the top inch or so of the soil begins to dry out. For young, newly planted speedwells, it is best to water more often until they are established. An inch of water per week is plenty to keep established plants healthy.
Temperature and Humidity
This groundcover plant is adaptable to a wide range of temperature and humidity levels, as long as it is grown within USDA hardiness zones 3 to 9. Keep in mind that the plant will remain evergreen in warm weather climates, but not in places where more seasonal changes in temperature are expected.
Fertilizer
Creeping speedwell is a light feeder and can even be grown in poor soil conditions, so regular fertilizing is not necessary. However, you can work compost or a well-balanced fertilizer into the soil in early spring if you want to ensure the plant receives needed nutrients.
Pruning
Pruning is not necessary, though it may be desired to keep the plant from spreading. Simply trim the plant with garden snips to do this. For large areas of creeping speedwell used as ground cover, a lawnmower is the best way to make quick work of the job. However, if you do not want the pruned pieces to take root, it is best to use a collection bag when mowing these plants.
Stop pruning in late summer, especially for plants grown in areas with cold winters. This allows the plants to create enough mature foliage to be protected through the winter. Pruning too late in the year will result in new growth that is too tender to survive the winter.
Propagating Creeping Speedwell
The spreading nature of creeping speedwell makes these plants easy to propagate. It can be accomplished by means of division, cuttings, or layering.
Division is a great option for plants whose centers begin to look bare or scraggly. To divide the plant, you will need a garden shovel, a hand shovel, a pair of snips, and a pair of gardening gloves. Then follow these instructions:
In early spring, use the garden shovel to gently dig around the plant, loosening the roots. Do this until the plant and its root system can be lifted from the ground.
Gently lift the plant out of the ground.
Using the shovels and the snips, divide the plant into however many sections you wish. Just be sure each section has healthy foliage and roots. Discard any bare areas.
Plant each section in its desired location.
To take cuttings, you will need a sharp pair of snips, moist, well-drained soil, and a small pot. Then follow these instructions:
Using the snips, cut a stem below a leaf node. Trim a section that is around 6 inches long.
Remove the leaves on the lower half of the cutting.
Bury the stripped end into moist soil. Make sure several nodes are buried, as this is where roots will form.
Keep the soil moist, but not soggy. Place the cuttings in bright, indirect light until roots form.
Check for roots by gently tugging on the cutting. If there is resistance, roots have formed. Once this happens, harden the cutting off and move it to its permanent location.
To layer, you will need a pair of garden gloves, a hand shovel, and a pair of snips. Then follow these instructions:
Find a node along the stem where you would like to propagate the plant.
Bury the node in the soil. Wait a few weeks for roots to form.
Check for roots by gently tugging on the buried node. Resistance means that roots have formed. At this point you may leave the node in place or cut the stem connecting it to the rest of the plant and dig up the new root system, planting it where you wish.
How to Grow Creeping Speedwell From Seed
Creeping speedwell can also be grown from seeds, started either indoors and outdoors. For indoor growth, start the seeds eight to 10 weeks before the last frost. You will need small pots, bright, indirect lighting, and a moist, well-draining seed starting mix, such as a peat moss mixture. Then follow these instructions:
Fill the pots with the seed starting mix and dampen the mixture.
Lightly sprinkle the tiny seeds onto the damp mixture and gently press them onto it. Do not bury them as they need light to germinate.
Place the pots in an area that receives bright, indirect light.
Keep the soil consistently moist.
Once the threat of frost is gone, harden off your seedlings. Then plant them into their permanent garden spaces.
To start seeds outdoors, follow these instructions:
Wait until the threat of frost is gone, then clear the area of weeds and work in organic material, such as compost. It is best to choose a spot that is protected from wind, as the seeds are very small and can be blown about.
Lightly sprinkle the seeds across the soil and gently tap them onto the soil to settle them in place. Do not bury them, as they need light to germinate.
Keep the soil moist as the seeds germinate and sprout. Once the plants become larger and more established, slowly reduce watering.
Potting and Repotting Creeping Speedwell
An easy way to contain creeping speedwell is by growing it in a pot. When choosing a container, be sure it has free-flowing drainage holes, as soggy soil can cause fungal problems. Since creeping speedwell will spread and fill the pot, at some point you will need to divide the plant or place it in a larger pot. When this time comes, tip the pot onto its side and tap it on all sides in order to loosen the roots. Slide the plant out when possible and either place it into a larger pot with loamy, well-draining soil, or divide the plant with a shovel or a pair of snips.
Overwintering
When grown in its appropriate growing zones, creeping speedwell does not require extra attention to survive the winter. Just be sure the soil does not get too wet, as this can lead to problems that may kill off the plant. If the winter is especially wet, you may want to cover the plant with plastic to keep some of the water out.
How to Get Creeping Speedwell to Bloom
Creeping speedwells produce small, four-petaled flowers seen in blue, purple, and pink. They often have white centers. Unlike other species of Veronica plants, creeping speedwell produces one flower per stalk as opposed to a spiky raceme covered in flowers. Still, these tiny flowers are attractive to pollinators such as butterflies and bees.
Because of their hardy nature, creeping speedwells do not often need much help to bloom. To encourage blooming, be sure to choose a planting spot that receives a few hours of sunlight each day. An area that receives morning sun and afternoon shade is ideal. Deadheading spent flower blooms will encourage more flowers to form.
Common Problems With Creeping Speedwell
Creeping speedwell is a very hardy plant and does not present many problems. In fact, it is more likely to challenge the gardener with problems of overgrowth. However, even extremely hardy plants may occasionally face problems. The biggest issues for creeping speedwell plants occur when the soil is too wet or too dry, manifesting in the form of wilting, soggy, or yellowing foliage.
Wilting Foliage
This is often seen in hot climates where the soil dries out quickly. If this is the case, try to plant your creeping speedwell in an area that receives afternoon shade. Increase the amount of water and frequency of watering times to ensure the plant receives enough.
Soggy, Wilting, and Yellowing Foliage
This is a sign of too much water and may point to root rot.2 If this is the case, cut back on watering and only water when the first inch or so of the soil is dry. If root rot is suspected, dig up the plant and cut away any infected roots and foliage. Amend the soil with a well-draining material such as sand or compost before replanting.
FAQ
Is creeping speedwell invasive?
Creeping speedwell is considered to be an invasive weed in some areas.1 Even in areas where it is not technically considered invasive, this plant has invasive qualities and can quickly spread outside its intended growing area.
Is creeping speedwell a perennial?
Yes, creeping speedwell is a perennial flowering plant. In areas with warm winters, this ground cover plant is also an evergreen.
How fast does creeping speedwell grow?
This ground cover is a fast grower and a quick spreader. This rapid growth makes containing the plant an important consideration for most gardeners.
Care
Pruning
Propagating
Growing From Seed
Potting and Repotting
Overwintering
Bloom
Common Problems
Frequently Asked Questions
BACK TO TOP
Creeping speedwell is a spreading perennial ground cover plant adorned with dainty flowers. Veronica filiformis is a trailing perennial that only reaches up to 5 inches in height and produces small, singular flowers. The blooms are composed of four rounded petals seen in shades of pink, purple or blue and appear in the spring and summer. The foliage is scallop-shaped and is evergreen in warm areas.
These plants spread quickly, creating mats that can reach up to 30 inches wide. This spreading nature, though good for covering large areas, can spread outside of their intended growing areas. The species is considered an invasive weed in some areas.1
Common Name Creeping Speedwell, Slender Speedwell
Botanical Name Veronica filiformis
Family Plantaginaceae
Plant Type Perennial, groundcover
Mature Size 2-5 in. tall, 20-30 in. wide
Sun Exposure Full, partial
Soil Type Loamy, sandy, clay, moist but well-drained
Soil pH Neutral
Bloom Time Spring, summer
Flower Color Pink, blue, purple
Hardiness Zones 3-9, USA
Native Area Europe, Asia
Creeping Speedwell Care
Creeping speedwell is very easy to care for and is often found growing wild in lawns, fields, or meadows. It is quite hardy and handles mowing and foot traffic well. In fact, cut pieces blown by a mower easily take root, spreading the plant further. These plants make excellent additions to rock gardens or around pathways.

Creeping speedwell are deer and rabbit resistant. They are susceptible to root rot or other fungal problems if the soil is kept too wet.2 Take note that the dense mats created by the plants may harbor ticks and fleas.
Because of its hardy nature and rapid spread, creeping speedwell is considered invasive in some areas. For example, according to the Center for Invasive Species and Ecosystem Health, Veronica filiformis is considered invasive in the state of West Virginia.1 Be sure to do thorough research before planting this species in your area.
Light
Creeping speedwell can be grown in both full sun and shade. However, full sun can be too intense for creeping speedwell when it is grown in warm climates. Plants grown in full shade often do not flower well. For the best growth and bloom, it is ideal to plant creeping speedwell in an area with partial shade, particularly in the afternoon.
Soil
Creeping speedwell is a hardy plant frequently found growing in lawns, fields, and meadows. It prefers loamy, sandy, well-draining, and moist soil, but can also tolerate some clay. These plants grow best in soil with a neutral pH level, though they can tolerate slightly acidic and slightly alkaline soils.
Water
Once established, creeping speedwell is considered drought-tolerant. To avoid problems with soggy soil, only water these plants when the top inch or so of the soil begins to dry out. For young, newly planted speedwells, it is best to water more often until they are established. An inch of water per week is plenty to keep established plants healthy.
Temperature and Humidity
This groundcover plant is adaptable to a wide range of temperature and humidity levels, as long as it is grown within USDA hardiness zones 3 to 9. Keep in mind that the plant will remain evergreen in warm weather climates, but not in places where more seasonal changes in temperature are expected.
Fertilizer
Creeping speedwell is a light feeder and can even be grown in poor soil conditions, so regular fertilizing is not necessary. However, you can work compost or a well-balanced fertilizer into the soil in early spring if you want to ensure the plant receives needed nutrients.
Pruning
Pruning is not necessary, though it may be desired to keep the plant from spreading. Simply trim the plant with garden snips to do this. For large areas of creeping speedwell used as ground cover, a lawnmower is the best way to make quick work of the job. However, if you do not want the pruned pieces to take root, it is best to use a collection bag when mowing these plants.
Stop pruning in late summer, especially for plants grown in areas with cold winters. This allows the plants to create enough mature foliage to be protected through the winter. Pruning too late in the year will result in new growth that is too tender to survive the winter.
Propagating Creeping Speedwell
The spreading nature of creeping speedwell makes these plants easy to propagate. It can be accomplished by means of division, cuttings, or layering.
Division is a great option for plants whose centers begin to look bare or scraggly. To divide the plant, you will need a garden shovel, a hand shovel, a pair of snips, and a pair of gardening gloves. Then follow these instructions:
In early spring, use the garden shovel to gently dig around the plant, loosening the roots. Do this until the plant and its root system can be lifted from the ground.
Gently lift the plant out of the ground.
Using the shovels and the snips, divide the plant into however many sections you wish. Just be sure each section has healthy foliage and roots. Discard any bare areas.
Plant each section in its desired location.
To take cuttings, you will need a sharp pair of snips, moist, well-drained soil, and a small pot. Then follow these instructions:
Using the snips, cut a stem below a leaf node. Trim a section that is around 6 inches long.
Remove the leaves on the lower half of the cutting.
Bury the stripped end into moist soil. Make sure several nodes are buried, as this is where roots will form.
Keep the soil moist, but not soggy. Place the cuttings in bright, indirect light until roots form.
Check for roots by gently tugging on the cutting. If there is resistance, roots have formed. Once this happens, harden the cutting off and move it to its permanent location.
To layer, you will need a pair of garden gloves, a hand shovel, and a pair of snips. Then follow these instructions:
Find a node along the stem where you would like to propagate the plant.
Bury the node in the soil. Wait a few weeks for roots to form.
Check for roots by gently tugging on the buried node. Resistance means that roots have formed. At this point you may leave the node in place or cut the stem connecting it to the rest of the plant and dig up the new root system, planting it where you wish.
How to Grow Creeping Speedwell From Seed
Creeping speedwell can also be grown from seeds, started either indoors and outdoors. For indoor growth, start the seeds eight to 10 weeks before the last frost. You will need small pots, bright, indirect lighting, and a moist, well-draining seed starting mix, such as a peat moss mixture. Then follow these instructions:
Fill the pots with the seed starting mix and dampen the mixture.
Lightly sprinkle the tiny seeds onto the damp mixture and gently press them onto it. Do not bury them as they need light to germinate.
Place the pots in an area that receives bright, indirect light.
Keep the soil consistently moist.
Once the threat of frost is gone, harden off your seedlings. Then plant them into their permanent garden spaces.
To start seeds outdoors, follow these instructions:
Wait until the threat of frost is gone, then clear the area of weeds and work in organic material, such as compost. It is best to choose a spot that is protected from wind, as the seeds are very small and can be blown about.
Lightly sprinkle the seeds across the soil and gently tap them onto the soil to settle them in place. Do not bury them, as they need light to germinate.
Keep the soil moist as the seeds germinate and sprout. Once the plants become larger and more established, slowly reduce watering.
Potting and Repotting Creeping Speedwell
An easy way to contain creeping speedwell is by growing it in a pot. When choosing a container, be sure it has free-flowing drainage holes, as soggy soil can cause fungal problems. Since creeping speedwell will spread and fill the pot, at some point you will need to divide the plant or place it in a larger pot. When this time comes, tip the pot onto its side and tap it on all sides in order to loosen the roots. Slide the plant out when possible and either place it into a larger pot with loamy, well-draining soil, or divide the plant with a shovel or a pair of snips.
Overwintering
When grown in its appropriate growing zones, creeping speedwell does not require extra attention to survive the winter. Just be sure the soil does not get too wet, as this can lead to problems that may kill off the plant. If the winter is especially wet, you may want to cover the plant with plastic to keep some of the water out.
How to Get Creeping Speedwell to Bloom
Creeping speedwells produce small, four-petaled flowers seen in blue, purple, and pink. They often have white centers. Unlike other species of Veronica plants, creeping speedwell produces one flower per stalk as opposed to a spiky raceme covered in flowers. Still, these tiny flowers are attractive to pollinators such as butterflies and bees.
Because of their hardy nature, creeping speedwells do not often need much help to bloom. To encourage blooming, be sure to choose a planting spot that receives a few hours of sunlight each day. An area that receives morning sun and afternoon shade is ideal. Deadheading spent flower blooms will encourage more flowers to form.
Common Problems With Creeping Speedwell
Creeping speedwell is a very hardy plant and does not present many problems. In fact, it is more likely to challenge the gardener with problems of overgrowth. However, even extremely hardy plants may occasionally face problems. The biggest issues for creeping speedwell plants occur when the soil is too wet or too dry, manifesting in the form of wilting, soggy, or yellowing foliage.
Wilting Foliage
This is often seen in hot climates where the soil dries out quickly. If this is the case, try to plant your creeping speedwell in an area that receives afternoon shade. Increase the amount of water and frequency of watering times to ensure the plant receives enough.
Soggy, Wilting, and Yellowing Foliage
This is a sign of too much water and may point to root rot.2 If this is the case, cut back on watering and only water when the first inch or so of the soil is dry. If root rot is suspected, dig up the plant and cut away any infected roots and foliage. Amend the soil with a well-draining material such as sand or compost before replanting.

FAQ
Is creeping speedwell invasive?
Creeping speedwell is considered to be an invasive weed in some areas.1 Even in areas where it is not technically considered invasive, this plant has invasive qualities and can quickly spread outside its intended growing area.
Is creeping speedwell a perennial?
Yes, creeping speedwell is a perennial flowering plant. In areas with warm winters, this ground cover plant is also an evergreen.
How fast does creeping speedwell grow?
This ground cover is a fast grower and a quick spreader. This rapid growth makes containing the plant an important consideration for most gardeners.
0
0
文章
Miss Chen
2018年08月30日

Shasta daisies (Leucanthemum X superbum) are undemanding plants, but pruning encourages more flowers and stronger growth. These perennials grow in U.S. Department of Agriculture plant hardiness zones 5 through 9, and thrive in full sun and well-drained, alkaline soils. They benefit from pruning from mid-summer onward, and dividing plants also encourages healthy growth. Shasta daisies grow 2 to 3 feet tall and 1 1/2 to 2 feet wide, depending on the cultivar.

Fading Flowers
Pruning Shasta daisy blooms as they fade encourages more flowers. Shasta daisies can flower less after they set seed, but removing the flowers before seeds develop prompts the plants to bloom again. Sterilize your pruning shear blades by wiping them with rubbing alcohol, and prune Shasta daisies when their petals droop and turn brown. Hold the flower in one hand and feel down to the base of the flower stem with the other hand. Prune the stem at the base, and remove the other fading blooms in the same way. Sterilize your pruning shears again after use.
Summer Pruning
Shasta daises benefit from pruning when the earliest blooms start to fade. Check your Shasta daisies every week, and prune fading flowers until late summer or the end of blooming. If the soil surface is dry after pruning, water plants until the water begins to puddle on the ground, and feed them with a liquid 15-30-15 fertilizer, which encourages more blooms. Dilute the product at a rate of 1 tablespoon per 1 gallon of water and apply it every 14 days, or dilute and apply the product according to the instructions on the label.
Pruning Clumps
Severely pruning Shasta daisy clumps in early fall can prolong their lives. Shasta daisies are short-lived perennials, but removing their leaves and stems when flowering is over encourages strong growth, which helps plants store energy for winter. Prune Shasta daisies to 8 inches tall, using sterilized pruning shears, and put the trimmings on the compost pile or in the trash. If your plants are too tall and lanky, pinch out the tips of non-flowering stems with your thumb and forefinger in spring to encourage them to grow more compact and bushy.

Lifting and Dividing
Lift and divide Shasta daisies every two or three years to encourage strong, healthy growth and flowering. Dig up a Shasta daisy plant on a cool, cloudy day in winter or early spring by pushing a garden fork into the soil about 6 inches from the plant base and gently levering it up. Do this three or four times around the base until the root ball lifts out of the soil. Divide the plant into three sections by pushing a sharp spade down through the roots, and plant the sections 24 to 36 inches apart at their original growing depths. Water the plants thoroughly and continue to water them regularly so that the soil stays moist.

Fading Flowers
Pruning Shasta daisy blooms as they fade encourages more flowers. Shasta daisies can flower less after they set seed, but removing the flowers before seeds develop prompts the plants to bloom again. Sterilize your pruning shear blades by wiping them with rubbing alcohol, and prune Shasta daisies when their petals droop and turn brown. Hold the flower in one hand and feel down to the base of the flower stem with the other hand. Prune the stem at the base, and remove the other fading blooms in the same way. Sterilize your pruning shears again after use.
Summer Pruning
Shasta daises benefit from pruning when the earliest blooms start to fade. Check your Shasta daisies every week, and prune fading flowers until late summer or the end of blooming. If the soil surface is dry after pruning, water plants until the water begins to puddle on the ground, and feed them with a liquid 15-30-15 fertilizer, which encourages more blooms. Dilute the product at a rate of 1 tablespoon per 1 gallon of water and apply it every 14 days, or dilute and apply the product according to the instructions on the label.
Pruning Clumps
Severely pruning Shasta daisy clumps in early fall can prolong their lives. Shasta daisies are short-lived perennials, but removing their leaves and stems when flowering is over encourages strong growth, which helps plants store energy for winter. Prune Shasta daisies to 8 inches tall, using sterilized pruning shears, and put the trimmings on the compost pile or in the trash. If your plants are too tall and lanky, pinch out the tips of non-flowering stems with your thumb and forefinger in spring to encourage them to grow more compact and bushy.

Lifting and Dividing
Lift and divide Shasta daisies every two or three years to encourage strong, healthy growth and flowering. Dig up a Shasta daisy plant on a cool, cloudy day in winter or early spring by pushing a garden fork into the soil about 6 inches from the plant base and gently levering it up. Do this three or four times around the base until the root ball lifts out of the soil. Divide the plant into three sections by pushing a sharp spade down through the roots, and plant the sections 24 to 36 inches apart at their original growing depths. Water the plants thoroughly and continue to water them regularly so that the soil stays moist.
0
0
文章
Miss Chen
2018年08月26日

Hostas are one of the most popular herbaceous perennial plants grown around the world. They are easy to look after and will tolerate shade. Pruning your hosta will keep it looking good year-round and help to reduce the chances of it being attacked by an infection. Hostas need to be planted in soil which is not going to be allowed to dry out in hot weather as they will quickly wilt when thirsty. Regular watering and a layer of mulch will help to keep them in top condition.
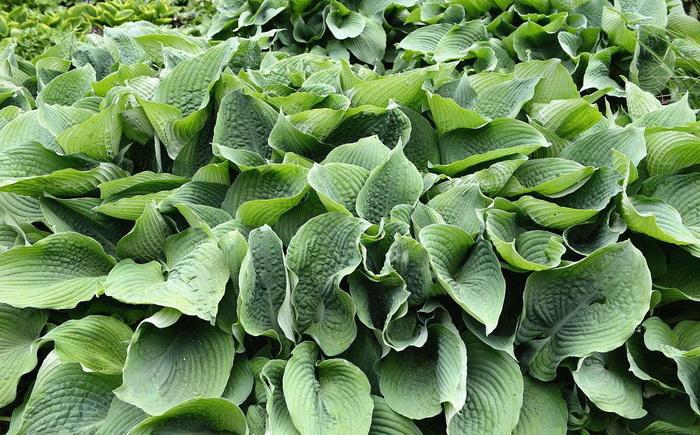
Step 1
Prune the hosta in fall when the leaves have died back. This way the plant will have taken as much energy and nutrients as possible from the leaves for next spring. Use pruning shears to carefully cut the dead leaves back to the base of the stem. Avoid pulling leaves out using your hands as this can tear into the living tissue at the base of the plant, leaving a wound which is open to fungal infection.
Step 2
Divide hostas in spring when you can clearly see where the new shoots are. Use a fork to dig the hosta out of the ground, removing as much soil from the roots as possible. Use pruning shears to remove any dead or unhealthy-looking roots. If left on the plant, this will worsen the plant's health and appearance. Use a spade to slice through the hosta root and replant the clumps at least 1 foot apart to give them space to grow.
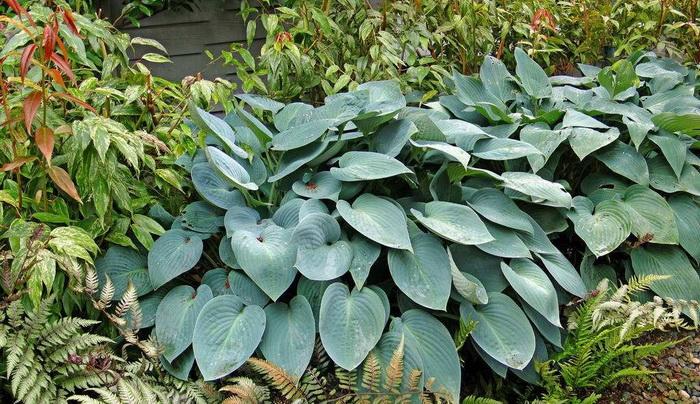
Step 3
After pruning and division, apply a layer of mulch around the plant. Mulch can be either well-rotted manure or compost and should be no more then 2 inches thick to discourage slugs from using it as a home. Mulch will feed the plant and help to keep it healthy. Mulch also keeps the soil moist in hot weather.

Step 1
Prune the hosta in fall when the leaves have died back. This way the plant will have taken as much energy and nutrients as possible from the leaves for next spring. Use pruning shears to carefully cut the dead leaves back to the base of the stem. Avoid pulling leaves out using your hands as this can tear into the living tissue at the base of the plant, leaving a wound which is open to fungal infection.
Step 2
Divide hostas in spring when you can clearly see where the new shoots are. Use a fork to dig the hosta out of the ground, removing as much soil from the roots as possible. Use pruning shears to remove any dead or unhealthy-looking roots. If left on the plant, this will worsen the plant's health and appearance. Use a spade to slice through the hosta root and replant the clumps at least 1 foot apart to give them space to grow.

Step 3
After pruning and division, apply a layer of mulch around the plant. Mulch can be either well-rotted manure or compost and should be no more then 2 inches thick to discourage slugs from using it as a home. Mulch will feed the plant and help to keep it healthy. Mulch also keeps the soil moist in hot weather.
0
0
文章
Miss Chen
2018年08月15日

When to prune sedum (Sedum spp.) is a question that is not answered with just a simple date. Pruning the flowering perennial, which grows in U.S. Department of Agriculture plant hardiness zones 3 through 10, depends on the size of the plant, the variety and how you want it to look. A compact, low-growing sedum requires different maintenance pruning than a tall, late-blooming variety.

Before You Prune
Before you prune your sedum, disinfect your pruning tools. Pruning shears are best for cutting back tall plants, while snips work well for pinching or clipping leaves. After brushing any dirt from the tool blades, disinfect the blades by soaking them for at least five minutes in a household disinfectant. After removing the tool from the disinfectant, rinse the blades with clean water and let them dry before using them on your plants. Repeat the disinfecting process before pruning another plant to avoid spreading disease.
Pinching for Shape
To encourage branching and low growth on young plants, pinching is recommended. To pinch the plant, use your fingers or pruning snips to remove the center growth from the top of a stem. Take care not to damage the buds or small leaf sets on either side of the center growth; these buds are where the branching will occur. Pinch back new plants when they are about 8 inches tall. You can still pinch off up to 2 inches after blooms start to appear, but it will delay flowering. The result is sedum with more horizontal growth, less vertical growth and added fullness.
Late Spring Pruning
A more severe pruning is required to encourage bushiness on an older plant that has gotten top heavy or leggy. To encourage new plant growth and get a fuller plant, cut the sedum back by one-half in May or June. New flower buds will form on the cut stalks, so you won't be sacrificing any of the showy display for the sake of a neater looking plant. Choose a point about halfway down a stalk and just above a set of leaves to make your cut. Cut cleanly through the stalk with sharp pruning shears, taking care not to damage the leaf set. Repeat with each stalk until the sedum is a uniform height.
Early Spring Pruning
Some varieties of tall sedum, such as "Autumn Joy" (Sedum x "Autumn Joy"), which grows in USDA zones 5 through 9, flower through the winter and need cut back in late winter or early spring. You can cut the sedum back in winter as soon as the flowers fade or any time after that until you see green peeping from the ground in spring. Cut the entire plant back to ground level using pruning shears or break the stalks at ground level by hand. In the spring, the sedum will re-emerge from the roots.

Year-Round Pruning
Some types of pruning are necessary year-round. This includes pruning out dead plant growth and cutting out diseased plant material. Removing these from your sedum as you see them will help keep the plant looking its best, keep it healthy and less prone to fungal or insect infestations. Cut dead stalks back to the base of the stalk. Pull any dead leaves when you spot them. Remove diseased portions of the plant to keep disease from spreading. Make sure you cut back far enough that you are leaving only healthy plant material. Make the cut just above a leaf set for new growth. Do not compost diseased sedum material.

Before You Prune
Before you prune your sedum, disinfect your pruning tools. Pruning shears are best for cutting back tall plants, while snips work well for pinching or clipping leaves. After brushing any dirt from the tool blades, disinfect the blades by soaking them for at least five minutes in a household disinfectant. After removing the tool from the disinfectant, rinse the blades with clean water and let them dry before using them on your plants. Repeat the disinfecting process before pruning another plant to avoid spreading disease.
Pinching for Shape
To encourage branching and low growth on young plants, pinching is recommended. To pinch the plant, use your fingers or pruning snips to remove the center growth from the top of a stem. Take care not to damage the buds or small leaf sets on either side of the center growth; these buds are where the branching will occur. Pinch back new plants when they are about 8 inches tall. You can still pinch off up to 2 inches after blooms start to appear, but it will delay flowering. The result is sedum with more horizontal growth, less vertical growth and added fullness.
Late Spring Pruning
A more severe pruning is required to encourage bushiness on an older plant that has gotten top heavy or leggy. To encourage new plant growth and get a fuller plant, cut the sedum back by one-half in May or June. New flower buds will form on the cut stalks, so you won't be sacrificing any of the showy display for the sake of a neater looking plant. Choose a point about halfway down a stalk and just above a set of leaves to make your cut. Cut cleanly through the stalk with sharp pruning shears, taking care not to damage the leaf set. Repeat with each stalk until the sedum is a uniform height.
Early Spring Pruning
Some varieties of tall sedum, such as "Autumn Joy" (Sedum x "Autumn Joy"), which grows in USDA zones 5 through 9, flower through the winter and need cut back in late winter or early spring. You can cut the sedum back in winter as soon as the flowers fade or any time after that until you see green peeping from the ground in spring. Cut the entire plant back to ground level using pruning shears or break the stalks at ground level by hand. In the spring, the sedum will re-emerge from the roots.

Year-Round Pruning
Some types of pruning are necessary year-round. This includes pruning out dead plant growth and cutting out diseased plant material. Removing these from your sedum as you see them will help keep the plant looking its best, keep it healthy and less prone to fungal or insect infestations. Cut dead stalks back to the base of the stalk. Pull any dead leaves when you spot them. Remove diseased portions of the plant to keep disease from spreading. Make sure you cut back far enough that you are leaving only healthy plant material. Make the cut just above a leaf set for new growth. Do not compost diseased sedum material.
0
0
文章
Miss Chen
2018年07月29日

Philodendron is a genus of evergreen tropical plants most commonly kept as conservatory or house plants. Pruning requirements for tropical plants, including philodendrons, are minimal except for when leaves die back due to age or damage. Two main types of philodendron growth forms exist: trailing, also known as vining, and clumping, also called self-heading. Prune philodendrons sparingly when needed to preserve their natural form.
Self-Heading Philodendron
Step 1
Prune out individual leaves that have died or become discolored or diseased. Sever the leaf at the base of the stem down to the crown of the plant just above the soil line.
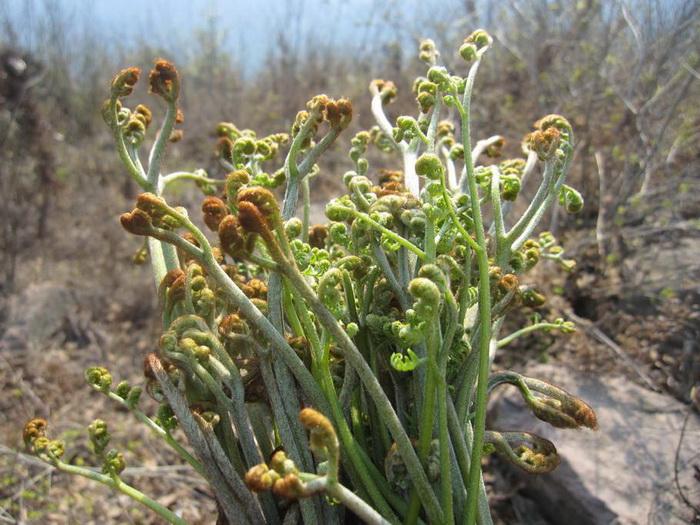
Step 2
Reduce the size or spread of the plants by removing the longest, oldest and most outsize leaves and stems down to the crown. Distribute these cuts evenly throughout the plant to maintain the natural form.
Step 3
Remove any stems that have lost their leaves. Sever the stem stump down to the crown of the plant, just above the soil line.
Vining Philodendron
Step 1
Snip off any dead, discolored, diseased or otherwise unsightly leaves that appear on the vines. Remove either an individual leaf or whole sections of vine as needed to keep the plant looking green and tidy.
Step 2
Cut back defoliated vines to just below a healthy leaf because the bare vines will likely not regenerate new growth once lost.
Step 3
Prune away leaves on the vines that have become brown or yellow due to over-watering or lack of sufficient sunlight. Once this occurs, the leaves will not be restored to a deep green hue. Remove the leaves at the base of the stem. If the vine tip or a section of vine is damaged, cut back to a healthy green leaf node just above the damaged tissues.

Step 4
Cut back the tips of the vines as desired to bring the plant back within preferred bounds and reduce size and spread.
Self-Heading Philodendron
Step 1
Prune out individual leaves that have died or become discolored or diseased. Sever the leaf at the base of the stem down to the crown of the plant just above the soil line.

Step 2
Reduce the size or spread of the plants by removing the longest, oldest and most outsize leaves and stems down to the crown. Distribute these cuts evenly throughout the plant to maintain the natural form.
Step 3
Remove any stems that have lost their leaves. Sever the stem stump down to the crown of the plant, just above the soil line.
Vining Philodendron
Step 1
Snip off any dead, discolored, diseased or otherwise unsightly leaves that appear on the vines. Remove either an individual leaf or whole sections of vine as needed to keep the plant looking green and tidy.
Step 2
Cut back defoliated vines to just below a healthy leaf because the bare vines will likely not regenerate new growth once lost.
Step 3
Prune away leaves on the vines that have become brown or yellow due to over-watering or lack of sufficient sunlight. Once this occurs, the leaves will not be restored to a deep green hue. Remove the leaves at the base of the stem. If the vine tip or a section of vine is damaged, cut back to a healthy green leaf node just above the damaged tissues.

Step 4
Cut back the tips of the vines as desired to bring the plant back within preferred bounds and reduce size and spread.
0
0
文章
Miss Chen
2017年11月19日

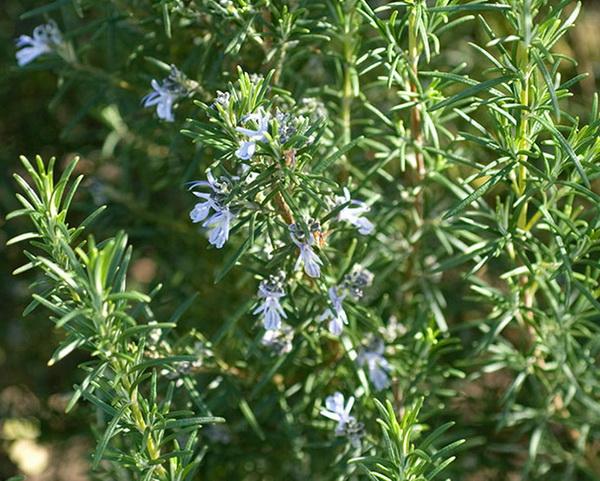
Rosemary is an aromatic evergreen herb used in cooking and scented cosmetic products. If you are already growing rosemary, you can start several new plants from your mother plant. The easiest way to regrow rosemary is by pruning and rooting cuttings.
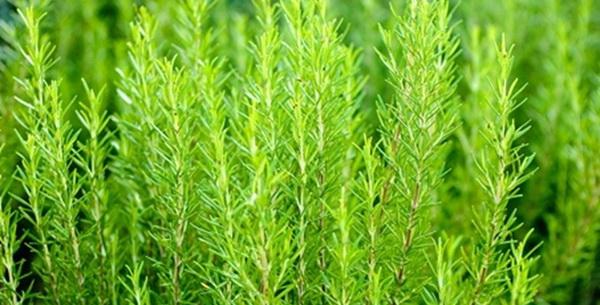
Step 1
Fill a small planter with soil or a mix of soil and sand or vermiculite. You can also plant several cuttings together in one large planter, rather than rooting single stems in individual planters.
Step 2
Cut a soft stem just below a leaf or pair of leaves with a sharp knife or cutting shears. Choose a cutting no less than 3 inches – but up to 8 inches – from the tip.
Step 3
Strip the leaves from the bottom of the stem so the portion of the stem that will be planted is free of leaves.
Step 4
Dip the end of the stem in hormone rooting powder, if desired. Rooting powder is available in gardening supply stores and fortifies cuttings, but it is not necessary when rooting rosemary.
Step 5
Push the cutting into the soil and water it. Cover the plant with a plastic bag and leave it in a warm, sunny spot for about three weeks. Check roots by gently inverting the planter into your hand to see the underside of the soil.

Step 1
Fill a small planter with soil or a mix of soil and sand or vermiculite. You can also plant several cuttings together in one large planter, rather than rooting single stems in individual planters.
Step 2
Cut a soft stem just below a leaf or pair of leaves with a sharp knife or cutting shears. Choose a cutting no less than 3 inches – but up to 8 inches – from the tip.
Step 3
Strip the leaves from the bottom of the stem so the portion of the stem that will be planted is free of leaves.

Step 4
Dip the end of the stem in hormone rooting powder, if desired. Rooting powder is available in gardening supply stores and fortifies cuttings, but it is not necessary when rooting rosemary.
Step 5
Push the cutting into the soil and water it. Cover the plant with a plastic bag and leave it in a warm, sunny spot for about three weeks. Check roots by gently inverting the planter into your hand to see the underside of the soil.
0
0
文章
Miss Chen
2017年11月11日

Pruning grape vines produces a healthy fruit harvest. If you do not prune the grape vines, they will grow too much foliage and not produce fruit. Grape vines are mature when they are at least 3 years of age. Prune your grape vines in the winter months to encourage new growth in the spring. Once you prune the grape vines, you can train them to grow on arbors or trellises so that they do not take over your yard or garden.

Step 1
Remove leaves on the ground around the grape vine. This will prevent insects and birds from invading the grape vines and keep the vines healthy.
Step 2
Prune away any tangled vines. The tangled vines will prevent the grape vine from producing grapes. Place the tangled vines in a compost bin or trash bag.
Step 3
Remove shoots growing between the trellis wires. This will encourage the vines to continue to grow on the wires. Cut these shoots at the base near the main stem.
Step 4
Cut away secondary shoots, also known as suckers, from the main cane's base. The suckers take energy away from the grape vine.

Step 5
Prune the canes to leave four on each side of the vine. Keep two young canes on each side that appear shiny and smooth to keep the grapevine producing fruit. Remove older canes when they begin to crack and peel.
Step 6
Prune the spurs on the main canes. Leave two to three of the bud spurs. Prune them by spacing them apart 4 to 6 inches.

Step 1
Remove leaves on the ground around the grape vine. This will prevent insects and birds from invading the grape vines and keep the vines healthy.
Step 2
Prune away any tangled vines. The tangled vines will prevent the grape vine from producing grapes. Place the tangled vines in a compost bin or trash bag.
Step 3
Remove shoots growing between the trellis wires. This will encourage the vines to continue to grow on the wires. Cut these shoots at the base near the main stem.
Step 4
Cut away secondary shoots, also known as suckers, from the main cane's base. The suckers take energy away from the grape vine.

Step 5
Prune the canes to leave four on each side of the vine. Keep two young canes on each side that appear shiny and smooth to keep the grapevine producing fruit. Remove older canes when they begin to crack and peel.
Step 6
Prune the spurs on the main canes. Leave two to three of the bud spurs. Prune them by spacing them apart 4 to 6 inches.
0
0
文章
Miss Chen
2017年11月09日

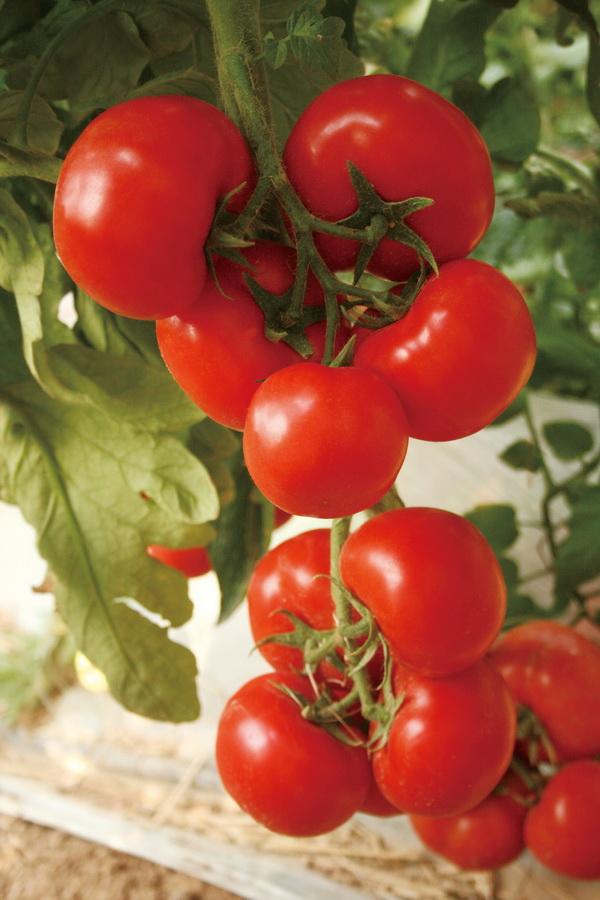
Tomatoes come in varieties with different grow habits. The fruits can be grown on plants with a determinate, indeterminate and even semi-determinate manner. The manner of growth will determine if and how you will be pruning the plants. Pruning tomatoes is not necessary, but may increase the size of fruit marginally and will make the plants easier to manage. Pruning usually means removal of suckers and occasionally pinching back to enhance compact growth and stem strength. The difference between determinate and indeterminate ultimately boils down to the length of harvest and the time of harvest. Determinates produce fruit first, usually in a two- to three-week period, while indeterminate varieties will produce fruit for a longer period, but near the end of the summer.
Step 1
Look at the branching formation on your plants. If the branches are long with sparse foliage, they are likely indeterminate. A compact, bushy plant is determinate because it form flowers at the terminal end of the branch, which signals the stem to stop growing. You will need to stake an indeterminate plant or it will fall over when it bears fruit. Determinate plants rarely require staking.
Step 2
Check for suckers at the base of your tomato plant and at the crotch of a leaved stem. These are small growth that will increase density in the tomato plant's crown, but will not flower and fruit. They need to be pruned out and they only happen on indeterminate plants. If they are left to grow, the plant may have mildew problems due to lack of air circulation, problems with fruit ripening because sunlight is not penetrating, and the suckers draw energy that would be better used on the fruit.
Step 3
Consider the height of the plant. Determinate varieties are usually only 2 to 3 feet tall. Indeterminate plants can get 6 feet tall and have numerous long branches. The determinate plants are also referred to as compact and usually have smaller fruit than indeterminate varieties. Some of the newer varieties of tomatoes are determinate while the older ones and many heirlooms are indeterminate.

Step 4
Count how many flowers are in various stages and how many are simply mature and ready to fruit. The determinate plants will flower nearly all at once and set fruit that will be the one crop on the plant and will ripen at nearly the same time. Then the plant yellows and is finished. The indeterminate plant will have buds, flowers and flowers that have been pollinated all at once and the cycle will continue all season long.
Step 5
Check the plant tag for your variety. Some of the common indeterminate types grown in the home garden are: Brandywine, Early Girl and Mr. Stripey. Some determinates that have proven to do well in the home vegetable garden are: Celebrity, Small Fry and Oregon Spring.

Step 1
Look at the branching formation on your plants. If the branches are long with sparse foliage, they are likely indeterminate. A compact, bushy plant is determinate because it form flowers at the terminal end of the branch, which signals the stem to stop growing. You will need to stake an indeterminate plant or it will fall over when it bears fruit. Determinate plants rarely require staking.
Step 2
Check for suckers at the base of your tomato plant and at the crotch of a leaved stem. These are small growth that will increase density in the tomato plant's crown, but will not flower and fruit. They need to be pruned out and they only happen on indeterminate plants. If they are left to grow, the plant may have mildew problems due to lack of air circulation, problems with fruit ripening because sunlight is not penetrating, and the suckers draw energy that would be better used on the fruit.
Step 3
Consider the height of the plant. Determinate varieties are usually only 2 to 3 feet tall. Indeterminate plants can get 6 feet tall and have numerous long branches. The determinate plants are also referred to as compact and usually have smaller fruit than indeterminate varieties. Some of the newer varieties of tomatoes are determinate while the older ones and many heirlooms are indeterminate.

Step 4
Count how many flowers are in various stages and how many are simply mature and ready to fruit. The determinate plants will flower nearly all at once and set fruit that will be the one crop on the plant and will ripen at nearly the same time. Then the plant yellows and is finished. The indeterminate plant will have buds, flowers and flowers that have been pollinated all at once and the cycle will continue all season long.
Step 5
Check the plant tag for your variety. Some of the common indeterminate types grown in the home garden are: Brandywine, Early Girl and Mr. Stripey. Some determinates that have proven to do well in the home vegetable garden are: Celebrity, Small Fry and Oregon Spring.
0
0
文章
Miss Chen
2017年11月02日

Pruning strawberries (Fragaria x ananassa) encourages them to grow strongly and produce plenty of fruit. Strawberries are hardy in U.S. Department of Agriculture plant hardiness zones 2 through 11. June-bearing or short-day strawberries fruit in spring and early summer; ever-bearing varieties produce strawberries through the growing season; day-neutral plants usually fruit three months after planting. Before and after pruning strawberries, wipe your pruning shear blades with rubbing alcohol to help prevent the spread of pests and diseases.

First-Year Plants
Pruning flowers on strawberries in their first year increases fruit production later. June-bearing, ever-bearing and day-neutral strawberries that have their first flowers pruned also grow more vigorously than unpruned plants.
Prune all the flowering stalks on June-bearing strawberries in the first growing season. Prune the stalks at their bases where they join the rest of the plant. Prune the first flush of flowers that appear on ever-bearing strawberries after planting. If your ever-bearing plants are growing strongly, you can allow the second flush of flowers to develop into fruits. Prune flowers on day-neutral varieties for six weeks after planting.
Matted Rows
Selective pruning of strawberry runners helps produce matted rows of plants. Runners are shoots that grow out from plants and develop roots, which grow into new plants. Matted rows of strawberries are wide rows that cover bare soil and suppress weeds.

To create matted rows of June-bearing or ever-bearing strawberries, plant new plants 12 to 18 inches apart in rows 3 to 4 feet apart. When runners appear, encourage six from each plant to form roots. Weigh them down, evenly spaced around the plants, with small stones or U-shaped pieces of wire at their nodes, which are bumps on the stems. Prune all other runners that appear at their bases where they join the rest of the plant.
Grow day-neutral strawberries 9 inches apart in rows 3 to 4 feet apart. Prune all runners on day-neutral plants in the first year, and allow them to form matted rows in the second and third year.
Ribbon Rows
Ribbon rows are rows of single strawberries. Growing strawberries in ribbon rows allows air to circulate and reduces the risk of pests and diseases.
To grow June-bearing, ever-bearing and day-neutral strawberries in ribbon rows, space the plants 4 to 9 inches apart in rows 2 to 3 feet apart. Prune all the runners that appear through the life of the plants. To help prevent problems with weeds, spread a 2-inch layer of sawdust or a 4-inch layer of clean straw between the strawberry plants.
Gray Mold
Strawberries suffer from a fungal disease called gray mold, but pruning helps reduce the disease's spread. Gray mold often affects strawberries in damp weather and in sites with poor air circulation. Blossoms and fruit slowly turn moldy, and finally a dusty, gray mold covers whole fruits.
Prune infected blossoms and fruit, and dead leaves, on June-bearing, ever-bearing and day-neutral strawberries. Pick healthy fruit at least every other day, and immediately refrigerate it. Water in the morning at the plant bases to help prevent gray mold.

First-Year Plants
Pruning flowers on strawberries in their first year increases fruit production later. June-bearing, ever-bearing and day-neutral strawberries that have their first flowers pruned also grow more vigorously than unpruned plants.
Prune all the flowering stalks on June-bearing strawberries in the first growing season. Prune the stalks at their bases where they join the rest of the plant. Prune the first flush of flowers that appear on ever-bearing strawberries after planting. If your ever-bearing plants are growing strongly, you can allow the second flush of flowers to develop into fruits. Prune flowers on day-neutral varieties for six weeks after planting.
Matted Rows
Selective pruning of strawberry runners helps produce matted rows of plants. Runners are shoots that grow out from plants and develop roots, which grow into new plants. Matted rows of strawberries are wide rows that cover bare soil and suppress weeds.

To create matted rows of June-bearing or ever-bearing strawberries, plant new plants 12 to 18 inches apart in rows 3 to 4 feet apart. When runners appear, encourage six from each plant to form roots. Weigh them down, evenly spaced around the plants, with small stones or U-shaped pieces of wire at their nodes, which are bumps on the stems. Prune all other runners that appear at their bases where they join the rest of the plant.
Grow day-neutral strawberries 9 inches apart in rows 3 to 4 feet apart. Prune all runners on day-neutral plants in the first year, and allow them to form matted rows in the second and third year.
Ribbon Rows
Ribbon rows are rows of single strawberries. Growing strawberries in ribbon rows allows air to circulate and reduces the risk of pests and diseases.
To grow June-bearing, ever-bearing and day-neutral strawberries in ribbon rows, space the plants 4 to 9 inches apart in rows 2 to 3 feet apart. Prune all the runners that appear through the life of the plants. To help prevent problems with weeds, spread a 2-inch layer of sawdust or a 4-inch layer of clean straw between the strawberry plants.
Gray Mold
Strawberries suffer from a fungal disease called gray mold, but pruning helps reduce the disease's spread. Gray mold often affects strawberries in damp weather and in sites with poor air circulation. Blossoms and fruit slowly turn moldy, and finally a dusty, gray mold covers whole fruits.
Prune infected blossoms and fruit, and dead leaves, on June-bearing, ever-bearing and day-neutral strawberries. Pick healthy fruit at least every other day, and immediately refrigerate it. Water in the morning at the plant bases to help prevent gray mold.
1
0
文章
Miss Chen
2017年10月30日

Pruning is a crucial aspect of grapevine cultivation, affecting overall vine balance. Extensive pruning takes place mid to late winter after grapevines enter winter dormancy to encourage productivity and direct vine canopy and bud growth during the growing season. Bare, exposed canes signal the dormancy of the vine. Removing old wood to make room for new fruiting wood is the primary purpose for heavily pruning grape vines.

Timing and Temperature
Because only shoots growing from 1-year-old canes produce fruit, healthy new canes must be produced every year to maintain annual production of fruit. A pruning practice that facilitates the production of fruiting wood involves removing all of the previous year's fruiting canes or spurs (now 2 years old) and any excess 1-year-old canes. From January through early March, grape growers should remove about 90 percent of wood growth from the previous growing season — with the exception of new 1-year-old fruiting canes and renewal spurs (new trunks), according to Oregon State University's Department of Horticulture. Pruning in the fall may increase vine susceptibility to freeze injury during winter. Optimal timing for pruning occurs when winter's coldest temperatures have likely passed and when temperatures consistently maintain levels above freezing.
Age Considerations
Cut back to two or three buds, a first-year vine should grow several shoots, promoting abundant leaf growth on the vine to permit the formation of a strong root system. The second year, remove flower clusters from the young vine as they form throughout the growing season. Implement typical pruning practices during the vine's third winter and allow fruit to develop during the following growing season. Old, neglected vines should undergo severe pruning in stages to minimize shock to the plant, removing dead and diseased wood first, continuing at intervals to remove old wood while leaving the new, 1-year-old wood growth.

Spring Pruning
In regions where risk of injury to the vine from severe winter weather exists, postpone heavy pruning until early spring. According to Cornell University, delay pruning through the winter months as long as feasible to reduce the danger of cold injury. If extremely cold temperatures do not occur in December, January and February, the danger of vine injury from cold is reduced. March may still produce damaging temperatures, but avoiding injury is more likely. Cornell University recommends examining the buds and proceeding on the basis of actual injury when the possibility of cold and freeze damage to grape vines exist, allowing you to compensate for actual injury losses.
Fruit Thinning
Fruit thinning is a type of pruning that is often necessary during the growing season to control excessive fruit production by permitting no more than one fruit cluster for each rapidly growing shoot. Fruit thinning ensures maximum quality and ripening, and its effectiveness depends on targeting new growth as early as possible throughout the growing season. During summer bloom, remove small or imperfect flower clusters at their first appearance to promote growth of large clusters of large grapes.

Timing and Temperature
Because only shoots growing from 1-year-old canes produce fruit, healthy new canes must be produced every year to maintain annual production of fruit. A pruning practice that facilitates the production of fruiting wood involves removing all of the previous year's fruiting canes or spurs (now 2 years old) and any excess 1-year-old canes. From January through early March, grape growers should remove about 90 percent of wood growth from the previous growing season — with the exception of new 1-year-old fruiting canes and renewal spurs (new trunks), according to Oregon State University's Department of Horticulture. Pruning in the fall may increase vine susceptibility to freeze injury during winter. Optimal timing for pruning occurs when winter's coldest temperatures have likely passed and when temperatures consistently maintain levels above freezing.
Age Considerations
Cut back to two or three buds, a first-year vine should grow several shoots, promoting abundant leaf growth on the vine to permit the formation of a strong root system. The second year, remove flower clusters from the young vine as they form throughout the growing season. Implement typical pruning practices during the vine's third winter and allow fruit to develop during the following growing season. Old, neglected vines should undergo severe pruning in stages to minimize shock to the plant, removing dead and diseased wood first, continuing at intervals to remove old wood while leaving the new, 1-year-old wood growth.

Spring Pruning
In regions where risk of injury to the vine from severe winter weather exists, postpone heavy pruning until early spring. According to Cornell University, delay pruning through the winter months as long as feasible to reduce the danger of cold injury. If extremely cold temperatures do not occur in December, January and February, the danger of vine injury from cold is reduced. March may still produce damaging temperatures, but avoiding injury is more likely. Cornell University recommends examining the buds and proceeding on the basis of actual injury when the possibility of cold and freeze damage to grape vines exist, allowing you to compensate for actual injury losses.
Fruit Thinning
Fruit thinning is a type of pruning that is often necessary during the growing season to control excessive fruit production by permitting no more than one fruit cluster for each rapidly growing shoot. Fruit thinning ensures maximum quality and ripening, and its effectiveness depends on targeting new growth as early as possible throughout the growing season. During summer bloom, remove small or imperfect flower clusters at their first appearance to promote growth of large clusters of large grapes.
0
0
成长记
Ueca
2017年09月24日

I had to trim back some branches on the side; I gave those cuttings to my roommate. Does pruning shape this plant's growth permanently?


2
0
文章
Dummer. ゛☀
2017年09月23日

Cacti are low maintenance plants that generally thrive with neglect and do not require a lot of pampering. It might surprise you to find that cacti can and do need to be pruned now and then. Cactus pruning is not always necessary and when to prune a cactus plant will depend upon why you are trimming it. A few notes on how to cut back a cactus for purposes of propagation, rejuvenation and structural integrity will send you on the road to cleaning up your succulents properly.
Can You Trim a Cactus?
New succulent growers may ask, “Can you trim a cactus?” Most cacti really don’t need any form of shaping unless they have a great huge limb that looks ready to tip the plant over. The major reasons for trimming cactus are to remove parts to root for new plants, remove offsets or pups for the same reason, reinvigorate a plant that has gotten too tall or too leggy, and to take off damaged material.
Cacti come in a wide range of forms. Cactus pruning can enhance these forms while preventing overcrowding, which can increase the chance of disease, mildew and unhealthy plants. The Opuntias have pads that serve as leaves and these are easy to remove and can be used to start new plants. Columnar plants, like Totem Pole Cacti or Organ Pipe Cacti, may simply get too tall or spindly and require a judicious beheading to force branching or simply thicker stems. Still other cacti will produce flower stalks which are persistent and become ugly when dead. Removal of these will restore the beauty of the plant.
Trimming cactus has a variety of purposes, but the good news is that you can use many of the parts you remove to start new plants.
How to Cut Back a Cactus
The “how” of cutting back a cactus answers like a bad joke. The simple answer is, very carefully. Most cacti have some type of spine or prickle which can be painful to encounter. Use thick gloves and wear long pants and sleeves for the bigger garden specimens.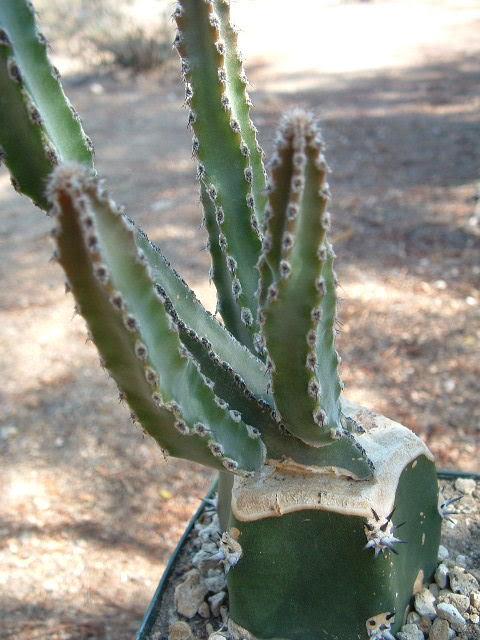
The tool will depend upon the size of the plant, but most will succumb to pruners. Only the largest will require a saw. As with all pruning, make sure the tool used is sharp and clean to avoid injuring the plant and decrease the chance of disease.
Remove limbs at the branch point but be careful not to cut into the main stem. Pads or leaves may just snap off or you can use pruners to remove them.
For a big job like cutting back a columnar specimen, use a saw and remove the main trunk at the point at which you would like to see branching or at the height you require the plant. Try to remove the stem at a growth point.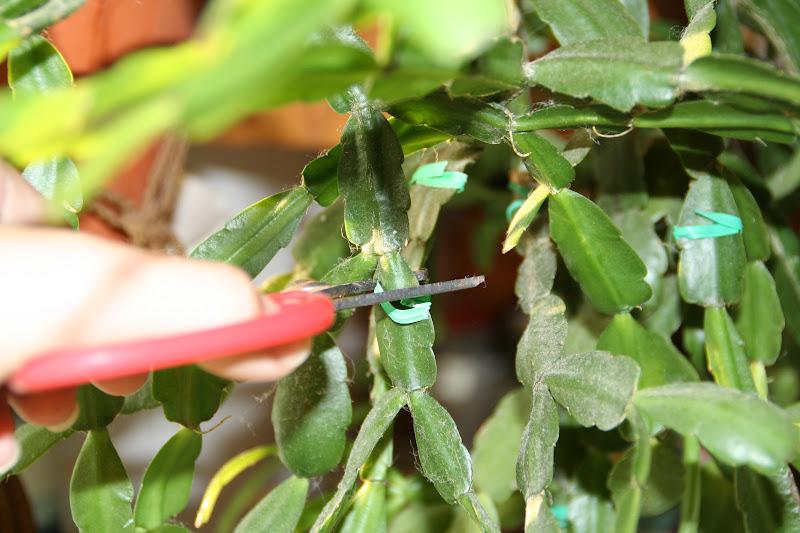
What to Do With Pruned Off Parts
Now for the fun part. Almost all the material you remove is salvageable except for diseased or dead stems and leaves.
Pads will root if laid on top of soil and develop into a new plant of the same species.
Cut stems and trunks should be allowed to callus at the end for several days and then can be planted to create new cactus.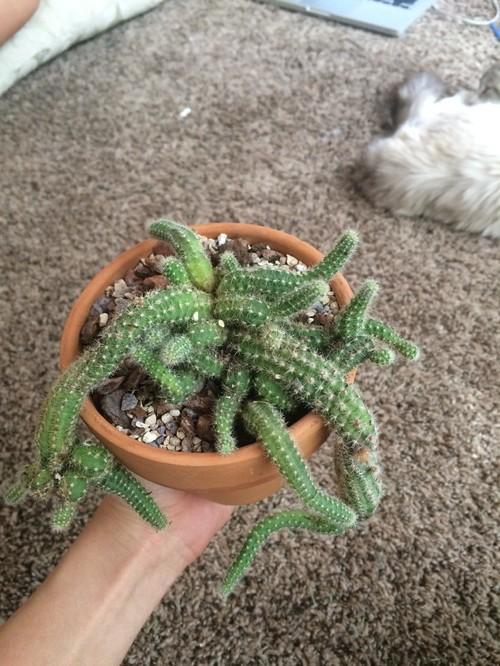
Any offsets or pups that you cut away from the base of a specimen are new plants in their own right and should be potted up immediately.
Dead flower stalks and leaves are compost, but some varieties of cactus produce leaves on the flower stem which can be treated the same way as the pads of other species. Most cactus parts will start rooting within a month.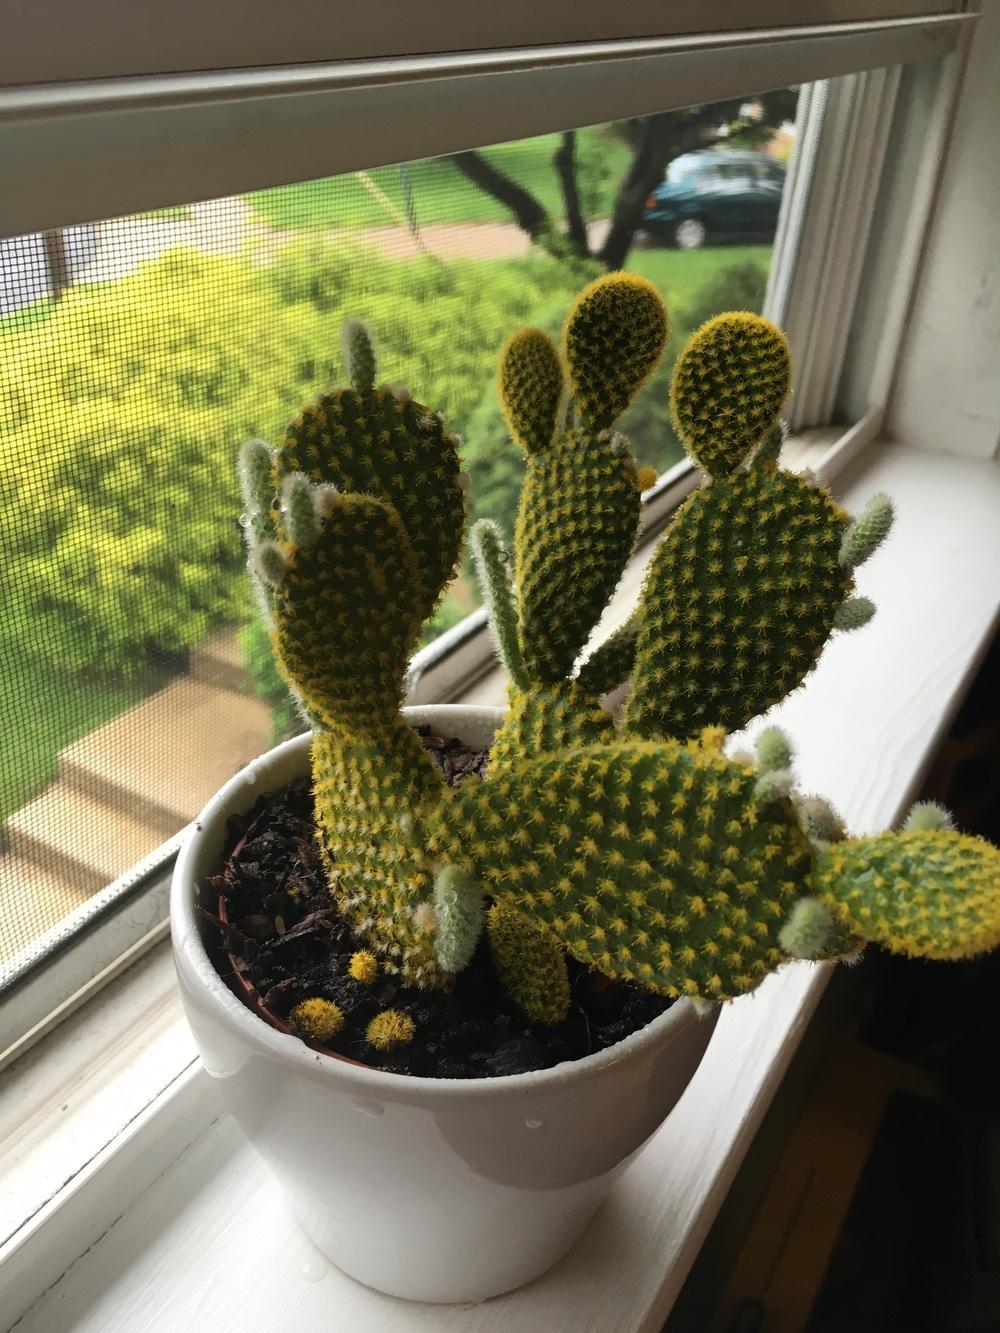
Once you restore your initial cactus to its glory, you will have the pleasure of making more of the spectacular plant and can increase your collection or give them away to family and friends.

Can You Trim a Cactus?
New succulent growers may ask, “Can you trim a cactus?” Most cacti really don’t need any form of shaping unless they have a great huge limb that looks ready to tip the plant over. The major reasons for trimming cactus are to remove parts to root for new plants, remove offsets or pups for the same reason, reinvigorate a plant that has gotten too tall or too leggy, and to take off damaged material.

Cacti come in a wide range of forms. Cactus pruning can enhance these forms while preventing overcrowding, which can increase the chance of disease, mildew and unhealthy plants. The Opuntias have pads that serve as leaves and these are easy to remove and can be used to start new plants. Columnar plants, like Totem Pole Cacti or Organ Pipe Cacti, may simply get too tall or spindly and require a judicious beheading to force branching or simply thicker stems. Still other cacti will produce flower stalks which are persistent and become ugly when dead. Removal of these will restore the beauty of the plant.

Trimming cactus has a variety of purposes, but the good news is that you can use many of the parts you remove to start new plants.
How to Cut Back a Cactus
The “how” of cutting back a cactus answers like a bad joke. The simple answer is, very carefully. Most cacti have some type of spine or prickle which can be painful to encounter. Use thick gloves and wear long pants and sleeves for the bigger garden specimens.

The tool will depend upon the size of the plant, but most will succumb to pruners. Only the largest will require a saw. As with all pruning, make sure the tool used is sharp and clean to avoid injuring the plant and decrease the chance of disease.
Remove limbs at the branch point but be careful not to cut into the main stem. Pads or leaves may just snap off or you can use pruners to remove them.
For a big job like cutting back a columnar specimen, use a saw and remove the main trunk at the point at which you would like to see branching or at the height you require the plant. Try to remove the stem at a growth point.

What to Do With Pruned Off Parts
Now for the fun part. Almost all the material you remove is salvageable except for diseased or dead stems and leaves.
Pads will root if laid on top of soil and develop into a new plant of the same species.
Cut stems and trunks should be allowed to callus at the end for several days and then can be planted to create new cactus.

Any offsets or pups that you cut away from the base of a specimen are new plants in their own right and should be potted up immediately.
Dead flower stalks and leaves are compost, but some varieties of cactus produce leaves on the flower stem which can be treated the same way as the pads of other species. Most cactus parts will start rooting within a month.

Once you restore your initial cactus to its glory, you will have the pleasure of making more of the spectacular plant and can increase your collection or give them away to family and friends.
0
0


