文章
Miss Chen
2021年03月31日

Summer came quietly,
In order to add a beautiful scenery to the windowsill
Many friends around
Start a gust of wind
Growing succulents
Or some plants that can be grown on the balcony.

Today
Just share it with everyone
How to protect flowers??

1. White vinegar cures yellow leaves
Applicable species: Camellia, azalea, frangipani, osmanthus, Milan, gardenia, jasmine and other acid-loving plants.
When growing flowers, flowers and leaves are often withered. If it is not for lack of water, it may be yellowing disease.
White vinegar and water are diluted in a ratio of 1:500 and placed in a small spray bottle, and sprayed on the leaves in the morning, spraying once every 2 days.
2. Beer to promote flowers
Applicable species: Foliage plants such as green radish, Brazilian ironwood, monstera, geranium, Chlorophytum, Dieffenbachia.
Wiping the leaves with beer can make the leaves green and bright, and watering on the roots can also make the plants grow vigorously and bloom in time.
Dilute the water and beer in a certain proportion, mix them evenly, and pour them on the roots of foliage plants. Twice a month, the flowers can be fresh and bright.
Pour a little beer in the vase when arranging flowers to make the colors of the flowers radiant.

3. Use waste oil to grow flowers
Applicable species: night flower, rose, clivia, longevity flower, honeysuckle and other fertilizer-loving plants.
Every time you clean the range hood, don't throw away the waste oil in the oil collecting cup. It is a good partner for plant-loving plants.
Insert holes at the edge of the flowerpot. Generally, insert two holes in the pot with a diameter of 15 cm, and three holes with a diameter of 25 cm. Pour waste oil into the hole and cover it with soil. The fertilizer effect can be maintained for two to three months.

4. Soapy water kills insects
Applicable species: all insect-bearing plants.
When there are pests on plants, try soapy water. It can kill many soft-shell pests, such as aphids, red spiders, and ants.
Dissolve the soap with rainwater, well water, cold boiled water, etc., and keep the concentration below 1%. Spray the solution on the leaf surface and back of diseased leaves in the morning, and don't spray it if there is no insect damage.
Soapy water tends to make the soil alkaline, so it is generally not used for watering flowers, but the insecticidal effect is not bad.
The above method is the secret recipe that Xiaon tried. Dear friends, you can choose the right method according to your flower type!
In order to add a beautiful scenery to the windowsill
Many friends around
Start a gust of wind
Growing succulents
Or some plants that can be grown on the balcony.

Today
Just share it with everyone
How to protect flowers??

1. White vinegar cures yellow leaves
Applicable species: Camellia, azalea, frangipani, osmanthus, Milan, gardenia, jasmine and other acid-loving plants.
When growing flowers, flowers and leaves are often withered. If it is not for lack of water, it may be yellowing disease.
White vinegar and water are diluted in a ratio of 1:500 and placed in a small spray bottle, and sprayed on the leaves in the morning, spraying once every 2 days.

2. Beer to promote flowers
Applicable species: Foliage plants such as green radish, Brazilian ironwood, monstera, geranium, Chlorophytum, Dieffenbachia.
Wiping the leaves with beer can make the leaves green and bright, and watering on the roots can also make the plants grow vigorously and bloom in time.
Dilute the water and beer in a certain proportion, mix them evenly, and pour them on the roots of foliage plants. Twice a month, the flowers can be fresh and bright.
Pour a little beer in the vase when arranging flowers to make the colors of the flowers radiant.

3. Use waste oil to grow flowers
Applicable species: night flower, rose, clivia, longevity flower, honeysuckle and other fertilizer-loving plants.
Every time you clean the range hood, don't throw away the waste oil in the oil collecting cup. It is a good partner for plant-loving plants.
Insert holes at the edge of the flowerpot. Generally, insert two holes in the pot with a diameter of 15 cm, and three holes with a diameter of 25 cm. Pour waste oil into the hole and cover it with soil. The fertilizer effect can be maintained for two to three months.

4. Soapy water kills insects
Applicable species: all insect-bearing plants.
When there are pests on plants, try soapy water. It can kill many soft-shell pests, such as aphids, red spiders, and ants.
Dissolve the soap with rainwater, well water, cold boiled water, etc., and keep the concentration below 1%. Spray the solution on the leaf surface and back of diseased leaves in the morning, and don't spray it if there is no insect damage.
Soapy water tends to make the soil alkaline, so it is generally not used for watering flowers, but the insecticidal effect is not bad.
The above method is the secret recipe that Xiaon tried. Dear friends, you can choose the right method according to your flower type!
0
0
文章
莹723
2021年03月23日

Pilea peperomiodes, also known as the Chinese money plant, missionary plant, pancake plant, the pass-it-along plant and the UFO plant, has a dome of beautiful and unusual leaves that look like small lily pads.
The Chinese money plant hails from southern China, and was first brought to the UK at the start of the twentieth century. It’s very easy to propagate, so circulated quietly among house plant enthusiasts (hence its nickname, the pass-it-along plant) but it was practically unheard until it became popular on social media a few years ago. Despite this, Pilea peperomiodes can be quite hard to get hold of – it’s best to go to a specialist house plant shop or online supplier. It’s also expensive, so if you have a friend with a plant, ask them to pot up one of the many babies that pop up around its base for you.

Pilea peperomiodes is an easy going plant that is good for beginners as it’s quite forgiving of neglect in terms of watering and feeding. But treat it well and it will reward you with fast growth, glossy green leaves and lots of babies at the base.
Each Pilea peperomiodes grows slightly differently and your plant is likely to grow more upright as it matures. Older plants may produce tiny flowers.
1.How to grow Pilea peperomiodes
Plant your Pilea peperomiodes in well drained compost and place in a warm, bright spot that’s not too sunny. Only water when the soil is beginning to dry out.

2.Where to grow Pilea peperomoides
Pilea peperomiodes does best in a warm spot that doesn’t go below 12°C in winter. Put it somewhere bright – it will take a bit of direct sun, but don’t let it sit in midday or afternoon sun, as this will scorch the leaves.

3.How to plant Pilea peperomiodes
There’s no need to take the plant out of it plastic pot when you bring your plant home (unless it’s root bound) – just put it inside a more decorative pot. Repot when root bound (you’ll see roots emerging out of the bottom of the pot). Plant in a mix of 2:1 soil-based compost (or peat-free, multi-purpose compost) and perlite, and make sure there are drainage holes at the bottom of the pot.

4.Caring for Pilea peperomiodes
From spring to autumn, water regularly but allow the top few centimetres of the compost to dry out between waterings, and let any excess drain away afterwards – like most house plants, Pilea peperomiodes does not like sitting in cold, soggy compost. Water less in winter. Feed once a month with a weak or diluted house plant food. Wipe the leaves occasionally to keep them shiny and free from dust. You could mist the leaves, although this is not essential. The plant will naturally gravitate towards the light, giving it a tilted appearance, so rotate it every few days to maintain its mounded look. Repot in spring if the plant has become root bound.

5.How to propagate Pilea peperomiodes
Pilea peperomiodes is very easy to propagate. It readily produces baby plants, known as offsets or pups, at its base – these can be carefully removed using a fork, and placed in an inch of water. A few weeks later, roots will have formed and you can pot up your new plants. They will grow fast.

6.Growing Pilea peperomiodes: problem solving
Yellow or brown leaves at the base of the plant are normal – these are older leaves that die and drop off naturally. If yellow leaves are appearing all over the plant, it could be due to over- or under watering, so check your watering regime.
Flopping, lacklustre leaves are due to under watering or over watering – check the soil to see which applies to your plant.
Bending, curling leaves can be due to lack of light.

Pale leaves can be a sign of too much bright sunlight. Brown spots on the leaves are sunburn.
Scale insect can be a problem – look for small brown lumps on the leaves. Gently wipe them away with cotton wool soaked in an insecticide based on fatty acids or plant oils. Act promptly as soon as you see them, as the problem can become widespread and affect the plant’s health.
Powdery mildew can appear as white patches on the leaves. Remove the affected leaves and improve air circulation around the plant.
The Chinese money plant hails from southern China, and was first brought to the UK at the start of the twentieth century. It’s very easy to propagate, so circulated quietly among house plant enthusiasts (hence its nickname, the pass-it-along plant) but it was practically unheard until it became popular on social media a few years ago. Despite this, Pilea peperomiodes can be quite hard to get hold of – it’s best to go to a specialist house plant shop or online supplier. It’s also expensive, so if you have a friend with a plant, ask them to pot up one of the many babies that pop up around its base for you.

Pilea peperomiodes is an easy going plant that is good for beginners as it’s quite forgiving of neglect in terms of watering and feeding. But treat it well and it will reward you with fast growth, glossy green leaves and lots of babies at the base.
Each Pilea peperomiodes grows slightly differently and your plant is likely to grow more upright as it matures. Older plants may produce tiny flowers.
1.How to grow Pilea peperomiodes
Plant your Pilea peperomiodes in well drained compost and place in a warm, bright spot that’s not too sunny. Only water when the soil is beginning to dry out.

2.Where to grow Pilea peperomoides
Pilea peperomiodes does best in a warm spot that doesn’t go below 12°C in winter. Put it somewhere bright – it will take a bit of direct sun, but don’t let it sit in midday or afternoon sun, as this will scorch the leaves.

3.How to plant Pilea peperomiodes
There’s no need to take the plant out of it plastic pot when you bring your plant home (unless it’s root bound) – just put it inside a more decorative pot. Repot when root bound (you’ll see roots emerging out of the bottom of the pot). Plant in a mix of 2:1 soil-based compost (or peat-free, multi-purpose compost) and perlite, and make sure there are drainage holes at the bottom of the pot.

4.Caring for Pilea peperomiodes
From spring to autumn, water regularly but allow the top few centimetres of the compost to dry out between waterings, and let any excess drain away afterwards – like most house plants, Pilea peperomiodes does not like sitting in cold, soggy compost. Water less in winter. Feed once a month with a weak or diluted house plant food. Wipe the leaves occasionally to keep them shiny and free from dust. You could mist the leaves, although this is not essential. The plant will naturally gravitate towards the light, giving it a tilted appearance, so rotate it every few days to maintain its mounded look. Repot in spring if the plant has become root bound.

5.How to propagate Pilea peperomiodes
Pilea peperomiodes is very easy to propagate. It readily produces baby plants, known as offsets or pups, at its base – these can be carefully removed using a fork, and placed in an inch of water. A few weeks later, roots will have formed and you can pot up your new plants. They will grow fast.

6.Growing Pilea peperomiodes: problem solving
Yellow or brown leaves at the base of the plant are normal – these are older leaves that die and drop off naturally. If yellow leaves are appearing all over the plant, it could be due to over- or under watering, so check your watering regime.
Flopping, lacklustre leaves are due to under watering or over watering – check the soil to see which applies to your plant.
Bending, curling leaves can be due to lack of light.

Pale leaves can be a sign of too much bright sunlight. Brown spots on the leaves are sunburn.
Scale insect can be a problem – look for small brown lumps on the leaves. Gently wipe them away with cotton wool soaked in an insecticide based on fatty acids or plant oils. Act promptly as soon as you see them, as the problem can become widespread and affect the plant’s health.
Powdery mildew can appear as white patches on the leaves. Remove the affected leaves and improve air circulation around the plant.
0
0
文章
莹723
2020年10月16日

Sowing cyclamen from seed is very easy, but it’s not a quick job– it can take a year or more before you see beautiful blooms.
To produce indoor cyclamen plants you need to use seeds of tender large-flowered varieties with wonderful colours.
Learn how to sow cyclamen seeds, below.
You Will Need
•Cyclamen seed
•10cm pot
•Seed compost
•Vermiculite
•Sheet of glass
•Black polythene
Step 1
Before sowing, soak the cyclamen seeds in warm water for at least 12 hours, to soften the seed coat, then rinse. Sow seeds into pots of compost, spacing them evenly.

Step 2
Sprinkle a layer of fine vermiculite or compost over the seeds until the surface is covered completely.

Step 3
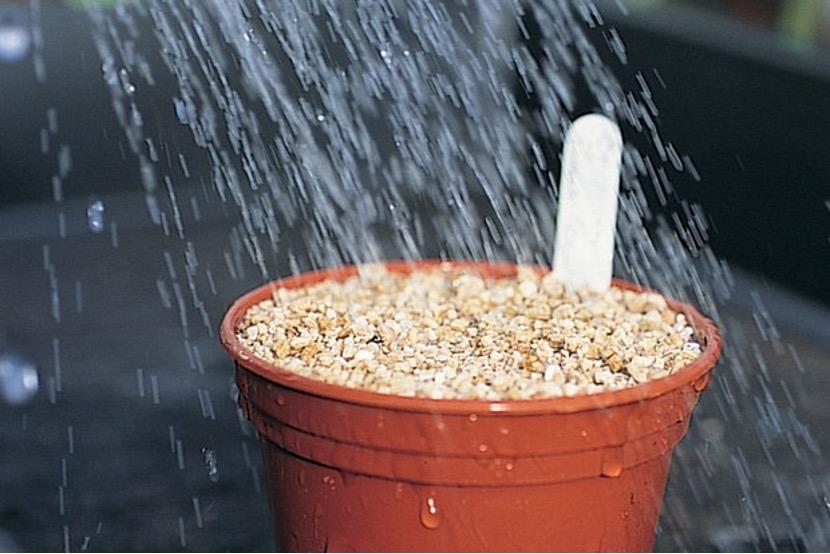
Water, then cover with a sheet of glass and a layer of black polythene to shut out the light and encourage germination. Keep temperature lower than 16° – 21°.
Step 4
Check pot regularly. Germination can take 30 – 60 days, and once the seedlings appear, remove the covering and pop your pot into a bright position.

Step 5
Leaves develop from a tiny tuber, and once two or three leaves have formed the plants can be potted up separately.

Step 6
Plant individually into 7.5cm pots of multi-purpose compost, keeping the tiny tuber level with the surface of the compost.

Step 7
Pot on into larger containers as your plants grow, watering them regularly and feeding them once a week. Most varieties should begin flowering about nine months after sowing. Keep them in a cool spot.

Remove faded flowers or yellowing leaves by twisting stems and giving them a firm tug.
To produce indoor cyclamen plants you need to use seeds of tender large-flowered varieties with wonderful colours.
Learn how to sow cyclamen seeds, below.
You Will Need
•Cyclamen seed
•10cm pot
•Seed compost
•Vermiculite
•Sheet of glass
•Black polythene
Step 1
Before sowing, soak the cyclamen seeds in warm water for at least 12 hours, to soften the seed coat, then rinse. Sow seeds into pots of compost, spacing them evenly.

Step 2
Sprinkle a layer of fine vermiculite or compost over the seeds until the surface is covered completely.

Step 3
Water, then cover with a sheet of glass and a layer of black polythene to shut out the light and encourage germination. Keep temperature lower than 16° – 21°.

Step 4
Check pot regularly. Germination can take 30 – 60 days, and once the seedlings appear, remove the covering and pop your pot into a bright position.

Step 5
Leaves develop from a tiny tuber, and once two or three leaves have formed the plants can be potted up separately.

Step 6
Plant individually into 7.5cm pots of multi-purpose compost, keeping the tiny tuber level with the surface of the compost.

Step 7
Pot on into larger containers as your plants grow, watering them regularly and feeding them once a week. Most varieties should begin flowering about nine months after sowing. Keep them in a cool spot.

Remove faded flowers or yellowing leaves by twisting stems and giving them a firm tug.

0
0
文章
莹723
2020年09月18日

Summer may go away, but your flowerbeds won’t! Flex your green thumb this autumn with beautiful flowers and plants to bring vibrant colors everyday. You’ll love fall decorations like wreaths, garlands, pumpkins, gourds and fresh flowers.Don’t retire your gardening tools now, because these fall blooms need to make an appearance outside your home and you'll reap the rewards of your planting in cold months.
1-Aster
These daisy-like flowers love lots of sunlight and water. They'll be blooming until almost winter.
Zones: 3-8
2-Chrysanthemum
Chrysanthemums bloom in tons of different shapes, sizes, and colors. They're perfect for container gardening—so fear not if you don't have room for a big garden.
Zones: 5-9

3-Parsley
Grow this popular herb and use it as a garnish for any dish.
Zones: 4-9

4-Winter Pansies
As evidenced by the name, winter pansies can hold their own once temps start to drop—but time your planting accordingly. These florals need to be in the soil with time to spare before the weather hits 45 degrees F or below.
Zones: 6 and above

5-Rosemary
Take this amazing herb off your fall holiday grocery list! You can plant the freshest rosemary it in your own backyard.
Zones: 9-11 as perennials, 1-8 as annuals

6-Cyclamen Hederifolium
A popular hardy perennial, cyclamen hederifolium blooms in the fall.
Zones: 5-9

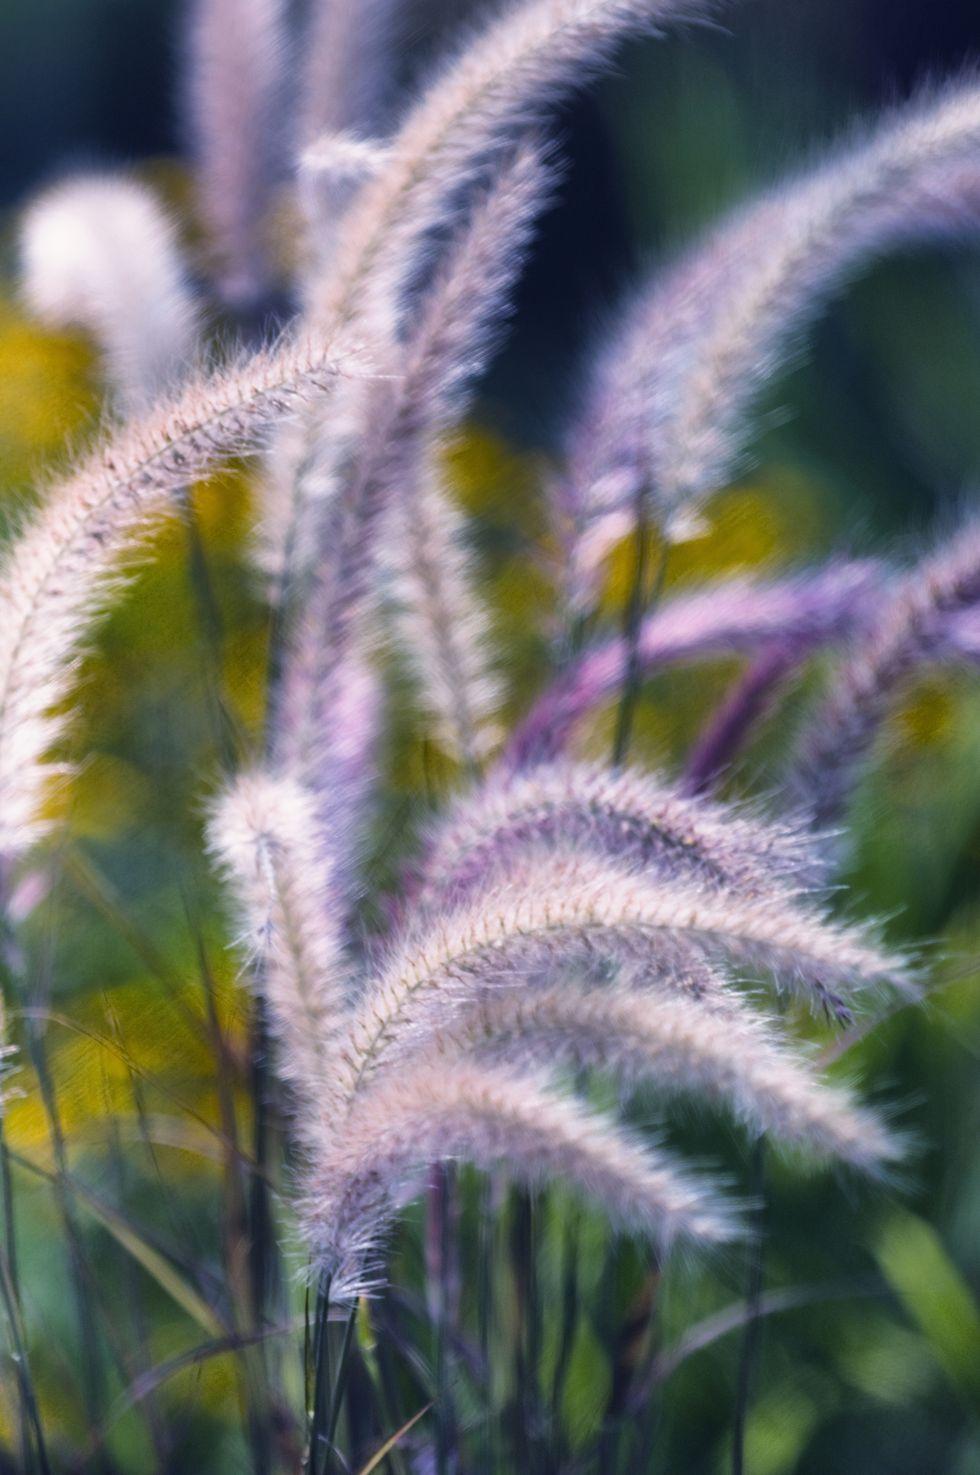
7-Purple Fountain Grass
This grass is a perfect pairing for other fall flowers like pansies, rudbeckia and flowering kale. Put it in the back of the garden to show off shorter stems.
Zones: 1-8
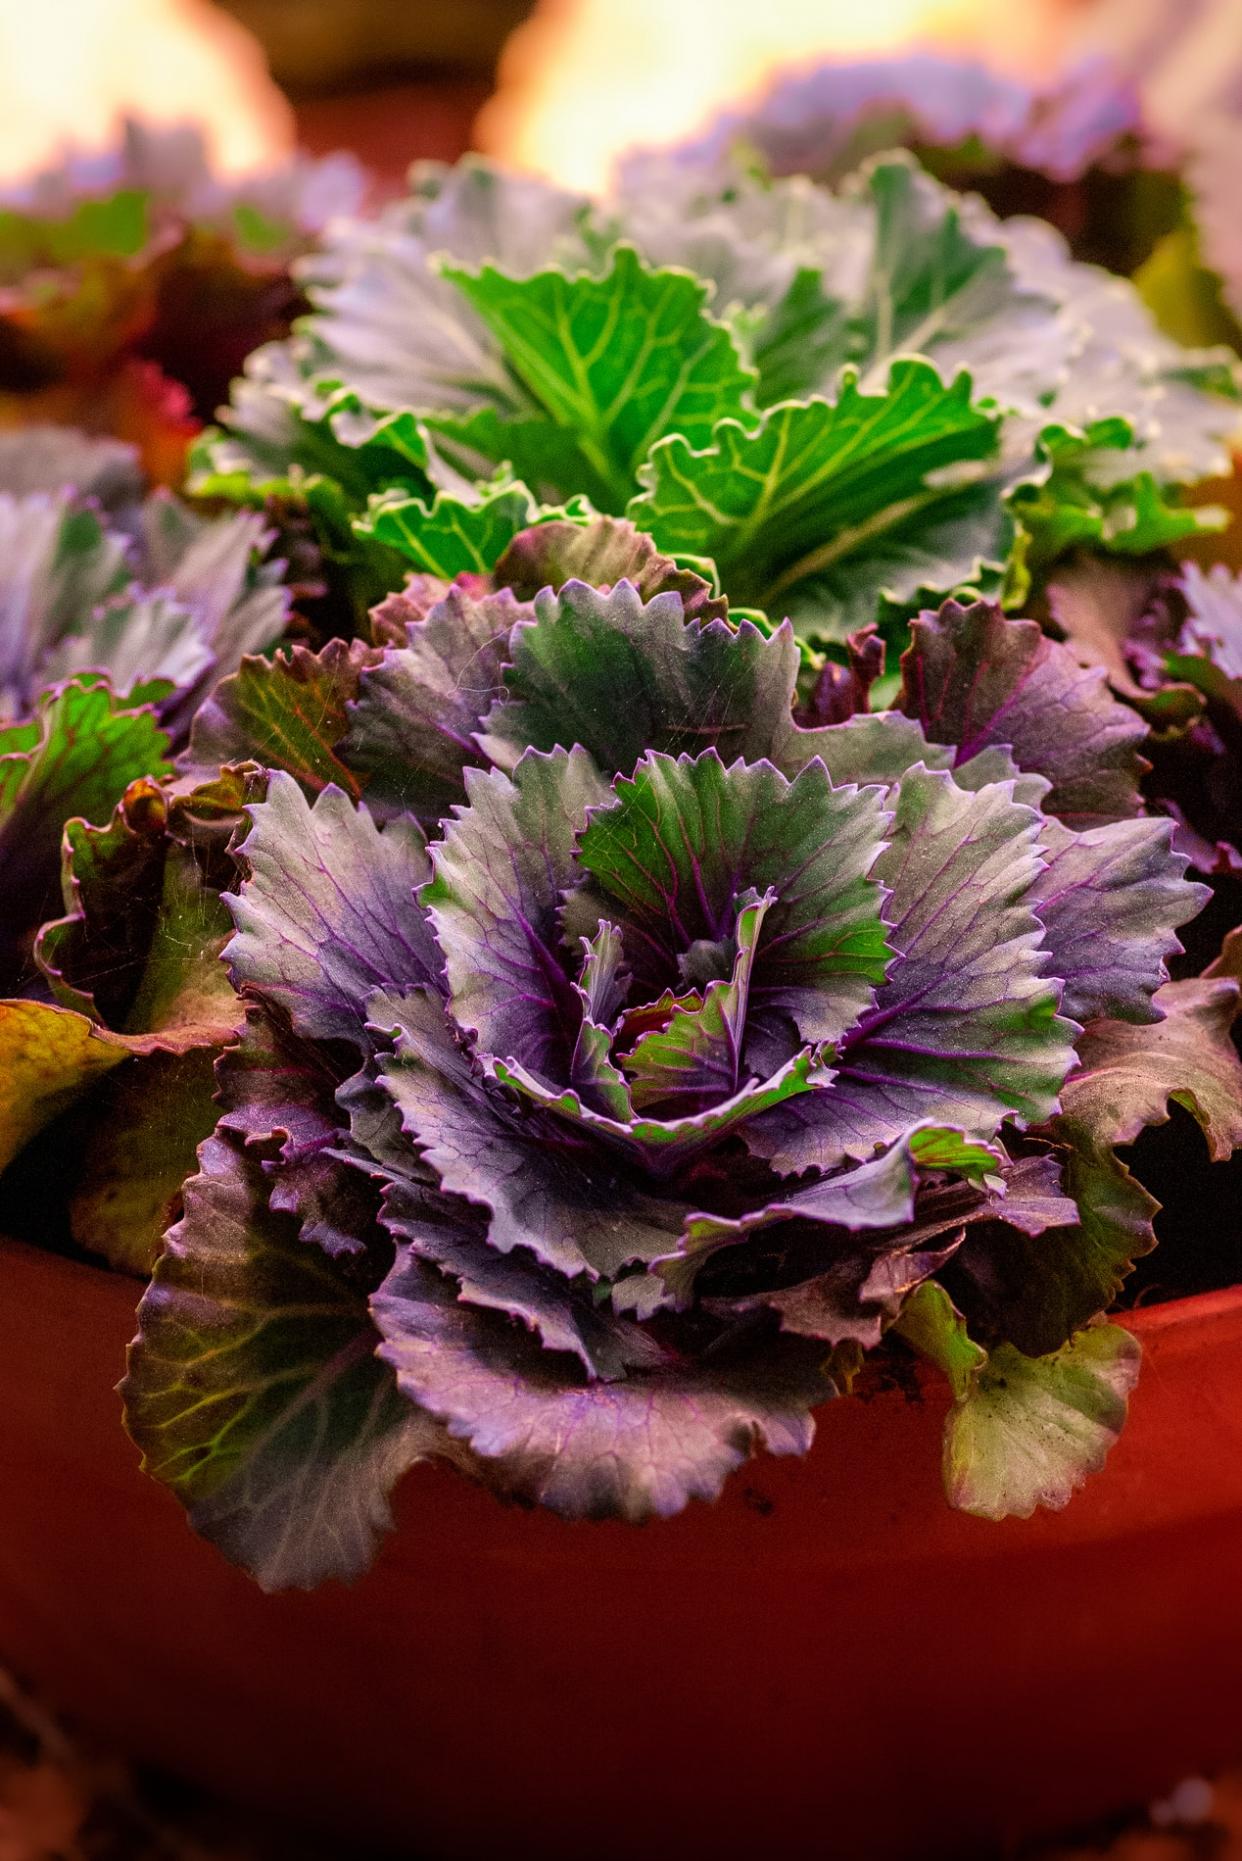
8-Ornamental Kale
Keep this kale well-watered if you want to see vibrant purple and green hues this fall.
Zones: 6-11
9-Witch Hazel
Growing this shrub is practically maintenance-free, and its bark extract is a well-known healing remedy for skin.
Zones: 5-8

10-Ornamental Peppers
These plants embody all the colors of fall in one punch. Not for human consumption, these fiery little peppers add a bit of flare to your fall garden.
Zones: 9-11

1-Aster
These daisy-like flowers love lots of sunlight and water. They'll be blooming until almost winter.
Zones: 3-8
2-Chrysanthemum
Chrysanthemums bloom in tons of different shapes, sizes, and colors. They're perfect for container gardening—so fear not if you don't have room for a big garden.
Zones: 5-9

3-Parsley
Grow this popular herb and use it as a garnish for any dish.
Zones: 4-9

4-Winter Pansies
As evidenced by the name, winter pansies can hold their own once temps start to drop—but time your planting accordingly. These florals need to be in the soil with time to spare before the weather hits 45 degrees F or below.
Zones: 6 and above

5-Rosemary
Take this amazing herb off your fall holiday grocery list! You can plant the freshest rosemary it in your own backyard.
Zones: 9-11 as perennials, 1-8 as annuals

6-Cyclamen Hederifolium
A popular hardy perennial, cyclamen hederifolium blooms in the fall.
Zones: 5-9

7-Purple Fountain Grass
This grass is a perfect pairing for other fall flowers like pansies, rudbeckia and flowering kale. Put it in the back of the garden to show off shorter stems.
Zones: 1-8

8-Ornamental Kale
Keep this kale well-watered if you want to see vibrant purple and green hues this fall.
Zones: 6-11

9-Witch Hazel
Growing this shrub is practically maintenance-free, and its bark extract is a well-known healing remedy for skin.
Zones: 5-8

10-Ornamental Peppers
These plants embody all the colors of fall in one punch. Not for human consumption, these fiery little peppers add a bit of flare to your fall garden.
Zones: 9-11

1
0
文章
ritau
2020年04月27日

If you're searching for the perfect indoor plant, you can't go wrong with an areca palm (Dypsis lutescens), which also goes by the names butterfly palm, yellow palm, or golden cane palm. Areca palms are a beautiful tropical plant that can grow up to 6 to 8 ft (1.8 to 2.4 m) tall indoors or up to 25 ft (7.6 m) tall outdoors. Since the plant is nonpoisonous, it’s a great option for homes with children and pets. As an added bonus, areca palms help clean the air in your home!With proper care, your areca palm can thrive for up to 10 years.
1. Use a well-draining, acidic soil that doesn’t clump up. Get a potting mix or outdoor soil from your local gardening store or online. Check that the soil is labeled as well-draining and acidic so your palm can thrive. Break up the soil before you plant your areca palm so you know it’ll be loose around the roots.

2. Plant the palm in a well-draining pot that’s twice the size of the root ball. Choose a pot that has drainage holes in the bottom so that the plant doesn’t become water-logged. Fill the pot 2/3 of the way with potting soil. Place your root ball in the center of the pot, then cover it with more potting soil. Pat the surface of the soil gently to settle the plant but don’t pack it down around the root ball.
3. Put your areca palm in the ground only if you live in USDA zones 10 or 11. Areca palms are commonly grown as a houseplant, but you may want to grow yours outside if your area is hot and humid. Check that your region is in a USDA zone 10 or 11. If so, plant it directly in the ground if you prefer.
4. Put your areca palm in a spot where it gets bright, indirect light. Areca palms need good lighting to thrive, but direct light can hurt your plant’s fronds. Pick a spot near a window or glass door where the light filters into the room. Place your plant where it’s in an indirect beam or near direct sunlight.
5. Maintain a temperature that’s between 55 to 75 °F (13 to 24 °C). Areca palms thrive best when the daytime temperature is 65 to 75 °F (18 to 24 °C) and the nighttime temperature is around 55 °F (13 °C). For indoor areca palms, adjust your thermostat so the room temperature stays ideal. If your plant is outdoors, bring it inside on days that are very hot or very cold. Via. WikiHow

1. Use a well-draining, acidic soil that doesn’t clump up. Get a potting mix or outdoor soil from your local gardening store or online. Check that the soil is labeled as well-draining and acidic so your palm can thrive. Break up the soil before you plant your areca palm so you know it’ll be loose around the roots.

2. Plant the palm in a well-draining pot that’s twice the size of the root ball. Choose a pot that has drainage holes in the bottom so that the plant doesn’t become water-logged. Fill the pot 2/3 of the way with potting soil. Place your root ball in the center of the pot, then cover it with more potting soil. Pat the surface of the soil gently to settle the plant but don’t pack it down around the root ball.
3. Put your areca palm in the ground only if you live in USDA zones 10 or 11. Areca palms are commonly grown as a houseplant, but you may want to grow yours outside if your area is hot and humid. Check that your region is in a USDA zone 10 or 11. If so, plant it directly in the ground if you prefer.
4. Put your areca palm in a spot where it gets bright, indirect light. Areca palms need good lighting to thrive, but direct light can hurt your plant’s fronds. Pick a spot near a window or glass door where the light filters into the room. Place your plant where it’s in an indirect beam or near direct sunlight.
5. Maintain a temperature that’s between 55 to 75 °F (13 to 24 °C). Areca palms thrive best when the daytime temperature is 65 to 75 °F (18 to 24 °C) and the nighttime temperature is around 55 °F (13 °C). For indoor areca palms, adjust your thermostat so the room temperature stays ideal. If your plant is outdoors, bring it inside on days that are very hot or very cold. Via. WikiHow

0
0
文章
ritau
2020年02月02日

“It is the time you have wasted for your rose that makes your rose so important.”
“You're beautiful, but you're empty...One couldn't die for you. Of course, an ordinary passerby would think my rose looked just like you. But my rose, all on her own, is more important than all of you together, since she's the one I've watered. Since she's the one I put under glass, since she's the one I sheltered behind the screen. Since she's the one for whom I killed the caterpillars (except the two or three butterflies). Since she's the one I listened to when she complained, or when she boasted, or even sometimes when she said nothing at all. Since she's my rose.”
― Antoine de Saint-Exupéry, The Little Prince

“We can complain because rose bushes have thorns, or rejoice because thorns have roses.”
― Alphonse Karr, A Tour Round My Garden
“Did you hear about the rose that grew from a crack in the concrete? Proving nature's laws wrong, it learned to walk without having feet. Funny, it seems to by keeping it's dreams; it learned to breathe fresh air. Long live the rose that grew from concrete when no one else even cared.”
― Tupac Shakur, The Rose That Grew from Concrete
“It was June, and the world smelled of roses. The sunshine was like powdered gold over the grassy hillside.”
― Maud Hart Lovelace, Betsy-Tacy and Tib
“I feel as if I had opened a book and found roses of yesterday sweet and fragrant, between its leaves.”
― L.M. Montgomery, Anne of the Island

“Feeling at peace, however fragilely, made it easy to slip into the visionary end of the dark-sight. The rose shadows said that they loved the sun, but that they also loved the dark, where their roots grew through the lightless mystery of the earth. The roses said: You do not have to choose. ”
― Robin McKinley, Sunshine
“Love is like the wild rose-briar; Friendship like the holly-tree. The holly is dark when the rose-briar blooms, but which will bloom most constantly?”
― Emily Brontë, The Complete Poems
“Princess,” he whispered against her ear. “My beautiful, beautiful princess. I want to spoil you. Pamper you. Indulge you.”
― Teresa Medeiros, A Whisper of Roses
“An idealist is one who, on noticing that a rose smells better than a cabbage, concludes that it makes a better soup.”
― H.L. Mencken, A Book of Burlesques

“You're beautiful, but you're empty...One couldn't die for you. Of course, an ordinary passerby would think my rose looked just like you. But my rose, all on her own, is more important than all of you together, since she's the one I've watered. Since she's the one I put under glass, since she's the one I sheltered behind the screen. Since she's the one for whom I killed the caterpillars (except the two or three butterflies). Since she's the one I listened to when she complained, or when she boasted, or even sometimes when she said nothing at all. Since she's my rose.”
― Antoine de Saint-Exupéry, The Little Prince

“We can complain because rose bushes have thorns, or rejoice because thorns have roses.”
― Alphonse Karr, A Tour Round My Garden
“Did you hear about the rose that grew from a crack in the concrete? Proving nature's laws wrong, it learned to walk without having feet. Funny, it seems to by keeping it's dreams; it learned to breathe fresh air. Long live the rose that grew from concrete when no one else even cared.”
― Tupac Shakur, The Rose That Grew from Concrete
“It was June, and the world smelled of roses. The sunshine was like powdered gold over the grassy hillside.”
― Maud Hart Lovelace, Betsy-Tacy and Tib
“I feel as if I had opened a book and found roses of yesterday sweet and fragrant, between its leaves.”
― L.M. Montgomery, Anne of the Island

“Feeling at peace, however fragilely, made it easy to slip into the visionary end of the dark-sight. The rose shadows said that they loved the sun, but that they also loved the dark, where their roots grew through the lightless mystery of the earth. The roses said: You do not have to choose. ”
― Robin McKinley, Sunshine
“Love is like the wild rose-briar; Friendship like the holly-tree. The holly is dark when the rose-briar blooms, but which will bloom most constantly?”
― Emily Brontë, The Complete Poems
“Princess,” he whispered against her ear. “My beautiful, beautiful princess. I want to spoil you. Pamper you. Indulge you.”
― Teresa Medeiros, A Whisper of Roses
“An idealist is one who, on noticing that a rose smells better than a cabbage, concludes that it makes a better soup.”
― H.L. Mencken, A Book of Burlesques

0
0


