成长记
Foggy_Garden
2018年09月14日

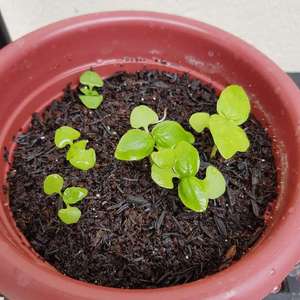
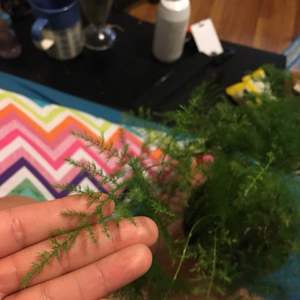
The new leaf has spead out and two new leafs below are growing too!

0
0
成长记
Plantlin
2018年09月12日

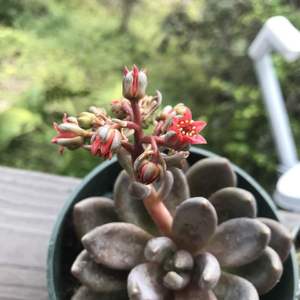
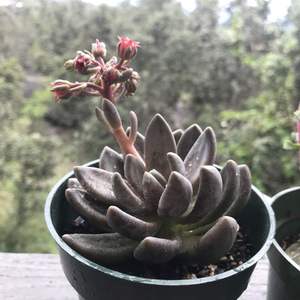
It is growing a bit wild... Thinking about making a new plant from cuttings:)


1
0
求助
cinbro
2018年09月10日

Can anyone identify this leaf? It is growing on the edge of a creek. It's a tree.


0
0
文章
Miss Chen
2018年09月10日

Growing beautiful stargazer lilies seems like a daunting task--how can such a strikingly unique and unusually large flower that seems to defy gravity be easy to grow? It is, however, with a little instruction and a few tips, you too can bring these jaw-dropping beauties into your landscape.Stargazer lilies will last for years with the proper care, and grows easily in zones 4-8.

Determine the location for your stargazer bulbs, and for each bulb, dig a hole three times the bulb's height. Remove any rocks that might impede the growth of the stalk when it emerges. Place the bulb in the hole with the pointy side up–if in doubt, plant the bulb sideways. Cover the bulb with soil and sprinkle with a small amount of fertilizer. Bulbs may be planted in the fall or in the spring.
Step 2
Water the emerging plants regularly, although they don't mind drought periods as long as the roots remain cool. Overwatering may cause the plants to rot, so it's best to err on the side of caution as far as water is concerned.Too much water may also attract slugs, which find lily leaves delicious. If slugs are a problem, place saucers of beer around the plant at night, which attracts them and they drown.
Step 3
Fertilize the plants in June, July and August with a light application of general purpose fertilizer around the base of the plant.
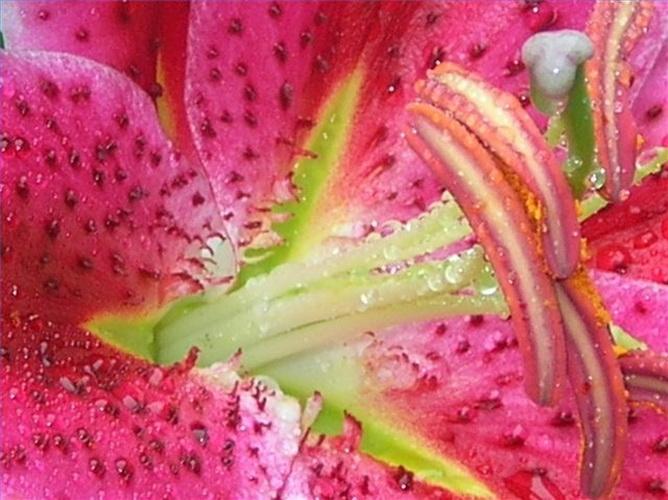
Deadhead the flower after it has finished blooming, which allows the plant to focus on its bulb, not setting seeds. Simply clip off the flower and about 6 inches of the stem below the flower. Leave the rest of the stem until fall, when you can cut back the entire plant to 3 inches.

Determine the location for your stargazer bulbs, and for each bulb, dig a hole three times the bulb's height. Remove any rocks that might impede the growth of the stalk when it emerges. Place the bulb in the hole with the pointy side up–if in doubt, plant the bulb sideways. Cover the bulb with soil and sprinkle with a small amount of fertilizer. Bulbs may be planted in the fall or in the spring.
Step 2
Water the emerging plants regularly, although they don't mind drought periods as long as the roots remain cool. Overwatering may cause the plants to rot, so it's best to err on the side of caution as far as water is concerned.Too much water may also attract slugs, which find lily leaves delicious. If slugs are a problem, place saucers of beer around the plant at night, which attracts them and they drown.
Step 3
Fertilize the plants in June, July and August with a light application of general purpose fertilizer around the base of the plant.

Deadhead the flower after it has finished blooming, which allows the plant to focus on its bulb, not setting seeds. Simply clip off the flower and about 6 inches of the stem below the flower. Leave the rest of the stem until fall, when you can cut back the entire plant to 3 inches.
2
0
文章
Miss Chen
2018年09月10日

There are few flowers that are as beautiful as a simple daisy. They can dress up well manicured flower beds and also look magnificent among roadside weeds. While daisies are a favorite flower of summer no matter where they are growing, what if they are located in a spot that just doesn't support them anymore? Can you move them to a different part of the lawn or bring them home from that roadside roost? Absolutely, if you time it just right and know what you are doing.

Step 1
When selecting a site for daisies, it is important to place them in a location with full sun. The best time of the year to transplant is spring, which will allow the root systems to take before winter. Some choose to transplant daisies right after they bloom in early summer.
Step 2
Prepare the new bed that the daisies will be moving to. Dig a hole twice the size and almost twice as deep as the root ball you are digging up. Fill the hole with water. Even though this will absorb before the new plants come in, it will assure that the new area is moist and will encourage the roots to take.
Step 3
If you are transplanting daisies by moving them from ground they are already planted in, you want to dig an extra 5 inches out from around the roots. If you are moving some daisies from a large clump, this will give you more that are likely to survive any transplant shock. The larger the root ball area is, the less shock damage will be done to the roots.
Step 4
Once you have the root ball dug, do not shake any dirt from it if at all possible. This will help keep the root ball intact and minimize shock. Place the root ball into the new location. Cover with dirt mixed with a third of mulch. Water again and if any dirt seems to have run off the roots, be sure to add more to cover. Tamp the dirt down again.

Keep your plants well watered for 3 weeks until the roots have a chance to become grounded in the new location. Sit back and enjoy the beauty of the daisies.

Step 1
When selecting a site for daisies, it is important to place them in a location with full sun. The best time of the year to transplant is spring, which will allow the root systems to take before winter. Some choose to transplant daisies right after they bloom in early summer.
Step 2
Prepare the new bed that the daisies will be moving to. Dig a hole twice the size and almost twice as deep as the root ball you are digging up. Fill the hole with water. Even though this will absorb before the new plants come in, it will assure that the new area is moist and will encourage the roots to take.
Step 3
If you are transplanting daisies by moving them from ground they are already planted in, you want to dig an extra 5 inches out from around the roots. If you are moving some daisies from a large clump, this will give you more that are likely to survive any transplant shock. The larger the root ball area is, the less shock damage will be done to the roots.
Step 4
Once you have the root ball dug, do not shake any dirt from it if at all possible. This will help keep the root ball intact and minimize shock. Place the root ball into the new location. Cover with dirt mixed with a third of mulch. Water again and if any dirt seems to have run off the roots, be sure to add more to cover. Tamp the dirt down again.

Keep your plants well watered for 3 weeks until the roots have a chance to become grounded in the new location. Sit back and enjoy the beauty of the daisies.
0
0
文章
Miss Chen
2018年09月10日

For a dramatic statement in your flower bed, try growing lupines (Lupinus spp.). These herbaceous perennials have mounds of bright green leaves and produce compact spikes of flowers that can grow upwards to 42 inches tall -- perfect for attracting bees, hummingbirds and butterflies. The flowers of these legumes come in a range of colors from white, cream, pink, rose-mauve, pale yellow, all shades of blue and all shades of violet, including one so dark it's nearly black. Lupines generally thrive in U.S. Department of Agriculture plant hardiness zones 4 to 7, depending on the species and cultivar.

Step 1
Select a well-drained site with full sunlight or semi-shade; tall varieties of lupines may need protection from the wind. The soil does not need to be particularly rich, but it should be neutral to slightly acidic. Test the soil and add sulfur or peat moss several weeks before planting to adjust its pH to between 6.8 and 7.2. Because lupines bloom early in the season and may look unsightly after flowering, place them near the back of the flower bed.
Step 2
Transplant lupines in the spring. Dig a hole that is larger than the plant's container. Carefully remove the lupine from the container and gently loosen the roots with your fingers. Place the plant in the hole, fill the hole with soil and tamp down gently to remove air spaces. Water gently to settle the soil. Depending upon the species of lupine, space the plants 15 to 24 inches apart. Apply light, organic mulch to hold down weeds and to help retain soil moisture.
Step 3
Water lupines regularly. Don't let the soil dry out completely. Apply a light amount of high potash fertilizer as the buds begin to form. Powdery mildew can be a problem, as well as aphids. Control these with a general fungicide and pesticide. Lupines can also develop viruses that cause stunting and discoloration. If this happens, destroy the plants; do not add them to the compost pile.

Step 4
Watch for the lupines to bloom beginning in early summer and continuing through mid-summer. Deadhead the plants regularly, removing spent flower spikes with pruning shears to prevent seed development. This allows the smaller flower spikes to develop and keeps lupines from spreading out of control. However, if you want to collect the seeds, allow the pods to dry on the plant and then collect the pods. Open the pods and store the seeds in an envelope in a cool dry place until time to plant.
Step 5
Sow the lupine seeds either in the early fall or early spring. Scarify (nick) the seeds before planting to quicken germination. Plant the seeds 1/4 to 1/2 inches deep. Because of the shallow planting depth, water gently so as not to disturb the seeds. Young seedlings require consistent moisture to help them establish healthy root systems.

Step 1
Select a well-drained site with full sunlight or semi-shade; tall varieties of lupines may need protection from the wind. The soil does not need to be particularly rich, but it should be neutral to slightly acidic. Test the soil and add sulfur or peat moss several weeks before planting to adjust its pH to between 6.8 and 7.2. Because lupines bloom early in the season and may look unsightly after flowering, place them near the back of the flower bed.
Step 2
Transplant lupines in the spring. Dig a hole that is larger than the plant's container. Carefully remove the lupine from the container and gently loosen the roots with your fingers. Place the plant in the hole, fill the hole with soil and tamp down gently to remove air spaces. Water gently to settle the soil. Depending upon the species of lupine, space the plants 15 to 24 inches apart. Apply light, organic mulch to hold down weeds and to help retain soil moisture.
Step 3
Water lupines regularly. Don't let the soil dry out completely. Apply a light amount of high potash fertilizer as the buds begin to form. Powdery mildew can be a problem, as well as aphids. Control these with a general fungicide and pesticide. Lupines can also develop viruses that cause stunting and discoloration. If this happens, destroy the plants; do not add them to the compost pile.

Step 4
Watch for the lupines to bloom beginning in early summer and continuing through mid-summer. Deadhead the plants regularly, removing spent flower spikes with pruning shears to prevent seed development. This allows the smaller flower spikes to develop and keeps lupines from spreading out of control. However, if you want to collect the seeds, allow the pods to dry on the plant and then collect the pods. Open the pods and store the seeds in an envelope in a cool dry place until time to plant.
Step 5
Sow the lupine seeds either in the early fall or early spring. Scarify (nick) the seeds before planting to quicken germination. Plant the seeds 1/4 to 1/2 inches deep. Because of the shallow planting depth, water gently so as not to disturb the seeds. Young seedlings require consistent moisture to help them establish healthy root systems.
0
0
文章
Miss Chen
2018年09月06日

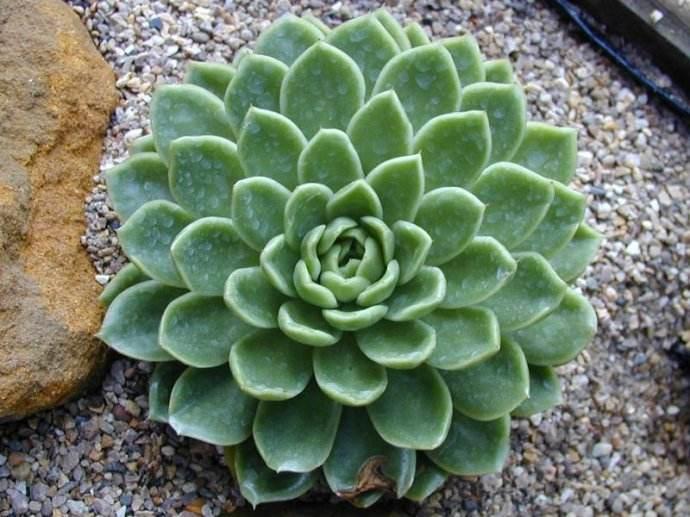
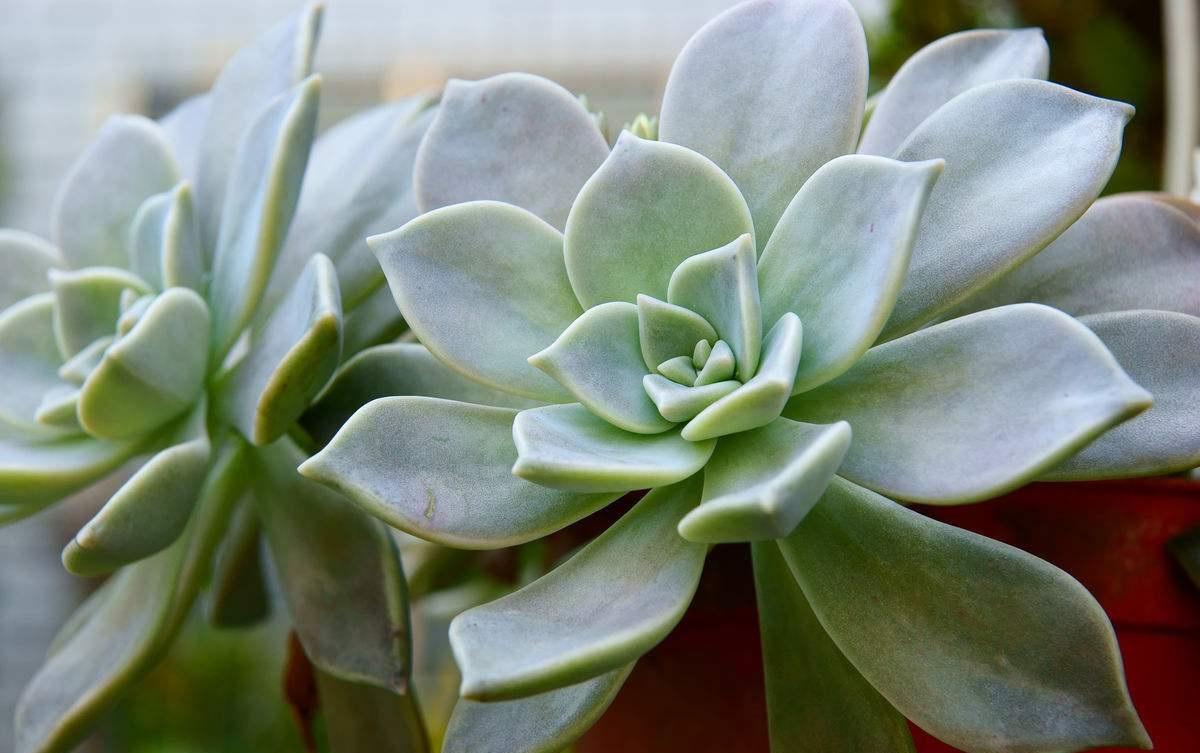
Hens and chicks plant (Sempervivum tectorum) is named for the rosette, or hen, and small offsets, or chicks, that grow on slender runners extending from the succulent. This sturdy plant thrives in tough growing conditions and needs only a thin layer of soil to develop roots. After the hen flowers and sets seed in summer, it dies back and the chicks fill in the empty spot. Hens and chicks grows outdoors in U.S. Department of Agriculture plant hardiness zones 3 through 8. Sometimes called houseleek, you can also grow hens and chicks as a houseplant.
Outdoor Care
Like most succulents, hens and chicks thrive in poor, sandy, well-draining soil and full sun. A spot where the plant gets afternoon shade is best in hot, sunny climates, but too much shade may result in a spindly, pale plant. To plant hens and chicks, loosen the top of the soil with a spade or garden fork, then nestle the plant into the top of the soil. It will soon develop roots that anchor the plant to the soil. Water to a depth of 6 to 8 inches after planting. After that, water only when the soil is dry -- usually every seven to 10 day during hot weather. The plant doesn't need any fertilizer. To keep hens and chicks neat, pinch off flower heads after the plant blooms in midsummer.
Houseplant Hens and Chicks
Hens and chicks performs best and shows its best colors outdoors, but with proper care and a container with drainage holes, you can grow this succulent plant indoors. Plant hens and chicks in a container filled with a mixture of equal parts potting mix and sand, then place the plant in a south-facing window where it gets at least six to eight hours of sun each day. If you don't have a sunny window, place the plant under grow lights or fluorescent bulbs for 14 to 16 hours per day. Allow 6 to 12 inches between the plant and the bulb. Proper watering is critical because succulent plants rot quickly in soggy, waterlogged soil. One watering per week is generally enough during warm weather, but never water the plant unless the soil feels completely dry. Water sparingly during the winter, providing only enough water to keep the plant from shriveling. Let the pot drain thoroughly and never let the plant stand in water.
Making More Hens and Chicks
Hens and chicks is easy to propagate by removing chicks from the hen any time or year. This usually happens because the plant outgrows its garden spot or container or because the hens and chicks are too crowded. Allow the chick to develop until the runner dies back and you can see small roots at the base of the chick. Cut or break the chick from the hen and plant it in a pot filled with a sandy potting soil mix, or in well-drained outdoor spot. To keep from transferring disease to the plant while pruning, wipe the blades of your tools with alcohol and allow to dry before using.
Considerations
Although hens and chicks can spread up to 2 feet wide, they are not considered an invasive plant. Hens and chicks are generally disease-free with the exception of root or stem rot or rust, which occur if hens and chicks are overwatered or placed in soil that doesn't drain well.

Outdoor Care
Like most succulents, hens and chicks thrive in poor, sandy, well-draining soil and full sun. A spot where the plant gets afternoon shade is best in hot, sunny climates, but too much shade may result in a spindly, pale plant. To plant hens and chicks, loosen the top of the soil with a spade or garden fork, then nestle the plant into the top of the soil. It will soon develop roots that anchor the plant to the soil. Water to a depth of 6 to 8 inches after planting. After that, water only when the soil is dry -- usually every seven to 10 day during hot weather. The plant doesn't need any fertilizer. To keep hens and chicks neat, pinch off flower heads after the plant blooms in midsummer.
Houseplant Hens and Chicks
Hens and chicks performs best and shows its best colors outdoors, but with proper care and a container with drainage holes, you can grow this succulent plant indoors. Plant hens and chicks in a container filled with a mixture of equal parts potting mix and sand, then place the plant in a south-facing window where it gets at least six to eight hours of sun each day. If you don't have a sunny window, place the plant under grow lights or fluorescent bulbs for 14 to 16 hours per day. Allow 6 to 12 inches between the plant and the bulb. Proper watering is critical because succulent plants rot quickly in soggy, waterlogged soil. One watering per week is generally enough during warm weather, but never water the plant unless the soil feels completely dry. Water sparingly during the winter, providing only enough water to keep the plant from shriveling. Let the pot drain thoroughly and never let the plant stand in water.
Making More Hens and Chicks
Hens and chicks is easy to propagate by removing chicks from the hen any time or year. This usually happens because the plant outgrows its garden spot or container or because the hens and chicks are too crowded. Allow the chick to develop until the runner dies back and you can see small roots at the base of the chick. Cut or break the chick from the hen and plant it in a pot filled with a sandy potting soil mix, or in well-drained outdoor spot. To keep from transferring disease to the plant while pruning, wipe the blades of your tools with alcohol and allow to dry before using.

Considerations
Although hens and chicks can spread up to 2 feet wide, they are not considered an invasive plant. Hens and chicks are generally disease-free with the exception of root or stem rot or rust, which occur if hens and chicks are overwatered or placed in soil that doesn't drain well.
0
2
文章
Miss Chen
2018年09月05日

Pampas grass, also known as Cortaderia selloana, is native to the moist South American grasslands, known also as the pampas. The fast-growing grass can live in almost any habitat, but it grows especially well in rich soil and mild climates. Since it can grow 6 to 10 feet tall, each tussock or clump should be given plenty of space between it and other plantings. The leaves are gray or bluish-green with narrowly tapering tips and sharp, serrated edges. Pampas grass can be used as an ornamental plant in a garden or lawn or used as a hedge due to its size. Large, flowering stalks range in color from white, yellow and pink. They grow from the base of the tussock and can reach 12 feet in height. During its lifespan, each plant can produce more than 1 million seeds. Pampas grass is banned in California and Hawaii, where it is listed as an invasive weed.

Definition
Life Cycle
Pampas grass is a perennial. The plant goes dormant during the winter and resumes growth in the spring. The plants germinate in the spring, slowly producing bulbs the first year. Most plants take several years before flowering, especially on drier sites. Flowering occurs primarily in late summer. Plants are fully grown, from seed germination to maturity, in 2-4 years. The center stems of pampas grass will die after one growing season, but new shoots of leaves arise from the edge of the plant to increase its size. The lifespan of pampas grass is 10-15 years.
Maintenance
Location: In heavy frost zones, keep the plant sheltered. Plants prefer full sun and rich, well-drained soil.
Pruning: While pampas grass is a very low-maintenance plant, it must be pruned back to 2-3 feet every fall. To encourage growth, cut the plant back before it goes dormant. To discourage growth, cut back after the plant goes dormant. Also exercise extreme caution when pruning due to the razor-sharp edges of the leaves.
Watering: Pampas grass is subject to root rot, so do not water excessively.

Removal: Pampas grass is very difficult to remove: The roots grow extremely deep. Seedlings to small plants can be dug up by hand. Larger plants should be removed using heavy machinery.

Definition
Life Cycle
Pampas grass is a perennial. The plant goes dormant during the winter and resumes growth in the spring. The plants germinate in the spring, slowly producing bulbs the first year. Most plants take several years before flowering, especially on drier sites. Flowering occurs primarily in late summer. Plants are fully grown, from seed germination to maturity, in 2-4 years. The center stems of pampas grass will die after one growing season, but new shoots of leaves arise from the edge of the plant to increase its size. The lifespan of pampas grass is 10-15 years.
Maintenance
Location: In heavy frost zones, keep the plant sheltered. Plants prefer full sun and rich, well-drained soil.
Pruning: While pampas grass is a very low-maintenance plant, it must be pruned back to 2-3 feet every fall. To encourage growth, cut the plant back before it goes dormant. To discourage growth, cut back after the plant goes dormant. Also exercise extreme caution when pruning due to the razor-sharp edges of the leaves.
Watering: Pampas grass is subject to root rot, so do not water excessively.

Removal: Pampas grass is very difficult to remove: The roots grow extremely deep. Seedlings to small plants can be dug up by hand. Larger plants should be removed using heavy machinery.
0
0
文章
Miss Chen
2018年08月31日

Sometimes called purple queen, purple heart (Setcreasea pallida) is a low-growing tender perennial grown for its showy violet leaves and sprawling, dark-purple stems. It grows in U.S. Department of Agriculture plant hardiness zones 7 through 11 and it's usually used as a ground cover or container plant. Purple heart needs little care, but providing some general maintenance will keep it looking its best.

Seasonal Watering
Although highly drought-tolerant once established, purple heart will look tidier and more lush if it gets regular water in summer. Water it weekly from spring until fall, providing 1 inch of water each time. Allow the soil to dry out on the surface between waterings to keep the roots healthy. During times of extreme heat or drought, increase watering to twice weekly if the soil is drying out faster than normal. Reduce watering to once every two weeks in winter and provide no water during rainy weather. Pot-grown purple hearts should also be watered whenever the soil dries on the surface. Water until the excess flows from the drainage holes of the pot. Always use pots with drainage holes for this plant.
Fertilizer Needs
Purple heart uses its soil nutrients efficiently and requires little supplemental fertilizer. Potted plants or those grown in poor or especially fast-draining soil may need a boost of nutrients during the active growing season to enhance their lush, violet foliage. Dissolve 1/2 teaspoon of general-purpose, 15-15-15 ratio fertilizer in 1 gallon of water. Apply the solution monthly and watch for pale or washed out-looking foliage, which is a sign of overfeeding. Reduce feeding to once every two months if the purple heart's foliage turns pale or if it starts producing an abundance of leggy, weedy growth.
Pruning and Grooming
Among purple heart's most positive attributes is its gracefully trailing habit and vigorous growth. This is also one of its greatest drawbacks because can quickly overtake a bed or produce spindly, unattractive growth if left unpruned. Pruning purple heart should be done in spring or early summer just after it finishes flowering. Remove up to two-thirds of the growth to promote a fuller, bushier appearance and encourage more blooming. Before pruning, soak your shears in a solution of equal parts water and rubbing alcohol or full-strength household disinfectant for five minutes and then rinse the blades. The pruned stems can be discarded in a green waste can or used to propagate new purple heart plants.
Considerations
Purple heart doesn't have serious pest or disease issues if it is grown under the right conditions, making it a smart choice for a low-maintenance yard. But it does have some significant drawbacks that may cause issues in your garden. Its vigorous growth may become invasive in warm, frost-free climates. Keeping it pruned helps limit its spread, but it may also require inorganic mulch or an underground root barrier to keep its roots from spreading. Another issue with purple heart is its foliage, which may irritate the skin. Growing it in a pot will address both concerns, as long as the pot is kept away from where people might accidentally brush against it.
1
1
文章
Miss Chen
2018年08月31日

Blue flowers are hard to find in the garden -- most lean toward purple hues. However, Evolvulus glomeratus "Blue Daze" is aptly named: The low-growing, herbaceous perennial features true-blue flowers that stand out against the attractive, olive-green leaves. Perfect for borders or containers, "Blue Daze" blooms all summer long when cared for properly.

Climate and Temperatures
"Blue Daze" is a warmth-loving plant. It is hardy in U.S. Department of Agriculture plant hardiness zones 8 through 11. In cooler climates, it is often grown as an annual or in a container that is brought indoors for the winter. Situate this plant where it will stay nice and warm. In fact, if you have a hot spot in your garden where other plants wilt, replace those plants with this flower -- "Blue Daze" likes it hot. It can even tolerate salty conditions, so if you're near the coast, plant this flower in a hanging container and watch it withstand the salty air. Most outdoor plants die at the first hint of freezing temperatures, so bring container plants indoors well before cool fall temperatures arise. Some "Blue Daze" plants can tolerate a light frost if they are surrounded by a thick layer of mulch.
Light and Location
For "Blue Daze" to bloom properly, it needs full sunlight. Each flower opens for only one day, but it is replaced by a new flower the next day. If the day is cloudy or the plant is shaded, the flower won't open and its brief life is wasted. Locate these plants -- including those grown in containers -- where they will get as much hot, direct sunlight as possible. As far as soil goes, "Blue Daze" tolerates a range of soils, including poor or sandy soil, as long as it is well drained. If you bring a container indoors for the winter, locate it in bright but indirect sunlight and in a cool location.
Food and Water
Because "Blue Daze" is such a prolific bloomer, it benefits from monthly applications of fertilizer during the growing season. Use a bloom-boosting 15-30-15 formulation, water-soluble fertilizer once a month, following the instructions for application on the package. These instructions vary depending on the brand, but in general, dilute 1 tablespoon of the fertilizer in 1 gallon of water and use this solution to water your plants. Because "Blue Daze" thrives in full, hot sunlight, it needs frequent watering. Water when the surface of the soil feels dry to the touch and frequently enough so that the soil is almost continually but barely moist. In the winter, they need little watering.

Pests and Problems
"Blue Daze" is a hardy plant. It does not suffer from serious pest or disease problems. The one thing it cannot tolerate is soggy soil. Extended periods of rain cause fungal problems to develop in the soil, which quickly destroy the shallow roots of the plant. Overwatering leads to the same result, as does poorly drained soils. Plants grown in containers should have drainage holes in the base to prevent this problem, and home gardeners should avoid planting "Blue Daze" in depressions or other locations that tend to collect water.

Climate and Temperatures
"Blue Daze" is a warmth-loving plant. It is hardy in U.S. Department of Agriculture plant hardiness zones 8 through 11. In cooler climates, it is often grown as an annual or in a container that is brought indoors for the winter. Situate this plant where it will stay nice and warm. In fact, if you have a hot spot in your garden where other plants wilt, replace those plants with this flower -- "Blue Daze" likes it hot. It can even tolerate salty conditions, so if you're near the coast, plant this flower in a hanging container and watch it withstand the salty air. Most outdoor plants die at the first hint of freezing temperatures, so bring container plants indoors well before cool fall temperatures arise. Some "Blue Daze" plants can tolerate a light frost if they are surrounded by a thick layer of mulch.
Light and Location
For "Blue Daze" to bloom properly, it needs full sunlight. Each flower opens for only one day, but it is replaced by a new flower the next day. If the day is cloudy or the plant is shaded, the flower won't open and its brief life is wasted. Locate these plants -- including those grown in containers -- where they will get as much hot, direct sunlight as possible. As far as soil goes, "Blue Daze" tolerates a range of soils, including poor or sandy soil, as long as it is well drained. If you bring a container indoors for the winter, locate it in bright but indirect sunlight and in a cool location.
Food and Water
Because "Blue Daze" is such a prolific bloomer, it benefits from monthly applications of fertilizer during the growing season. Use a bloom-boosting 15-30-15 formulation, water-soluble fertilizer once a month, following the instructions for application on the package. These instructions vary depending on the brand, but in general, dilute 1 tablespoon of the fertilizer in 1 gallon of water and use this solution to water your plants. Because "Blue Daze" thrives in full, hot sunlight, it needs frequent watering. Water when the surface of the soil feels dry to the touch and frequently enough so that the soil is almost continually but barely moist. In the winter, they need little watering.

Pests and Problems
"Blue Daze" is a hardy plant. It does not suffer from serious pest or disease problems. The one thing it cannot tolerate is soggy soil. Extended periods of rain cause fungal problems to develop in the soil, which quickly destroy the shallow roots of the plant. Overwatering leads to the same result, as does poorly drained soils. Plants grown in containers should have drainage holes in the base to prevent this problem, and home gardeners should avoid planting "Blue Daze" in depressions or other locations that tend to collect water.
0
0
文章
Miss Chen
2018年08月31日

Winterize both garden-grown and container-grown hostas in the fall to prevent root damage. They will reward this extra winter care with lush new foliage in the spring and showy flowers in the summer. There's only one way to winterize hostas growing in the ground, but a few options exist for container hostas.

Hostas and Winter Damage
Hostas (Hosta spp.) are hardy in U.S. Department of Agriculture plant hardiness zones 3 to 9. They can survive winter temperatures as low as -40 degrees Fahrenheit when planted in the ground. Damage occurs to the root system when temperatures fluctuate. This is a bigger problem for hostas planted in the fall because they have not had a chance to grow their roots deep into the ground, but damage can occur in established hostas, too. As the ground goes through thaws and freezes, it pushes or heaves the hostas up, exposing their roots to the elements.
Hostas in the Ground
Cover hostas with 2 to 3 inches of shredded bark mulch in the fall after the ground freezes to a depth of 3 inches. The mulch will help insulate the soil, reducing the severity of temperature fluctuations, and protect the crowns of the plants. Remove the mulch in the spring when the ground thaws and there is no longer any danger that it will freeze again.
The tops of the hostas must be uncovered right away if new shoots begin to poke through the mulch. It can be left covering the crowns of the plants, though, if there is a chance temperatures may plummet again. Remove mulch from the crowns of the plants and pull it back a few inches away from stems after the danger of freezing temperatures has passed.
Hostas in Containers
Protect container-grown hostas from extreme cold, temperature fluctuations and moisture. Hostas in containers will be subjected to wind-chill temperatures far below what they would experience in the ground, and fluctuations will be more extreme. In addition, moisture will gather in the pots on top of the frozen roots when the sun warms the container, which will cause root rot.

Move hostas into an unheated garage or shed when temperatures begin to drop below freezing. Water them if temperatures warm to above freezing and the soil thaws only if it is completely dry. Set them back outdoors in the spring when temperatures warm to above freezing. If new shoots appear before freezing temperatures are over for the year, move the hostas outdoors to get some sunshine during the day while it is warm then back into the enclosure at night.
Dig holes in the ground large enough to hold the containers and sink the hostas, containers and all, into the ground in the fall before it freezes. Cover them with 2 to 3 inches of shredded bark mulch after the ground freezes. Pile the mulch over the top of the soil within the containers beneath the leaves and add more until plants are covered. This will prevent water pooling on the soil in the containers. Remove mulch in the spring and move the containers back to their usual positions when the danger of freezing weather has passed.
Bunch the potted hostas close together in an area protected from the wind such as right up against the north side of a building or next to the foundation of the house underneath a deck. Pile shredded bark mulch or shredded leaves over the soil in the containers and then over all of the plants to a depth of 2 to 3 inches. Pack it along the outer edge of the group of containers to a thickness of 3 to 4 inches. Uncover them and move them back to their usual locations in the spring when temperatures are likely to stay above freezing.

Hostas and Winter Damage
Hostas (Hosta spp.) are hardy in U.S. Department of Agriculture plant hardiness zones 3 to 9. They can survive winter temperatures as low as -40 degrees Fahrenheit when planted in the ground. Damage occurs to the root system when temperatures fluctuate. This is a bigger problem for hostas planted in the fall because they have not had a chance to grow their roots deep into the ground, but damage can occur in established hostas, too. As the ground goes through thaws and freezes, it pushes or heaves the hostas up, exposing their roots to the elements.
Hostas in the Ground
Cover hostas with 2 to 3 inches of shredded bark mulch in the fall after the ground freezes to a depth of 3 inches. The mulch will help insulate the soil, reducing the severity of temperature fluctuations, and protect the crowns of the plants. Remove the mulch in the spring when the ground thaws and there is no longer any danger that it will freeze again.
The tops of the hostas must be uncovered right away if new shoots begin to poke through the mulch. It can be left covering the crowns of the plants, though, if there is a chance temperatures may plummet again. Remove mulch from the crowns of the plants and pull it back a few inches away from stems after the danger of freezing temperatures has passed.
Hostas in Containers
Protect container-grown hostas from extreme cold, temperature fluctuations and moisture. Hostas in containers will be subjected to wind-chill temperatures far below what they would experience in the ground, and fluctuations will be more extreme. In addition, moisture will gather in the pots on top of the frozen roots when the sun warms the container, which will cause root rot.

Move hostas into an unheated garage or shed when temperatures begin to drop below freezing. Water them if temperatures warm to above freezing and the soil thaws only if it is completely dry. Set them back outdoors in the spring when temperatures warm to above freezing. If new shoots appear before freezing temperatures are over for the year, move the hostas outdoors to get some sunshine during the day while it is warm then back into the enclosure at night.
Dig holes in the ground large enough to hold the containers and sink the hostas, containers and all, into the ground in the fall before it freezes. Cover them with 2 to 3 inches of shredded bark mulch after the ground freezes. Pile the mulch over the top of the soil within the containers beneath the leaves and add more until plants are covered. This will prevent water pooling on the soil in the containers. Remove mulch in the spring and move the containers back to their usual positions when the danger of freezing weather has passed.
Bunch the potted hostas close together in an area protected from the wind such as right up against the north side of a building or next to the foundation of the house underneath a deck. Pile shredded bark mulch or shredded leaves over the soil in the containers and then over all of the plants to a depth of 2 to 3 inches. Pack it along the outer edge of the group of containers to a thickness of 3 to 4 inches. Uncover them and move them back to their usual locations in the spring when temperatures are likely to stay above freezing.
0
0


