文章
Miss Chen
2018年07月06日

Onions are ideally suited for container gardening. Even a 6- to 10-inch container is large enough to get started, and can fit easily on a balcony or doorstep. Growing onions in containers is a perfect solution for space-challenged gardeners. As an added bonus, container gardening is easy on sore knees and backs as very little bending and stooping is required. Plant onions in spring and in a few weeks you'll have fresh, delicious onions.

Step 1
Purchase onion sets at a nursery or garden center. Sets, which are small onions that were started the previous year, are the easiest and most effective way of planting onions in containers. Small sets, which are smaller than a dime, are best for growing large onions for use in cooking or for slicing. Sets larger than a dime are best for growing small green onions often used in salads, and will be ready for harvest very quickly. Sets can be planted in March or April.
Step 2
Prepare a container at least 6 to 10 inches in diameter. Any container with drainage holes in the bottom will work. Fill the container with any good quality commercial potting soil.
Step 3
Plant large onion sets about 1 inch below the surface of the soil. Plant the sets close enough to touch, as the green onions will be harvested before crowding becomes problematic. Small sets, which will be used for large, dry onions, should be planted with 2 to 4 inches between each set.
Step 4
Water the onions immediately. Check the moisture daily by poking your finger into the top of the soil. If the top inch of the soil is dry, water the onions until water runs through the drainage hole. Don't water again until the top inch of the soil is dry. During hot, dry weather, onions may need water every day.
Step 5
Fertilize the onions two to four weeks after planting and repeat every two to three weeks. Use a regular water-soluble fertilizer applied according to the directions on the package. Alternatively, use a time-release granular fertilizer that can be mixed into the soil at planting time.
Step 6
Begin harvesting green onions when the tops are at least 6 inches tall. Green onions are best harvested when they are small, as the onions will develop a stronger flavor as they get larger.

Step 7
Harvest large onions in July or August when the tops of the plants begin to fall over. Harvest in the morning and lay the onions on top of the soil to dry until afternoon. Braid the tops of the onions in bunches of six to eight onions and hang the bunches in a warm, dry place to dry for two to three weeks

Step 1
Purchase onion sets at a nursery or garden center. Sets, which are small onions that were started the previous year, are the easiest and most effective way of planting onions in containers. Small sets, which are smaller than a dime, are best for growing large onions for use in cooking or for slicing. Sets larger than a dime are best for growing small green onions often used in salads, and will be ready for harvest very quickly. Sets can be planted in March or April.
Step 2
Prepare a container at least 6 to 10 inches in diameter. Any container with drainage holes in the bottom will work. Fill the container with any good quality commercial potting soil.
Step 3
Plant large onion sets about 1 inch below the surface of the soil. Plant the sets close enough to touch, as the green onions will be harvested before crowding becomes problematic. Small sets, which will be used for large, dry onions, should be planted with 2 to 4 inches between each set.
Step 4
Water the onions immediately. Check the moisture daily by poking your finger into the top of the soil. If the top inch of the soil is dry, water the onions until water runs through the drainage hole. Don't water again until the top inch of the soil is dry. During hot, dry weather, onions may need water every day.
Step 5
Fertilize the onions two to four weeks after planting and repeat every two to three weeks. Use a regular water-soluble fertilizer applied according to the directions on the package. Alternatively, use a time-release granular fertilizer that can be mixed into the soil at planting time.
Step 6
Begin harvesting green onions when the tops are at least 6 inches tall. Green onions are best harvested when they are small, as the onions will develop a stronger flavor as they get larger.

Step 7
Harvest large onions in July or August when the tops of the plants begin to fall over. Harvest in the morning and lay the onions on top of the soil to dry until afternoon. Braid the tops of the onions in bunches of six to eight onions and hang the bunches in a warm, dry place to dry for two to three weeks
0
0
求助
Pommy Mommy
2018年07月02日

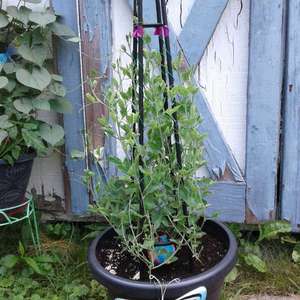
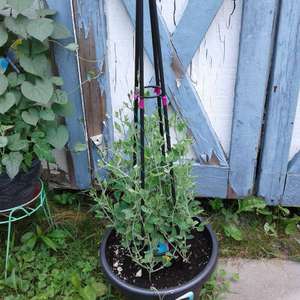
I found this growing wild at my new house what is this?


1
0
Pommy Mommy:I think you are absolutely right, I was able to dig some of the stem out from under some black raspberry bushes and the roots must be ancient because they the stem/vine is HUGE! I've never seen sweet peas this large I always start them from seed every year so I don't even have flowers on mine yet. I'm renovating my dream home, which is 114 years old so there's at least a century of flowers planted around the yard that's been overgrown! thank you for your input. Have a blessed day
WHdeckgardener:maybe a sweet pea? smell sweet?
亚瑟塞尔:maybe it is kidney bean.
成长记
Pommy Mommy
2018年07月02日

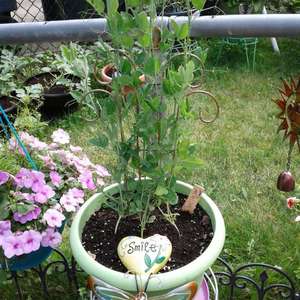
Now that I've identified my "mystery plant" as watermelons!!! I separated them and I planted them in their own large pot so they are growing incredibly fast!
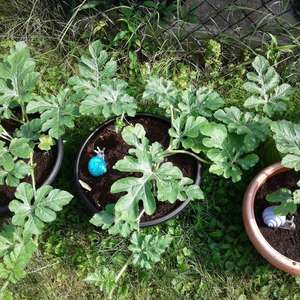
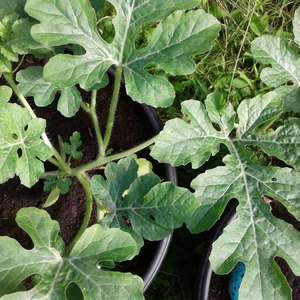
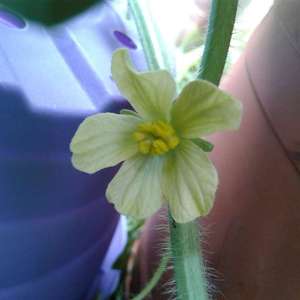


0
0
文章
Miss Chen
2018年07月01日

With container gardens, you can have fresh vegetables all year even when garden space is not available. Zucchini is a summer squash that grows best in full sun and warm conditions. As container culture gains popularity, many new dwarf or small growing varieties of vegetables are being developed; compact zucchini varieties are no exception, and include the culitvars Black Magic, Hybrid Jackpot, Gold Rush and Classic. Grow zucchini indoors all year round. In winter, place the pots in a south facing window where they will get the most sun.

Step 1
Fill 2-inch pots with soil-less seed starting mix. Use a pre-mixed formula available at garden centers or make your own by mixing equal parts vermiculite and peat moss. Dampen the mixture and fill the 2-inch pots.
Step 2
Place one zucchini seed in each pot and cover it with 1/2 inch of soil. Place the pots in dappled or filtered sun with a temperature range between 65 and 75 degrees Fahrenheit. Keep the soil around the seedlings damp with frequent light applications of water. The seedlings will germinate in five to seven days and be ready to transplant into a large, permanent container in three to four weeks.
Step 3
Fill one 5-gallon container for each zucchini plant. Use a well-draining soil-less potting mix and fill the pot to 1-inch below the lip of the container. Garden centers sell pre-formulated mixes for indoor vegetable container growing. Alternately, mix your own by combining equal parts loam, peat and coarse clean sand. Add a 14-14-14 liquid fertilizer to the mix. Check the back of the package to determine the correct amount.
Step 4
Dampen the potting mix with water until it is light and crumbly. Scoop out a shallow hole in the center of the pot large enough to accommodate the root ball of one zucchini plant. Select the strongest of the zucchini seedlings for planting.

Step 5
Slide the seedling out of the small pot and place it into the large container with the base of the stem planted at the same depth in the soil as it was in the seeding pot. Fill in around the roots and pat down the soil to secure the seedling in the pot. Place the potted zucchini in a sunny window where it will get at least five to six hours of sun each day.
Step 6
Fertilize once a week using a fertilizer formulated for complete nutrition. There are many combinations on the market for vegetable growing. A good, basic fertilizer formula like a 5-10-10 or a 10-10-10 fertilizer is suitable. Check the package for the correct application amount and method.
Step 7
Water when the top of the soil feels dry to the touch, usually daily or every other day for container grown zucchini plants. Soak the soil thoroughly at each watering. Place the pot on a saucer or tray to catch water and protect surfaces. Empty the saucer after every watering to prevent water from sitting around the root system.
Step 8
Harvest the zucchini plants as when they are 3 to 4 inches long and still tender. Harvest continuously as the fruits ripen to encourage the plant to keep producing. Zucchini are ready to harvest 50 to 70 days after planting.

Step 1
Fill 2-inch pots with soil-less seed starting mix. Use a pre-mixed formula available at garden centers or make your own by mixing equal parts vermiculite and peat moss. Dampen the mixture and fill the 2-inch pots.
Step 2
Place one zucchini seed in each pot and cover it with 1/2 inch of soil. Place the pots in dappled or filtered sun with a temperature range between 65 and 75 degrees Fahrenheit. Keep the soil around the seedlings damp with frequent light applications of water. The seedlings will germinate in five to seven days and be ready to transplant into a large, permanent container in three to four weeks.
Step 3
Fill one 5-gallon container for each zucchini plant. Use a well-draining soil-less potting mix and fill the pot to 1-inch below the lip of the container. Garden centers sell pre-formulated mixes for indoor vegetable container growing. Alternately, mix your own by combining equal parts loam, peat and coarse clean sand. Add a 14-14-14 liquid fertilizer to the mix. Check the back of the package to determine the correct amount.
Step 4
Dampen the potting mix with water until it is light and crumbly. Scoop out a shallow hole in the center of the pot large enough to accommodate the root ball of one zucchini plant. Select the strongest of the zucchini seedlings for planting.

Step 5
Slide the seedling out of the small pot and place it into the large container with the base of the stem planted at the same depth in the soil as it was in the seeding pot. Fill in around the roots and pat down the soil to secure the seedling in the pot. Place the potted zucchini in a sunny window where it will get at least five to six hours of sun each day.
Step 6
Fertilize once a week using a fertilizer formulated for complete nutrition. There are many combinations on the market for vegetable growing. A good, basic fertilizer formula like a 5-10-10 or a 10-10-10 fertilizer is suitable. Check the package for the correct application amount and method.
Step 7
Water when the top of the soil feels dry to the touch, usually daily or every other day for container grown zucchini plants. Soak the soil thoroughly at each watering. Place the pot on a saucer or tray to catch water and protect surfaces. Empty the saucer after every watering to prevent water from sitting around the root system.
Step 8
Harvest the zucchini plants as when they are 3 to 4 inches long and still tender. Harvest continuously as the fruits ripen to encourage the plant to keep producing. Zucchini are ready to harvest 50 to 70 days after planting.
0
0
文章
Miss Chen
2018年07月01日

If you're interested in growing potatoes (Solanum tuberosum) in your home garden, don't overlook a variety called Yukon Gold, which yields yellow-fleshed potatoes in the early to middle part of the season. Yukon Gold potatoes are high in vitamin A, which gives them their colorful flesh, and are good for eating unpeeled because they have extra-thin skins. They grow as annuals in all parts of the United States and are easy-to-grow plants, needing only basic care while growing and a bit of special attention at harvest time.

Starting Plants
Like most varieties, Yukon Gold potatoes can be started from seed potatoes, which are small tubers grown during the previous season. You can also start plants from pieces of larger potatoes, as long as each piece you plant has at least one bud, or "eye," at its surface. Before planting, allow cut pieces to dry, or heal, for seven to 10 days at 65 degrees Fahrenheit and dust cut surfaces with a powdered fungicide labeled for use on potato pieces; do this in a wind-protected spot and wear gloves to protect your hands.
Plant seed potatoes or pieces in early spring, but wait until the soil has warmed to 40 degrees Fahrenheit because Yukon Gold potatoes are a bit slow to sprout, and planting in soil that's too cool can promote growth of fungus.
Soil, Sun and Water
Yukon Gold potatoes grow best in well-drained soil that's loose and easily dug. If your soil is dense and heavy, and compacts easily, amend it with organic matter such as compost to loosen it while also improving fertility. Space potato pieces 10 to 15 inches apart, setting them in a trench at a depth of 6 inches; deep planting prevents tubers from jutting out of the soil as they grow. For best results, choose a sunny site where plants get at least six hours of sun each day. Plants need regular, consistent moisture during the period of greatest growth, early summer to midsummer; they do best when watered well every two or three days, to reach a total of 1 inch of water weekly, including rain; later in the season, when green tops begin to die back, avoid fungal problems by watering only when soil is dry to the touch.
Fertilizing and Hilling
Because potatoes form underground, you'll need to bury the plants' tops to ensure that tubers remain covered -- a process called hilling. When plants are about 8 inches tall, cover the lower half of the plants with soil or straw, and repeat this about three weeks later. Fertilizing Yukon Gold potatoes helps ensure a good harvest, starting when you plant seed potatoes or potato pieces. Scatter fertilizer into a small trench about 2 or 3 inches to the side of the planting row, preventing contact of fertilizer with the seed potatoes or pieces because it can burn tender roots. Use about 3 pounds of a granular, 8-16-16 formula for each 100 square feet of planted area. Once plants are about 6 inches tall, repeat fertilization by broadcasting about 2 pounds of the same formula per 100 square feet, applying it in a band about 10 inches away from the plants.

Problems and Harvest
Yukon Gold potatoes can attract Colorado potato beetles, yellow and brown striped, hard-shelled insects; control these pests by hand-picking. Aphids -- small, soft-bodied greenish-yellow pests -- might also be a problem; wash plants with a strong water stream early on sunny days to remove and destroy them. Fungal problems such as blight, which might cause limp, blackened leaves and stems, can be prevented by purchasing seed potatoes certified free of the disease. Planting in an area with good air circulation and removing debris regularly from under the plants also keeps down fungus.
Yukon Gold potatoes are ready to harvest about 50 days after planting, once vines begin dying back and foliage yellows. Use a fork to lift potatoes gently, then shake off loose dirt, cover tubers with paper or towels and let them dry in a cool, dark place for a few days; store them in a cool spot at 50 to 60 degrees Fahrenheit.

Starting Plants
Like most varieties, Yukon Gold potatoes can be started from seed potatoes, which are small tubers grown during the previous season. You can also start plants from pieces of larger potatoes, as long as each piece you plant has at least one bud, or "eye," at its surface. Before planting, allow cut pieces to dry, or heal, for seven to 10 days at 65 degrees Fahrenheit and dust cut surfaces with a powdered fungicide labeled for use on potato pieces; do this in a wind-protected spot and wear gloves to protect your hands.
Plant seed potatoes or pieces in early spring, but wait until the soil has warmed to 40 degrees Fahrenheit because Yukon Gold potatoes are a bit slow to sprout, and planting in soil that's too cool can promote growth of fungus.
Soil, Sun and Water
Yukon Gold potatoes grow best in well-drained soil that's loose and easily dug. If your soil is dense and heavy, and compacts easily, amend it with organic matter such as compost to loosen it while also improving fertility. Space potato pieces 10 to 15 inches apart, setting them in a trench at a depth of 6 inches; deep planting prevents tubers from jutting out of the soil as they grow. For best results, choose a sunny site where plants get at least six hours of sun each day. Plants need regular, consistent moisture during the period of greatest growth, early summer to midsummer; they do best when watered well every two or three days, to reach a total of 1 inch of water weekly, including rain; later in the season, when green tops begin to die back, avoid fungal problems by watering only when soil is dry to the touch.
Fertilizing and Hilling
Because potatoes form underground, you'll need to bury the plants' tops to ensure that tubers remain covered -- a process called hilling. When plants are about 8 inches tall, cover the lower half of the plants with soil or straw, and repeat this about three weeks later. Fertilizing Yukon Gold potatoes helps ensure a good harvest, starting when you plant seed potatoes or potato pieces. Scatter fertilizer into a small trench about 2 or 3 inches to the side of the planting row, preventing contact of fertilizer with the seed potatoes or pieces because it can burn tender roots. Use about 3 pounds of a granular, 8-16-16 formula for each 100 square feet of planted area. Once plants are about 6 inches tall, repeat fertilization by broadcasting about 2 pounds of the same formula per 100 square feet, applying it in a band about 10 inches away from the plants.

Problems and Harvest
Yukon Gold potatoes can attract Colorado potato beetles, yellow and brown striped, hard-shelled insects; control these pests by hand-picking. Aphids -- small, soft-bodied greenish-yellow pests -- might also be a problem; wash plants with a strong water stream early on sunny days to remove and destroy them. Fungal problems such as blight, which might cause limp, blackened leaves and stems, can be prevented by purchasing seed potatoes certified free of the disease. Planting in an area with good air circulation and removing debris regularly from under the plants also keeps down fungus.
Yukon Gold potatoes are ready to harvest about 50 days after planting, once vines begin dying back and foliage yellows. Use a fork to lift potatoes gently, then shake off loose dirt, cover tubers with paper or towels and let them dry in a cool, dark place for a few days; store them in a cool spot at 50 to 60 degrees Fahrenheit.
0
0
文章
Miss Chen
2018年07月01日

Growing broccoli in a greenhouse gives you the ability to enjoy fresh broccoli year round. Although a greenhouse offers an enclosed environment in which to grow a variety of seasonal plants, if you live in an area with wide temperature swings, you must still control the temperature inside the greenhouse. Cold nights, for instance, can frostbite plants in an unheated greenhouse, wasting your hard work.

Step 1
Install adequate central heating and cooling in the greenhouse, knowing that greenhouses get only 25 percent of their heat from the sun and require additional heating-and-cooling regulation in regions with moderate to extreme swings in temperature.
Step 2
Install two fans, one facing inward, serving as air input and one facing outward, serving as air output (exhaust). Fans help ventillate the air and introduce fresh amounts of carbon dioxide. For small greenhouses of 200 to 600 square feet, select fans capable of moving 5,000 cubic feet of air, and for larger greenhouses of 600 to 1,200 square feet, select fans capable of moving 12,000 cubic feet of air.
Step 3
Install wooden crates measuring a minimum of 3 feet wide per row and at least 2 feet deep.
Step 4
Spread fertilized soil into the crates to a depth of 23 inches to 24 inches. The soil settles a little, so you should fill the crates as full as possible.
Step 5
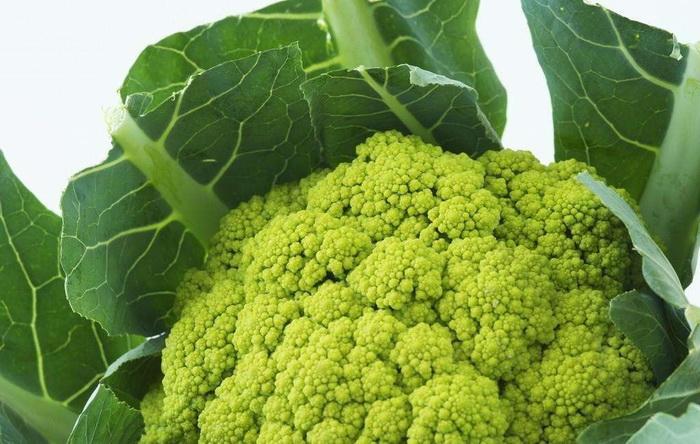
Plant the broccoli seeds 1 inch deep and about 15 inches to 24 inches apart in a layer of starter fertilizer that offers the broccoli seeds the required nutrients they need to encourage fast growth.
Step 6
Water the soil as the soil becomes dry to the touch, but when the broccoli sprouts, do not water the actual "heads"; water the stalks at their bases. Watering the brocolli heads encourages inedible blossoms.
Step 7
Allow the plant to grow 2 1/2 to 3 1/2 months.
Step 8
Harvest the plants by snipping them off beneath the head allowing for 5 inches to 6 inches of stalk.

Step 1
Install adequate central heating and cooling in the greenhouse, knowing that greenhouses get only 25 percent of their heat from the sun and require additional heating-and-cooling regulation in regions with moderate to extreme swings in temperature.
Step 2
Install two fans, one facing inward, serving as air input and one facing outward, serving as air output (exhaust). Fans help ventillate the air and introduce fresh amounts of carbon dioxide. For small greenhouses of 200 to 600 square feet, select fans capable of moving 5,000 cubic feet of air, and for larger greenhouses of 600 to 1,200 square feet, select fans capable of moving 12,000 cubic feet of air.
Step 3
Install wooden crates measuring a minimum of 3 feet wide per row and at least 2 feet deep.
Step 4
Spread fertilized soil into the crates to a depth of 23 inches to 24 inches. The soil settles a little, so you should fill the crates as full as possible.
Step 5
Plant the broccoli seeds 1 inch deep and about 15 inches to 24 inches apart in a layer of starter fertilizer that offers the broccoli seeds the required nutrients they need to encourage fast growth.

Step 6
Water the soil as the soil becomes dry to the touch, but when the broccoli sprouts, do not water the actual "heads"; water the stalks at their bases. Watering the brocolli heads encourages inedible blossoms.
Step 7
Allow the plant to grow 2 1/2 to 3 1/2 months.
Step 8
Harvest the plants by snipping them off beneath the head allowing for 5 inches to 6 inches of stalk.
0
0
求助
dxstxnxx
2018年06月30日

HELP ID:
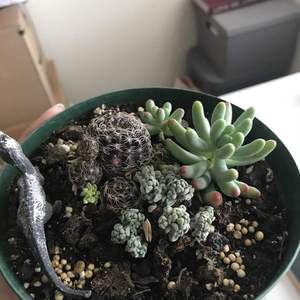
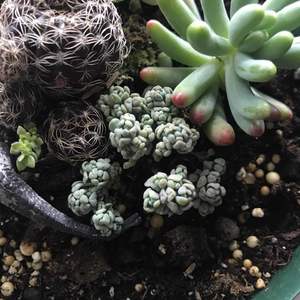
I recently bought this collection of succulents from my local swap meet and was ultimately attracted to the low-growing grass-like succulents as shown in my second picture. Does anyone recognize it? and/or have tips for caring for it? your help is very much appreciated 🙂
#helpmerecognizethissucculent


1
0
dxstxnxx:@Fion thank you! 😊
Fion:Sedum dasyphyllum var. dasyphyllum(姬星美人)😁
文章
Miss Chen
2018年06月30日

Has your four-year-old ever looked at you begrudgingly over a plate of veggies, and said, “I wish there was an ice cream plant.”? Well, move over parsnips and eggplant, because with some orchid-growing know-how, you can cultivate one of the most aromatic and intoxicating spices on earth for ice cream, coffee drinks, and desserts.

The vanilla orchid is not an easy plant to grow for beginners. Some previous success with orchid growing is beneficial. A greenhouse is also highly desirable, especially for gardeners who don't live in a frost-free climate.
An Ancient Delicacy
How lucky were the ancient Aztec people of Mexico? Not only were they the first to discover the delights of cocoa, they also were the first to harvest the only edible produced by the family Orchidaceae. It's amazing that the secrets of the pods from the genus Vanilla planifolia were ever discovered, as the fresh pods bear no flavor. Only a careful process of steaming and fermentation release the perfumed essence contained within the seeds.
Like many orchids, the vanilla bean orchid is an epiphyte, and lives on a host tree without drawing nutrients from it. The vine clambers up to the treetops in a zigzag fashion, exhibiting long succulent lance-shaped leaves. Each blooming branch will bear one to two dozen creamy blooms, for a total of several hundred flowers on a mature vine.
Put Your Greenhouse to Use
The vanilla orchid, like most orchids, grows best in bright filtered shade and high humidity. Think of the native jungle habitat of the vanilla orchid; you must replicate this as well as possible using a combination of temperature controls and pampering mists and irrigation. Ideal temperatures are between 60-70 degrees F at night, and 80-95 degrees F during the day. The plants are not frost tolerant, which means those who don't live in a tropical climate must use a greenhouse to rear the plants.
In its native habitat, a mature vanilla orchid vine can grow to 300 feet or greater. However, you can keep your vine to a manageable 20 to 30 feet in greenhouse conditions. Training the vine laterally instead of straight up allows you to get more vine in a smaller space.
Planting the Vanilla Orchid
Start your vanilla orchid in a mixture of half bark and half potting mix. This is slightly more dense and heavy than most orchid growing media. Your cutting or small starter plant will need this combination of excellent drainage and nutrients to nourish the plant while the vine develops. After the vine develops its epiphytic roots, it will no longer depend on the roots in the potting mix. Patience is a requirement for those who wish to harvest vanilla pods, as the plants take anywhere from three to five years from cuttings to flower production.

Vanilla Plant Care
Wherever you grow your vanilla orchid, you must provide this large vine with a sturdy support. In tropical climates, a large tree makes an ideal support. If you grow your vine in a conservatory or greenhouse, a solid wood trellis can support the plant. Don’t bother with fancy latticework; a simple lumber structure is stronger and will soon be obscured by the vine.
Fertilize your vanilla orchid every two weeks during the spring and summer with an orchid fertilizer. Mist your plant regularly and make every effort to keep an 80% humidity level.
Hand-pollinate the flowers in the late morning with a chopstick. Remove pollen from the stamen of one flower and place it on the stigma of another flower. If you are able to allow pollinating insects access to your greenhouse, your chances of a successful pollination may increase. Flowers that have pollinated will wither on the vine rather than falling off within a day. Small green pods will form within a week, eventually elongating into six-inch pods, and are ready to harvest in 9-10 months.
Harvesting Your Vanilla Pods
If pollination is successful, your three-year-old vanilla orchid will produce green bean-like pods from October through March. Good quality pods should be at least six inches long. The curing process is labor-intensive, and involves sweating and drying, which contributes to the premium price of vanilla beans sold in markets. Every day for six weeks, you must wrap the beans in a blanket at night to facilitate moisture condensation on the pods. During the day, place the beans on trays in the sun, or under a heat lamp indoors. Following this sweating process, you should dry the now brown and shriveled pods in a dark, dry place for an additional three months. You can store the cured beans in an air tight container indefinitely.

The vanilla orchid is not an easy plant to grow for beginners. Some previous success with orchid growing is beneficial. A greenhouse is also highly desirable, especially for gardeners who don't live in a frost-free climate.
An Ancient Delicacy
How lucky were the ancient Aztec people of Mexico? Not only were they the first to discover the delights of cocoa, they also were the first to harvest the only edible produced by the family Orchidaceae. It's amazing that the secrets of the pods from the genus Vanilla planifolia were ever discovered, as the fresh pods bear no flavor. Only a careful process of steaming and fermentation release the perfumed essence contained within the seeds.
Like many orchids, the vanilla bean orchid is an epiphyte, and lives on a host tree without drawing nutrients from it. The vine clambers up to the treetops in a zigzag fashion, exhibiting long succulent lance-shaped leaves. Each blooming branch will bear one to two dozen creamy blooms, for a total of several hundred flowers on a mature vine.
Put Your Greenhouse to Use
The vanilla orchid, like most orchids, grows best in bright filtered shade and high humidity. Think of the native jungle habitat of the vanilla orchid; you must replicate this as well as possible using a combination of temperature controls and pampering mists and irrigation. Ideal temperatures are between 60-70 degrees F at night, and 80-95 degrees F during the day. The plants are not frost tolerant, which means those who don't live in a tropical climate must use a greenhouse to rear the plants.
In its native habitat, a mature vanilla orchid vine can grow to 300 feet or greater. However, you can keep your vine to a manageable 20 to 30 feet in greenhouse conditions. Training the vine laterally instead of straight up allows you to get more vine in a smaller space.
Planting the Vanilla Orchid
Start your vanilla orchid in a mixture of half bark and half potting mix. This is slightly more dense and heavy than most orchid growing media. Your cutting or small starter plant will need this combination of excellent drainage and nutrients to nourish the plant while the vine develops. After the vine develops its epiphytic roots, it will no longer depend on the roots in the potting mix. Patience is a requirement for those who wish to harvest vanilla pods, as the plants take anywhere from three to five years from cuttings to flower production.

Vanilla Plant Care
Wherever you grow your vanilla orchid, you must provide this large vine with a sturdy support. In tropical climates, a large tree makes an ideal support. If you grow your vine in a conservatory or greenhouse, a solid wood trellis can support the plant. Don’t bother with fancy latticework; a simple lumber structure is stronger and will soon be obscured by the vine.
Fertilize your vanilla orchid every two weeks during the spring and summer with an orchid fertilizer. Mist your plant regularly and make every effort to keep an 80% humidity level.
Hand-pollinate the flowers in the late morning with a chopstick. Remove pollen from the stamen of one flower and place it on the stigma of another flower. If you are able to allow pollinating insects access to your greenhouse, your chances of a successful pollination may increase. Flowers that have pollinated will wither on the vine rather than falling off within a day. Small green pods will form within a week, eventually elongating into six-inch pods, and are ready to harvest in 9-10 months.
Harvesting Your Vanilla Pods
If pollination is successful, your three-year-old vanilla orchid will produce green bean-like pods from October through March. Good quality pods should be at least six inches long. The curing process is labor-intensive, and involves sweating and drying, which contributes to the premium price of vanilla beans sold in markets. Every day for six weeks, you must wrap the beans in a blanket at night to facilitate moisture condensation on the pods. During the day, place the beans on trays in the sun, or under a heat lamp indoors. Following this sweating process, you should dry the now brown and shriveled pods in a dark, dry place for an additional three months. You can store the cured beans in an air tight container indefinitely.
0
0
文章
Miss Chen
2018年06月29日


1.Ice Plants
Ice plants are an interesting genus of succulents, with daisy-like flowers. There is a good amount of variety among ice plants; some are low growing spreaders, others become bushy subshrubs. There are over 150 species in this genus from southern Africa. Most are easy growers that bloom freely. The botanical name, Lampranthus, is from the Greek words "Lampros" (bright) and anthos (flower).
Leaves: The stocky leaves grow in pairs and can be cylindrical or almost triangular. They are short, very succulent and often blue-green.
Flowers: Daisy-like flowers with thin petals that only open in the sun. Different species bloom in vivid shades of yellow, orange, pink and red. The flowers form near the stem tips. Some varieties bloom over a long period, others only a few weeks.
Botanical Name
Lampranthus species and hybrids
Common Names
Ice Plant. You may see individual species labeled as Ice Plants and some have quantifiers like Trailing Ice Plant. It can be confusing. If you are looking for a specific plant, you would be wise to have the botanical name.
Cold Hardiness
Hardiness will vary with the species and variety, but most are only perennial in USDA Hardiness Zones 8 - 10. Some species can tolerate a light frost, but despite their name, prolonged periods of cold, damp conditions will cause them to rot. Gardeners in colder areas can grow them as annuals or houseplants.
Sun Exposure
All varieties of ice plant grow and bloom best in full sun.
Mature Plant Size
The size will vary among the species, but most of the commonly grown ice plant varieties remain 2 ft. (60 cm) tall or lower, with a spreading habit.
Bloom Time
Many ice plants put on their best show in spring, with sporadic repeat blooms throughout the season, however, a few, like Lampranthus spectabilis, bloom all summer.
Suggested Varieties of Ice Plant
Lampranthus aurantiacus - Spring blooming, upright plant with bright orange petals around a yellow center. H 2 ft. (60 cm)
Lampranthus coccineus / Redflush Ice Plant - Bright red flowers throughout the season. Somewhat frost tolerant. H 2 ft. (60 cm)
Lampranthus haworthii - Blue-green leaves held up like a candelabra are covered with pink or purple flowers in the spring. Repeat blooms sporadically. H 2 ft. (60 cm)
Lampranthus spectabilis /Trailing Ice Plant- Long blooming in white or purple-pink. Low growing and spreading. H 2 ft. (60 cm)
Design Suggestions Using Ice Plant
Where the plants are hardy, they make a nice ground cover. Ice plants thrive in poor soil and make a wonderful alpine or rock garden plant or tucked in a stone wall. Their spreading habit means they quickly fill a container and spill over, so they are equally nice in hanging baskets and free-standing containers.

2.Growing and Caring for Ice Plants
Ice Plant Growing Tips
Soil: A neutral soil pH is fine, but it is more important to provide sandy, well-draining soil. Plants will rot if left in wet or damp soil for prolonged periods of time.
Planting: Ice Plants can be grown from either seed or cuttings. Seeds need warm temperatures (55 F.) to germinate. Taking cuttings is the fastest method. Make cuttings while the plant is actively growing, from spring to early fall. Cut shoots about 3 - 6 inches long and remove all but the top set of leaves.
Succulent cuttings should be allowed to dry slightly and callus. Leave them out in the air for several hours or overnight. Then root in sandy soil, in containers. Keep the soil evenly moist, until the cutting root. You can tell they have rooted by gently tugging on them. If they offer resistance, they have rooted and can be potted up.
Caring for Ice Plants
Established plants are extremely drought tolerant, however, they do prefer regular weekly watering during the summer. Allow the soil to dry out between waterings in the winter, when they are somewhat dormant.
Flowering is more abundant if container grown plants are fed a balanced fertilizer, according to label directions. In-ground plants should be fed if the soil is poor or if blooming is sparse.
Plants can be divided or repotted in early spring.
Pests & Problems of Ice Plants
Weather is the biggest problem when growing Ice Plants. Few diseases have been reported, but mealy bug and scale can occasionally infest.
0
0


