成长记
💫sammie💫
2018年05月17日

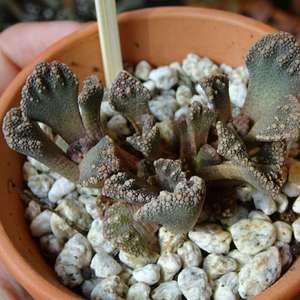
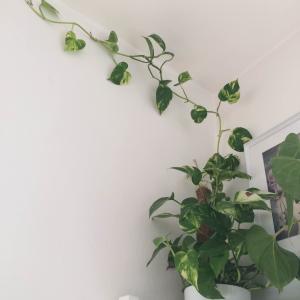
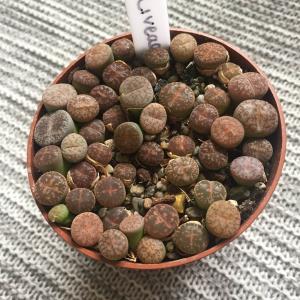
been having the tray for about a week, a relative offered to give me a few leaves since they saw i've taken interest in plants! some are from my sunsets, two of its leaves are growing some teeny-tiny roots! the other two, i'm not sure of their type, but they're growing well!


0
0
成长记
FieryFlame
2018年05月17日

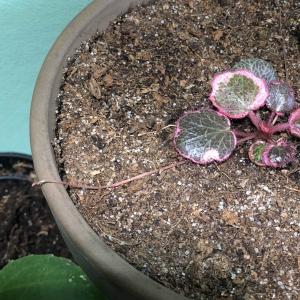
Top leaf and growing point fell off
第一片叶子和小芽都掉了... 😭😭😭
还有救么……

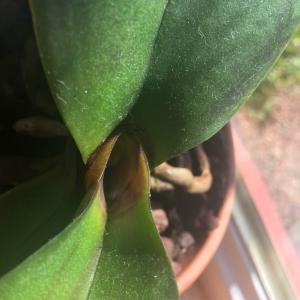
第一片叶子和小芽都掉了... 😭😭😭
还有救么……


0
0
FieryFlame:@fekorod 好滴,谢谢
fekorod:@FieryFlame 杀菌的
FieryFlame:@fekorod 涂什么药呢? 都是浸盆的,从来没浇过叶心啊……
fekorod:不一定。。伤口涂点药然后观察吧。。浇水一定别存在叶心
文章
Miss Chen
2018年05月15日

The best time for cutting down asparagus (Asparagus officinalis) is when the plant becomes dormant in fall. Asparagus produces new shoots in spring, which you can harvest as asparagus spears. These shoots develop and mature over the growing season, forming many-branched, feathery stems. The plant's top growth dies in fall, though the roots remain alive, ready to sprout again in spring. Growing 3 to 5 feet tall, asparagus grows in U.S. Department of Agriculture plant hardiness zones 4 through 8.
Why Cut Asparagus

Asparagus usually dies down naturally in fall, but cutting the asparagus stems at this time has its benefits. Rust and other diseases that affect asparagus overwinter on plant debris. Cutting down and removing asparagus stems when the plants are dormant helps prevent diseases from infecting new shoots the following year.
Old asparagus varieties include female, berry-producing plants, and some new, male varieties also sometimes include a few female plants. Berries that are left on an asparagus bed create problems with asparagus seedlings the following year.
Removing dead asparagus foliage also keeps the bed neat and tidy, and makes room for new shoots in spring.
When to Cut

Cut asparagus down after the stems have turned yellow, but before the berries fall. Asparagus stems often turn yellow after the first frost. When stems turn yellow and wither, they're no longer providing nutrients for the roots, and they can be removed. Cut down asparagus stems when they're completely yellow. Don't wait any longer, because berries on the plants will fall.
In warm climates, asparagus sometimes doesn't turn yellow but continues growing in late fall and winter. If the asparagus shoots don't turn yellow, stop watering the plants.
How to Cut

Cut asparagus stems with pruning shears. Starting at one end of the asparagus bed, hold an asparagus stem in one hand, and prune it 2 inches above the soil surface. Continue in the same way over the whole bed.
When you've finished, wipe the pruning shear blades with a cloth that was dipped in rubbing alcohol. Sterilizing pruning shears helps prevent diseases from spreading. You can put dead asparagus foliage on the compost pile.
After Care

After cutting asparagus stems, spread a thick organic mulch. Mulches add organic matter and nutrients to the soil and help control weeds, and also provide some protection from severe freezes. Removing the mulch in stages in spring can extend the asparagus harvesting season.
Spread a layer of leaves, compost, manure or other organic matter 4 to 6 inches deep over the asparagus bed. For a long harvest period, remove the mulch from one-half the bed in spring. The asparagus shoots will appear on the bare half of the bed first. When they appear, remove the mulch from the other one-half of the bed.
Why Cut Asparagus

Asparagus usually dies down naturally in fall, but cutting the asparagus stems at this time has its benefits. Rust and other diseases that affect asparagus overwinter on plant debris. Cutting down and removing asparagus stems when the plants are dormant helps prevent diseases from infecting new shoots the following year.
Old asparagus varieties include female, berry-producing plants, and some new, male varieties also sometimes include a few female plants. Berries that are left on an asparagus bed create problems with asparagus seedlings the following year.
Removing dead asparagus foliage also keeps the bed neat and tidy, and makes room for new shoots in spring.
When to Cut

Cut asparagus down after the stems have turned yellow, but before the berries fall. Asparagus stems often turn yellow after the first frost. When stems turn yellow and wither, they're no longer providing nutrients for the roots, and they can be removed. Cut down asparagus stems when they're completely yellow. Don't wait any longer, because berries on the plants will fall.
In warm climates, asparagus sometimes doesn't turn yellow but continues growing in late fall and winter. If the asparagus shoots don't turn yellow, stop watering the plants.
How to Cut

Cut asparagus stems with pruning shears. Starting at one end of the asparagus bed, hold an asparagus stem in one hand, and prune it 2 inches above the soil surface. Continue in the same way over the whole bed.
When you've finished, wipe the pruning shear blades with a cloth that was dipped in rubbing alcohol. Sterilizing pruning shears helps prevent diseases from spreading. You can put dead asparagus foliage on the compost pile.
After Care

After cutting asparagus stems, spread a thick organic mulch. Mulches add organic matter and nutrients to the soil and help control weeds, and also provide some protection from severe freezes. Removing the mulch in stages in spring can extend the asparagus harvesting season.
Spread a layer of leaves, compost, manure or other organic matter 4 to 6 inches deep over the asparagus bed. For a long harvest period, remove the mulch from one-half the bed in spring. The asparagus shoots will appear on the bare half of the bed first. When they appear, remove the mulch from the other one-half of the bed.
0
0
文章
Miss Chen
2018年05月15日

Across the month of March, gardeners in Tennessee prepare their soil beds in anticipation of planting potatoes. Rather than growing these vegetables from seeds, gardeners purchase small, healthy tubers called seed potatoes, which are certified disease-free. Since seed potatoes are planted in the ground and initially protected from frost, planting take place roughly two to four weeks before the average last spring frost date across the Volunteer State. The ideal garden site for potatoes is one with fertile, organic-rich soil that is moist and drains well. Full sun exposure ensures the best growth and production of tubers for harvest.

Step 1
Cultivate the soil with a shovel or rototiller in early spring as soon as the ground is workable. Dig the soil 6 to 10 inches deep. That means there is no frost in the soil, and it's not overly wet. Depending on the location in Tennessee, prepare the vegetable garden area for potatoes between late February and late March.
Step 2
Scatter 1 to 3 inches of organic matter on top of the soil and mix with the shovel or rototiller. Use compost, leaf mold or well-rotted animal manure to improve the texture and fertility of the soil. The potatoes will benefit from your bed preparation.
Step 3
Rake the tilled area smooth with a garden rake and allow it to naturally settle for three to seven days. While raking, remove any debris and pulverize any soil clumps so the area is even and fine-textured.
Step 4
Purchase seed potatoes at the garden center. Ask staff members for insight into the different varieties. Confirm that the seed potatoes are certified disease-free. They also should look plump and feel dry and firm to the touch.

Step 5
Cut the seed potatoes with a knife into segments about 2 oz. in size. Each cut segment needs to contain at least one dormant bud called an eye. From this eye the potato stem and roots sprout. This is optional since some seed potatoes are rather small and don't need cutting so one to three eyes exist on each. If you cannot plant the cut seed potatoes within four hours, allow them to air dry for one or two days. This curing of the wounds seals the tuber and helps prevent any infestation by disease spores.
Step 6
Create a 4- to 5-inch-deep furrow in the vegetable garden with the hoe. Space rows of potatoes 36 inches apart.
Step 7
Place a seed potato into the furrow with the cut side down or eyes oriented upward or to the side. Space potatoes 10 to 12 inches apart in the furrow. Cover them with soil and gently tamp the surface with the back of the hoe blade. This removes air pockets and brings the seed potatoes in direct contact with soil particles.

Step 1
Cultivate the soil with a shovel or rototiller in early spring as soon as the ground is workable. Dig the soil 6 to 10 inches deep. That means there is no frost in the soil, and it's not overly wet. Depending on the location in Tennessee, prepare the vegetable garden area for potatoes between late February and late March.
Step 2
Scatter 1 to 3 inches of organic matter on top of the soil and mix with the shovel or rototiller. Use compost, leaf mold or well-rotted animal manure to improve the texture and fertility of the soil. The potatoes will benefit from your bed preparation.
Step 3
Rake the tilled area smooth with a garden rake and allow it to naturally settle for three to seven days. While raking, remove any debris and pulverize any soil clumps so the area is even and fine-textured.
Step 4
Purchase seed potatoes at the garden center. Ask staff members for insight into the different varieties. Confirm that the seed potatoes are certified disease-free. They also should look plump and feel dry and firm to the touch.

Step 5
Cut the seed potatoes with a knife into segments about 2 oz. in size. Each cut segment needs to contain at least one dormant bud called an eye. From this eye the potato stem and roots sprout. This is optional since some seed potatoes are rather small and don't need cutting so one to three eyes exist on each. If you cannot plant the cut seed potatoes within four hours, allow them to air dry for one or two days. This curing of the wounds seals the tuber and helps prevent any infestation by disease spores.
Step 6
Create a 4- to 5-inch-deep furrow in the vegetable garden with the hoe. Space rows of potatoes 36 inches apart.
Step 7
Place a seed potato into the furrow with the cut side down or eyes oriented upward or to the side. Space potatoes 10 to 12 inches apart in the furrow. Cover them with soil and gently tamp the surface with the back of the hoe blade. This removes air pockets and brings the seed potatoes in direct contact with soil particles.
0
0
文章
Miss Chen
2018年05月14日

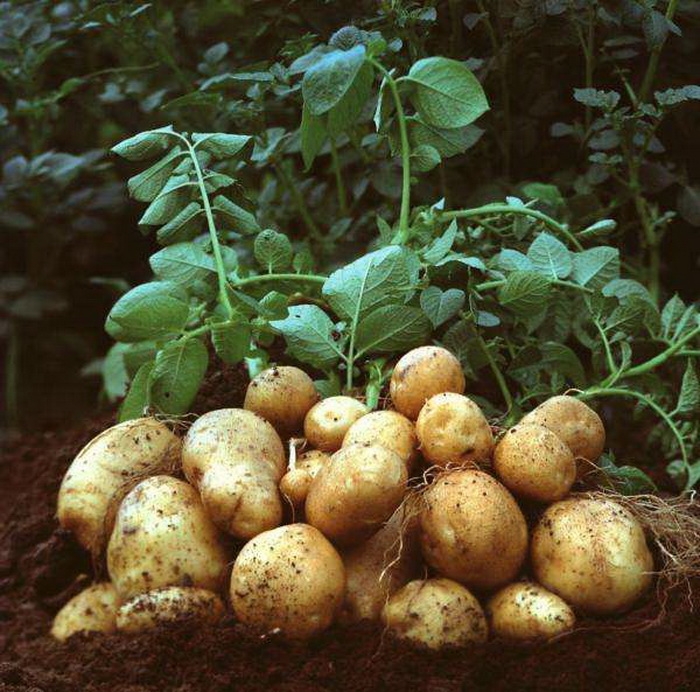
Potatoes are easy to grow, and the plants can be highly productive if grown under the best conditions. Oklahoma gardeners are fortunate to have a climate well-suited to growing potatoes, and starting your plants at the right time will help make sure your crop is a bountiful one.
Time Frame
Potatoes are considered cool-season vegetables. They are not particularly sensitive to frost, and can be planted earlier than more tender garden plants. You can plant potatoes from mid-February to mid-March. If you live in southern Oklahoma, you should plant during the earlier portion of this range.
Considerations
Potatoes grow best in soil that is well aerated, moist and well drained; avoid compacting the soil. A pH between 5.0 and 5.5 is ideal. Potatoes grow well in sunny conditions, but excessive heat and lack of moisture reduce yield.

Sweet Potatoes
Sweet potatoes are less hardy than regular potatoes, and should be planted between May 1 and June 20.

Time Frame
Potatoes are considered cool-season vegetables. They are not particularly sensitive to frost, and can be planted earlier than more tender garden plants. You can plant potatoes from mid-February to mid-March. If you live in southern Oklahoma, you should plant during the earlier portion of this range.
Considerations
Potatoes grow best in soil that is well aerated, moist and well drained; avoid compacting the soil. A pH between 5.0 and 5.5 is ideal. Potatoes grow well in sunny conditions, but excessive heat and lack of moisture reduce yield.

Sweet Potatoes
Sweet potatoes are less hardy than regular potatoes, and should be planted between May 1 and June 20.
0
0


