文章
Miss Chen
2018年08月30日

Shasta daisies are an old-fashioned favorite in the garden. Both novice and experienced gardeners will easily grow a beautiful clump of shasta daisies in a sunny growing area that will return year after year to provide lovely summer blooms. As the years go by, shasta daisies will expand and many gardeners like to divide them to create new shasta daisy plants. You can easily divide shasta daisy plants in the spring when they first sprout from the soil.

Step 1
Watch for the first growth of the shasta daisies in the spring. When you see this growth, dig with the shovel to remove the entire shasta daisy clump. Make sure you keep the roots intact as you remove the clump from the soil. Place the clump onto the ground nearby.
Step 2
Use your hands or a utility knife to separate the outer portions of the plant (foliage and entire root systems together). As long as the divided portions of the clump have both foliage and roots, they should grow.
Step 3
Examine the inner portions of the clump to see if there are any parts that appear old and woody. If you find portions like this, cut them out and discard them.
Step 4
Prepare a new growing area by working the soil with the garden spade down to a depth of 8 inches. Add 2 inches of compost to the top of the soil to improve the soil composition and work this in well with the spade.

Step 5
Dig holes for each shasta daisy plant that are 18 inches apart and deep enough to accommodate the root systems with the plants being at the same depth as they were previously growing.
Step 6
Place the newly divided shasta daisy plants into the prepared holes and fill soil in around the roots. Tamp down the soil around the plants with your hands and provide a generous amount of water for each shasta daisy plant.

Step 1
Watch for the first growth of the shasta daisies in the spring. When you see this growth, dig with the shovel to remove the entire shasta daisy clump. Make sure you keep the roots intact as you remove the clump from the soil. Place the clump onto the ground nearby.
Step 2
Use your hands or a utility knife to separate the outer portions of the plant (foliage and entire root systems together). As long as the divided portions of the clump have both foliage and roots, they should grow.
Step 3
Examine the inner portions of the clump to see if there are any parts that appear old and woody. If you find portions like this, cut them out and discard them.
Step 4
Prepare a new growing area by working the soil with the garden spade down to a depth of 8 inches. Add 2 inches of compost to the top of the soil to improve the soil composition and work this in well with the spade.

Step 5
Dig holes for each shasta daisy plant that are 18 inches apart and deep enough to accommodate the root systems with the plants being at the same depth as they were previously growing.
Step 6
Place the newly divided shasta daisy plants into the prepared holes and fill soil in around the roots. Tamp down the soil around the plants with your hands and provide a generous amount of water for each shasta daisy plant.
0
0
文章
Miss Chen
2018年08月29日

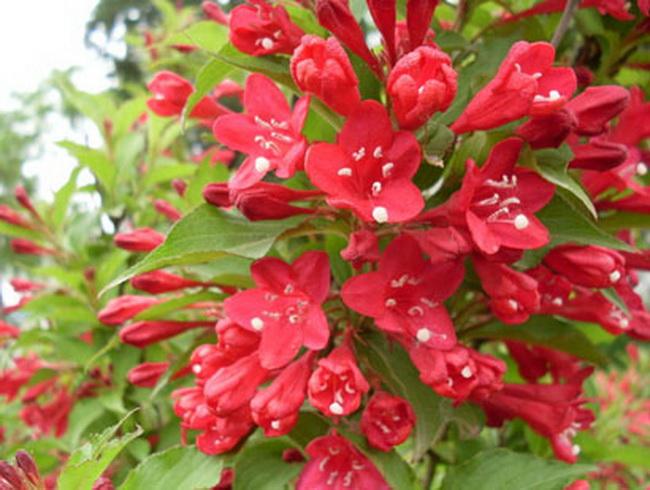
If you're growing a weigela (Weigela spp.) or you're thinking of planting one, you probably know that it's an especially easy-to-grow shrub. A tough plant that has masses of colorful flowers in late spring or early summer, a weigela is cold-tolerant and grows in U.S. Department of Agriculture plant hardiness zones 4 through 9, depending on the variety. Whatever type of weigela you grow, it's a good idea to give it a bit of extra care as winter approaches and at winters end to help keep it flourishing.
Fall Preparation
Although a weigela is a deciduous plant that drops its leaves in fall, its roots continue functioning for a while and don't become dormant as quickly as the top growth. Because of this, it's important to support good root growth during fall, especially if your weigela is newly planted. Continue watering the shrub during fall, giving it extra water whenever the top 1 to 2 inches of its soil feel dry to the touch. Moist soil also tends to stay warm longer than dry soil, so watering through fall helps keep the roots warm.
Adding a 6- or 8-inch layer of organic mulch, such as straw or shredded bark, in fall helps conserve soil moisture and keeps roots growing as long as possible. In cold-winter areas, mulch also protects the plant from freeze-thaw cycles that cause the ground to expand and contract. These cycles can heave roots out of the ground and damage them.
Winter Sun Damage
Because a weigela has no leaves in winter, its stems are susceptible to a problem called sun scald, which happens when sun heats up the bark on bright but cold days, stimulating activity in the stem that can be followed by tissue damage when the sun goes down and the stem is chilled. This is especially likely in a young or recently transplanted shrub, or in one planted where its south-facing side is unprotected. If sun scald develops, you'll see dried or cracked bark, or areas on a stem that are sunken or shriveled.
You can help prevent sun scald by wrapping the larger stems on a weigela with a commercial tree wrap or a light-colored plastic tree guard. If your weigela is bushy and has only thin stems that aren't easily wrapped, provide some shade on the south-facing side by stapling a sheet of burlap to two or three stakes driven into the ground near the south-facing side of the shrub.
At Winter's End
Although weigela is a hardy plant, it's prone to winter dieback, especially in areas with harsh winters. Because of this, it's a good idea to examine the plant at the end of winter and prune off any dead stems.

Double-check stems that look dead by scratching the bark with a fingernail. If tissue under the bark is greenish white, the stem is healthy, but dry tissue indicates the stem has died back.
Remove dead stems by cutting into healthy tissue behind the damaged part, using sharp shears or a pruning knife that you wipe with rubbing alcohol between each cut to prevent spreading disease.
You can also remove any broken or damaged branches at the end of winter, but a weigela has its heaviest flowering in spring on the previous season's growth, so it's best you don't prune heavily in winter to preserve flower buds. If your shrub is older and overgrown, you can stimulate its growth by pruning off a few large branches at the end of winter. Cut these off near the shrub's base to let light into its interior so new shoots can form.

Fall Preparation
Although a weigela is a deciduous plant that drops its leaves in fall, its roots continue functioning for a while and don't become dormant as quickly as the top growth. Because of this, it's important to support good root growth during fall, especially if your weigela is newly planted. Continue watering the shrub during fall, giving it extra water whenever the top 1 to 2 inches of its soil feel dry to the touch. Moist soil also tends to stay warm longer than dry soil, so watering through fall helps keep the roots warm.
Adding a 6- or 8-inch layer of organic mulch, such as straw or shredded bark, in fall helps conserve soil moisture and keeps roots growing as long as possible. In cold-winter areas, mulch also protects the plant from freeze-thaw cycles that cause the ground to expand and contract. These cycles can heave roots out of the ground and damage them.
Winter Sun Damage
Because a weigela has no leaves in winter, its stems are susceptible to a problem called sun scald, which happens when sun heats up the bark on bright but cold days, stimulating activity in the stem that can be followed by tissue damage when the sun goes down and the stem is chilled. This is especially likely in a young or recently transplanted shrub, or in one planted where its south-facing side is unprotected. If sun scald develops, you'll see dried or cracked bark, or areas on a stem that are sunken or shriveled.
You can help prevent sun scald by wrapping the larger stems on a weigela with a commercial tree wrap or a light-colored plastic tree guard. If your weigela is bushy and has only thin stems that aren't easily wrapped, provide some shade on the south-facing side by stapling a sheet of burlap to two or three stakes driven into the ground near the south-facing side of the shrub.
At Winter's End
Although weigela is a hardy plant, it's prone to winter dieback, especially in areas with harsh winters. Because of this, it's a good idea to examine the plant at the end of winter and prune off any dead stems.

Double-check stems that look dead by scratching the bark with a fingernail. If tissue under the bark is greenish white, the stem is healthy, but dry tissue indicates the stem has died back.
Remove dead stems by cutting into healthy tissue behind the damaged part, using sharp shears or a pruning knife that you wipe with rubbing alcohol between each cut to prevent spreading disease.
You can also remove any broken or damaged branches at the end of winter, but a weigela has its heaviest flowering in spring on the previous season's growth, so it's best you don't prune heavily in winter to preserve flower buds. If your shrub is older and overgrown, you can stimulate its growth by pruning off a few large branches at the end of winter. Cut these off near the shrub's base to let light into its interior so new shoots can form.
0
0
文章
Miss Chen
2018年08月28日

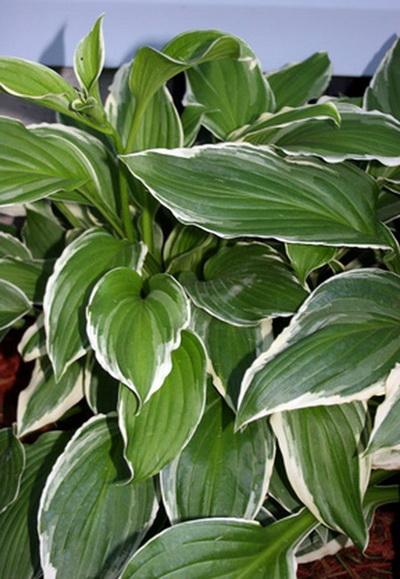
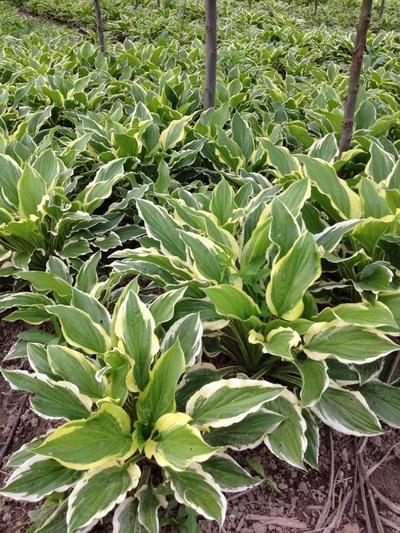
Hostas--also called plaintain lilies--are low-growing foliage plants with large, showy leaves that can range in color from deep green through chartreuse into deep blue, with white, lavender or purple blooms in August. There are also variegated cultivars featuring cream, white or yellow centers or borders. Hostas excel as ground cover and add texture and interest to shaded sections of landscapes. Hostas can perform well in Texas as long as they are of the proper cultivar and don't get too much scorching summer sun.
Step 1
Choose vigorous, healthy hostas cultivars with the best chances for growing well in Texas. According to the Texas A and M University Extension, good hostas varieties for Texas gardeners include the green-leafed lancifolia and royal standard cultivars, the blue-leafed blue cadet and blue angel types and the variegated sugar and cream and so sweet varieties. Examine the plant before purchase to make sure it is free of pests and diseases.
Step 2
Choose a planting site in shade or partial sun with afternoon shade and make sure it has rich, moist soil. For more specific recommendations on sunlight, check the cultivar; blue-leaf hostas require more shade than green-leaf varieties, and too much bright sun will bleach out the leaf coloration of the yellow cultivars.
Step 3
Prepare the garden bed in the spring by using a pitchfork to loosen soil to a depth of 12 to 15 inches, then mixing in a 2 to 4-inch layer of compost.
Step 4
Dig a planting hole twice the size of the container the hosta was sold in, and place the hosta in the hole so the top of the root ball is level with the soil surface. Backfill with garden soil and firmly tamp the soil into place but don't press so hard that the soil becomes compacted. Space hostas 36 inches apart if planting more than one. Water your hostas well after planting, and continue to water regularly to keep the soil moist.
Step 5
Apply a 2 1/2-inch layer of mulch to protect the roots, conserve moisture and provide a physical barrier against disease.
Step 6
Fertilize hostas in early spring with a balanced slow-release granular fertilizer in a 10-10-10 NPK formulation. According to the University of Georgia Cooperative Extension, the fertilizer should be applied at a rate of 1/2 pound per 100 square feet.
Step 7
Watch your hostas closely for damage from slugs, to which they are very susceptible. At the first sign of damage use slug bait or make a beer trap by leaving a saucer of beer by the hostas at night; slugs will crawl in and drown.

Step 1
Choose vigorous, healthy hostas cultivars with the best chances for growing well in Texas. According to the Texas A and M University Extension, good hostas varieties for Texas gardeners include the green-leafed lancifolia and royal standard cultivars, the blue-leafed blue cadet and blue angel types and the variegated sugar and cream and so sweet varieties. Examine the plant before purchase to make sure it is free of pests and diseases.
Step 2
Choose a planting site in shade or partial sun with afternoon shade and make sure it has rich, moist soil. For more specific recommendations on sunlight, check the cultivar; blue-leaf hostas require more shade than green-leaf varieties, and too much bright sun will bleach out the leaf coloration of the yellow cultivars.
Step 3
Prepare the garden bed in the spring by using a pitchfork to loosen soil to a depth of 12 to 15 inches, then mixing in a 2 to 4-inch layer of compost.
Step 4
Dig a planting hole twice the size of the container the hosta was sold in, and place the hosta in the hole so the top of the root ball is level with the soil surface. Backfill with garden soil and firmly tamp the soil into place but don't press so hard that the soil becomes compacted. Space hostas 36 inches apart if planting more than one. Water your hostas well after planting, and continue to water regularly to keep the soil moist.

Step 5
Apply a 2 1/2-inch layer of mulch to protect the roots, conserve moisture and provide a physical barrier against disease.
Step 6
Fertilize hostas in early spring with a balanced slow-release granular fertilizer in a 10-10-10 NPK formulation. According to the University of Georgia Cooperative Extension, the fertilizer should be applied at a rate of 1/2 pound per 100 square feet.
Step 7
Watch your hostas closely for damage from slugs, to which they are very susceptible. At the first sign of damage use slug bait or make a beer trap by leaving a saucer of beer by the hostas at night; slugs will crawl in and drown.
0
0
文章
Miss Chen
2018年08月28日

Large, silken-textured flowers of many colors grace peony (Paeonia spp.) bushes during the spring. Fall care helps spring blooms, but how you should care for peonies in the fall depends on what type of peony you're growing. Most common is the non-woody herbaceous peony (Paeonia lactiflora), hardy in U.S. Department of Agriculture plant hardiness zones 3 through 8. It dies back in fall and renews its growth from underground tubers each spring. Tree peony (Paeonia suffruticosa), growing in USDA zones 4 through 8, forms a deciduous woody shrub that remains in the garden year-round.

Cutting Back Foliage
If you have herbaceous peonies, remove all the old stems in late fall after the first frost turns the foliage yellow. Before cutting the stems, dip clean, sharp pruner blades in rubbing alcohol to lessen the chance of spreading disease. Discard all the cut foliage to prevent a fungal disease called botrytis blight or gray mold, which affects peonies and can survive the winter months in composted old stems.
Providing Winter Protection
Protect peonies from the winter cold, especially in colder areas of their hardiness zones. In late fall, give herbaceous perennials a mulch layer 2 to 3 inches thick, using an organic material such as shredded bark or straw. You can wait until after the ground freezes to apply mulch. For tree peonies in colder areas, such as zones 4 and 5, wrap the bush with burlap in late fall to provide protection against winds as well as cold temperatures.
Pruning Shrubs
Although tree peonies usually don't need much pruning, older bushes may become leggy. To renew the growth, prune the oldest tree peony branches back to the base in fall after the leaves drop. Clean the pruners with rubbing alcohol before pruning. However, if your tree peony is grafted rather than growing on its own roots, it's best not to do renewal pruning. Instead, moderately cut back some of the lower branches to fill out the base of the bush.
Fertilizing Peonies
If you want to use an organic fertilizer such as aged compost or aged manure, in late fall add a 2-inch-thick layer of either material on top of the soil around established peony bushes. If you use inorganic fertilizers, wait until spring.

Moving Plants
If you need to relocate either herbaceous or tree peonies, fall is the best time. Carefully dig around and then under the roots, taking care not to damage the fleshy tubers. Lever the peony out of the ground, disturbing the root mass as little as possible. Transplant it in the new location, which should be in sun with well-draining, rich soil. Keep the plant at its original soil level, and water it well.
Dividing Plants
Large, established herbaceous peonies can be divided in the fall to renew growth or to make new plants, although clumps can grow in place for 40 or 50 years without division. To divide a plant, cut back the foliage, and then carefully dig up the peony and shake or wash the dirt away from the root system. Use a sharp knife cleaned with rubbing alcohol and cut the clump into divisions, each holding three to five eyes and several roots. Eyes are the buds on top of the crown that grow into new stems. Replant each piece in its new garden location, placing the buds 1 to 2 inches below the soil surface. Water the divisions thoroughly.

Cutting Back Foliage
If you have herbaceous peonies, remove all the old stems in late fall after the first frost turns the foliage yellow. Before cutting the stems, dip clean, sharp pruner blades in rubbing alcohol to lessen the chance of spreading disease. Discard all the cut foliage to prevent a fungal disease called botrytis blight or gray mold, which affects peonies and can survive the winter months in composted old stems.
Providing Winter Protection
Protect peonies from the winter cold, especially in colder areas of their hardiness zones. In late fall, give herbaceous perennials a mulch layer 2 to 3 inches thick, using an organic material such as shredded bark or straw. You can wait until after the ground freezes to apply mulch. For tree peonies in colder areas, such as zones 4 and 5, wrap the bush with burlap in late fall to provide protection against winds as well as cold temperatures.
Pruning Shrubs
Although tree peonies usually don't need much pruning, older bushes may become leggy. To renew the growth, prune the oldest tree peony branches back to the base in fall after the leaves drop. Clean the pruners with rubbing alcohol before pruning. However, if your tree peony is grafted rather than growing on its own roots, it's best not to do renewal pruning. Instead, moderately cut back some of the lower branches to fill out the base of the bush.
Fertilizing Peonies
If you want to use an organic fertilizer such as aged compost or aged manure, in late fall add a 2-inch-thick layer of either material on top of the soil around established peony bushes. If you use inorganic fertilizers, wait until spring.

Moving Plants
If you need to relocate either herbaceous or tree peonies, fall is the best time. Carefully dig around and then under the roots, taking care not to damage the fleshy tubers. Lever the peony out of the ground, disturbing the root mass as little as possible. Transplant it in the new location, which should be in sun with well-draining, rich soil. Keep the plant at its original soil level, and water it well.
Dividing Plants
Large, established herbaceous peonies can be divided in the fall to renew growth or to make new plants, although clumps can grow in place for 40 or 50 years without division. To divide a plant, cut back the foliage, and then carefully dig up the peony and shake or wash the dirt away from the root system. Use a sharp knife cleaned with rubbing alcohol and cut the clump into divisions, each holding three to five eyes and several roots. Eyes are the buds on top of the crown that grow into new stems. Replant each piece in its new garden location, placing the buds 1 to 2 inches below the soil surface. Water the divisions thoroughly.
0
0
文章
Miss Chen
2018年08月27日

Hostas (Hosta spp.) are usually prized for their foliage, but yellow and brown leaves are not the most desirable of rewards. Growing in U.S. Department of Agriculture plant hardiness zones 3 through 8, they thrive in rich, moist soil and can tolerate full shade. Healthy hostas glow in shades of blue, green, gold and cream. Unfortunately, that fabulous foliage will fade if hostas are cared for improperly or are damaged by pests or diseases.

The Root of the Problem
Anything that damages the roots of hostas can cause yellow and brown leaves. The damaged roots are unable to absorb nutrients and water, and as a result, the plant suffers or even dies, depending on the extent of the damage. Although hostas prefer moist, cool soils, heavy and wet soil in spring and winter can lead to root rot -- a fungal disease that rots away the roots. Well-drained soil is a must for these plants, and pots containing hostas should have a hole in the bottom to allow for good drainage. Burrowing animals, such as voles, can also damage the roots of the plants. Voles prefer to create their tunnels under lawns, mulch and areas with loose soil, so try planting your hostas among tree roots or near other underground barriers that will naturally block tunneling animals.
Let There Be Light
Many home gardeners use hostas to brighten up shady corners of their gardens, but hostas are brighter when they receive some sunlight. They key here is knowing how much is too much. Some hostas are much more tolerant of direct sunlight than others. Too much hot, direct sunlight can scorch the leaves of some varieties, causing them to turn yellow and brown. Choose varieties that can withstand the sun, such as "Sun Power" hybrids. In general, home gardeners in USDA zones 6 and above should avoid planting hostas in direct sunlight, according to the Missouri Botanical Gardens website. Making sure your hostas get enough water during hot, dry periods can also help.
Vexing Viruses
Hostas can sometimes suffer from something called "Virus X," which causes the leaves to develop dark spots, rings, browning or twisting of the leaves. Unfortunately, there is no cure for this disease. In addition, these symptoms often mimic those of spontaneous mutations, or sports, which some home gardeners find desirable. In general, however, it's best to remove plants that suffer from these symptoms, especially if they appear all over the plant. If they appear in just one section of the plant or on only a few leaves, you can just remove those leaves.

Frustrating Fungi
Fungi don't just affect the roots of hosta plants. They can also damage the stems and leaf petioles. In fact, petiole rot is a common and serious affliction of hostas. When this happens, the leaves are cut off from the main stem and are unable to receive nutrients. They turn yellow and brown, and pull away easily from the plant. Southern blight, which rots the stem, and anthracnose, which usually attacks the leaves themselves, are also fungal diseases that can cause hosta foliage to turn yellow and brown. Avoid these problems as best you can by watering at the ground level, rather than from overhead, and by watering early in the morning so that the sun can dry off the leaves. Overcrowded conditions can also contribute to fungal diseases, so make sure air can circulate around your hosta plants.

The Root of the Problem
Anything that damages the roots of hostas can cause yellow and brown leaves. The damaged roots are unable to absorb nutrients and water, and as a result, the plant suffers or even dies, depending on the extent of the damage. Although hostas prefer moist, cool soils, heavy and wet soil in spring and winter can lead to root rot -- a fungal disease that rots away the roots. Well-drained soil is a must for these plants, and pots containing hostas should have a hole in the bottom to allow for good drainage. Burrowing animals, such as voles, can also damage the roots of the plants. Voles prefer to create their tunnels under lawns, mulch and areas with loose soil, so try planting your hostas among tree roots or near other underground barriers that will naturally block tunneling animals.
Let There Be Light
Many home gardeners use hostas to brighten up shady corners of their gardens, but hostas are brighter when they receive some sunlight. They key here is knowing how much is too much. Some hostas are much more tolerant of direct sunlight than others. Too much hot, direct sunlight can scorch the leaves of some varieties, causing them to turn yellow and brown. Choose varieties that can withstand the sun, such as "Sun Power" hybrids. In general, home gardeners in USDA zones 6 and above should avoid planting hostas in direct sunlight, according to the Missouri Botanical Gardens website. Making sure your hostas get enough water during hot, dry periods can also help.
Vexing Viruses
Hostas can sometimes suffer from something called "Virus X," which causes the leaves to develop dark spots, rings, browning or twisting of the leaves. Unfortunately, there is no cure for this disease. In addition, these symptoms often mimic those of spontaneous mutations, or sports, which some home gardeners find desirable. In general, however, it's best to remove plants that suffer from these symptoms, especially if they appear all over the plant. If they appear in just one section of the plant or on only a few leaves, you can just remove those leaves.

Frustrating Fungi
Fungi don't just affect the roots of hosta plants. They can also damage the stems and leaf petioles. In fact, petiole rot is a common and serious affliction of hostas. When this happens, the leaves are cut off from the main stem and are unable to receive nutrients. They turn yellow and brown, and pull away easily from the plant. Southern blight, which rots the stem, and anthracnose, which usually attacks the leaves themselves, are also fungal diseases that can cause hosta foliage to turn yellow and brown. Avoid these problems as best you can by watering at the ground level, rather than from overhead, and by watering early in the morning so that the sun can dry off the leaves. Overcrowded conditions can also contribute to fungal diseases, so make sure air can circulate around your hosta plants.
0
0
文章
Miss Chen
2018年08月26日

When shopping for new plants, many gardeners keep an eye out for something pretty to grow in that shady area of the garden. Found in nature growing on the forest floor, horny goat weed (Epimedium spp) is worth considering, for its bronze and red-tipped foliage as well as its winter hardiness. Also known as bishop's hat and barrenwort, horny goat weed is a perennial flowering plant, hardy to U.S. Department of Agriculture zones 4 through 8.
Step 1
Add 2 inches of peat moss and 3 inches of compost to the planting soil and mix it into the top 10 inches. This will start your horny goat weed off right by giving it a rich soil in which to grow.
Step 2
Dig planting holes, 8 to 10 inches apart, that are the same depth and three times the width of the nursery pot in which the horny goat weed is growing. Gently remove the plants from the pots and place the roots in the hole. Backfill the hole with soil, pressing lightly around the base of the plants.
Step 3
Water the horny goat weed immediately after planting and keep the soil moist at all times. During hot, dry or windy weather, check the soil more frequently and water if needed.
Step 4
Apply 2 to 3 inches of compost to the top of the soil, completely surrounding the horny goat weed, in early spring.
Step 5
Cut off any winter-damaged foliage and stems in the spring. Don't be afraid to trim the entire plant back to the ground if needed, as it will grow right back.
0
0
文章
Miss Chen
2018年08月22日

When you think of gorgeous plants to nurture throughout the growing season, you probably picture flowering plants. Coleus (Solenostemon spp. or Plectranthus spp.), however, are instead grown for their striking foliage, which helps make a bold garden statement. They are tender perennials, typically grown as annuals outside their native Southeast Asia.

Coleus Hardiness
Coleus are in danger of cold damage once the temperature drops to 30 degrees Fahrenheit. Anything below 25 degrees will kill the plant. This means that they are hardy only in U.S. Department of Agriculture plant hardiness zones 10 through 13, though they may survive in sheltered locations protected from frost in USDA zone 9b. In colder zones, they are grown as annuals or as houseplants.
Preferred Conditions
Coleus can survive in sun or shade, but different cultivars have different preferences. Full sun bleaches color out of the leaves of shade-loving coleus, and full shade makes the colors on sun-tolerant cultivars more subdued. Cultivars that grow well in shade include "Black Magic," "'Fishnet Stockings" and "Sunset." Cultivars that prefer sunny conditions include "Alabama Sunset," "Pineapple" and "Solar Shadow."
Coleus will grow in a wide range of soil conditions, including clay, sand, loam and acidic soils. However, soils high in organic matter are best, and well-drained soil is essential. Coleus grown in soggy soils have stunted growth and the leaves will turn muddy, scorched-looking and fall off the plant. Coleus shouldn't be allowed to dry out completely, though. For the first seven to 10 days after planting, water to keep the soil around the root ball moist. After that, water deeply when the top 1 inch of soil dries out.
Planting Coleus
In USDA zones 10 through 13, coleus can be planted outdoors year-round. When growing coleus as an annual in zone 9 or below, plant outside in the spring after all danger of frost has passed. They can be started indoors from seed, planting eight to 10 weeks before the last frost date in your area. Coleus seeds germinate in soil temperatures 70 to 75 degrees Fahrenheit, and take seven to 14 days to sprout. The seeds need light to germinate, so don't cover them with potting mix. When you move the plants outdoors, space them 12 to 36 inches apart, depending on the cultivar's mature size; check plant tags before planting to make sure you're giving each plant enough room.
Ongoing Care
Keep coleus plants bushy and compact by pinching off the flowers as they develop. Coleus that are grown as perennials in warm climate zones have a tendency to become leggy, so be sure to pinch-back the tips of the plants when the branches start to get too long. Compact varieties like the "Wizard" series and the cultivar "Duckfoot" require little or no pinching to maintain an attractive bushy form.
Where they are hardy, coleus can live for years, but even with regular pinching and pruning they may become unattractive and leggy after a few years. You can replace unattractive plants by taking stem cuttings. Cut a section of young stem at least 2 inches long at any time of the year, and peel off the lowest leaves. Stick the cutting in water, and pot it when it starts to grow roots.

Coleus in Containers
Coleus grown in containers can be placed indoors or out. In zones where coleus are not hardy, you can set them outside after the last spring frost and move them indoors before the first autumn frost to keep the plants alive. Like coleus grown in the ground, container coleus require well-drained soil. Since containers dry out more quickly than garden beds, coleus in containers require more frequent watering. When grown as a houseplant, place coleus in a warm location with bright light.
Fertilizer Tips
Coleus have low fertilizer requirements. For in-ground plants, fertilize every four weeks starting in early summer to encourage mid-summer growth. Three fertilizer applications will be enough for plants grown as annuals, but perennials can be fertilized into early fall when the temperatures start to cool. Use a liquid fertilizer at half the usual strength. For example, mix a concentrated liquid fertilizer with an N-P-K ratio of 12-4-8 at a ratio of 1 teaspoon fertilizer per 1 gallon of water. This will cover 20 square feet of garden space.
When fertilizing container plants, use the same concentrated liquid fertilizer as for in-ground coleus. Mix 1/2 teaspoon with 1 gallon of water and apply it to the potting soil in place of a regular watering every two weeks during the growing season.

Coleus Hardiness
Coleus are in danger of cold damage once the temperature drops to 30 degrees Fahrenheit. Anything below 25 degrees will kill the plant. This means that they are hardy only in U.S. Department of Agriculture plant hardiness zones 10 through 13, though they may survive in sheltered locations protected from frost in USDA zone 9b. In colder zones, they are grown as annuals or as houseplants.
Preferred Conditions
Coleus can survive in sun or shade, but different cultivars have different preferences. Full sun bleaches color out of the leaves of shade-loving coleus, and full shade makes the colors on sun-tolerant cultivars more subdued. Cultivars that grow well in shade include "Black Magic," "'Fishnet Stockings" and "Sunset." Cultivars that prefer sunny conditions include "Alabama Sunset," "Pineapple" and "Solar Shadow."
Coleus will grow in a wide range of soil conditions, including clay, sand, loam and acidic soils. However, soils high in organic matter are best, and well-drained soil is essential. Coleus grown in soggy soils have stunted growth and the leaves will turn muddy, scorched-looking and fall off the plant. Coleus shouldn't be allowed to dry out completely, though. For the first seven to 10 days after planting, water to keep the soil around the root ball moist. After that, water deeply when the top 1 inch of soil dries out.
Planting Coleus
In USDA zones 10 through 13, coleus can be planted outdoors year-round. When growing coleus as an annual in zone 9 or below, plant outside in the spring after all danger of frost has passed. They can be started indoors from seed, planting eight to 10 weeks before the last frost date in your area. Coleus seeds germinate in soil temperatures 70 to 75 degrees Fahrenheit, and take seven to 14 days to sprout. The seeds need light to germinate, so don't cover them with potting mix. When you move the plants outdoors, space them 12 to 36 inches apart, depending on the cultivar's mature size; check plant tags before planting to make sure you're giving each plant enough room.
Ongoing Care
Keep coleus plants bushy and compact by pinching off the flowers as they develop. Coleus that are grown as perennials in warm climate zones have a tendency to become leggy, so be sure to pinch-back the tips of the plants when the branches start to get too long. Compact varieties like the "Wizard" series and the cultivar "Duckfoot" require little or no pinching to maintain an attractive bushy form.
Where they are hardy, coleus can live for years, but even with regular pinching and pruning they may become unattractive and leggy after a few years. You can replace unattractive plants by taking stem cuttings. Cut a section of young stem at least 2 inches long at any time of the year, and peel off the lowest leaves. Stick the cutting in water, and pot it when it starts to grow roots.

Coleus in Containers
Coleus grown in containers can be placed indoors or out. In zones where coleus are not hardy, you can set them outside after the last spring frost and move them indoors before the first autumn frost to keep the plants alive. Like coleus grown in the ground, container coleus require well-drained soil. Since containers dry out more quickly than garden beds, coleus in containers require more frequent watering. When grown as a houseplant, place coleus in a warm location with bright light.
Fertilizer Tips
Coleus have low fertilizer requirements. For in-ground plants, fertilize every four weeks starting in early summer to encourage mid-summer growth. Three fertilizer applications will be enough for plants grown as annuals, but perennials can be fertilized into early fall when the temperatures start to cool. Use a liquid fertilizer at half the usual strength. For example, mix a concentrated liquid fertilizer with an N-P-K ratio of 12-4-8 at a ratio of 1 teaspoon fertilizer per 1 gallon of water. This will cover 20 square feet of garden space.
When fertilizing container plants, use the same concentrated liquid fertilizer as for in-ground coleus. Mix 1/2 teaspoon with 1 gallon of water and apply it to the potting soil in place of a regular watering every two weeks during the growing season.
0
0
文章
Miss Chen
2018年08月15日

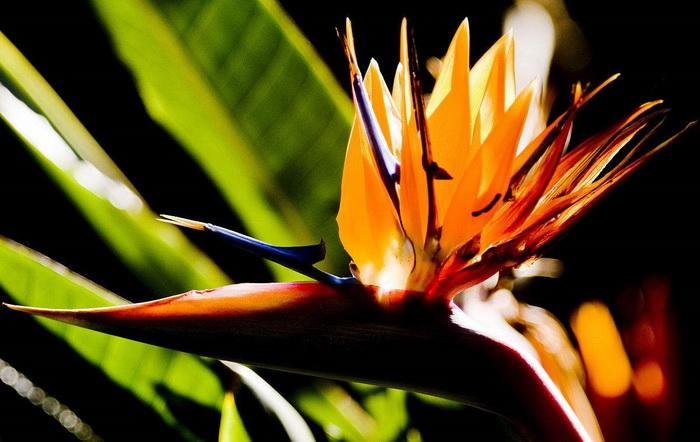
No matter where you live, you can quickly bring a taste of the tropics to your indoor or outdoor garden by growing bird of paradise. Known botanically as Strelitzia reginae, this colorful, eye-catching plant lights up any garden.
Bird of Paradise Features
Showy bird of paradise flowers consist of orange, blue and white, which form to resemble an exotic bird's beak. There's also a variety that has all white flowers. Each bird of paradise flower can last up to two weeks on or off the plant. The plant's foliage is also dramatic. The large, green, textural leaves make a statement even when the plant isn't blooming.
Bird of Paradise History
Native to South Africa, bird of paradise is widely cultivated throughout South America today. The plant got its botanical name when it was introduced to England in 1773 by Sir Joseph Banks, who ran Kew Gardens at the time. He named the plant Strelitzia after Queen Charlotte, wife of George III. She lived at Kew Gardens for several years.
Where to Grow Bird of Paradise
Bird of paradise makes an excellent accent in the landscape. Use the plant around pools and spas to add a tropical feel or put bird of paradise in a pot and display it as a focal point. When grown in containers, bird of paradise can be displayed on patios, balconies and decks.
Bird of paradise requires full sun outdoors to thrive. The plant is frost sensitive, so it can only be grown outdoors year-round in frost-free climates, such as zones 9 through 12. If you wish to grow bird of paradise outdoors in other zones, do so in the spring and summer when night temperatures are 60 degrees and above. Grow the plant in a container and bring it indoors when nighttime temperatures drop in fall.
Bird of Paradise Grown as a Houseplant
Bird of paradise does well when grown indoors as a houseplant, as such a warm environment is ideal. The plant requires a bright, sunny location, such as in front of an eastern or southern window. Bird of paradise also does well when grown under full-spectrum lighting.
Bird of Paradise Care and Maintenance
With consistent care, bird of paradise can thrive. Though the plant is drought tolerant once established, it grows best when you keep the soil moist but not soggy. This will generally require that you water the plant once a week when grown in the ground. Container-grown plants will require more frequent watering, especially when temperatures are high.

Fertilize bird of paradise once in spring and again in summer with an all-purpose fertilizer designed for flowering plants. Always follow the package directions on the fertilizer, as too much can burn plant roots and damage the plant.
Bird of paradise is a self-cleaning plant that tends to shed its own leaves when necessary. That means it rarely needs pruning. When you do prune, remove dead foliage and spent flower stalks.

Bird of Paradise Features
Showy bird of paradise flowers consist of orange, blue and white, which form to resemble an exotic bird's beak. There's also a variety that has all white flowers. Each bird of paradise flower can last up to two weeks on or off the plant. The plant's foliage is also dramatic. The large, green, textural leaves make a statement even when the plant isn't blooming.
Bird of Paradise History
Native to South Africa, bird of paradise is widely cultivated throughout South America today. The plant got its botanical name when it was introduced to England in 1773 by Sir Joseph Banks, who ran Kew Gardens at the time. He named the plant Strelitzia after Queen Charlotte, wife of George III. She lived at Kew Gardens for several years.
Where to Grow Bird of Paradise
Bird of paradise makes an excellent accent in the landscape. Use the plant around pools and spas to add a tropical feel or put bird of paradise in a pot and display it as a focal point. When grown in containers, bird of paradise can be displayed on patios, balconies and decks.
Bird of paradise requires full sun outdoors to thrive. The plant is frost sensitive, so it can only be grown outdoors year-round in frost-free climates, such as zones 9 through 12. If you wish to grow bird of paradise outdoors in other zones, do so in the spring and summer when night temperatures are 60 degrees and above. Grow the plant in a container and bring it indoors when nighttime temperatures drop in fall.
Bird of Paradise Grown as a Houseplant
Bird of paradise does well when grown indoors as a houseplant, as such a warm environment is ideal. The plant requires a bright, sunny location, such as in front of an eastern or southern window. Bird of paradise also does well when grown under full-spectrum lighting.
Bird of Paradise Care and Maintenance
With consistent care, bird of paradise can thrive. Though the plant is drought tolerant once established, it grows best when you keep the soil moist but not soggy. This will generally require that you water the plant once a week when grown in the ground. Container-grown plants will require more frequent watering, especially when temperatures are high.

Fertilize bird of paradise once in spring and again in summer with an all-purpose fertilizer designed for flowering plants. Always follow the package directions on the fertilizer, as too much can burn plant roots and damage the plant.
Bird of paradise is a self-cleaning plant that tends to shed its own leaves when necessary. That means it rarely needs pruning. When you do prune, remove dead foliage and spent flower stalks.
0
0
成长记
kensong
2018年08月14日

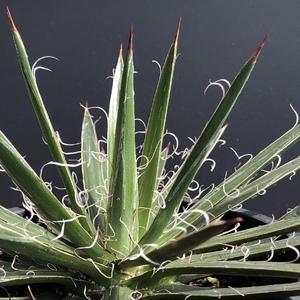
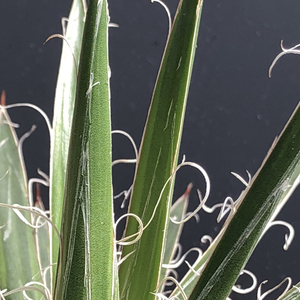
The Agave Schidigera is a stunning succulent with a single rosette of slender spiky leaves that is dark green with conspicuous white swirly hairs on the leaf margins. Slow growing and not a difficult one to care for.


0
0
文章
Miss Chen
2018年08月13日

Amstel Series begonias (Begonia x Hiemalis Amstel Series) have a mounding form, typically reaching about 12 inches tall. They usually bloom continuously throughout the growing season. The members of this series belong to the group called Rieger begonias, which were developed by crossing a tuberous begonia with a wax begonia.

Amstel begonias grow as perennials outdoors only in the frost-free climates in U.S. Department of Agriculture plant hardiness zones 10 through 11, but you can treat them as annuals or grow them as houseplants elsewhere.
Where to Plant
Amstel begonias are relatively tolerant of heat and can grow in a variety of light conditions, but do best in a spot that receives sunlight filtered through leaves or that is otherwise partially shaded.
Watering
Amstel begonias need consistent moisture, but won't tolerate soggy, saturated soils. Monitor the soil's moisture level carefully, and water so the soil doesn't dry out completely but is never waterlogged. If you're growing your begonias in pots or containers, make sure the containers have drainage holes and are never left sitting in standing water.
Fertilizer
Amstel begonias benefit from a monthly application of fertilizer to help them to continue to bloom prolifically through the season. Mix 1/2 teaspoon of water-soluble 15-30-15 fertilizer in 1 gallon of water, and use the solution to water the plant. Apply it at the base of the plant, and avoid getting the fertilizer on the plant's leaves and stems.
Pruning
Over the course of the season, Amstel begonias may get leggy or have a ragged in appearance. If this happens, prune or pinch the stems back so that they contain three to five growth nodes. The plants will rebound from this severe pruning and should start to bloom again in a week or two.
Removing wilted flowers promptly will encourage the plant to put its energy into new flowers and will help ensure it keeps blooming vigorously.
If you use pruners to maintain the plant, dip the blades in isopropyl alcohol after each cut to help prevent the spread of diseases.

Pests and Diseases
Amstel begonias are resistant to most pests and diseases and should be problem-free given good growing conditions. To prevent fungal infections, such as powdery mildew, avoid getting the leaves wet when you're watering and space the plants 12 to 15 inches apart so that there is plenty air circulation around the plants.

Amstel begonias grow as perennials outdoors only in the frost-free climates in U.S. Department of Agriculture plant hardiness zones 10 through 11, but you can treat them as annuals or grow them as houseplants elsewhere.
Where to Plant
Amstel begonias are relatively tolerant of heat and can grow in a variety of light conditions, but do best in a spot that receives sunlight filtered through leaves or that is otherwise partially shaded.
Watering
Amstel begonias need consistent moisture, but won't tolerate soggy, saturated soils. Monitor the soil's moisture level carefully, and water so the soil doesn't dry out completely but is never waterlogged. If you're growing your begonias in pots or containers, make sure the containers have drainage holes and are never left sitting in standing water.
Fertilizer
Amstel begonias benefit from a monthly application of fertilizer to help them to continue to bloom prolifically through the season. Mix 1/2 teaspoon of water-soluble 15-30-15 fertilizer in 1 gallon of water, and use the solution to water the plant. Apply it at the base of the plant, and avoid getting the fertilizer on the plant's leaves and stems.
Pruning
Over the course of the season, Amstel begonias may get leggy or have a ragged in appearance. If this happens, prune or pinch the stems back so that they contain three to five growth nodes. The plants will rebound from this severe pruning and should start to bloom again in a week or two.
Removing wilted flowers promptly will encourage the plant to put its energy into new flowers and will help ensure it keeps blooming vigorously.
If you use pruners to maintain the plant, dip the blades in isopropyl alcohol after each cut to help prevent the spread of diseases.

Pests and Diseases
Amstel begonias are resistant to most pests and diseases and should be problem-free given good growing conditions. To prevent fungal infections, such as powdery mildew, avoid getting the leaves wet when you're watering and space the plants 12 to 15 inches apart so that there is plenty air circulation around the plants.
0
0
文章
Miss Chen
2018年08月12日

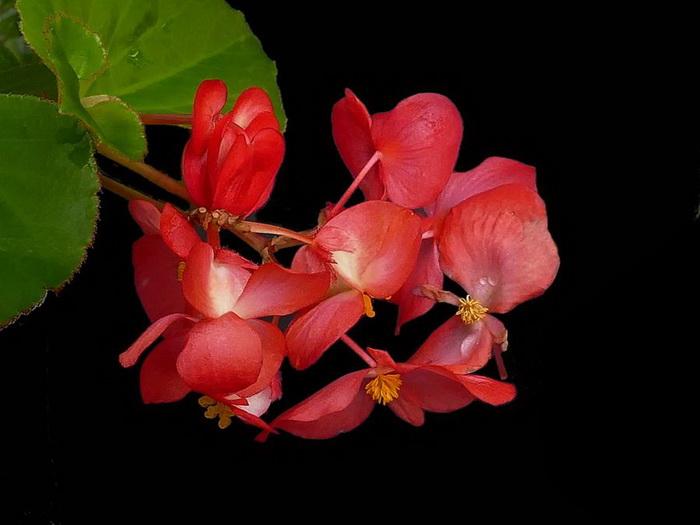
Few plants are more versatile than the begonia (Begonia spp.), which comes in many different types. One group is especially well-adapted to growing in a hanging planter or basket, either outdoors or in the house. This type of begonia is called trailing or scadent -- scadent means "climbing" -- because its branches can become quite long, in some varieties up to 8 feet, making them ideal for hanging planters. For example, some types of tuberous begonias (Begonia tuberosa) have this type of growth habit and do especially well as hanging plants. They grow in U.S. Department of Agriculture plant hardiness zones 9 through 11, but can also grow as annuals or as houseplants, needing only basic care and occasional trimming to thrive.
Light Needs
Trailing begonias need strong light to produce a full, multi-stemmed plant with lots of flowers. If you grow the plant outdoors, keep it in a spot that gets some filtered sun in the morning, but avoid full sun at midday or during the hot afternoon hours because this could burn the plant. A spot under a widely-branched tree that provides shifting sun and partial shade is ideal. Indoors, keep a houseplant in a bright spot, such as in an east window where it gets some morning sun.
If the leaves start to fade and become light green, this indicates that the begonia is getting too much light, so move the plant to a shadier spot. If the stems get extra-long, with long distances between leaf origins, this signals that the plant needs more light; in this case, move it to a brighter spot.
Water Needs
Hanging begonia plants do best when soil is evenly moist, but it's important not to over-water because this can cause constantly soggy soil which can damage the plant and, if uncorrected, might kill it. For an indoor-grown plant, water whenever the top inch or two feels dry to the touch, allowing the pot to drain fully. Never keep the pot in a water-filled saucer, because this can cause root rot.
A hanging begonia grown outdoors needs watering whenever its soil surface feels dry. It's a good idea to check this every few days during the summer, because hot weather can cause the soil to dry quickly.
Whether grown indoors or in the garden, a begonia slows its growth during winter when it rests, so cut back watering during the winter months.

Fertilizing Guidelines
Fertilizing a hanging begonia every other time you give it water helps keep the plant growing and flowering during it active season, usually from spring until early fall. Use a balanced formula such as 20-20-20, diluting it half-strength or about 1/4 teaspoon per gallon of water, but check your product label for further directions.
To boost flowering, you can switch to a high-phosphorus formula just before flowering starts, usually in early summer, to help set more flower buds. For example, use a 15-30-15 formula, diluting 1 tablespoon per gallon of water for garden plants and 1/2 teaspoon per gallon for houseplants, but check the product label for additional information. Feed the plant every one or two weeks until the blooming season ends, usually in fall.
Withhold fertilizer during winter to give the plant a rest.
Trimming and Other Care
Trailing begonias in hanging planters can start appearing leggy as the season progresses and the stems get longer. Encourage bushier growth and lateral branching by pinching back the growing tips frequently, using your fingertips or shears that you wipe with rubbing alcohol between cuts to prevent spreading plant diseases. By varying the length of stems through trimming, you can also produce a more shapely plant. For an older plant, remove some old stems now and then to encourage new growth from the plant's base.
Begonias are usually free of significant disease problems, but they can attract several pests, including fluffy white mealybugs. Control these by touching each pest with a cotton swab dipped in rubbing alcohol to destroy it. The plant might also attract spider mites, which form visible, web-like coverings on leaves and flowers. Destroy these pests by spraying the plant thoroughly with insecticidal soap, diluted at a rate of 5 tablespoons per gallon of water; repeat this every two weeks as needed.
Frost Protection
If you grow a hanging begonia outdoors year round and you expect unusual cold or even a bit of frost, bring the plant indoors until weather warms. You can also leave it outdoors, but protect it by hanging a light cloth from the planter's hook so it covers the entire plant, or by placing the planter in a plastic bag that's large enough to enclose the entire plant, tying the bag's open ends to the planter's hook. Be careful when removing any covering, so that you don't injure stems or flower buds.

Light Needs
Trailing begonias need strong light to produce a full, multi-stemmed plant with lots of flowers. If you grow the plant outdoors, keep it in a spot that gets some filtered sun in the morning, but avoid full sun at midday or during the hot afternoon hours because this could burn the plant. A spot under a widely-branched tree that provides shifting sun and partial shade is ideal. Indoors, keep a houseplant in a bright spot, such as in an east window where it gets some morning sun.
If the leaves start to fade and become light green, this indicates that the begonia is getting too much light, so move the plant to a shadier spot. If the stems get extra-long, with long distances between leaf origins, this signals that the plant needs more light; in this case, move it to a brighter spot.
Water Needs
Hanging begonia plants do best when soil is evenly moist, but it's important not to over-water because this can cause constantly soggy soil which can damage the plant and, if uncorrected, might kill it. For an indoor-grown plant, water whenever the top inch or two feels dry to the touch, allowing the pot to drain fully. Never keep the pot in a water-filled saucer, because this can cause root rot.
A hanging begonia grown outdoors needs watering whenever its soil surface feels dry. It's a good idea to check this every few days during the summer, because hot weather can cause the soil to dry quickly.
Whether grown indoors or in the garden, a begonia slows its growth during winter when it rests, so cut back watering during the winter months.

Fertilizing Guidelines
Fertilizing a hanging begonia every other time you give it water helps keep the plant growing and flowering during it active season, usually from spring until early fall. Use a balanced formula such as 20-20-20, diluting it half-strength or about 1/4 teaspoon per gallon of water, but check your product label for further directions.
To boost flowering, you can switch to a high-phosphorus formula just before flowering starts, usually in early summer, to help set more flower buds. For example, use a 15-30-15 formula, diluting 1 tablespoon per gallon of water for garden plants and 1/2 teaspoon per gallon for houseplants, but check the product label for additional information. Feed the plant every one or two weeks until the blooming season ends, usually in fall.
Withhold fertilizer during winter to give the plant a rest.
Trimming and Other Care
Trailing begonias in hanging planters can start appearing leggy as the season progresses and the stems get longer. Encourage bushier growth and lateral branching by pinching back the growing tips frequently, using your fingertips or shears that you wipe with rubbing alcohol between cuts to prevent spreading plant diseases. By varying the length of stems through trimming, you can also produce a more shapely plant. For an older plant, remove some old stems now and then to encourage new growth from the plant's base.
Begonias are usually free of significant disease problems, but they can attract several pests, including fluffy white mealybugs. Control these by touching each pest with a cotton swab dipped in rubbing alcohol to destroy it. The plant might also attract spider mites, which form visible, web-like coverings on leaves and flowers. Destroy these pests by spraying the plant thoroughly with insecticidal soap, diluted at a rate of 5 tablespoons per gallon of water; repeat this every two weeks as needed.
Frost Protection
If you grow a hanging begonia outdoors year round and you expect unusual cold or even a bit of frost, bring the plant indoors until weather warms. You can also leave it outdoors, but protect it by hanging a light cloth from the planter's hook so it covers the entire plant, or by placing the planter in a plastic bag that's large enough to enclose the entire plant, tying the bag's open ends to the planter's hook. Be careful when removing any covering, so that you don't injure stems or flower buds.
0
0
成长记
2B_BotanicalFie
2018年08月11日
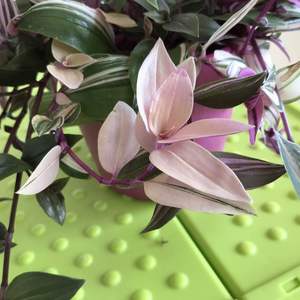
Growing big!



2
0
2B_BotanicalFie:@Plantlin Yep! Goed hè! Van die grote plant.
Plantlin:Wow are these the cuttings??


