文章
Miss Chen
2018年07月18日

Vegetable gardening in Tennessee can be broken down into two planting and growing seasons with warm-season vegetables and cool-season vegetables. Warm-season vegetables are planted in the spring after any danger of frost and before July, and cool-season vegetables are planted in the fall to benefit from the winter chill; many cool-season vegetables can also be planted in early spring.

Fall Planting of Cool-Season Vegetables
Cool-season vegetables are planted in the summer and fall between July 1st and September 30th for fall and winter harvest. This allows them to take advantage of the cool fall and winter temperatures to germinate and grow properly. Cool-season vegetables are relatively shallow rooted and sensitive to drought, so careful monitoring of water is critical. Examples of cool-season vegetables that work for planting in this time frame in Tennessee are broccoli, cabbage, Chinese cabbage, cauliflower, collards, pickling cucumbers, slicing cucumbers, kale, kohlrabi, lettuce, mustard greens, Irish potatoes, icicle radishes and spinach.
Spring Planting of Warm-Season Vegetables
Warm-season vegetables grow in warm soil and ambient air temperatures which allow them to germinate and develop properly. They are planted between the first week of April and the end of July. Warn-season vegetables and their seeds will be damaged by any exposure to frost or temperatures within 15 degrees of freezing. Unlike winter-season vegetables, they have long, deep roots that make them drought resistant even in the heat of summer, though still requiring watering to grow. For spring planting, consider bush beans, snap beans, pole beans, runner beans, lima beans, cantaloupe, sweet corn, pickling cucumber, slicing cucumber, eggplant, okra, peas, sweet peppers and tomatoes.

Spring Planting of Cool-Season Vegetables
You can also plant cool-season vegetables in the spring in Tennessee between early February and the end of March. Cool-season vegetables that can be grown as spring crops include beets, broccoli, savoy cabbage, round green cabbage, cauliflower, carrots, collards, kale, kohlrabi, butter crunch lettuce, iceberg lettuce, mustard greens, bunch onions, sweet storing onions, English peas, sugar snap peas, Irish and Yukon gold potatoes, white icicle radishes, spinach, Swiss chard, rhubarb and turnips.

Fall Planting of Cool-Season Vegetables
Cool-season vegetables are planted in the summer and fall between July 1st and September 30th for fall and winter harvest. This allows them to take advantage of the cool fall and winter temperatures to germinate and grow properly. Cool-season vegetables are relatively shallow rooted and sensitive to drought, so careful monitoring of water is critical. Examples of cool-season vegetables that work for planting in this time frame in Tennessee are broccoli, cabbage, Chinese cabbage, cauliflower, collards, pickling cucumbers, slicing cucumbers, kale, kohlrabi, lettuce, mustard greens, Irish potatoes, icicle radishes and spinach.
Spring Planting of Warm-Season Vegetables
Warm-season vegetables grow in warm soil and ambient air temperatures which allow them to germinate and develop properly. They are planted between the first week of April and the end of July. Warn-season vegetables and their seeds will be damaged by any exposure to frost or temperatures within 15 degrees of freezing. Unlike winter-season vegetables, they have long, deep roots that make them drought resistant even in the heat of summer, though still requiring watering to grow. For spring planting, consider bush beans, snap beans, pole beans, runner beans, lima beans, cantaloupe, sweet corn, pickling cucumber, slicing cucumber, eggplant, okra, peas, sweet peppers and tomatoes.

Spring Planting of Cool-Season Vegetables
You can also plant cool-season vegetables in the spring in Tennessee between early February and the end of March. Cool-season vegetables that can be grown as spring crops include beets, broccoli, savoy cabbage, round green cabbage, cauliflower, carrots, collards, kale, kohlrabi, butter crunch lettuce, iceberg lettuce, mustard greens, bunch onions, sweet storing onions, English peas, sugar snap peas, Irish and Yukon gold potatoes, white icicle radishes, spinach, Swiss chard, rhubarb and turnips.
0
0
文章
Miss Chen
2018年07月18日

Vegetables grow at different rates depending on the type they are. Some will be ready to harvest within a month, while others will take more than a year to grow. The time spent growing your own vegetables is well worth it. Fresh, home-grown vegetables taste best and often are more nutritious than vegetables that have been shipped across the country and stored on a grocer's shelf.
Whether you have a large garden, a small patch of ground in your back yard, or just a container on your patio, it's possible to grow your own vegetables. If you live in an area with a very short growing season, you may not be able to grow certain types of vegetables unless you have a greenhouse.
Radishes
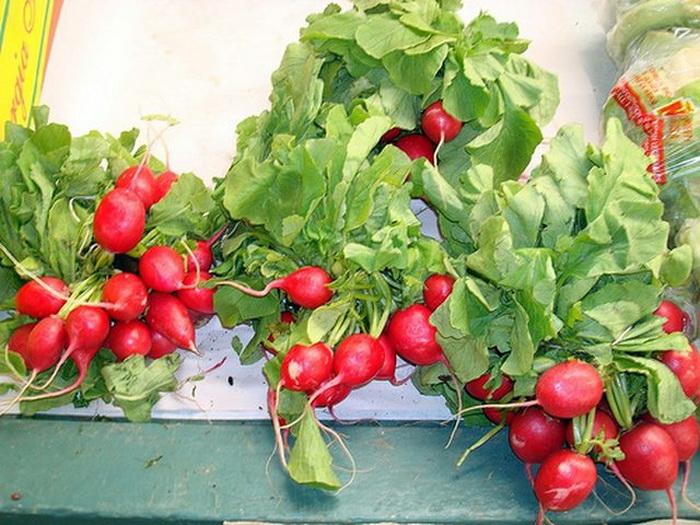
by Svadilfari, Radishes grow quickly.
Radishes are grown from seed and are one of the easiest and fastest vegetables to grow. You can start them indoors in February or March and then put them in the garden when all danger of frost has passed. They will be ready to pick in about 30 days. You can even get a second harvest if you start your second set of seeds indoors in March and place them in the garden after you harvest the first bunch.
Beans

by wanko, Green Beans ready for harvest
There are many types of beans, but they basically all take approximately the same time to grow. Pole bean seeds can be planted directly in the garden around a pole or trellis in May in the northern gardening zones, and they will be ready to harvest in about 60 to 70 days. Bush beans should be planted in April or May and take the same 60 to 70 days. In warmer climates where you can plant a month earlier, offset a few rows by a few days so all your beans don't come in at once. Once beans are harvested, the soil can be used for a fall crop. Beans are not cold-hardy and will not tolerate a frost. Other crops that grow in this time frame are onions and peas.
Corn

by La Grande Farmers' Market, Fresh corn on the cob
Corn needs a lot of space and may not be suitable for all gardens. It should be planted in blocks of rows to ensure good pollination. There are many varieties of corn and it will take between two to a little over three months to harvest, depending on the variety. Lettuce, spinach and some varieties of potatoes also take about two to three months to grow to maturity.
Potatoes

by Dr. Hemmert, Freshly harvested potatoes
Potatoes are very easy vegetables to grow and you can grow them from the potatoes in your kitchen. There are many varieties, and each will be ready to harvest at different times. The main tip to follow when growing potatoes is not to allow the tuber to receive direct sunlight. The sun will cause it to turn green and you will have to throw it out because it will be poisonous. Early varieties will take as little as 70 days, while the mid and late varieties can take from 90 to 150 days before they are ready to dig. Check to see if they are ready by digging down to see how large the potato is without disturbing the roots. If it feels large enough, dig out only the number of potatoes that you need and allow the rest to grow until the entire plant dies down. Then harvest them all. Squash and tomatoes take about the same time to grow.
Cabbage

by net_efekt, Coleslaw anyone?
Cabbage, broccoli, peppers and eggplant take four to five months to grow to maturity. Cabbage and peppers, however, should be planted indoors a month or two before transplanting to the garden. Begin the seeds in February or March and place in the garden in May. Other vegetables that grow in this time frame are pumpkins and watermelons.
Asparagus
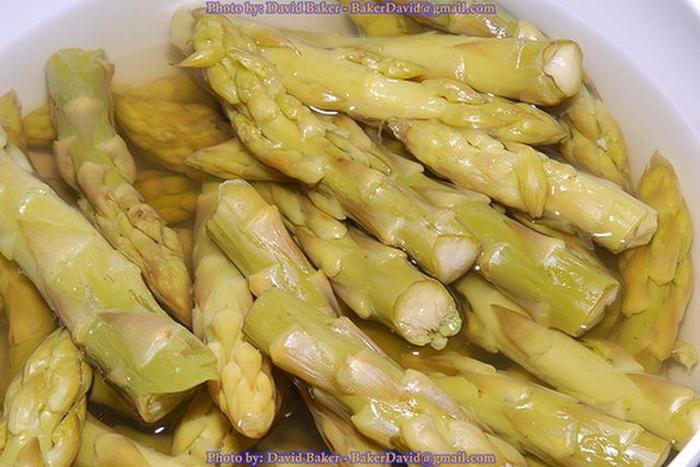
by rust.bucket, Asparagas is easy to grow.
Plant asparagus as soon as you can work the soil. You can grow asparagus by planting seed or roots, but roots will grow faster. You should not harvest the asparagus until the second or even third spring after planting to allow the plant to get well established. Mulching in the late fall will protect the plant roots from frost heave and they will return without being replanted. Use compost when planting. As the plant grows, it will spread with new plants, so give it lots of room.
Whether you have a large garden, a small patch of ground in your back yard, or just a container on your patio, it's possible to grow your own vegetables. If you live in an area with a very short growing season, you may not be able to grow certain types of vegetables unless you have a greenhouse.
Radishes

by Svadilfari, Radishes grow quickly.
Radishes are grown from seed and are one of the easiest and fastest vegetables to grow. You can start them indoors in February or March and then put them in the garden when all danger of frost has passed. They will be ready to pick in about 30 days. You can even get a second harvest if you start your second set of seeds indoors in March and place them in the garden after you harvest the first bunch.
Beans

by wanko, Green Beans ready for harvest
There are many types of beans, but they basically all take approximately the same time to grow. Pole bean seeds can be planted directly in the garden around a pole or trellis in May in the northern gardening zones, and they will be ready to harvest in about 60 to 70 days. Bush beans should be planted in April or May and take the same 60 to 70 days. In warmer climates where you can plant a month earlier, offset a few rows by a few days so all your beans don't come in at once. Once beans are harvested, the soil can be used for a fall crop. Beans are not cold-hardy and will not tolerate a frost. Other crops that grow in this time frame are onions and peas.
Corn

by La Grande Farmers' Market, Fresh corn on the cob
Corn needs a lot of space and may not be suitable for all gardens. It should be planted in blocks of rows to ensure good pollination. There are many varieties of corn and it will take between two to a little over three months to harvest, depending on the variety. Lettuce, spinach and some varieties of potatoes also take about two to three months to grow to maturity.
Potatoes

by Dr. Hemmert, Freshly harvested potatoes
Potatoes are very easy vegetables to grow and you can grow them from the potatoes in your kitchen. There are many varieties, and each will be ready to harvest at different times. The main tip to follow when growing potatoes is not to allow the tuber to receive direct sunlight. The sun will cause it to turn green and you will have to throw it out because it will be poisonous. Early varieties will take as little as 70 days, while the mid and late varieties can take from 90 to 150 days before they are ready to dig. Check to see if they are ready by digging down to see how large the potato is without disturbing the roots. If it feels large enough, dig out only the number of potatoes that you need and allow the rest to grow until the entire plant dies down. Then harvest them all. Squash and tomatoes take about the same time to grow.
Cabbage

by net_efekt, Coleslaw anyone?
Cabbage, broccoli, peppers and eggplant take four to five months to grow to maturity. Cabbage and peppers, however, should be planted indoors a month or two before transplanting to the garden. Begin the seeds in February or March and place in the garden in May. Other vegetables that grow in this time frame are pumpkins and watermelons.
Asparagus

by rust.bucket, Asparagas is easy to grow.
Plant asparagus as soon as you can work the soil. You can grow asparagus by planting seed or roots, but roots will grow faster. You should not harvest the asparagus until the second or even third spring after planting to allow the plant to get well established. Mulching in the late fall will protect the plant roots from frost heave and they will return without being replanted. Use compost when planting. As the plant grows, it will spread with new plants, so give it lots of room.
0
0
文章
Miss Chen
2018年07月17日

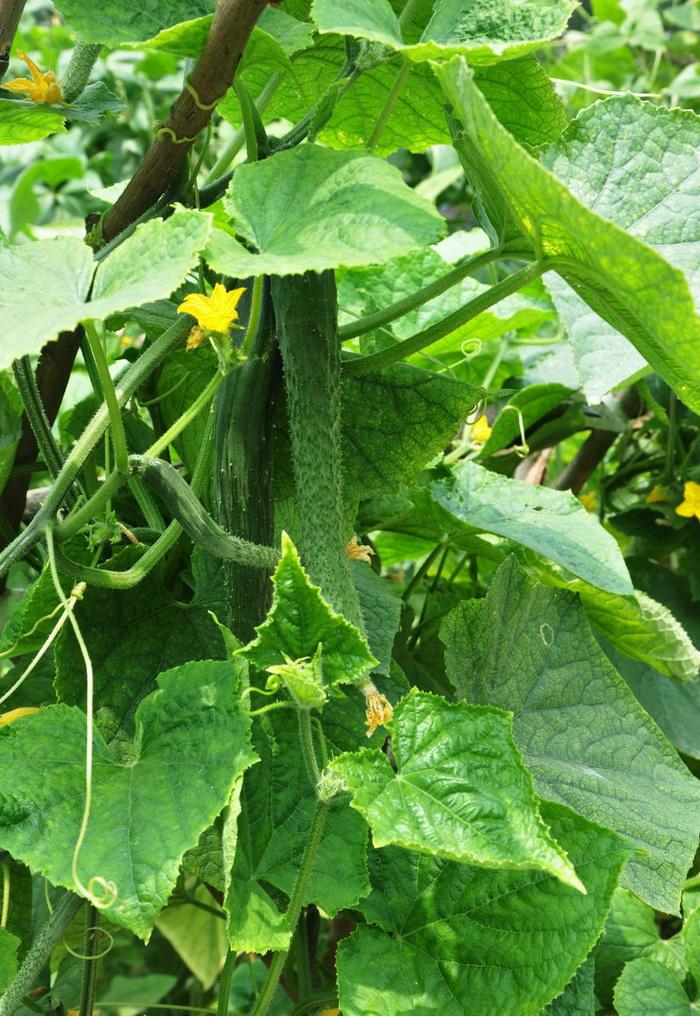
Fresh-picked cucumbers from your garden are not only healthier for you, but they taste better too. Growing cucumbers is an easy project whether it's for slicing in your salad or for pickling. There are two types of cucumbers you can grow, bush or vine. The vine type is the cucumber that will grow on the trellis, and they grow straighter and are cleaner than cucumbers that grow on the ground. Growing your cucumbers from seed will take from a month to two months depending on the size cucumber or pickle you want.
Step 1
Prepare the soil for the cucumber seeds. Place the cucumbers to the north end of the garden to avoid shading your other plants. Cultivate the soil to remove all weeds, and amend the soil for the seeds by adding compost to it and mixing it throughout. Mound the soil to two inches high and a foot apart for each plant. Do not plant the seeds until the soil temperature has reached 70 degrees.
Step 2
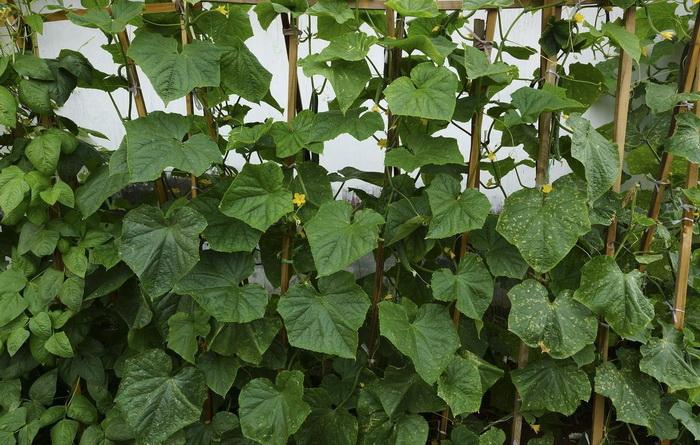
Set up the trellis to the north of the mounds. Use a side of your fence if your garden is fenced in. Other types of trellises can be used too, such as vegetable cages, A-frames or fashion your own out of bamboo poles and chicken wire. Make sure the poles are pushed well into the ground because the plants will pull on it and become heavy.
Step 3
Plant the seeds in the mounds. You can plant 3 or 4 seeds per mound, and weed out the weaker of the plants when they start to sprout, leaving only one plant per mound.
Step 4
Place the cucumber's tendrils on the trellis when they first start to show. Helping the cucumber onto the trellis is important as it will attach to anything including other plants. Once it is attached to the trellis it will continue to climb without any more help.
Step 5
Keep the soil moist as the cucumbers are growing. Try to water the ground, and keep the foliage as dry as possible to avoid moisture diseases. Fertilize with a liquid vegetable fertilizer attached to your garden hose every two weeks.
Step 6
Harvest the cucumbers when they are the size you desire. Do not let them get too large, or they will be bitter and very seedy. Cut the cucumbers from the vine; do not pull them or you will damage the vine.

Step 1
Prepare the soil for the cucumber seeds. Place the cucumbers to the north end of the garden to avoid shading your other plants. Cultivate the soil to remove all weeds, and amend the soil for the seeds by adding compost to it and mixing it throughout. Mound the soil to two inches high and a foot apart for each plant. Do not plant the seeds until the soil temperature has reached 70 degrees.
Step 2
Set up the trellis to the north of the mounds. Use a side of your fence if your garden is fenced in. Other types of trellises can be used too, such as vegetable cages, A-frames or fashion your own out of bamboo poles and chicken wire. Make sure the poles are pushed well into the ground because the plants will pull on it and become heavy.
Step 3
Plant the seeds in the mounds. You can plant 3 or 4 seeds per mound, and weed out the weaker of the plants when they start to sprout, leaving only one plant per mound.
Step 4
Place the cucumber's tendrils on the trellis when they first start to show. Helping the cucumber onto the trellis is important as it will attach to anything including other plants. Once it is attached to the trellis it will continue to climb without any more help.

Step 5
Keep the soil moist as the cucumbers are growing. Try to water the ground, and keep the foliage as dry as possible to avoid moisture diseases. Fertilize with a liquid vegetable fertilizer attached to your garden hose every two weeks.
Step 6
Harvest the cucumbers when they are the size you desire. Do not let them get too large, or they will be bitter and very seedy. Cut the cucumbers from the vine; do not pull them or you will damage the vine.
0
0
文章
Miss Chen
2018年07月16日

Fast-growing annual vines with yellow blooms up to 5 inches across, loofah plants (Luffa spp.) usually require a four-month growing season to produce mature gourds. Therefore, gardeners in the north may need to start them indoors about 4 to 6 weeks before the last spring frost. During the summer and early autumn, the heavy vines should be grown in humus-rich soil in full sun, preferably on a sturdy trellis or fence to keep their 1 to 2-foot gourds off the ground. Those fruits must be harvested before or just after the first autumn frost and are used both as bath sponges and dish scrubbers.

Pick and Peel Mature Sponges
If you live in an area with a long growing season, Jack Arnott of Cobb County Extension Service recommends that you allow your loofah gourds to dry on the vine until their skin is brown and brittle and you hear seeds rattle when you shake those gourds. Break open the skin at the blossom the end opposite the stem of the gourd to reach those seeds, if you wish to save them. It usually is easy to pick off the rest of the brittle skin with your fingers to reveal the sponge beneath. If you prefer, you can dunk the gourds in a bucket of water instead -- for any time period lasting from 5 minutes to several days -- and peel off their skins in wet strips.
Pick and Peel Immature Sponges
If your growing season isn't quite long enough, Jeanine Davis of North Carolina State University Cooperative Extension reports that you can harvest adequate sponges from gourds which have only partially yellowed, as long as their skins are beginning to slip. After you make an opening to save the seeds, grab the end of one of the fibers running the length of the gourd's ridges and pull on it to unzip the remaining skin.
Clean and Dry Sponges
Immediately plunge a less-than-mature sponge into a bucket of water to wash out any juices that remain due to its only half-dry condition. Although the sponge still will be white at that stage, it's a good idea to soak it in a bleach solution to eliminate fungi and bacteria. Mature sponges also should be immersed in bleach solution, of 4 tablespoons of bleach per 1 gallon of water, both to kill contaminants and to brighten their naturally off-white color.

After disinfecting the sponges, rinse them with clean water and spread them in the sun to dry. A porous surface works well for this purpose. You can turn screens into drying tables by laying them horizontally on top of sawhorses.

Pick and Peel Mature Sponges
If you live in an area with a long growing season, Jack Arnott of Cobb County Extension Service recommends that you allow your loofah gourds to dry on the vine until their skin is brown and brittle and you hear seeds rattle when you shake those gourds. Break open the skin at the blossom the end opposite the stem of the gourd to reach those seeds, if you wish to save them. It usually is easy to pick off the rest of the brittle skin with your fingers to reveal the sponge beneath. If you prefer, you can dunk the gourds in a bucket of water instead -- for any time period lasting from 5 minutes to several days -- and peel off their skins in wet strips.
Pick and Peel Immature Sponges
If your growing season isn't quite long enough, Jeanine Davis of North Carolina State University Cooperative Extension reports that you can harvest adequate sponges from gourds which have only partially yellowed, as long as their skins are beginning to slip. After you make an opening to save the seeds, grab the end of one of the fibers running the length of the gourd's ridges and pull on it to unzip the remaining skin.
Clean and Dry Sponges
Immediately plunge a less-than-mature sponge into a bucket of water to wash out any juices that remain due to its only half-dry condition. Although the sponge still will be white at that stage, it's a good idea to soak it in a bleach solution to eliminate fungi and bacteria. Mature sponges also should be immersed in bleach solution, of 4 tablespoons of bleach per 1 gallon of water, both to kill contaminants and to brighten their naturally off-white color.

After disinfecting the sponges, rinse them with clean water and spread them in the sun to dry. A porous surface works well for this purpose. You can turn screens into drying tables by laying them horizontally on top of sawhorses.
0
0
成长记
Plantlin
2018年07月16日

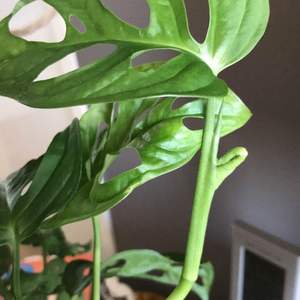
Still doing well. The new shoots are growing, but the original piece seems to have stopped...


0
0
成长记
Plantlin
2018年07月15日

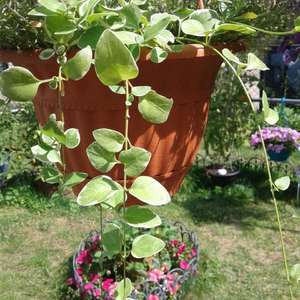
I had a huge plant of these... but mist of it died:( this is what I rescued! Hope they will start growing back.


1
0
文章
Miss Chen
2018年07月12日

If you enjoy growing vegetables, then don't overlook snow peas (Pisum sativum var. saccharatum) and snap peas (Pisum sativum var. macrocarpon). These peas don't produce ordinary, round, green peas you'll find in cans at the grocery store. Instead, they both offer special kinds of peas with edible pea pods that have a crunchy texture and slightly sweet flavor, with snap peas being a bit sweeter. Snow peas and snap peas share many similarities, but each has a unique and clearly distinguishable pod. These varieties are also harvested at different maturity levels. Both plants grow as annuals in all U.S. Department of Agriculture plant hardiness zones.

Dissimilar Pods
Although snow peas and snap peas both have edible pea pods, their pods are very different. The snow pea pod is especially large, up to 5 inches long. It is broad, flat and very thin. Snow pea pods are also translucent, allowing you to see light through them. These peas taste best when picked young, before the peas inside them produce visible bulges along the back of the pod. The flatter the pod the better. Snap peas, in contrast, produce narrow, oval-shaped pods. These pods are thick, fleshy and opaque. You can't see the peas inside snap pea pods because the pod itself is so thick. Despite this fleshy cocoon, snap peas remain quite crisp and produce an audible snap when broken in half. This is how the plant got its name. The best time to pick snap peas is when the pods are full-size and filled with young but well-developed peas.
Growth Supports
Like all pea varieties, snap and snow pea plants grow as trailing vines that have tendrils capable of attaching to a support. Some snow pea varieties have shorter vines than those of snap peas and can grow well without any support. For example, the snow pea cultivar "Oregon Sugar Pod II" has vines that are only about 28 inches long or tall, while the cultivar "Snowbird" has even shorter vines, about 18 inches. Snap pea vines, however, are tall and almost always require the support of a fence or trellis. If necessary, you can make your own simple support by stringing stiff wire between two stakes in the ground.
Climate
Both snow and snap peas are cool-season crops, thriving during cool spring or fall weather. Plant either type early in spring, as soon as the soil becomes workable, or in early fall while time remains for a crop before winter arrives. Both plants are frost-resistant and will likely survive until the first killing frost. Snap peas also resist a short hot spell well, growing a bit faster in warm temperatures but still producing a sweet, crunchy crop. Because snow peas need picking before the peas grow inside the pods, however, they're a bit more sensitive than snap peas to heat. If a heat wave lasts more than one or two days, your peas may mature a bit too rapidly. If they do, the peas may be a bit tougher than normal but will still have a pleasant taste.

Soil and Water
Snow and snap peas both grow in any type of garden soil, provided it is well-drained. They need even moisture to set a good crop and do best with about 1 inch of water weekly, including rain. Provide supplemental water during dry spells, but avoid overhead watering to lower the risk of fungal disorders. Instead, use a soaker hose or drip-irrigation system. Adding a 3-inch-thick layer of organic mulch, such as straw or shredded bark, helps conserve soil moisture and keeps down weeds that compete with the pear for moisture and soil nutrients. Don't allow the mulch to touch the plant stems.

Dissimilar Pods
Although snow peas and snap peas both have edible pea pods, their pods are very different. The snow pea pod is especially large, up to 5 inches long. It is broad, flat and very thin. Snow pea pods are also translucent, allowing you to see light through them. These peas taste best when picked young, before the peas inside them produce visible bulges along the back of the pod. The flatter the pod the better. Snap peas, in contrast, produce narrow, oval-shaped pods. These pods are thick, fleshy and opaque. You can't see the peas inside snap pea pods because the pod itself is so thick. Despite this fleshy cocoon, snap peas remain quite crisp and produce an audible snap when broken in half. This is how the plant got its name. The best time to pick snap peas is when the pods are full-size and filled with young but well-developed peas.
Growth Supports
Like all pea varieties, snap and snow pea plants grow as trailing vines that have tendrils capable of attaching to a support. Some snow pea varieties have shorter vines than those of snap peas and can grow well without any support. For example, the snow pea cultivar "Oregon Sugar Pod II" has vines that are only about 28 inches long or tall, while the cultivar "Snowbird" has even shorter vines, about 18 inches. Snap pea vines, however, are tall and almost always require the support of a fence or trellis. If necessary, you can make your own simple support by stringing stiff wire between two stakes in the ground.
Climate
Both snow and snap peas are cool-season crops, thriving during cool spring or fall weather. Plant either type early in spring, as soon as the soil becomes workable, or in early fall while time remains for a crop before winter arrives. Both plants are frost-resistant and will likely survive until the first killing frost. Snap peas also resist a short hot spell well, growing a bit faster in warm temperatures but still producing a sweet, crunchy crop. Because snow peas need picking before the peas grow inside the pods, however, they're a bit more sensitive than snap peas to heat. If a heat wave lasts more than one or two days, your peas may mature a bit too rapidly. If they do, the peas may be a bit tougher than normal but will still have a pleasant taste.

Soil and Water
Snow and snap peas both grow in any type of garden soil, provided it is well-drained. They need even moisture to set a good crop and do best with about 1 inch of water weekly, including rain. Provide supplemental water during dry spells, but avoid overhead watering to lower the risk of fungal disorders. Instead, use a soaker hose or drip-irrigation system. Adding a 3-inch-thick layer of organic mulch, such as straw or shredded bark, helps conserve soil moisture and keeps down weeds that compete with the pear for moisture and soil nutrients. Don't allow the mulch to touch the plant stems.
0
0
文章
Miss Chen
2018年07月10日

Description: This herbaceous biennial plant is a low-growing rosette of basal leaves during the first year, but during the second year it becomes 3-6' tall. The second-year plant is little branched below, but produces short flowering side stems above. The stems are rather stout, round or slightly ridged in circumference, and light green to slightly reddish green. Young stems are covered with white cobwebby hairs, but older stems become glabrous and have conspicuous longitudinal veins. The basal leaves are up to 2' long and 1½' across. They have long petioles and resemble the leaves of rhubarb to some extent. The lower leaves of second year plants resemble the basal leaves, except that they are somewhat smaller. These leaves are ovate-cordate, dull green above, and whitish green below, with blunt tips. They are nearly glabrous above, but finely pubescent below. Their margins are somewhat undulate, crisped, or smooth, sometimes with a few blunt teeth. Their long petioles have a conspicuous furrow above and they are usually hollow inside. The middle to upper leaves of second year plants are similar in appearance, but they are smaller in size and more likely to be ovate with margins that are more smooth and petioles that are shorter.
The upper stems terminate in small clusters of flowerheads on short stalks. Each flowerhead is about ¾–1" across, consisting of numerous disk florets and floral bracts that have narrow hooked tips. There are no ray florets. Each disk floret has a corolla that is narrowly cylindrical with 5 slender upright lobes at the apex. The disk florets are usually some shade of pink or purple, although a rare form of Common Burdock with white florets occurs. The slender white style is strongly exerted from the corolla and bifurcated at its tip. The dark purple anthers form a sheath around the style that lies just above the lobes of the corolla. The abundant bracts are green at the base, but become yellowish green toward the their hooked tips. They have a spiny appearance and have few, if any, cobwebby hairs in their midst. The blooming period occurs from mid-summer to early fall, and lasts about a month for a colony of plants. The achenes are oblong, broader and more truncate at one end than the other, and light brown with dark brown speckles. At the apex, each achene has a crown of fine bristles, but these are deciduous and soon fall off. The floral bracts turn brown and enclose the withered flowers at the top, forming a bur. The burs are persistent and remain on the stalks after the leaves have withered away during the fall. The root system consists of a stout taproot that runs deep into the ground. This plant spreads by reseeding itself, and often forms colonies of variable size.
Cultivation: Common Burdock is often found in full or partial sun, slightly moist to mesic conditions, and a loamy fertile soil. It has a robust nature and can be found in other kinds of soil and drier conditions. It is often aggressive.

Range & Habitat: This non-native plant is common in central and northern Illinois, but less common or absent in southern Illinois (see Distribution Map). This is by far the most common Arctium sp. (Burdock) in the state. It is adventive from Northern Europe and also occurs in Asia. Habitats include woodland edges, savannas, thickets, pastures, edges of fields and fence rows, weedy meadows, barnyards, areas along roads and railroads, and waste areas. Disturbed areas are preferred, although it occasionally appears in more pristine natural areas, particularly along paths and animal trails.
Faunal Associations: The flowers are pollinated primarily by long-tongued bees, including bumblebees, honeybees, Miner bees, and Leaf-Cutting bees, which suck nectar and collect pollen. Other visitors include bee flies, butterflies, and skippers, which seek nectar and are also effective at pollination. The caterpillars of several Papaipema spp. (Borer Moths) bore through the pith of the stems, including Papaipema cataphracta (Burdock Borer Moth), Papaipema arctivorens (Northern Burdock Borer Moth), and Papaipema rigida (Rigid Sunflower Borer Moth). The foliage of Common Burdock is one of the food sources for the caterpillars of the butterfly Vanessa cardui (Painted Lady). The Ring-Necked Pheasant eats the seeds to a limited extent. Because the foliage is bitter-tasting, Common Burdock is not a preferred food plant for mammalian herbivores, although livestock and deer will browse on it if nothing else is available. There is some evidence that the foliage may be toxic to rabbits. The seeds are distributed far and wide by animals and humans because the burs cling readily to fur and clothing. They are quite difficult to remove.

Photographic Location: Along a fence row at the webmaster's apartment complex in Urbana, Illinois.
Comments: Apparently, the stout taproot has a sweet taste and can be used as food. Similarly, if the outer husk of the stems are peeled away, the pith can be used like a vegetable. There are 3 Arctium spp. (Burdocks) in Illinois. One of them, Arctium tomentosum (Woolly Burdock) has abundant cobwebby hairs that cover the floral bracts below their hooked tips. Another species, Arctium lappa (Great Burdock), is often taller than Common Burdock, and it has larger flowerheads about 1–1½" across. The flowerheads of Great Burdock have longer stalks and they are arranged in flat-headed cymes, whereas the flowerheads of Common Burdock are more vertically bunched together on short stalks, as revealed in the upper photograph. The petioles of the lower leaves in Great Burdock are less furrowed on the upper surface and they are solid inside, rather than hollow.
The upper stems terminate in small clusters of flowerheads on short stalks. Each flowerhead is about ¾–1" across, consisting of numerous disk florets and floral bracts that have narrow hooked tips. There are no ray florets. Each disk floret has a corolla that is narrowly cylindrical with 5 slender upright lobes at the apex. The disk florets are usually some shade of pink or purple, although a rare form of Common Burdock with white florets occurs. The slender white style is strongly exerted from the corolla and bifurcated at its tip. The dark purple anthers form a sheath around the style that lies just above the lobes of the corolla. The abundant bracts are green at the base, but become yellowish green toward the their hooked tips. They have a spiny appearance and have few, if any, cobwebby hairs in their midst. The blooming period occurs from mid-summer to early fall, and lasts about a month for a colony of plants. The achenes are oblong, broader and more truncate at one end than the other, and light brown with dark brown speckles. At the apex, each achene has a crown of fine bristles, but these are deciduous and soon fall off. The floral bracts turn brown and enclose the withered flowers at the top, forming a bur. The burs are persistent and remain on the stalks after the leaves have withered away during the fall. The root system consists of a stout taproot that runs deep into the ground. This plant spreads by reseeding itself, and often forms colonies of variable size.
Cultivation: Common Burdock is often found in full or partial sun, slightly moist to mesic conditions, and a loamy fertile soil. It has a robust nature and can be found in other kinds of soil and drier conditions. It is often aggressive.

Range & Habitat: This non-native plant is common in central and northern Illinois, but less common or absent in southern Illinois (see Distribution Map). This is by far the most common Arctium sp. (Burdock) in the state. It is adventive from Northern Europe and also occurs in Asia. Habitats include woodland edges, savannas, thickets, pastures, edges of fields and fence rows, weedy meadows, barnyards, areas along roads and railroads, and waste areas. Disturbed areas are preferred, although it occasionally appears in more pristine natural areas, particularly along paths and animal trails.
Faunal Associations: The flowers are pollinated primarily by long-tongued bees, including bumblebees, honeybees, Miner bees, and Leaf-Cutting bees, which suck nectar and collect pollen. Other visitors include bee flies, butterflies, and skippers, which seek nectar and are also effective at pollination. The caterpillars of several Papaipema spp. (Borer Moths) bore through the pith of the stems, including Papaipema cataphracta (Burdock Borer Moth), Papaipema arctivorens (Northern Burdock Borer Moth), and Papaipema rigida (Rigid Sunflower Borer Moth). The foliage of Common Burdock is one of the food sources for the caterpillars of the butterfly Vanessa cardui (Painted Lady). The Ring-Necked Pheasant eats the seeds to a limited extent. Because the foliage is bitter-tasting, Common Burdock is not a preferred food plant for mammalian herbivores, although livestock and deer will browse on it if nothing else is available. There is some evidence that the foliage may be toxic to rabbits. The seeds are distributed far and wide by animals and humans because the burs cling readily to fur and clothing. They are quite difficult to remove.

Photographic Location: Along a fence row at the webmaster's apartment complex in Urbana, Illinois.
Comments: Apparently, the stout taproot has a sweet taste and can be used as food. Similarly, if the outer husk of the stems are peeled away, the pith can be used like a vegetable. There are 3 Arctium spp. (Burdocks) in Illinois. One of them, Arctium tomentosum (Woolly Burdock) has abundant cobwebby hairs that cover the floral bracts below their hooked tips. Another species, Arctium lappa (Great Burdock), is often taller than Common Burdock, and it has larger flowerheads about 1–1½" across. The flowerheads of Great Burdock have longer stalks and they are arranged in flat-headed cymes, whereas the flowerheads of Common Burdock are more vertically bunched together on short stalks, as revealed in the upper photograph. The petioles of the lower leaves in Great Burdock are less furrowed on the upper surface and they are solid inside, rather than hollow.
0
0


