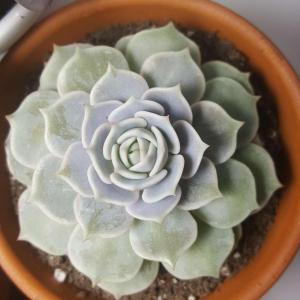
成长记
Flora Wong
2017年12月21日

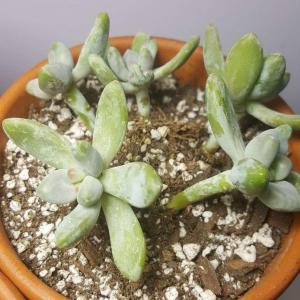
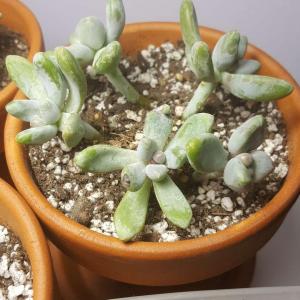
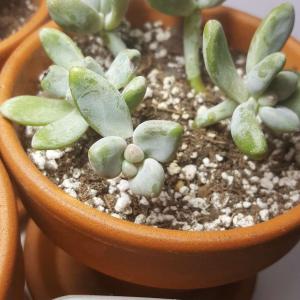
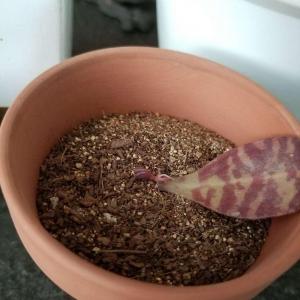
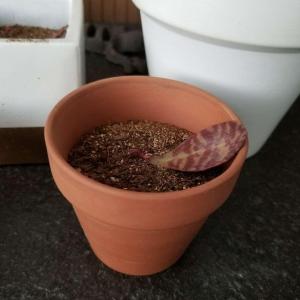
gave the babies a home of their own. hopefully they all do well! they're growing tiny leaves!



1
0
Aki
2017年12月13日

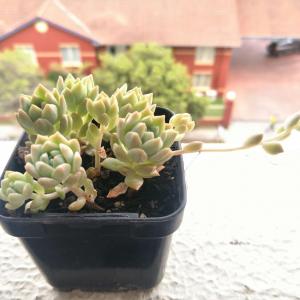
they seem to like the weather in Lao 😊 growing fast!


3
0
Aki:@采元气少女✨ Lao is a country in south east Asia 😅
采元气少女✨:What does Lao mean...
文章
Miss Chen
2017年12月09日

Growing mushrooms at home allows you to save money and enjoy delicious varieties of mushrooms each day with every meal. Because mushrooms do not contain the green chlorophyll that's found within other types of plants, this fungus relies on drawing all nourishment from the soil and water. To grow mushrooms, start by harvesting mushroom spores from dried mushrooms. Carefully monitor the mushrooms until they are fully developed and ready for consumption.

Collecting Spores
Step 1
Cut the stems off several fresh mushrooms and lay each mushroom on a piece of laminated card-stock paper. If possible, lay each mushroom cap with gills facing down, against the laminated paper.
Step 2
Place plastic bowls over each mushroom cap. Turn a dehumidifier on near the covered mushroom caps. The tiny gap between the card and the bowl allows the dehydrator to dry the mushroom caps, but prevents the mushroom spores from escaping.
Step 3
Allow the mushroom caps to sit under the plastic bowls overnight with the dehumidifier running. The next day, remove the plastic bowls and reserve the dried mushrooms for cooking, but notice the powdery white or black film on the laminated paper piece. This dusty substance is thousands of mushroom spores that have dropped straight down from the mushroom gills.
Planting and Growing Mushrooms
Step 1
Cut straw into sections between 3 and 6 inches long. Place the straw in a container and sterilize the straw by pouring boiling water over it to kill any unwanted bacteria.

Step 2
Pour the hot water off the straw and allow the straw to cool down to room temperature. While it cools, mix the mushroom spores from the laminated paper with the damp grains.
Step 3
Place the spore and damp grain mixture over a 1 to 2-inch layer of straw inside a plastic container.
Step 4
Monitor the grown as the mushroom spores and grain develop into a spore colony that creates a root structure for the mushroom network. The roots, called mycelium, develop into white and lacy filaments.
Step 5
Sterilize a collection of peat moss using the same method described in steps 1 and 2. Place the drained peat moss over the mushroom root structure and allow the mushrooms to grow up and through the peat moss over a period of days or weeks.

Collecting Spores
Step 1
Cut the stems off several fresh mushrooms and lay each mushroom on a piece of laminated card-stock paper. If possible, lay each mushroom cap with gills facing down, against the laminated paper.
Step 2
Place plastic bowls over each mushroom cap. Turn a dehumidifier on near the covered mushroom caps. The tiny gap between the card and the bowl allows the dehydrator to dry the mushroom caps, but prevents the mushroom spores from escaping.
Step 3
Allow the mushroom caps to sit under the plastic bowls overnight with the dehumidifier running. The next day, remove the plastic bowls and reserve the dried mushrooms for cooking, but notice the powdery white or black film on the laminated paper piece. This dusty substance is thousands of mushroom spores that have dropped straight down from the mushroom gills.
Planting and Growing Mushrooms
Step 1
Cut straw into sections between 3 and 6 inches long. Place the straw in a container and sterilize the straw by pouring boiling water over it to kill any unwanted bacteria.

Step 2
Pour the hot water off the straw and allow the straw to cool down to room temperature. While it cools, mix the mushroom spores from the laminated paper with the damp grains.
Step 3
Place the spore and damp grain mixture over a 1 to 2-inch layer of straw inside a plastic container.
Step 4
Monitor the grown as the mushroom spores and grain develop into a spore colony that creates a root structure for the mushroom network. The roots, called mycelium, develop into white and lacy filaments.
Step 5
Sterilize a collection of peat moss using the same method described in steps 1 and 2. Place the drained peat moss over the mushroom root structure and allow the mushrooms to grow up and through the peat moss over a period of days or weeks.
0
0
文章
Miss Chen
2017年12月09日

Growing your own morel mushrooms at home will prevent you from mistaking poisonous mushrooms for them when hunting for the mushrooms in the wild. Morel mushrooms appear in the spring, and typically grow near apple and elm trees. The mushrooms are considered a delicacy, and they only grow for a limited time during the spring. Growing these mushrooms will require a lot of effort and patience, but they will be well worth the hard work and wait.

Step 1
Locate an area that has well-drained soil. Remove all the weeds and grass from the area. Choose a location with shade that receives filtered sunlight.
Step 2
Combine an equal amount of peat, wood ash and gypsum to fill the top 4 to 6 inches of soil at your prepared site. You can burn wood and collect the ash as long as you use it within 48 hours.
Step 3
Inject the morel mushroom spores into the soil with a spawning kit. Follow the direction on the kit to ensure that you inject them properly. Spread the spawn over the soil according to the kit.
Step 4
Water the morel mushroom to keep the soil moist. Remove large debris away from the growing bed.

Step 5
Harvest the morels once they reach 4 inches in height. Cover the soil with a layer of composted manure and wood ash to keep the bed prepared for the next growing season. The bed will continue to grow morel mushrooms as long as you tend to the area properly.

Step 1
Locate an area that has well-drained soil. Remove all the weeds and grass from the area. Choose a location with shade that receives filtered sunlight.
Step 2
Combine an equal amount of peat, wood ash and gypsum to fill the top 4 to 6 inches of soil at your prepared site. You can burn wood and collect the ash as long as you use it within 48 hours.
Step 3
Inject the morel mushroom spores into the soil with a spawning kit. Follow the direction on the kit to ensure that you inject them properly. Spread the spawn over the soil according to the kit.
Step 4
Water the morel mushroom to keep the soil moist. Remove large debris away from the growing bed.

Step 5
Harvest the morels once they reach 4 inches in height. Cover the soil with a layer of composted manure and wood ash to keep the bed prepared for the next growing season. The bed will continue to grow morel mushrooms as long as you tend to the area properly.
0
0
成长记
Flora Wong
2017年12月09日

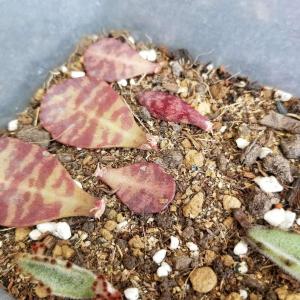
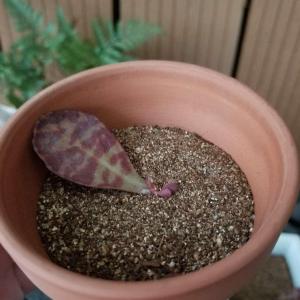
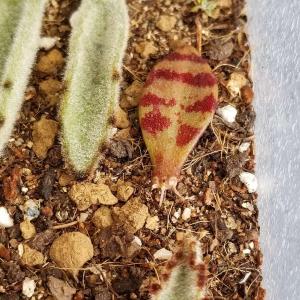
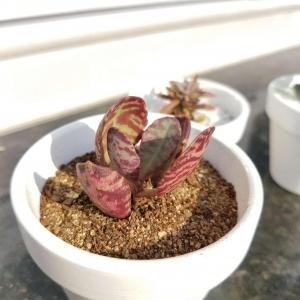
I think my dog stepped on it, so I had to save what I could. but the leaves and cutting are growing roots! :D



1
0
成长记
astronbot
2017年12月06日

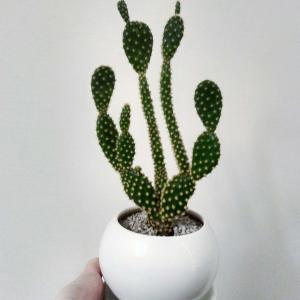
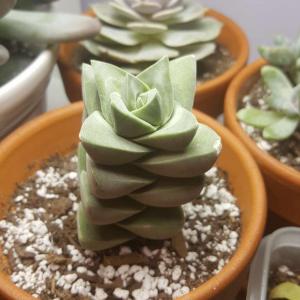
I thought he wasn't growing but I took a closer look at the top and he definitely is!

0
0
文章
Miss Chen
2017年12月04日

Mushrooms are fungi that have very different growing requirements from those of green plants. Mushrooms come in many varieties, but they have similar growing needs. The easiest mushrooms for new growers to cultivate are oyster mushrooms, according to the National Sustainable Agriculture Information Service. White button and shiitake mushrooms are two other popular choices. Mushrooms may be grown in almost any container. With the right growing medium and conditions, you can have delicious and fresh mushrooms for your culinary needs.

Step 1
Fill your container with hardwood chips, chopped cereal straws, such as wheat, or shredded corn cobs. Mushrooms contain no chlorophyll, the substance that makes leaves green, and must obtain their nutrients from their growing medium.
Step 2
Moisten the growing medium with water, keeping it warm and consistently damp. Turn it often with a hand-held rake to make sure the mixture has adequate oxygen. The growing medium will reach temperatures of 145 degrees. This unique compost contains the nutrients mushrooms need to grow.
Step 3
Place the container with the composted growing medium on a heating pad to keep the temperature of the growing medium about 70 degrees Fahrenheit.

Step 4
Sprinkle the mushroom spawn over the growing medium. Mushrooms don't grow by seed but by spawn, or microscopic spores. One mushroom can produce up to 16 billion spores according to Fresh Mushrooms.
Step 5
Keep your container in an area of your house that receives little to no sunlight, such as a basement or even a closet. The location should be easily accessible as the growing mushrooms need supervision.
Step 6
Lower the temperature of the soil to between 55 and 60 degrees F once the spawn has rooted. You will notice filaments spreading through the growing medium. This takes about three weeks according to Gardening Know How.
Step 7
Cover the spawn with one inch of garden soil. Lay a damp cloth over the soil and the entire container. Keep the cloth and the soil damp, but not wet. This will provide your mushrooms with the humidity and moisture they need to grow.
Step 8
Harvest your mushrooms when the cap has separated from the stem. It takes between 17 and 25 days for mushrooms to mature, according to Fresh Mushrooms.

Step 1
Fill your container with hardwood chips, chopped cereal straws, such as wheat, or shredded corn cobs. Mushrooms contain no chlorophyll, the substance that makes leaves green, and must obtain their nutrients from their growing medium.
Step 2
Moisten the growing medium with water, keeping it warm and consistently damp. Turn it often with a hand-held rake to make sure the mixture has adequate oxygen. The growing medium will reach temperatures of 145 degrees. This unique compost contains the nutrients mushrooms need to grow.
Step 3
Place the container with the composted growing medium on a heating pad to keep the temperature of the growing medium about 70 degrees Fahrenheit.

Step 4
Sprinkle the mushroom spawn over the growing medium. Mushrooms don't grow by seed but by spawn, or microscopic spores. One mushroom can produce up to 16 billion spores according to Fresh Mushrooms.
Step 5
Keep your container in an area of your house that receives little to no sunlight, such as a basement or even a closet. The location should be easily accessible as the growing mushrooms need supervision.
Step 6
Lower the temperature of the soil to between 55 and 60 degrees F once the spawn has rooted. You will notice filaments spreading through the growing medium. This takes about three weeks according to Gardening Know How.
Step 7
Cover the spawn with one inch of garden soil. Lay a damp cloth over the soil and the entire container. Keep the cloth and the soil damp, but not wet. This will provide your mushrooms with the humidity and moisture they need to grow.
Step 8
Harvest your mushrooms when the cap has separated from the stem. It takes between 17 and 25 days for mushrooms to mature, according to Fresh Mushrooms.
0
0
文章
Miss Chen
2017年12月03日

While commercial mushroom farms raise and package large quantities of mushrooms for consumers, packaged mushroom gardens give individual gardeners the opportunity to raise a small, indoor mushroom crop. These mushroom-growing kits include everything you need to start your own small mushroom garden. Although you can purchase one of these ready-made kits from Internet suppliers and gardening centers, you can also put together the necessary ingredients to make your own mushroom-growing kit. Use this for your own gardening hobby or present this homemade kit as a gift for a friend.

Putting Together Your Kit
Step 1
Obtain a broad, shallow container or recycle a used one for this purpose. A large casserole dish or a plastic storage bin works well for building a mushroom garden.
Step 2
Mix equal amounts of sterile compost, potting soil and peat, filling your container with a 2-to-3-inch layer of this rich medium. Reserve about 1/4 cup of this mixture in a sealed envelope. Smooth the top of your soil mix with a large, wooden spoon, removing any ridges or dips, creating a uniform surface.
Step 3
Gather mushroom spores for your garden kit. Known as spore printing, collecting spores allows you to propagate new mushrooms from harvested species. Purchase only fresh mushrooms from your grocery store to use for this purpose. Cut off the stems and place your mushroom caps, gills down, on a piece of clean, white paper. Wait 12 hours for the mushrooms to release the majority of the miniscule spores. Carefully transfer the spores to a sealable envelope for storage. Keep these cool and dry.

Step 4
Tear off a sheet or two of clear plastic wrap to place over the top of your container. Poke several holes in the plastic wrap to allow adequate airflow. Complete your mushroom garden kit with a plastic spray bottle for misting the soil. Your kit is now ready for planting or giving away as a gift. Include growing instructions with a gift.
Planting and Growing Your Mushrooms
Step 1
Plant your mushroom garden by misting the surface of your soil with a fine spray of water until it glistens. Scatter your tiny spores over the surface of the damp soil. Sprinkle the reserved 1/4 cup of medium over the top of your spores, barely covering them with this fine substance. Spray the surface again to create even dampness and place your plastic wrap over the top of your container.
Step 2
Put your planted mushroom garden in a dimly lit area, such as a closet or storage cabinet. Maintain the temperature in your closet near 75 degrees Fahrenheit. Keep the soil slightly damp to the touch by spraying it every few days.
Step 3
Look for the small mushrooms to appear within one to two weeks. Begin harvesting them as they reach maturity to allow space for new ones to grow. Mushroom gardens often continue supplying fresh produce for six to eight weeks.

Putting Together Your Kit
Step 1
Obtain a broad, shallow container or recycle a used one for this purpose. A large casserole dish or a plastic storage bin works well for building a mushroom garden.
Step 2
Mix equal amounts of sterile compost, potting soil and peat, filling your container with a 2-to-3-inch layer of this rich medium. Reserve about 1/4 cup of this mixture in a sealed envelope. Smooth the top of your soil mix with a large, wooden spoon, removing any ridges or dips, creating a uniform surface.
Step 3
Gather mushroom spores for your garden kit. Known as spore printing, collecting spores allows you to propagate new mushrooms from harvested species. Purchase only fresh mushrooms from your grocery store to use for this purpose. Cut off the stems and place your mushroom caps, gills down, on a piece of clean, white paper. Wait 12 hours for the mushrooms to release the majority of the miniscule spores. Carefully transfer the spores to a sealable envelope for storage. Keep these cool and dry.

Step 4
Tear off a sheet or two of clear plastic wrap to place over the top of your container. Poke several holes in the plastic wrap to allow adequate airflow. Complete your mushroom garden kit with a plastic spray bottle for misting the soil. Your kit is now ready for planting or giving away as a gift. Include growing instructions with a gift.
Planting and Growing Your Mushrooms
Step 1
Plant your mushroom garden by misting the surface of your soil with a fine spray of water until it glistens. Scatter your tiny spores over the surface of the damp soil. Sprinkle the reserved 1/4 cup of medium over the top of your spores, barely covering them with this fine substance. Spray the surface again to create even dampness and place your plastic wrap over the top of your container.
Step 2
Put your planted mushroom garden in a dimly lit area, such as a closet or storage cabinet. Maintain the temperature in your closet near 75 degrees Fahrenheit. Keep the soil slightly damp to the touch by spraying it every few days.
Step 3
Look for the small mushrooms to appear within one to two weeks. Begin harvesting them as they reach maturity to allow space for new ones to grow. Mushroom gardens often continue supplying fresh produce for six to eight weeks.
0
0


