文章
Miss Chen
2017年11月01日

Tomatoes are 95 percent water, with most varieties soaking up summer rains to become pump and juicy on the vine. Water – along with sunshine and nutrient-rich soil – is needed at every stage of the growing process. Otherwise, tomatoes won't grow, blossom and produce fruit. The manner in which water is delivered, either via rain or via a controlled system, can affect tomatoes in a positive way, or can also have devastating results.

Cracking and Splitting
A tomato's fragile skin can easily start splitting and cracking due to inconsistencies in soil moisture. Once a tomato starts to ripen, it forms a protective skin that helps it during harvest, but if rain is heavy during ripening time and the tomato receives too much water, that skin will crack and split. Laying mulch and setting up a regular watering schedule can help prevent splitting and cracking by keeping the soil moisture consistent despite irregular rain.
Blossom End Rot
A tomato plant can start to rot at its blossoms, causing the blossom end of the fruit to turn brown. If rain has been inconsistent, your tomato plants are not getting enough nutrition, especially calcium, because the soil is dry and not able to deliver the proper nutrients to the plant. To remedy this, be sure to lay mulch on your garden to retain moisture and don't rely only on rain to water your garden. Water your garden daily to keep the soil consistently moist. If splitting or cracking has occurred, remove the bad tomatoes and apply a calcium chloride spray to the new growth.

Insects
A strong, heavy rain can help keep your tomato plants free from spider mites, which are barely visible to the human eye, and aphids, which are tiny pear-shaped insects that like to hang out on leaves. The pressure from a heavy rain can keep these insects at bay by washing them away, but if there hasn't been a hard rain in a long time, soapy water or a chemical spray may be needed to control the insects.
Fungal Blight
Fungal blight can devastate a tomato plant, with the spots first appearing on lower leaves. Fungal blight rarely occurs during dry times, but once the rainy, humid season hits, fungal blight can quickly destroy a tomato plant. To control blight, fungicide sprays should be applied prior to a rain event.

Cracking and Splitting
A tomato's fragile skin can easily start splitting and cracking due to inconsistencies in soil moisture. Once a tomato starts to ripen, it forms a protective skin that helps it during harvest, but if rain is heavy during ripening time and the tomato receives too much water, that skin will crack and split. Laying mulch and setting up a regular watering schedule can help prevent splitting and cracking by keeping the soil moisture consistent despite irregular rain.
Blossom End Rot
A tomato plant can start to rot at its blossoms, causing the blossom end of the fruit to turn brown. If rain has been inconsistent, your tomato plants are not getting enough nutrition, especially calcium, because the soil is dry and not able to deliver the proper nutrients to the plant. To remedy this, be sure to lay mulch on your garden to retain moisture and don't rely only on rain to water your garden. Water your garden daily to keep the soil consistently moist. If splitting or cracking has occurred, remove the bad tomatoes and apply a calcium chloride spray to the new growth.

Insects
A strong, heavy rain can help keep your tomato plants free from spider mites, which are barely visible to the human eye, and aphids, which are tiny pear-shaped insects that like to hang out on leaves. The pressure from a heavy rain can keep these insects at bay by washing them away, but if there hasn't been a hard rain in a long time, soapy water or a chemical spray may be needed to control the insects.
Fungal Blight
Fungal blight can devastate a tomato plant, with the spots first appearing on lower leaves. Fungal blight rarely occurs during dry times, but once the rainy, humid season hits, fungal blight can quickly destroy a tomato plant. To control blight, fungicide sprays should be applied prior to a rain event.
0
0
成长记
pzsoofi
2017年10月31日

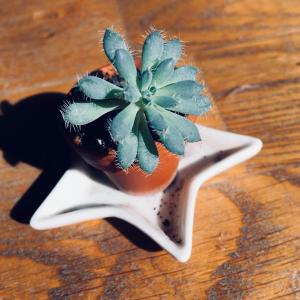
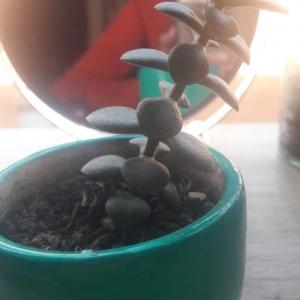
It’s growing but I still don’t know what it is.

0
0
pzsoofi:@Ueca well thank you, I guess the mystery is solved now :)
Ueca:Echeveria setosa var. deminuta
paranormalplant
2017年10月30日

here's an old picture of my first succulent, Fred!! i picked him up from a hardware store back in early August, and he's been growing great ever since!! #Haworthiafasciata


0
0
文章
Miss Chen
2017年10月28日

Strawberries (Fragaria ananassa) are productive little plants that, given good growing conditions, will produce prolifically year after year. Although the length and severity of Michigan winters, particularly in the northern reaches of the state, can be a challenge to some fruit crops, strawberries aren't daunted by the cold. Cultivars are available that are hardy in U.S. Department of Agriculture plant hardiness zones 2 to 11, so they can handle the climate throughout Michigan.

Recommended Varieties
June-bearing strawberry varieties produce one large crop of berries, usually in mid-June in Michigan, and they typically produce more berries per season than other types of plants. Among suitable varieties of June-bearing cultivars for Michigan are "Allstar" (Fragaria ananassa "Allstar") and "Jewel" (Fragaria ananassa "Jewel"), both of which are hardy in USDA zones 4 to 8, and "Cavendish" (Fragaria ananassa "Cavendish") and "Annapolis" (Fragaria ananassa "Annapolis"), which are hardy in USDA zones 3 to 8.
Ever-bearing varieties produce two relatively small crops, the first in the spring and the second in the early fall; the timing of the crops is triggered by the length of daylight hours. Day-neutral varieties produce berries independently of day length and may produce through most of the season. Recommended cultivars for the state include "Tribute" (Fragaria ananassa "Tribute") and "Tristar" (Fragaria ananassa "Tristar"), which are hardy in USDA zones 4 to 8.
Site Selection
Strawberries prefer well-drained soils that contain plenty of organic matter. They also need at least 8 hours of sunlight per day to produce well, so they should be planted in full sun; although the plants can tolerate partial shade, they're unlikely to bear well if they don't get enough light.
Strawberries will also produce best if they're growing in slightly acidic soil with a pH level between 5.3 and 6.5.

Soil Preparation
Strawberries benefit from consistent soil moisture, so the soil in the planting bed needs to drain well yet retain enough moisture to keep the plants' roots from drying out. Incorporating 1 to 4 inches of organic compost or peat moss into the soil will help by contributing moisture-retentive material to sandy soils that otherwise might drain too quickly and by loosening dense clay soils that might retain too much water.
Setting Plants
Plant strawberries as early in the spring as possible so that they have plenty of time to get established at the beginning of the season.
Strawberries must be planted at the correct depth or they won't grow well. If they're planted so shallowly that the roots are exposed, the roots may dry out, but if they're planted so deeply that the crown where the leaves emerge is buried, the plant may rot. Place the plants so that the surface of the soil meets the midpoint of the crown. Firm the soil around the plants and water them well.
In laying out rows of plants, space plants 18 to 24 inches apart, with 3 or 4 feet between rows.
In a "matted row" planting system, plants are allowed to send out runners from which new plants grow and fill in the row; this system works well with June-bearing varieties. In a "hill" planting systems, runners are cut off and not allowed to produce new plants; this system is most often used with ever-bearing or day-neutral varieties.

Recommended Varieties
June-bearing strawberry varieties produce one large crop of berries, usually in mid-June in Michigan, and they typically produce more berries per season than other types of plants. Among suitable varieties of June-bearing cultivars for Michigan are "Allstar" (Fragaria ananassa "Allstar") and "Jewel" (Fragaria ananassa "Jewel"), both of which are hardy in USDA zones 4 to 8, and "Cavendish" (Fragaria ananassa "Cavendish") and "Annapolis" (Fragaria ananassa "Annapolis"), which are hardy in USDA zones 3 to 8.
Ever-bearing varieties produce two relatively small crops, the first in the spring and the second in the early fall; the timing of the crops is triggered by the length of daylight hours. Day-neutral varieties produce berries independently of day length and may produce through most of the season. Recommended cultivars for the state include "Tribute" (Fragaria ananassa "Tribute") and "Tristar" (Fragaria ananassa "Tristar"), which are hardy in USDA zones 4 to 8.
Site Selection
Strawberries prefer well-drained soils that contain plenty of organic matter. They also need at least 8 hours of sunlight per day to produce well, so they should be planted in full sun; although the plants can tolerate partial shade, they're unlikely to bear well if they don't get enough light.
Strawberries will also produce best if they're growing in slightly acidic soil with a pH level between 5.3 and 6.5.

Soil Preparation
Strawberries benefit from consistent soil moisture, so the soil in the planting bed needs to drain well yet retain enough moisture to keep the plants' roots from drying out. Incorporating 1 to 4 inches of organic compost or peat moss into the soil will help by contributing moisture-retentive material to sandy soils that otherwise might drain too quickly and by loosening dense clay soils that might retain too much water.
Setting Plants
Plant strawberries as early in the spring as possible so that they have plenty of time to get established at the beginning of the season.
Strawberries must be planted at the correct depth or they won't grow well. If they're planted so shallowly that the roots are exposed, the roots may dry out, but if they're planted so deeply that the crown where the leaves emerge is buried, the plant may rot. Place the plants so that the surface of the soil meets the midpoint of the crown. Firm the soil around the plants and water them well.
In laying out rows of plants, space plants 18 to 24 inches apart, with 3 or 4 feet between rows.
In a "matted row" planting system, plants are allowed to send out runners from which new plants grow and fill in the row; this system works well with June-bearing varieties. In a "hill" planting systems, runners are cut off and not allowed to produce new plants; this system is most often used with ever-bearing or day-neutral varieties.
0
0
文章
Miss Chen
2017年10月28日

Firm, tightly tied hay or straw bales make a quick and easy-to-use organic raised bed for growing strawberries. Gardening in bales allows you to transform rocky, uneven or clay soil — or even a paved parking spot — into fertile growing space. Though growing in a bale is most often recommended for annuals, it's possible to grow strawberries in them for two years, especially if you live in a more northern climate. Make sure your strawberry bed is near a water source, since you'll be watering often.

Step 1
Place a layer of black plastic on the ground where you'd like your strawberry bed. Select a location in full sun. Place bales on top of the plastic, end to end tightly, in rows with the twines facing up. Straw bales work well because they have fewer seeds in them, which results in fewer weed problems, but Bermuda grass, fescue or rye grass hay are also suitable, according to the University of Mississippi Extension, as they also compost readily.
Step 2
Soak the bales with water beginning about 10 days before all danger of frost has passed in your area. Soaking may require as much as 15 gallons of water per bale. Water the bales daily for three days to keep them damp, thereby encouraging the decomposition process.
Step 3
Sprinkle half a cup of blood meal on each bale and water it in each day for days four through six, thereby encouraging composting microorganisms to warm the bales to more than 100 degrees Fahrenheit. This heating occurs even without the blood meal, but a bit of fertilizer accelerates the process.
Step 4
Sprinkle each bale with a quarter cup of blood meal and water it in during days seven through nine.

Step 5
Water the bales on the 10th day. Check the temperature of the bales on the 11th day. If they are no longer heating and all danger of frost has passed, then you may begin planting.
Step 6
Transplant your strawberries into the bales, four to six plants per bale. Use a trowel to create a crack in the hay or straw and insert each plant into the bale so the crown is even with the surface of the bale.
Step 7
Keep the bales moist, watering daily or as needed. As the bales continue to decompose, they hold more water and retain it for a longer period. If weeds or grasses begin to grow from the bales, simply trim them to keep them short.
Step 8
Remove all the blossoms from the strawberry plants for the first few months after planting in order to encourage the plants to build up a food reserve. Then in about July, leave the blossoms undisturbed and allow fruit to develop. Expect to harvest your first strawberries within a month.
Step 9
Apply a 3-inch layer of winter mulch on top of the strawberry plants after frost has stopped growth but before a heavy freeze. Wheat straw makes good mulch.
Step 10
Remove the mulch in the spring once the plants start poking through. Fertilize with about 2 oz. of urea per bale. Water as needed to keep the bales moist throughout the growing season.

Step 1
Place a layer of black plastic on the ground where you'd like your strawberry bed. Select a location in full sun. Place bales on top of the plastic, end to end tightly, in rows with the twines facing up. Straw bales work well because they have fewer seeds in them, which results in fewer weed problems, but Bermuda grass, fescue or rye grass hay are also suitable, according to the University of Mississippi Extension, as they also compost readily.
Step 2
Soak the bales with water beginning about 10 days before all danger of frost has passed in your area. Soaking may require as much as 15 gallons of water per bale. Water the bales daily for three days to keep them damp, thereby encouraging the decomposition process.
Step 3
Sprinkle half a cup of blood meal on each bale and water it in each day for days four through six, thereby encouraging composting microorganisms to warm the bales to more than 100 degrees Fahrenheit. This heating occurs even without the blood meal, but a bit of fertilizer accelerates the process.
Step 4
Sprinkle each bale with a quarter cup of blood meal and water it in during days seven through nine.

Step 5
Water the bales on the 10th day. Check the temperature of the bales on the 11th day. If they are no longer heating and all danger of frost has passed, then you may begin planting.
Step 6
Transplant your strawberries into the bales, four to six plants per bale. Use a trowel to create a crack in the hay or straw and insert each plant into the bale so the crown is even with the surface of the bale.
Step 7
Keep the bales moist, watering daily or as needed. As the bales continue to decompose, they hold more water and retain it for a longer period. If weeds or grasses begin to grow from the bales, simply trim them to keep them short.
Step 8
Remove all the blossoms from the strawberry plants for the first few months after planting in order to encourage the plants to build up a food reserve. Then in about July, leave the blossoms undisturbed and allow fruit to develop. Expect to harvest your first strawberries within a month.
Step 9
Apply a 3-inch layer of winter mulch on top of the strawberry plants after frost has stopped growth but before a heavy freeze. Wheat straw makes good mulch.
Step 10
Remove the mulch in the spring once the plants start poking through. Fertilize with about 2 oz. of urea per bale. Water as needed to keep the bales moist throughout the growing season.
0
0
文章
Miss Chen
2017年10月28日

The gray mold fungus is the main cause of mold in strawberries (Fragaria x ananassa). Gray mold, Botrytis cinerea, usually affects strawberries growing in cold or damp conditions and it makes them inedible. Contact with decayed plant material also helps spread gray mold. Strawberries grow in U.S. Department of Agriculture plant hardiness zones 2 through 11, depending on the variety. Buying new, disease-free plants every year helps reduce problems with mold.

Causes of Mold
Mold overwinters in plant debris and on living plants that carry the disease, and infects strawberries when conditions are right. Ripe, red strawberries or unripe green strawberries can suffer from mold, but the fungus most quickly affects ripening fruit.
Contact with soil, dead leaves and infected fruit spreads the mold fungus. Fungus spores can also spread through people touching infected fruits and then healthy fruits, and on the wind. Gray mold develops when temperatures are between 70 and 80 degrees Fahrenheit. Wet weather, high humidity and overhead watering also encourage mold growth. Overfertilizing strawberry plants creates lush, soft growth that's vulnerable to mold attack.
Symptoms of Infection
Strawberries infected with gray mold develop minor symptoms that gradually become worse. Infections often begin under the small leaves surrounding the strawberry stalks. Light brown spots appear, which grow larger and develop gray, dusty mold that covers the whole fruit. Strawberry fruits infected with gray mold usually maintain their shape. Infected fruits don't recover. In unfavorable conditions, such as dry, warm air and good air circulation, the disease progresses slowly. The strawberry plant's eaves and stems usually look normal, though gray mold can spread up strawberry stalks.

Preventing Mold
Avoiding crowding and shady sites and use other =controls help prevent mold in strawberries. Grow strawberry plants 2 feet apart in rows 18 inches apart in open, full-sun sites. Stagger the plants so that they are diagonally opposite in their rows.
Water strawberries with drip irrigation or soaker hoses, and not with a watering can, garden hose or sprinklers. Spread a sheet of woven plastic that allows water to penetrate, or another mulch, between the plants to prevent fruits from touching the soil. Suitable mulches include clean straw, sawdust and paper. Don't fertilize strawberries in spring, but wait until after harvesting the fruits. Apply a 16-16-16 fertilizer at a rate of 1 1/2 pound for each 100 square feet, when the strawberry leaves are dry. Don't allow the fertilizer to touch the leaves.
Removing dead and diseased fruits and foliage also helps prevent gray mold from spreading. Sterilize pruning shears by wiping the blades with a cloth that was dipped in rubbing alcohol, before and after pruning strawberries.
Treating Mold
Regular spraying with a fungicide helps protect strawberries from mold. Put on long pants, a long-sleeved shirt, safety goggles and gloves before spraying strawberries with fungicides.
On a dry, still day in spring, when new growth appears on the strawberries, dilute a fungicide containing 48.9 percent N-trichtoromethylthio~cyclohexene-1,2-dicarboximide at a rate of 2 level tablespoons per 1 gallon of water. One gallon of solution treats 100 square feet of strawberry plants. Spray the plants, covering all plant surfaces, and spray them again every seven days until harvest. Manufacturers' instructions vary from product to product, so always read the product label and follow the instructions. Make sure any product you buy is safe to use on edibles.

Causes of Mold
Mold overwinters in plant debris and on living plants that carry the disease, and infects strawberries when conditions are right. Ripe, red strawberries or unripe green strawberries can suffer from mold, but the fungus most quickly affects ripening fruit.
Contact with soil, dead leaves and infected fruit spreads the mold fungus. Fungus spores can also spread through people touching infected fruits and then healthy fruits, and on the wind. Gray mold develops when temperatures are between 70 and 80 degrees Fahrenheit. Wet weather, high humidity and overhead watering also encourage mold growth. Overfertilizing strawberry plants creates lush, soft growth that's vulnerable to mold attack.
Symptoms of Infection
Strawberries infected with gray mold develop minor symptoms that gradually become worse. Infections often begin under the small leaves surrounding the strawberry stalks. Light brown spots appear, which grow larger and develop gray, dusty mold that covers the whole fruit. Strawberry fruits infected with gray mold usually maintain their shape. Infected fruits don't recover. In unfavorable conditions, such as dry, warm air and good air circulation, the disease progresses slowly. The strawberry plant's eaves and stems usually look normal, though gray mold can spread up strawberry stalks.

Preventing Mold
Avoiding crowding and shady sites and use other =controls help prevent mold in strawberries. Grow strawberry plants 2 feet apart in rows 18 inches apart in open, full-sun sites. Stagger the plants so that they are diagonally opposite in their rows.
Water strawberries with drip irrigation or soaker hoses, and not with a watering can, garden hose or sprinklers. Spread a sheet of woven plastic that allows water to penetrate, or another mulch, between the plants to prevent fruits from touching the soil. Suitable mulches include clean straw, sawdust and paper. Don't fertilize strawberries in spring, but wait until after harvesting the fruits. Apply a 16-16-16 fertilizer at a rate of 1 1/2 pound for each 100 square feet, when the strawberry leaves are dry. Don't allow the fertilizer to touch the leaves.
Removing dead and diseased fruits and foliage also helps prevent gray mold from spreading. Sterilize pruning shears by wiping the blades with a cloth that was dipped in rubbing alcohol, before and after pruning strawberries.
Treating Mold
Regular spraying with a fungicide helps protect strawberries from mold. Put on long pants, a long-sleeved shirt, safety goggles and gloves before spraying strawberries with fungicides.
On a dry, still day in spring, when new growth appears on the strawberries, dilute a fungicide containing 48.9 percent N-trichtoromethylthio~cyclohexene-1,2-dicarboximide at a rate of 2 level tablespoons per 1 gallon of water. One gallon of solution treats 100 square feet of strawberry plants. Spray the plants, covering all plant surfaces, and spray them again every seven days until harvest. Manufacturers' instructions vary from product to product, so always read the product label and follow the instructions. Make sure any product you buy is safe to use on edibles.
0
0
文章
Miss Chen
2017年10月28日

The gray mold fungus is the main cause of mold in strawberries (Fragaria x ananassa). Gray mold, Botrytis cinerea, usually affects strawberries growing in cold or damp conditions and it makes them inedible. Contact with decayed plant material also helps spread gray mold. Strawberries grow in U.S. Department of Agriculture plant hardiness zones 2 through 11, depending on the variety. Buying new, disease-free plants every year helps reduce problems with mold.

Causes of Mold
Mold overwinters in plant debris and on living plants that carry the disease, and infects strawberries when conditions are right. Ripe, red strawberries or unripe green strawberries can suffer from mold, but the fungus most quickly affects ripening fruit.
Contact with soil, dead leaves and infected fruit spreads the mold fungus. Fungus spores can also spread through people touching infected fruits and then healthy fruits, and on the wind. Gray mold develops when temperatures are between 70 and 80 degrees Fahrenheit. Wet weather, high humidity and overhead watering also encourage mold growth. Overfertilizing strawberry plants creates lush, soft growth that's vulnerable to mold attack.
Symptoms of Infection
Strawberries infected with gray mold develop minor symptoms that gradually become worse. Infections often begin under the small leaves surrounding the strawberry stalks. Light brown spots appear, which grow larger and develop gray, dusty mold that covers the whole fruit. Strawberry fruits infected with gray mold usually maintain their shape. Infected fruits don't recover. In unfavorable conditions, such as dry, warm air and good air circulation, the disease progresses slowly. The strawberry plant's eaves and stems usually look normal, though gray mold can spread up strawberry stalks.

Preventing Mold
Avoiding crowding and shady sites and use other =controls help prevent mold in strawberries. Grow strawberry plants 2 feet apart in rows 18 inches apart in open, full-sun sites. Stagger the plants so that they are diagonally opposite in their rows.
Water strawberries with drip irrigation or soaker hoses, and not with a watering can, garden hose or sprinklers. Spread a sheet of woven plastic that allows water to penetrate, or another mulch, between the plants to prevent fruits from touching the soil. Suitable mulches include clean straw, sawdust and paper. Don't fertilize strawberries in spring, but wait until after harvesting the fruits. Apply a 16-16-16 fertilizer at a rate of 1 1/2 pound for each 100 square feet, when the strawberry leaves are dry. Don't allow the fertilizer to touch the leaves.
Removing dead and diseased fruits and foliage also helps prevent gray mold from spreading. Sterilize pruning shears by wiping the blades with a cloth that was dipped in rubbing alcohol, before and after pruning strawberries.
Treating Mold
Regular spraying with a fungicide helps protect strawberries from mold. Put on long pants, a long-sleeved shirt, safety goggles and gloves before spraying strawberries with fungicides.
On a dry, still day in spring, when new growth appears on the strawberries, dilute a fungicide containing 48.9 percent N-trichtoromethylthio~cyclohexene-1,2-dicarboximide at a rate of 2 level tablespoons per 1 gallon of water. One gallon of solution treats 100 square feet of strawberry plants. Spray the plants, covering all plant surfaces, and spray them again every seven days until harvest. Manufacturers' instructions vary from product to product, so always read the product label and follow the instructions. Make sure any product you buy is safe to use on edibles.

Causes of Mold
Mold overwinters in plant debris and on living plants that carry the disease, and infects strawberries when conditions are right. Ripe, red strawberries or unripe green strawberries can suffer from mold, but the fungus most quickly affects ripening fruit.
Contact with soil, dead leaves and infected fruit spreads the mold fungus. Fungus spores can also spread through people touching infected fruits and then healthy fruits, and on the wind. Gray mold develops when temperatures are between 70 and 80 degrees Fahrenheit. Wet weather, high humidity and overhead watering also encourage mold growth. Overfertilizing strawberry plants creates lush, soft growth that's vulnerable to mold attack.
Symptoms of Infection
Strawberries infected with gray mold develop minor symptoms that gradually become worse. Infections often begin under the small leaves surrounding the strawberry stalks. Light brown spots appear, which grow larger and develop gray, dusty mold that covers the whole fruit. Strawberry fruits infected with gray mold usually maintain their shape. Infected fruits don't recover. In unfavorable conditions, such as dry, warm air and good air circulation, the disease progresses slowly. The strawberry plant's eaves and stems usually look normal, though gray mold can spread up strawberry stalks.

Preventing Mold
Avoiding crowding and shady sites and use other =controls help prevent mold in strawberries. Grow strawberry plants 2 feet apart in rows 18 inches apart in open, full-sun sites. Stagger the plants so that they are diagonally opposite in their rows.
Water strawberries with drip irrigation or soaker hoses, and not with a watering can, garden hose or sprinklers. Spread a sheet of woven plastic that allows water to penetrate, or another mulch, between the plants to prevent fruits from touching the soil. Suitable mulches include clean straw, sawdust and paper. Don't fertilize strawberries in spring, but wait until after harvesting the fruits. Apply a 16-16-16 fertilizer at a rate of 1 1/2 pound for each 100 square feet, when the strawberry leaves are dry. Don't allow the fertilizer to touch the leaves.
Removing dead and diseased fruits and foliage also helps prevent gray mold from spreading. Sterilize pruning shears by wiping the blades with a cloth that was dipped in rubbing alcohol, before and after pruning strawberries.
Treating Mold
Regular spraying with a fungicide helps protect strawberries from mold. Put on long pants, a long-sleeved shirt, safety goggles and gloves before spraying strawberries with fungicides.
On a dry, still day in spring, when new growth appears on the strawberries, dilute a fungicide containing 48.9 percent N-trichtoromethylthio~cyclohexene-1,2-dicarboximide at a rate of 2 level tablespoons per 1 gallon of water. One gallon of solution treats 100 square feet of strawberry plants. Spray the plants, covering all plant surfaces, and spray them again every seven days until harvest. Manufacturers' instructions vary from product to product, so always read the product label and follow the instructions. Make sure any product you buy is safe to use on edibles.
0
0
文章
Miss Chen
2017年10月26日

Grapes will grow in a hydroponic system, provided they are well-supported and get an adequate flow of nutrients. The container for growing grapes must be large enough to hold the mature plant and arranged so the weight of the plant and fruit won't tip it over. A good hydroponic growing system for grapes is an ebb-and-flow system. This system fills the planter nearly full of liquid nutrients several times a day and then drains the liquid so the plant roots can get air.

Step 1
Drill a 1/2-inch hole in the bottom of the bucket. Fit in a short section of the hose. Caulk around it to prevent leaks and allow it to dry for at least 24 hours. This will allow the nutrient liquid to drain back into the reservoir.
Step 2
Make two ½-inch holes in one end of the plastic storage bin, near the top. The holes will allow both the cord from a submersible pump and a filler hose to pass out of the reservoir while the lid is on. Drill a ½-inch hole in the lid of the bin to allow the drain hose access to the bin. This bin will be the nutrient reservoir.
Step 3
Place a piece of screen over the drain hole to prevent perlite from leaking out. Fill the bucket with perlite. Add a thick layer of clay pellets or silica stones at the bottom to give it some weight. Be sure to use new, sterile pellets, stones and perlite to avoid contaminating the hydroponic system.

Step 4
Plant the grape vine in the perlite to the depth recommended on the plant tag. Be sure the plant is secure in the perlite. Place the bucket on a shelf or table in a sunny location next to a trellis, arbor, fence or netting where you can secure the grape vine as it grows.
Step 5
Set the reservoir in a spot lower than the planting bucket. Attach a filler hose to a submersible pump and place the pump in the reservoir. Run both the pump's power cord and the hose out of the reservoir through the holes in the end. Fill the container about two-thirds full of nutrient solution. Put the lid on it.
Step 6
Fit the plant bucket's drain hose into the hole in the reservoir lid. Bring the filler hose up from the reservoir and clip it securely to the inside of the bucket's rim.
Step 7
Set the timer to run three or four times per day, just long enough to fill the bucket to about an inch from the tip of the perlite. Plug the pump into the time and plug the timer into an outlet to complete your setup for growing hydroponic grapes.

Step 1
Drill a 1/2-inch hole in the bottom of the bucket. Fit in a short section of the hose. Caulk around it to prevent leaks and allow it to dry for at least 24 hours. This will allow the nutrient liquid to drain back into the reservoir.
Step 2
Make two ½-inch holes in one end of the plastic storage bin, near the top. The holes will allow both the cord from a submersible pump and a filler hose to pass out of the reservoir while the lid is on. Drill a ½-inch hole in the lid of the bin to allow the drain hose access to the bin. This bin will be the nutrient reservoir.
Step 3
Place a piece of screen over the drain hole to prevent perlite from leaking out. Fill the bucket with perlite. Add a thick layer of clay pellets or silica stones at the bottom to give it some weight. Be sure to use new, sterile pellets, stones and perlite to avoid contaminating the hydroponic system.

Step 4
Plant the grape vine in the perlite to the depth recommended on the plant tag. Be sure the plant is secure in the perlite. Place the bucket on a shelf or table in a sunny location next to a trellis, arbor, fence or netting where you can secure the grape vine as it grows.
Step 5
Set the reservoir in a spot lower than the planting bucket. Attach a filler hose to a submersible pump and place the pump in the reservoir. Run both the pump's power cord and the hose out of the reservoir through the holes in the end. Fill the container about two-thirds full of nutrient solution. Put the lid on it.
Step 6
Fit the plant bucket's drain hose into the hole in the reservoir lid. Bring the filler hose up from the reservoir and clip it securely to the inside of the bucket's rim.
Step 7
Set the timer to run three or four times per day, just long enough to fill the bucket to about an inch from the tip of the perlite. Plug the pump into the time and plug the timer into an outlet to complete your setup for growing hydroponic grapes.
0
0
成长记
Flora Wong
2017年10月25日

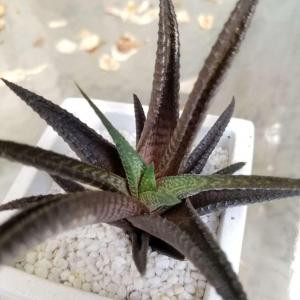
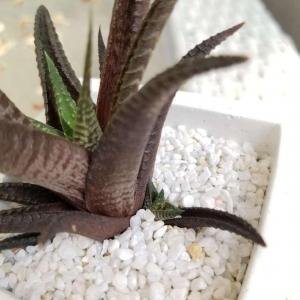
it seemed so dead but it's growing fresh leaves! keeping it away from direct sun this time. hopefully it stays green.


0
0
shirly mei
2017年10月21日

I propagated a bunch of black prince leaves because it had a root rot. most of them started growing but a lot doesn't have roots


3
0
stunning.succulents:would love to see an update!
shirly mei:@meriunkat thank you!
meriunkat:💚they will show up soon
成长记
Estefania Pereira
2017年10月16日

ITS CHANGING AND GROWING NEW LEAVES, i never actually expected it to show signs of life but it did so we were liars continues to exist!!



1
0


