文章
Dummer. ゛☀
2017年08月05日

BOTANICAL NAME: Crocus
PLANT TYPE: Flower
SUN EXPOSURE: Full SunPart Sun
SOIL TYPE: AnyLoamy
FLOWER COLOR: BlueOrangePinkPurpleWhiteYellow
BLOOM TIME: SpringWinter
When it seems like winter will never lose its icy grip, the dainty goblet-shaped crocus pushes through the snow to put on a show of colorful revival. If you are not planting this perennial bulb, you are missing an early season of delight.
From snow crocuses (the first to bloom) to giant Dutch crocuses, all just 2 to 4 inches tall, these blooms offer a variety in color (pinks, reds, oranges, yellows, purples, blues, and more) that stand out against the bleak late-winter landscape. Many have strong perfumes that lure bees out of their hives in February or March.
Small bulbs like crocus not only provide winter garden color, but they naturalize, meaning that they spread and come back year after year—with minimum care—for an ever-larger display. As a bonus, deer, squirrels, and rabbits rarely bother early little bulbs.
PLANTING
Before the ground freezes in the fall, early bulbs can be planted most anywhere, except in the dense shade on the north side of buildings.
Ideally, plant crocus corms 6 to 8 weeks before a hard frost is expected and when soils are below 60 degrees F. This is usually during September and October in the North, and October and November in the South.
Make sure the soil drains well, because bulbs will rot in soggy ground.
Work in organic matter such as compost, peat or a substitute, such as shredded leaves to a depth of at least 10 inches.
Plant crocus bulbs 3 to 4 inches deep (with the pointy end up). After planting, water well.
Plant bulbs in groups or clusters rather than spacing them in a single line along a walkway or border. Single flowers get lost in the landscape.Plant a few inches apart, and plant in groups of 10 or more.
Consider planting crocuses in lawns and meadows where they can form carpets, or mass them in the front of flower beds along the edge.
Plant taller bulbs and spring-flowering shrubs behind the early bulbs for color contrast.
CARE
Apply a balanced fertilizer in early autumn if your spring is short and the days heat up fast; or, apply fertilizer after bulbs flower if your spring is long and temperate; bulbs will have a chance to use the extra nutrients to produce bigger carbohydrate stores.
Through the autumn, keep crocus beds watered if weather gets dry but do not waterlog. Cover the beds with mulch before the winter.
In late February, remove mulches from snowdrops and crocuses so the shoots can come through.
In February and March, keep plastic milk jugs or other coverings on hand to protect the flowers of crocuses and other early bloomers against the return of severe weather.
If you have crocuses growing in your lawn in mid-Spring, don't mow until their leaves have died down.
PESTS/DISEASES
Mice, voles, and squirrels may feed on the corms. If they are a problem, consider planting crocus bulbs in buried wire cages.
Birds sometimes pick off the flowers.
Corms in storage are prone to rots and molds.
PLANT TYPE: Flower
SUN EXPOSURE: Full SunPart Sun
SOIL TYPE: AnyLoamy
FLOWER COLOR: BlueOrangePinkPurpleWhiteYellow
BLOOM TIME: SpringWinter
When it seems like winter will never lose its icy grip, the dainty goblet-shaped crocus pushes through the snow to put on a show of colorful revival. If you are not planting this perennial bulb, you are missing an early season of delight.
From snow crocuses (the first to bloom) to giant Dutch crocuses, all just 2 to 4 inches tall, these blooms offer a variety in color (pinks, reds, oranges, yellows, purples, blues, and more) that stand out against the bleak late-winter landscape. Many have strong perfumes that lure bees out of their hives in February or March.
Small bulbs like crocus not only provide winter garden color, but they naturalize, meaning that they spread and come back year after year—with minimum care—for an ever-larger display. As a bonus, deer, squirrels, and rabbits rarely bother early little bulbs.

PLANTING
Before the ground freezes in the fall, early bulbs can be planted most anywhere, except in the dense shade on the north side of buildings.
Ideally, plant crocus corms 6 to 8 weeks before a hard frost is expected and when soils are below 60 degrees F. This is usually during September and October in the North, and October and November in the South.
Make sure the soil drains well, because bulbs will rot in soggy ground.
Work in organic matter such as compost, peat or a substitute, such as shredded leaves to a depth of at least 10 inches.
Plant crocus bulbs 3 to 4 inches deep (with the pointy end up). After planting, water well.
Plant bulbs in groups or clusters rather than spacing them in a single line along a walkway or border. Single flowers get lost in the landscape.Plant a few inches apart, and plant in groups of 10 or more.
Consider planting crocuses in lawns and meadows where they can form carpets, or mass them in the front of flower beds along the edge.
Plant taller bulbs and spring-flowering shrubs behind the early bulbs for color contrast.

CARE
Apply a balanced fertilizer in early autumn if your spring is short and the days heat up fast; or, apply fertilizer after bulbs flower if your spring is long and temperate; bulbs will have a chance to use the extra nutrients to produce bigger carbohydrate stores.
Through the autumn, keep crocus beds watered if weather gets dry but do not waterlog. Cover the beds with mulch before the winter.
In late February, remove mulches from snowdrops and crocuses so the shoots can come through.
In February and March, keep plastic milk jugs or other coverings on hand to protect the flowers of crocuses and other early bloomers against the return of severe weather.

If you have crocuses growing in your lawn in mid-Spring, don't mow until their leaves have died down.
PESTS/DISEASES
Mice, voles, and squirrels may feed on the corms. If they are a problem, consider planting crocus bulbs in buried wire cages.
Birds sometimes pick off the flowers.
Corms in storage are prone to rots and molds.
1
0
文章
Dummer. ゛☀
2017年08月04日

The tree’s yearly cycle
Within a given year, plants go through various phases:
winter dormancy
revival and flowering
producing new growth and fruit
a short period of summer dormancy
consolidation of the new growth
preparation for the winter dormancy.
The start points and lengths of the phases are very much dependent on variations in the photoperiod (the relationship between the length of the daytime and of night) and climate, which can alter the periods of rest or activity. For example, if there are very high temperatures, above 32–35°C, that last for more than a very brief spell, this will slow down or inhibit photosynthesis: the plant will then go into a period of dormancy that will not end until normal conditions have been re-established.

When to intervene
The time to intervene on a bonsai is usually dictated by the plant’s life cycle. Sometimes the right moment is limited to a very short period of just a few days: this is the case for pinching buds on maples. Sometimes, on the other hand, the work can be carried out over an extended period, by adapting the procedures or replacing them with other solutions which, if carefully applied, may even be preferable: this is the case for the repotting of some broadleaves in summer.
In general, the period for intervention more or less coincides with seasonal changes:
in winter, the tree is dormant because of very cold weather
in early spring, growth begins again
in spring and early summer, there is major growth
in high summer, the tree is dormant due to the heat
in early autumn, fruit is produced and growth stabilises
in late autumn, the tree prepares for the winter dormancy.
These are only rough guidelines, however. Geographical position and local microclimate are highly variable factors, so it is necessary to check the plant’s ability to adapt to the chosen location. Paying close attention to the biological cycle of plants to glean useful pointers and to choose the time and method of intervention is much more pertinent, and gives more accurate information than following tables of prescribed data.
Phase 1. During winter dormancy
Broadleaves are inactive during this period. The absence of leaves does not allow photosynthesis, and there is no activity in the organs. The part above ground has no need for either light or fertiliser. Stick only to routine maintenance, to avoid the possibility of infestation by parasites or fungus. The roots, on the other hand, need a certain amount of moisture in the soil to stay alive and not dry out. But take care not to over-water; otherwise you risk asphyxiating them. During this period, because of the low temperatures, water evaporates slowly and is not absorbed at all by the leaves. The soil dries so slowly that it is easy to forget to check it. This is a good period for a number of types of work on bonsai.
Repotting
Most bonsai can be repotted during the winter, but the best period for this is the weeks immediately prior to the early spring revival, when you judge that there is no longer a danger of intense cold that could damage the roots. If repotting a tree in the middle of winter, you need to remember to put it in a place where is safe from frost – although not in a heated room, because you do not want to stimulate premature growth.
Broadleaves are generally repotted after hosing down the root ball to clean it and leave the roots bare. This provides an opportunity to have a good look at all of the roots every two to three years. You therefore need to take advantage of it to improve them, by removing thicker ones so as to stimulate growth of finer ones which absorb nutrients dissolved in water. The improvements must concern either the buried roots, or those on the surface, and the nebari which should be attended to at each repotting.
The root mass of a vigorous broadleaf can be reduced by 60%, or even more, without causing any suffering to the plant.
Repotting conifers is more complicated and carries a slightly higher level of risk than that of broadleaves. It should never be done with bare roots; instead, part of the root ball must be kept intact. The fine roots of conifers generally have more trouble forming. To absorb food, they need mycorrhizas, which therefore need to be retained.
The time available in late winter for repotting broadleaves is rather limited. Repotting must be suspended as soon as the first buds start to open. A second possibility for repotting arises in June, when the leaves from the first budding are mature. The period for repotting conifers is much longer and can extend right up to the point when the candles open for pines, or to the growth of new foliage for junipers: in practice, it can last from the first half of February until mid-June, depending on the microclimate of the location concerned. Cutting back the roots during repotting stimulates the plant to quickly produce new roots, new growth, and to repair its wounds: healing is very speedy in this period.
Pruning
As for the above-ground parts of the plant, this late winter period is a good time for structural pruning, replacement pruning and maintenance pruning:
Structural, or ‘hard’, pruning is intended to give an initial form to virgin material, reducing the length of the trunk and accentuating the taper if this is part of the design conceived for the bonsai, or removing unnecessary branches.
Replacement pruning is used to reduce the height of a bonsai or the length of its branches. It thus serves to make the bonsai’s form more compact. This and the previous type of pruning use a smaller and shorter secondary branch to replace the one that has been cut off. If necessary, before growth starts again in the spring, this is the moment to carry out a second styling exercise, to go back over the design or perfect it.
Maintenance pruning. It is also possible to use a very light pruning to get back the shape that has been lost through the new growth from the last season. This type of pruning, which is usually combined with wire training, allows the bonsai’s form to be re-established and the foliage to grow correctly. Repeated every year, this procedure leads the bonsai towards maturity and encourages its growth activity to stabilise.
It is always best to treat the severed ends after pruning with cut paste or adhesive aluminium tape, to protect them from microorganisms and insects, and to retain a minimum level of humidity, which is necessary for the development of healing cells.
The use of adhesive aluminium tape (0.5 mm thickness) for healing has been adapted to bonsai by the master Harumi Miyao, renowned in Japan as the greatest expert on Japanese maple, Acer palmatum. The technique consists of covering the perfectly flat (not concave!) cut with a piece of aluminium tape which goes 2 centimetres beyond the edge of the cut all round. Healing then takes half the time that it does with other methods, and there is no swelling.
Other tasks for the dormant period
The winter dormancy is a good time for:
working on jin and shari (dead parts of branches or trunks), whether small or large
major work on deadwood on junipers, pines and Prunus
bending trunks and branches, small or large
treating deadwood with jin seal to prevent it from rotting
using jin seal as a preventative measure (dilute 1 part jin seal with 30 parts water) on trunks and major branches of broadleaves.
On pines, just before maintenance pruning and wire training, if it has not been done already, it is possible to remove the old needles to allow more light to penetrate, to activate the dormant buds inside the tree and to sort through the terminal buds at the ends of the branches to leave just two of them.
Phase 2. Reawakening in early spring
At the beginning of spring, broadleaves need to be carefully inspected to spot the first signs of budding. Some species, such as elm and hornbeam, should initially be left to bud freely. Only a few weeks later, when the new shoots have developed at least four to six leaves, is intervention necessary by cutting with scissors after the second leaf.
Others, however – especially in the case of bonsai that have already been styled – need intervention to keep overly vigorous growth under control and avoid compromising the elegance and refinement of the ends of the ramification. This is the case for Japanese maples in the styling phase: if they are left to grow unfettered, during the season they will produce thick, straight shoots a metre long.
On the other hand, on a maple that is in the phase of refinement, intervention on the buds is required every day, from the moment the first ones start to open until the last ones have finished budding. The procedure consists of opening the first two leaves, which will be retained, and removing the leaves inside. This operation, which is called “pinching”, induces the growth of new and smaller buds, which will sprout from the axils of the remaining leaves. The procedure, which needs to be constantly repeated and is often carried out alongside deleafing, generates small leaves and an elegant and slender ramification, which is what characterises Japanese maples. Beech is an unusual case, because it only buds once in the spring. This idiosyncrasy has the result of increasing the time required for the ramification to densify.
Phase 3. New growth in Spring

Pinching junipers
All varieties of juniper (Juniperus communis, J. chinensis, J. phoenicea L., etc.), if well cultivated (with the necessary sunlight, water and fertiliser), bud continuously from spring to autumn. New shoots should be pinched back with the fingertips every 10 to 15 days, or trimmed with scissors two or three times during the season. If you choose to use scissors, then cut by inserting the scissor blades parallel to the stalk of the shoot.
Pinching firs
As for firs, only large buds should be pinched, when they reach 2 to 3 centimetres (about an inch) long. Break them off with your fingers, halfway down. Leave small buds to develop, to balance the energy of the different areas of the tree.
Pinching broadleaves
Plants have a natural tendency to grow most in the areas that have the greatest amount of light, so that they can photosynthesise as much as possible. The bonsaist’s task is to spread the growth as evenly as possible, to balance out the energy across all areas of the plant. Pinching is needed for the most vigorous buds, to limit their development and encourage strengthening of the weaker ones. Usually you should only keep the first two buds, and remove the others. However, in particularly thick areas, it is better to leave only one, while leaving three or even four in the thinner areas.
This procedure should be repeated as and when necessary as the new growth comes out, and should continue throughout the growing season.
Flowering and fruiting plants are a separate case, because they should be left free to grow. They should only be pruned at the end of summer, after the differentiation between flower buds and leaf buds has been established. Flower buds develop at the bases of branches that have grown during the year.
If you prune the branches before the buds are differentiated, which generally happens around the end of June, the reduction of the leaf surface area obliges the plant to increase the number of leaf buds and abandon flower buds in order to re-establish a balance in the existing foliage.
Pinching pines
The months of May and June are a period of intense activity in pines. If you want make a pine into a bonsai, pinching candles and pruning new shoots are absolute musts. If small branches are not slowed down, they will continue to grow longer in all directions, seeking out as much light as possible. They will then be impossible to make more compact in order to create foliage pads. The energy will then be concentrated around the thickest areas – the branches at the top of the tree and the ends of the other branches – as is the case for almost all plants, which will increase the energy in these spots, to the detriment of the thinner areas which will end up perishing. To reverse this tendency, you need to cut off a greater or lesser amount of the candles. The period to do this is difficult to establish a priori, because it varies according to the specimens concerned and the geographical region. What you need to remember is that, on vigorous specimens, candles should be pinched when they have developed adequately, to somewhere around 3 centimetres (an inch and a quarter). To pinch them back, take the candle between your thumb and index finger and cut it off, while gently twisting it. You should not use scissors, because if you do, the ends of the needles will turn black as they develop. When candles do not open all at once, you need to pay careful attention and pinch them all back bit by bit, as they develop.
Layering
When the plant is at the height of its activity, it is the right moment for layering. Sap is flowing abundantly and all the organs are working at a good pace, which encourages roots to sprout quickly. Layering (also called marcotting) can be used to thin down an overly thick trunk, to create a new specimen by using an interesting part of an over-thick plant, to improve nebari that is not particularly attractive, etc. The procedure takes advantage of the capacity many plants have of rapidly producing new roots at a point where a ring of bark has been removed. Layering is an easy method of multiplying numbers of plants. It is used a lot to produce specimens with good proportions and interesting characteristics, and quite quickly at that.
Taking cuttings
Cuttings are a reproduction technique that allows plants with perfectly identical characteristics to the parent plant to be obtained. Again, this technique takes advantage of the capacity that certain species have – junipers and almost all broadleaves – to put out roots. Pines are not recommended here, because they usually have too slow a metabolism for the cutting to take root before it dries out. If the part destined for the cutting is well chosen, the new plant will have good characteristics, but will need plenty of time in order to reach the appropriate dimensions for creating a bonsai.
Phase 4. Summer
Summer repotting
Sometimes, for lack of time or by force of events, you cannot repot during the ideal period, which is generally at the end of winter. Some species can be safely repotted outwith this season, usually in June, by taking certain precautions. This summer repotting is done when broadleaves are mature – that is, when they have finished developing and are completely fulfilling all their functions (first and foremost of which is photosynthesis). They change slightly in colour (growing darker), as well as in texture – they become more resistant, and rubbing them between your fingers makes a sound similar to rustling a sheet of paper. This is the best time for an “off-season” repotting. In summer, roots should only be cut back by a maximum of 40 %, while in spring they can be cut back by up to 60%. In addition, it is likewise advisable to cut back the foliage, by defoliating to a greater or lesser degree, so as to improve the water balance – between absorbed and evaporated water. After repotting, it is important to protect the plant from direct sunlight and wind for a few weeks, and to shelter it in a bright spot. To ensure the substrate has the right level of moisture, which encourages the plant to sprout and develop radicles, on the surface where it dries out most quickly, cover the soil with a layer of small pieces of sphagnum; these can be left permanently in place.
If you work carefully, broadleaves generally withstand being repotted out of season without any problem at all. For conifers (pines and junipers), since their repotting period is longer, the need to repot them in June is eliminated, and all the more so since June is the month when candles develop and new needles and shoots are put out; and it is dangerous and not right to stress plants without good reason.
Pruning new shoots on pines
During June, and sometimes up to mid-July depending on the climate and the specific characteristics of each plant, new shoots on pines should be cut back with scissors. These new shoots are buds that have become candles and have sprouted needles. The aim of pruning new shoots is to keep the lengthening of the branches under control, to encourage dormant buds to be roused and consequently to form dense, compact ramification, as well as reducing the length of needles.
Summer dormancy
As high summer temperatures start to arrive – above 32-35°C (90–95°F) – almost all plants stop or considerably slow down their growth rate. Metabolism, photosynthesis, transpiration and gaseous exchange undergo major changes, forcing the leaves to put mechanisms in place that can reduce the absorption of heat and can dissipate it as much as possible through stomata. Plants stop growing and go into a state of rest. When conditions return to “normal” for them, all their mechanisms start to work normally again.
During this period, full attention needs to be paid to watering: often, very high temperatures and wind will dry out the substrate very quickly and literally burn the dehydrated leaves. The leaves begin to go dry (turn brown) on their outer edges, and if the plant is not quickly watered, including being sprayed with a fine mist, they will end up drying out completely. It is easy to understand that in order to function properly, plants need a quantity of water that is at least equal to that used to carry out all their functions. When the amount of water that is lost through foliar transpiration, evaporation from the substrate etc. is greater than the amount being absorbed, the leaves will wither.
If the imbalance is only slight and does not last long, normal conditions can quickly be re-established by watering, and no permanent damage will be recorded. Only photosynthesis and growth will be temporarily inhibited. Without watering, the loss of water will spread from the leaves to the trunk and right down to the roots, and the leaves will fall off within a few days. As with leaf loss in late autumn, the loss of all leaves in advance through drying out is not always a sign that the plant is dead. If the buds for the following spring have been produced, and the dehydration has not affected the branches, trunk or roots, the plant will bud normally in the spring.
If the plant is rehydrated, it may even recover during the season that is already underway, and reconstruct its root system and buds.

Phase 5. In autumn
Fertilising
Once the hottest period is past, in late August or early September (depending on the region), temperatures return to normal, below 30°C (86°F), and plants then readopt their normal growth activity. This is also the moment when attention needs to be focused as much as possible on fertilisation, which needs to supply the plant with the substances it needs to develop, consolidate new growth, reconstitute exhausted reserves and strengthen itself to best cope with the winter season.
In autumn, it is preferable to use fertilisers that are low in nitrogen, which is better for encouraging vegetative growth, especially for young plants and those that are in the construction phase. The feed also needs to be rich in phosphorus – to stimulate root growth and prepare a good flowering for the spring – and in potassium, to strengthen the plant, increase the roots’ assimilation capacity and consolidate the new growth that has been produced during the season.
Chemical fertilisers, which should be used with great care, can be put quickly to use by plants. Conversely, the nutrients of organic fertilisers need to break down by fermentation to be assimilated: this is why they can only be used by the roots 20 to 30 days after they have been applied.
Phase 6. Winter rest
Winter is the time when, after lavishing care and attention on plants, you can finally reap the rewards of your efforts and enjoy them: trees offer up bunches of little apples, orange kakis, a whole host of multicoloured berries and splendidly coloured leaves. But there are still some small tasks that need to be done, to guide plants towards their rest period as best as possible:
remove old pine needles – those that have not grown this season – to allow light to penetrate between the branches and activate the reawakening of dormant buds;
remove dead leaves on broadleaf trees, to prevent stagnation of the moisture from creating problems;
treat branches and trunks of broadleaves with jin seal to guard against disease and fungal infections (1 part jin seal to 30 parts water).
Within a given year, plants go through various phases:
winter dormancy
revival and flowering
producing new growth and fruit
a short period of summer dormancy
consolidation of the new growth
preparation for the winter dormancy.
The start points and lengths of the phases are very much dependent on variations in the photoperiod (the relationship between the length of the daytime and of night) and climate, which can alter the periods of rest or activity. For example, if there are very high temperatures, above 32–35°C, that last for more than a very brief spell, this will slow down or inhibit photosynthesis: the plant will then go into a period of dormancy that will not end until normal conditions have been re-established.

When to intervene
The time to intervene on a bonsai is usually dictated by the plant’s life cycle. Sometimes the right moment is limited to a very short period of just a few days: this is the case for pinching buds on maples. Sometimes, on the other hand, the work can be carried out over an extended period, by adapting the procedures or replacing them with other solutions which, if carefully applied, may even be preferable: this is the case for the repotting of some broadleaves in summer.
In general, the period for intervention more or less coincides with seasonal changes:
in winter, the tree is dormant because of very cold weather
in early spring, growth begins again
in spring and early summer, there is major growth
in high summer, the tree is dormant due to the heat
in early autumn, fruit is produced and growth stabilises
in late autumn, the tree prepares for the winter dormancy.
These are only rough guidelines, however. Geographical position and local microclimate are highly variable factors, so it is necessary to check the plant’s ability to adapt to the chosen location. Paying close attention to the biological cycle of plants to glean useful pointers and to choose the time and method of intervention is much more pertinent, and gives more accurate information than following tables of prescribed data.
Phase 1. During winter dormancy
Broadleaves are inactive during this period. The absence of leaves does not allow photosynthesis, and there is no activity in the organs. The part above ground has no need for either light or fertiliser. Stick only to routine maintenance, to avoid the possibility of infestation by parasites or fungus. The roots, on the other hand, need a certain amount of moisture in the soil to stay alive and not dry out. But take care not to over-water; otherwise you risk asphyxiating them. During this period, because of the low temperatures, water evaporates slowly and is not absorbed at all by the leaves. The soil dries so slowly that it is easy to forget to check it. This is a good period for a number of types of work on bonsai.
Repotting
Most bonsai can be repotted during the winter, but the best period for this is the weeks immediately prior to the early spring revival, when you judge that there is no longer a danger of intense cold that could damage the roots. If repotting a tree in the middle of winter, you need to remember to put it in a place where is safe from frost – although not in a heated room, because you do not want to stimulate premature growth.
Broadleaves are generally repotted after hosing down the root ball to clean it and leave the roots bare. This provides an opportunity to have a good look at all of the roots every two to three years. You therefore need to take advantage of it to improve them, by removing thicker ones so as to stimulate growth of finer ones which absorb nutrients dissolved in water. The improvements must concern either the buried roots, or those on the surface, and the nebari which should be attended to at each repotting.
The root mass of a vigorous broadleaf can be reduced by 60%, or even more, without causing any suffering to the plant.
Repotting conifers is more complicated and carries a slightly higher level of risk than that of broadleaves. It should never be done with bare roots; instead, part of the root ball must be kept intact. The fine roots of conifers generally have more trouble forming. To absorb food, they need mycorrhizas, which therefore need to be retained.
The time available in late winter for repotting broadleaves is rather limited. Repotting must be suspended as soon as the first buds start to open. A second possibility for repotting arises in June, when the leaves from the first budding are mature. The period for repotting conifers is much longer and can extend right up to the point when the candles open for pines, or to the growth of new foliage for junipers: in practice, it can last from the first half of February until mid-June, depending on the microclimate of the location concerned. Cutting back the roots during repotting stimulates the plant to quickly produce new roots, new growth, and to repair its wounds: healing is very speedy in this period.
Pruning
As for the above-ground parts of the plant, this late winter period is a good time for structural pruning, replacement pruning and maintenance pruning:
Structural, or ‘hard’, pruning is intended to give an initial form to virgin material, reducing the length of the trunk and accentuating the taper if this is part of the design conceived for the bonsai, or removing unnecessary branches.
Replacement pruning is used to reduce the height of a bonsai or the length of its branches. It thus serves to make the bonsai’s form more compact. This and the previous type of pruning use a smaller and shorter secondary branch to replace the one that has been cut off. If necessary, before growth starts again in the spring, this is the moment to carry out a second styling exercise, to go back over the design or perfect it.
Maintenance pruning. It is also possible to use a very light pruning to get back the shape that has been lost through the new growth from the last season. This type of pruning, which is usually combined with wire training, allows the bonsai’s form to be re-established and the foliage to grow correctly. Repeated every year, this procedure leads the bonsai towards maturity and encourages its growth activity to stabilise.
It is always best to treat the severed ends after pruning with cut paste or adhesive aluminium tape, to protect them from microorganisms and insects, and to retain a minimum level of humidity, which is necessary for the development of healing cells.
The use of adhesive aluminium tape (0.5 mm thickness) for healing has been adapted to bonsai by the master Harumi Miyao, renowned in Japan as the greatest expert on Japanese maple, Acer palmatum. The technique consists of covering the perfectly flat (not concave!) cut with a piece of aluminium tape which goes 2 centimetres beyond the edge of the cut all round. Healing then takes half the time that it does with other methods, and there is no swelling.
Other tasks for the dormant period
The winter dormancy is a good time for:
working on jin and shari (dead parts of branches or trunks), whether small or large
major work on deadwood on junipers, pines and Prunus
bending trunks and branches, small or large
treating deadwood with jin seal to prevent it from rotting
using jin seal as a preventative measure (dilute 1 part jin seal with 30 parts water) on trunks and major branches of broadleaves.
On pines, just before maintenance pruning and wire training, if it has not been done already, it is possible to remove the old needles to allow more light to penetrate, to activate the dormant buds inside the tree and to sort through the terminal buds at the ends of the branches to leave just two of them.
Phase 2. Reawakening in early spring
At the beginning of spring, broadleaves need to be carefully inspected to spot the first signs of budding. Some species, such as elm and hornbeam, should initially be left to bud freely. Only a few weeks later, when the new shoots have developed at least four to six leaves, is intervention necessary by cutting with scissors after the second leaf.
Others, however – especially in the case of bonsai that have already been styled – need intervention to keep overly vigorous growth under control and avoid compromising the elegance and refinement of the ends of the ramification. This is the case for Japanese maples in the styling phase: if they are left to grow unfettered, during the season they will produce thick, straight shoots a metre long.
On the other hand, on a maple that is in the phase of refinement, intervention on the buds is required every day, from the moment the first ones start to open until the last ones have finished budding. The procedure consists of opening the first two leaves, which will be retained, and removing the leaves inside. This operation, which is called “pinching”, induces the growth of new and smaller buds, which will sprout from the axils of the remaining leaves. The procedure, which needs to be constantly repeated and is often carried out alongside deleafing, generates small leaves and an elegant and slender ramification, which is what characterises Japanese maples. Beech is an unusual case, because it only buds once in the spring. This idiosyncrasy has the result of increasing the time required for the ramification to densify.
Phase 3. New growth in Spring

Pinching junipers
All varieties of juniper (Juniperus communis, J. chinensis, J. phoenicea L., etc.), if well cultivated (with the necessary sunlight, water and fertiliser), bud continuously from spring to autumn. New shoots should be pinched back with the fingertips every 10 to 15 days, or trimmed with scissors two or three times during the season. If you choose to use scissors, then cut by inserting the scissor blades parallel to the stalk of the shoot.
Pinching firs
As for firs, only large buds should be pinched, when they reach 2 to 3 centimetres (about an inch) long. Break them off with your fingers, halfway down. Leave small buds to develop, to balance the energy of the different areas of the tree.
Pinching broadleaves
Plants have a natural tendency to grow most in the areas that have the greatest amount of light, so that they can photosynthesise as much as possible. The bonsaist’s task is to spread the growth as evenly as possible, to balance out the energy across all areas of the plant. Pinching is needed for the most vigorous buds, to limit their development and encourage strengthening of the weaker ones. Usually you should only keep the first two buds, and remove the others. However, in particularly thick areas, it is better to leave only one, while leaving three or even four in the thinner areas.
This procedure should be repeated as and when necessary as the new growth comes out, and should continue throughout the growing season.
Flowering and fruiting plants are a separate case, because they should be left free to grow. They should only be pruned at the end of summer, after the differentiation between flower buds and leaf buds has been established. Flower buds develop at the bases of branches that have grown during the year.
If you prune the branches before the buds are differentiated, which generally happens around the end of June, the reduction of the leaf surface area obliges the plant to increase the number of leaf buds and abandon flower buds in order to re-establish a balance in the existing foliage.
Pinching pines
The months of May and June are a period of intense activity in pines. If you want make a pine into a bonsai, pinching candles and pruning new shoots are absolute musts. If small branches are not slowed down, they will continue to grow longer in all directions, seeking out as much light as possible. They will then be impossible to make more compact in order to create foliage pads. The energy will then be concentrated around the thickest areas – the branches at the top of the tree and the ends of the other branches – as is the case for almost all plants, which will increase the energy in these spots, to the detriment of the thinner areas which will end up perishing. To reverse this tendency, you need to cut off a greater or lesser amount of the candles. The period to do this is difficult to establish a priori, because it varies according to the specimens concerned and the geographical region. What you need to remember is that, on vigorous specimens, candles should be pinched when they have developed adequately, to somewhere around 3 centimetres (an inch and a quarter). To pinch them back, take the candle between your thumb and index finger and cut it off, while gently twisting it. You should not use scissors, because if you do, the ends of the needles will turn black as they develop. When candles do not open all at once, you need to pay careful attention and pinch them all back bit by bit, as they develop.
Layering
When the plant is at the height of its activity, it is the right moment for layering. Sap is flowing abundantly and all the organs are working at a good pace, which encourages roots to sprout quickly. Layering (also called marcotting) can be used to thin down an overly thick trunk, to create a new specimen by using an interesting part of an over-thick plant, to improve nebari that is not particularly attractive, etc. The procedure takes advantage of the capacity many plants have of rapidly producing new roots at a point where a ring of bark has been removed. Layering is an easy method of multiplying numbers of plants. It is used a lot to produce specimens with good proportions and interesting characteristics, and quite quickly at that.
Taking cuttings
Cuttings are a reproduction technique that allows plants with perfectly identical characteristics to the parent plant to be obtained. Again, this technique takes advantage of the capacity that certain species have – junipers and almost all broadleaves – to put out roots. Pines are not recommended here, because they usually have too slow a metabolism for the cutting to take root before it dries out. If the part destined for the cutting is well chosen, the new plant will have good characteristics, but will need plenty of time in order to reach the appropriate dimensions for creating a bonsai.
Phase 4. Summer
Summer repotting
Sometimes, for lack of time or by force of events, you cannot repot during the ideal period, which is generally at the end of winter. Some species can be safely repotted outwith this season, usually in June, by taking certain precautions. This summer repotting is done when broadleaves are mature – that is, when they have finished developing and are completely fulfilling all their functions (first and foremost of which is photosynthesis). They change slightly in colour (growing darker), as well as in texture – they become more resistant, and rubbing them between your fingers makes a sound similar to rustling a sheet of paper. This is the best time for an “off-season” repotting. In summer, roots should only be cut back by a maximum of 40 %, while in spring they can be cut back by up to 60%. In addition, it is likewise advisable to cut back the foliage, by defoliating to a greater or lesser degree, so as to improve the water balance – between absorbed and evaporated water. After repotting, it is important to protect the plant from direct sunlight and wind for a few weeks, and to shelter it in a bright spot. To ensure the substrate has the right level of moisture, which encourages the plant to sprout and develop radicles, on the surface where it dries out most quickly, cover the soil with a layer of small pieces of sphagnum; these can be left permanently in place.
If you work carefully, broadleaves generally withstand being repotted out of season without any problem at all. For conifers (pines and junipers), since their repotting period is longer, the need to repot them in June is eliminated, and all the more so since June is the month when candles develop and new needles and shoots are put out; and it is dangerous and not right to stress plants without good reason.
Pruning new shoots on pines
During June, and sometimes up to mid-July depending on the climate and the specific characteristics of each plant, new shoots on pines should be cut back with scissors. These new shoots are buds that have become candles and have sprouted needles. The aim of pruning new shoots is to keep the lengthening of the branches under control, to encourage dormant buds to be roused and consequently to form dense, compact ramification, as well as reducing the length of needles.
Summer dormancy
As high summer temperatures start to arrive – above 32-35°C (90–95°F) – almost all plants stop or considerably slow down their growth rate. Metabolism, photosynthesis, transpiration and gaseous exchange undergo major changes, forcing the leaves to put mechanisms in place that can reduce the absorption of heat and can dissipate it as much as possible through stomata. Plants stop growing and go into a state of rest. When conditions return to “normal” for them, all their mechanisms start to work normally again.
During this period, full attention needs to be paid to watering: often, very high temperatures and wind will dry out the substrate very quickly and literally burn the dehydrated leaves. The leaves begin to go dry (turn brown) on their outer edges, and if the plant is not quickly watered, including being sprayed with a fine mist, they will end up drying out completely. It is easy to understand that in order to function properly, plants need a quantity of water that is at least equal to that used to carry out all their functions. When the amount of water that is lost through foliar transpiration, evaporation from the substrate etc. is greater than the amount being absorbed, the leaves will wither.
If the imbalance is only slight and does not last long, normal conditions can quickly be re-established by watering, and no permanent damage will be recorded. Only photosynthesis and growth will be temporarily inhibited. Without watering, the loss of water will spread from the leaves to the trunk and right down to the roots, and the leaves will fall off within a few days. As with leaf loss in late autumn, the loss of all leaves in advance through drying out is not always a sign that the plant is dead. If the buds for the following spring have been produced, and the dehydration has not affected the branches, trunk or roots, the plant will bud normally in the spring.
If the plant is rehydrated, it may even recover during the season that is already underway, and reconstruct its root system and buds.

Phase 5. In autumn
Fertilising
Once the hottest period is past, in late August or early September (depending on the region), temperatures return to normal, below 30°C (86°F), and plants then readopt their normal growth activity. This is also the moment when attention needs to be focused as much as possible on fertilisation, which needs to supply the plant with the substances it needs to develop, consolidate new growth, reconstitute exhausted reserves and strengthen itself to best cope with the winter season.
In autumn, it is preferable to use fertilisers that are low in nitrogen, which is better for encouraging vegetative growth, especially for young plants and those that are in the construction phase. The feed also needs to be rich in phosphorus – to stimulate root growth and prepare a good flowering for the spring – and in potassium, to strengthen the plant, increase the roots’ assimilation capacity and consolidate the new growth that has been produced during the season.
Chemical fertilisers, which should be used with great care, can be put quickly to use by plants. Conversely, the nutrients of organic fertilisers need to break down by fermentation to be assimilated: this is why they can only be used by the roots 20 to 30 days after they have been applied.
Phase 6. Winter rest
Winter is the time when, after lavishing care and attention on plants, you can finally reap the rewards of your efforts and enjoy them: trees offer up bunches of little apples, orange kakis, a whole host of multicoloured berries and splendidly coloured leaves. But there are still some small tasks that need to be done, to guide plants towards their rest period as best as possible:
remove old pine needles – those that have not grown this season – to allow light to penetrate between the branches and activate the reawakening of dormant buds;
remove dead leaves on broadleaf trees, to prevent stagnation of the moisture from creating problems;
treat branches and trunks of broadleaves with jin seal to guard against disease and fungal infections (1 part jin seal to 30 parts water).
0
0
文章
Dummer. ゛☀
2017年07月30日

Family - Oleaceae
Stems - To +2m tall, multiple from base, branching, woody, erect to reclining. Tigs hollow, with conspicuous lenticels, the youngest slightly 4-angled. Winter buds lance-ovoid, pointed.

Leaves - Opposite, petiolate. Petiole to 1.5cm long, minutely winged or not, glabrous. Blade lance-ovate to ovate, to +/-6cm long, +/-3cm broad, glabrous, green, acute. Margins serrate above the middle, typically entire near base.

Inflorescence - Flowers mostly appearing before leaves, axillary, solitary or in fascicles. Pedicels glabrous, to +/-6mm long.
Flowers - Corolla yellow, 4-lobed, glabrous. Tube to 8mm long. Lobes to 2cm long, 1cm broad, oblong. Stamens 2, adnate at base of corolla tube. Filaments yellow, 4mm long, glabrous. Anthers yellowish-tan, 2.1mm long. Stigma biglobose, capitate. Style to 1.5mm long. Ovary glabrous, 2-locular, glabrous, superior. Calyx 4-lobed, green or with some purple. Tube to 1mm long, glabrous. Lobes to 6mm long, 2.5mm broad, with evident midvein. Margins entire, scarious, ciliate. Capsule loculicidal, to 2cm long, 1cm in diameter, tannish, with lenticels, many seeded.

Flowering - March - April.
Habitat - Cultivated.
Origin - Native to Asia.
Other info. - Forsythia is one of the first plants to bloom in Missouri in the spring. The brilliant yellow flowers are impossible to miss and decorate the landscape. The flowers appear before the leaves but typically remain until the plant is almost leafed out. There are other species of Forsythia which are cultivated in Missouri but nearly all look alike. They can be differentiated by looking at the hairiness of the leaves and the pith (or lack of) of the twigs and branches. For a complete rundown of the genus go here.
Stems - To +2m tall, multiple from base, branching, woody, erect to reclining. Tigs hollow, with conspicuous lenticels, the youngest slightly 4-angled. Winter buds lance-ovoid, pointed.

Leaves - Opposite, petiolate. Petiole to 1.5cm long, minutely winged or not, glabrous. Blade lance-ovate to ovate, to +/-6cm long, +/-3cm broad, glabrous, green, acute. Margins serrate above the middle, typically entire near base.

Inflorescence - Flowers mostly appearing before leaves, axillary, solitary or in fascicles. Pedicels glabrous, to +/-6mm long.
Flowers - Corolla yellow, 4-lobed, glabrous. Tube to 8mm long. Lobes to 2cm long, 1cm broad, oblong. Stamens 2, adnate at base of corolla tube. Filaments yellow, 4mm long, glabrous. Anthers yellowish-tan, 2.1mm long. Stigma biglobose, capitate. Style to 1.5mm long. Ovary glabrous, 2-locular, glabrous, superior. Calyx 4-lobed, green or with some purple. Tube to 1mm long, glabrous. Lobes to 6mm long, 2.5mm broad, with evident midvein. Margins entire, scarious, ciliate. Capsule loculicidal, to 2cm long, 1cm in diameter, tannish, with lenticels, many seeded.

Flowering - March - April.
Habitat - Cultivated.
Origin - Native to Asia.
Other info. - Forsythia is one of the first plants to bloom in Missouri in the spring. The brilliant yellow flowers are impossible to miss and decorate the landscape. The flowers appear before the leaves but typically remain until the plant is almost leafed out. There are other species of Forsythia which are cultivated in Missouri but nearly all look alike. They can be differentiated by looking at the hairiness of the leaves and the pith (or lack of) of the twigs and branches. For a complete rundown of the genus go here.
0
0
文章
Dummer. ゛☀
2017年06月30日

Growth habit of Veronica
Veronica love light, it is a long day plant, light to maintain a high level, when the winter and early spring to fill. The temperature is generally maintained at a good level and should be covered by winter during the winter. Medium fertility is enough.
When choosing soil, Veronica usually chooses well drained soil.
The main role of Veronica
Veronica's main role is to watch the role of the general may be Veronica planted in the courtyard or flower beds, gardens, can also be used as green plants. Potted farming can also be suitable for cut flowers.
Morphological character
Veronica is a scattered, many branched herb, much villous, 10-25 cm tall. Leaves only 2-4 pairs (axillary flowers with bracts, below), with 3-6 mm long stipe, leaf blade cordate to ovate, 5-10 mm long, 6-7 mm wide, 2-4 deeply obtuse teeth on each side, both sides white villous. Racemes long; leafy bracts, the lower part of the opposite or alternate; pedicels slightly shorter than bracts; calyx lobes ovate, apex acute, fruit increased slightly, three veins, sparsely covered with short stiff hairs; corolla pale purple, blue, pink or white, 4-5 mm in diam., lobes rounded to ovate; corolla short stamen. Capsule nearly kidney shaped, densely glandular hairy, slightly shorter than calyx, 4-5 mm wide, notched about 90 degrees, lobes rounded, veins not obvious, persistent styles with indentations, or skipped. Seeds abaxially, horizontal, ca. 1.5 mm. Florescence 3-10 months.


0
0
文章
Colorful
2017年05月23日

9 different colors of houseplants and how they impact your lifestyle! Learn about them and bring them in to beat the winter blues!
If you are suddenly feeling anxious, tired or sad and that you’re lacking energy, well join the club and don’t worry; winter is coming. Days are way too short, temperatures are low, sun is absent of the picture and summer gave way to a colder and heavier season. Yes, it’s tough, but winter also has advantages: snowfalls, holidays, skiing. If winter activities are not enough to kick the blues, we have lots of suggestions for ways to lift your spirits up and get rid of the winter melancholies.
You miss the light, the greenery and the colors of summer? So let’s bring them home! A lot of studies have shown that indoor plants can have positive effects on wellbeing. Besides providing a soothing environment, reducing stress or making you relax, indoor plants also stimulate us. This is exactly what we need to beat the winter blues, isn’t it?
And to make the solution even more effective, you should include flowers in the mix. Indeed, colors have healing powers that can cheer anyone up! Garden design trends are also incorporating color therapy. Meaning, that the arrangements include colorful flowers which trigger happy emotions, heightens feelings of life satisfaction and affects social behavior in a positive manner, as analyzed by behavioral studies led at Rutgers University. Let’s explore colors, shall we?
1. Red
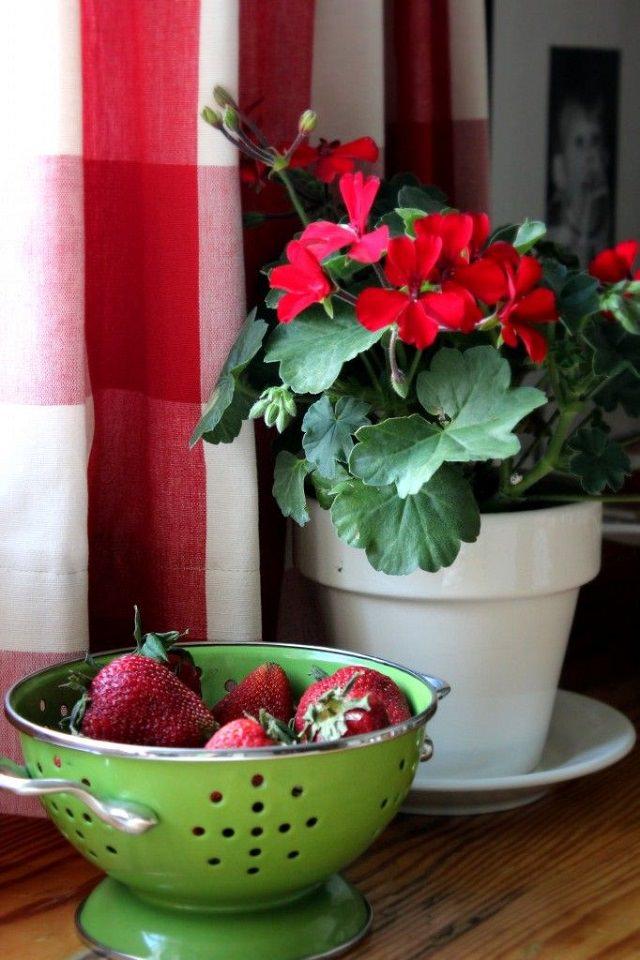
Even if red is not a recommended when it comes to the wall of your new bedroom, this color triggers a sense of vitality and boosts energy. This warm color is good for passive people and for those who always feel tired. Red also multiplies by ten the senses such as hearing, vision and touch. So what do you think about a Ranunculus bouquet in your bedroom or poisettias, Christmas cactus, geraniums, you have plenty of options.
2. Orange
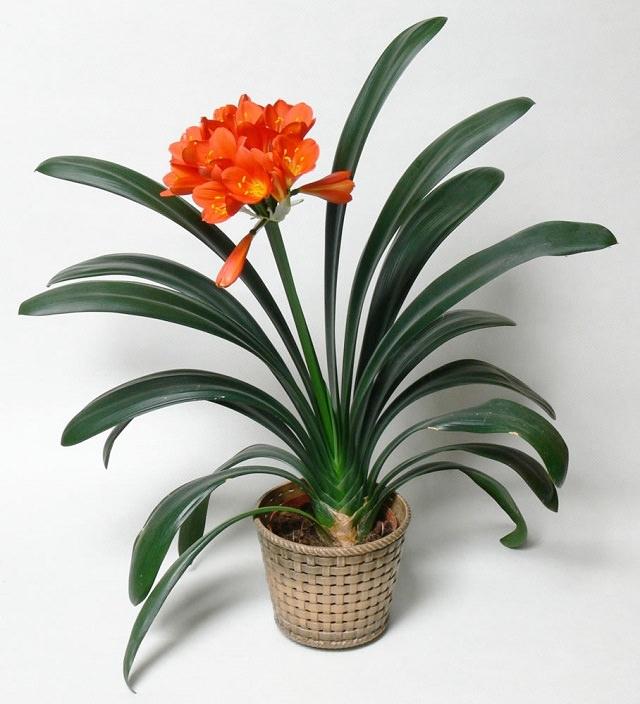
Don’t forget to add some orange in your indoor landscape design. Like red, it is a warm color but it’s less exciting. It still cheers people up but in a softer way. By seeing orange flowers such as begonias, people feel their body and mind relieved from pressures. Plus, orange fosters creative thinking, by helping people at rock bottom get out of it and imagine new possibilities in life.
3. Yellow
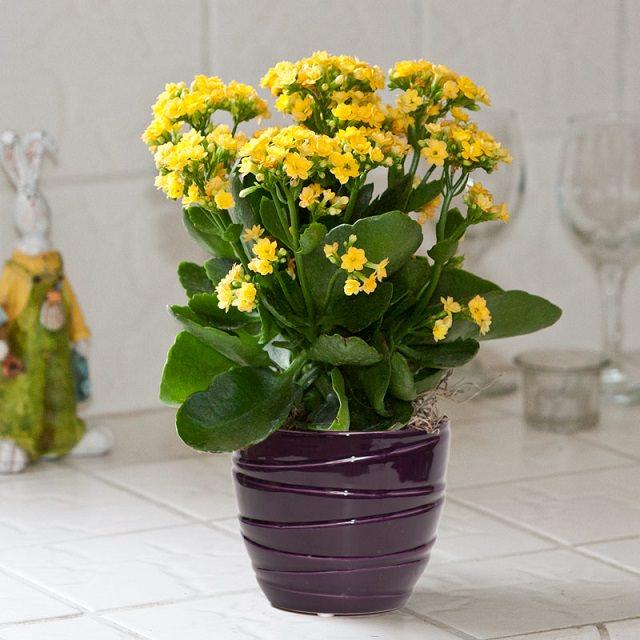
If creative people love yellow, it is because it allows them to be even more creative. This cheerful color, associated to the brightness of the sun, helps stimulate intelligence. Just be careful not to overuse it because it can lead to insomnia for example. So, just avoid putting those wonderful sunflowers in your bedroom. However, you have many other planting options like sweet potato vine, kalenchoe, black eyed susan etc.
4. Green
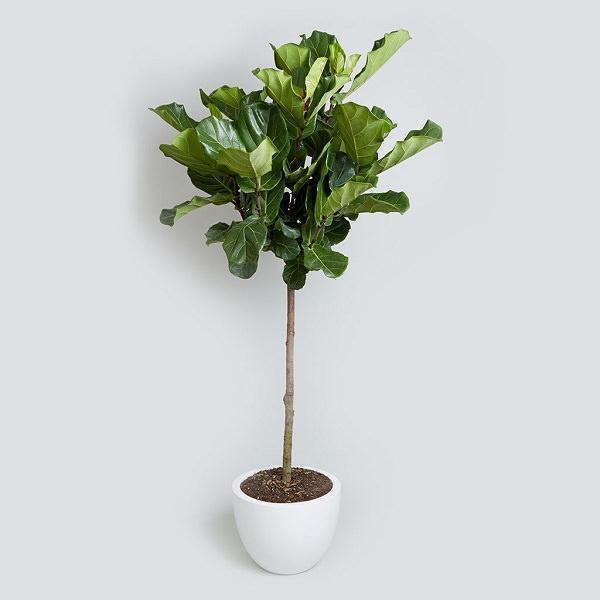
Because green is the color of nature and that represents the Earth, it symbolizes growth and renewal. So green bring balance and comforts you. A Spider Plant is perfect to bring harmony into a home.
5. Blue
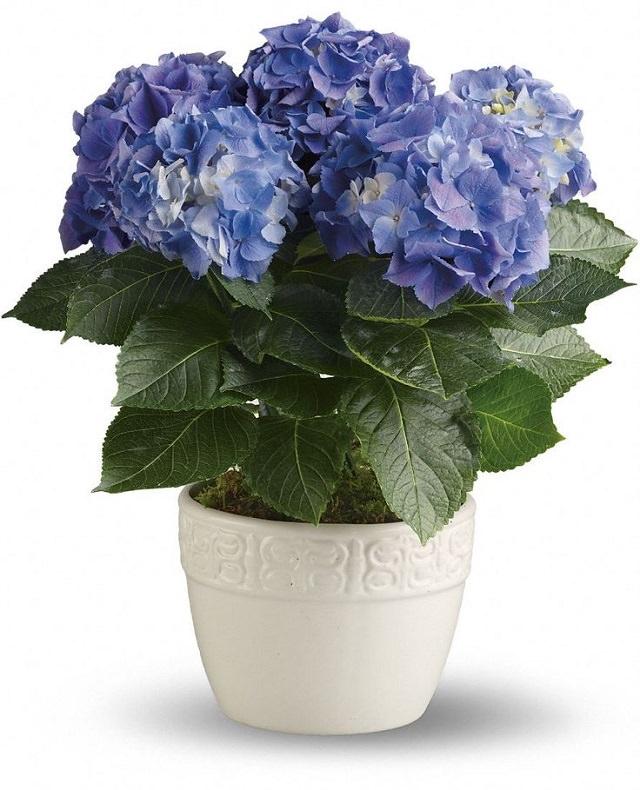
Blue is probably the most famous color in terms of soothing. As the color symbolizing the sky and the sea, it is linked with serenity. Blue calms strong emotions such as anger or hysteria. Grow Iris or hydrangea inside your home and you will definitely get rid of any rage signs. If you feel distressed, the blue color will lower blood pressure as well as your heart rate. Tranquility boost guaranteed.
6. Violet
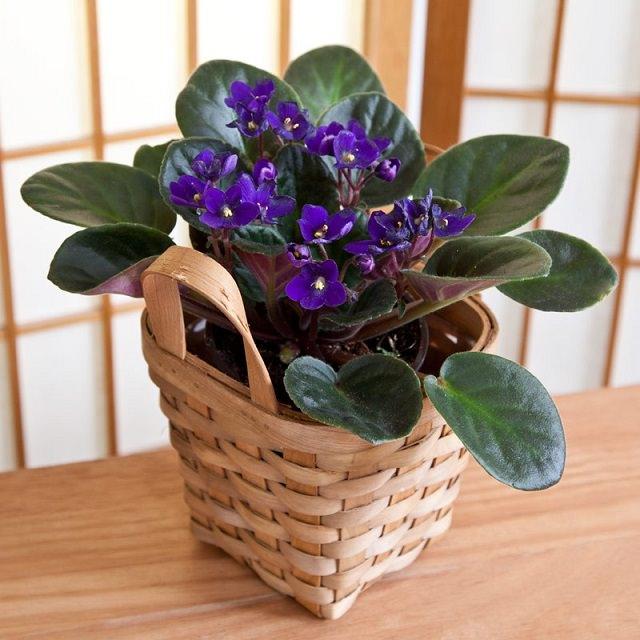
Along with purple and lavender, the violet color is linked with the cerebral and nervous systems, and for that reason, it relaxes the mind by releasing any kind of emotional stress. Violet heals different states of mind like melancholy or hysteria by bringing spiritual insights. For that matter, violet gives way to renewal and motivates the transformation. Simply grow Pansies in your bedroom, it will help you sleep, and dreams will positively affect the day coming next.
7. White

White is a sign of pureness, and that is why it helps to get rid of all the negative moods and reach the truth. If winter makes you feel insecure, simply add Paperwhites into your indoor landscape design and you’ll immediately feel the harmony getting the upper hand in every aspects of your life. There are many other beautiful houseplants that provide white color like peace lily, jasmine, gardenia.
8. Magenta
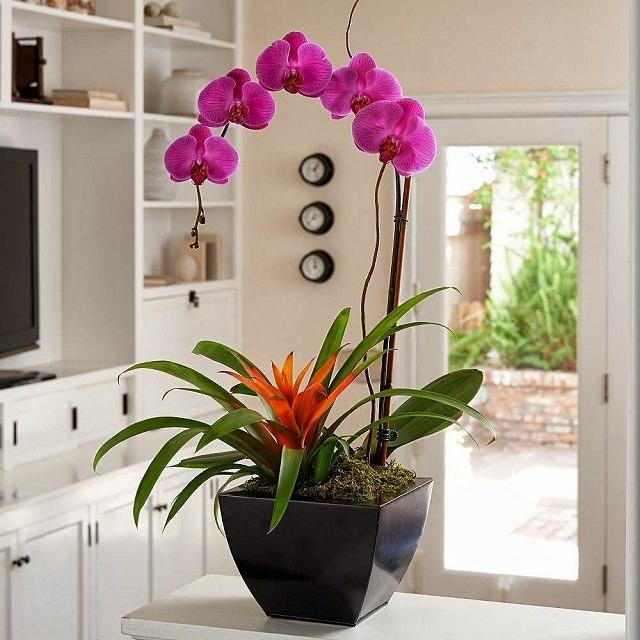
Like violet, magenta is also a spiritual color. It helps strengthen the link with your life purpose. And because it is a little bit flashier than purple, it boosts adrenaline. At home, Tulips do the job perfectly well or you can grow the orchids.
9. Pink
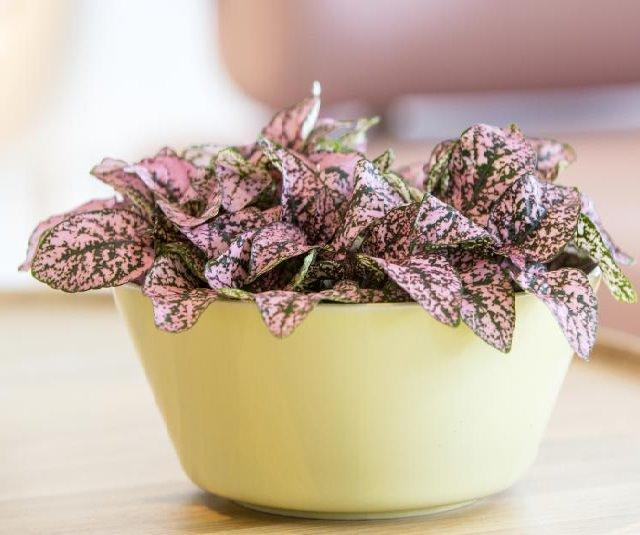
You see pink and you automatically see candies and tender images from your childhood. Pink definitely brings some youth back, and heals your grief and sadness, because it means affection and protection. For that matter, this bouquet of roses is going to please all the family. You can also look at other plants like pink hibiscus, geraniums, polka-dot plant, and begonia.
Now that you know how to set up your indoor garden to battle the winter blues, you don’t need to be afraid! Simply use flowers and plants from all different colors to boost your mood, and you will be the happiest person in the world!
If you are suddenly feeling anxious, tired or sad and that you’re lacking energy, well join the club and don’t worry; winter is coming. Days are way too short, temperatures are low, sun is absent of the picture and summer gave way to a colder and heavier season. Yes, it’s tough, but winter also has advantages: snowfalls, holidays, skiing. If winter activities are not enough to kick the blues, we have lots of suggestions for ways to lift your spirits up and get rid of the winter melancholies.
You miss the light, the greenery and the colors of summer? So let’s bring them home! A lot of studies have shown that indoor plants can have positive effects on wellbeing. Besides providing a soothing environment, reducing stress or making you relax, indoor plants also stimulate us. This is exactly what we need to beat the winter blues, isn’t it?
And to make the solution even more effective, you should include flowers in the mix. Indeed, colors have healing powers that can cheer anyone up! Garden design trends are also incorporating color therapy. Meaning, that the arrangements include colorful flowers which trigger happy emotions, heightens feelings of life satisfaction and affects social behavior in a positive manner, as analyzed by behavioral studies led at Rutgers University. Let’s explore colors, shall we?
1. Red

Even if red is not a recommended when it comes to the wall of your new bedroom, this color triggers a sense of vitality and boosts energy. This warm color is good for passive people and for those who always feel tired. Red also multiplies by ten the senses such as hearing, vision and touch. So what do you think about a Ranunculus bouquet in your bedroom or poisettias, Christmas cactus, geraniums, you have plenty of options.
2. Orange

Don’t forget to add some orange in your indoor landscape design. Like red, it is a warm color but it’s less exciting. It still cheers people up but in a softer way. By seeing orange flowers such as begonias, people feel their body and mind relieved from pressures. Plus, orange fosters creative thinking, by helping people at rock bottom get out of it and imagine new possibilities in life.
3. Yellow

If creative people love yellow, it is because it allows them to be even more creative. This cheerful color, associated to the brightness of the sun, helps stimulate intelligence. Just be careful not to overuse it because it can lead to insomnia for example. So, just avoid putting those wonderful sunflowers in your bedroom. However, you have many other planting options like sweet potato vine, kalenchoe, black eyed susan etc.
4. Green

Because green is the color of nature and that represents the Earth, it symbolizes growth and renewal. So green bring balance and comforts you. A Spider Plant is perfect to bring harmony into a home.
5. Blue

Blue is probably the most famous color in terms of soothing. As the color symbolizing the sky and the sea, it is linked with serenity. Blue calms strong emotions such as anger or hysteria. Grow Iris or hydrangea inside your home and you will definitely get rid of any rage signs. If you feel distressed, the blue color will lower blood pressure as well as your heart rate. Tranquility boost guaranteed.
6. Violet

Along with purple and lavender, the violet color is linked with the cerebral and nervous systems, and for that reason, it relaxes the mind by releasing any kind of emotional stress. Violet heals different states of mind like melancholy or hysteria by bringing spiritual insights. For that matter, violet gives way to renewal and motivates the transformation. Simply grow Pansies in your bedroom, it will help you sleep, and dreams will positively affect the day coming next.
7. White

White is a sign of pureness, and that is why it helps to get rid of all the negative moods and reach the truth. If winter makes you feel insecure, simply add Paperwhites into your indoor landscape design and you’ll immediately feel the harmony getting the upper hand in every aspects of your life. There are many other beautiful houseplants that provide white color like peace lily, jasmine, gardenia.
8. Magenta

Like violet, magenta is also a spiritual color. It helps strengthen the link with your life purpose. And because it is a little bit flashier than purple, it boosts adrenaline. At home, Tulips do the job perfectly well or you can grow the orchids.
9. Pink

You see pink and you automatically see candies and tender images from your childhood. Pink definitely brings some youth back, and heals your grief and sadness, because it means affection and protection. For that matter, this bouquet of roses is going to please all the family. You can also look at other plants like pink hibiscus, geraniums, polka-dot plant, and begonia.
Now that you know how to set up your indoor garden to battle the winter blues, you don’t need to be afraid! Simply use flowers and plants from all different colors to boost your mood, and you will be the happiest person in the world!
0
0
文章
Gina
2017年05月23日

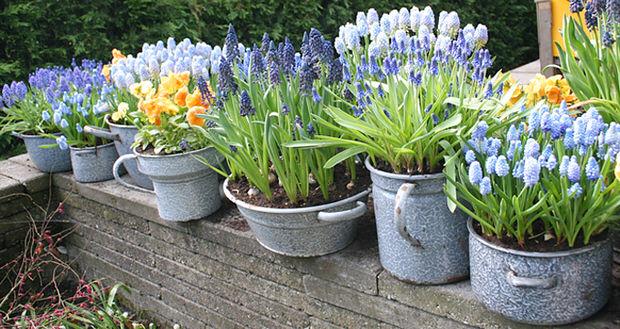
When the dark days of winter have set in, many of us long for spring to come early! Not only can you find ways to bring it on a little early, you can pot up spring to be ready to show it off in your home, on your porch or in the garden! The trick is to learn how to force spring bulbs to bloom in pots. Best bets for forcing include tulips, hyacinths and daffodils.
There are two steps to forcing bulbs… the chill step, where the roots develop, and the grow step, where they…well, grow! (And bloom, of course!)
Step One: The Chill Step
Pot up bulbs in shallow pots or containers in lightweight potting soil that is well drained. Layer bulbs of different types and sizes if you like. It is important throughout this stage that the soil be kept lightly moist… you may need to check every couple of days and add a little water. Now place the pots in a cool, dark spot for 8-16 weeks, depending on size and variety (small bulbs need less, like crocus) or until roots show through the drainage holes in the bottom. You want the spot to be less than 50 degrees, but not freezing. A refrigerator is the perfect spot, and some people use a cold frame out in the garden. Just make sure they don’t freeze, and that the roots are fully formed before you move on to the grow step.
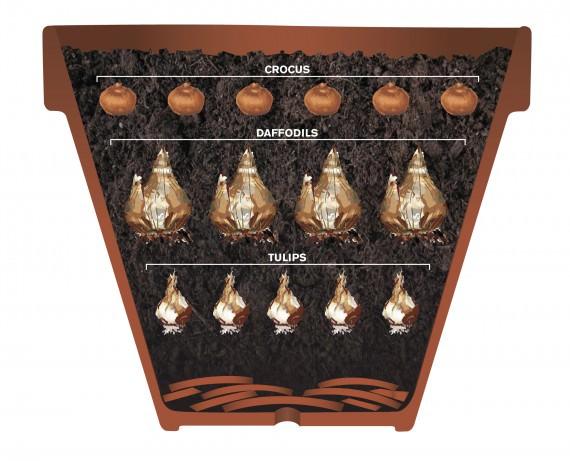
Step Two: The Grow Step
Once you see good root formation, the next step is to place them in a cooler spot in bright sunlight. You want to let them become accustomed to warmth for a few weeks, perhaps in a north facing window in a room that is not overly heated. Remember the moist soil!
After they have gotten some good growth on them, move them to a sunny and warmer window, porch or spot in the garden. They should bloom within 3-4 weeks from removing them from cold storage.
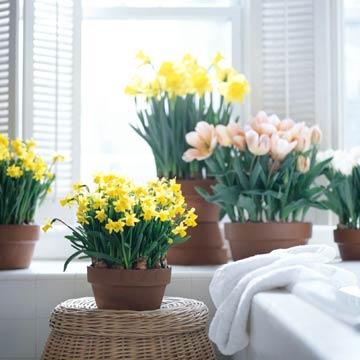
Forced bulbs rarely re-bloom the next year, so treat them like annuals. These can make great Easter gifts, or simply happy gifts to those you care about (including you!) who need a dose of spring, perhaps a little early!
1
1
文章
Micky
2017年05月23日


During the winter, you may think there is not much to be done outside. But I love the outdoors the whole year, and I think there is always a way to find happiness in the garden! So take advantage of those frigid outdoor temps, don some good gloves and a scarf, and head out to the garden to create these 7 crafty outdoor projects with ice! Our feature project, above, is from Kate at ‘Faceless 39’. She shows us how to make decorative ice gems for your garden with step by step photos… This is an easy project that’s lots of fun!

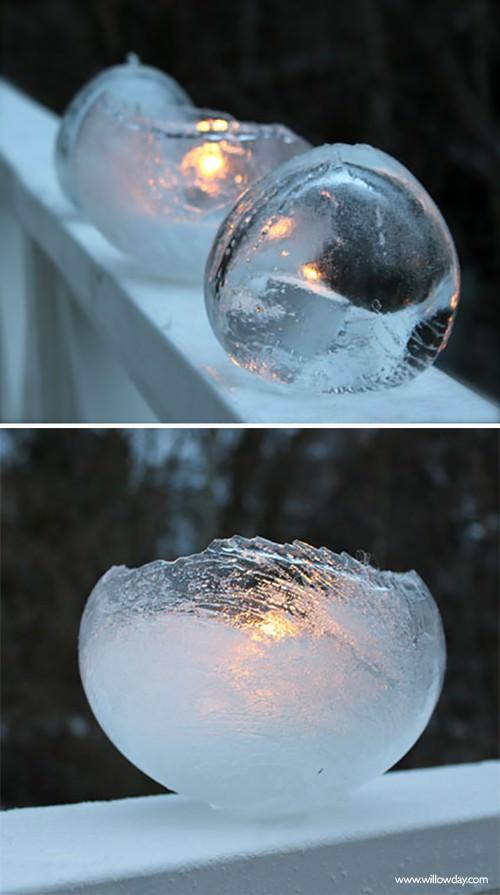
Learn to make ice lanterns, from ‘Willowday’! I love how the candle glows against the melting ice… these would be amazing along a walkway for a holiday party!
I have never seen a craft quite like these winter ice sun catchers from Tracy on ‘Hubpages’. Easy to follow tutorial, these are so cool! What if you just used all blues, to create a look of glowing ice?

hese DIY ice luminaries from Gabrielle at ‘Design Mom’ are the perfect way to light up a porch or add splash to a garden to be viewed from indoors, perhaps during a holiday get together? If it’s not quite cold enough to freeze them hard outdoors, and you are just using them for an event, you can freeze them on a cookie sheet in your freezer, then place outside just before use.

From ‘Queen Vanna Creations’, these ice balloons use food coloring to get that bright color. Fun!

Want to make an ice project that looks like you suddenly have the ability to craft your own giant snowflakes? Make lace and ice, with the help of ‘Resurrection Fern’. Easy and so pretty!

Lastly, if you want to make those great ice globes, and you want to do it the easy way… check out these ice globe luminary kits by ‘Gardeners Supply‘. For the amount of fun you get from them, they aren’t real expensive.


0
0
文章
Gina
2017年05月23日

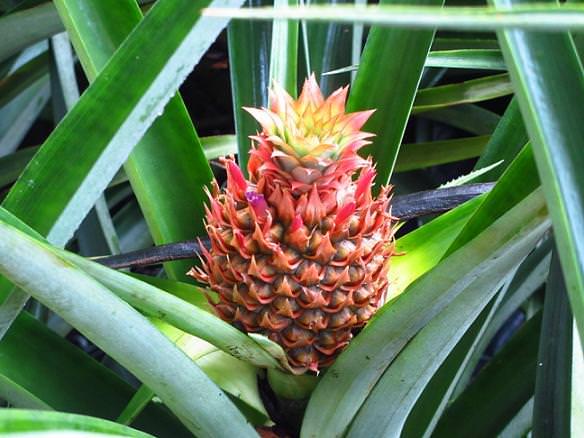
It’s no secret to anyone who went through kindergarten that you can grow plants from some of the cuttings of common vegetables. But for those of you about to head into winter (or just because!) and are going to be missing your more tropical looking plants in the garden, we have a great quick tip for you. Are you aware, that if you replant the top of a pineapple, not only will it grow, it grows into a very cool, modern looking houseplant you can enjoy all winter? Who-da thunk?
Here’s how:
Cut or twist off the top of your pineapple by just grasping with gloves, then twist until it comes apart. Peel off the bottom leaves until a good chunk of base is exposed. (You don’t want leaves sitting in water to rot.) Then slice off the bottom to make it a clean cut. Set in a saucer of water to root. Make sure you keep the bottom section from drying out while it’s rooting. Once you see a good number of new roots forming (about 3 weeks or so) then you can pot it up. Use a moisture retaining potting soil and pot up you plant, making sure you firm the soil well around the base. Keep the soil evenly moist. In a few weeks the roots should take hold in the soil and you will have a new plant! Keep in bright light, and water regularly.
Beat that for easy! Will your plant grow a pineapple? Eh…maybe in a few years if it has the right conditions, but it will be an excellent reminder of summer all year round…Any other ideas for cool house plants grown from fruits or veggies? And yes, we did say cool… no one wants to see your avocado pit on the windowsill!
3
0
文章
Gina
2017年05月22日


If you want to get crafty in the garden, for the garden, or just as a way to keep your thumb green during the winter months, we have the project for you! Hypertufa is a mix of concrete and other elements that is lightweight, easy to work with, can be molded or even carved, and is a perfect project for both beginner and experienced crafters and gardeners. You can create pots, containers, art… ok, we will just let these cool tutorials speak for themselves, ok? BTW… you can even do this on a covered kitchen table with the kids! All you need is a place to let them cure, and you get amazing results for just a little creative effort. Oh, yeah. It’s fun! Our feature photo above is from ‘Martha’. She shows us how to make these bowl hypertufas using a kitchen mixing bowl as a mold! (Can you say dollar store?) These would look great inside or out, and she has a bunch of other variations as well, including a basketweave patterned hypertufa. Check it out!
The basic recipe (Although there are TONS of variations!) From ‘Lowes‘.
1 Part Portland Cement
1 Part Perlite
1 Part Peat Moss
1 Part Water (Can be adjusted to consistency needed for each project)
Mix dry ingredients with gloved hands before adding water. Mix well. Thick oatmeal is a good place to start, thickness wise.
Spray inside of mold with non stick cooking spray.
Pack mixture into mold in whatever way you wish to create sides of containers, art… whatever!
Put inside closed plastic bag for 24-36 hours. This keeps it from drying too quickly, which can cause cracking. Now set in some out of the way place for 2-3 weeks to totally cure. Pop off mold, use a brush or sponge to rub off any imperfections. Done!
Ok, you can see I was pretty casual with the basic directions here. That’s ’cause it’s a very forgiving medium, so have some fun with it! Most of these tutorials have their own take on the directions as well.
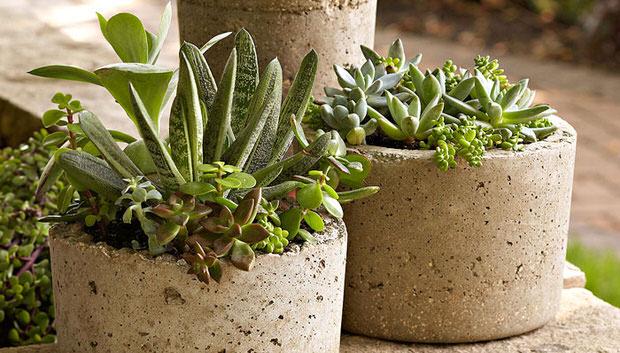
From Pam at ‘House of Hawthornes’, everything about making hypertufa containers. Make sure you take note at what she used for molds… Ok, just trust me, it works!

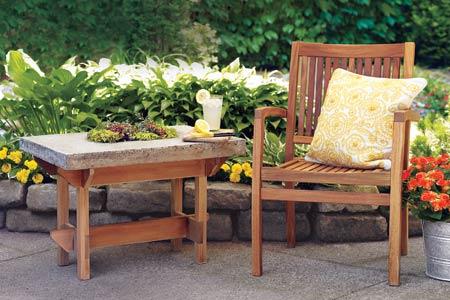
‘This Old House’ shows us it isn’t just for making containers! Make this hypertufa table! Use their plans for the whole table, or just make the top and use it with an existing base.
Learn to make a hypertufa planter from ‘Gardeners Supply’. As you can see, they used theirs for a container water garden!
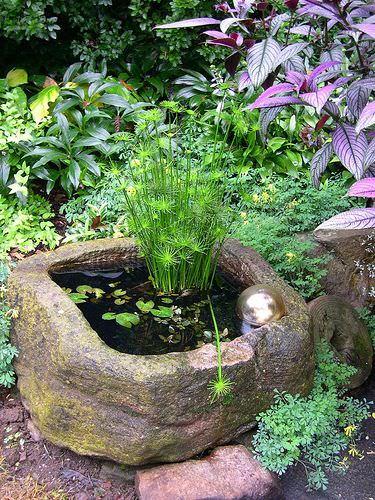
We LOVE this hypertufa tough from ‘Dirty Horticulture’… it has such an organic feel, like it’s been there 100 years! Lots of great tips on making molds as well.
Hypertufa garden seat by ‘Flat Earth Designs’ via ‘My Notting Hill‘ in Texas. Are we starting to see the versatility in this medium?

Make a hypertufa millstone for over a fountain, with help from ‘Houzz GardenWeb’!

This wicker basket hypertufa is also from ‘Martha’ An easy variation, I love these for a country or traditional porch!
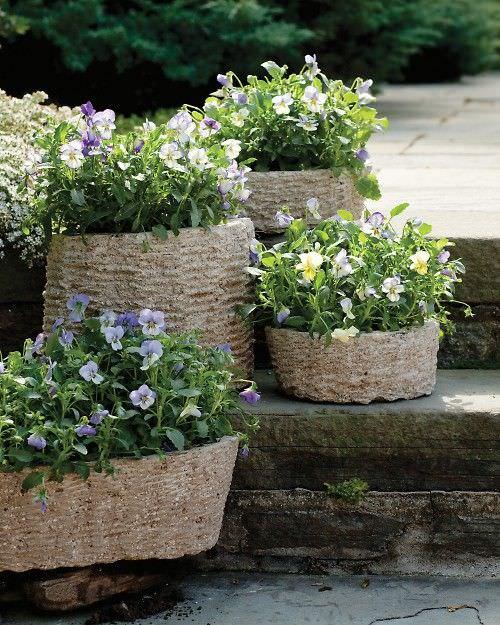
Lastly, these hypertufa containers use recycled items as molds… I really like the texture the veggie oil container made! From ‘Home Life Science’.

1
1
文章
Joss
2017年05月22日


We all do it every spring…we lust after those gorgeous bulb gardens, full of bright colors after a long gray winter… And every year we say, “Next spring I’m going to have a garden like that!” Well this is your year, because not only is TGG going to give you an easy to understand primer on which bulbs to choose, we are going to show you exactly how to choose, buy and design with them this fall so that next spring your yard will be the envy of the block!
Planning the Bulb Garden
Unless you are planning to plant hundreds of bulbs in full public garden style (not recommended for the average gardener!) planning a bulb garden isn’t complicated. Here are a couple of guidelines to keep in mind.
Choose just two or three types of bulbs to use in your yard. Using just a few of every pretty bulb out there will just leave your garden looking cluttered and lost, without the impact you are looking for. Use the same bulb in groups and drifts for the best design strategy.
Choose bulbs that bloom at the same time. Most bulbs bloom for just a few short weeks every spring, and to get the best effect, choose ones that bloom together. Bulbs are classified into early season, mid season and late season bloomers. If you want the most impressive show, plan your bulb garden to either all bloom at once, or to have several different shows in each classification.

For instance, you could choose a mid season tulip, daffodil and grape hyacinth (my fav combo, btw) and create a one time show with larger groups of those three bulbs. Or, you could create smaller shows of each an early season group, mid season group, and late season group so that something is always in bloom. There is no right answer, just depends on how much time and planning you wish to put into you bulb garden.
Choose a color scheme for you bulb garden. Want gentle, sweet pastels, or bright and vibrant colors? Complementary colors grown together, such as red and blue, or yellow and blue are always show stoppers. A bulb garden looks best though when the color scheme is consistent.
Plan cover ups. After bulbs finish blooming, their greenery withers, but you can’t cut them back yet if you plan on them returning the following year. Plant a ground cover or sprawling perennials around and through your bulb garden so that as the bulbs finish, they and other plants will be naturally growing over the stalks to cover and hide them.
How to Choose Bulbs
Don’t buy discount bulbs at the local stop and shop. Quality and health of your bulbs will make all the difference in both display, and their ability to return, and multiply year after year. Here’s how to choose healthy bulbs.
Buy from a trusted online source. Two that we use and depend on are DutchBulbs.com and WhiteFlowerFarm.com.
Another reliable choice is your local plant nursery – not your local home improvement store. If you want small flowers and a wimpy display, then you go ahead and buy those bulk bags at Walmart.
Choose bulbs that are smooth and free of defects.
Buy “top grade” bulbs. This refers to their size, and yes, size matters. If they aren’t marked top grade, they aren’t top grade!

Finally, wait until late fall to plant your bulbs, but before the ground freezes. Find out from your nursery their recommendation for planting depth for your particular bulbs for your area – it can vary due to winter cold.
You can have that gorgeous spring bulb garden if you plan now, so take our advice, and start shopping now before the best bulbs are sold out!
2
2
文章
Micky
2017年05月22日

Learn how to grow spelt in this article. Planting and Growing spelt is easier in temperate climates. It is more winter hardy than conventional wheat varieties and also tolerates poor conditions well.

USDA Zones— 5 – 8
Difficulty— Easy
Other Names— Triticum Spelta, Dinkel wheat, Hulled wheat, Spelt, Spelt wheat, Espelta, Blé des Gaulois, Epeautre, Dinkel Spelt, Spelz, Spelta
Spelt (Triticum Spelta) is a plant belongs to the grass family. This rustic looking subspecies of wheat is resistant to diseases. Though it is is not widely grown, but it is of great interest in organic farming.
It adapts well to cold climates and thrives in various soil types: sandy, wet, poor and non-draining. It is less demanding for nutrients and more competitive against weeds than wheat. Making it an interesting cereal crop for mountain areas.
How to Grow SpeltSowing
The seeds are sown in rows, optimum distance between rows is about 18 – 20 cm apart. The seeds are buried 3 cm deep and spaced about 5 to 8 cm. To avoid competition with weeds, it is important not to plant too early in the season.
Seed Sowing Density for Growing Spelt
The best time for sowing is identical to that of wheat. The seeding density is recommended about 200-300 seeds per sqm, corresponding to 150-180 kg of seed per hectare.
Varieties
Spelt exists in two varieties – Winter and Spring.
Requirements for Growing SpeltPosition
Spelt grows similar to wheat but it is more winter hardy. Growing spelt in full sun is required for productivity and healthy growth.
Soil
For optimum growth, spelt must be grown in soil that is good, ie. Humus, rich in nutrients, with a pH close to neutral. Prepare soil similar to wheat. This grain also grows in soil types that are low in nutrients, poorly drained or sandy.
Watering
Keep the soil moist after planting until the germination of seeds. Once sprouted, it doesn’t require too much watering. Water only in hot and dry days. More regularly, if you live in a warmer zone.
Weeding
Weed the soil before planting and remove competitive weeds time to time.
Fertilization
Fertilizer requirements are similar to winter wheat. Excess nitrogen can cause lodging in spelt.
Pests and Diseases
As spelt is a subspecies of wheat, most of the pests and diseases are similar. It is recommended to select the most resistant varieties that are tolerant to pests and diseases.
Harvest
0
0
文章
Micky
2017年03月15日


At the end of winter, we can all start to feel little flower deprived… I know I love driving by a well designed garden that has those first, early spring blooms. (Yes, I am admitting mine has none. Shhh.) Not only can those first blooms brighten your day after all the gloom of winter, they can jump start the gardening bug! Now everyone knows about the typical annuals you can buy at any grocery store or Home Depot… pansy’s, primroses and violas. I want to introduce you to some early spring flowering plants you may not have thought of, that come back year after year for a better display each time, and add more interest and texture. So here are my top early spring bloomers, and how to grow them!
Grape Hyacinth
Grape Hyacinths are small bulblets that are planted in fall, and one of the earliest spring bloomers. They are a grassy looking plant that comes back every year with clustered flowers of various colors of purple, and even white! They love full sun to part shade, and average to sandy soil. These plants multiply quickly, and can even be planted under trees. Looks best planted in sweeps, combine well with daffodils and tulips. Bloom March – May, depending on your climate and variety. Some are even fragrant!

Lenten Rose
Lenten Rose blooms as early as February, with elegant flowers in pink, purple and white colors held above leathery, semi evergreen foliage. Some of the blooms are very detailed and gorgeous up close. Plant out of the wind, preferably with afternoon shade in hot areas. Likes a more fertile soil. Hardy to Zone 5… Mild areas may see these bloom even in late winter!

Daphne
Daphne is a highly fragrant shrub that grows from 2-3 feet, covered with clusters of white to pink flowers in February – March. Evergreen leaves are a fine background shrub the rest of the year, but Daphne’s fragrance is where its specialness lies. Loves good drainage, and needs good air circulation as well. Deer resistant, hardy to Zone 5, and keep in mind, the berries may be poisonous. Our fav is ‘Carol Mackie‘…

Hyancinths
Hyacinths are another very fragrant flower, a bulb planted in fall. Good drainage is required, as well as full sun. Blooms in March – April, hardy to Zone 4…

Moss, or Creeping Phlox
A ground cover that remains semi evergreen, this plant spreads to 2 feet and is covered with very bright pink, blue, purple or white flowers in April. Phlox demand well drained soil, or it will be very short lived… Makes quite a show! Hardy to Zone 3, needs full sun. Shear after flowering by one third.

Gold Alyssum
Gold Alyssum is a great ground cover type plant that spreads well and gives a jolt of bright yellow in early to mid spring. It blooms over a long period, and is hardy down to Zone 4. Easy to grow, just cut back by a third after flowering to keep the plant from looking rangy. Is great where it can cascade over walls. Heat and drought resistant.

Brunnera
If you need an early bloomer for shade, Brunnera is a great choice because it transcends the seasons. Once it’s pretty and delicate blue flowers finish, the heavily veined leaves give a foliage show the rest of the season. Some varieties are actually grown more so for their highly decorative foliage. Hardy to Zone 3, 15 inches high, and tolerates wet sites. We love ‘Jack Frost‘, because it’s got a good balance between flowers and foliage interest.

Bleeding Heart
One of my favorites, Bleeding Heart is also a child’s delight, as each flower is a heart shape! (I don’t bother explaining “bleeding” to a five year old…) Blooming in early spring, prefers afternoon shade and rich soil. In all but mild summer climates, Bleeding Heart will go dormant in the summer and die back to the ground. No worries though, it will be back the next spring! Just be sure to plan other plants that will fill in to cover the empty spot in summer. Hardy to Zone 3… The fernleaf variety has a different type of foliage, but it is not exactly the same plant. Fernleaf bloom in summer.

Peonies
Our last choice are Peonies… Some varieties bloom early in spring, and some not until summer, so be sure to check out with your local nursery the best early peonies for you! We have a whole post on how to grow peonies that might help you get started.
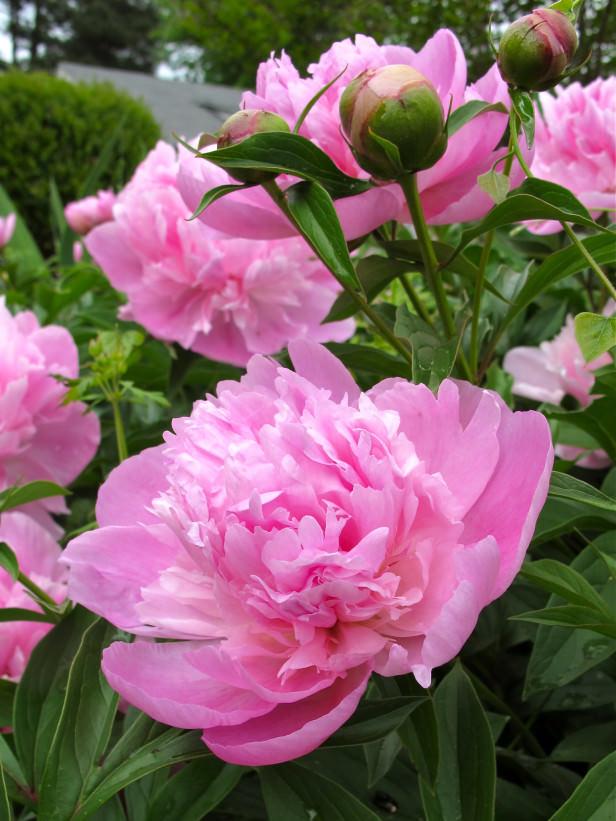
I hope you get inspired to start your early bloomers, and get a head start on the garden! Want to recommend a variety we left out? Comment!
0
0
文章
Abigal
2017年03月15日

For all of you who have loved our popular post Garden Edging: 5 Ways to Edge Your Landscape with Recycled Materials then we have even more great ideas for you! Garden or landscape edging can define a garden area, give structure in winter months, and add your personality as well. Whether you choose to use one of these unique edging ideas, or something more traditional, almost every garden can benefit from some “boundaries”. One tip I left out of the last post… when placing your edging materials, do yourself a favor and lay a strip of landscape fabric underneath. You will save your self a world of headaches down the road, when you have to pull a thousand blades of maddening grass from between your perfectly placed stones, or worse…have to remove a section in order to weed, then replace. That’s a lot of work that a preventative step can help avoid!
So here are some unique and creative garden edging ideas for the more adventurous gardener! The photo below is from Heidi at ‘My Sweet Cottage‘. Heidi and her husband found a ledge stone that was square in form so they could create this edging that they simply pounded in place with a mallet, then backfilled with soil. Gorgeous and natural looking!

Seashells
We HAVE to love these shell edgings! Perfect for a beach themed home, or just because you love the beach! We would suggest half burying the shells with soil to help keep them in place. Also, make sure they face away from you for the best effect and the bigger the better.

Roof Tiles
A gardener in Colorado creatively used leftover roof tiles as garden edging. The tiles are secured by old builders block behind the bottom edge of the tiles, then soil. This would be a great place to use recycled concrete chunks as well. I wonder if you could scout out broken tiles from a local builder and get them for free, for hauling them off site? Great re-purposed project!

Bamboo Edging
Using old bamboo fence rolls, cut into smaller sections can make a great edging material, especially for a contemporary garden. Secure it with stakes every foot or two, depending on your situation.

Twigs
Using twigs and sticks from your garden, you can create a custom, natural looking edging! I love this idea! Here are easy instructions for this project.

Sedums and Bricks!
You could conceivably use this idea to create a garden edging that is both living, and sturdy. Plant in every building block, or skip a few. Use the same plant in all the edging for continuity, or use different colors or varieties of the same plant for some personality.
Bottle Edging
Yes, we did bottles before, but I love the way Melinda Myers used all the same color to not only edge the walkway, but also to offer some support to the plants at they grow in height.
Wheels
This garden was edged with these wonderful antique metal wheels, but what about using old bicycle wheels?

More Wheels
This one is creative and done with intention, is full of personality, and was found in the Georgetown gardens. That being said, make sure your “junk funk” doesn’t cross the line, to just plain ol’ junk!
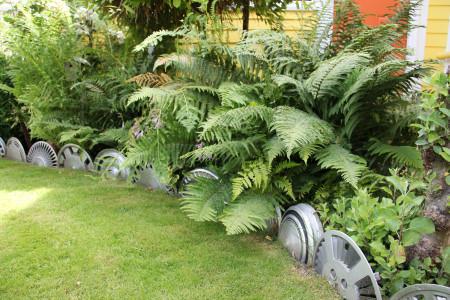
Balls, Anyone?
Ok, this last one is perhaps one of our most creative so far… Any one love it? Hate it? What about the other ideas? Share with our readers!

So here are some unique and creative garden edging ideas for the more adventurous gardener! The photo below is from Heidi at ‘My Sweet Cottage‘. Heidi and her husband found a ledge stone that was square in form so they could create this edging that they simply pounded in place with a mallet, then backfilled with soil. Gorgeous and natural looking!

Seashells
We HAVE to love these shell edgings! Perfect for a beach themed home, or just because you love the beach! We would suggest half burying the shells with soil to help keep them in place. Also, make sure they face away from you for the best effect and the bigger the better.

Roof Tiles
A gardener in Colorado creatively used leftover roof tiles as garden edging. The tiles are secured by old builders block behind the bottom edge of the tiles, then soil. This would be a great place to use recycled concrete chunks as well. I wonder if you could scout out broken tiles from a local builder and get them for free, for hauling them off site? Great re-purposed project!

Bamboo Edging
Using old bamboo fence rolls, cut into smaller sections can make a great edging material, especially for a contemporary garden. Secure it with stakes every foot or two, depending on your situation.

Twigs
Using twigs and sticks from your garden, you can create a custom, natural looking edging! I love this idea! Here are easy instructions for this project.

Sedums and Bricks!
You could conceivably use this idea to create a garden edging that is both living, and sturdy. Plant in every building block, or skip a few. Use the same plant in all the edging for continuity, or use different colors or varieties of the same plant for some personality.
Bottle Edging
Yes, we did bottles before, but I love the way Melinda Myers used all the same color to not only edge the walkway, but also to offer some support to the plants at they grow in height.
Wheels
This garden was edged with these wonderful antique metal wheels, but what about using old bicycle wheels?

More Wheels
This one is creative and done with intention, is full of personality, and was found in the Georgetown gardens. That being said, make sure your “junk funk” doesn’t cross the line, to just plain ol’ junk!

Balls, Anyone?
Ok, this last one is perhaps one of our most creative so far… Any one love it? Hate it? What about the other ideas? Share with our readers!

0
1
成长记
Elena Galkina
2017年03月08日

That tiny child with a strong will to live. During the winter it had a lot of adventures. Its leaves were so strong, that it was pulled out from the soil and has viewable one root tied the plant with soil. I had to cut the pot edge and now it hard seats in the soil


1
0
求助
Liseli
2017年02月23日

What plant is this? at the moment it's late winter season here, so it may be difficult to identify


0
0
lrgarden:Waiting for spring 😄
Liseli:unfortunately I don't have any pictures better than these, since it's winter here.. :/
sunnyzou:Do u have any pictures with leaves or flowers?


