文章
Miss Chen
2021年12月05日

Although Brussel sprouts date back to ancient Rome, they're named for the city of Brussels, Belgium, where they have been enjoyed since the 14th century. Part of the cabbage family, Brussels sprouts can be grown in just about any home vegetable garden as long as you have patience—they are slow-growing plants that require a long growing season.
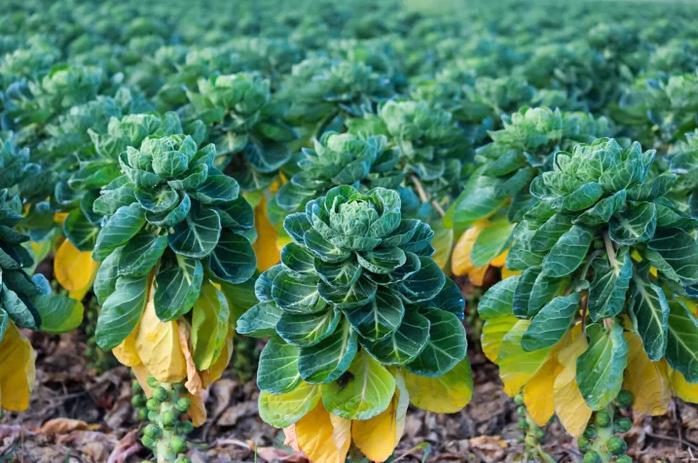
If you seen Brussels sprouts only in the grocery store, you will delight in the striking appearance of their plant form: The numerous mini cabbage heads form along thick, 30-inch-tall stalks, along with bold, jutting stems and broad, cabbage-like leaves. The leaves are also edible and can be prepared like other hardy greens.
Like other vegetables in the Brassicaceae family, Brussels sprouts taste best after they have been subjected to cool weather. Usually, that means harvesting after a light frost or a snow. In cooler climates, they are best planted in early summer for a fall harvest. In warmer climates, they should be planted in late summer for a late fall or winter harvest.
Common Name Brussels sprouts
Botanical Name Brassica oleracea (Gemmifera group)
Family Brassicaceae
Plant Type Annual vegetable
Size 30 in. tall, 8 to 12 in. wide
Sun Exposure Full sun
Soil Type Loamy
Soil pH Neutral (6.5 to 7)
Bloom Time Non-flowering
Flower Color Non-flowering
Hardiness Zones 2 to 9
Native Area Mediterranean
How to Plant Brussels Sprouts
Brussels sprouts require a long growing season of 80 days or more, and they improve in flavor after being subjected to a light frost. In colder climates, you can start brussels sprouts seeds indoors around early May, and transplant the seedlings to the garden in mid-June, or about four months before the first fall frost. Plant only after the last spring frost. Be sure to allow the full time outdoors for required days to harvest. In warmer climates, fall planting is preferred. You should be able to direct seed in mid-summer for a late fall or early winter harvest.
Brussels Sprouts Care
Light
The plants will grow and sprout best in full sun and need at least 6 hours of sun daily. Too much shade will slow the sprouts' maturity.
Soil
Brussels sprouts like a slightly acidic to neutral soil that is fertile, well-drained and moist, with plenty of organic matter. The soil pH should be between 6.5 and 7. A good amount of organic matter will help maintain the moisture they need for their intense growth.
Brussels sprouts like the soil around them to be firm, but not compacted. Pat it down lightly.
Water
Keep the sprouts' soil moist but not soaked, giving it between 1 and 1.5 inches of water per week.
Temperature and Humidity
Brussels sprouts prefer temperatures between 45 and 75 degrees Fahrenheit. They'll tolerate a couple of days below freezing, and even improve their flavor with a bit of light frost. This is not a warm-weather crop—sprouts that mature during hot or dry weather will be bitter and flimsy.
Fertilizer
Fertilize Brussels sprout plants twice a season with a nitrogen fertilizer—once when the plants are about 12 inches high and again four weeks later.
Types of Brussels Sprouts
'Bubbles' F1 (85 to 90 days to maturity): This variety tolerates heat and drought, and grows 2-inch sprouts that are resistant to powdery mildew and rust.
'Jade Cross' F1 and "Jade Cross E" F1 (90 days): Jade Cross was a 1959 All-America Selections Winner. Both are compact plants that are good for windy locations. The sprouts are slightly larger on 'Jade Cross E.' Good disease-resistance.
'Long Island Improved'OP (90 days): This variety is another small but high-yield plant that stands up to wind and tolerates freezing.
'Oliver' F1 (85 days): An early producer, the 1-inch sprouts are easy to pick and the compact plant is disease-resistant.
'Royal Marvel' F1 (85 days): ''Royal Marvel' is an early and productive plant that is resistant to bottom rot and tip burn.
'Rubine' (85 to 95 days): These heirloom purple plants are late-maturing and lower-yield than green varieties but have good flavor.
Harvesting
Brussels sprouts take about three to four months from transplant before you can begin harvesting. They grow tall first and don't start producing sprouts until they reach almost full height. Each sprout grows in the leaf axil or joint. They begin maturing from the bottom of the plant upward. Start harvesting when the lower sprouts reach the size of large marbles. Pick the sprouts before they get too large and start cracking and turning bitter.
Pulling off the sprouts is easier if you remove the leaf below the sprout first, then twist and pull the sprout. Some people prefer to cut, rather than pull the sprouts. Each plant yields approximately a quart of sprouts total.
After harvesting, a second crop of Brussels sprouts may begin to grow at the base of the stem. These will not be as tight as the first buds, but they are still edible. The leafy tops are also edible and can be cooked as greens. Cutting the tops is a good way to speed up the development of the remaining sprouts, at the end of the season.

To extend your Brussels sprouts harvest in cold seasons, mulch plants with straw and/or cover with a row cover for protection. Whole plants can be pulled, potted and stored in a root cellar. Bare root plants stored in a cool cellar will give you an additional two to three weeks of harvest.
How to Grow Brussels Sprouts From Seed
If you live in an area with cold winters, start your seeds indoors about two to three weeks before the last spring frost. For areas with mild winters, start the seeds outdoors in the early to mid-summer for a mid-fall or early winter harvest. If you live in a region with warm winters—where temperatures are rarely below freezing—start seeds outdoors in the late summer for a mid- to late-winter harvest. Cover the seeds with 1/4 to 1/2 inch of soil, and keep the soil moist.
Space seeds for outdoor plants about 2 feet apart with 3 feet between rows, or stagger plants 2 feet apart in each direction, for a grid layout. When the plants are about 6 inches tall, thin them as needed to a spacing of 12 to 24 inches.
Transplant indoor seedlings to the garden when they are about 3 inches tall. It is very important that you do not allow the seedlings to become root bound or the plants will remain stunted when transplanted.
Common Pests and Diseases
Brussels sprouts are prone to the same problems as cabbage and broccoli. The most common pests are cabbage looper, imported cabbage worm, cabbage root maggot, aphids, and Harlequin bug. Because this is a late-season crop, you have time to monitor for problems before the sprouts start forming.
Diseases include blackleg, black rot, and clubroot. Disease control is best achieved by rotating the crop each year. Clubroot is diminished when you raise the soil pH to about 7.0.
If you seen Brussels sprouts only in the grocery store, you will delight in the striking appearance of their plant form: The numerous mini cabbage heads form along thick, 30-inch-tall stalks, along with bold, jutting stems and broad, cabbage-like leaves. The leaves are also edible and can be prepared like other hardy greens.
Like other vegetables in the Brassicaceae family, Brussels sprouts taste best after they have been subjected to cool weather. Usually, that means harvesting after a light frost or a snow. In cooler climates, they are best planted in early summer for a fall harvest. In warmer climates, they should be planted in late summer for a late fall or winter harvest.

Common Name Brussels sprouts
Botanical Name Brassica oleracea (Gemmifera group)
Family Brassicaceae
Plant Type Annual vegetable
Size 30 in. tall, 8 to 12 in. wide
Sun Exposure Full sun
Soil Type Loamy
Soil pH Neutral (6.5 to 7)
Bloom Time Non-flowering
Flower Color Non-flowering
Hardiness Zones 2 to 9
Native Area Mediterranean
How to Plant Brussels Sprouts
Brussels sprouts require a long growing season of 80 days or more, and they improve in flavor after being subjected to a light frost. In colder climates, you can start brussels sprouts seeds indoors around early May, and transplant the seedlings to the garden in mid-June, or about four months before the first fall frost. Plant only after the last spring frost. Be sure to allow the full time outdoors for required days to harvest. In warmer climates, fall planting is preferred. You should be able to direct seed in mid-summer for a late fall or early winter harvest.
Brussels Sprouts Care
Light
The plants will grow and sprout best in full sun and need at least 6 hours of sun daily. Too much shade will slow the sprouts' maturity.
Soil
Brussels sprouts like a slightly acidic to neutral soil that is fertile, well-drained and moist, with plenty of organic matter. The soil pH should be between 6.5 and 7. A good amount of organic matter will help maintain the moisture they need for their intense growth.
Brussels sprouts like the soil around them to be firm, but not compacted. Pat it down lightly.
Water
Keep the sprouts' soil moist but not soaked, giving it between 1 and 1.5 inches of water per week.
Temperature and Humidity
Brussels sprouts prefer temperatures between 45 and 75 degrees Fahrenheit. They'll tolerate a couple of days below freezing, and even improve their flavor with a bit of light frost. This is not a warm-weather crop—sprouts that mature during hot or dry weather will be bitter and flimsy.
Fertilizer
Fertilize Brussels sprout plants twice a season with a nitrogen fertilizer—once when the plants are about 12 inches high and again four weeks later.
Types of Brussels Sprouts
'Bubbles' F1 (85 to 90 days to maturity): This variety tolerates heat and drought, and grows 2-inch sprouts that are resistant to powdery mildew and rust.
'Jade Cross' F1 and "Jade Cross E" F1 (90 days): Jade Cross was a 1959 All-America Selections Winner. Both are compact plants that are good for windy locations. The sprouts are slightly larger on 'Jade Cross E.' Good disease-resistance.
'Long Island Improved'OP (90 days): This variety is another small but high-yield plant that stands up to wind and tolerates freezing.
'Oliver' F1 (85 days): An early producer, the 1-inch sprouts are easy to pick and the compact plant is disease-resistant.
'Royal Marvel' F1 (85 days): ''Royal Marvel' is an early and productive plant that is resistant to bottom rot and tip burn.
'Rubine' (85 to 95 days): These heirloom purple plants are late-maturing and lower-yield than green varieties but have good flavor.
Harvesting
Brussels sprouts take about three to four months from transplant before you can begin harvesting. They grow tall first and don't start producing sprouts until they reach almost full height. Each sprout grows in the leaf axil or joint. They begin maturing from the bottom of the plant upward. Start harvesting when the lower sprouts reach the size of large marbles. Pick the sprouts before they get too large and start cracking and turning bitter.
Pulling off the sprouts is easier if you remove the leaf below the sprout first, then twist and pull the sprout. Some people prefer to cut, rather than pull the sprouts. Each plant yields approximately a quart of sprouts total.
After harvesting, a second crop of Brussels sprouts may begin to grow at the base of the stem. These will not be as tight as the first buds, but they are still edible. The leafy tops are also edible and can be cooked as greens. Cutting the tops is a good way to speed up the development of the remaining sprouts, at the end of the season.

To extend your Brussels sprouts harvest in cold seasons, mulch plants with straw and/or cover with a row cover for protection. Whole plants can be pulled, potted and stored in a root cellar. Bare root plants stored in a cool cellar will give you an additional two to three weeks of harvest.
How to Grow Brussels Sprouts From Seed
If you live in an area with cold winters, start your seeds indoors about two to three weeks before the last spring frost. For areas with mild winters, start the seeds outdoors in the early to mid-summer for a mid-fall or early winter harvest. If you live in a region with warm winters—where temperatures are rarely below freezing—start seeds outdoors in the late summer for a mid- to late-winter harvest. Cover the seeds with 1/4 to 1/2 inch of soil, and keep the soil moist.
Space seeds for outdoor plants about 2 feet apart with 3 feet between rows, or stagger plants 2 feet apart in each direction, for a grid layout. When the plants are about 6 inches tall, thin them as needed to a spacing of 12 to 24 inches.
Transplant indoor seedlings to the garden when they are about 3 inches tall. It is very important that you do not allow the seedlings to become root bound or the plants will remain stunted when transplanted.
Common Pests and Diseases
Brussels sprouts are prone to the same problems as cabbage and broccoli. The most common pests are cabbage looper, imported cabbage worm, cabbage root maggot, aphids, and Harlequin bug. Because this is a late-season crop, you have time to monitor for problems before the sprouts start forming.
Diseases include blackleg, black rot, and clubroot. Disease control is best achieved by rotating the crop each year. Clubroot is diminished when you raise the soil pH to about 7.0.
0
0
文章
Miss Chen
2021年12月01日

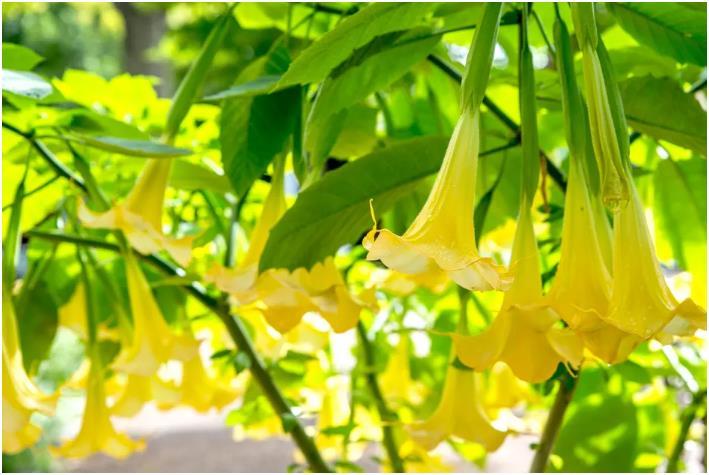
The show-stopping hanging bugle-shaped flowers of brugmansia make this plant a delight for any garden. Grown either as a woody shrub or small tree, brugmansia is a tropical plant native to Central and South America. Brugmansia is best planted in mid-spring when temperatures outdoors no longer drop below 50 degrees at night. The plant will grow very quickly, often growing between 24 to 36 inches a year. All parts of the brugmansia plant are toxic to humans, dogs, and cats.1 It is also an invasive plant in Australia, New Zealand, Central America, the Caribbean, and the Pacific Islands.
Common Name Brugmansia, trumpet of death
Botanical Name Brugmansia
Family Solanaceae
Plant Type Perennial, shrub
Mature Size 6–20 ft. tall, 3–15 ft. wide
Sun Exposure Full
Soil Type Moist but well-drained
Soil pH Acidic
Bloom Time Summer, fall
Flower Color White, yellow, orange, pink, peach
Hardiness Zones 8–10 (USDA)
Native Area South America, Central America
Toxicity Toxic to people, toxic to pets
Brugmansia Care
Brugmansia can take the form of a shrub or small tree, depending on the area in which it's grown. Its leaves are 6 to 8 inches long, arranged alternately on the stems, and it's known for its spectacular drooping flowers, which can grow up to 20 inches long.
In cooler zones, brugmansia can be grown as a container plant and brought indoors when temperatures drop. The flowers produce a strong, fragrant scent, most noticeable at night. Hummingbirds are also drawn to its flowers and fragrance.
Light
Generally, brugmansia does well in a spot that boasts full sun. However, in especially hot or dry environments, it can stand to have a bit of shade, especially during the warmer afternoon hours. Regardless of the location, though, you should aim to allow the plant between six and eight hours of sunlight daily for it to thrive.
Soil
Brugmansia is perhaps least picky about the soil it grows in. It can exist happily in almost any blend, from sand and clay to loam and richly organic mixtures. The most important factor lies in the soil's drainage. Brugmansia does not like to be waterlogged but prefers consistently moist soil, so there's a delicate balance. If growing in pots, brugmansia will typically do well in a potting mix designed for azaleas and camellias.
Water
This is a very thirsty plant that needs to be watered well—and often. If growing brugmansia in a pot, ensure there are ample drainage holes at the base so the plant doesn't get waterlogged. Root rot can occur if the soil becomes soggy. The exact watering cadence for your plant will depend on the weather and the method of planting (container vs. in ground). Brugmansia needs more water when the weather is warm. Plants housed in a container may need to be watered twice a day during the peak of summer. Ultimately, never let the soil dry out, and you should aim to grant your plant at least three inches of water a week.
Temperature and Humidity
Generally, brugmansia can withstand moderate to warm temperatures and should not be kept outdoors if the temperatures dip below 40 degrees Fahrenheit. If you live in an environment where fall or winter gets cold, plant your brugmansia in a container that you can move to a dark, frost-free place (like a garage) before the first frost of the season. You can allow it to go dormant.
Fertilizer
Like many other plants with large, spectacular blooms, brugmansia should be fertilized at least once a week (larger plants can even be fertilized two to three times a week). Use a water-soluble fertilizer, and avoid slow-release formulas, as these do not work fast enough for the plant. Bloom-boosting fertilizers, such as 15-30-15 or 10-50-10 mixture, are best.
Types of Brugmansia
Brugmansia species have distinctive, drooping flowers, and most have sweetly scented blooms at night. The biggest difference between species is color.
Brugmansia suaveolens: Native to Brazil; this cream-colored blooming plant is one of the most popular species.
Brugmansia aurea: This plant sports yellow blooms and is often called a golden trumpet. It's native to Ecuador and Venezuela.
Brugmansia sanguine: This red-flowering species lacks a scent and is commonly pollinated by long-billed hummingbirds. It is native to Colombia and Chile.
Brugmansia vulcanicola: Native to the Andean Mountains range from Colombia to Ecuador, this salmon-colored specimen is considered the rarest of the brugmansia. Its 'Rosa Lila' hybrid is a rose-colored cultivar.
Brugmansia arborea: This plant features the shortest trumpet flowers, often a whiter cream color than most. This plant is native to the countries along the Andes Mountains range.
Pruning
Although they do not require pruning, trimming brugmansia will keep the plant producing flowers constantly. If growing it as a small tree, begin to prune when the main trunk forms its first "Y" and choose a central leader as the trunk. Systematically prune away older branches and stems to encourage the plant to produce more branches. Flowers will eventually appear on the terminal ends of the stems. The best time to prune brugmansia is typically in the fall. Keep at least six to 10 nodes on the branches.
If your shrub is getting too tall, you can easily train a container-grown brugmansia tree into a smaller shrub size. Pruning your container brugmansia to a desired height or shape will not affect the size or frequency of the flowers.
Propagating Brugmansia
Brugmansia can be propagated through seeds and cuttings. The best time to get a stem cutting is in the morning. Attempt propagation in the spring for the best success. Stem cuttings are the best method because the plant matures quicker than from seed. Here's how to propagate from stem cutting:
You will need potting soil, a pot, gloves, pruning shears, and optionally, rooting hormone.
Don the gloves and cut a stem, measuring back 10 inches from the tip of the selected cutting. Make a cut 1/4-inch below a set of leaves using the pruning shears. Strip off the bottom set of leaves just above the cut to expose the leaf nodes.
Apply rooting hormone to the cut end and bury the cut end in moistened potting soil. Firmly pack the soil around the stem to hold it up.
Put the pot in a slightly shady spot, and cover the pot with plastic. Water the plant from the bottom by placing the pot with its bottom-set drainage holes in a tray of water.
After a few weeks, the cutting will develop a good root system and be transplanted into the garden or a larger pot.
How to Grow Brugmansia From Seed
Moisten a quality potting mix in a pot and lay the seed on the soil surface. Cover with about a quarter to one-half inch of soil. Keep the soil moist. Place the pot in a warm place and look for signs of germination. Germination can take from two weeks to several months, but most seedlings will emerge within a month.
Potting and Repotting Brugmansia
Brugmansias can grow well in containers and are the way to go if you plan to keep it outdoors in a non-tropical zone. You will need to bring it if the temperatures drop lower than 50 F. Plant brugmansia in a 24-inch diameter container. Keep your potted brugmansia thoroughly watered while outside. Potted plants need more water than in-ground plants. Expect to water your outdoor brugmansia at least twice a day at the height of the season's hot, sunny days. Most brugmansias will not grow to their full height if they are grown in a container. At the most, the typical container-grown brugmansia will reach about 12 feet. Keep the plant pruned to maintain that size. Potted brugmansia should be gradually repotted as it grows to its final container—about 20 gallons in size.
Overwintering
Once winter sets in and outdoor temps drop below 50 F, bring in your brugmansia. You can treat it as a houseplant or allow it to go into dormancy. As a houseplant, give it light and water. Water it when the soil dries out, like any other houseplant. It may not flower while inside, but the foliage will look nice.
If you decide to allow it to go dormant, place it in a dark garage, basement, or closet (not colder than 50 F). You can trim it back by one-third and not harm the plant. Only water it sparingly about once a month. It may lose its leaves and look dead, but as long as the trunk is green, it's still alive. As spring approaches, about a month before you can reintroduce the plant to the outdoors, gradually increase watering (about once a week). Put the plant in a sunny spot or give it a grow light for at least 8 hours. In about one week, you should notice some new leaves or branch growth. After you put the plant back outside, its growth will boom, and you will notice its signature flowers within weeks.
Common Pests
Whiteflies are a big problem for brugmansia.3 Cabbage worms, spider mites, and aphids are also common. Other pests that may appear include cucumber beetles (in the midwestern United States), slugs and snails, fungus gnats (inside), and mealybugs. To treat these pest infestations, use isopropyl (rubbing) alcohol on a cotton ball or cotton swab to dab the insects. Another option, make a spray solution of equal parts water and isopropyl alcohol and spray the plant. You can also treat the plant with neem oil or insecticidal soap to repel pests.
How to Get Brugmansia to Bloom
Only a mature brugmansia will bloom. If you started your plant from seeds, it could take up to five years before you see blooms. If you started your brugmansia from a cutting, it might speed up the process, but it can still take about four years. Brugmansia needs ample water to produce blooms and good drainage for good root health. Brugmansia is also a heavy feeder, requiring fertilizer regularly. If all of these factors are met, make sure that it's not root-bound. If it's in too small a container, it may not produce flowers. Move it to a larger container, water, and feed it.

Common Problems With Brugmansia
This plant requires little care and eventually yields some of the most noteworthy blossoms, however, brugmansia is susceptible to pests and diseases that can compromise the health and longevity of the plant.
Stunted Plant Growth and Blotches
Mosaic virus and tomato spotted wilt are common viruses that affect plants in the Solanaceae family. They both can cause stunted plant growth and irregular streaking or blotches. Though the plant may survive and bounce back with proper care, these viruses are permanent and cannot be cured. Avoid planting angel trumpets next to heirloom tomatoes or tobacco plants (Nicotiana spp.) to prevent these viruses.
Wilting Leaves
Fusarium and verticillium wilt are two fungal infections. Both fungi affect the roots and travel up the stem, stopping water from entering the plant and causes wilted foliage. Fusarium wilt usually occurs in warm weather, while verticillium is more common in cooler temperatures. There is no cure; you can only manage the disease. The fungi can live in the soil for a long time. The best bet is to start with new plants and new soil.
Blackening Leaves and Smelly Odor
Root rot is a common fungal disease caused by excessive watering. You can prevent root rot by keeping the potting mix moist but never soggy. Decrease watering when temperatures drop in late summer or autumn. Root rot can be deadly, but if caught early enough, you might be able to save the plant. Pull the root ball out of the container; cut away rotten, mushy roots; sterilize the potting container; and plant the healthy portion of root in fresh, well-draining soil.
Common Name Brugmansia, trumpet of death
Botanical Name Brugmansia
Family Solanaceae
Plant Type Perennial, shrub
Mature Size 6–20 ft. tall, 3–15 ft. wide
Sun Exposure Full
Soil Type Moist but well-drained
Soil pH Acidic
Bloom Time Summer, fall
Flower Color White, yellow, orange, pink, peach
Hardiness Zones 8–10 (USDA)
Native Area South America, Central America
Toxicity Toxic to people, toxic to pets

Brugmansia Care
Brugmansia can take the form of a shrub or small tree, depending on the area in which it's grown. Its leaves are 6 to 8 inches long, arranged alternately on the stems, and it's known for its spectacular drooping flowers, which can grow up to 20 inches long.
In cooler zones, brugmansia can be grown as a container plant and brought indoors when temperatures drop. The flowers produce a strong, fragrant scent, most noticeable at night. Hummingbirds are also drawn to its flowers and fragrance.
Light
Generally, brugmansia does well in a spot that boasts full sun. However, in especially hot or dry environments, it can stand to have a bit of shade, especially during the warmer afternoon hours. Regardless of the location, though, you should aim to allow the plant between six and eight hours of sunlight daily for it to thrive.
Soil
Brugmansia is perhaps least picky about the soil it grows in. It can exist happily in almost any blend, from sand and clay to loam and richly organic mixtures. The most important factor lies in the soil's drainage. Brugmansia does not like to be waterlogged but prefers consistently moist soil, so there's a delicate balance. If growing in pots, brugmansia will typically do well in a potting mix designed for azaleas and camellias.
Water
This is a very thirsty plant that needs to be watered well—and often. If growing brugmansia in a pot, ensure there are ample drainage holes at the base so the plant doesn't get waterlogged. Root rot can occur if the soil becomes soggy. The exact watering cadence for your plant will depend on the weather and the method of planting (container vs. in ground). Brugmansia needs more water when the weather is warm. Plants housed in a container may need to be watered twice a day during the peak of summer. Ultimately, never let the soil dry out, and you should aim to grant your plant at least three inches of water a week.
Temperature and Humidity
Generally, brugmansia can withstand moderate to warm temperatures and should not be kept outdoors if the temperatures dip below 40 degrees Fahrenheit. If you live in an environment where fall or winter gets cold, plant your brugmansia in a container that you can move to a dark, frost-free place (like a garage) before the first frost of the season. You can allow it to go dormant.
Fertilizer
Like many other plants with large, spectacular blooms, brugmansia should be fertilized at least once a week (larger plants can even be fertilized two to three times a week). Use a water-soluble fertilizer, and avoid slow-release formulas, as these do not work fast enough for the plant. Bloom-boosting fertilizers, such as 15-30-15 or 10-50-10 mixture, are best.
Types of Brugmansia
Brugmansia species have distinctive, drooping flowers, and most have sweetly scented blooms at night. The biggest difference between species is color.
Brugmansia suaveolens: Native to Brazil; this cream-colored blooming plant is one of the most popular species.
Brugmansia aurea: This plant sports yellow blooms and is often called a golden trumpet. It's native to Ecuador and Venezuela.
Brugmansia sanguine: This red-flowering species lacks a scent and is commonly pollinated by long-billed hummingbirds. It is native to Colombia and Chile.
Brugmansia vulcanicola: Native to the Andean Mountains range from Colombia to Ecuador, this salmon-colored specimen is considered the rarest of the brugmansia. Its 'Rosa Lila' hybrid is a rose-colored cultivar.
Brugmansia arborea: This plant features the shortest trumpet flowers, often a whiter cream color than most. This plant is native to the countries along the Andes Mountains range.
Pruning
Although they do not require pruning, trimming brugmansia will keep the plant producing flowers constantly. If growing it as a small tree, begin to prune when the main trunk forms its first "Y" and choose a central leader as the trunk. Systematically prune away older branches and stems to encourage the plant to produce more branches. Flowers will eventually appear on the terminal ends of the stems. The best time to prune brugmansia is typically in the fall. Keep at least six to 10 nodes on the branches.
If your shrub is getting too tall, you can easily train a container-grown brugmansia tree into a smaller shrub size. Pruning your container brugmansia to a desired height or shape will not affect the size or frequency of the flowers.
Propagating Brugmansia
Brugmansia can be propagated through seeds and cuttings. The best time to get a stem cutting is in the morning. Attempt propagation in the spring for the best success. Stem cuttings are the best method because the plant matures quicker than from seed. Here's how to propagate from stem cutting:
You will need potting soil, a pot, gloves, pruning shears, and optionally, rooting hormone.
Don the gloves and cut a stem, measuring back 10 inches from the tip of the selected cutting. Make a cut 1/4-inch below a set of leaves using the pruning shears. Strip off the bottom set of leaves just above the cut to expose the leaf nodes.
Apply rooting hormone to the cut end and bury the cut end in moistened potting soil. Firmly pack the soil around the stem to hold it up.
Put the pot in a slightly shady spot, and cover the pot with plastic. Water the plant from the bottom by placing the pot with its bottom-set drainage holes in a tray of water.
After a few weeks, the cutting will develop a good root system and be transplanted into the garden or a larger pot.
How to Grow Brugmansia From Seed
Moisten a quality potting mix in a pot and lay the seed on the soil surface. Cover with about a quarter to one-half inch of soil. Keep the soil moist. Place the pot in a warm place and look for signs of germination. Germination can take from two weeks to several months, but most seedlings will emerge within a month.
Potting and Repotting Brugmansia
Brugmansias can grow well in containers and are the way to go if you plan to keep it outdoors in a non-tropical zone. You will need to bring it if the temperatures drop lower than 50 F. Plant brugmansia in a 24-inch diameter container. Keep your potted brugmansia thoroughly watered while outside. Potted plants need more water than in-ground plants. Expect to water your outdoor brugmansia at least twice a day at the height of the season's hot, sunny days. Most brugmansias will not grow to their full height if they are grown in a container. At the most, the typical container-grown brugmansia will reach about 12 feet. Keep the plant pruned to maintain that size. Potted brugmansia should be gradually repotted as it grows to its final container—about 20 gallons in size.
Overwintering
Once winter sets in and outdoor temps drop below 50 F, bring in your brugmansia. You can treat it as a houseplant or allow it to go into dormancy. As a houseplant, give it light and water. Water it when the soil dries out, like any other houseplant. It may not flower while inside, but the foliage will look nice.
If you decide to allow it to go dormant, place it in a dark garage, basement, or closet (not colder than 50 F). You can trim it back by one-third and not harm the plant. Only water it sparingly about once a month. It may lose its leaves and look dead, but as long as the trunk is green, it's still alive. As spring approaches, about a month before you can reintroduce the plant to the outdoors, gradually increase watering (about once a week). Put the plant in a sunny spot or give it a grow light for at least 8 hours. In about one week, you should notice some new leaves or branch growth. After you put the plant back outside, its growth will boom, and you will notice its signature flowers within weeks.
Common Pests
Whiteflies are a big problem for brugmansia.3 Cabbage worms, spider mites, and aphids are also common. Other pests that may appear include cucumber beetles (in the midwestern United States), slugs and snails, fungus gnats (inside), and mealybugs. To treat these pest infestations, use isopropyl (rubbing) alcohol on a cotton ball or cotton swab to dab the insects. Another option, make a spray solution of equal parts water and isopropyl alcohol and spray the plant. You can also treat the plant with neem oil or insecticidal soap to repel pests.
How to Get Brugmansia to Bloom
Only a mature brugmansia will bloom. If you started your plant from seeds, it could take up to five years before you see blooms. If you started your brugmansia from a cutting, it might speed up the process, but it can still take about four years. Brugmansia needs ample water to produce blooms and good drainage for good root health. Brugmansia is also a heavy feeder, requiring fertilizer regularly. If all of these factors are met, make sure that it's not root-bound. If it's in too small a container, it may not produce flowers. Move it to a larger container, water, and feed it.

Common Problems With Brugmansia
This plant requires little care and eventually yields some of the most noteworthy blossoms, however, brugmansia is susceptible to pests and diseases that can compromise the health and longevity of the plant.
Stunted Plant Growth and Blotches
Mosaic virus and tomato spotted wilt are common viruses that affect plants in the Solanaceae family. They both can cause stunted plant growth and irregular streaking or blotches. Though the plant may survive and bounce back with proper care, these viruses are permanent and cannot be cured. Avoid planting angel trumpets next to heirloom tomatoes or tobacco plants (Nicotiana spp.) to prevent these viruses.
Wilting Leaves
Fusarium and verticillium wilt are two fungal infections. Both fungi affect the roots and travel up the stem, stopping water from entering the plant and causes wilted foliage. Fusarium wilt usually occurs in warm weather, while verticillium is more common in cooler temperatures. There is no cure; you can only manage the disease. The fungi can live in the soil for a long time. The best bet is to start with new plants and new soil.
Blackening Leaves and Smelly Odor
Root rot is a common fungal disease caused by excessive watering. You can prevent root rot by keeping the potting mix moist but never soggy. Decrease watering when temperatures drop in late summer or autumn. Root rot can be deadly, but if caught early enough, you might be able to save the plant. Pull the root ball out of the container; cut away rotten, mushy roots; sterilize the potting container; and plant the healthy portion of root in fresh, well-draining soil.
0
0
文章
Miss Chen
2021年11月22日

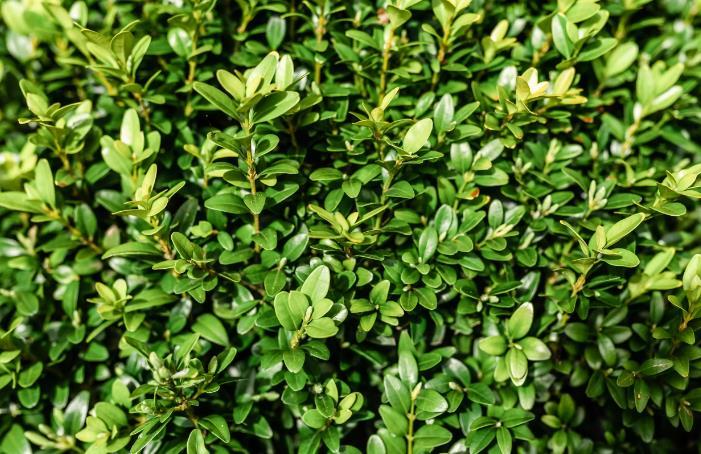
The Buxus genus includes about 70 species of slow-growing broadleaf evergreens. Most of the garden forms are cultivars or hybrids of two species— B. sempervirens (common box) and B. microphylla (Japanese box). Boxwoods are typically large shrubs or small trees, but most of the varieties used in modern landscaping are dwarf varieties, such as B. sempervirens 'Suffruticosa', a popular plant for hedges and topiaries. Another dwarf variety is the Korean (Buxus sinica var. insularis). It reaches a mature height of just two feet tall (with a slightly greater spread). These dwarf boxwood shrubs are prized for their densely packed, light-green leaves and rounded, compact growth habit.
Botanical Name Buxus spp.
Common Names Boxwood, English boxwood, box
Plant Type Broadleaf evergreen shrub
Mature Size Varies by species; dwarf varieties are typically 2 to 8 feet tall
Sun Exposure Full sun to part shade
Soil Type Medium moisture loamy soil
Soil pH 6.8 to 7.5
Bloom Time April to May
Flower Color Green to creamy yellow (flowers are not significant)
Hardiness Zones 5 to 9 (depends on species and variety)
Native Area Southern Europe, Asia
Toxicity Toxic to pets
How to Grow Boxwood Shrubs
Boxwoods are best planted in loamy soil in a full-sun to part-shade location, preferably in an area somewhat sheltered from winds. Their roots are shallow, so the soil must be protected from the heat. Maintain a layer of organic garden mulch, three inches thick, around each plant. Start mulching 2 inches out from the trunk—as a general rule, it is bad to mulch right up against the trunk of a bush or tree, because it invites pests and diseases—and work your way about one foot outwards, around the whole circumference, space permitting.
When grown as a hedge or formal screen, the primary maintenance for the shrubs will be in regular pruning, though this will not be necessary if you are using them as specimen plantings.
Light
Boxwoods will take full sun to partial shade, but planting them in an area bathed in dappled shade for the hottest part of the afternoon is preferable. When sheltered by trees, the roots of dwarf boxwoods will profit from the cooler soil temperatures.
Soil
Boxwood shrubs require well-drained soils, or they will suffer from root rot. Although they may tolerate soils with a lower pH, certified soil scientist, Victoria Smith notes that they prefer a soil pH in the 6.8 to 7.5 range.
Water
For the first two years, boxwoods require deep weekly watering. Avoid shallow watering, since moisture will not reach the deepest roots. Mature plants will thrive with a deep watering every 2 to 4 weeks.
Temperature and Humidity
Boxwoods typically thrive in the climate conditions in zones 6 to 8. In very hot summer weather, the shrubs will appreciate more water and shade. Zone 5 gardeners may find that stem tips die back in cold weather.
Fertilizer
Fertilize with an all-purpose fertilizer in spring prior to the emergence of new growth.
Propagating Boxwood Shrubs
Boxwood is best propagated by rooting some stem cuttings. In midsummer, cut 3- to 4-inch lengths of stem tips of new growth. Remove the lower leaves and scape the bark from one side of the cutting. Bury the ends of the cuttings in a pot filled with a mixture of sand, peat moss, and vermiculite. Moisten the potting medium, place the pot in a sealed plastic bag, and set it in a bright location. Check the moisture daily, and mist whenever the cutting is dry. Check for roots every few days by tugging on the cutting.
When the roots are sufficiently developed, remove the pot from the plastic bag and transplant the cutting into another container filled with a rich potting mix. Continue to grow the plant in a sunny window until outdoor planting time the following spring.
Pruning Boxwood Shrubs
Although they are known for their tolerance for hard pruning, most boxwoods will form a nice informal shape without much pruning at all. Only occasional pruning is required to clean out dead branches or those that are twisted together.
When pruning hard for shape, the trimming can be done almost any time during the growing season, though it should be avoided in late fall to avoid winter bronzing.
Varieties of Boxwood
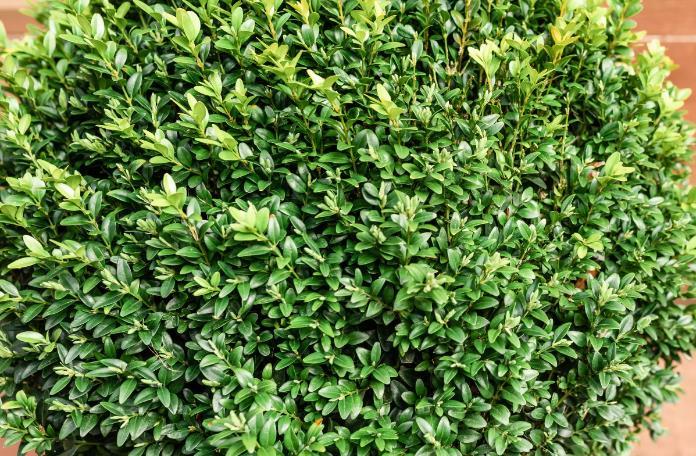
There are many kinds of boxwoods, and the best plant for you depends on your particular landscaping needs.
Buxus sempervirons 'Suffruticosa' cultivars are favored in gardens because they grow more slowly. The growth habit is tighter and more compact than the 'Arborescens' cultivars. These shrubs grow to 2 to 3 feet in height with a 2- to 4-foot spread.
B sempervirens' Arborescens' is a considerably larger, faster-growing plant, growing as tall as 20 feet with a spread of 8 to 10 feet.
B. sempervirens 'Monrue Green Tower' is a columnar form, 9 feet tall and 1 to 2 feet in spread. It is great for a tall screen or for sculpting topiary use. Two plants can be used to flank an entryway.
Buxus microphylla var. japonica, the Japanese boxwood, is one of the most popular shrubs for low hedges. It is also preferred where a more drought-tolerant shrub is needed. It is for zones 6 to 9 and has mature dimensions of 6 to 8 feet tall by 10 to 15 feet wide. Japanese boxwoods figure prominently at a number of historic sites in the Far East.
B. microphylla japonica 'Winter Gem' is 4 to 6 feet tall with a similar spread. The cultivar name comes from the pleasing gold and bronze tinges of its foliage in winter.
B. microphylla japonica 'Golden Triumph' is 2 to 3 feet tall and 3 to 4 feet wide; it is valued for its variegated leaves.
Common Pests/Diseases
A common problem for boxwood shrubs is "winter bronzing," a shift to reddish-brown or yellowish foliage color caused by winter exposure to wind and sun. One way to address the problem is to spray an anti-desiccant on the shrubs in late November and again in late January and to make sure your plants are watered sufficiently throughout the growing season. Also, you can build a structure around your bushes to shelter them from the wind and sun in winter. But some gardeners do not mind—or even actually value—the winter bronzing on the foliage.
Leafminer, boxwood mite, and boxwood psyllid are common pests. The damage is disfiguring but not fatal, and the pests can be treated with horticultural oils. In the deep South, nematodes are of concern.
Boxwoods can be susceptible to fungal blights and leaf spot, and root rot can also be a problem in poorly-drained soils.
In the northern part of the hardiness range, new growth is susceptible to winter damage.
Landscape Uses
While people occasionally use boxwood shrubs as specimen plants in their landscape-design work, they are more often grouped together in foundation plantings or to form hedges. Dwarf boxwoods are famous for their use in formal landscape design. They respond well to pruning, which makes them popular as knot-garden plants, as topiary plants, and as bonsai plants. Wall germander (Teucrium chamaedrys) is used in a similar way.
Other uses for these bushes extend beyond the life of the plant. As a cut evergreen for the holiday season, sprigs of it are used in wreaths, garlands, kissing balls, and topiary "tree" arrangements.
Botanical Name Buxus spp.
Common Names Boxwood, English boxwood, box
Plant Type Broadleaf evergreen shrub
Mature Size Varies by species; dwarf varieties are typically 2 to 8 feet tall
Sun Exposure Full sun to part shade
Soil Type Medium moisture loamy soil
Soil pH 6.8 to 7.5
Bloom Time April to May
Flower Color Green to creamy yellow (flowers are not significant)
Hardiness Zones 5 to 9 (depends on species and variety)
Native Area Southern Europe, Asia
Toxicity Toxic to pets

How to Grow Boxwood Shrubs
Boxwoods are best planted in loamy soil in a full-sun to part-shade location, preferably in an area somewhat sheltered from winds. Their roots are shallow, so the soil must be protected from the heat. Maintain a layer of organic garden mulch, three inches thick, around each plant. Start mulching 2 inches out from the trunk—as a general rule, it is bad to mulch right up against the trunk of a bush or tree, because it invites pests and diseases—and work your way about one foot outwards, around the whole circumference, space permitting.
When grown as a hedge or formal screen, the primary maintenance for the shrubs will be in regular pruning, though this will not be necessary if you are using them as specimen plantings.
Light
Boxwoods will take full sun to partial shade, but planting them in an area bathed in dappled shade for the hottest part of the afternoon is preferable. When sheltered by trees, the roots of dwarf boxwoods will profit from the cooler soil temperatures.
Soil
Boxwood shrubs require well-drained soils, or they will suffer from root rot. Although they may tolerate soils with a lower pH, certified soil scientist, Victoria Smith notes that they prefer a soil pH in the 6.8 to 7.5 range.
Water
For the first two years, boxwoods require deep weekly watering. Avoid shallow watering, since moisture will not reach the deepest roots. Mature plants will thrive with a deep watering every 2 to 4 weeks.
Temperature and Humidity
Boxwoods typically thrive in the climate conditions in zones 6 to 8. In very hot summer weather, the shrubs will appreciate more water and shade. Zone 5 gardeners may find that stem tips die back in cold weather.
Fertilizer
Fertilize with an all-purpose fertilizer in spring prior to the emergence of new growth.
Propagating Boxwood Shrubs
Boxwood is best propagated by rooting some stem cuttings. In midsummer, cut 3- to 4-inch lengths of stem tips of new growth. Remove the lower leaves and scape the bark from one side of the cutting. Bury the ends of the cuttings in a pot filled with a mixture of sand, peat moss, and vermiculite. Moisten the potting medium, place the pot in a sealed plastic bag, and set it in a bright location. Check the moisture daily, and mist whenever the cutting is dry. Check for roots every few days by tugging on the cutting.
When the roots are sufficiently developed, remove the pot from the plastic bag and transplant the cutting into another container filled with a rich potting mix. Continue to grow the plant in a sunny window until outdoor planting time the following spring.
Pruning Boxwood Shrubs
Although they are known for their tolerance for hard pruning, most boxwoods will form a nice informal shape without much pruning at all. Only occasional pruning is required to clean out dead branches or those that are twisted together.
When pruning hard for shape, the trimming can be done almost any time during the growing season, though it should be avoided in late fall to avoid winter bronzing.

Varieties of Boxwood
There are many kinds of boxwoods, and the best plant for you depends on your particular landscaping needs.
Buxus sempervirons 'Suffruticosa' cultivars are favored in gardens because they grow more slowly. The growth habit is tighter and more compact than the 'Arborescens' cultivars. These shrubs grow to 2 to 3 feet in height with a 2- to 4-foot spread.
B sempervirens' Arborescens' is a considerably larger, faster-growing plant, growing as tall as 20 feet with a spread of 8 to 10 feet.
B. sempervirens 'Monrue Green Tower' is a columnar form, 9 feet tall and 1 to 2 feet in spread. It is great for a tall screen or for sculpting topiary use. Two plants can be used to flank an entryway.
Buxus microphylla var. japonica, the Japanese boxwood, is one of the most popular shrubs for low hedges. It is also preferred where a more drought-tolerant shrub is needed. It is for zones 6 to 9 and has mature dimensions of 6 to 8 feet tall by 10 to 15 feet wide. Japanese boxwoods figure prominently at a number of historic sites in the Far East.
B. microphylla japonica 'Winter Gem' is 4 to 6 feet tall with a similar spread. The cultivar name comes from the pleasing gold and bronze tinges of its foliage in winter.
B. microphylla japonica 'Golden Triumph' is 2 to 3 feet tall and 3 to 4 feet wide; it is valued for its variegated leaves.
Common Pests/Diseases
A common problem for boxwood shrubs is "winter bronzing," a shift to reddish-brown or yellowish foliage color caused by winter exposure to wind and sun. One way to address the problem is to spray an anti-desiccant on the shrubs in late November and again in late January and to make sure your plants are watered sufficiently throughout the growing season. Also, you can build a structure around your bushes to shelter them from the wind and sun in winter. But some gardeners do not mind—or even actually value—the winter bronzing on the foliage.
Leafminer, boxwood mite, and boxwood psyllid are common pests. The damage is disfiguring but not fatal, and the pests can be treated with horticultural oils. In the deep South, nematodes are of concern.
Boxwoods can be susceptible to fungal blights and leaf spot, and root rot can also be a problem in poorly-drained soils.
In the northern part of the hardiness range, new growth is susceptible to winter damage.
Landscape Uses
While people occasionally use boxwood shrubs as specimen plants in their landscape-design work, they are more often grouped together in foundation plantings or to form hedges. Dwarf boxwoods are famous for their use in formal landscape design. They respond well to pruning, which makes them popular as knot-garden plants, as topiary plants, and as bonsai plants. Wall germander (Teucrium chamaedrys) is used in a similar way.
Other uses for these bushes extend beyond the life of the plant. As a cut evergreen for the holiday season, sprigs of it are used in wreaths, garlands, kissing balls, and topiary "tree" arrangements.
0
0


