文章
莹723
2021年03月10日

If you’re tired of all those dull grays and browns in your garden, take heart: Spring is on the way! Actually, many annuals, perennials, and shrubs offer their finest shows in early spring.
Many early bloomers are tough enough to handle a frost or two—or even a freakishly late spring snowstorm! But before you buy anything, read the plant tag or description so you’ll be sure you have the right conditions.
For example, full sun means at least six hours of direct sunlight per day; part sun is about half that. Shade means that an area doesn’t get any direct sunlight. Don’t forget that if you’re planting shrubs or perennials, which come back every year, they must be suited to survive winters in your region.
And pay attention to the mature size of plants in descriptions. A tiny six-inch potted plant eventually grows up, so give it plenty of space to spread so it won't crowd your other plantings or need moved.
Here are some of the best early spring flowers for your garden.
1.Snowdrop
Also called galanthus, these bulbs must be planted in the fall for an early springtime show, often appearing when snow is still on the ground in northern climates. Part shade to shade.
2. Pansy and Viola
These charming annuals come in every shade of the rainbow, and their tiny “faces” are adorable. Plant violas and pansies in pots, baskets, and window boxes to brighten your early spring garden. Some types rebound in the fall or drop seeds to pop up again on their own next spring. Full sun.
3.Flowering Quince
This beautiful shrub is one of the first to bloom in spring in shades of pink, red, or peach. It works well as a border planting. Newer varieties are thornless so they're easier to handle. Full sun.
4.Daffodil
Every spring garden needs these sunny yellow blooms! They come in sizes ranging from six inches to two feet tall, and they bloom at different times from early to late spring. Plant in fall for spring blooms next year and for many seasons afterward. Group bulbs together in bunches for the most dramatic effect instead of planting single bulbs. Full sun.
5.Magnolia
These early spring bloomers have gorgeous, almost unreal-looking blossoms. There are many different types of magnolias, some which are evergreen and some which are deciduous, which means they shed their leaves. Many deciduous types of magnolias bloom before they’ve even leafed out again. Because there are so many different types, make sure to select one that's suited to your USDA Hardiness zone. Full sun to part shade.
6.Grape Hyacinth
The delicate grape-scented blooms, also called muscari, top out at four to six inches tall, so they look great in rock gardens or along the front of beds. Plant them in the fall for spring blooms next year. They naturalize readily, so every year you’ll have more of these dainty little flowers. Full sun to part sun.
7.Diascia
The tiny open-faced blooms of this lesser-known cool season annual come in pleasing springtime shades of pink, peach, and white. Plant them with other spring bloomers in pots or as a ground cover. They fade when it gets hot. Full sun to part shade.
8.Fritillaria
Bell-shaped flowers come in deep shades of purple, pink, white, and red on this lesser-known spring charmer. Plant fritallaria in the fall for dramatic blooms next spring. Full sun.
0
0
文章
莹723
2021年02月21日

Whether you're growing fruits and veggies or herbs and flowers, edging is the finishing touch for any type of garden. By placing edging around garden beds full of annual flowers and perennials, they'll look more polished and your mulch will stay in place. Plus, it will add character and charm to your home's curb appeal.

Installing garden edging also takes some effort! Get your tools together first, including gardening gloves, an edging shovel, garden spade, rake and kneeler pad.
Here are some of the best materials for edging your garden beds.
1.Paver Stones
Pavers made from concrete are nearly indestructible. But they're heavy to handle and time-consuming to install, so plan on a few days of heavy carrying and digging. You can make paths with pavers, or just use them for edging beds.
Pros: Lasts forever and very attractive
Cons: Time-consuming to install

2.Woven Willow
Also called "wattle," this natural edge is perfect for English or country gardens. It's used extensively in Europe.
Pros: Beautiful in the right setting
Cons: Easily damaged and pricey for large areas

3.Natural Rock
Rocks are available in an array of sizes, colors, and shapes, and creeping flowers look amazing tumbling over them! Simply line the edges of each bed, but opt for rocks that are the size of a soft ball or larger for the most visual impact. Visit a nursery or garden center for options.
Pros: Lasts forever
Cons: Takes time to fit them together in a pleasing way

4.Brick
Lay bricks in a shallow trench on their side with the wide side down, or stand them upright. The hardest part is getting everything level. Hint: Use a rubber mallet and line level on a string.
Pros: Lasts forever, relatively inexpensive
Cons: Labor-intensive to install

5.Poured Concrete
This is typically not a DIY job for newbies, as you must build a form, then mix and pour concrete into the mold. Consider hiring an expert, because mistakes are not easily fixed.
Pros: Lasts a long time
Cons: Can’t easily adjust the layout of the planting bed in future years

6.Recycled Rubber Edging
A few companies now make rubber edging that’s pounded into place. It’s nearly indestructible, as it’s usually made from recycled tires.
Pros: Lasts a lifetime
Cons: Doesn’t look great in formal or cottage gardens

7.Landscape Timber
If you’re handy with a saw, landscape timbers are a cost-effective method of edging. They're often pressure-treated to prevent rotting. You’ll need to level the ground and cut sections as needed.
Pros: Inexpensive and long-lasting
Cons: Cannot be used to create curved borders

8.Decorative Fence
Small sections of fence are super-easy for lining a garden perimeter. Many different types and sizes exist including metal, wood, and plastic, so you’ll find the one that suits your garden’s style.
Pros: Easy to place
Cons: Easily damaged, doesn't hold mulch in place


Installing garden edging also takes some effort! Get your tools together first, including gardening gloves, an edging shovel, garden spade, rake and kneeler pad.
Here are some of the best materials for edging your garden beds.
1.Paver Stones
Pavers made from concrete are nearly indestructible. But they're heavy to handle and time-consuming to install, so plan on a few days of heavy carrying and digging. You can make paths with pavers, or just use them for edging beds.
Pros: Lasts forever and very attractive
Cons: Time-consuming to install

2.Woven Willow
Also called "wattle," this natural edge is perfect for English or country gardens. It's used extensively in Europe.
Pros: Beautiful in the right setting
Cons: Easily damaged and pricey for large areas

3.Natural Rock
Rocks are available in an array of sizes, colors, and shapes, and creeping flowers look amazing tumbling over them! Simply line the edges of each bed, but opt for rocks that are the size of a soft ball or larger for the most visual impact. Visit a nursery or garden center for options.
Pros: Lasts forever
Cons: Takes time to fit them together in a pleasing way

4.Brick
Lay bricks in a shallow trench on their side with the wide side down, or stand them upright. The hardest part is getting everything level. Hint: Use a rubber mallet and line level on a string.
Pros: Lasts forever, relatively inexpensive
Cons: Labor-intensive to install

5.Poured Concrete
This is typically not a DIY job for newbies, as you must build a form, then mix and pour concrete into the mold. Consider hiring an expert, because mistakes are not easily fixed.
Pros: Lasts a long time
Cons: Can’t easily adjust the layout of the planting bed in future years

6.Recycled Rubber Edging
A few companies now make rubber edging that’s pounded into place. It’s nearly indestructible, as it’s usually made from recycled tires.
Pros: Lasts a lifetime
Cons: Doesn’t look great in formal or cottage gardens

7.Landscape Timber
If you’re handy with a saw, landscape timbers are a cost-effective method of edging. They're often pressure-treated to prevent rotting. You’ll need to level the ground and cut sections as needed.
Pros: Inexpensive and long-lasting
Cons: Cannot be used to create curved borders

8.Decorative Fence
Small sections of fence are super-easy for lining a garden perimeter. Many different types and sizes exist including metal, wood, and plastic, so you’ll find the one that suits your garden’s style.
Pros: Easy to place
Cons: Easily damaged, doesn't hold mulch in place

0
0
文章
莹723
2021年02月08日

Even if your "garden" is a few pots on a balcony or patio, growing things is good for us! Besides adding zest to our cooking, many modern drugs, such as aspirin, are derived from plants. "Over time, we've found many plants are effective for nutrition, for adding spice to foods, and also for healing us,” says vice president for botanical science at the New York Botanical Garden, Michael Balick, PhD. “There’s also a positive mental health aspect to gardening.” More and more studies show that gardening can help you deal with anxiety and depression, manage weight, and control blood pressure. Plus, who doesn't need more fresh air and sunshine, especially these days?

The great thing about most herbs is that most do just as well in pots as in ground. Some healing plants are perennial, which means they'll return year after year. In many parts of the country, even the snowy North, you'll be able to harvest the hardier herbs for much of the year. Many are easy to dry or freeze so you can use them year-round in cooking.

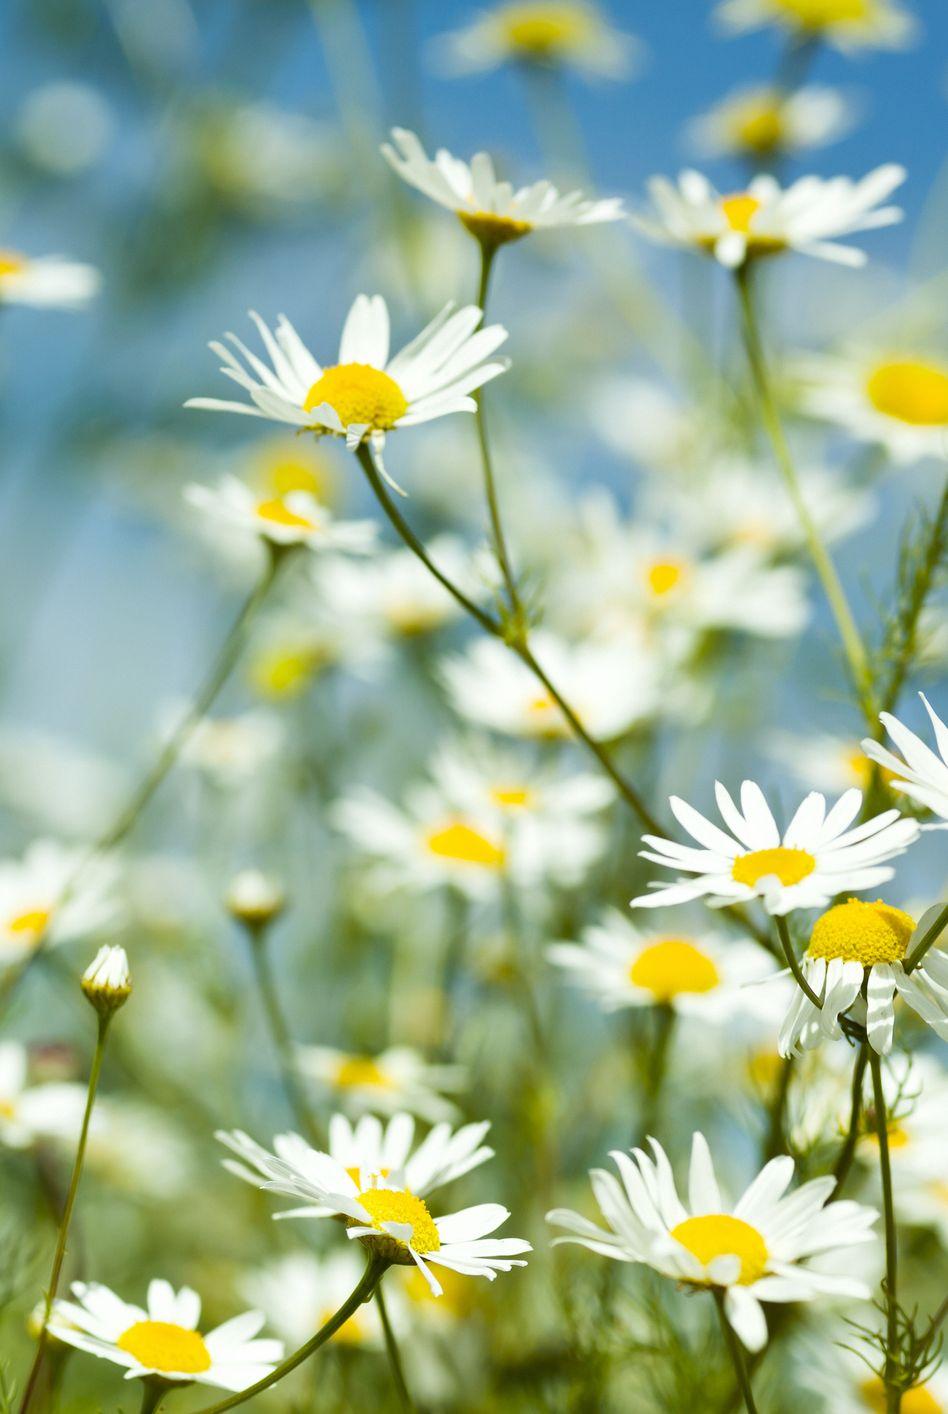
1.Chamomile
Roman chamomile is a low-growing perennial, while German chamomile is an annual that can become two feet tall. Chamomile likes full sun to part shade and needs well-drained soils.
How to use: Both types are used interchangeably. When the flowers begin to open, harvest them and spread out to dry. Chop the dried flowers, add about one tablespoon per cup of hot water, and steep five minutes to make a tea to aid sleep or digestion. Or place the chopped flowers in a small muslin bag with a drawstring to make a tea bag. Bonus: Use this after it cools to soothe red, puffy eyes!
2.Mint
There are hundreds of varieties of mint, with flavors varying from peppermint to chocolate. Mint is one of the easiest herbs to grow. In fact, keep it in a pot or it will take over your garden! Make sure to plant in full sun (6 hours or more direct sun per day).
How to use: Mint relaxes the smooth muscles of the GI tract, so it’s long been used for digestive issues. When you have tummy trouble or feel nauseated, make a tea for sipping. Strip about a dozen leaves (peppermint and spearmint are especially good) and steep in one cup of boiling water until it takes on a yellowish hue.

3.Rosemary
Rosemary originates in the Mediterranean, so it needs full sun and prefers sandy or rocky soil. It’s drought tolerant and perennial in warmer climates. In cold climates, pot it up and bring it indoors for the winter, giving it tons of light.
How to use: Make a hair rinse (good for oily hair) by placing one teaspoon dried rosemary or a handful of fresh rosemary in a cup of boiling water; add one tablespoon lemon juice, and let steep for 10 minutes. Strain, let the infusion cool, and pour through freshly shampooed hair. Add it to dishes such as focaccia, sauces, and roasted meats.

4.Lavender
Lavender likes full sun in well-drained soil, but make sure you choose a variety that will thrive in your zone.
How to use: Harvest the leaves and flowers just as the flower spikes begin to open, chop them up and put them in a small sachet to tuck a few under your pillow to reduce anxiety and help you sleep better. It's also delicious in baked goods such as scones!

5.Lemon Balm
Lemon balm is very easy to grow in full sun and well-drained soil. Keep it in a container so it doesn’t spread rampantly throughout the garden.
How to use: Pour one cup boiling water over five or six fresh leaves. Steep for five minutes, strain and sweeten. Drink several times a day for an upset tummy.

6.Aloe Vera
Grow aloe vera indoors in bright light. Don’t keep it too wet because it retains moisture. It doesn't mind being overcrowded in the pot, so don't worry about repotting unless you want to make new baby plants.
How to use: Aloe vera is a great topical home remedy for skin irritation because compounds in the leaves have anti-inflammatory properties. Cut off the largest outermost leaves, peel and squeeze the gel-like substance onto minor burns or poison ivy or poison oak rashes.

7.Basil
Basil needs full sun and well-drained soil. Pinch off the flowers as soon as they begin to form to encourage branching and the growth of more leaves.
How to use: Basil has antiseptic and antibacterial properties. Crush a few leaves and apply to mosquito bites. Leave on for a few minutes to relieve itching. It's the star ingredient in many Mediterranean dishes including sauces, soups, and pesto. It also freezes well if you have an abundance (toss leaves in a blender with water or olive oil, blend until mostly smooth, then freeze in ice cube trays!).

8.Calendula
These pretty orange and yellow flowers, also known as French pot marigold, like full sun. It’s an annual that blooms from summer until frost, and it's not difficult to grow from seed.
How to use: Pick the flowers when they're fully opened, but not yet gone to seed. Pour one cup boiling water over two teaspoons of petals. Steep for 10 minutes, strain, and let cool. Use as a mouthwash or gargle to relieve inflammation.

9.Thyme
Thyme likes hot, dry conditions and soil that isn’t too rich. It’s incredibly easy to grow in full sun (it even tolerates some shade), and most varieties spread quickly.
How to use: Thyme’s antimicrobial activity may help relieve coughs and cold symptoms. Make a tea by pouring a cup of boiling water over a tablespoon of fresh leaves, and steep for 10 minutes. Drink several times a day. It's lovely in sauces and chicken dishes.

10.Sage
Sage needs full sun and well-drained soil. It’s a perennial in most climates.
How to use: Sage’s antimicrobial properties may relieve upper respiratory symptoms. Chop up about one teaspoon of the leaves and steep in a cup of boiling hot water for 10 minutes. Cool, and use as a gargle for sore throats. It's also delish in stuffing, chicken, and pork dishes.


The great thing about most herbs is that most do just as well in pots as in ground. Some healing plants are perennial, which means they'll return year after year. In many parts of the country, even the snowy North, you'll be able to harvest the hardier herbs for much of the year. Many are easy to dry or freeze so you can use them year-round in cooking.

1.Chamomile
Roman chamomile is a low-growing perennial, while German chamomile is an annual that can become two feet tall. Chamomile likes full sun to part shade and needs well-drained soils.
How to use: Both types are used interchangeably. When the flowers begin to open, harvest them and spread out to dry. Chop the dried flowers, add about one tablespoon per cup of hot water, and steep five minutes to make a tea to aid sleep or digestion. Or place the chopped flowers in a small muslin bag with a drawstring to make a tea bag. Bonus: Use this after it cools to soothe red, puffy eyes!

2.Mint
There are hundreds of varieties of mint, with flavors varying from peppermint to chocolate. Mint is one of the easiest herbs to grow. In fact, keep it in a pot or it will take over your garden! Make sure to plant in full sun (6 hours or more direct sun per day).
How to use: Mint relaxes the smooth muscles of the GI tract, so it’s long been used for digestive issues. When you have tummy trouble or feel nauseated, make a tea for sipping. Strip about a dozen leaves (peppermint and spearmint are especially good) and steep in one cup of boiling water until it takes on a yellowish hue.

3.Rosemary
Rosemary originates in the Mediterranean, so it needs full sun and prefers sandy or rocky soil. It’s drought tolerant and perennial in warmer climates. In cold climates, pot it up and bring it indoors for the winter, giving it tons of light.
How to use: Make a hair rinse (good for oily hair) by placing one teaspoon dried rosemary or a handful of fresh rosemary in a cup of boiling water; add one tablespoon lemon juice, and let steep for 10 minutes. Strain, let the infusion cool, and pour through freshly shampooed hair. Add it to dishes such as focaccia, sauces, and roasted meats.

4.Lavender
Lavender likes full sun in well-drained soil, but make sure you choose a variety that will thrive in your zone.
How to use: Harvest the leaves and flowers just as the flower spikes begin to open, chop them up and put them in a small sachet to tuck a few under your pillow to reduce anxiety and help you sleep better. It's also delicious in baked goods such as scones!

5.Lemon Balm
Lemon balm is very easy to grow in full sun and well-drained soil. Keep it in a container so it doesn’t spread rampantly throughout the garden.
How to use: Pour one cup boiling water over five or six fresh leaves. Steep for five minutes, strain and sweeten. Drink several times a day for an upset tummy.

6.Aloe Vera
Grow aloe vera indoors in bright light. Don’t keep it too wet because it retains moisture. It doesn't mind being overcrowded in the pot, so don't worry about repotting unless you want to make new baby plants.
How to use: Aloe vera is a great topical home remedy for skin irritation because compounds in the leaves have anti-inflammatory properties. Cut off the largest outermost leaves, peel and squeeze the gel-like substance onto minor burns or poison ivy or poison oak rashes.

7.Basil
Basil needs full sun and well-drained soil. Pinch off the flowers as soon as they begin to form to encourage branching and the growth of more leaves.
How to use: Basil has antiseptic and antibacterial properties. Crush a few leaves and apply to mosquito bites. Leave on for a few minutes to relieve itching. It's the star ingredient in many Mediterranean dishes including sauces, soups, and pesto. It also freezes well if you have an abundance (toss leaves in a blender with water or olive oil, blend until mostly smooth, then freeze in ice cube trays!).

8.Calendula
These pretty orange and yellow flowers, also known as French pot marigold, like full sun. It’s an annual that blooms from summer until frost, and it's not difficult to grow from seed.
How to use: Pick the flowers when they're fully opened, but not yet gone to seed. Pour one cup boiling water over two teaspoons of petals. Steep for 10 minutes, strain, and let cool. Use as a mouthwash or gargle to relieve inflammation.

9.Thyme
Thyme likes hot, dry conditions and soil that isn’t too rich. It’s incredibly easy to grow in full sun (it even tolerates some shade), and most varieties spread quickly.
How to use: Thyme’s antimicrobial activity may help relieve coughs and cold symptoms. Make a tea by pouring a cup of boiling water over a tablespoon of fresh leaves, and steep for 10 minutes. Drink several times a day. It's lovely in sauces and chicken dishes.

10.Sage
Sage needs full sun and well-drained soil. It’s a perennial in most climates.
How to use: Sage’s antimicrobial properties may relieve upper respiratory symptoms. Chop up about one teaspoon of the leaves and steep in a cup of boiling hot water for 10 minutes. Cool, and use as a gargle for sore throats. It's also delish in stuffing, chicken, and pork dishes.

0
0
文章
莹723
2021年02月03日

Chrysanthemums, also called mums, are the quintessential fall flower. They're inexpensive, come in tons of different colors and bloom in response to shorter days when the rest of your garden is fading. They also have few pests and generally aren't munched by hungry deer because their foliage isn't particularly tasty.

But are mums annuals or perennials? The answer is...mums really are sort of both, depending on conditions and when you get them in the ground. If you wait until fall to plant chrysanthemums in your garden, you're missing out! Plant them earlier in the season, and you'll be able to enjoy them returning year after year.

1.What kind of mums should you plant?
There are garden mums, also called hardy mums, and florist mums. Garden mums thrive in zones 4 to 9, while florist mums—like you can buy at the grocery store in gift pots—are only hardy to USDA Hardiness zones 7 to 9 (find your zone here). Read the label so you know what you’re buying to ensure that a specific variety will survive winters in your area.

2.Do mums come back every year?
Yes. And no! It depends on when you get them in the ground. Mums need to get their root systems established in time to survive winter. If you plant them in the fall, that's often too late because they’re putting energy into blooming, not building roots. You may get lucky if you plant them early in the season and if you choose those that are in tight bud, rather than plants in bloom.
You also have a better shot with fall planting in warm climates. For anywhere else in the country, get your mums in the ground in spring if you want them to return next year. They still will bloom this fall, too.

3.How can I make sure my mums come back?
Dig a hole slightly larger than the pot and just as deep as the root ball. Water well, and mulch to maintain moisture, keep down the weeds and offer winter protection. Water during dry spells. When the plants appear next spring, feed them with a granular slow-release fertilizer, if you like, and pinch off the tips (the top inch or so) a few times before July to encourage bushiness.
After that, stop pinching or you’ll remove flower buds. If you're not into maintenance, leave them be for a more freeform appearance. Either way, your mums won't have that tightly mounded shape subsequent seasons as when you bought them. That's because the plants you first brought home were treated with growth regulators to produce dense, rounded forms.

4.Do mums need full sun?
Absolutely! They need at least six hours of direct sunlight per day. Like most flowering plants, they won't bloom well if they aren't getting tons of sun.
5.Do mums need special care?
Once in bloom, don't bother cutting off spent blossoms because that doesn't extend the flowering time. Next spring, don't be too eager to yank them out if it appears they're not doing anything at first. Sometimes it takes time for them to pop up after a long winter. If you don’t see anything happening by late spring, they probably didn't make it. Treat yourself to some new mums!


But are mums annuals or perennials? The answer is...mums really are sort of both, depending on conditions and when you get them in the ground. If you wait until fall to plant chrysanthemums in your garden, you're missing out! Plant them earlier in the season, and you'll be able to enjoy them returning year after year.

1.What kind of mums should you plant?
There are garden mums, also called hardy mums, and florist mums. Garden mums thrive in zones 4 to 9, while florist mums—like you can buy at the grocery store in gift pots—are only hardy to USDA Hardiness zones 7 to 9 (find your zone here). Read the label so you know what you’re buying to ensure that a specific variety will survive winters in your area.

2.Do mums come back every year?
Yes. And no! It depends on when you get them in the ground. Mums need to get their root systems established in time to survive winter. If you plant them in the fall, that's often too late because they’re putting energy into blooming, not building roots. You may get lucky if you plant them early in the season and if you choose those that are in tight bud, rather than plants in bloom.
You also have a better shot with fall planting in warm climates. For anywhere else in the country, get your mums in the ground in spring if you want them to return next year. They still will bloom this fall, too.

3.How can I make sure my mums come back?
Dig a hole slightly larger than the pot and just as deep as the root ball. Water well, and mulch to maintain moisture, keep down the weeds and offer winter protection. Water during dry spells. When the plants appear next spring, feed them with a granular slow-release fertilizer, if you like, and pinch off the tips (the top inch or so) a few times before July to encourage bushiness.
After that, stop pinching or you’ll remove flower buds. If you're not into maintenance, leave them be for a more freeform appearance. Either way, your mums won't have that tightly mounded shape subsequent seasons as when you bought them. That's because the plants you first brought home were treated with growth regulators to produce dense, rounded forms.

4.Do mums need full sun?
Absolutely! They need at least six hours of direct sunlight per day. Like most flowering plants, they won't bloom well if they aren't getting tons of sun.
5.Do mums need special care?
Once in bloom, don't bother cutting off spent blossoms because that doesn't extend the flowering time. Next spring, don't be too eager to yank them out if it appears they're not doing anything at first. Sometimes it takes time for them to pop up after a long winter. If you don’t see anything happening by late spring, they probably didn't make it. Treat yourself to some new mums!

0
0
文章
莹723
2021年01月27日

Sowing seed is a simple and inexpensive way of growing new flowers and vegetables for your garden. You can start the growing year much earlier than if sowing outside. When growing salad and vegetable crops, it’s a good idea to sow a small amount of seed every two weeks, to ensure you have a long season of fresh produce to eat throughout summer. This is called ‘successional sowing’.

You don’t need a lot of kit to sow seeds. Many gardeners buy expensive propagators but a seed tray or a few plastic pots, will do the job. If you don’t have plastic pots then try using old yoghurt pots with holes punched in the bottom, or tomato or mushroom punnets instead of a seed tray. Any vessel that can hold compost and allow water to drain freely is suitable.
To maintain an even temperature and keep the soil moist, it’s a good idea to cover the soil with a clear piece of plastic. A bespoke propagator will come with its own clear plastic lid, but you can use cling film, old freezer bags or any clear plastic bag. Use cellotape or an elastic band to fix it to the pot.

Follow our step-by-step guide to sowing seed indoors, below.
You Will Need
• Seeds
• Multi-purpose, peat-free compost
• Seed trays or pots
• Plant labels
• Pencil or waterproof pen
• Watering can with rose attachment
• Polythene bag
• Sheet of glass, or a propagator

Step 1
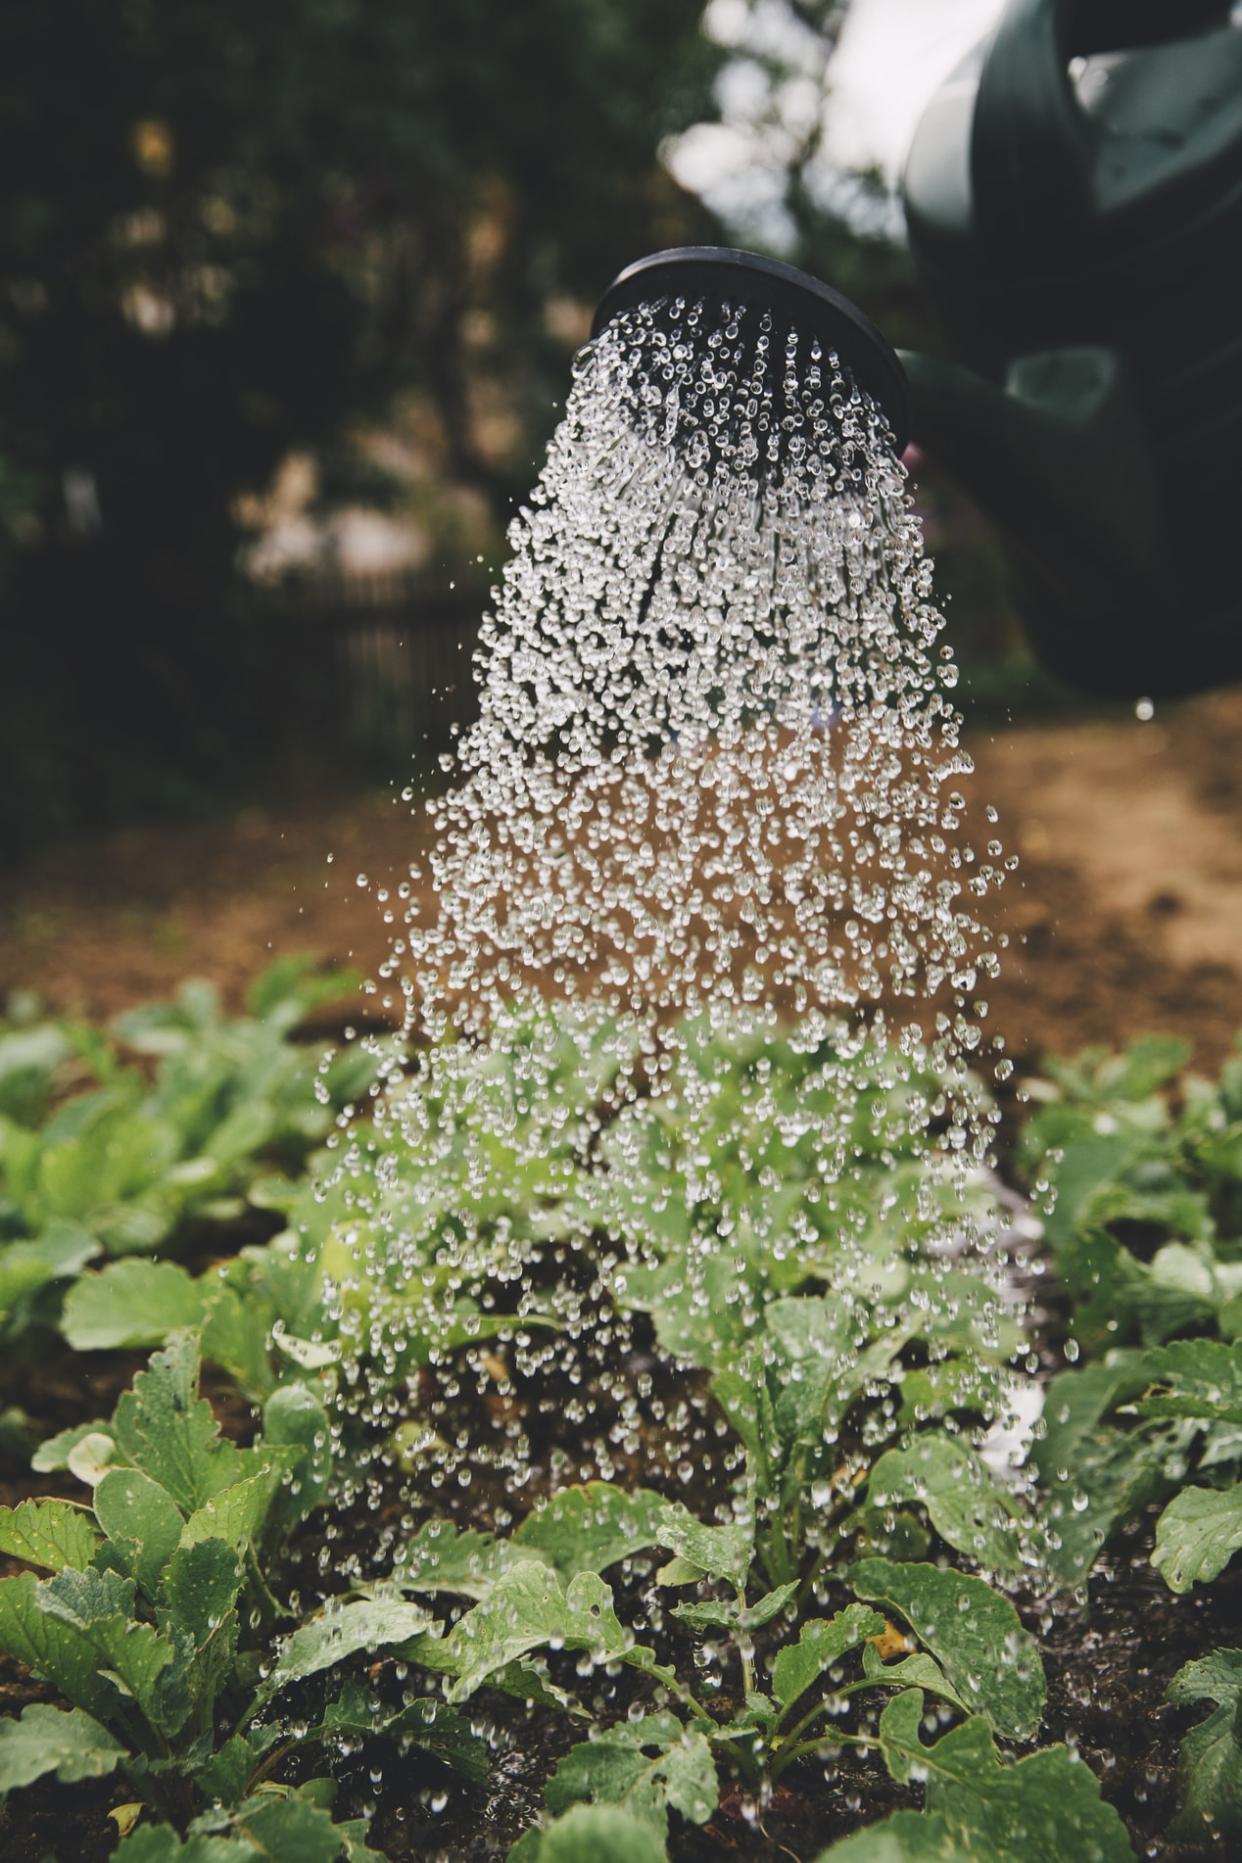
Fill small pots or seed trays with compost. Use a watering can fitted with a fine rose to thoroughly wet the compost, and leave to drain.
Step 2
Sprinkle seeds evenly and thinly over the surface of the compost, leaving approx 2cm – 3cm between each one, if possible. Some seed is very small, making this impossible. Cover seeds with a thin layer of compost, about the same depth as the size of the seed (the smaller the seed, the thinner the layer of compost).
Step 3
Cover the pot with a clear polythene bag or piece of glass or clear plastic, to maintain an even temperature for germination, and keep the compost moist. Place the pot of seeds on a well-lit windowsill or in a heated propagator.

Step 4
Remove the plastic or glass cover as soon as the seeds have germinated and you can see the seedlings growing out of the compost. Grow them on in a warm place indoors – if growing them on a windowsill you may need to move them at night as temperatures can drop dramatically. The young plants will ready to be ‘pricked’ out when the second pair of leaves, known as ‘true’ leaves, emerges.
Step 5
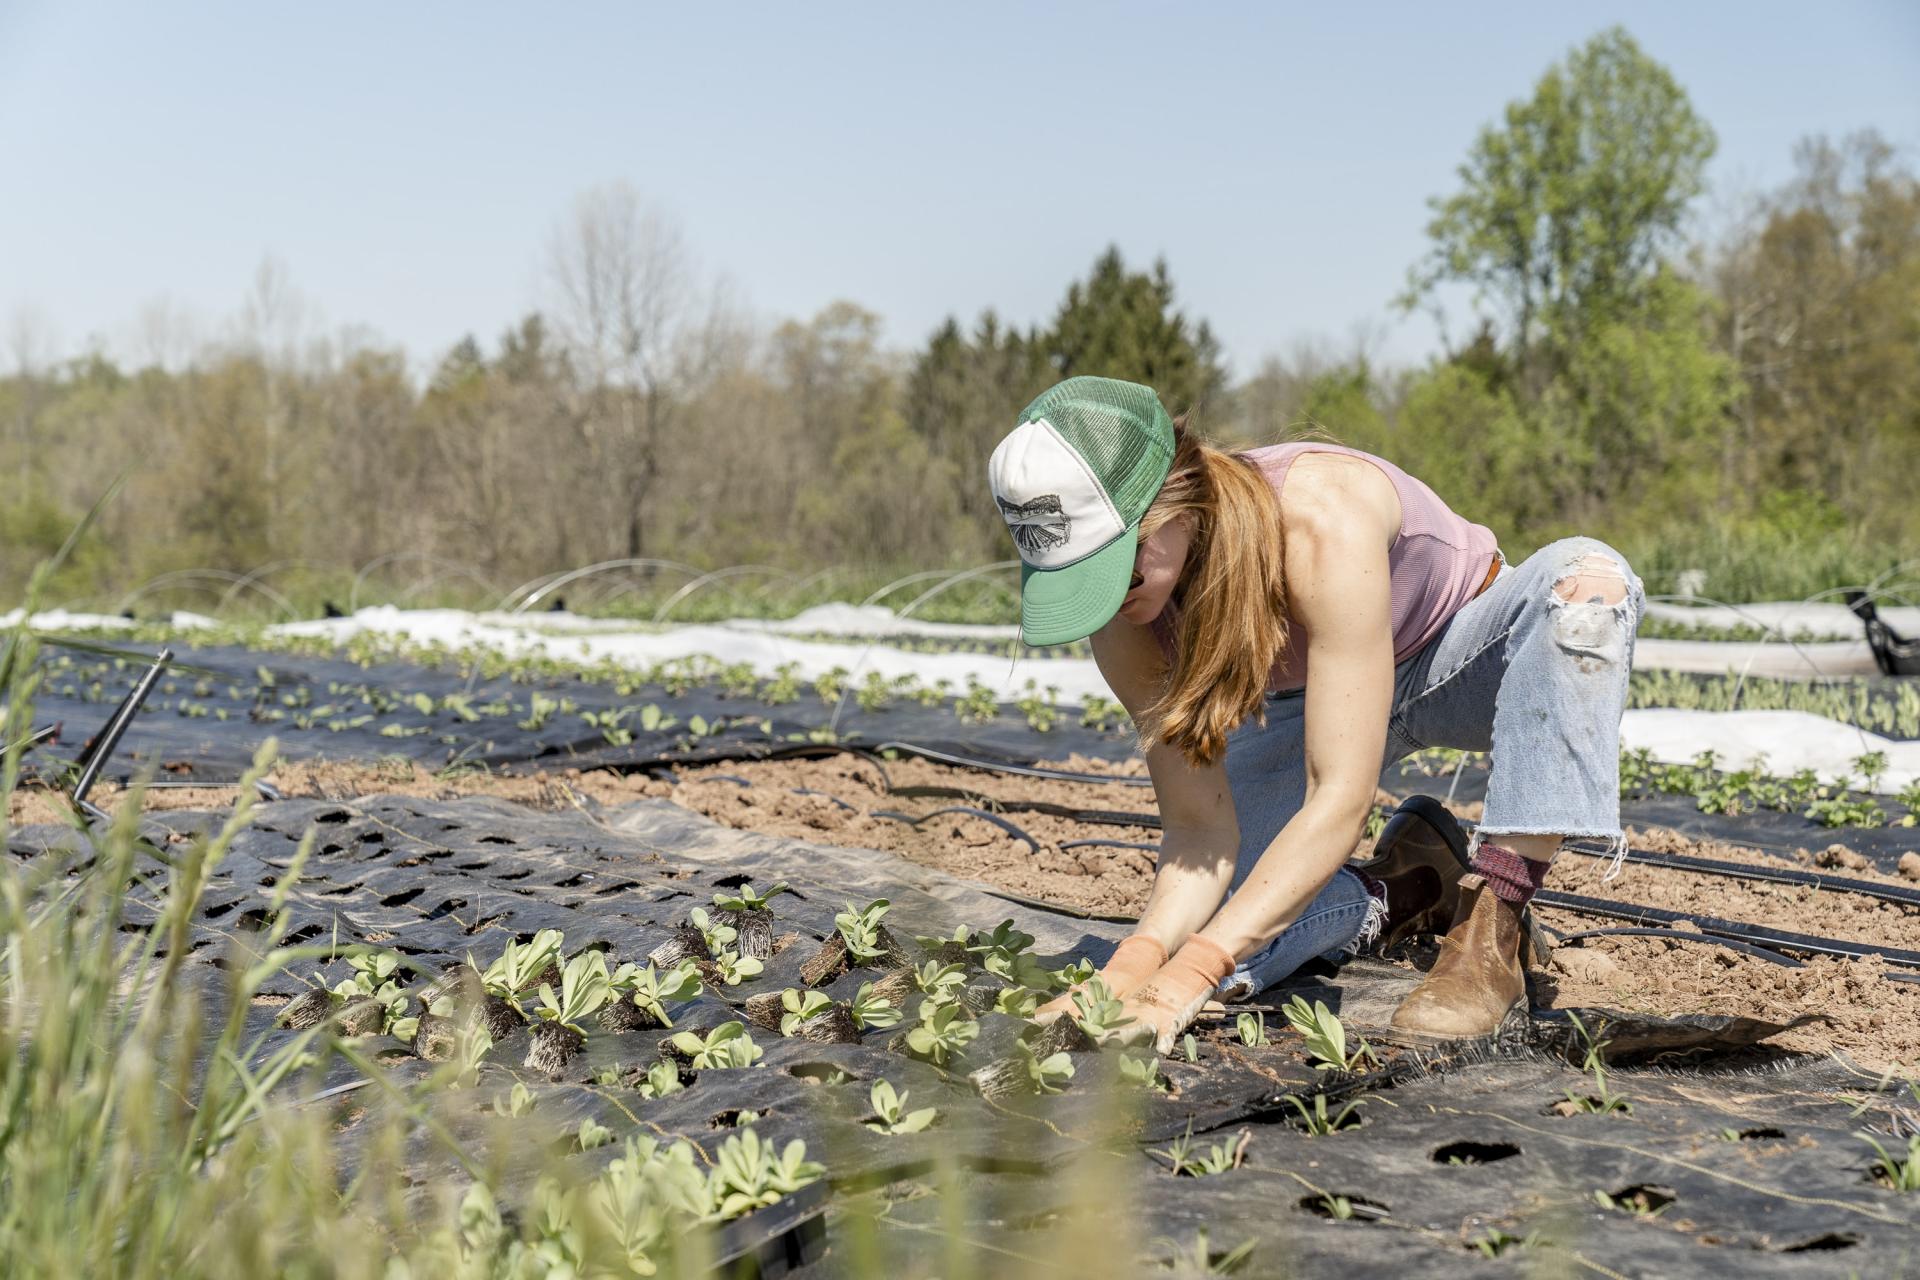
When pricking out seedlings, handle them only by their leaves, not the stem. Fill a seed tray with compost and plant seedlings about 5cm apart, burying the seedling up to the base of the first set of leaves.

Step 6s
After a couple of weeks, the young plants will be large enough to pot individually into 7.5cm pots, or planted outside in well-prepared soil. Handle plants gently, firm compost around them and water well. Don’t allow the soil or compost to dry out.


You don’t need a lot of kit to sow seeds. Many gardeners buy expensive propagators but a seed tray or a few plastic pots, will do the job. If you don’t have plastic pots then try using old yoghurt pots with holes punched in the bottom, or tomato or mushroom punnets instead of a seed tray. Any vessel that can hold compost and allow water to drain freely is suitable.
To maintain an even temperature and keep the soil moist, it’s a good idea to cover the soil with a clear piece of plastic. A bespoke propagator will come with its own clear plastic lid, but you can use cling film, old freezer bags or any clear plastic bag. Use cellotape or an elastic band to fix it to the pot.

Follow our step-by-step guide to sowing seed indoors, below.
You Will Need
• Seeds
• Multi-purpose, peat-free compost
• Seed trays or pots
• Plant labels
• Pencil or waterproof pen
• Watering can with rose attachment
• Polythene bag
• Sheet of glass, or a propagator

Step 1
Fill small pots or seed trays with compost. Use a watering can fitted with a fine rose to thoroughly wet the compost, and leave to drain.
Step 2
Sprinkle seeds evenly and thinly over the surface of the compost, leaving approx 2cm – 3cm between each one, if possible. Some seed is very small, making this impossible. Cover seeds with a thin layer of compost, about the same depth as the size of the seed (the smaller the seed, the thinner the layer of compost).

Step 3
Cover the pot with a clear polythene bag or piece of glass or clear plastic, to maintain an even temperature for germination, and keep the compost moist. Place the pot of seeds on a well-lit windowsill or in a heated propagator.

Step 4
Remove the plastic or glass cover as soon as the seeds have germinated and you can see the seedlings growing out of the compost. Grow them on in a warm place indoors – if growing them on a windowsill you may need to move them at night as temperatures can drop dramatically. The young plants will ready to be ‘pricked’ out when the second pair of leaves, known as ‘true’ leaves, emerges.

Step 5
When pricking out seedlings, handle them only by their leaves, not the stem. Fill a seed tray with compost and plant seedlings about 5cm apart, burying the seedling up to the base of the first set of leaves.

Step 6s
After a couple of weeks, the young plants will be large enough to pot individually into 7.5cm pots, or planted outside in well-prepared soil. Handle plants gently, firm compost around them and water well. Don’t allow the soil or compost to dry out.

0
0
文章
莹723
2021年01月20日

Poison Garden, the deadliest garden in the world. This is one garden where you won't want to pick any flowers—unless you have a death wish.
Located at Alnwick Castle in Northumberland, England, this lush, green gated patch is home to over 95 plants, all of which can kill you.

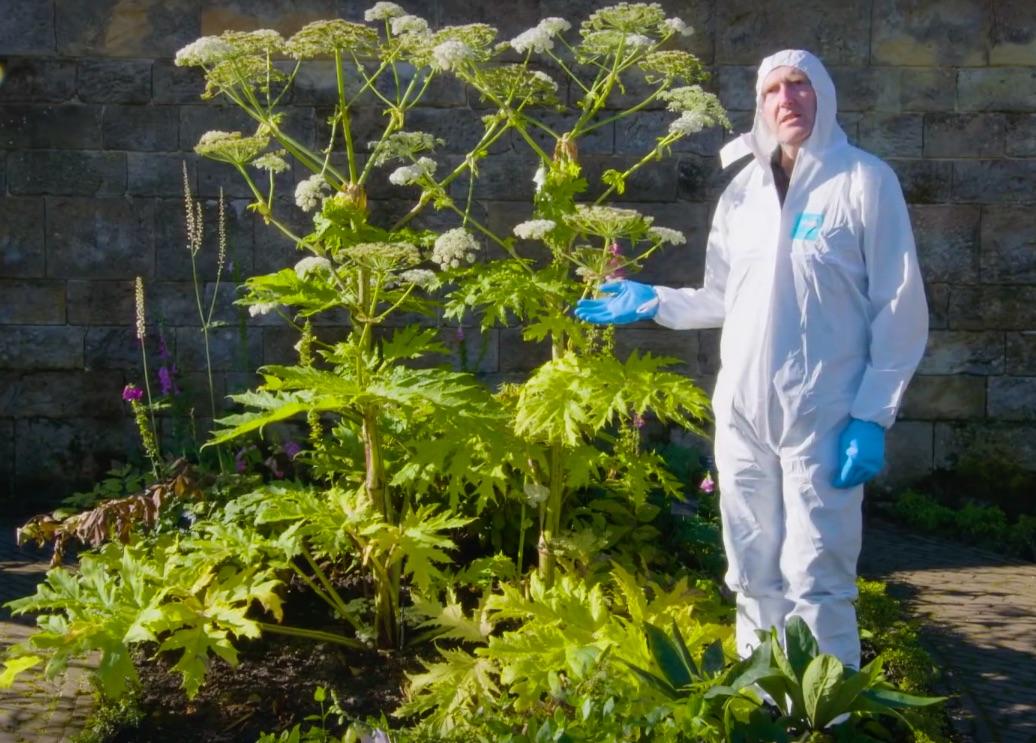
"We obviously have to maintain the garden, so we have to tend to the plants, and when we do that we have to be very careful of the way we operate, so we have to cover some of our skin when we deal with particularly dangerous plants," head gardener Trevor Jones said.
What's the story behind the Poison Garden, which opened in 2005? After visiting a similar one in Padua, Italy built by the Medici family, the Duchess of Northumberland decided that she wanted to start her own, since it was more interesting than your standard herb garden.

Here are some of the plants you would find in the Poison Garden, if you dared to enter:
1.GIANT HOGWEED
This plant can grow up to 14 feet or more, and can cause severe skin irritation, painful blistering, permanent scarring and even blindness.
2.ACONTIUM
Beautiful, right? But beware. These poisonous flowers were once used as poisonous arrows by the Aleuts of Alaska's Aleutian Islands for hunting whales. They also have a long history of killing enemies in battle by being used on spears and arrows.

3.ARUM MACULATUM
These flowers have needle-shaped crystals which irritate the skin, mouth, tongue and throat. They have the ability to swell the throat, making it hard to breathe and causing burning pain and an upset stomach. This plant also acts as an insect trap, with its fecal odor (charming!) and warm temperatures.

4.DATURA FLOWERS
These plants are known for causing delirious states and death.
So, if you're planning to visit Alnwick Castle (fun fact: it served as the setting for Hogwarts in the first two Harry Potter films) you can enter the Poison Garden if you dare—just be sure not to touch, taste, or even smell the plants (yes, visitors have fainted from inhaling toxic fumes before). "People think we're being overdramatic when we talk about not smelling the plants, but I've seen the health and safety reports," the Duchess said.

Located at Alnwick Castle in Northumberland, England, this lush, green gated patch is home to over 95 plants, all of which can kill you.

"We obviously have to maintain the garden, so we have to tend to the plants, and when we do that we have to be very careful of the way we operate, so we have to cover some of our skin when we deal with particularly dangerous plants," head gardener Trevor Jones said.
What's the story behind the Poison Garden, which opened in 2005? After visiting a similar one in Padua, Italy built by the Medici family, the Duchess of Northumberland decided that she wanted to start her own, since it was more interesting than your standard herb garden.

Here are some of the plants you would find in the Poison Garden, if you dared to enter:
1.GIANT HOGWEED
This plant can grow up to 14 feet or more, and can cause severe skin irritation, painful blistering, permanent scarring and even blindness.

2.ACONTIUM
Beautiful, right? But beware. These poisonous flowers were once used as poisonous arrows by the Aleuts of Alaska's Aleutian Islands for hunting whales. They also have a long history of killing enemies in battle by being used on spears and arrows.

3.ARUM MACULATUM
These flowers have needle-shaped crystals which irritate the skin, mouth, tongue and throat. They have the ability to swell the throat, making it hard to breathe and causing burning pain and an upset stomach. This plant also acts as an insect trap, with its fecal odor (charming!) and warm temperatures.

4.DATURA FLOWERS
These plants are known for causing delirious states and death.
So, if you're planning to visit Alnwick Castle (fun fact: it served as the setting for Hogwarts in the first two Harry Potter films) you can enter the Poison Garden if you dare—just be sure not to touch, taste, or even smell the plants (yes, visitors have fainted from inhaling toxic fumes before). "People think we're being overdramatic when we talk about not smelling the plants, but I've seen the health and safety reports," the Duchess said.

0
0
文章
莹723
2020年12月29日

• Botanical name: Hippeastrum 'Happy Garden'
• Common name: Amarylis
• Family: Amaryllidaceae
• Plant Type: House plant
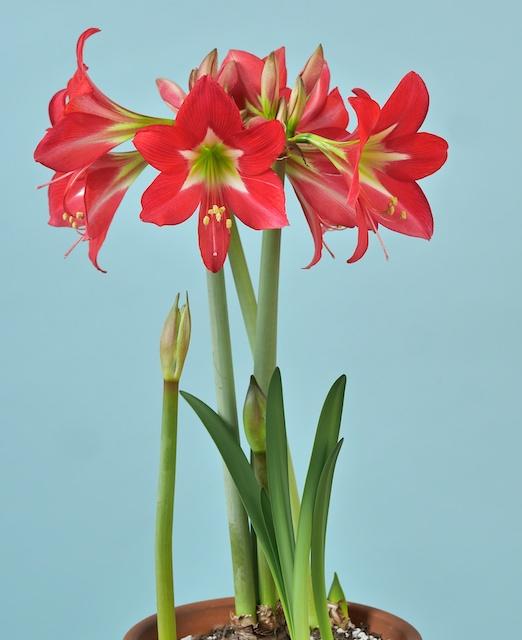
Hippeastrum, or amaryllis, are most commonly grown as flowering houseplants, and are often given as gifts at Christmas. The bulbous plants hail from South Africa, and bear four to six large flowers on a tall, light green hollow stem.
It’s easy to force amaryllis bulbs to flower indoors over Christmas, and once they’ve finished flowering they can be stored and encouraged to flower the following year.

Hippeastrum ‘Happy Garden’ bears multiple heads of red flowers with a green-white centre. For best results, grow at room temperature, around 20°C in a well-lit room, ideally in full sun. Water sparingly at first, then increase the amount as the flower stems develop.

——How to grow Hippeastrum 'Happy Garden'
• Plant size
60cm height
25cm spread
• Aspect
South facing, west facing
• Sun exposure: Full sun
• Hardiness: Half hardy
• Soil type: Well drained / light / sandy

——Is Hippeastrum 'Happy Garden' poisonous?
Hippeastrum 'Happy Garden' can be toxic.
Toxic to:
Toxic to Cats
Toxic to Dogs
——Plants that go well with Hippeastrum 'Happy Garden'
Hippeastrum ‘Red Lion’
Amarylis

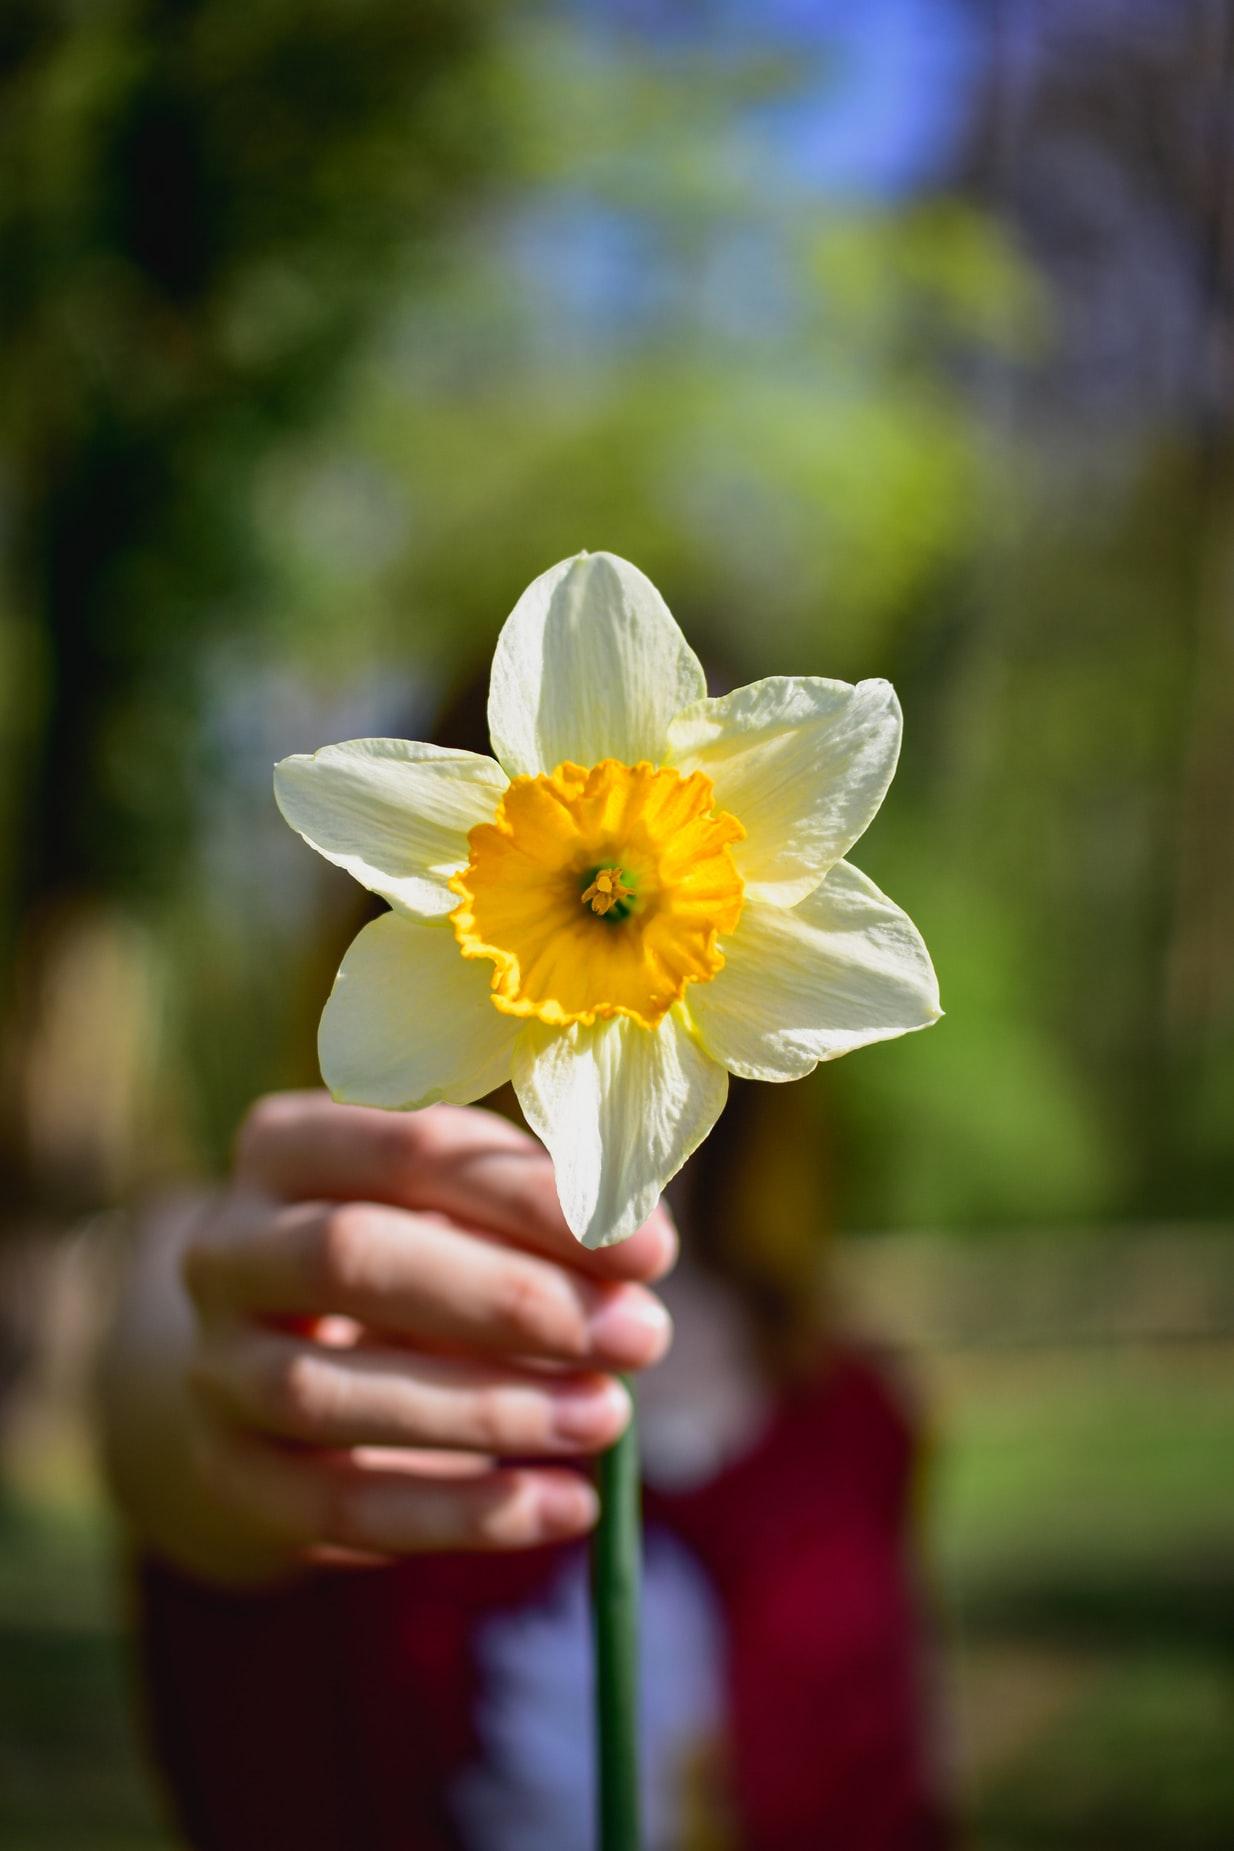
Narcissus papyraceus
Paperwhite narcissus
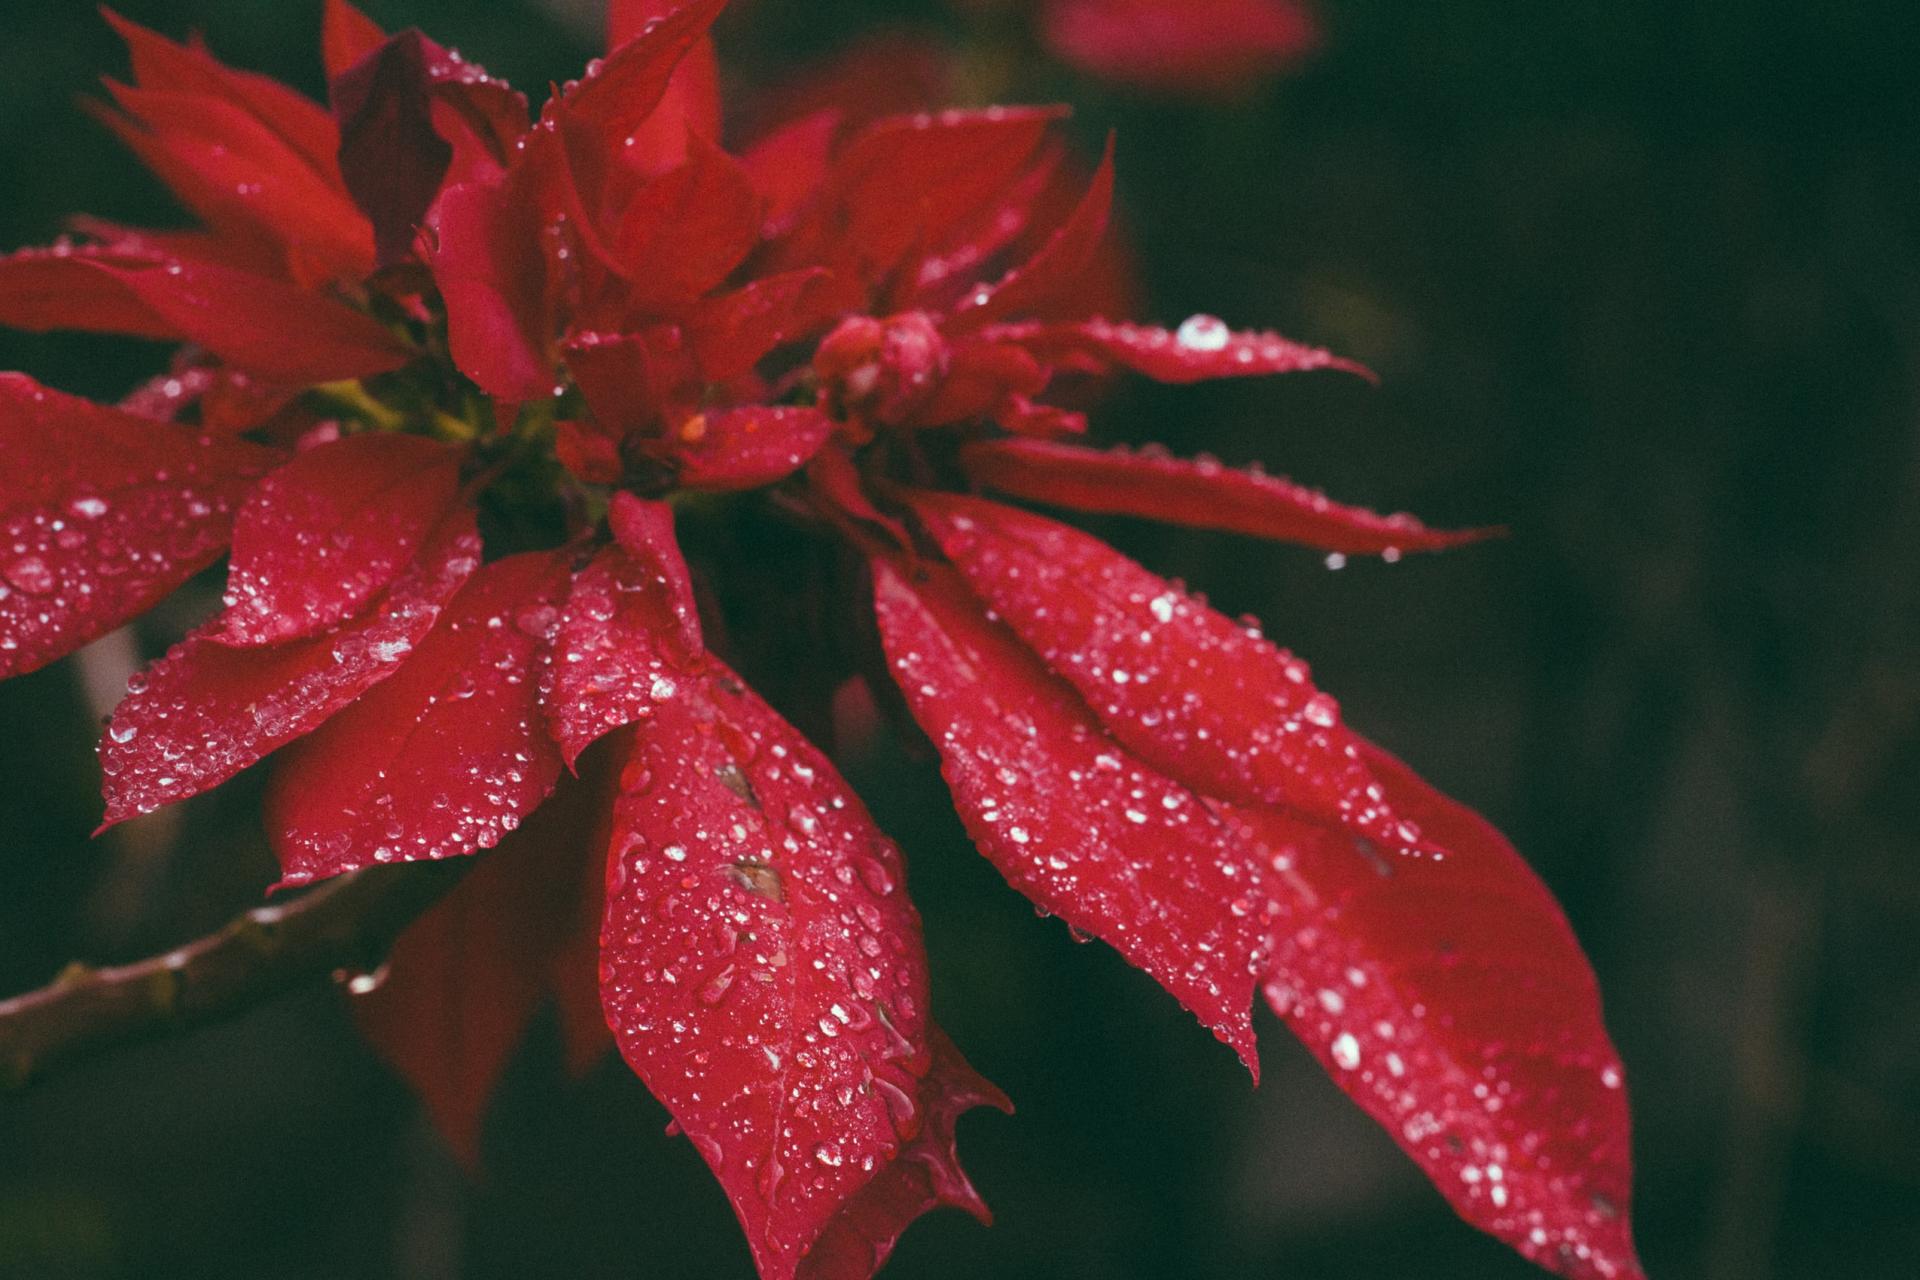
Euphorbia pulcherrimum
Poinsettia
• Common name: Amarylis
• Family: Amaryllidaceae
• Plant Type: House plant

Hippeastrum, or amaryllis, are most commonly grown as flowering houseplants, and are often given as gifts at Christmas. The bulbous plants hail from South Africa, and bear four to six large flowers on a tall, light green hollow stem.
It’s easy to force amaryllis bulbs to flower indoors over Christmas, and once they’ve finished flowering they can be stored and encouraged to flower the following year.

Hippeastrum ‘Happy Garden’ bears multiple heads of red flowers with a green-white centre. For best results, grow at room temperature, around 20°C in a well-lit room, ideally in full sun. Water sparingly at first, then increase the amount as the flower stems develop.

——How to grow Hippeastrum 'Happy Garden'
• Plant size
60cm height
25cm spread
• Aspect
South facing, west facing
• Sun exposure: Full sun
• Hardiness: Half hardy
• Soil type: Well drained / light / sandy

——Is Hippeastrum 'Happy Garden' poisonous?
Hippeastrum 'Happy Garden' can be toxic.
Toxic to:
Toxic to Cats
Toxic to Dogs
——Plants that go well with Hippeastrum 'Happy Garden'
Hippeastrum ‘Red Lion’
Amarylis

Narcissus papyraceus
Paperwhite narcissus

Euphorbia pulcherrimum
Poinsettia

0
0
文章
莹723
2020年11月16日

Tender orchids are one of the most popular houseplants, but to keep them flourishing and flowering, it’s important to avoid some common mistakes.
Moth orchids are arguably the most popular and commonly grown orchids, found everywhere from garden centres to supermarkets. They enjoy a constant temperature of around 18°C, so are best grown indoors all year round.
Other orchids, like dendrobiums, cymbidiums and oncidiums need a minimum evening temperature of 10°C, so can be moved outside in summer to a bright spot out of direct sunlight.

1——Using the wrong pots
If you’re growing moth orchids (Phalaenopsis) you need to grow them in clear containers to allow the green roots to photosynthesise. Dendrobiums and cymbidiums don’t have photosynthetic roots, so can be grown in opaque pots. Vandas don’t need any pot at all, and can be grown in empty vases or suspended from wires.
2——Overpotting
Re-pot orchids in spring when the roots have filled the pot, this is usually carried out each year. Don’t let them remain in the same compost for over two years. Don’t overpot orchids as the compost won’t dry out fast enough, leading to root rot. Choose a pot that is just bigger and always use orchid compost.
3——Poor watering
Orchids roots are very susceptible to root rot, so it’s important that they’re never sitting in water. Water orchids by dunking the whole container in water, then draining, or from above and again allow to drain. Tepid water is ideal, tepid rainwater even better.
4——The wrong light
Most orchids, including phalaenopsis, dendrobiums and cymbidiums need indirect sunlight, as direct sunlight can scorch the leaves. They enjoy high humidity, so it’s worth buying a spray bottle to give them a good mist.

5——Not deadheading
Orchids are grown for their flowers, so it’s essential that they’re deadheaded correctly to encourage more flowers. Moth orchids flower multiple times on one stem, so cut off faded flowers just above the next flower bud. On other orchids you can cut the old flower stem right to the base.
6——Avoid terracotta pots
When potting and repotting orchids, it’s best to steer clear of terracotta pots – the orchid’s roots will fasten themselves to the surface, making it difficult to repot in future.

Moth orchids are arguably the most popular and commonly grown orchids, found everywhere from garden centres to supermarkets. They enjoy a constant temperature of around 18°C, so are best grown indoors all year round.
Other orchids, like dendrobiums, cymbidiums and oncidiums need a minimum evening temperature of 10°C, so can be moved outside in summer to a bright spot out of direct sunlight.

1——Using the wrong pots
If you’re growing moth orchids (Phalaenopsis) you need to grow them in clear containers to allow the green roots to photosynthesise. Dendrobiums and cymbidiums don’t have photosynthetic roots, so can be grown in opaque pots. Vandas don’t need any pot at all, and can be grown in empty vases or suspended from wires.
2——Overpotting
Re-pot orchids in spring when the roots have filled the pot, this is usually carried out each year. Don’t let them remain in the same compost for over two years. Don’t overpot orchids as the compost won’t dry out fast enough, leading to root rot. Choose a pot that is just bigger and always use orchid compost.
3——Poor watering
Orchids roots are very susceptible to root rot, so it’s important that they’re never sitting in water. Water orchids by dunking the whole container in water, then draining, or from above and again allow to drain. Tepid water is ideal, tepid rainwater even better.
4——The wrong light
Most orchids, including phalaenopsis, dendrobiums and cymbidiums need indirect sunlight, as direct sunlight can scorch the leaves. They enjoy high humidity, so it’s worth buying a spray bottle to give them a good mist.

5——Not deadheading
Orchids are grown for their flowers, so it’s essential that they’re deadheaded correctly to encourage more flowers. Moth orchids flower multiple times on one stem, so cut off faded flowers just above the next flower bud. On other orchids you can cut the old flower stem right to the base.
6——Avoid terracotta pots
When potting and repotting orchids, it’s best to steer clear of terracotta pots – the orchid’s roots will fasten themselves to the surface, making it difficult to repot in future.

0
0
文章
莹723
2020年11月04日

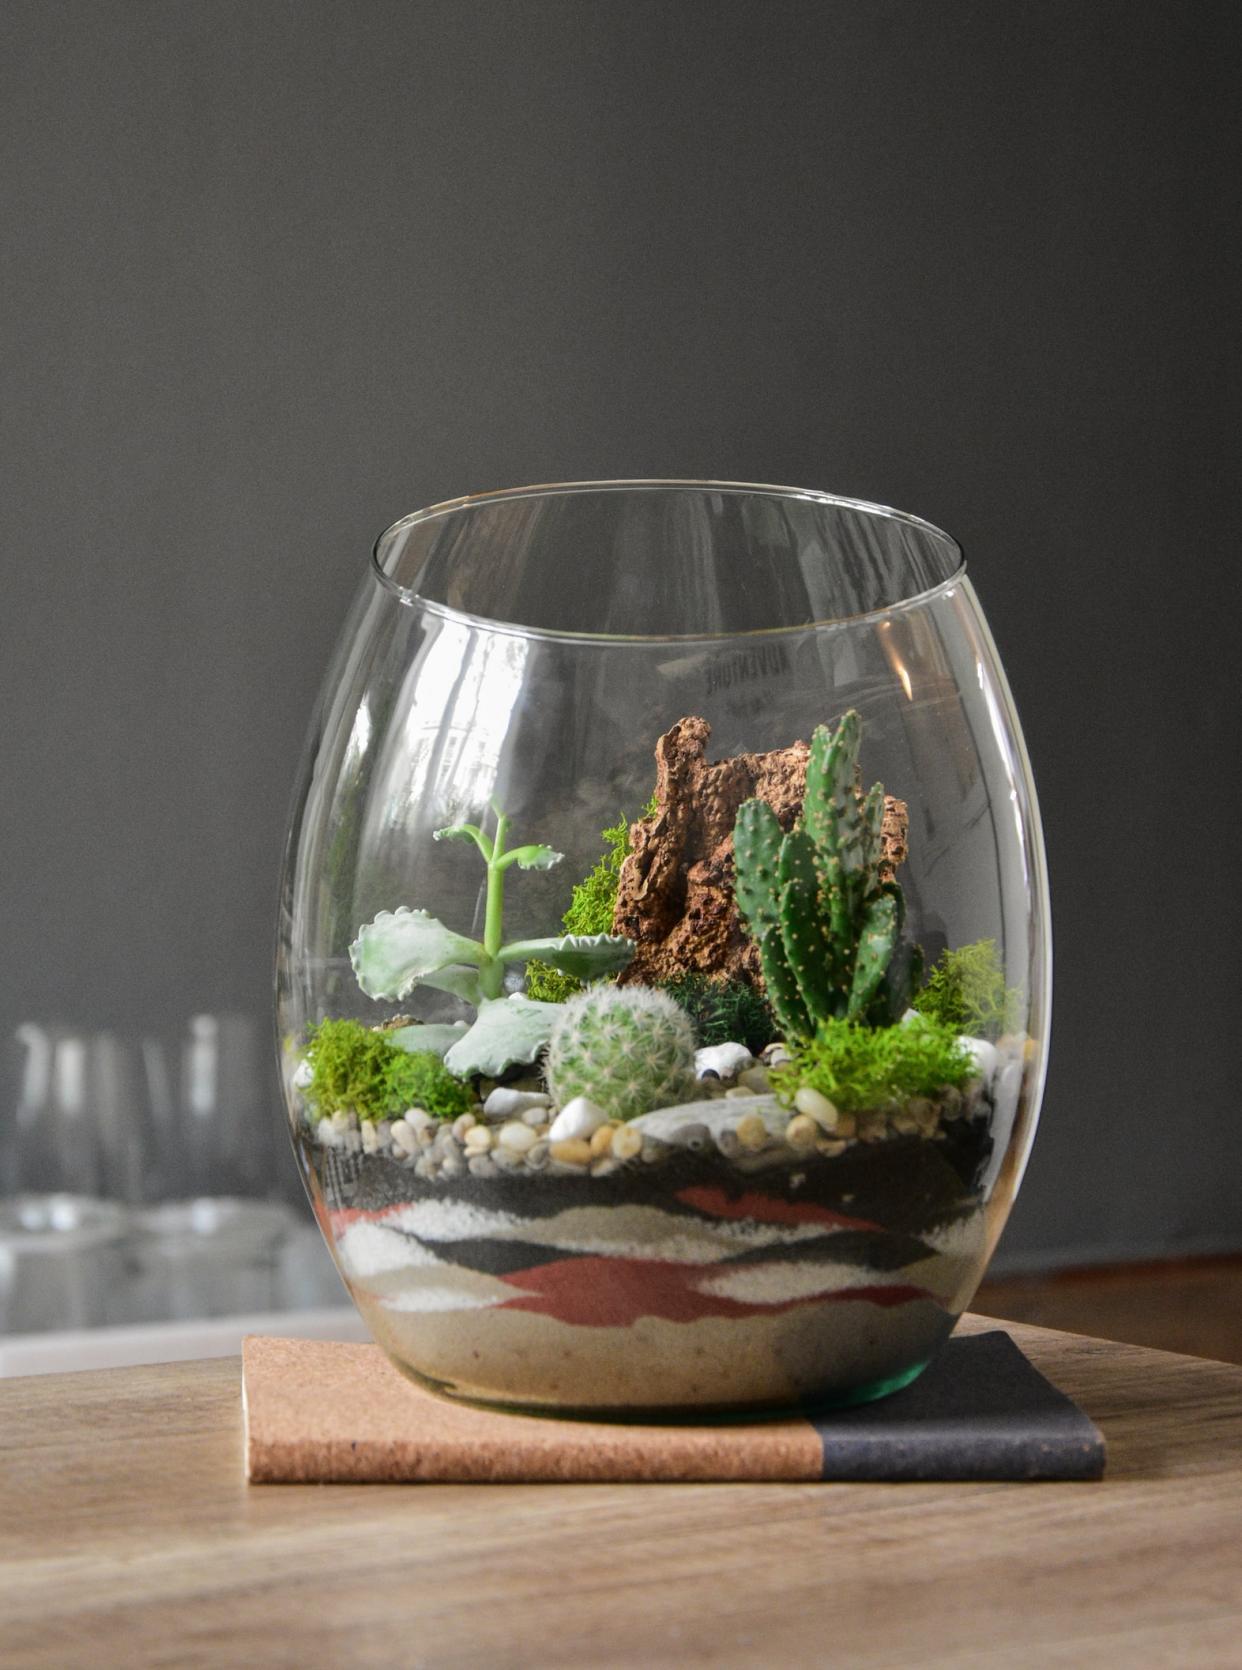
Bottle gardens, or terrariums, are enjoying a revival, and they’re easy to create.The key is to combine small plants that thrive in similar growing conditions – usually either damp shade or drought.
You can plant a bottle garden in virtually any glass vessel, though closed ones are best for moisture lovers and open ones best for plants used to drier conditions. Don’t worry if you can’t find what we used – look in charity shops, garden centres, your kitchen cupboard or on the internet for something that appeals.

You Will Need
•Vintage glass bottle
•Horticultural grit
•Peat free houseplant compost
•Moss, (from the lawn)
•Spathiphyllum 'Chopin'
•Fittonia verschaffeltii
•Syngonium 'White Butterfly'
•Chlorophytum comosum 'Ocean'
•Peperomia rotundifolia
Total time:
20 minutes
Step 1
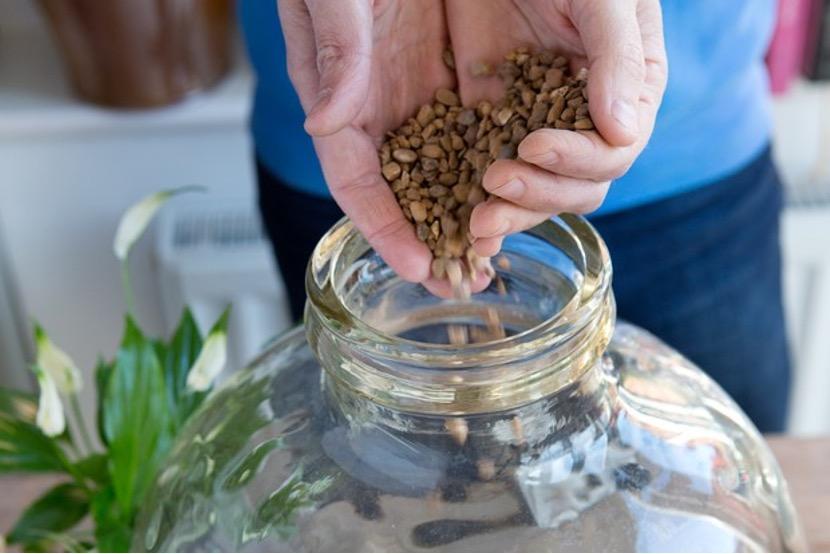
Put 5cm of horticultural grit in the bottom of the bottle for drainage. Add houseplant compost till the bottle is about a third full – breaking up any lumps with your hands. Choose lush foliage plants that thrive in low light and humidity.
Step 2
Position the plants one at a time, planting them as you would in a container – firm the compost around them. Fill gaps between plants with a layer of moss.

Step 3
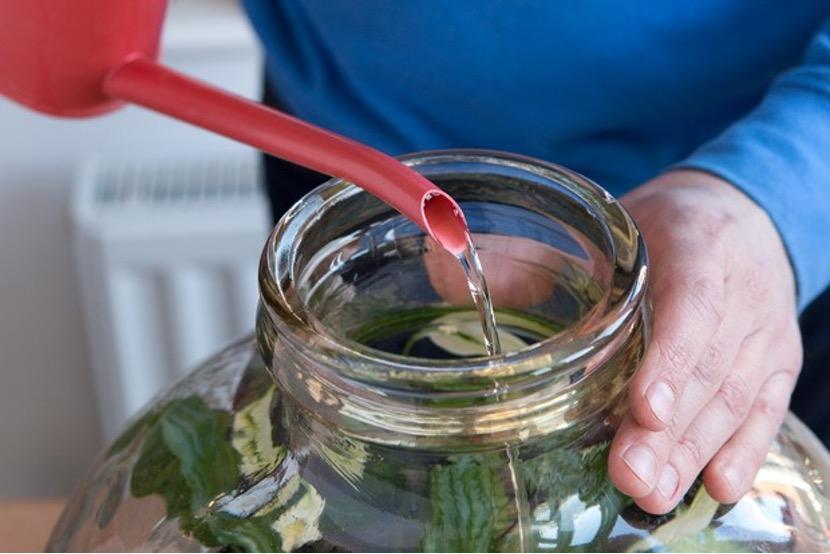
Water sparingly down the sides of the bottle as the curved sides will prevent a lot of evaporation. Ensure the compost doesn’t dry out or become saturated with water. Place in a bright spot out of direct sunlight.
Alternative plants for a bottle garden
• Maidenhair fern (Adiantum raddianum)
• Golden polypody (Phlebodium aureum)
• Hares foot fern (Humata tyermannii)
• Mind-your-own-business (Soleirolia soleirolii)
• Centella (Centella asiatica)
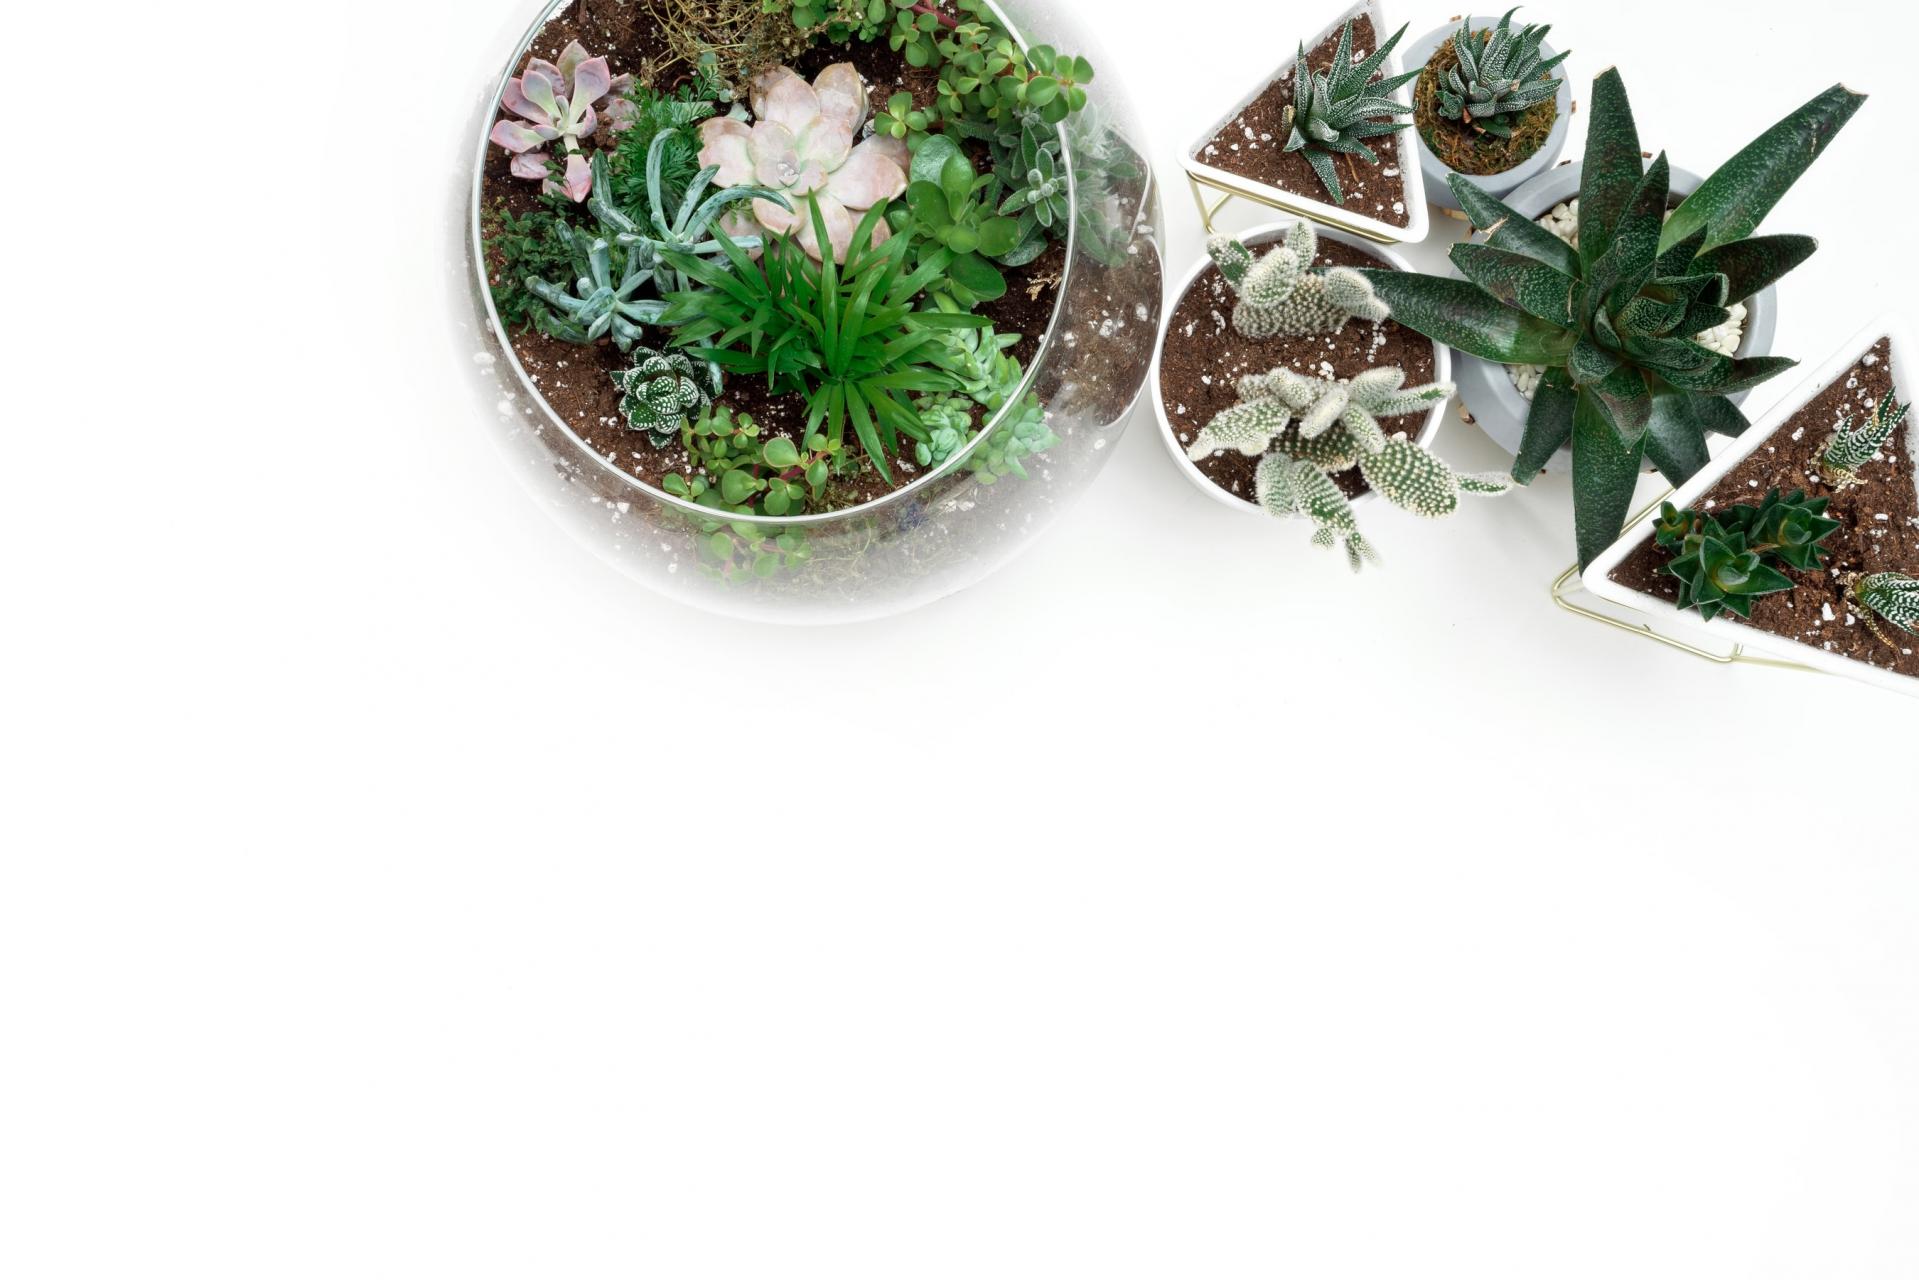
• Cacti and succulents
You can plant a bottle garden in virtually any glass vessel, though closed ones are best for moisture lovers and open ones best for plants used to drier conditions. Don’t worry if you can’t find what we used – look in charity shops, garden centres, your kitchen cupboard or on the internet for something that appeals.

You Will Need
•Vintage glass bottle
•Horticultural grit
•Peat free houseplant compost
•Moss, (from the lawn)
•Spathiphyllum 'Chopin'
•Fittonia verschaffeltii
•Syngonium 'White Butterfly'
•Chlorophytum comosum 'Ocean'
•Peperomia rotundifolia

Total time:
20 minutes
Step 1
Put 5cm of horticultural grit in the bottom of the bottle for drainage. Add houseplant compost till the bottle is about a third full – breaking up any lumps with your hands. Choose lush foliage plants that thrive in low light and humidity.

Step 2
Position the plants one at a time, planting them as you would in a container – firm the compost around them. Fill gaps between plants with a layer of moss.

Step 3
Water sparingly down the sides of the bottle as the curved sides will prevent a lot of evaporation. Ensure the compost doesn’t dry out or become saturated with water. Place in a bright spot out of direct sunlight.

Alternative plants for a bottle garden
• Maidenhair fern (Adiantum raddianum)
• Golden polypody (Phlebodium aureum)
• Hares foot fern (Humata tyermannii)
• Mind-your-own-business (Soleirolia soleirolii)
• Centella (Centella asiatica)
• Cacti and succulents

0
0
文章
莹723
2020年10月14日

Winter is coming! But,whether you live in North or South, not everything in your garden will be asleep from December to March. Even in the coldest days, many annual flowers, perennial flowers, and flowering shrubs don’t wait to show off. And in mild climates, some winter flowers—like pansies, violas, and ornamental kale and cabbages—will bloom all season long.
Before setting your heart on any of these beauties, make sure you’ll be able to give a plant what it needs, such as full sun or shade. Pay attention to planting times too. Most winter bloomers, including bulbs, need put in the ground in the fall.
Not sure where to start? Check out our free garden plans right here.
1.English Primrose
While some varieties bloom in spring or summer, English primroses show in winter. Red, pink, purple, yellow, or white flowers with mounds of deep green foliage cover this plant.

2.Algerian Iris
Unlike other iris plants in your garden, this lesser-known variety blooms in winter to early spring! Its delicate silvery-purple blooms have a sweet fragrance.

3.Crocus
Sweet little cup-like flowers pop their heads up in late winter to early spring. These bulbs do tend to attract rodents, so don’t be surprised if they bloom somewhere other than where you planted them. Your rodent friends like to dig them up and replant elsewhere to store as food!

4. Pussy Willow
The little fuzzy flowers on these shrubs aren’t bright and showy like a lot of winter bloomers. But they display their considerable charms when winter snow is still on the ground,as a sign that spring is coming.

5.Pansy
Like their relatives, violas, pansies offer brilliant color in early spring. They’ll survive a light frost and bloom for most of the winter in mild climates.

6.Winter Jasmine
This shrub has pretty, yellow flowers on arching branches in late winter. It doesn’t have a fragrance like other types of jasmine, but it does offer a bright splash of sunshine in winter.

7.Cyclamen
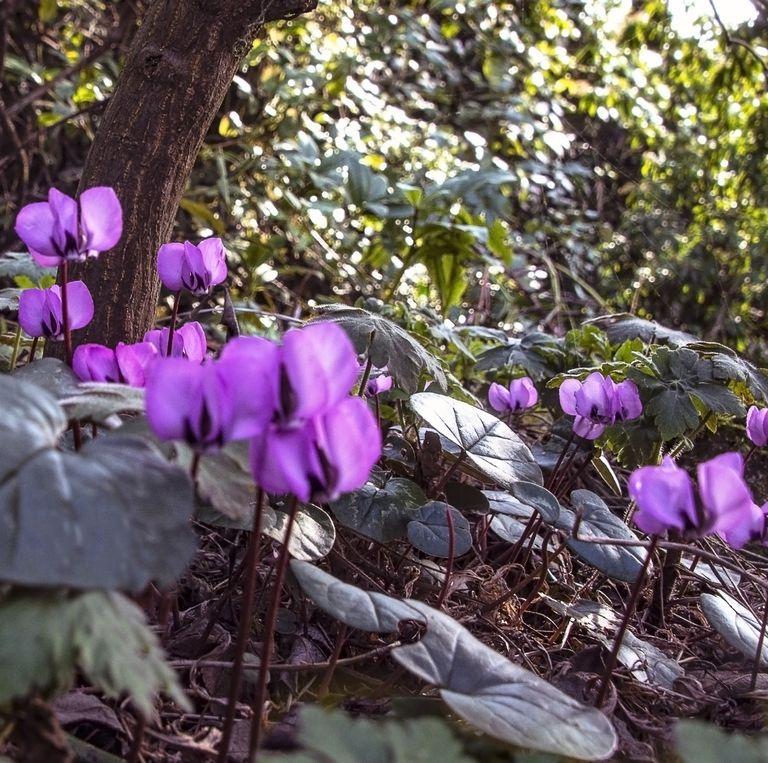
These pretty, delicate-looking perennials in pinks, whites, and fuchsia are often sold as houseplants. But in mild climates, they do well as ground covers. They like to be under deciduous trees so they can soak up winter sun.
8.Winter Aconite
These happy little yellow blooms will pop up through the snow. Bonus: Deer and rodents usually leave these alone. Plant these bulbs in fall.

9.Viola
The brightly colored, charming violas are a welcome sight on chilly mornings. In mild climates, they’ll last all winter long. They self-seed freely, so you’ll get more baby plants in subsequent years.

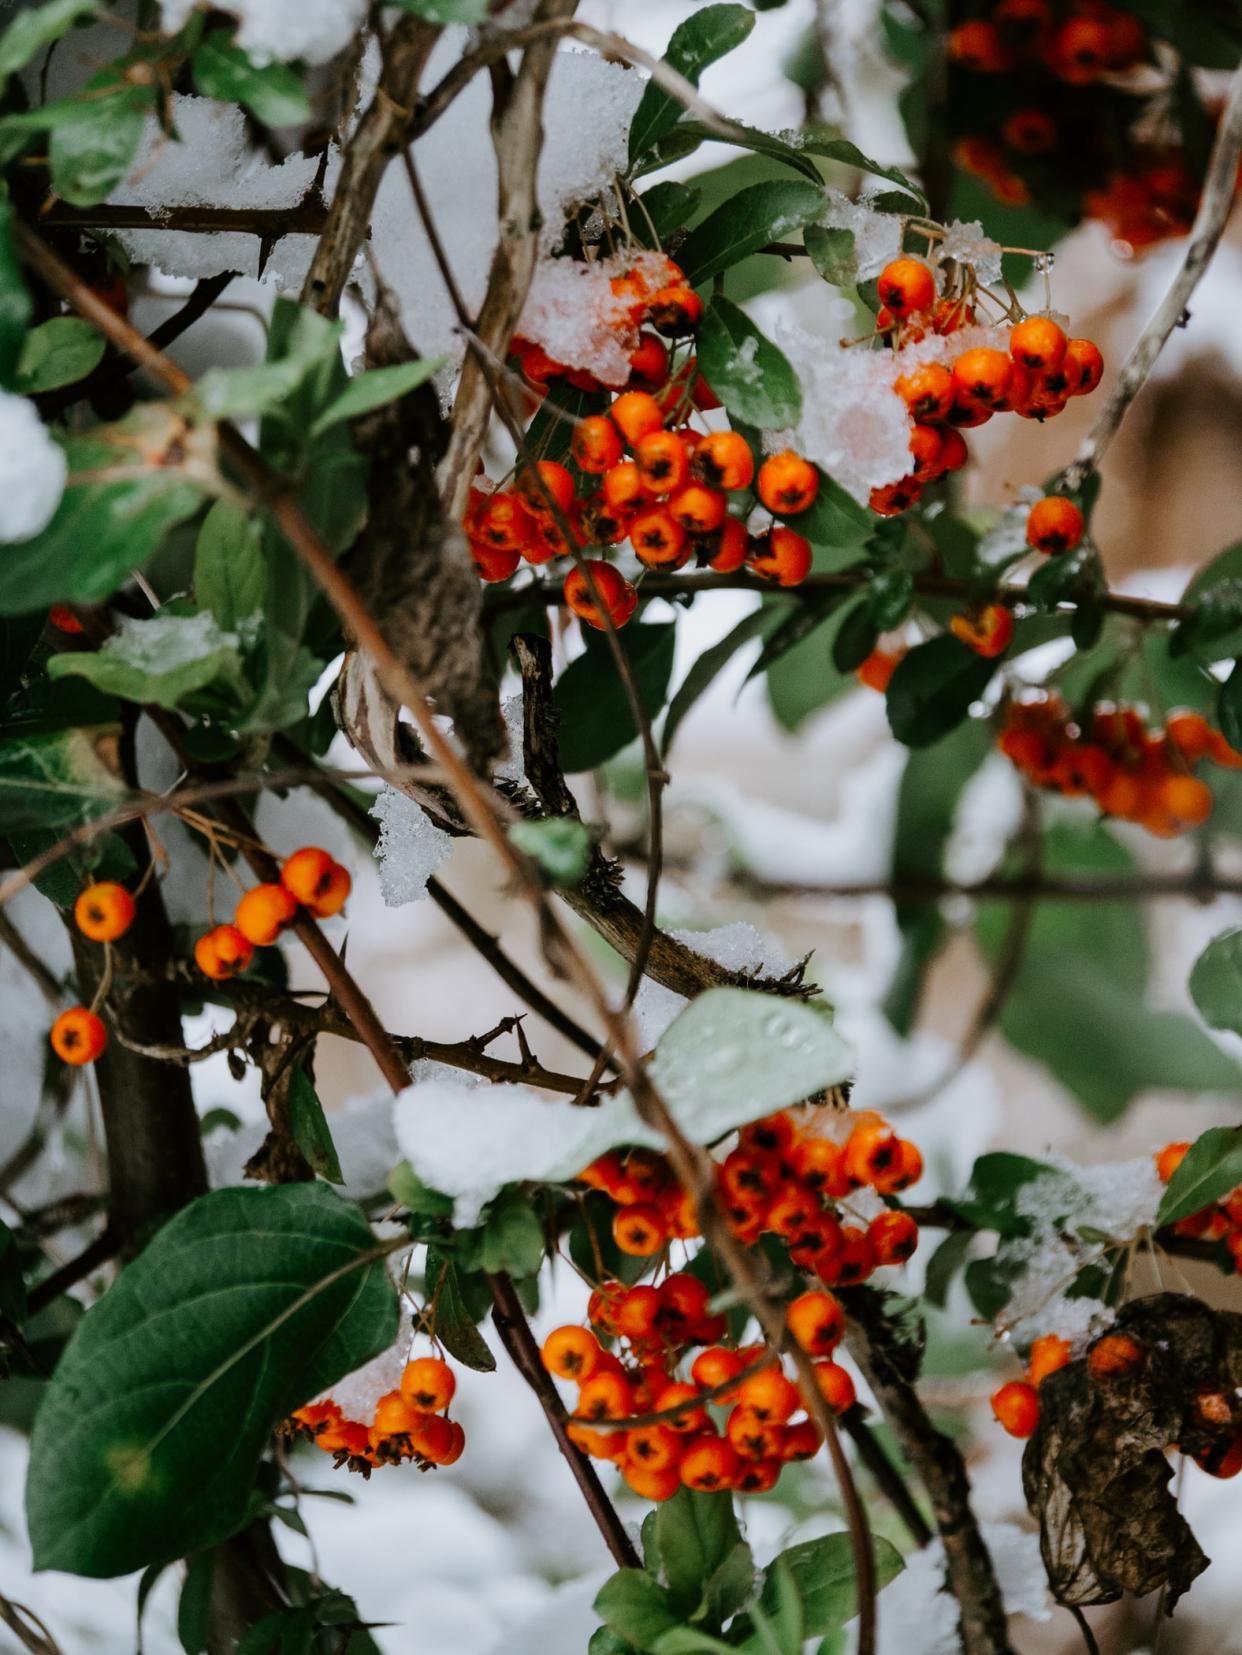
10.Winterberry
When cold weather strikes, this plant bursts with bright red berries that add cheery color to the evergreen shrubs. Clip some to bring for holiday cheer, but beware the sharp leaves!
11.Snowdrop
Adorable, drooping white and green flowers appear in late winter, often while there’s still snow. Plant a bunch of them, and get these bulbs in the ground in fall for winter blooms.

12.Daffodil
Daffodils are usually seen as one of the first signs of spring, they will begin growing as early as February. Don't worry about snow or freezing temperatures harming the foliage, they're extremely cold hardy.

Before setting your heart on any of these beauties, make sure you’ll be able to give a plant what it needs, such as full sun or shade. Pay attention to planting times too. Most winter bloomers, including bulbs, need put in the ground in the fall.
Not sure where to start? Check out our free garden plans right here.
1.English Primrose
While some varieties bloom in spring or summer, English primroses show in winter. Red, pink, purple, yellow, or white flowers with mounds of deep green foliage cover this plant.

2.Algerian Iris
Unlike other iris plants in your garden, this lesser-known variety blooms in winter to early spring! Its delicate silvery-purple blooms have a sweet fragrance.

3.Crocus
Sweet little cup-like flowers pop their heads up in late winter to early spring. These bulbs do tend to attract rodents, so don’t be surprised if they bloom somewhere other than where you planted them. Your rodent friends like to dig them up and replant elsewhere to store as food!

4. Pussy Willow
The little fuzzy flowers on these shrubs aren’t bright and showy like a lot of winter bloomers. But they display their considerable charms when winter snow is still on the ground,as a sign that spring is coming.

5.Pansy
Like their relatives, violas, pansies offer brilliant color in early spring. They’ll survive a light frost and bloom for most of the winter in mild climates.

6.Winter Jasmine
This shrub has pretty, yellow flowers on arching branches in late winter. It doesn’t have a fragrance like other types of jasmine, but it does offer a bright splash of sunshine in winter.

7.Cyclamen
These pretty, delicate-looking perennials in pinks, whites, and fuchsia are often sold as houseplants. But in mild climates, they do well as ground covers. They like to be under deciduous trees so they can soak up winter sun.

8.Winter Aconite
These happy little yellow blooms will pop up through the snow. Bonus: Deer and rodents usually leave these alone. Plant these bulbs in fall.

9.Viola
The brightly colored, charming violas are a welcome sight on chilly mornings. In mild climates, they’ll last all winter long. They self-seed freely, so you’ll get more baby plants in subsequent years.

10.Winterberry
When cold weather strikes, this plant bursts with bright red berries that add cheery color to the evergreen shrubs. Clip some to bring for holiday cheer, but beware the sharp leaves!

11.Snowdrop
Adorable, drooping white and green flowers appear in late winter, often while there’s still snow. Plant a bunch of them, and get these bulbs in the ground in fall for winter blooms.

12.Daffodil
Daffodils are usually seen as one of the first signs of spring, they will begin growing as early as February. Don't worry about snow or freezing temperatures harming the foliage, they're extremely cold hardy.

0
0
文章
莹723
2020年10月09日

Do you want to find a great way to get the kids outside, entertained and away from the TV or computer screen? Believe me, you need these simple garden projects. All of the activities are suitable for children of primary school age. Younger kids will need a bit of guidance. Please browse down~
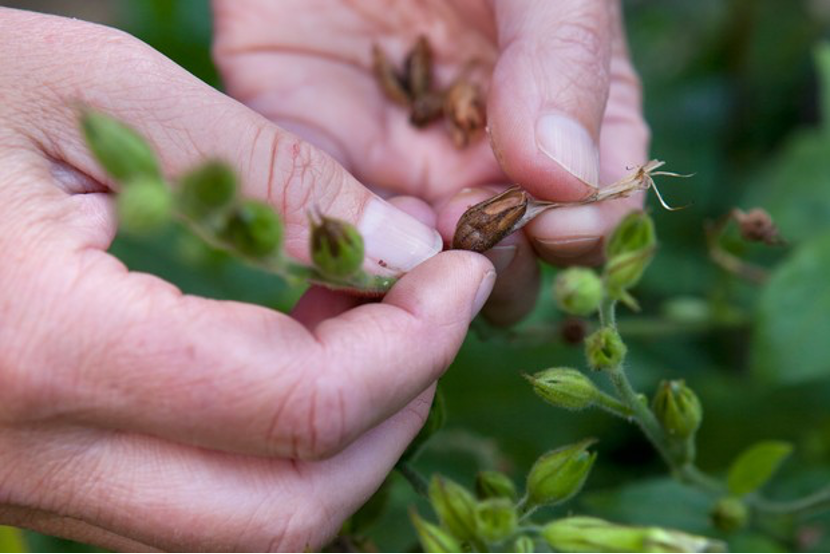
1.Collect seeds
At this time, plants and crops are bursting into flower everywhere. Children can have a lot of fun collecting seeds in the garden for sowing next year. Show them how to burst seedpods and shake seeds from ripe seedheads. They can design and make paper seed packets to store them in.
2.Grow micro-greens
Micro-leaves are all the rage and kids will love growing them. You can just use seeds of any veg with edible leaves, such as basil, broccoli or spinach. Plastic cups, yoghurt pots or biodegradable pots are great containers, and you can draw a smiley face on them. Fill your pots almost to the top with compost – just leave a little gap to make watering easier. Scatter the veg or herb seeds thinly across the surface, then cover with a little compost. Water the compost, and make sure it doesn’t dry out. Then simply place the pots on an indoor windowsill to grow.

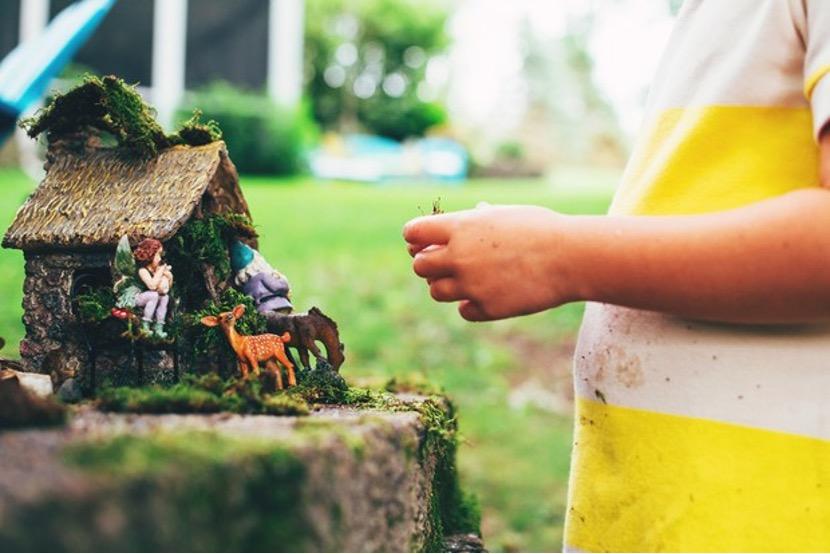
3.Fairy garden
Help children create an enchanted garden at the base of a tree or in a hollow in the ground. Kids will love collecting stones for paths and twigs for fences, and add ferns and other small plants around the trunk. Help little ones to tie ribbons to branches and make a fairy door for a tree or wall by decorating a piece of cardboard or the lid of an ice-cream tub.
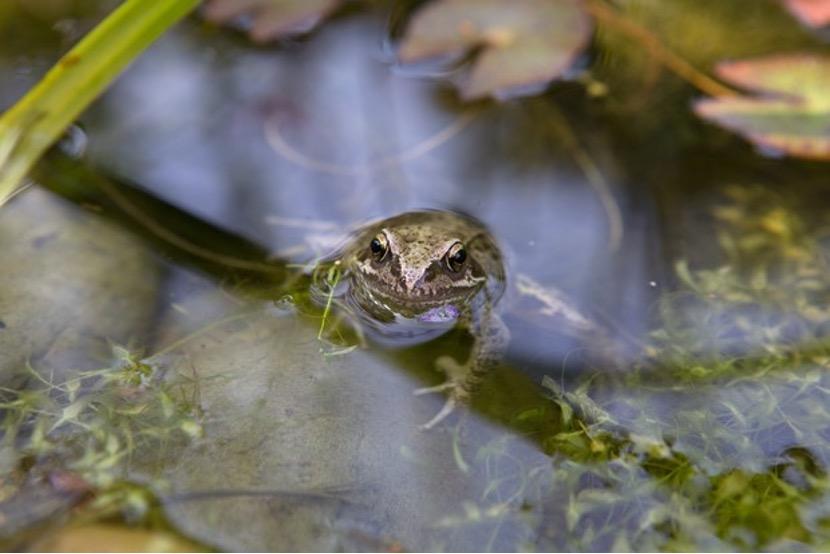
4.Pond in a pot
Kids will love getting wet and muddy, especially on a hot summer’s day. It’s easy to make Container ponds which will attract birds and insects, so you could speed some time watching wildlife peacefully. Use a large, shallow container with no drainage holes, and add a selection of pond and marginal plants, plus an oxygenator to help keep the water clear. Site it in a little shade, rather than in full sun, and keep the water topped up.
5.Create a glass jar terrarium
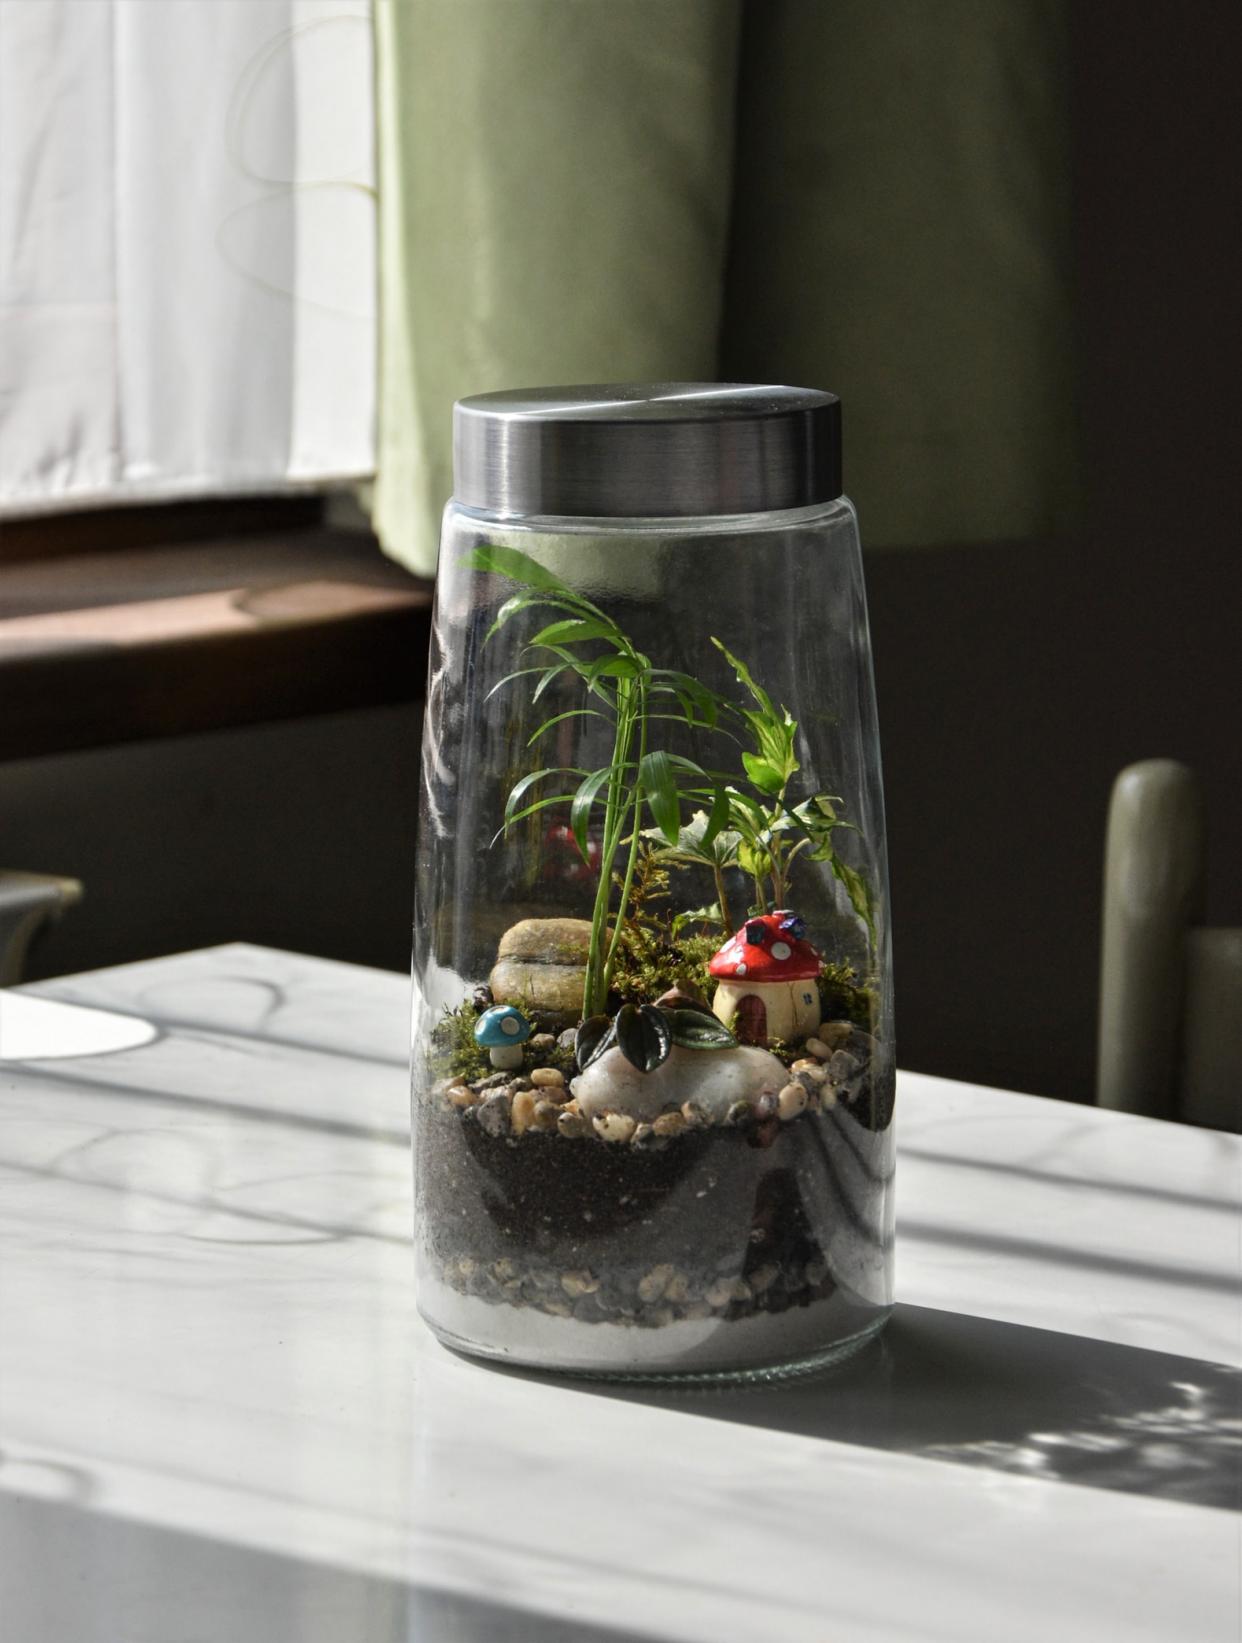
Glass jar gardens are the perfect size for little hands. Let your children select an array of succulents from the garden centre. Place gravel in the base of a large jar, top with a layer of compost, and then lower in the plants and arrange into a display. Firm in with fingers or a pencil. Add a little water, plus a layer of gravel to hold in the moisture. Stand the jar on a bright indoor windowsill.
6.Make a bug box
You just require an open-fronted box – the kids can run around the garden for the materials to fill it with. A drilled log may provide a home for solitary bees, while stacks of pine cones, stones, broken pots, twigs and dried grass can be added to attract ladybirds, woodlice or toad.

7.Pot up colourful containers
These instant container displays are easy to plant. Let your kids choose plants from the seasonal displays at the garden, then use a cheerful pot to match. Choose either a coloured plastic pot or paint a terracotta pot with a brightly coloured paint. Ensure there are drainage holes in the base, then add multi-purpose compost until it’s two-thirds full. Remove the plants from their pots and place them on the compost – arrange into an attractive display. Fill in around the roots with more compost and firm in well. Water the plants in and place the pot in a sheltered, sunny spot. Continue to water regularly over summer and pinch off faded flowers to encourage more to grow.

8.Twig teepee
Encourage your kids to build an adult-free space, using branches stacked against a wall, fence or tree. Help them arrange the branches to make walls that are dense so they provide privacy and with an opening that’s just wide enough for them to crawl through. Older children will enjoy designing the den and could try building a freestanding one too.

9.Make a grass bucket seat
This grass seat will last all summer and beyond, and older children will enjoy keeping it in trim with shears or scissors. Choose an old metal bucket or bin and add drainage holes in the bottom. Fill it to the brim with compost, firm down and then sprinkle lawn seed over the top. Water it well and leave to germinate, which in summer should only take about a week. Don’t let it dry out and, when it’s nice and thick, encourage one of your older children to cut it, using shears.

10.Create a succulent plant display
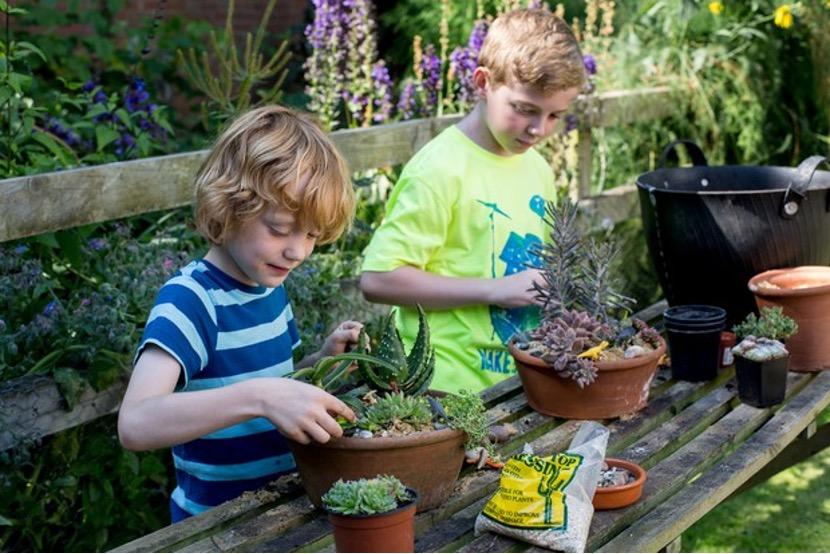
Succulents planted in a pot look good for months on end and require very little maintenance. Let them choose the plants they want to grow from the garden centre. Arrange the plants so they’re evenly distributed around the pot and fill around them with cactus compost. Top-dress with horticultural gravel to complete the look. The kids can add their own accessories – in this case toy dinosaurs – to make the display more individual to them. This display can stay outside over summer and then can be transferred to a bedroom windowsill in autumn, providing interest for many more months.
1.Collect seeds
At this time, plants and crops are bursting into flower everywhere. Children can have a lot of fun collecting seeds in the garden for sowing next year. Show them how to burst seedpods and shake seeds from ripe seedheads. They can design and make paper seed packets to store them in.

2.Grow micro-greens
Micro-leaves are all the rage and kids will love growing them. You can just use seeds of any veg with edible leaves, such as basil, broccoli or spinach. Plastic cups, yoghurt pots or biodegradable pots are great containers, and you can draw a smiley face on them. Fill your pots almost to the top with compost – just leave a little gap to make watering easier. Scatter the veg or herb seeds thinly across the surface, then cover with a little compost. Water the compost, and make sure it doesn’t dry out. Then simply place the pots on an indoor windowsill to grow.

3.Fairy garden
Help children create an enchanted garden at the base of a tree or in a hollow in the ground. Kids will love collecting stones for paths and twigs for fences, and add ferns and other small plants around the trunk. Help little ones to tie ribbons to branches and make a fairy door for a tree or wall by decorating a piece of cardboard or the lid of an ice-cream tub.

4.Pond in a pot
Kids will love getting wet and muddy, especially on a hot summer’s day. It’s easy to make Container ponds which will attract birds and insects, so you could speed some time watching wildlife peacefully. Use a large, shallow container with no drainage holes, and add a selection of pond and marginal plants, plus an oxygenator to help keep the water clear. Site it in a little shade, rather than in full sun, and keep the water topped up.

5.Create a glass jar terrarium
Glass jar gardens are the perfect size for little hands. Let your children select an array of succulents from the garden centre. Place gravel in the base of a large jar, top with a layer of compost, and then lower in the plants and arrange into a display. Firm in with fingers or a pencil. Add a little water, plus a layer of gravel to hold in the moisture. Stand the jar on a bright indoor windowsill.

6.Make a bug box
You just require an open-fronted box – the kids can run around the garden for the materials to fill it with. A drilled log may provide a home for solitary bees, while stacks of pine cones, stones, broken pots, twigs and dried grass can be added to attract ladybirds, woodlice or toad.

7.Pot up colourful containers
These instant container displays are easy to plant. Let your kids choose plants from the seasonal displays at the garden, then use a cheerful pot to match. Choose either a coloured plastic pot or paint a terracotta pot with a brightly coloured paint. Ensure there are drainage holes in the base, then add multi-purpose compost until it’s two-thirds full. Remove the plants from their pots and place them on the compost – arrange into an attractive display. Fill in around the roots with more compost and firm in well. Water the plants in and place the pot in a sheltered, sunny spot. Continue to water regularly over summer and pinch off faded flowers to encourage more to grow.

8.Twig teepee
Encourage your kids to build an adult-free space, using branches stacked against a wall, fence or tree. Help them arrange the branches to make walls that are dense so they provide privacy and with an opening that’s just wide enough for them to crawl through. Older children will enjoy designing the den and could try building a freestanding one too.

9.Make a grass bucket seat
This grass seat will last all summer and beyond, and older children will enjoy keeping it in trim with shears or scissors. Choose an old metal bucket or bin and add drainage holes in the bottom. Fill it to the brim with compost, firm down and then sprinkle lawn seed over the top. Water it well and leave to germinate, which in summer should only take about a week. Don’t let it dry out and, when it’s nice and thick, encourage one of your older children to cut it, using shears.

10.Create a succulent plant display
Succulents planted in a pot look good for months on end and require very little maintenance. Let them choose the plants they want to grow from the garden centre. Arrange the plants so they’re evenly distributed around the pot and fill around them with cactus compost. Top-dress with horticultural gravel to complete the look. The kids can add their own accessories – in this case toy dinosaurs – to make the display more individual to them. This display can stay outside over summer and then can be transferred to a bedroom windowsill in autumn, providing interest for many more months.

0
0


